#Best Wall-Putty Manufacturers
Explore tagged Tumblr posts
Visit Tumblr Blog
Explore Tumblr blogs with no restrictions, modern design and the best experience.
Last Seen Tumblr Blogs


Fun Fact
Post activity is at the highest at 4:00 pm EDT; notes peak at 10:00 pm EDT.
Text
Navigating the Varied Realm of Wall Putty: A Comprehensive Guide to Types and Utilizations
Wall putty, a fundamental ingredient for achieving impeccably smooth and enduring finishes on both interior and exterior surfaces, is available in an array of formulations designed to suit distinct purposes.
This blog will delve into the intricate universe of wall putty, uncovering its diverse categories, applications, and advantageous characteristics.
Also Read: Master Coat – Best Wall Putty Brand in India
Conventional Wall Putty: Serving as a versatile choice, conventional wall putty finds its niche on interior surfaces. Its application is effortless, effectively concealing minor fissures and imperfections. It acts as an essential foundation for paints, elevating adhesion and ensuring a uniform coat.
White Cement-Based Putty: Engineered for achieving a refined and luminous veneer, white cement-based putty encompasses white cement and polymer additives. This variant is particularly well-suited for interior walls, as it repels moisture while providing an optimal canvas for paints. Its usage extends to decorative finishes as well.
Acrylic Wall Putty: Renowned for its pliability, acrylic wall putty stands as a fitting choice for both interior and exterior surfaces. It exhibits the ability to withstand slight shifts without succumbing to fractures and boasts elevated water resistance. It is notably effective in spaces characterized by high humidity, such as bathrooms and kitchens.
Gypsum-Based Putty: Crafted from gypsum powder and enriching additives, gypsum-based putty is favored for its lightweight constitution and superlative smoothness. Its common application encompasses ceilings and drywalls. However, it's essential to acknowledge that its water-soluble nature renders it unsuitable for wet areas.
Polymer-Modified Cement Putty: This category marries cement with polymers, augmenting its adhesive characteristics and pliancy. It is an excellent contender for exterior walls that contend with fluctuating weather conditions, as it showcases resilience against fissures and water infiltration.
Fast-Setting Putty: Engineered for expedited drying, fast-setting putties abbreviate the waiting period between successive layers. These variants prove particularly advantageous for projects constrained by tight timelines. Nevertheless, their successful application hinges on prompt and efficient execution.
High-Performance Putty: High-performance putties present advanced attributes like heightened adhesion, crack resistance, and even protection against mold formation. They are optimal choices for high-traffic zones, commercial establishments, and locales susceptible to dampness.
Applications:
Conventional and white cement-based putties excel at leveling surfaces and establishing a seamless undercoat.
Acrylic putties find their forte in areas marked by humidity concerns, thanks to their adeptness at repelling water.
Gypsum-based putties shine in the creation of intricate ceiling designs.
Polymer-modified putties emerge as prime contenders for exterior surfaces that confront diverse weather variations.
Benefits:
Amplified paint adhesion and finish quality.
Skillful concealment of cracks and imperfections.
Prolonged longevity of paint applications.
Heightened aesthetic appeal of walls and ceilings.
Endurance against water and longevity.
Conclusion: The realm of wall putty is a multi-faceted one, with each variant catering to distinct requisites. Whether the goal is to achieve a flawlessly curated interior or a weather-enduring exterior, the choice of wall putty wields a significant influence on the ultimate result. Gaining insight into the classifications, applications, and benefits empowers informed decisions and paves the way for attaining superlative surface finishes.
Looking For Best Wall Putty Brand in India? Visit MasterCoat- #1 Wall Putty Brand Based in Ahmedabad, India since 1997.
#distemper#exterior design#interior#interior design#interiors#manufacturing#primer#putty#reverend putty#stephanie putty#mastercoat#best wall putty manufacturer in ahmedabad#best wall putty brand in india
2 notes
·
View notes
Text
Best Wall Putty Manufacturer & Supplier in India | Walplast
Walplast is India's third-largest Wall Putty manufacturer and Supplier. Buy the best-quality water-resistant wall putty at the best price today.
0 notes
Text
Common Epoxy Grout-Related Mistakes And How To Avoid Them
Learn about common epoxy grout-related mistakes and how to avoid them. Our guide provides practical tips to ensure a flawless application, helping you achieve durable, professional-looking grout for your tiling projects.
0 notes
Text
सकरनी मैगज़ीन डिजिटल 2023 का आनंद लें, साथ ही जानिए कंपनी का नए साल का नया विज़न - Sakarni
#best wall putty in india#best wall putty manufacturers in india#gold touch wall putty#best white cement#best white cement brand in delhi#emulsion
0 notes
Text
Wallcare Putty: The Secret to Flawless and Durable Walls
When it comes to ensuring a smooth and durable finish for your walls, wallcare putty is indispensable. Often overlooked in the painting process, wallcare putty plays a vital role in enhancing the appearance and longevity of your walls. This blog takes a closer look at wallcare putty, its advantages, application process, and how it can elevate your home’s interiors and exteriors.
What is Wallcare Putty?
Wallcare putty is a fine powder made from white cement and special additives, designed to prepare walls for painting. Applied to interior and exterior surfaces, it creates a uniform and smooth base, filling in cracks and imperfections. Not only does it improve the paint finish, but it also protects walls from moisture, cracks, and other damages.
Why is Wallcare Putty Important?
Smooth Surface Preparation Wallcare putty eliminates roughness, unevenness, and small cracks, ensuring a flawless surface ready for painting.
Enhanced Paint Finish It boosts the adhesion of paint to walls, making the colors appear more vibrant and even.
Prevention of Dampness Acting as a protective layer, wallcare putty resists moisture and prevents damp patches or peeling paint.
Durability By strengthening the walls and preventing hairline cracks, wallcare putty ensures the longevity of both the wall surface and paint.
Cost Efficiency Using wallcare putty reduces the amount of paint needed and minimizes maintenance costs in the long run.
Steps to Apply Wallcare Putty
To get the best results, follow these simple steps:
Clean the Surface
Remove dust, grease, and loose particles from the wall.
Ensure the surface is dry and free from moisture.
Prepare the Putty
Mix the wallcare putty with clean water until it forms a smooth, lump-free paste.
Follow the manufacturer’s guidelines for the correct mixing ratio.
Apply the First Coat
Spread a thin layer of putty evenly using a trowel or blade.
Cover all cracks and imperfections for a uniform surface.
Allow Drying
Let the first coat dry for 4-6 hours before applying the second coat.
Apply the Second Coat
Apply another thin layer for better coverage and smoother results.
Sand the Surface
Once the putty is completely dry, sand it lightly with fine sandpaper to achieve a perfect finish.
Advantages of Using Wallcare Putty
Improves Paint Longevity It increases paint life by enhancing its adhesion and preventing flaking or peeling.
Resists Weather Conditions Wallcare putty protects against humidity, ensuring walls remain free from damp patches and fungal growth.
Eco-Friendly Option Most wallcare putties are non-toxic and environmentally safe, making them a responsible choice for homes and offices.
Versatility Suitable for both interiors and exteriors, wallcare putty can be used on concrete, plaster, and even ceilings.
Common Mistakes to Avoid When Using Wallcare Putty
Skipping Cleaning: A dirty or damp surface reduces the effectiveness of the putty.
Improper Mixing: Uneven mixing can lead to a poor finish. Always mix thoroughly.
Rushing Drying Time: Allow enough time for each coat to dry to avoid cracks or uneven layers.
Ignoring Sanding: Sanding ensures the wall is perfectly smooth before painting.
Pro Tips for Achieving Perfect Walls
Use good-quality tools for application and sanding.
Always prepare a fresh mixture and use it within the specified time.
Work in a dust-free environment for a cleaner finish.
Conclusion
A beautifully painted wall starts with proper surface preparation, and wallcare putty is an essential part of that process. Its ability to provide a smooth, moisture-resistant, and durable base makes it a crucial element for any painting project. Whether you're renovating your home or constructing a new space, using high-quality wallcare putty ensures your walls remain stunning and strong for years to come.
For premium-quality wallcare putty that delivers exceptional results, choose JKmaxx Paints. Let your walls shine with a flawless finish!
0 notes
Text
A Comprehensive Guide to Buying Wall Putty Online and Understanding Plaster of Paris Prices in Azamgarh and Lucknow

Introduction
When it comes to home improvement or construction, choosing the right materials is crucial. Wall putty, plaster of Paris (POP), and white cement are among the most important materials for achieving a smooth and durable finish. With the convenience of online shopping, purchasing wall putty and other building materials has become easier. However, understanding the pricing and quality of these products is essential for making informed decisions.
In this article, we will discuss the benefits of buying wall putty online, explore the plaster of Paris price in Azamgarh and Lucknow, delve into white cement and its pricing, and provide answers to frequently asked questions.
Benefits of Buying Wall Putty Online
Buying wall putty online offers several advantages over traditional shopping methods:
1. Convenience
· You can browse and purchase products from the comfort of your home or workplace.
· Online platforms operate 24/7, allowing you to shop at your preferred time.
2. Wide Range of Options
· Online stores often have a wider variety of brands and types of wall putty.
· Access to product reviews and ratings helps you choose the best option.
3. Competitive Pricing
· Many e-commerce websites offer discounts and deals that are not available in physical stores.
· Price comparisons across multiple platforms are quick and easy.
4. Detailed Product Information
· Online listings include specifications, application instructions, and customer reviews.
· You can make an informed decision by reading detailed product descriptions.
5. Doorstep Delivery

Plaster of Paris Price in Azamgarh
Current Market Trends
Plaster of Paris online, commonly known as POP, is a versatile material used for wall finishing, moldings, and false ceilings. In Azamgarh, the price of POP can vary based on factors like brand, quality, and quantity purchased.
· Average Price Range: INR 300 to INR 450 per 25 kg bag.
· Factors Influencing Price:
o Brand reputation
o Grade and purity of the POP
o Transportation and logistics costs
Where to Buy in Azamgarh
· Local hardware stores
· Authorized dealers of major brands

Plaster of Paris Price in Lucknow
Lucknow, being a larger city, offers more options for purchasing POP. Prices in Lucknow are slightly competitive due to higher demand and availability.
· Average Price Range: INR 280 to INR 400 per 25 kg bag.
· Popular Brands:
o Birla White POP
o JK Lakshmi POP
o Sakarni POP
Tips for Getting the Best Deal
· Buy in bulk to avail of wholesale discounts.
· Check online platforms for ongoing offers.

White Cement: An Essential Construction Material
White cement is widely used for decorative purposes, wall finishing, and architectural designs. It provides a smooth, glossy finish and enhances the overall aesthetics of a structure.
White Cement Price Overview
Prices of white cement vary depending on the brand, quality, and location:
· Price in Azamgarh: INR 500 to INR 700 per 25 kg bag.
· Price in Lucknow: INR 480 to INR 650 per 25 kg bag.
Top Brands
· Birla White Cement
· JK Cement
· UltraTech White Cement
Factors Affecting White Cement Prices
· Purity and Grade: Higher-grade products are more expensive.
· Brand Value: Premium brands often command a higher price.
· Transportation Costs: Prices may increase for locations farther from manufacturing plants.
Tips for Buying Building Materials Online
1. Choose Reputable Platforms
· Opt for trusted websites like Amazon, Flipkart, or specialized construction material platforms.
2. Read Reviews and Ratings
· Customer reviews provide insights into product quality and delivery services.
3. Compare Prices
· Use price comparison tools to find the best deals.
4. Verify Authenticity
· Check for certifications and batch details to ensure the authenticity of the product.
5. Check Return and Refund Policies
· Familiarize yourself with the return policy in case the product does not meet your expectations.
Frequently Asked Questions (FAQs)
Q1: What is wall putty, and why is it important?
A: Wall putty is a cement-based material used to smoothen wall surfaces and prepare them for painting. It enhances paint durability and provides a flawless finish.
Q2: Can I use white cement instead of wall putty?
A: While white cement can be used for wall finishing, wall putty is specifically designed for this purpose and provides better results.
Q3: How is plaster of Paris different from white cement?
A: POP is made from gypsum and is used for moldings and false ceilings, whereas white cement is a lime-based product used for wall finishing and decorative applications.
Q4: Are online prices for building materials cheaper?
A: Online prices can be cheaper due to discounts and promotions. However, shipping costs may apply.
Q5: Which brand of wall putty is best?
A: Popular brands include Birla White Wall Putty, JK Wall Putty, and Asian Paints SmartCare Putty.
Conclusion
Buying wall putty, plaster of Paris, and white cement online is a convenient and cost-effective solution for homeowners and contractors. Understanding the pricing and quality of these materials in Azamgarh, building contractor in Lucknow, ensures you get the best value for your money. Whether you are renovating your home or working on a new construction project, investing in high-quality materials will result in durable and aesthetically pleasing results.
By following the tips and guidelines provided in this article, you can make informed decisions and complete your projects with confidence.
#white cement price#construction materials#birla white cement price in lucknow#buy white cement online#cement prices#building material#online construction material#cement prices in lucknow#buy cement online#tmt saria
0 notes
Text
How Putty Mixers Revolutionize Wall Finishing and Material Preparation

Wall finishing and material preparation are critical stages in construction and renovation projects. The advent of modern tools, especially the putty mixer machine, has significantly streamlined these processes. This blog will explore how putty mixers have transformed the industry and why they are indispensable for achieving smooth and flawless finishes.
What is a Putty Mixer Machine?
A putty mixer machine is a specialized tool designed to mix wall putty, paint, and other construction materials uniformly. It ensures a consistent blend, eliminating lumps and achieving a smooth texture essential for wall finishing. The machine’s advanced features make it an ideal choice for contractors, painters, and builders looking to enhance efficiency and quality in their projects.
Key Benefits of Using a Putty Mixer
Consistent mixing: The wall pot mixer ensures evenness, which is important for a flawless wall finish.
Time saved: Hand mixing can be time consuming and labor intensive. A cyst mixing equipment company offers equipment that significantly reduces preparation time.
Enhanced Quality: The machine’s ability to mix precisely ensures that the pot used sticks better and lasts longer.
Cost-Effective: By minimizing material wastage, paint putty mixers prove to be a cost-effective investment for contractors.
Why Choose a Manufacturer of Putty Mixers?
When selecting a putty mixer machine manufacturer, it’s essential to consider factors like reliability, quality, and after-sales service. A reputed manufacturer of putty mixers ensures that their machines are durable, efficient, and equipped with advanced features to meet modern construction needs.
Applications of Putty Mixers
Wall Preparation: A wall putty mixer machine ensures the putty is perfectly blended, providing a smooth surface for painting.
Paint Mixing: Contractors rely on paint putty mixers for achieving the right consistency in paints, ensuring even application and a professional finish.
Material Blending: Beyond putty and paint, these mixers are versatile enough to handle a variety of materials used in construction projects.
Features to Look for in a Putty Mixer
When choosing a putty mixer, consider the following features:
Durable Construction: High quality materials for durability.
Efficient motor: A powerful motor keeps it running constantly.
Easy-to-use design: Easy-to-use controls make the device accessible for all skill levels.
Portability: The lightweight, compact design allows for maximum portability.
Revolutionizing Wall Finishing: The Role of Technology
The adoption of putty mixers has marked a significant shift in the construction industry. Traditional methods often led to inconsistent results and longer project durations. Modern putty mixer machine manufacturers have addressed these challenges by integrating cutting-edge technology, making wall finishing faster, more efficient, and more precise.
Why Partner with RCMPL?
At RCMPL, we are proud to be a leading manufacturer of putty mixers. Designed with innovative and quality materials, our machines meet the needs of the construction industry. Whether you need a paint potty mixer or a specialized wall putty mixing machine, our products offer reliable, efficient performance and exceptional results.
Conclusion
The introduction of putty mixer machines has revolutionized the way wall finishes and material preparations are handled. With their ability to enhance efficiency, ensure quality, and reduce costs, these machines are a game-changer for construction professionals. When looking for the best in the market, trust a reputed manufacturer of putty mixers like RCMPL to deliver top-notch solutions that meet your project needs.
Ready to elevate your wall finishing processes? Visit RCMPL today to explore our range of putty mixer machines.
#Putty Mixer#Wall Putty Mixer Machine Manufacturer#Wall Putty Mixer Machine#Manufacturer of Putty Mixer#Paint Putty Mixer
0 notes
Text
How Do You Repair Cracks in Concrete Walls?
Repairing cracks in concrete walls is an essential task to maintain the integrity and longevity of the structure. Cracks can occur due to natural settling, temperature changes, moisture, or external pressure, and if left unaddressed, they can lead to more severe damage. Here’s a step-by-step guide on how to repair cracks in concrete walls:
Assess the Crack: First, determine the type and size of the crack. Small, hairline cracks may be easier to fix, while larger cracks may require more intensive repair methods.
Clean the Area: Use a wire brush, chisel, or pressure washer to remove any dirt, debris, or loose concrete from around the crack. This ensures that the repair material adheres properly to the surface.
Widen the Crack (if necessary): For deeper or larger cracks, you may need to widen the crack slightly using a hammer and chisel. This helps the patching material bond better.
Apply a Concrete Filler: Use a concrete patching compound or epoxy to fill the crack. For hairline cracks, a sealant may be sufficient. Apply the filler with a putty knife, filling the crack completely and smoothing the surface.
Allow the Repair to Cure: Follow the manufacturer’s instructions for curing times. Typically, the repair will need several hours to dry completely, though it can vary based on the type of material used.
Seal the Repair: Once the filler is dry, apply a concrete sealer to prevent moisture from entering the crack in the future.
For larger or structural cracks, it’s best to consult a professional to ensure proper assessment and repair techniques.
0 notes
Text
Sigma Mixer

Sigma Mixers Kneader is heavy-duty mixer specially designed for uniform mixing and kneading of highly viscous materials. Mmixer machine consists two 'Z' shapes blades moving in opposite direction at different speeds. Kneader made in stainless steel construction and provided with jacket arrangement for handling heating or cooling application. The mixing action also involves combination of shearing, stretching, folding, dividing and recombining of material processed between sigma blades and container walls that ensure optimum results.
Sigma Mixer is available in capabilities of 5, 10, 25,50, 100, 250, 350, 500 liters with power support of 1, 3, 5, 10, 15, 20,25, 30 HP. We are rated among one of best sigma mixer manufacturer in India Specially designed for: Sigma blade mixer have application to produce highly viscous materials like different kinds of Chemical, Dyes & Pigments, Paint, Polymers Plastic, Putties, Plastic, Pharmaceuticals, Printing ink, stiff pastes, adhesives, polyester Compounds, flush colours, brake lining compounds, resign, soap, PVC coatings, Rubber compounds, Confectionery, Magnetic Tape Coatings, Ceramic, Carbon Black, doughs, Food Products, Fibre Glass, Grease, Lead Storage Battery, Soap & Detergent etc.
0 notes
Text
MasterCoat - Best Wall Putty Manufacturer in Ahmedabad
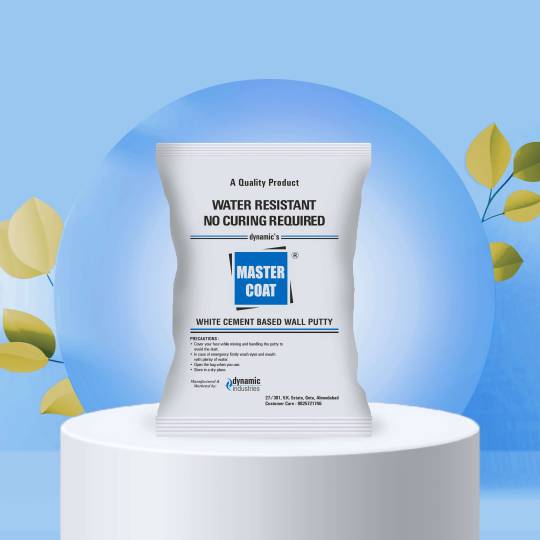
MasterCoat, established in Ahmedabad, India since 1997, stands as a premier wall putty manufacturer.
With an illustrious history of quality and innovation, they've consistently delivered premium wall putty solutions.
MasterCoat's commitment to excellence, advanced production techniques, and a diverse range of products have earned them a reputation as the best in the industry.
Trusted by professionals and homeowners alike, MasterCoat continues to set the benchmark for wall putty, ensuring flawless finishes and lasting aesthetics for every surface.
#putty#manufacturing#interior design#interior#interiors#distemper#exterior design#reverend putty#primer#stephanie putty#mastercoat#best wall putty manufacturers in ahmedabad#best wall putty brand in india#best wall putty in gujarat#white cement based wall putty
3 notes
·
View notes
Text
Expert Solutions for Building Painting Challenges: Tips for Flawless Results Painting a building can be challenging, from choosing the right colors to selecting the best tools. But with the right guidance, achieving professional results in residential painting and commercial painting projects becomes more manageable. Top Painters is here to walk you through key solutions to common building painting challenges, covering everything from interior painting to exterior painting. For flawless results, trust our experienced team to handle your next project with precision and care. 1. Paint with Quality for a Flawless Finish Quality painting relies on two essential factors: Clean Wall Surface: Ensure the wall has no grease, dust, fingerprints, or moisture. Improved paint adherence is facilitated by a clean wall. Dry Wall Surface: Keep wall moisture below 12%, and ensure putty and plaster are fully dry. A dry wall prevents bubbling or cracking in the paint. For reliable products that help ensure quality painting, check out the durable paint options at Dulux. 2. Choosing the Right Paint Color and Type Selecting the right paint can be overwhelming, especially when the color appears different in a store compared to your home. To find the ideal color, sample a few shades and test them on your wall. Opt for colors slightly lighter than your preference to avoid surprises once applied. Remember, factors like natural light and decor play a role in color perception, so make sure your choice complements your space. 3. Techniques for Using Painting Tools Using tools effectively is essential to achieving a professional finish: Rollers: Dampen the roller slightly before use to maximize paint absorption. Choose a thinner roller for glossy paints and a thicker one for textured walls. Brushes: Avoid wiping excess paint on the edge of the can; instead, let it drip back into the can. Submerge only half of the brush to prevent build-up, which can lead to uneven strokes. Need quality tools for your next project? Visit Bunnings Warehouse to explore a variety of brushes, rollers, and other essentials. 4. Handling Common Building Painting Challenges Mold on Walls For buildings that are regularly exposed to rain or shaded areas, mold can develop on walls, causing stains and paint failure. To solve this, remove the mold completely and prepare the area with a mold-resistant primer before painting. Cracked Paint on Exterior Walls Exterior paint can crack, blister, and peel due to environmental factors. Prevent cracking by applying a thick, high-quality paint that withstands outdoor elements, ensuring your building looks fresh and well-maintained. Faded Paint Fading paint can make a business or residential building look tired and unappealing. For a fresh, vibrant look, repaint the surface with a weather-resistant paint that maintains its color even under sunlight. 5. Steps to Ensure Successful Building Painting For both residential and commercial painting, follow these keys to success: Read Product Information: Check the manufacturer’s instructions and safety guidelines. Consult Experts: Speak with painters, architects, or interior designers to gain insights tailored to your project. Consulting professionals can save time and ensure a higher-quality result. Maintaining an attractive building facade is essential in business, as it reflects a thriving, well-kept establishment. Don’t let faded or peeling paint ruin first impressions—update your building’s appearance with the help of experts. Related Articles: "Common Mistakes in Building Painting" "building painting preparation" "Building Painting Tools - Get Acquainted with the Essential Painting Equipment" "8 Tricks of Building Painting | Steps to Painting and Coloring Buildings" Summary Painting a building involves challenges that require careful planning and the right tools. By focusing on color choice, tool use, and surface preparation, you can tackle building painting challenges efficiently.
At Top Painters, we have the experience and skills to deliver exceptional results for any residential painting or commercial painting project. Allow our painters to meticulously and expertly execute your concept. Ready to transform your space? Contact us today to hire our professional painters for your next project. Frequently Asked Questions 1. How can I prevent wall cracks in exterior painting? Use high-quality, thick paint that can withstand outdoor elements to prevent cracking on exterior walls. 2. What should I do if there is excess paint on the brush? Allow the excess paint to drip back into the can and avoid wiping it on the edge, as this causes build-up that may dry and affect storage. 3. What is the key to successful building painting? The key is preparation. Ensure surfaces are clean and dry, choose high-quality paint, and consult professionals if unsure about any part of the process. 4. What moisture level is recommended for dry walls in Australia? The recommended moisture level for walls before painting is below 12%. 5. How can I improve the quality of building painting? Ensure surfaces are clean and dry, select the right tools, and use high-quality, weather-resistant paints for long-lasting results. 6. How do I choose the best paint for residential vs. commercial painting projects? For residential painting, choose colors that suit your home’s interior style and personal taste, while focusing on durability for high-traffic areas. In commercial painting, consider high-quality, weather-resistant paints for exterior surfaces and colors that align with your brand image for interior spaces. 7. What types of painting tools are best for textured walls? For textured walls, using a thicker roller can help achieve a smooth finish. For fine details, such as trims, use angled brushes that offer precision and coverage. 8. How do I avoid streaks and uneven paint coverage? To avoid streaks, apply paint in thin, even coats, allowing each layer to dry before applying the next. Using quality tools and applying a primer on the wall also ensures a smoother finish. 9. Can I use the same paint for interior and exterior painting? Not always. Exterior paint is formulated to withstand weather conditions and UV rays, making it more durable but often unsuitable for indoor use due to its chemical composition. For interior painting, use paints designed for indoor application to ensure safety and durability. 10. How can I get an accurate color match when repainting a wall? Take a sample of the wall color to a paint store for color matching. Many stores use spectrophotometers to match the exact shade, ensuring consistency across new and old painted surfaces. 11. How often should I repaint my building’s exterior? The frequency depends on the paint quality, exposure to weather, and wall condition. Typically, exterior paint should be refreshed every 5-10 years to maintain a fresh and professional appearance, particularly for commercial buildings. 12. What is the difference between satin, matte, and gloss finishes? Matte: Low sheen and covers imperfections well, ideal for ceilings and low-traffic areas. Satin: Slightly reflective, good for moderate-traffic areas like hallways and living rooms. Gloss: High sheen, highly durable, perfect for high-traffic areas and surfaces that need regular cleaning, like trims and kitchens. 13. How can I prevent paint from fading over time? To reduce fading, especially for exterior painting, use high-quality, UV-resistant paints. Choosing lighter colors for outdoor areas also helps minimize visible fading caused by sunlight.
0 notes
Text
Advantages of Waterproof Wall Putty
Explore the top advantages of waterproof wall putty. Enjoy enhanced wall durability, moisture resistance, and protection against mold and mildew. Ideal for any space, it provides a smooth, long-lasting finish, making it a superior choice for durable wall care.
0 notes
Text
Transform Your Space with Stone Finish Texture: A Comprehensive Guide
When it comes to interior design, achieving a sophisticated and timeless look can be challenging. One of the most effective ways to add a touch of elegance and natural beauty to any space is through the use of stone finish texture. This versatile technique can transform walls, floors, and even furniture, creating a stunning visual impact that is both stylish and durable. In this blog, we'll explore the benefits, applications, and techniques for incorporating stone finish texture into your home or office decor.

What is Stone Finish Texture?
Stone finish texture is a decorative technique that mimics the appearance and feel of natural stone surfaces. It can be applied to a variety of materials, including concrete, plaster, and drywall, to create a realistic stone-like effect. This finish is achieved using specialized tools and materials, resulting in a textured surface that adds depth and dimension to any space.
Benefits of Stone Finish Texture
Aesthetic Appeal: Stone finish texture adds a touch of luxury and sophistication to any room. Its natural look complements a wide range of design styles, from rustic to modern.
Durability: This finish is not only visually appealing but also highly durable. It can withstand wear and tear, making it ideal for high-traffic areas.
Versatility: Stone finish texture can be applied to various surfaces, including walls, floors, countertops, and even furniture. This flexibility allows you to create a cohesive design throughout your space.
Easy Maintenance: Unlike natural stone, which can be porous and prone to staining, stone finish texture is relatively easy to clean and maintain. A simple wipe-down with a damp cloth is usually sufficient to keep it looking its best.
Applications of Stone Finish Texture
1. Walls: One of the most popular uses for stone finish texture is on walls. Whether you're looking to create an accent wall in your living room or add a rustic touch to your kitchen, this technique can bring a unique and captivating element to your interior design.
2. Floors: Stone finish texture can also be applied to floors, providing a durable and visually appealing alternative to traditional flooring materials. This is particularly useful in areas like bathrooms, kitchens, and entryways where moisture and heavy foot traffic are common.
3. Countertops: Transform your kitchen or bathroom countertops with stone finish texture. This technique can mimic the look of expensive natural stone at a fraction of the cost, offering a budget-friendly way to achieve a high-end look.
4. Furniture: Give old furniture a new lease on life by applying stone finish texture. This can be an excellent way to update pieces like coffee tables, dining tables, and even cabinets, adding a unique and custom touch to your decor.
How to Apply Stone Finish Texture
Applying stone finish texture requires a few specialized tools and materials, but with some patience and practice, it can be a rewarding DIY project. Here are the basic steps:
Prepare the Surface: Start by cleaning and priming the surface you plan to texture. This ensures better adhesion and a smoother finish.
Mix the Texture Material: Follow the manufacturer's instructions to mix the stone finish texture material. This might involve combining a dry mix with water or other additives to achieve the desired consistency.
Apply the Base Coat: Using a trowel or putty knife, apply a thin base coat of the texture material to the surface. Allow it to dry according to the manufacturer's recommendations.
Create the Texture: Once the base coat is dry, apply additional layers to build up the texture. Use different tools, such as brushes, sponges, or rollers, to create the desired stone-like effect. Be sure to vary your technique to achieve a more natural look.
Seal the Surface: After the texture is fully dry, apply a sealer to protect the finish and enhance its durability. Choose a sealer that is appropriate for the type of surface and the level of wear it will experience.
Conclusion
Stone finish texture is a fantastic way to elevate the aesthetic appeal of any space while adding a touch of durability and versatility. Whether you're looking to create a striking feature wall, a durable floor, or custom countertops, this technique offers endless possibilities. With its easy maintenance and timeless beauty, stone finish texture is a valuable addition to any interior design project. So, why not give it a try and transform your space with the natural elegance of stone?
0 notes
Text
How to Get Paint Off Ceiling
Removing paint from a ceiling can be a daunting task, but with the right tools and techniques, you can restore your ceiling to its original condition. Whether you accidentally painted your ceiling while working on your walls, or you're dealing with old, peeling paint, this guide will walk you through the process step by step.

Materials Needed
Before you begin, gather the following materials:
Drop cloths or plastic sheeting
Painter's tape
Ladder
Safety goggles and mask
Protective clothing
Paint scraper or putty knife
Sandpaper (medium and fine grit)
Paint remover or stripper
Clean cloths or rags
Bucket of water
Sponge
Vacuum cleaner with a brush attachment
Step-by-Step Guide
Step 1: Prepare the Area
Protect Your Furniture and Floors: Lay drop cloths or plastic sheeting over your furniture and floors to protect them from paint chips and debris.
Tape Off the Area: Use painter's tape to cover the edges where the ceiling meets the walls. This will prevent damage to the walls during the paint removal process.
Step 2: Safety First
Wear Protective Gear: Put on safety goggles and a mask to protect yourself from dust and fumes. Wear old clothing or a protective suit to keep paint and debris off your skin.
Step 3: Remove Loose Paint
Scrape Off Loose Paint: Use a paint scraper or putty knife to gently scrape away any loose or peeling paint. Be careful not to gouge the ceiling surface.
Vacuum the Area: Use a vacuum cleaner with a brush attachment to remove paint chips and dust from the ceiling.
Step 4: Apply Paint Remover
Choose the Right Paint Remover: Select a paint remover or stripper that is suitable for your ceiling material. Follow the manufacturer's instructions for application and safety precautions.
Apply the Paint Remover: Use a clean cloth or sponge to apply the paint remover to the painted area. Work in small sections to ensure the remover doesn't dry out before you can scrape the paint.
Step 5: Scrape Off the Paint
Scrape Gently: After allowing the paint remover to sit for the recommended time, use a paint scraper or putty knife to gently scrape off the softened paint. Be patient and work slowly to avoid damaging the ceiling.
Wipe Clean: Use a damp cloth or sponge to wipe away any residue left by the paint remover.
Step 6: Sand the Ceiling
Smooth the Surface: Once the paint is removed, use medium-grit sandpaper to smooth out any rough spots or remaining paint. Follow up with fine-grit sandpaper for a smooth finish.
Clean the Area: Vacuum the ceiling and surrounding area to remove dust and debris from sanding.
Step 7: Final Touches
Inspect the Ceiling: Check for any remaining paint spots or rough areas. Repeat the scraping and sanding process if necessary.
Clean Up: Remove the painter's tape, drop cloths, and plastic sheeting. Dispose of paint chips and debris properly.
Tips and Warnings
Ventilation: Ensure the room is well-ventilated when using paint remover or stripper. Open windows and use fans to circulate air.
Test a Small Area: Before applying paint remover to the entire ceiling, test it on a small, inconspicuous area to ensure it won't damage the ceiling material.
Patience is Key: Removing paint from a ceiling can be time-consuming. Take your time and work carefully to achieve the best results.
0 notes
Text
Complete Wall Putty Plant Setup for Best Quality Output

Setting up a Wall Putty Manufacturing Plant is a crucial step for ensuring high-quality wall finishes in modern construction projects. Wall putty plays a vital role in achieving smooth and durable surfaces for painting and decoration. A well-designed Wallputty Plant can help achieve the best quality output, optimizing efficiency, consistency, and cost-effectiveness. In this blog, we will explore the key components of a wall putty plant, the essential machinery involved, and how it can enhance your production process.
Why Invest in a Wall Putty Plant?
A wall bag manufacturing plant provides a more systematic and efficient way to manufacture wall bags, ensuring proper mixing of materials such as cement, fillers and additives. It prevents manual errors and ensures product consistency. Whether you are a small company or a large company, installing a Wallputty Plant can streamline your manufacturing process and reduce costs over time.
Key Components of a Wall Putty Manufacturing Plant
Storage of raw materials The first step in setting up a wall putty plant is to develop a proper storage of raw materials such as white cement, polymers, other additives etc. It should these materials are stored in silos or hoppers to keep them dry and free from contamination.
Weighing and Mixing System One of the most important steps in wallbag production is the accurate weighing and mixing of ingredients. The bag mixer plays an important role in the preference and quality. The perfect Wall Putty Mixer Machine ensures that all ingredients are evenly mixed, creating a uniform mix that is ready to use.
Putty Machines The heart of a wall putty factory is a putty machine. This machine blends the ingredients, ensuring a consistent blend that meets quality standards. High-performance wall putty mixers are designed to handle high production volumes, allowing manufacturers to meet market demand without compromising quality.
Containment Once a cyst has formed, it is important to contain it in appropriate molds or bottles. Automated packaging systems can help ensure the continuous efficiency of the Wall Putty Production process and reduce labor costs.
Control system An advanced control system is needed to control and monitor all production processes. These systems help maintain consistency, track product quality and ensure that each wall bag meets the required standards.
Benefits of a Complete Wall Putty Plant Setup
1. Continuous quality improvement A professional wall bag manufacturing facility ensures that every putty produced remains of the same high quality. Working systems and highly accurate putty machines reduce the chances of human error, resulting in the best possible product.
2. Increased production By investing in the entire Valputi plant, manufacturers can scale up production to meet growing market demand. With a stable system and efficient Wall Putty Mixer Machines, productivity can be increased without compromising quality or consistency.
3. Reducing labor costs Automating the Wall Putty Production process greatly reduces the manual work required. The use of advanced Wallputty Manufacturing Equipment not only improves efficiency but reduces operating costs.
4. Time management The optimized wall putty plant ensures fast production cycles, allowing manufacturers to meet tight lead times and market demands. The use of efficient Putty Mixer technology accelerates the mixing and mixing process, reducing downtime.
5. It’s not environmental Modern sandbag machinery is designed to reduce dust and waste generation, making the process more environmentally friendly and the raw materials a proper use and storage helps reduce environmental footprint.
How to Set Up a High-Quality Wall Putty Plant?
Choose the Right Location Selecting a strategic location for your Wallputty Plant is crucial for reducing transportation costs and ensuring easy access to raw materials.
Invest in Quality Machinery High-quality Putty Making Machinery is the backbone of any wall putty production line. Choose machinery that offers precise control over the mixing process, ensuring a consistent and high-quality product.
Ensure Proper Training Even with automated systems, it’s essential to train your staff on how to operate and maintain the Wall Putty Mixer Machine and other equipment. Proper training will ensure smooth operations and minimize the risk of machine breakdowns.
Focus on Quality Control Implement strict quality control measures at every stage of the Wall Putty Production process. This includes regular testing of raw materials, monitoring the mixing process, and ensuring the final product meets market standards.
Partner with Reliable Suppliers To maintain consistent production, it’s important to establish partnerships with reliable suppliers for your raw materials and Wallputty Manufacturing Equipment.
Why Choose Readymix Construction Machinery Pvt. Ltd.?
At Readymix Construction Machinery Pvt. Ltd., we specialize in offering customized solutions for Wall Putty Manufacturing Plants. Whether you are setting up a small-scale operation or looking for a full-scale production facility, we provide the latest Putty Making Machinery and Wallputty Manufacturing Equipment designed to meet your specific needs.
Our solutions stand out due to:
Advanced Technology: We use cutting-edge technology to ensure the most efficient and precise production process.
Customization: Our equipment and plants can be tailored to suit your production scale and requirements.
Expert Support: With years of experience, we offer expert guidance in setting up and optimizing your Wallputty Plant.
Sustainability: Our solutions prioritize environmental sustainability, ensuring minimal waste and energy efficiency.
Conclusion
Setting up a complete Wall Putty Manufacturing Plant is a strategic investment for companies looking to produce high-quality wall putty consistently and efficiently. With the right Putty Mixer, Wall Putty Mixer Machine, and other Putty Making Machinery, manufacturers can meet market demand while maintaining superior product quality. At Readymix Construction Machinery Pvt. Ltd., we are dedicated to providing you with the best solutions for your Wallputty Plant needs.
To learn more about our Wall Putty Manufacturing Plant solutions, visit www.rcmpl.co.in and discover how we can help you achieve the best quality output for your wall putty production.
#Wall Putty Manufacturing Plant#Wallputty Plant#Putty Mixer#Wall Putty Production#Putty Making Machinery#Wall Putty Mixer Machine#Wallputty Manufacturing Equipment
0 notes
Text
Simple ideas for covering popcorn ceilings
Post has been published on becoration
Simple ideas for covering popcorn ceilings

Do you want to transform your home and get rid of the annoying textured walls? Then you’re in the right place. We’re going to give you some simple and easy ideas to cover up textured walls and achieve a smooth and radiant surface on your walls. Get ready to refresh your space and add a touch of freshness to your home!
Before you start covering up the texture, it’s important to properly prepare the area. Remove furniture and decorative items from the room and cover the floor and the items you can’t move with plastic sheets or newspapers to protect them from dust and paint.
Clean the walls with a damp cloth to remove dust and dirt and make sure they’re completely dry before you begin the covering process. Skipping this step could lead to unsatisfactory results.
One simple and effective way to cover textured walls is by using wallpaper. Choose a design that you like and that fits the style of your home, and follow the manufacturer’s instructions to apply it correctly to the walls. Wallpaper not only covers the texture effectively but also adds texture and personality to your walls, creating a unique and cozy atmosphere in your home.
Another option to cover the texture is by using joint compound to smooth the walls. Apply a thin layer of joint compound over the textured surface and use a putty knife or trowel to smooth it out and create a flat, even surface.
Once the joint compound is dry, lightly sand the surface to remove any imperfections and apply a primer coat before painting the walls with the color of your choice.
If you prefer to keep the texture on your walls but want to conceal the textured effect, you can opt for stucco to create a more subtle textured effect. Apply a layer of stucco over the textured surface and use a trowel or sponge to create interesting patterns and textures.
Once the stucco is dry, you can paint the walls with the desired color to complete the look. Choose colors that match your personality and that fit best with the decoration you want to achieve in your home.
Another option for covering textured walls is to install drywall panels over the existing walls. Drywall panels will provide a smooth and even surface that you can paint or wallpaper according to your preferences. Additionally, this option is ideal if you’re looking for a more durable and permanent solution to get rid of textured walls.
There are special paints designed specifically to cover textured walls and create a smooth and uniform surface. These paints usually have a high coverage capacity and are formulated to hide surface imperfections, including texture.
Consult with a paint expert to find the most suitable option for your needs and preferences. It’s worth spending a little more money on quality products as they will last longer.
If you’re not confident about doing the work yourself or if the texture is too pronounced to cover with home methods, you can always consult with a professional. A skilled painter or contractor can assess the situation and recommend the best solution to cover the texture and achieve the desired result on your walls. If you decide to hire a professional, make sure to get several quotes and choose someone with experience and positive references.
Referrer: Decoración 2.0, decoration news in Spanish
0 notes