#3D PRINTING
Explore tagged Tumblr posts
Text
DBFZ Yamcha and Ten cookies...done!!!
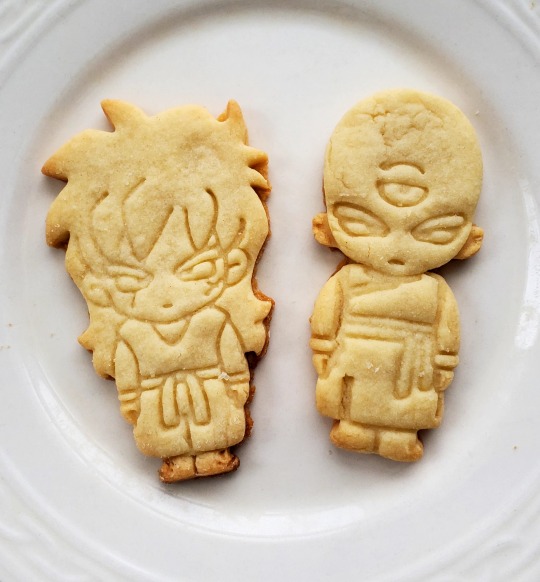
Soo I've been on a mission to recreate the Yamcha and Ten cookies from dragon ball fighterz because they're adorable...and they're finally real!! :'D process and info below! (kind of long lol)

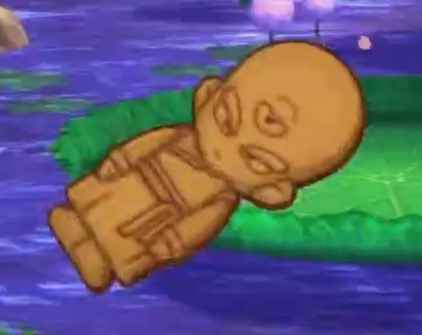
I saw someone share these screencaps from the game a while ago and as someone who never played DBFZ I was so charmed at how cute these things are. I wondered if anyone had ever made cookie cutters for them, did a quick search and didn't really find anything, so just kind of moved on.
A few months later I remembered them again and was like, man, I really would love to see these brought to life lol. And I searched again and actually found someone who made them!!... But they weren't selling them anymore. 😭💔

^Reddit post from user ShadowLord898.
So in the next few days I went into the DBFZ game files, figured out how to navigate them and locate/open the proprietary file types (took...a lot of googling), and eventually found the cookie textures!!! Which I then painstakingly traced over to create vectors.


I thought once I had the vectors, it would be easy to drop them into a 3D program and extrude them to make the cookie cutters. BOY WAS I WRONG!!! It's probably just my inexperience working with vectors in 3D programs, but I tried Blender, Fusion 360, and Tinkercad and had problems in each one before finally figuring out the right approach. (I really almost gave up 🤧 but I hadn't realized that your geometry/topology don't need to be perfect when 3D modeling for print as opposed to, like, something you plan to create a texture for.)


Tinkercad and its extremely user friendly interface, plus SVG import functionality, saved me.


Oh then I realized I forgot to reverse the design, which you have to do for a cookie cutter because of how they work. I thought I would need to flip all the vectors and re-import them, recreate the models... but thankfully there's a "flip" button in Tinkercad. Fixed.

I sent the files over to my friend @.theprocrastinatingengineer on Instagram, who has a 3D printing service, and he was able to print them out for me!

While I was waiting for them to ship I downloaded Cura ("slicer" program for preparing 3D files for print) just for fun. (I was really eager...)


And here's when I finally got them!!!

Despite choosing all the dimensions carefully, I was still surprised how dainty they were when I actually held them in my hand. I wasn't sure if they would work...
So I made the dough and everything, used some 5mm thick chopsticks as guides to roll out the dough to the thickness I wanted. I put plastic wrap over the dough to prevent the cutters from directly touching the dough due to food safety concerns. Here is my first attempt to use them:
After this my mindset quickly shifted from caring about food safety to "what's a little more plastic in my system?" / "I'm here for a good time, not a long time!!" / "welll the dough gets baked anyway so that kills the germs it should be fiiine" **I Do Not recommend others to be so careless... also important note: I was the only one eating these so I didn't have to worry about others' safety 🥴
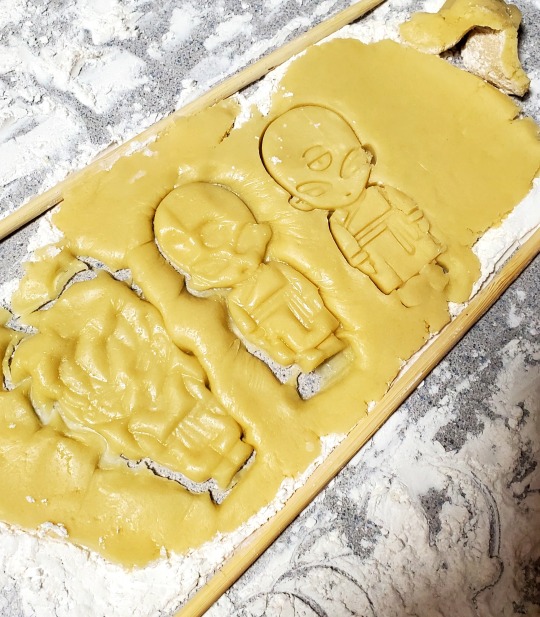
^The difference between using the cutters with and without the plastic wrap.
This first rolling out of the dough was actually a little too thick; in my design I hadn't accounted for the way the dough squishes up when you press the cutter into it. There wasn't enough vertical space at all, and the dough kept getting stuck in the cutter. It was a bad time!!! (didn't get a lot of photos of the failures here because my hands were covered in flour)
After lots of broken cookie cutouts, re-flouring the surface/cutters/rolling pin, and re-rolling the dough to be a bit thinner, I managed to get these out. I had to support Ten's head like a newborn when moving the dough onto the cookie sheet because the connection to the body was so delicate 😢
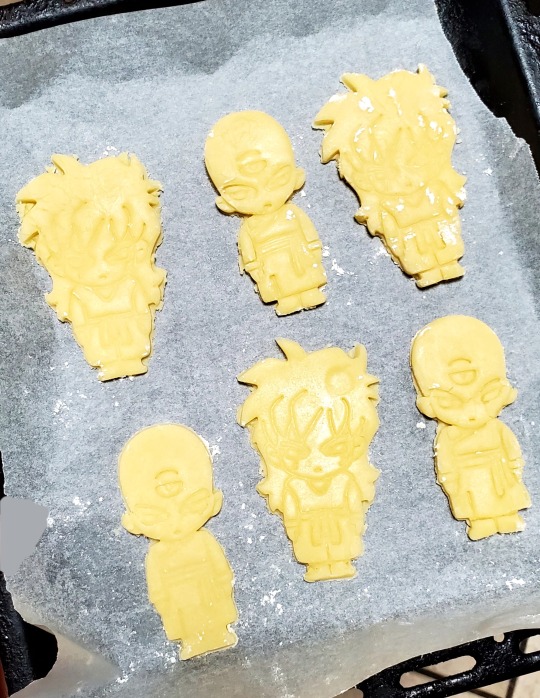
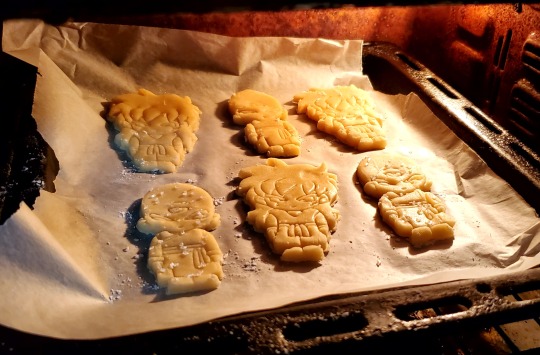
AND HERE THEY ARE...fully baked and ready 🥹
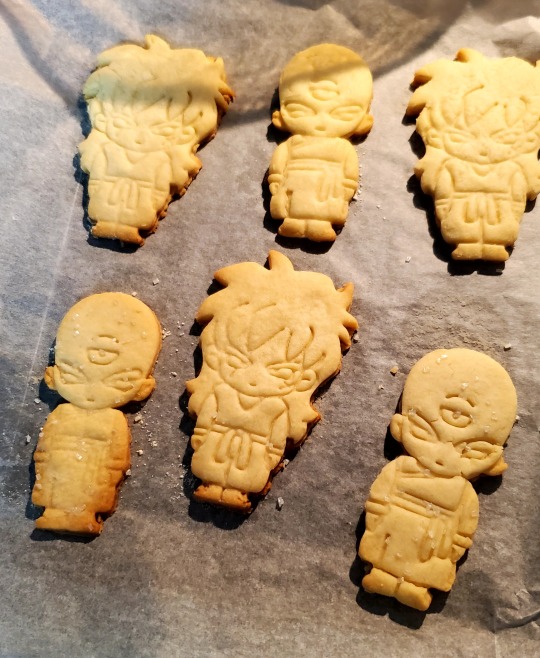
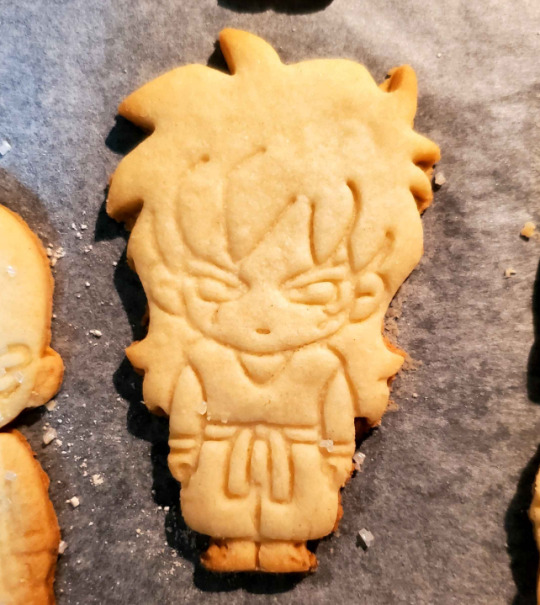
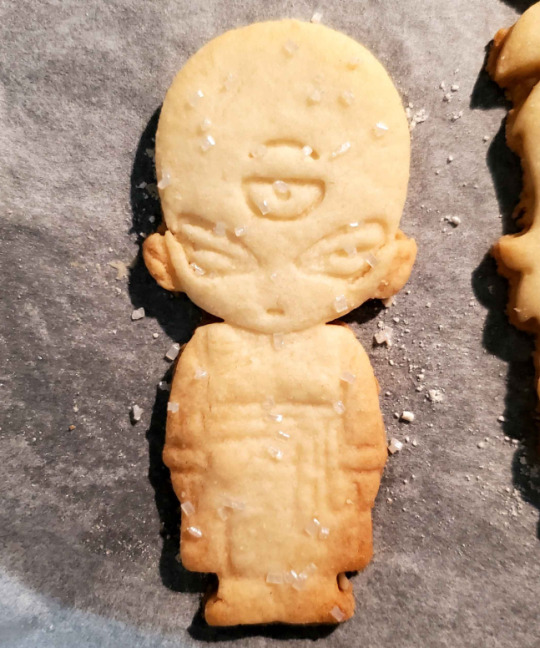
For the most part I was going to leave them undecorated like how they are in the game. But @.lamichicuenta made this really cute drawing of the cookies where Yamcha had chocolate decorations and Ten was a salty cracker, and I really wanted to try decorating some to resemble those!! Here are the photos of both versions of the cookies the next day once I was able to get some natural light for nicer pics.


(I meant to poke some holes in Ten's cookie to look more like a cracker but I forgot about it until they were already baking.)
They tasted fine...yamcha was better thanks to the chocolate. 🤭


If you read all this, thank you for following my cookie cutter journey... 😌🙏💖
Oh yeah and I made the vectors, 3D print files, and specs/info all available in a google drive folder here for anyone to use if they want! https://drive.google.com/drive/folders/1hQ7uq3leYPK64pGgt3LhFw-70IZnkYzh?usp=drive_link
OH and one last thing, i ended up revising the 3D models to hopefully fix the issue of not enough vertical space. ...turns out I hit the maximum for photos and videos in this post, but you can see it on my twitter here! https://twitter.com/freezebobs/status/1875720926840680678
I didn't get to try these revised models, but they are the ones I put in the drive folder. 😊👍
#dragon ball#dbz#dragon ball z#dragon ball fighterz#dbfz#tenshinhan#yamcha#tien shinhan#tien#yamtien#tiencha#food#cookies#3d printing#I spent a long time writing and adding all the pictures and captions so if tumblr fudges up this post i will be very sad#I realized I forgot to mention a couple things like the cookie cutter design tutorial I was following#And the way I actually created the models#When making the vectors#Make the outline its own path. And the inner/embossed details separate from it#Export the outline and the inner details as separate svg files#Import them separately into 3d program so you can extrude them to different heights for cutting/embossing#It doesn't matter if they overlap a bit. Tinkercad doesn't mind and once you join everything you still get a fine STL export for print☺️#As for the tutorial I used. The main takeaways were that I kept the 3d printer nozzle width in mind when choosing dimensions#Friend with the 3d printer said that you don't really need to do that though#Also the “bridges” or the little cross that connects the parts that float/aren't connected to the rest of the design (eg eyes and mouth)#I followed many random tutorials and things throughout this whole process#Can you tell i luv to document... (sincere)
147 notes
·
View notes
Text


so i got p03s 3d model...ive been currently working on making him articulated like a doll so here are some wips! (ignore the fact he's green and missing some parts since its a prototype)

also let me know if you have a guess on what this part of his design is meant to be because i have no idea :,)
the whole red circled area of his back is flat but im pretty sure its meant to be interpreted as a hole because of the cylinders on each side? thats what i did with the prototype print as you can see in the picture but i do not know

i personally think its supposed to be a game cartridge slot because he is themed after a handheld game console (fun fact: the black slab on the top right of his head is a trigger button and i just only found that out after looking at the 3d model)
but it might just be a hole to show inner wirings and mechanisms like how the cores from portal 2 have their sides open....who knows

95 notes
·
View notes
Text


Another 4 pairs of tactipaws packed and shipped today. I spent the last half of December sick as shit so stuff fell behind but I'm back up and running and working to increase capacity
That being said if you want to get a pair of Tactipaws DM me to order!
#maker#furry maker#furry#puppy maker#puppy girl#puppy#paws#pawb#tactipaws#tactical#tacticool#queer#transgender#robotics#lgbt makers#robot girl#robots#3d printing
32 notes
·
View notes
Text

My partner built a spray painting station complete with a turntable in honor of our first big print: Hunter's helmet! I forgot to take any pics pre-sanding, but the file is amazing and I'm so excited to paint it!
28 notes
·
View notes
Text

I 3D printed this "Malicious Face" and I love the texture / print layers. They are very interesting.
maurice ultrakill
Yippee
#art#my art#adhd fueled art#maurice ultrakill#ultrakill#malicious face ultrakill#3d printing#is this my art? i found the file online is it fair to call it that?#yeag#silly little guy#yippee
22 notes
·
View notes
Text

i guess i made a 6mm tesla
25 notes
·
View notes
Text
Lil 3d printed and painted anya
#art#model painting#3d printing#mouthwashing anya#anya mouthwashing#mouthwashing#mouthwashing fanart#painting
26 notes
·
View notes
Text
I've already said this in my comment, but thank you again for your super extensive replies to my heap of questions! I love that you met some people who want you to join their club, how cool is that?? I've actually never really thought about doing cosplay myself, I'm afraid I'm way too shy for it, but all this sounds so amazing!! I really hope you'll find a nice place as part of their club, in between all those crazy (in a good way) fans!
(I'm also crying over the Boba candy bucket, I love it so much <3)
It's actually my boyfriend who's into 3D-printing (all for fun and our own usage). I'm far from as technical as he is, but I do know a little bit about it from everything he tells me (and I asked him a few things so I could toss it into my reply)! We bought our first house together last year and one of the smaller spare rooms is now officially his 3D-printing room. We can close the door and he's working on a proper ventilation system in there, so we don't have to worry about any unhealthy vapours (or at least, worry less). He's currently printing with a FDM printer (FLSUN V400), mostly with PLA but it can also print with ABS, TPU and ASA. He's been building his own printer with mostly self-printed parts, but ever since he got his FLSUN V400 a few months ago, he's been so content with it, he's not sure if he's gonna finish the other printer anymore. He also has a LCD resin printer (Anycubic Photon M3 Plus), but he hasn't printed with that one yet (he still has to finish the ventilation system in the room).
And thank you SO MUCH for writing down all the sources of your STL files! I'm currently not planning on doing cosplay myself (but of course, this could change in the future), but I am VERY interested in printing and painting those scaled-down-mini-helmets, I love them so much <3 AND THE LITTLE TECH HELMET FOR THE STRING OF LIGHTS I seriously came across an official string of lights with little Boba Fett helmets A FEW DAYS AGO and I thought, I need this but with clone helmets?? And the teeny Gregor bucket with the blue window tint looks AMAZING, holy nerfballs!!
Ahahahaha, I'm laughing at your VPL remark! I was into Warhammer years ago (before 3D-printing became a thing), and we said the exact same thing, only we called them 'mould lines'! (We always used needle files to file away those lines, which felt like taking forever; it most definitely wasn't my favourite part about mini figurines 😂) Dry brushing during the painting process on the other hand, is one of my favourite techniques!!
Thank you SO much for sharing your collected knowledge from your experience! Again, I'm currently not planning on doing any cosplay, but I do like my 'hobby' work to look good! It's still a mess at our house since the move, but when the place (and my head along with it) is clearer, I'm definitely gonna get back into painting! And I can't wait to start with some of those adorable teeny clone buckets!
Thanks again, I saved your post so I can refind it whenever I need it, and I really appreciate you taking so much time and effort to put all of this information together! Thank you so much!! <3
Since this response got out of hand, I'm giving it its' own post.
It's dangerous to ask a maker (artist?) about their processes @lonewolflupe @ulchabhangorm. But since you're curious, please accept my very first:

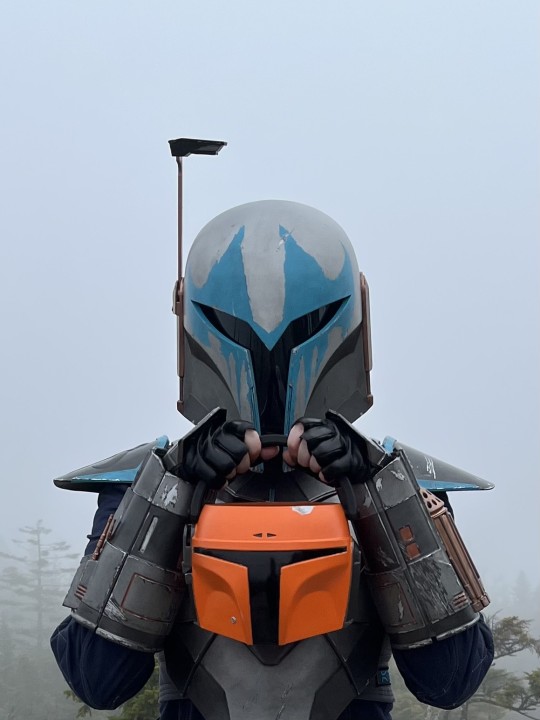
All of the pictured things were 3D printed by me on my FDM printer (Bambu Labs A1), including the teeny helmets. The non-helmet bits are pieces of Tech's armour. I'm currently building a Tech kit for 501st Legion approval. I "like" Crosshair and Scorch the most, but I am "most like" Tech. /sigh
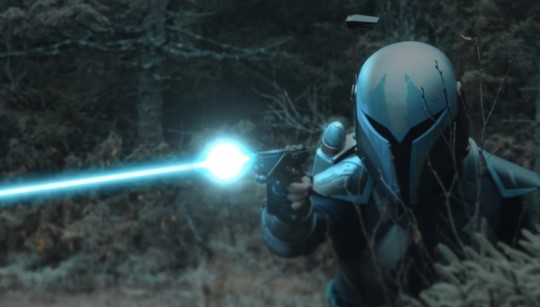
I do! (Mostly) All of the armour parts of Archers' kit were 3D printed and finished by me on my FDM printer, with the exception of my pauldrons which were resin printed by someone else, but finished by me. I initially began making the kit for a Halloween costume, challenged by a coworker to a work-Halloween costume contest, but ended up meeting a couple vode from the Mando Mercs club (MMCC). I was invited (gently coerced?) to complete the kit to their standards and join the club. I'm in that process now, but still have a few things to finish before I gain Official Member status. 🙂
I made a lil' Boba candy bucket!!
3. I mostly print with PLA+. I can print with PETG, ABS, and other materials but my printer is running inside a spare room and I'm not set up with an enclosure or awesome ventilation yet to print with materials which off gas more toxic VOCs. Although PETG would be stronger for a buy'ce that is going to be worn PLA+ works just fine for most folks who are not in very hot conditions. (PLA will sag and melt in high heat) . The first time I wore my full kit, I was at work, and did a full day of fieldwork in it. The whole kit survived apart from one of the thrusters on my jetpack which I accidentally busted off while putting it back in the kit box (adhesive failure, I should have used hardware but I was in a rush to finish it before Halloween) . All fixed now! PLA would be just fine for printing teeny and/or decorative helmets. Just don't toss full size ones onto the floor off of a shelf (ask me how I know).
4. You can get STLs for clone helmets in all the places you'd expect (cults, thingiverse, etc) and from vendors on Etsy. Be careful, though, some of those files are stolen, and some are REALLY terrible and inaccurate. I usually avoid 'free' files, as for things as complex as helmets often end up being more costly in other ways, or are just not the quality I want. Galactic Armory has a nice selection of clone helmets (I have..... all of them. /embarrassment). Marko of Mystery Makers has really great Bad Batch (and other SW) helmets. He always tries to go a step beyond other modelers with his designs, both with functionality and accuracy. The Crosshair and RC helmet in my original post are both printed from Mystery Makers files. The RC helmet is the closest to the game design available, and the Cross helmet has a super cool functional rangefinder (like the different lenses are there and flip up and down, not just the whole rangefinder stalk moving). The Tech helmet is printed from Galactic Armory files, as are the rest (with the exception of Archers helmet which is AlterEgo, if I recall). The teeny helmets are printed from the full size files, just scaled down to 25%. I wouldn't' try to print these on an SLA/LCD resin printer, because the supports would be a nightmare I think, but it works just fine on an FDM printer. The most difficult part is printing the teeny greeblies for them which are super teeny at 25%. I almost always end up breaking the lil' rangefinder stalks, and am pretty sure I've lost the tusks for Rex's helmet more than once.
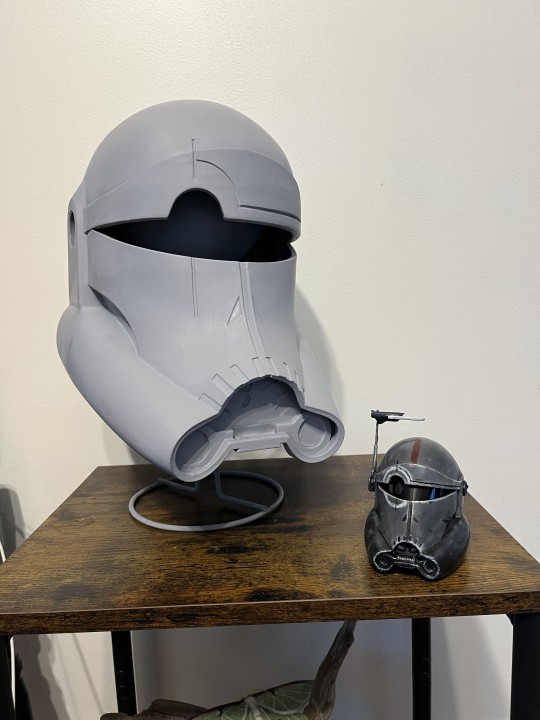
Cross WIP (Mystery Makers) with teeny (30%) Cross (Galactic Armory) 💙 Guess how many times I broke that teeny rangefinder stalk? Yeah. Four. 😖
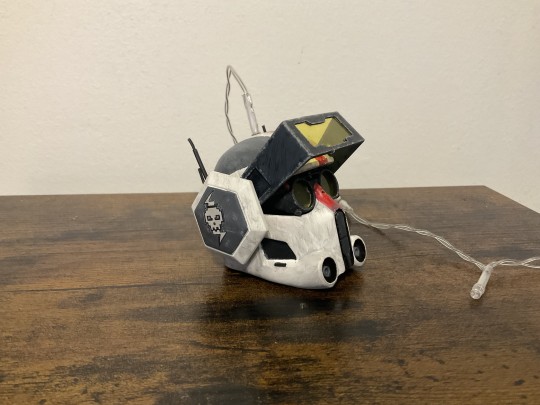
Likewise, guess how many times I broke and lost the SUPER TEENY antennae on Tiny Tech's helmet? 😫
5. The visors in the full size helmets are generally welding/grinding replacement shields (Hobart brand, usually - available on Amazon). They are dark enough to obscure the wearers face and can be fairly easily cut to shape and installed. Tech's visor and goggle lenses are cut yellow acrylic, and in my original post still have the protective backing on them as they aren't 'officially' installed yet - which I why you can't see through them.
The visors for the full-size RC boys are more complicated. I believe the exact details of how I’ve been taught to do it are considered proprietary 🥺😏. To achieve the “Flirtation Mask” effect, two visors, a diffuser, and a strip of LEDs are installed in a very secret, not so secret, way. I’m working on a Scorch bucket, full size, and will have help to do this for the first time. Stay tuned. 😆 For the teeny helmets I use automotive window tint for the visors. It's easier to cut and bend into tiny shapes to fit inside the helmets. I got some blue stuff for the commando helmets, which should look cool once I install the lights. 😎
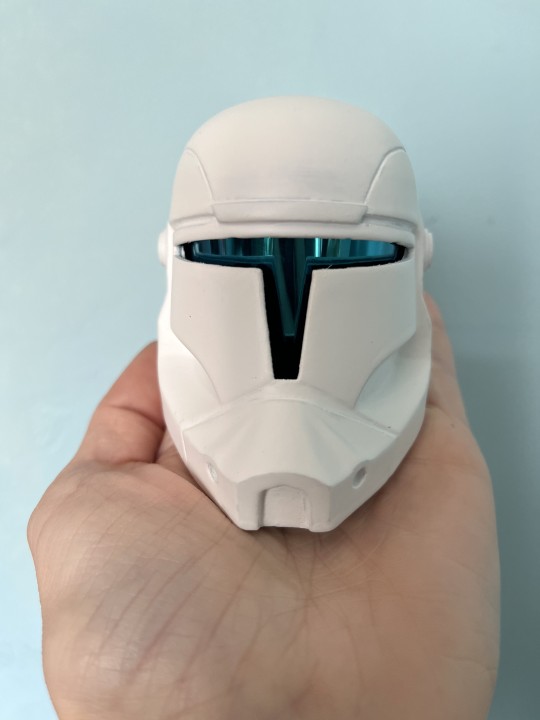
Teeny Gregor bucket WIP, with blue window tint FLIRTATION MASK 💙
6. The lil helmet stand under teeny Keeli (which I'm making for @eobe) is printed from a file from Galactic Armory. It's been through the ringer, because I use it to hold all the little helmets while I'm spray painting them and letting them cure. It did look nice when it was newer, and has the republic cog on the base. There is also a wall-mounted version which I have printed to hang Archer's helmet. I'll probably make more for the other helmets eventually.
7. VPLs (Visible Print Lines) are the enemy! As an MMCC member, it has been drilled into me that VPLs are evil and must be vanquished with extreme violence. I try to finish everything (with the exception of the flexi things people keep asking me to make) to an excellent standard with no VPLs - including the teeny helmets.
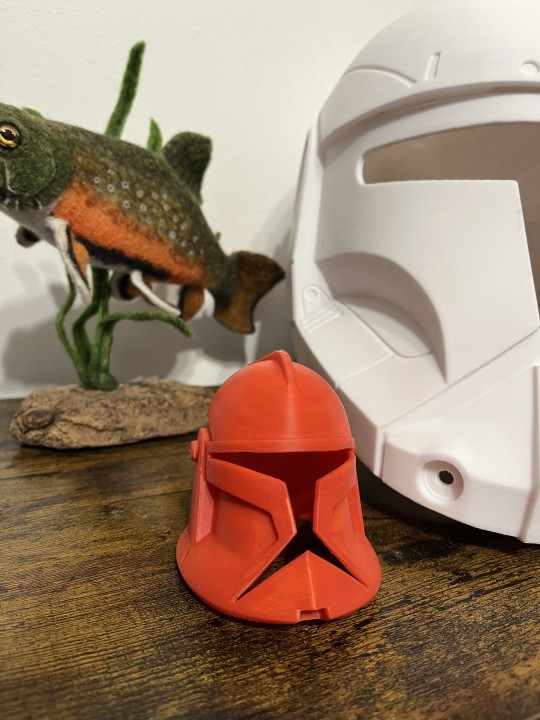
Raw Phase 1 (Animated) clone helmet and RC (Scorch) helmet). My printer does an excellent job, but still there are VPLs to be dealt with!
8. This question - how to get rid of VPLs could warrant it's own post. There are SO MANY techniques - some good, some NOT - but which ones you use depends largely on your print characteristics and what you intend to do with it. A lot of people lately have been recommending bathing the entire piece in a Bondo spot putty and acetone slurry several times until the lines are filled. I DO NOT recommend doing this for a piece that you intend to wear. I experimented with this and found out that after a small amount of wear the bondo likes to expel your paint in large chips, leaving ugly bondo-red spots behind. It would probably work ok for decorative pieces though. Other people have used UV curing resin to coat pieces to fill VPLs. It works, but UGH that stuff is toxic to touch and breathe, and it needs to be properly washed and cured, and cured some more. It's also much more difficult to sand than automotive body work products (which in all fairness are also toxic to breathe and touch - WEAR YOUR PPE).
My general process for armour pieces is to remove supports and then roughly sand (120 grit) only the really rough spots (like things that were overhangs or had a lot of supports). Sanding happens with a combination of sanding papers, sanding sticks, and needle files - depending on the piece. I then adhere pieces together (if they were printed in pieces like some of the larger full-size helmets) with plastic bonder. Seams are filled with Bondo plastic metal or EverCoat depending on the piece and I often plastic weld and staple the inside for strength. The seams are then sanded smooth. After I'm happy with the smoothness of the seams the entire piece will get 2-3 coats of automotive high-build filler primer (from a rattle can, though I have used the 1:4 mix stuff and brushed it on - I'd only recommend this with a large piece as that stuff REALLY fills things in quick - including the things you don't want it to) and a wet sand to 320 grit. At this point most of the print lines are filled, but stubborn areas, such as the top of the dome may still necessitate more coats. I generally end up applying 5 coats of filler primer, wet sanding between them. Following the final coat of filler primer, I'll wet sand again to about 400 grit (much more if we're going for the Beskar finish which needs a SUPER SMOOTH finish to work) and then put on a coat of regular primer. Black for helmets that will be dark (Most of the CF99 boys), and white for the other clone helmets. At this point they should be completely VPL free and ready for greebly installation and the "real" paint job. This process takes me at least a few days on full-size helmets as the paints have to cure between sanding and reapplication, and painting has to happen outside in good conditions. It's not inexpensive, but it is the most efficient and long-lasting way to do it, in my experience.
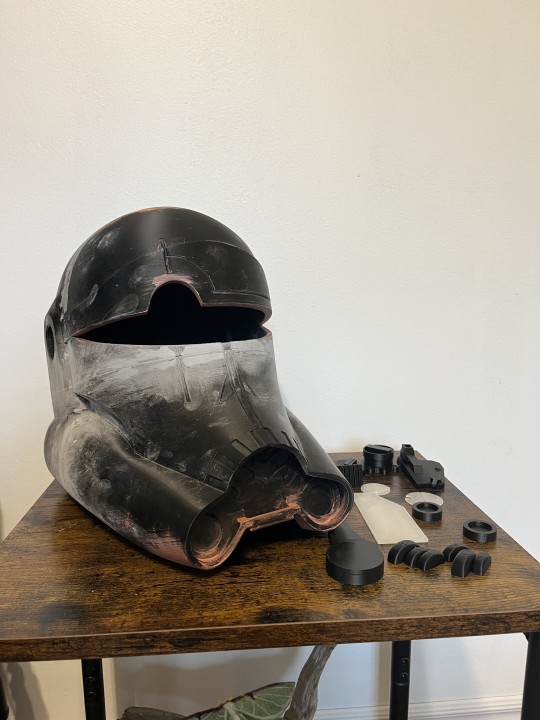
Cross helmet WIP. You can see the seam just under the visor cut out. This one printed in three pieces and needed ALL the seam filling and sanding. The pinkish and grey stuff are body fill products to fill in rough spots and seam lines. If you look at the last photo - of the same helmet - you can see they did a decent job of hiding that there was a seam. 😊
9. I use a lot of automotive products and paint. Since all my full size helmets are mean to be worn they need to be finished to a fairly high standard and be relatively tough. Archer's helmet body was finished entirely with Rustoleum brand filler primer and four layers of metallic paints (all rattle cans). The blue on the front was a Montana brand acrylic rattle can, and the copper parts (ear caps, rangefinder stalk) were enamel paint (Alclad copper) airbrushed on. The weathering - chips and scratches - were achieved by layering on a liquid latex medium between coats, so that when it was peeled off it revealed small bits of the coats beneath. It gives the damage a more realistic look than painting silver 'scratches' on after the fact. This liquid latex medium can be used to give the paint applied to clone helmets the chipped look to their painted designs as seen in the animation. It's a little more challenging to do in small scale though. After all the top coat paints are applied, I'll seal them in with a clear layer of satin or gloss sealant (rattle can). After that, I'll go over the entire piece with an acrylic black wash to make it look "dirty" and worn. 😅. After all that process, padding, visors, and electronics (HUD lights, fans, voice amps) are installed if needed. The whole thing is pretty time-consuming. I now understand why quality finished helmets cost as much as they do. My teeny helmets are all finished as I described above in the VPL section, but I use acrylics hand-painted on with a brush to apply the designs. In the animation versions of these helmets, particularly in TBB, the helmets all look like they've been (roughly) hand painted, so this technique works ok, I think. I apply the chipping and weathering at edges with dry brushing acrylics. I could apply a liquid latex mask and airbrush them, but eh. I'm using these little guys as fairy light "lanterns". They're super cute with the light showing a bit through the visors, particularly Tech. :)
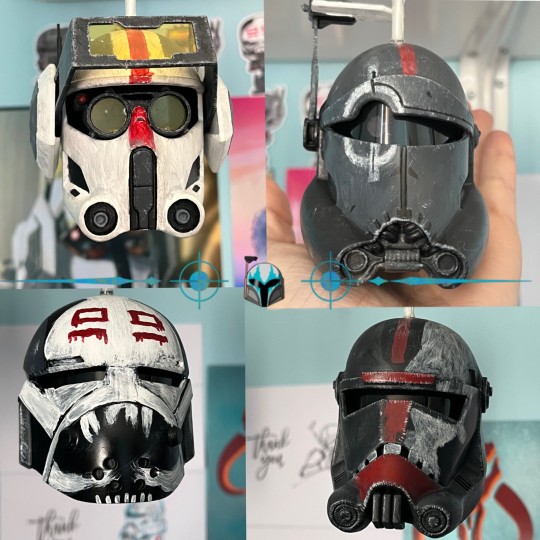
The Teeny Batch boys that I've got finished. Echo is coming, he just needs his top coat and weathering. :D
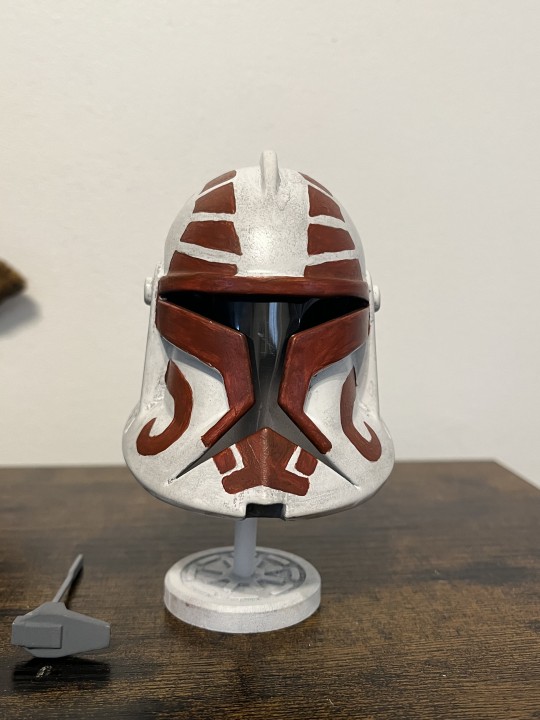
Lil' Keeli almost finished, with his unfinished rangefinder. Have not broken the stalk yet! /cheer 🎉
10. Acrylics brand? Hmm... I've used the Montana Gold rattle can acrylics which some of the MMCC mandos seem to like. I'm not sure if the ones I got were duds, but I wasn't super impressed. The cans did a lot of spitting and messed up my paint a few times. My brush on acrylics are Liquitex or Golden. Both can be thinned and airbrushed, and are more costly than cheap crafting brands but are more highly pigmented and last longer (plus the finish is nicer).
11. Base colour is whatever primer I finish with - white or black, depending on what color the final piece will be. For Mando helmets, the base colour is a metallic silver, so that when I peel off the liquid latex layers, the pint chips down to “bare metal/beskar”. Since clone helmets are plastioid, the base colour for them remains white or black.
12. I finish with a rattle can sealant. Satin finish usually, but that depends on the look you want. Always try to stick with the same brand of primer, paint, and sealant. Different brands have different chemistry - accelerants and so on, and can, and often do react with one another. The frustration of having to sand down a piece that was almost finished cannot be described.
To avoid paint heartache, always also paint in good conditions. Temperature, humidity, wind, etc can all ruin you day and paint job. Please also always wear your PPE!
13. Are they? I hope they are. They sure are a labour of love, and much work - but it makes me happy to make them and to look at them. 😅
I'm very fond of Archer's buy'ce, and the whole kit really. It was the first one I 'finished' (every mando's kit is an ongoing WIP - forever), and the process of making it kept me focused on something positive during a rough time in my life. Wearing it is super fun! Ibic Manda!
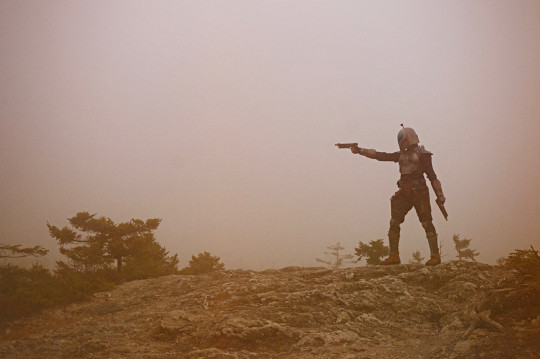

WOW that got lengthy, so sorry! I had ALL the questions when I started, and a lot of the info you need is hard to find or in bits and pieces all over the internet. If you have any other questions, feel free to ask! I can only share my experience, but I have spent a huge amount of 2024 working on these for what that's worth. 🫣
30 notes
·
View notes
Text
31K notes
·
View notes
Text
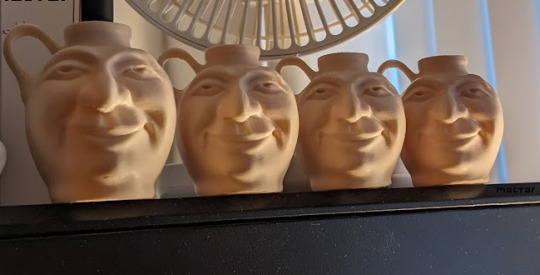
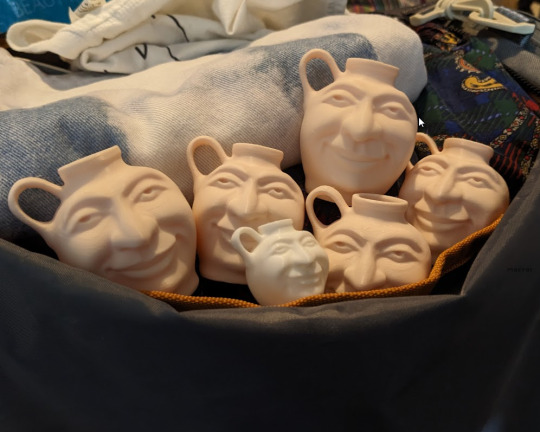
family outing
7K notes
·
View notes
Text
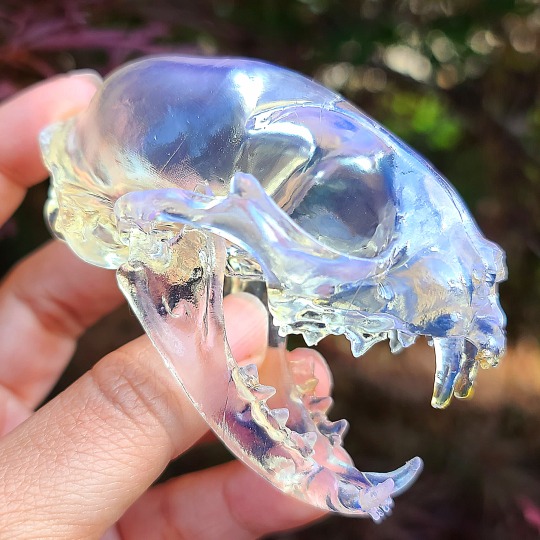
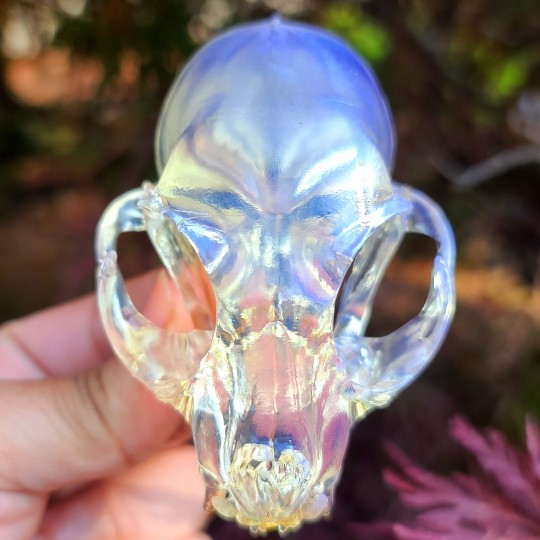
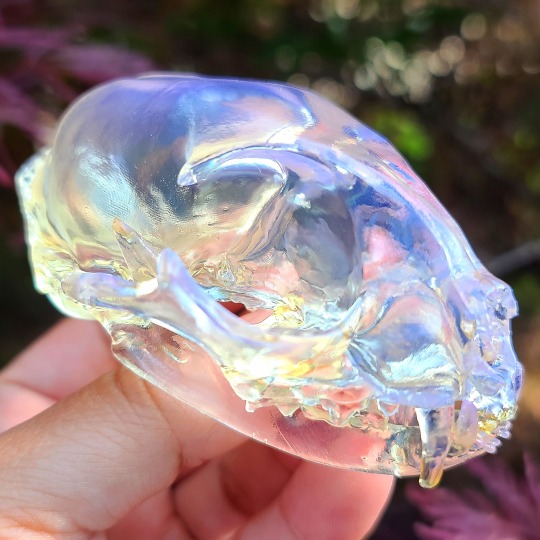
let me be perfectly clear
3K notes
·
View notes
Text
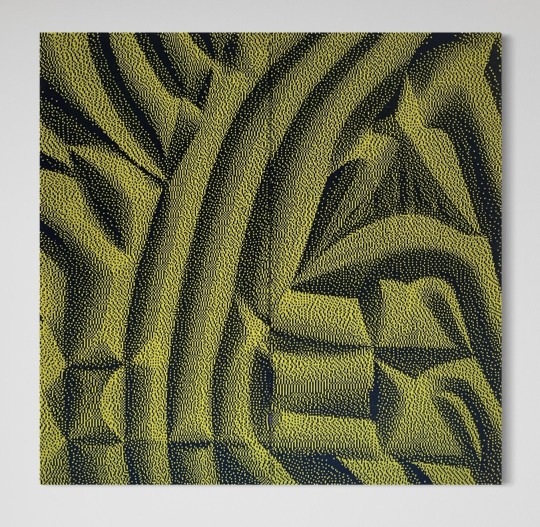
Computational knit
48” x 48”
Wool
2024
#candace thatcher#candacethatcher#artists on tumblr#p5js#artistsontumblr#foryourprocessing#3d printing#ayab
1K notes
·
View notes
Text


Accidentally 3d printed the teeniest of capybaras.
Meant to resize at 75%, ended up at 50% 😅
1K notes
·
View notes
Text
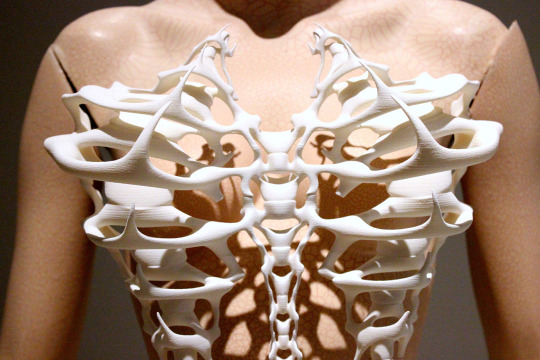
Iris van Herpen: 'Capriole, Ensemble' (2011)
3K notes
·
View notes
Text
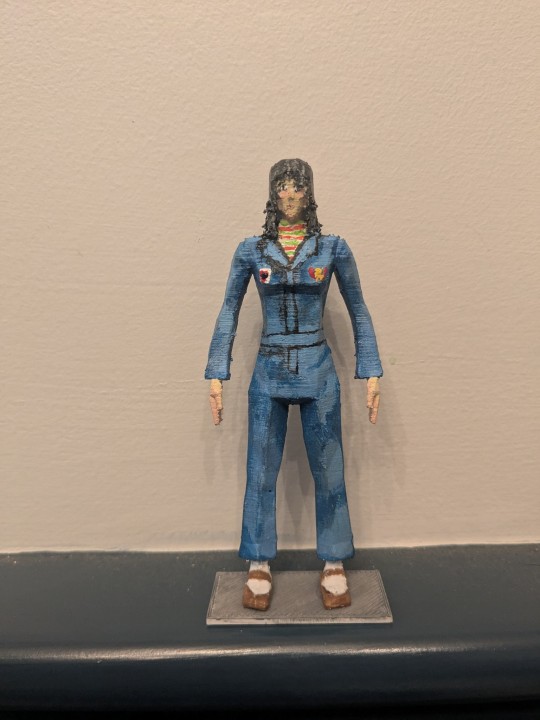
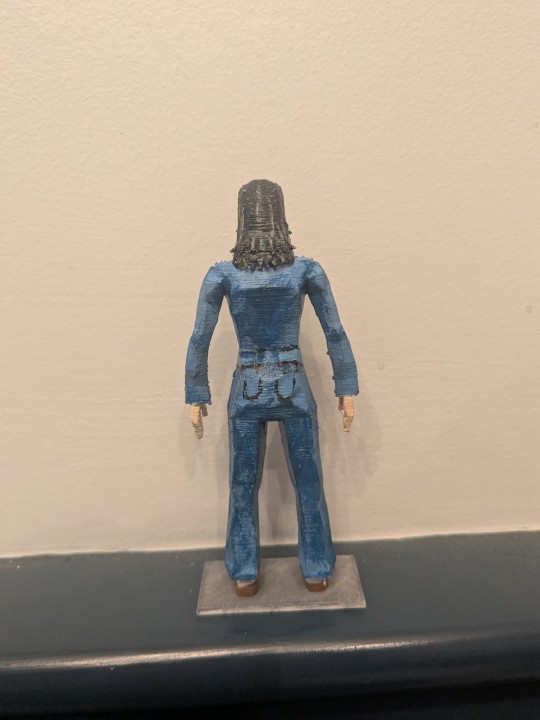
300 years later, I finished assembling and painting the vash figure ! ( knives next 🙃?)
.
605 notes
·
View notes