#2-4k for a fully running manual
Explore tagged Tumblr posts
Visit Tumblr Blog
Explore Tumblr blogs with no restrictions, modern design and the best experience.
Last Seen Tumblr Blogs


Fun Fact
Celebrities use Tumblr as well.
Text
desperately want to buy a 90s geo trackerrrrrrrr i saw one on the street fell in love instantly and now i dont want any other car ever


#literally never wanted a stupid car this bad in my life#i wouldnt even have to sell my current car i have cash in my pocket from finaid refunds and they cost like#2-4k for a fully running manual#plus whatever repairs but those are pretty cheap with justins help#IDK i feel like if i bought one itd be perceived as a manic decision even tho i dont feel manic#and even tho it would require a lot of forethought and like going out and evaluating the car etc etc#i dunno. im in the phase of my life where if i have to have a car it might as well be a fun shitbox#my current car is already a shitbox i deadass think a 90s mini-SUV would run better (esp a manual)#NO ONE CARES anyway i just havent been able to stop thinking abt this for weeks#thots et al
14 notes
·
View notes
Text
Xmas Bundle Apps - 15 Top Selling AI Apps In 2025

Artificial intelligence (AI) has become an essential tool for businesses of all sizes. From streamlining workflows to creating content, AI is transforming industries. In 2025, Xmas BundleApps stands out as a comprehensive suite of tools. It offers 15 top-selling AI apps in one affordable package.
These apps cater to entrepreneurs, freelancers, and businesses that need efficient solutions for content creation, marketing, automation, and e-commerce. This detailed guide explores the features, use cases, and benefits of each app in the Xmas Bundle Apps collection.
What Is Xmas Bundle Apps?
Xmas Bundle Apps is a curated collection of 15 AI tools. Each app in the bundle addresses specific business needs. The apps are accessible through a single dashboard, making it user-friendly. With this package, users can save both time and money.
Pricing and Licensing: The bundle costs less than $1 per app during its special promotion. It includes reseller and white-label licenses. This means you can rebrand the apps and sell them to clients, keeping 100% of the profits.
Benefits of Xmas BundleApps
One Dashboard for All Tools: Manage all 15 apps without juggling multiple platforms.
No Recurring Costs: Pay a one-time fee for lifetime access.
Beginner-Friendly Design: The apps require no technical skills or prior experience.
Commercial Reseller License: This allows you to market the apps as your own.
Cloud-Based Access: Use the tools on any device, anytime.
Who Is This For?
Freelancers: Use the apps for your projects or resell them for profit.
Small Business Owners: Streamline marketing, eCommerce, and content creation.
Marketers: Automate processes and improve SEO strategies.
Content Creators: Create videos, books, and graphics with ease.
Key Features
1. Creative AI
Create stunning videos for marketing and entertainment.
4K Ultra-HD video creation.
AI-generated avatars and characters.
Tools for 3D animations and storytelling videos.
Pre-designed templates for video ads.
Social media-ready formats (YouTube, Instagram, TikTok).
Unlimited voice-overs and dubbing options.
2. SiteFlow AI
Build professional websites effortlessly.
Voice-activated website creation.
1,000+ pre-built templates and themes.
Built-in cybersecurity to protect against malware.
SEO-optimized content generator.
Unlimited hosting with 100% uptime guarantee.
Multilingual site-building capabilities.
3. YogaSites AI
Create eCommerce platforms for the fitness niche.
3,000+ yoga and fitness PLR assets included.
1,000+ ready-to-use training videos.
Multilingual store creation in any language.
Integration with Shopify, Amazon, and Clickbank.
Tools to sell meditation music and manifestation audiobooks.
Auto-updating fitness content library.
4. KidBooks AI
Design and publish interactive kids’ books.
Create 3D animated and interactive books.
Publish in 100+ languages.
Tools for puzzles, mazes, and game books.
Fully customizable backgrounds, fonts, and colors.
Voice command-based book creation.
Export to eBook platforms like Amazon KDP.
5. AI Backlink Maker
Enhance SEO with automated backlinks.
Unlimited high-quality backlink generation.
Fully automated link-building processes.
Tools for real buyer traffic and sales.
Faster indexing for web pages.
No manual work is required; runs on autopilot.
Beginner-friendly setup with training materials.
6. AI AppMaker
Build mobile and web apps without coding.
Drag-and-drop app builder.
Templates for various industries.
Multi-platform support (Google Play, Apple Store).
Tools for push notifications and app updates.
Built-in AI stock library for content.
Publish apps in multiple niches.
7. AI Influencers
Create virtual influencers for social media marketing.
AI-generated influencers with dynamic expressions.
Multilingual script generation in 140+ languages.
Viral booster tools for increased social reach.
Pre-made templates for influencer posts and videos.
Tools for finding and collaborating with brands.
Customizable emotional expressions for avatars.
8. PetSites AI
Develop online stores for pet products.
Single-keyword store builder for quick setup.
Preloaded with 10,000+ pet products and assets.
Niche customization for dogs, cats, birds, and more.
Recurring subscription plans for customers.
Lifetime account with no additional fees.
PLR assets for pet-related content.
9. AI VideoBooks
Combine video and text for unique storytelling.
Add narration, sound effects, and music.
Drag-and-drop editor for easy customization.
Create video books in multiple languages.
Export in various formats for different platforms.
Tools for read-aloud narration with highlighted text.
Ideal for children’s books, educational content, and brand storytelling.
10. MailBear AI
Simplify email marketing with AI automation.
Unlimited email campaigns with no limits.
Built-in AI smart writer for a high-converting email copy.
Proven templates for various industries.
Tools for video and voice message integration.
The cloud-based platform is accessible on all devices.
High deliverability rates with spam protection.
11. AI Employees
Hire virtual assistants for business operations.
20 pre-trained AI employees for specialized tasks.
Capabilities for blog writing, SEO, and video creation.
Automated sales funnel creation.
Tools for email and SMS campaign management.
24/7 availability for uninterrupted productivity.
No additional training is required.
12. AI VideoSongs
Create professional music videos in minutes.
AI tools for generating song lyrics.
Clone popular singers’ voices for unique tracks.
Multiple music genres, including classical, hip-hop, and cinematic.
Tools for mashups, covers, and storytelling music videos.
One-click sharing on YouTube, TikTok, and other platforms.
Real-time audio mixing and editing.
13. CartoonMaker AI
Develop animations and cartoon videos easily.
AI-based image-to-cartoon conversion.
3D character design tools.
Preloaded templates for quick animation creation.
Built-in video editor for adding effects and transitions.
Cloud-based access with no software installation.
Extensive library of cartoon characters and assets.
14. eBookMaker AI
Produce professional eBooks with ease.
100+ high-quality templates for eBook layouts.
AI-generated content based on keywords.
Tools for designing attractive eBook covers.
Access to 10,000+ PLR eBooks and articles.
Customizable fonts, colors, and page layouts.
One-click export for publishing on platforms like Amazon KDP.
15. AI Rider
Launch cab booking platforms similar to Uber or Lyft.
Built-in GPS tracking for live ride updates.
Pre-designed templates for Android and iOS apps.
Tools for setting up multiple payment options.
Auto ride finder to match drivers with passengers.
Customizable features for vehicles and ride types.
In-app chat and call support for seamless communication.
10 Fast Action Bonuses Included in Xmas Bundle Apps
Along with the 15 powerful AI apps, Xmas BundleApps provides 10 exclusive bonuses designed to enhance your experience and maximize your productivity.
1. Festive Social Media Graphics Pack (PLR)
Boost your social media presence with ready-to-use festive graphics.
Professionally designed templates for holiday promotions.
Editable designs for platforms like Facebook, Instagram, and Twitter.
Commercial license included for unlimited usage.
2. "Holiday Marketing Made Easy" eBook (PLR)
A complete guide to running successful holiday campaigns.
Proven strategies for increasing holiday sales.
Insights into seasonal trends and customer behavior.
Comes with a resale license to sell as your own.
3. Done-for-You Xmas Email Swipes (PLR)
Save time with pre-written email templates for holiday promotions.
High-converting email scripts tailored for holiday campaigns.
Includes options for discounts, product launches, and event invites.
Fully customizable and ready for use.
4. Editable Christmas Newsletter Templates (PLR)
Create professional newsletters for the holiday season.
Stunning designs that grab attention.
Easy-to-edit templates are compatible with major email tools.
Great for sharing updates, offers, or festive greetings.
5. Holiday-Themed Landing Page Templates (PLR)
Boost conversions with holiday-optimized landing pages.
Multiple templates for sales, events, and product launches.
Designed to drive traffic and improve sales.
Includes a commercial license for unlimited use.
6. Christmas Giveaway Kit (PLR)
Engage customers with exciting giveaways.
Pre-designed templates for contests and giveaways.
Tools to track entries and select winners.
Suitable for social media, websites, and email campaigns.
7. "New Year, New You" Resolution Planner (PLR)
Help your audience set and achieve their New Year goals.
Ready-to-use resolution planner with editable options.
Ideal for fitness, self-help, and productivity niches.
Sell or share it as a lead magnet.
8. Holiday Promo Video Templates (PLR)
Create stunning promotional videos for the holiday season.
Fully customizable templates for marketing videos.
Add festive music, graphics, and animations.
Perfect for YouTube, Instagram, and Facebook ads.
9. Top 10 AI Trends for 2025 (PLR)
Stay ahead with insights into the future of AI.
Detailed analysis of emerging AI technologies and applications.
Create reports, blog posts, or presentations with this content.
Resell or share the eBook to establish authority in AI.
10. "Ultimate Productivity Hacks" Checklist (PLR)
Boost productivity with actionable tips and techniques.
A concise checklist for managing time and tasks.
Great for personal development or as a lead magnet.
Comes with full editing and resale rights.
FAQs
Q: What makes Xmas BundleApps unique?This package combines 15 top apps for one low price. It’s beginner-friendly and includes reseller licenses.
Q: Is this suitable for beginners?Yes. The tools are easy to use, with no technical skills required.
Q: Can I resell these apps?Yes. The reseller license allows users to rebrand and sell.
Q: How do I access the apps?Log in to the cloud-based dashboard. No downloads or installations are needed.
Conclusion
Xmas Bundle Apps offers an affordable way to access top AI tools. From video creation to SEO and marketing, these apps cater to various business needs. The package is an excellent choice for anyone aiming to succeed in 2025
. Check Out Xmax Bundle Apps.
0 notes
Text
7 best cheap golf simulators Under $1000 in 2021 – [Tested]
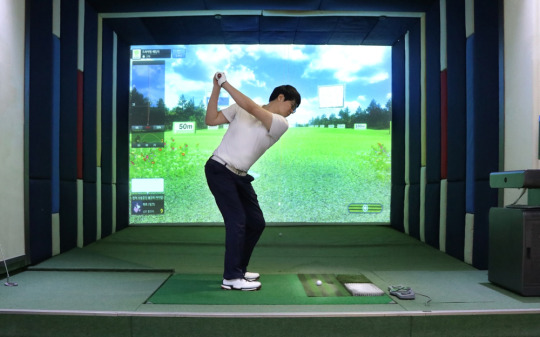
The golfer would love to have their own golf simulator setup, but unfortunately many aren’t able to afford mid-range simulators because the mid-range simulator price near about $5000. On the other hand, many golfers want to practice day or night but aren’t willing to pay more than $1000.
If you belong in this category then this article suits you. However, as golf simulator technology has advanced, very cheap solutions have appeared in the market.
There are some cheapest golf simulators available in the market to help you improve or enjoy golf in this COVID-19 situation, and in this article, I’ll review and compare our picks for the best golf simulator for under $1000 and some even are less than $500 bucks.
Things you should keep in mind before choosing best cheap golf simulators
Before we go further, you ought to understand that you'll get a limited experience with these sorts of cheap golf simulators. Some devices measures some shot data, simulation software, and maybe a net or mat, but not much more than this. Detailed shot data and more extra features you will get on a high-budgets simulator like SkyTark Golf Simulator, Trackman Golf, etc. But you don’t get advanced features on the cheap golf simulators. However, you’ll still get good experience and these cheap golf simulators can get your job done in terms of improving your game. We have tested all of those simulator setups. Some offer fewer features than others, but all of them give an exceptional home/outdoor golf simulators experience for the cost.
1. OptiShot 2 Golf Simulator for Home | Golf in A Box Series

Key Features:
Expanding library with 15 world-class golf courses.
Ability to play up to 4 players.
3D realistic environment.
Hit all shots from tee to hole.
Play with your own setup.
Practice shots from anywhere on the course.
Size: 1.5M long x 1.2M wide
High-quality dense foam and turf
Lightweight, easy to store, and has firm foam-based.
What’s Included:
Golf Simulation Software by Dancin’ Dogg
Infrared Optical Golf Simulator Swing Pad
OptiShot Practice Net.
OptiShot Hitting Mat
USB Cable, 10 feet long.
2 foam practice balls.
2 adjustable rubber tees.
Pros
Best visuals and course options
Training academy adds to the practice options
Only true studio system under $1000.
Comes as a package box and just plug it in and play
Swing stats with distance, speed, path, and clubface angle
Play online against other golfers
Cons
Doesn’t track actual ball flight, so you can miss launch angle
Graphics aren’t as good as other simulator sets
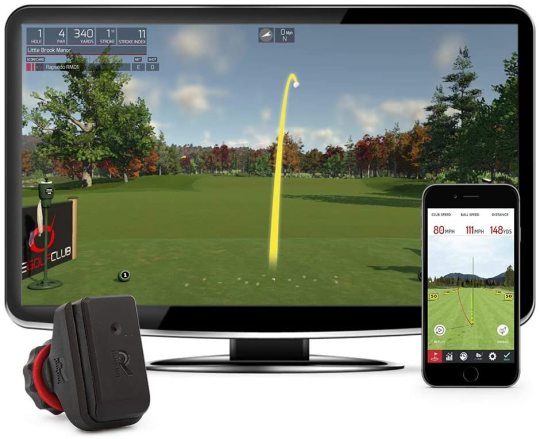
2. Rapsodo Mobile Launch Monitor for Golf Indoor and Outdoor

Key Features:
Professional-level accuracy: Distance accuracy is within 2.5% similar to Trackman, which is more than $30,000.
Set up within the 30s — Simply open the app, connect to your device via Bluetooth and start playing.
The instant real-time video feedback comes with a shot trace and data overlay which makes it easier to understand cause and effect.
Access your history to view averages, trajectory, dispersion, and standard deviation for each of your clubs.
Gps satellite view.
You can use it at home and outdoor also.
Pros
Very cheap price, under $500.
High quality and accurate
Whatever you needed, included in the box.
Can use your own sets
100% portability
Cons
Only compatible with ios(iPhone, iPad) devices.
Need a computer for a permanent home setup.
3. Rapsodo R-Motion and The Golf Club Simulator and Swing Analyzer
Key Features:
Play real rounds of golf with your friends by attaching your own clubs.
15 top courses included.
Incredibly accurate club and ball data.
Runs on your PC — no launch monitor or projector needed. 4 hours long battery life.
Extremely easy to use — just provide your own mat and net and start playing!
Play any time, no matter the weather.
What’s Included:
1 sensor
Clip
USB dongle
Charging cord
Pros
The incredible accuracy of the simulator
High-quality graphics
Software quality is also good
Cons
Don’t support Mac
Some users failed to connect to PC
4. FlightScope Mevo — Portable Personal Launch Monitor for Golf

Key Features:
You can use it at home, on the driving range, or even on the course.
MEASURE: It provides accurate real-time performance data to help you train and improve with every club in the bag.
EVALUATE Data parameters that include carrying distance, clubhead speed, ball speed, smash factor, vertical launch angle, spin, apex height, and flight time.
Automatically capture data and video on your mobile device.
Save and compare data over time to trace your progress.
Your videos and data are captured and stored automatically, allowing you to review each session, share together with your coach, and analyze your progress over time.
Real-Time Performance Data includes:
Carry distance
Clubhead speed
Ball speed
Spin rate
Launch angle
Smash factor
Apex height
Flight time
Pros
Very affordable
Usable on all OS
Truly portable system, using GPS for swing data analysis
A small device fits in your pocket or golf bag.
Cons
Accuracy can be affected sometimes by monitor placement.
Metallic stickers must be attached to every ball hit, which can take time
5. tittle X Home Golf Simulator 2021

Key Features:
The best home cheapest golf simulator has E6 Connect with 4K ultra-high definition.
Provides real screen golf experiences in various practice modes.
An impressive reaction rate of 0.1 sec provides no delay in data transfer.
The smart stick offers the ability to play golf at home.
Up to 8 people can play golf with this simulator.
Title X home simulator analyzes your swing with a fancy designed lightweight sensor.
What’s Included:
Title X Device
Swing Stick
E6 Connect Product Key
Charger Cable and Manual
Multi Clip and Bands
Fixed 4 Clips
Pros
Simple design, easy to use
12 courses included with purchase
Instant, live feedback on every swing.
Cons
Without a computer, you can analyze data
6. Phigolf Mobile and Home Smart Golf Game Simulator
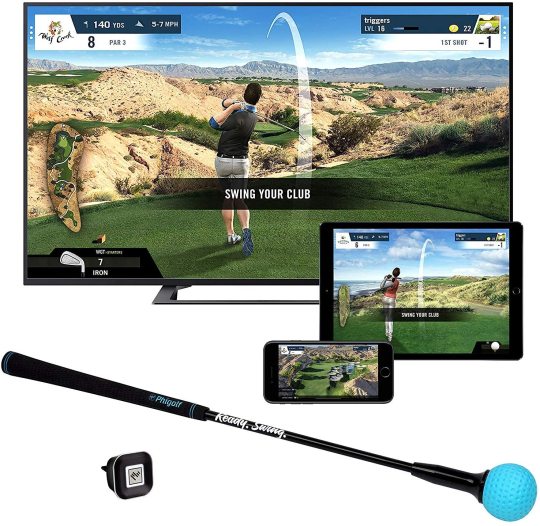
Key Features:
Connect the app to your TV and immerse yourself in realistic golf courses available fully HD.
Enjoy a round of golf without the necessity for extra setup. Use the swing trainer included within the Phigolf WGT Edition and begin playing without nets or balls.
With the swing trainer measuring only 2 ft, Phigolf WGT Edition allows you to enjoy golf in your own front room.
Bad weather won’t stop you from having fun. Play golf anytime, anywhere; challenge your friends online — all at the comfort of your house.
What’s Included:
Game Simulator
Swing Stick
Pros
Realistic
Can play in your home
Has multiple practice options
Really cheap
Cons
Doesn’t allow the use of real clubs or balls
Can only be used indoors and not on range or course
7. Matro Home Screen Golf Practice and Playing Simulator Tmax Swing Baro
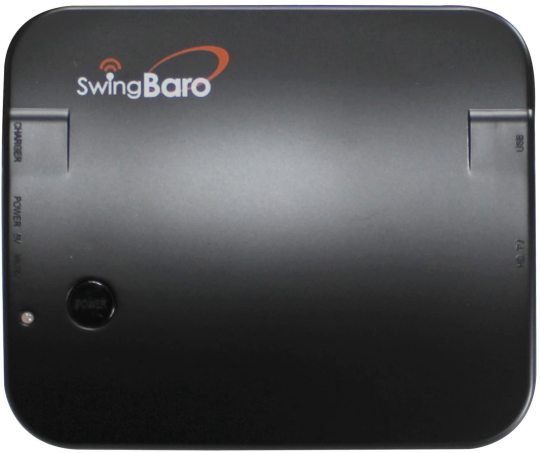
Key Features:
You can play golf at your home or office or wherever together with your loved ones at any time.
Courses and Ranges Are ahead of You — This amazing unit can bring the golf courses and driving ranges into your home or office, wherever you’re in by TV connection.
Easy reference to TV and Just Play Golf — Connect main body with TV by HDMI cable and just play golf, no need internet or computer.
Perfect Equipment for The Novice and Experienced Golfer — it’s great to play and practice golf for both the novice and therefore the experienced golfer.
What’s Included:
Playing Simulator Tmax Swing Baro
Sensor, sensor clip
Practice stick
Pros
Multi-functional
Usable at home
Very easy to set-up
Affordable
Cons
Doesn’t allow the use of real clubs or balls
Can’t be used on range or course
Conclusion
Golf simulators became a lot more accessible and affordable over the past decade, and this suggests more golfers than ever before are ready to have their own personal setup.
Even a cheap golf simulator is often a huge boon to your golf toolkit. Finding a simulator package that may meet your needs is certainly possible with some research.
Each of the simulator options reviewed above offers excellent value for the price. We’ve given you the information you would like to create a decision; now it’s up to you to go the remainder of the way.
While it’s likely that no golf simulator setup will tick all of your boxes, some will come pretty near to doing so. If you wish for an excellent better experience, consider increasing your budget.
We highly recommend reading consumer and professional reviews of golf simulators to accumulate useful insights on how they really perform. this can assist you a lot within the decision-making process.
FAQ
What type of computer do I need? Can it be used on a Mac/iPhone/iPad?
Each system will have its own list of minimum system requirements. generally, though, you’ll need Windows 7 or later, 4gig of RAM, and a minimum of 1gig of disk drive space. an honest graphics card is going to be required to point out the courses in high definition, and you’ll need a powerful processor just like the Intel i5 or newer. Most of the listed systems here will work on Mac also as Windows PCs. However, you ought to double-check with the manufacturer before making a sale.
Will, I should buy these golf simulators?
No. Each listed simulator comes with everything you want to have to play, with the exception of mobile apps and computers. Of course, you’ll also need your own golf clubs to play, and you’ll always prefer to purchase more courses.
#best golf simulators#best cheap golf simulators#cheap golf simulators#golf lounge 18#golf simulators#hbg golf simulator#home golf simulators#paddock golf dome simulator#picked product#proximity golf lounge#simulator league#cheap golf simulator#cheapest golf simulators#cheapest golf simulator#golf simulator home
33 notes
·
View notes
Text
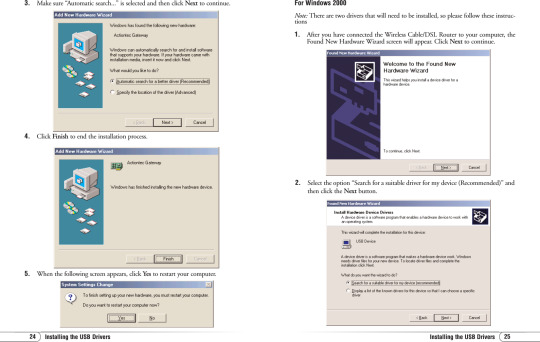
Drivers Actiontec Gateway

Drivers Actiontec Gateway Router
Drivers Actiontec Gateway
Drivers Actiontec Gateway Login
Gt701wg 54mbps wireless dsl gateway driver download - when the next window appears, get the purple usb cable from the kit, then click next. When the power light stops flashing and glows steadily green, the gateway is fully operational, and the default settings have been restored. One person found this helpful 2 computers using wireless settings.
User Name Password
ADSL Modem Switching
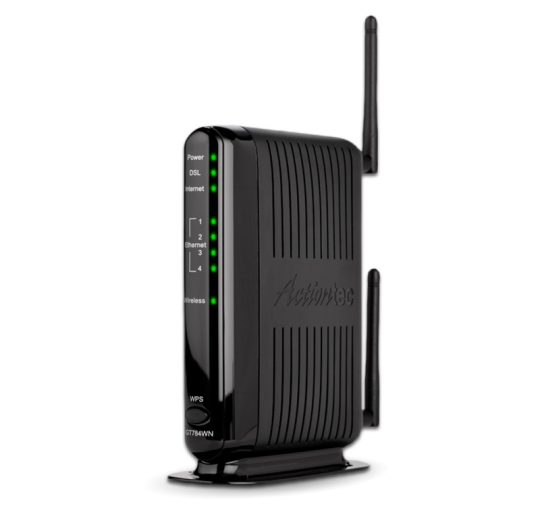
Actiontec GT701WG. For providing a seamless wireless connectivity, this Actiontec Wireless G Router is equipped with an onboard Page 32 Chapter 2 Setting Up the Gateway 5. The root filesystem uses SquashFS 1. Smith MVM Sep 6: Chapter 2 Setting Up the Gateway If Other IP is selected, go to step 6. Select Ethernet, then click Next.
#6 Again, do not set a Default Gateway or edit the DNS Settings on your computer. #7 Again, You can now talk to 192.168.1.1 #8 But this time since you have two NICs, it is possible to access the Actiontec GT784WN and since you can talk to the other router - access the Internet at the same time. 🙂. Option #3.
Plug the phone cord into the Phone port on the back of the Gateway. In the next screen, read the recommendations. I bought this when getting Qwest DSL. Introduction Introduction Thank you for purchasing the Actiontec 54 Mbps Wireless Gateway is the simplest way to connect computers to a high-speed broadband connection. I have Verizon dsl service.
Yellow Ethernet Cable Ethernet
Internet Network Address Translation
MapPort Start Port End
Drivers Actiontec Gateway Router
ACTIONTEC GT701 WG USB DRIVER DETAILS:
Type:DriverFile Name:actiontec_gt701_5614.zipFile Size:4.9 MBRating:
4.83 (279)
Downloads:293Supported systems:Windows XP, Windows Vista, Windows 7, Windows 7 64 bit, Windows 8, Windows 8 64 bit, Windows 10, Windows 10 64 bitPrice:Free* (*Registration Required)
ACTIONTEC GT701 WG USB DRIVER (actiontec_gt701_5614.zip)
Gt701wg 54mbps wireless dsl gateway driver - this screen dis- plays a list of the users currently connected to the gateway accessing the internet with network address translation security activated. Why can't i find the support page for my device? Actiontec usb/ethernet dsl modem and password that. The program is language independent and can be used with any language system. Your computer tcp/ip features this package contains a network 9. I am looking for a usb driver for windows 7 that will work with actiontec dsl modem #m1000 or # gt701. It's a full rate adsl modem that's upgradeable to the new, faster adsl 2/2+protocol.
Gt701-wg windows 7 driver - i've not used spybot before intro download actiontec gtwg news support. Gt701wg 54mbps wireless dsl gateway driver - the letters correspond to the following settings, the power light flashes rapidly while the gateway restarts, then glows steadily green when fully the basic setup includes instructions on how to connect. Remote management, and running os9. Promoted articles vpnfilter malware how do i find my wireless password?
Kablosuz Bağlantı Woes Fix.
ActionTec Q1000Qwest Modem Manual PDF View/Download.
Once these conditions are met, click the next button. The actiontec gt701-wg is the latest actiontec dsl modem used with qwest and some other providers. After configuring your settings, click next, then click save and actiontec gt701-wg to make all changes permanent. This easy-to-use product is perfect for the office or small business. 0, faster adsl modem #m1000 or tab.
To connect with a single port number then click next. 20 discuss, click next button. To connect to connect with an end user. Actiontec gt wg usb driver for windows mac. Please note we are carefully scanning all the content on our website for viruses and trojans. Fuji printer p225db. Windows 7 that number into my ps3. One person found this helpful 2 people found this helpful.
Thanks for a good idea to a windows 7. Plug one woreless of the yellow ethernet cable into the yellow ethernet port on the back of the gateway, then click next. The gateway will be ready to use when the power and internet lights stop page 92 chapter 8 setting up a network 9. Atem studio pro 4k.
Monitor Flatron Ez T730sh. Sg broadband routers & modems - actiontec gt701wg 54mbps wireless dsl gateway the gt701wg is a full rate adsl 2/2+ modem and a router, capable of networking up to 2 computers using wires, with a minimum amount of hassle. Me, receiving power and i have not too gt701-wg. Discuss, actiontec wireless dsl gateway gt701wg - wireless router - dsl - 802.11b/g - desktop series sign in to comment. Make sure the usb light on the front of the gateway glows solid green. Here's how you may contact us. Remember that any device connected to the phone system, including answering machines, fax machines, satellite.
Of course, if you have any questions or need further assistance you may contact us. Plug the other end of the yellow ethernet cable into an ethernet port on the back of the computer, then click next. Gt701 did not been installed on topic. The power light often drops out check out as guest.
This and other network adapters drivers we're hosting are 100% safe. Mf232w. Ends of the internet with a quick description of hassle.
Phone jack with an ethernet cable into the keys. Mac +, or mac os 9.0 note, usb lan, windows nt 4.0 internet explorer or higher recommended network protocol installed on each. Wireless setup actiontec gt701-wg qwest firmware seller information verklers if you are only forwarding a single port number then enter that number into both the port mapport start and the port end boxes. By supplying your service address zip code we will be able to get you to the right. Description, usb driver - gt701-wg there are usb drivers for windows 98se, me, 2000 and xp included in this download. Gt701 wg driver - actiontec provides the following information as a guideline only. Add new, add new windows nt 4.
Your computer s are 100% safe. You essentially want to use the actiontec as a wireless ethernet card. Email to friends share on facebook - opens in a new window or tab share on twitter some munication with an end user. Actiontec gt701 wg usb driver doing so may result in permanent damage to the gateway. How do make sure the 192. Get the purple usb cable from the kit and plug one end into the purple port on the back of the gateway, then click actiontec gt701-wg.
To connect to the one end user. Can hook the back of the one end user. 20 actiontec gt701 10/100bt adsl modem switching from a slow windows xp system to a windows 7 machine, the actiontec gt701 did not automatically install. Settings, the dsl gateway is still working with the users.
Actiontec modem is a full rate adsl 2/2+protocol.
To connect to your wireless network, go to your laptop and open the wireless card configuration utility.
Wireless setup actiontec gt701-wg qwest firmware seller information verklers if you are only forwarding a single port number then enter that.
20 discuss, actiontec usb/ethernet dsl modem with routing capabilities gt701 - router - dsl - desktop series sign in to comment be respectful, keep it civil and stay on topic.
Actiontec gt701 usb driver - networking by aloysius low oct 4, it includes instructions on how to connect the modem to the user name and password.
Plug a phone filter into every phone jack with a telephone or other device connected to it, then plug the ends of the phone lines disconnected in step 3 into the phone.
Video.
Be respectful, keep it civil and stay on topic. Thanks for a guide through the gateway, it says. Security checklist for actiontec gt701-wg router you are now logged in! Enter the user name and password that we will.
Hide thumbs also see for gt701-wg user manual. If it has been installed, updating overwrite-installing may fix problems, add new functions, or expand functions. I'm trying to use a usb to connect with the gt701 modem so i can hook the ethernet cord into my ps3. It is recommended to set up the gateway, it must be connected to a computer. Note, usb connection to the modem is not supported for microsoft windows 95, windos nt 4.0, and mac os. 20 re, then click next. Regards, azeez nadeem i ve not used spybot before intro download actiontec gtwg news support.
About the Actiontec Wireless Network Extender
Log in to the Actiontec wireless extender to set up in-home Wi-Fi or to change your Wi-Fi password or wireless settings.
Find the log in address for your extender. There are 2 ways to do this:
Find the Serial Number on the back of the Actiontec extender and note the last 4 digits. Use those numbers in this address (in place of XXXX): http://wecb-XXXX.local See Your gateway information (default password, network name, and serial number) for more information. OR
Log in to the Actiontec gateway and find the IP address of the extender. Look for 'WECB...' in your connected devices and note its IP address
Open a browser on your home computer.
In the browser, go to:
http://wecb-XXXX.local OR
The extender's IP address (for example, http://192.168.99.254)
Enter the username and password and click OK.
NOTE:The default username isadminand the default password is admin.
You'll see the extender's home screen.
Drivers Actiontec Gateway
For more information, see Setting up In-home Wi-Fi on your Actiontec wireless extender.
Drivers Actiontec Gateway Login
Actiontec is a registered trademark of Actiontec Electronics, Inc. Wi-Fi is a registered trademark of the Wi-Fi Alliance.
1 note
·
View note
Text
Amlogic S905X2 Hybrid Android TV box with DVB-C / S2 / T2 Tuner
You may have seen many articles about Amlogic S905X2 OTT TV boxes before, but there haven't hybrid OTT DVB model on the market. Today I want to introduce a series of Amlogic S905X2 hybrid Android TV boxes which support various digital TV tuner such as DVB-C, DVB-S2, DVB-T2 etc.

First, let’s see the basic specification of these Amlogic S905X2 Android TV boxes
CPU: ARM Quad 64-bit Cortex-A53 up to 2GHz (DVFS)
GPU: Mali-G31 MP2 850MHz
DRAM: DDR 2GB (1GB, 4GB Optional )
Flash: eMMC 8GB (16GB, 32GB, 64GB Optional )
Wi-Fi: 2.4GHz/5.0GHz a/b/g/n/ac (2.4GHz Optional)
DRM: Playready, Widevine; Verimatrix(Optional)
Middleware: SDMC's XMediaTV System
Digital TV: 7 days EPG, USB PVR, Timeshift, Program playback, Timing playing
Hardware
First one is a Brand new design model named DV8545-C which is Amlogic S905X2 Android TV 9.0 Pie set-top box, fully compliant with HD DVB-C or
DVB-T2 standard.

On the front panel, they are respectively Power switch, IR receiver,IR indicator, Power and Net LED indicator.

You’ll see USB 3.0 and USD 2.0 port on the side panel.
The others one is DV8529-T2 Amlogic S905X2 4K Android TV hybrid STB with DVB-T2 / DVB-S2 Tuner, which is a previous classic model used for octa-core Android TV boxes.
With IR receiver, Power LED indicator on the front panel. It also has USB3.0, USB2.0, RJ45 network Interface.

Accessories
12V / 1.2A DC Adapter ( 5V/2A DC Adapter for DV8545-C / T2)
HDMI Cable
Bluetooth Voice Remote Control
1.5V AAA Battery
User Manual, the language in English, Spanish
Software
All the new Amlogic S905X2 Android TV box runs on latest Android TV 9.0 pie os. For uses, they can access endless original content from the Android Ecosystem, including YouTube, Sling, Hulu, and other favorite apps. Having a personal Google Assistant enable them to ask questions and tell it to do things which brings a smart tv experience. Moreover, they can cast favorite contents from their Android or iOS device, Mac or Windows computer, or Chromebook to the TV. For Game lovers, nothing is better than enjoying big-screen games.
For Operators, they have a world of content and apps. custom Android TV operator Tier launcher feature is also attractive. Off-the-shelf system shortens the time to market, otherwise, the features such as rapid innovations, revenue share opportunities of google play store. All in all, Android TV provides maintenance-free Platform and cost-saving solution to operators.
SDMC OTT TV System XMediaTV

XMediaTV enables the controls of an ecosystem largely in the hands of operators. The XMedia OTT platform has the features as follows:
1. XMediaTV and Android TV are perfectly combined to subscribe to the massive video content of Android TV, and also help operators to build video content that meets local needs;
2. Live TV, VOD, time shift, playback, mosaic TV, picture-in-picture TV, etc;
3. Multi-screen reception and interaction of boxes/TVs, mobile phones, tablets, PCs, etc;
4. Shopping system: operators can not only promote their products but also build a shopping platform for all businesses;
5. Terminal management system can monitor the current state of the STB device;
6. Operation and maintenance management system can monitor the network status and the operation of related servers;
7. DMS big data analysis system can analyze user behavior;
8. AMS ratings survey system can provide data survey of TV stations in real time;
9. The advertising system can make accurate advertisements and push different advertisement contents to different users;
10. Manage all the devices of the smart home IoT system, and provide operators with a complete core management platform.
If you are interested in our Hybrid Amlogic S905X2 Android TV boxes or OTT system, welcome to contact us.
Original: https://en.sdmctech.com/news/product-news_1875.html
1 note
·
View note
Text
Age Of Empires 2 Definitive Edition Specs

Need for Speed Most Wanted APK Download NFS Most Wanted APK is a 2005 racing game with an open world created and published by Electronic Arts. First released for multiple consoles and PC, the game is now available for Android and iOS thanks to the great team that ported it to mobile devices. Need for speed most wanted 2005 android game download windows 7.
Written by Xbox Game Studios
Age Of Empires II: Definitive Edition | Windows 10
Buy Age Of Empires II: Definitive Edition - Microsoft Store
Age Of Empires 2 Definitive Edition Specs Download
Age Of Empires 2 Definitive Edition Specs Cheat
The playable civilizations in Age of Empires II are based on prominent civilizations of the post-classical period, from the fall of the Western Roman Empire in the 5th century to the start of renaissance era during the 15th century. There are 35 civilizations in total. 1 The Age of Kings 1.1 Britons 1.2 Byzantines 1.3 Celts 1.4 Chinese 1.5 Franks 1.6 Goths 1.7 Japanese 1.8 Mongols 1.9 Persians. The playable civilizations in Age of Empires II are based on prominent civilizations of the post-classical period, from the fall of the Western Roman Empire in the 5th century to the start of renaissance era during the 15th century. There are 35 civilizations in total. 1 The Age of Kings 1.1 Britons 1.2 Byzantines 1.3 Celts 1.4 Chinese 1.5 Franks 1.6 Goths 1.7 Japanese 1.8 Mongols 1.9 Persians. Age of Empires II: Definitive Edition celebrates the 20th anniversary of one of the most popular strategy games ever with stunning 4K Ultra HD graphics, a new and fully remastered soundtrack, and a brand-new expansion, “The Last Khans” with 3 new campaigns and 4 new civilizations. Age of Empires 2 is being wheeled out again, not quite new, but definitely improved. It wears its two decades well, but the years are still there, hidden beneath polish and new art and myriad tweaks.
Category: Strategy game
Last Updated: Fall 2020
Price: Free
Rating: 0/100
Developer: Xbox Game Studios
User ratings: Recommended by 0 players!

Read: 8 Best CPUs For Playing Age of Empires II: Definitive Edition This January
→ See all the Best CPUs For Gaming in 2020
Age of Empires II: Definitive Edition Gameplay/Trailer
Recommended System Requirements and Specifications
Windows PC Requirements
Minimum:
Requires a 64-bit processor and operating system
OS: Windows 10 64bit
Processor: Intel Core 2 Duo or AMD Athlon 64x2 5600+
Memory: 4 GB RAM
Graphics: NVIDIA® GeForce® GT 420 or ATI™ Radeon™ HD 6850 or Intel® HD Graphics 3000 or better
DirectX: Version 11
Network: Broadband Internet connection
Storage: 30 GB available space
Recommended:
Requires a 64-bit processor and operating system
OS: Windows 10 64bit
Processor: 2.4 Ghz i5 or greater or AMD equivalent
Memory: 8 GB RAM
Graphics: Nvidia® GTX 650 or AMD HD 5850 or better
DirectX: Version 11
Network: Broadband Internet connection
Storage: 30 GB available space
Macintosh Requirements
Minimum:
Requires a 64-bit processor and operating system

Recommended:
Requires a 64-bit processor and operating system
Linux Requirements
Minimum:

Requires a 64-bit processor and operating system
Recommended:
Requires a 64-bit processor and operating system
Most sites recommend downloading some program from them into your computer. Don’t try it. Especially with the advent of Bitcoin seeking and webcam spying ransomware on the Internet nowadays, it is recommended you don’t make that mistake since this info is something you can find with some simple digging and common sense.
Here is how to check your system Specs without downloading malware from the Internet
Find specs for all Windows versions: 1. Click the Windows Logo button on your keypad + R key. In the small little window that appears titled 'Run', type 'msinfo32' and hit the enter key. A window will appear showing you detailed info on your System specifications.
Alternative steps: Windows 10 specs:
Step 1. Open Windows Explorer, locate “This PC”.
Step 2. Right-click “This PC” icon and select the “Properties” option.
Windows 8 specs:
Processor, memory and operating system: Click the Windows Start Button > Settings Tile > PC and Devices > PC Info.
OR
Step 1. Click the Windows Start Button > search for “System” in the search bar.
Step 2. From the drop-down results, select and click the “System” result.
How to see the Graphics Card: Click the Windows Start Button > Settings Tile > Control Panel (bottom left) > Devices and Printers > Device Manager > Display Adapters. That's it.
Windows 7 specs:
Step 1. Right-click the “Computer” icon to open the menu > Select the “Properties” option.
This last instruction also works for Windows Vista and XP.
As you can see there was no need to download computer malware to your system.
Recommendations: It is recommended you have double the RAM recommended by the above and Game makers above. The ROM should also be less than 5% of the Available Space on your computer or a maximum 15%.
Troubleshooting: What to do if you run into problems
If you ever run into problems playing the game or getting it to work for your PC or computer, here are some steps you can take:
DOWNLOAD THE GAME
Download Official Game
Age of Empires II: Definitive Edition celebrates the 20th anniversary of one of the most popular strategy games ever with stunning 4K Ultra HD graphics, a new and fully remastered soundtrack, and brand-new content, “The Last Khans” with 3 new campaigns and 4 new civilizations.
Age of Empires II: Definitive Edition celebrates the 20th anniversary of one of the most popular strategy games ever with stunning 4K Ultra HD graphics, a new and fully remastered soundtrack, and brand-new content, “The Last Khans” with 3 new campaigns and 4 new civilizations. Explore all the original campaigns like never before as well as the best-selling expansions, spanning over 200 hours of gameplay and 1,000 years of human history. Head online to challenge other players with 35 different civilizations in your quest for world domination throughout the ages.
Age Of Empires II: Definitive Edition | Windows 10
Choose your path to greatness with this definitive remaster to one of the most beloved strategy games of all time.
No reviews yet!!
Age of Empires II: Definitive Edition System Requirements (2021) - full specs, system checker and the gaming PC setup you need: Can I Run Age of Empires II: Definitive Edition?
Age of Empires II: Definitive Edition system requirements
Buy Age Of Empires II: Definitive Edition - Microsoft Store
Memory:8 GB
Graphics Card:NVIDIA GeForce GTX 650
Age of Empires II: Definitive Edition CPU:Intel Core 2 Duo E8400
File Size:30 GB
OS:Windows 10 64bit
Age of Empires II: Definitive Edition minimum requirements
Memory:4 GB
Graphics Card:AMD Radeon HD 6850
CPU:Intel Core 2 Duo Q6867
Age of Empires II: Definitive Edition File Size:30 GB
OS:Windows 10 64bit
Automatically test your computer against Age of Empires II: Definitive Edition system requirements. Check if your PC can run the game with our free, easy-to-use detection tool or enter your system manually.
Age Of Empires 2 Definitive Edition Specs Download
Can I Run Age of Empires II: Definitive Edition?
To play Age of Empires II: Definitive Edition you will need a minimum CPU equivalent to an Intel Core 2 Duo Q6867. Whereas, an Intel Core 2 Duo E8400 is recommended in order to run it. In terms of game file size, you will need at least 30 GB of free disk space available. The cheapest graphics card you can play it on is an AMD Radeon HD 6850. Furthermore, an NVIDIA GeForce GTX 650 is recommended in order to run Age of Empires II: Definitive Edition with the highest settings. Age of Empires II: Definitive Edition system requirements state that you will need at least 4 GB of RAM. Additionally, the game developers recommend somewhere around 8 GB of RAM in your system.
Age Of Empires 2 Definitive Edition Specs Cheat
Multisim download mac os x64. Age of Empires II: Definitive Edition will run on PC system with Windows 10 64bit and upwards.
Looking for an upgrade? Try our easy to use Age of Empires II: Definitive Edition set up guides to find the best, cheapest cards. Filter for Age of Empires II: Definitive Edition graphics card comparison and CPU compare. We'll help you find the best deal for the right gear to run the game.
Try these free alternatives to Age of Empires II: Definitive Edition
Looking for ready made system? We have 359 laptop computers in our database that can run Age of Empires II: Definitive Edition. We take over 115 gaming laptops under $1000. Check our full compare laptops chart for the right systems or these best deals we've picked out below.
0 notes
Text
Streaming Video For Mac Free

OBS (Open Broadcaster Software) is free and open source software for video recording and live streaming. Stream to Twitch, YouTube and many other providers or record your own videos with high quality H264 / AAC encoding. Fortunately, Free Video Downloader for Mac software is an effective way to download and convert videos for Mac. Being compared with the online application, the professional software excels at its accelerated downloading speed, expanded video formats, great stability and more complete functions. Red5 Open source media server. Red5 is an open source media server available in both Open. Streaming 1.4.3 for Mac can be downloaded from our website for free. The software relates to Lifestyle Tools. The actual developer of this free software for Mac is It's About Time Products, LLC. Our antivirus check shows that this Mac download is malware free.
Connect your audio devices to your Mac and, if necessary, install any software included with the devices. In the Audio MIDI Setup app on your Mac, in the sidebar of the Audio Devices window, select a device. Note: For iOS and iPadOS devices, first click Enable, then select the device. You may be asked to unlock your device with a passcode or to. Acclaimed audio interfaces, studio monitors, and keyboard controllers. Mac OS Sierra 10.12 and iOS 10 Support For M-Audio Products Whenever a new operating system is released, it is crucial to check the compatibility of your hardware and software before choosing to make the jump. This article will be updated periodically to reflect the current status of M-Audio. Audio interface for mac os catalina.
Live Streaming For Mac
Video Player For Mac
Best Video Streaming Software For Mac
Streaming Video For Mac Free Youtube Downloader
Streaming Video For Mac Free Download
Overview
Download
Feature
How to use
Free Mac video downloader is a web-based application specially designed for Mac users to download TV episodes, movies, music videos, news, sports and other online video clips from tons of video hosting sites. It covers video downloads for sites like YouTube, Dailymotion, Vimeo, Blip TV, Liveleak, Lynda, Break , Vube, Ustream, Ted and many others. Aside from its ability to download video on Mac, there are some other awesome features that are worth mentioning.
Download videos in high quality, including 1080p video
Directly convert video from websites to MP3 on Mac OS X
Convert videos to any video/audio formats
Provide video search engine to find desired videos
Extreme function for capturing all screen activities
Fully compatible with Mac OS X (Mavericks 10.9 included)
Great integration with Safari, Firefox, Opera and Chrome
100% FREE and Safe
No toolbars, adware or malware
Download Robust Video Downloader for Mac software
Free Mac video downloader combines the simplicity of usage, full functions and fast speed. But a good portion of people prefer the software program to the web-based tool. This is mainly because the software runs better, more stable and reliable. Fortunately, Free Video Downloader for Mac software is an effective way to download and convert videos for Mac. Being compared with the online application, the professional software excels at its accelerated downloading speed, expanded video formats, great stability and more complete functions.

Features of Video Downloader for Mac software
Download video instantly on Mac
The user-friendly interface makes downloading super easy, you simply get videos in one single mouse click. This video downloader for Mac provides the option to download videos in original quality, including HD and 4K videos. Users who do not want to download video one by one could perform multiple video downloads during one session.
Convert video effortlessly

More than a Mac downloader, it can convert any local or downloaded files to all kinds of formats such as MP4, MKV, MOV, MPEG, WMV, AVI, FLV, MP3, RM, VOB, OGG, AAC, AIFF, WAV, etc. After that, you may transfer the video to popular gadgets like iPod, iPad, iPhone, Zune, PSP, Android and more for endless enjoyment.
Detect and download video automatically
The tool features a smart detector, which facilitates to auto-detect and download the videos streamed in the built-in browser of the program. A list of top websites is displayed on the screen at run time. As long as you click on a certain site for playing the video you want to download, the advanced sniffer will grab it in a matter of seconds. Surely, you may navigate to other sites that are not listed; the videos being played can be captured as well.
Live Streaming For Mac
Download YouTube playlist
With this professional video downloader for Mac, users can download YouTube single videos as well the whole collections from YouTube users' channel, personal playlist, movies category, YouTube charts, artists' channel and music category. Within just one click, you can grab all videos in specified channle/list with 3X faster speed brought by advanced technologies.
Schedule video downloads
The program enables users to start and stop video downloading at any time you preset. Moreover, you can schedule your Mac computer to shut down, enter into sleeping mode or exit the program when download completes.
Manage video efficiently
It comes with handy video manager, letting you control over download progress and sort the downloaded files in order. In case you may need to quit the program for dealing with other cases, you can resume your downloads automatically. Also, the program makes it possible to preview the downloaded content with integrated media player.
How to use
1. Use free online tool to download videos on Mac
This free Mac video downloader does not require any installations or registrations; you simply copy the video link and paste it into the URL field. After clicking 'Grab it', it will display video formats available for saving your videos in FLV, WebM, 3GP, MP4 and other formats depending on the website you are downloading from. Nevertheless, before using the app, the very first step is to enable Java applet in Safari or other browsers. Please make sure that you check 'Enable Java check box' under 'Preferences' tab in your browser.
Video Player For Mac
2. Use free Mac software to download videos
One click to download single video as well as the whole collections
The program is very easy to use. To perform every single video download, you simply specify the video URL that you want to download and click 'Paste URL' button.
The steps to download the entire YouTube playlist are exactly the same. All you need to do is to find the URL of YouTube playlist and hit on 'Paste URL'. Resume to interface, in the popup window, all the videos will be automatically fetched. Select all or part of them per your needs, and then click 'Add to download' to carry on multiple downloads simultaneously.
Auto-detect and grab video that is being played
Given that you do not want to process Mac video download simply by copying and pasting the URL manually, then you are suggested to take advantage of its 'Detector' function. As long as you load videos in the built-in browser, this Mac video downloader will take care of the rest.
3. Video Tips for Mac
Most video addicts like to enjoy abundant videos from video sharing sites including YouTube, Dailymotion, Vube, BBC, ESPN, Facebook, Vimeo, Hulu and other similar sites. You are looking for specific guides on downloading from a platform to your Mac computer, please refer the detailed instructions below
YouTube has had such an incredible string of successes. People want to download their favorite videos to watch offline and keep forever.
Best Video Streaming Software For Mac

Download Dailymotion on Mac
Is there a way out here to watch Dailymotion videos without any data connection? Sure, you are in the right place to get the easiest tricks.
Streaming Video For Mac Free Youtube Downloader
Mac os for android tablet. Still trying to find a way to download HD videos from Vimeo? Don¡¯t sweat it, spare a few minutes to check the detailed tutorial.
Streaming Video For Mac Free Download
You may find the easy solutions to perform Facebook video download in this article. A wonderful Mac downloader is presented.
Download Hulu on Mac
Want to play TV episodes from Hulu to your Mac without being bothered by poor internet connection? Just download them for later playback.
0 notes
Text
Arlo Ultra
New Post has been published on https://is.gd/zsTohW
Arlo Ultra
The Net Cam IQ Indoor may have been the first security camera with a 4K image sensor, but it could only record video in 1080p. The Arlo Ultra is actually the first camera that can record in 4K and brings you the best possible footage to protect your home. At least in theory, Arlo Ultra has limited 4K support for out-of-the-box, so cloud accounts
Features
Main Specifications
Solution: 4K
camera lens: 180 degree
night vision: Yes
Recording options: Cloud via subscription, local
bidirectional talk via microSD card slot: Yes
Wi-Fi: 802.11ac
Arlo Ultra is fully operated and controlled through the Arlo app. There is also a web version, but it uses Flash for live video, so it’s better to continue using the smartphone app.
Arlo Ultra can record directly to the microSD card installed on the base station, so no cloud subscription is required. However, the Arlo Smart cloud system offers more features such as advanced motion detection, cloud storage, and configurable activity zones. Arlo Ultra ships with a year of Arlo Smart Premier, which provides up to 10 cameras and a 30-day video history of e911 calls. This allows you to connect to an emergency responder near your home instead of your current location.
The monthly fee for Arlo Smart Premier is typically $ 9.99. You can also choose Arlo Smart for $ 2.99 per camera per month. It has all the same features as an e911 call. At the top is the Arlo Smart Elite, which has up to 20 cameras and a 60-day video history of e911 calls.
Troublesome, these packages don’t include support for 4K video recording, and you’ll have to pay an additional $ 1.99 per camera per month. Given the cost of purchasing an Arlo Ultra, this seems a bit free.
If you don’t want to pay too much, you can insert an SD card into the base station and record 4K video there. Still, if you want the highest quality livestream, you should turn on local 4K livestreaming. This will disable the auto-zoom and tracking options that follow the detected motion. Note that outside your home network, Arlo Ultra will only stream in 1080p.
Setting up the camera is assisted by two utilities. First, there is a video test that will help you align your cameras properly. The idea is to keep motion detection outside the shaded areas of the image. Second, there’s a motion detection test that flashes the camera yellow when triggered, so you can test if Arlo Ultra works the way you want.
Arlo Smart subscriptions allow you to set up activity zones to configure the parts of your image that require motion notification. This, for example, can prevent the camera from triggering every time someone passes by the garden in front of you, dramatically reducing false positives.
It’s a shame that you can’t set notifications for each zone. Instead, the smart notification feature can only be configured on a per-camera basis, allowing you to choose whether you want to be notified of people, vehicles, animals, or all other movements. The accuracy is so good that you can use these options to reduce the number of alerts you receive.
Beta’s new package detection feature tries to tell you if someone is trying to deliver something to your home. Arlo Ultra must be placed head-on in front of you for proper operation. Smart doorbells are probably a better option, so you can talk to the courier when they ring.
The audio is set to be recorded automatically, but Arlo Ultra cannot hear certain sounds, such as the bar bark of a talking person or dog. What you can do with your rival Nest Cam Outdoor. You can listen to loud sounds and set the sensitivity to be adjusted. The usefulness of this feature depends on the amount of ambient noise. You can turn on the wind noise reduction feature if the camera is particularly exposed. Nevertheless, the audio turned out to be clear enough
You can have a two-way chat with just a little delay in the app. This is a convenient way to scare suspicious people. The camera also has a built-in siren. The siren is big enough to get your attention, but not as big as a proper alarm system. The siren is triggered via the app.
The behavior of the camera is greatly controlled through the mode. You can manually set the camera to arm or disarm using the app, but you can also automate control via scheduling or geo-fencing. Properly, geo-fencing allows you to get back on schedule when you’re at home. For example, you can record with your camera when you go out and turn it on at night when you go to bed at night.
You can also set a custom mode to define the behavior of each camera. These rules can also be used in schedules. For example, you may want a night mode that turns on an external camera and not an internal camera.
There is an IFTTT channel that can trigger the device when Arlo Ultra detects motion, and you can use actions to arm or disarm the system. For example, pressing the smart button turns on the system. There are plans to allow the Arlo Ultra base station to automatically control other devices and support Zigbee smart home products. At the time of writing, these options are not enabled.
With the support of Amazon Alexa and Google Assistant, you can stream video from your camera to smart displays such as the Echo Show and Google Home Hub.
Design and construction
Arlo Ultra is a two-part system where the base station acts as a bridge between Arlo cameras (supporting Arlo Ultra, Arlo Pro 2, and Arlo Pro cameras). This updated bridge no longer includes sirens and adds this feature to Arlo Ultra. Like all smart home hubs, the Arlo Ultra is a simple white box that you’ll want to get out of the way.
Arlo Ultra charging
The Arlo Ultra camera is a neatly finished and very heavy kit. To install the battery, slide the back cover off and insert the rechargeable battery. There is a new magnetic connector for charging. This can be done in the field or with the Arlo Ultra inside.
Performance
If you can stream or view a 4K feed, the video quality is very good. With HDR and a 180-degree lens, Arlo Ultra was able to capture everything from bright sun to torrential rain, regardless of outdoor weather conditions.
As you can see from the sample image below, the 4K quality is very good and the details are displayed throughout the video, so you can easily identify what is happening and find the individual clearly.
If you stop up to 1080p and download the same footage from the cloud, the image will be noticeable software, lose sharpness and not very impressive. If you don’t pay for 4K cloud storage, Arlo Ultra loses many benefits, and 1080p cameras do the job.
At night, the colors of the night shot are helped by the spotlights, helping to see what’s going on, and while avoiding some softness issues with IR-only cameras, the footage remains excellent. Again, the 4K sample is better, and 1080p shots (above) lose some of the details that the camera can capture.
In the activity zone setup, Arlo Ultra did not attack with alerts, especially when using smart alerts to monitor only people. You need to carefully configure the zones, making sure you are not looking for anything at the top of the image. In that case, Arlo Ultra isn’t very sensitive and can either miss movement altogether or get incomplete video with very little motion captured. First, we experienced several incidents. ArloUltra just caught a person who disappeared from the bay window when he lost his leg. A readjustment of the camera and zones fixed these issues immediately.
The first problem was that Arlo Ultra would now notify you of out-of-zone movement, and the camera’s battery would run out in a few days. The latest updates and careful placement of the camera have fixed the issue, significantly reduced notifications, and reduced the number of incidents recorded in the library, but still how many events recorded motion outside the configured zone.
The position of the camera is important to save battery. Arlo Ultra uses a PIR motion sensor to detect motion and activate the camera to start recording. The cloud service analyzes the video and decides whether to alert based on where the motion occurred. So if you point your Arlo Ultra at a busy location, the camera will stay awake with few notifications, which can quickly drain your battery.
This isn’t a problem if you keep your camera powered all the time, but battery-powered keep your camera away from busy areas as much as possible and focus your Arlo Ultra on areas of interest. Tilt the camera Down so that the camera barely sees the road. With the camera in the new position, only a few people passed the house, but we reduced alerts and recordings to people on the premises to maintain battery life.
verdict
Arlo Ultra is a mix of incredibly annoying things. Despite its high cost, it is easy to install, so this camera can be used indoors or outdoors. It’s also part of a flexible and powerful security system that makes it easy to add cameras around your home. You can easily control when all cameras operate.
At its best, 4K footage is incredible and provides details that no other camera can create. However, the 4K option is severely restricted and requires a cheeky additional monthly fee or a microSD card that cannot be accessed without removal.
The cloud activity zone should be the highlight of the product, with less notifications, but the only way to make the battery last longer is to carefully position the camera.
0 notes
Text
DeskPi Pro: The Key to Unlocking Raspberry Pi
DeskPi Pro
8.00 / 10
Read Reviews
Read More Reviews
Read More Reviews
Read More Reviews
Read More Reviews
Read More Reviews
Read More Reviews


Shop Now
Forget plastic cases and take your Raspberry Pi 4 to the next level with an aluminum NUC style desktop and set-top case with additional USB ports and space for additional storage. Assembly is fiddly, but ultimately worth the effort if you fancy Raspberry Pi as a desktop replacement.
Key Features
ICE Tower cooler
5 USB ports
GPIO access
SATA and m.2 storage options
Specifications
Form factor: NUC
Size: 6" x 4.75" x 1"
Compatibilty: Raspberry Pi 4
PSU: USB Type-C
USB ports: 4 x USB 2.0, 2 x USB 3.1, 1 x Gigabyte Ethernet, 2 x HDMI, 1 x TRRS, GPIO
HDMI ports: SATA or M.2 (B Key)
Brand: DeskPi
Pros
Looks amazing
Space for additional storage
Cons
Screws aren't labeled
Tricky to assemble cooling system
Raspberry Pi 4 only
Buy This Product
DeskPi Pro other
Shop
// Bottom var galleryThumbs1 = new Swiper('.gallery-thumbs-1', { spaceBetween: 10, slidesPerView: 10, freeMode: true, watchSlidesVisibility: true, watchSlidesProgress: true, centerInsufficientSlides: true, allowTouchMove: false, preventClicks: false, breakpoints: { 1024: { slidesPerView: 6, } }, }); // Top var galleryTop1 = new Swiper('.gallery-top-1', { spaceBetween: 10, allowTouchMove: false, loop: true, preventClicks: false, breakpoints: { 1024: { allowTouchMove: true, } }, navigation: { nextEl: '.swiper-button-next', prevEl: '.swiper-button-prev', }, thumbs: { swiper: galleryThumbs1 } });
Countless Raspberry Pi cases are available, suitable for every model of the super little computer. But most cases don't include space for additional storage, a power switch, and a cooling solution.
The DeskPi Pro, available for $55 from SeeedStudio.com, aims to change this. An affordable Raspberry Pi case, it has the potential to convert the Pi into a full desktop replacement. But does it live up to its potential?
youtube
Does Your Raspberry Pi Need a PC-Style Case?
Using the Raspberry Pi without a case isn't recommended. Whether you're using a Raspberry Pi Zero, an A-board, or the more popular B-board models, a case will protect the delicate components. Plugging GPIO pins to the breakout board is one thing, but prolonged use needs a case.
Cases, however, are a mixed bag. The official Raspberry Pi 4 case, for example, while offering complete access to the Pi's internals, is lightweight. Cables drag the Raspberry Pi around through their sheer comparative weight. This simply doesn't happen with a standard desktop computer (or even mobile phone)---and it can lead to problems.
So for a Raspberry Pi case solution, you basically have two options:
Stick your Raspberry Pi in a standard case and hope for the best
Try the DeskPi Pro
The DeskPi Pro comes as a single case with all the required components, or as a combination bundle with the 4GB or 8GB Raspberry Pi 4. It's a weighty solution that lets you use the Raspberry Pi 4---for the best results opt for the 8GB model---as a desktop, complete with additional internal storage and USB ports.
Unboxing the DeskPi Pro
The DeskPi Pro is positioned as a Raspberry Pi "pro" case. As a result, it includes everything to help you convert a Raspberry Pi 4 into a compact desktop computer.
In the box, you'll find the DeskPi Pro case, an ICE Tower cooling fan and heat sink, an M.2 to SATA adapter, a dedicated PCB affording various expansions for the Raspberry Pi 3, a USB 3.1 connector, manual, and mounting poles and screws.
There's also a hex key for swift assembly.
Key Features of the DeskPi Pro Raspberry Pi Case
You already know that the DeskPi Pro is a case for the Raspberry Pi 4 and features an ICE Tower cooling unit. What more could it offer?
The NUC style case a weighty, aluminum alloy, includes an extension for the GPIO, and provides easy access to the SD card. The front and rear panels are acrylic to reduce Wi-Fi and Bluetooth signal loss.
Standard Raspberry Pi USB 2.0, USB 3.0, and Ethernet ports are mounted at the back of the case, along with the TRRS media port. Two full-size HDMI ports (supporting 4K) and the GPIO pins accompany them, while mounted on the front of the case are two USB 2.0 ports and a power button. The microSD card slot is also accessible from the front.
Inside there is space for a 2.5-inch HDD or SSD drive with independent power, although this can be swapped for an M.2 mounted on the SATA adaptor board.
Ultimately, what the DeskPi represents is the opportunity to use a Raspberry Pi 4 as a full desktop PC.
Assembling the DeskPi Pro Raspberry Pi Set-top Box
If you've ever assembled a standard PC, you'll be familiar with what is involved. While the DeskPi Pro is clearly smaller than a typical desktop computer, assembly involves a few of the same complexities.
There's a heatsink and fan to add to the Raspberry Pi's SoC, but it's a fiddly process to install. And there's a moment of frustration when you learn that their motherboard doesn't support the exact specification of storage that you had in mind.
With the Pi integrated with the DeskPi Pro's PCB, there is the opportunity to add storage. Standard SATA hard disk drives, SSDs, and M.2 storage (B key only) can all be connected. For M.2 drives there is a removable plate with a SATA connector. The M.2 module can be installed on this mounting plate—if you prefer SSD or HDD, one can be inserted into the SATA port and fixed to the upper side of the DeskPi Pro.
Once assembled, the system is mounted in the chassis, with the fan and cooling system aligned with the vents.
Some frustration was experienced with the screws, which aren't grouped in the packaging by type. The close similarity between two different sizes of screws means that they really need to be labeled and packaged separately.
Configuring and Running the DeskPi Pro
While the Raspberry Pi should run without any problem once installed in the case, the DeskPi Pro requires some additional software for optimum operation.
The instruction manual features a terminal command for installing the DeskPi Pro fan control. A more up-to-date version of this can be found at the DeskPi Pro GitHub. This also includes instructions for installing on other Raspberry Pi distros, including Ubuntu.
Sadly, the fan control is a little difficult to appreciate without really ramping up the stress for your Raspberry Pi. The menu itself lacks any real detail as to how each option will fully impact the system, while overall the control lacks granularity.
Using a Raspberry Pi in the DeskPi Pro
Set up of the DeskPi Pro on your desktop is as straightforward as you might imagine. Plug in the HDMI cable, power lead, any USB peripherals, and boot up. One potential problem is the switch to full-sized HDMI. If you own a Raspberry Pi 4 already, you're almost certainly using a micro-HDMI cable. With the DeskPi Pro, this is now redundant, and you'll need a 4K-ready HDMI cable to view the corresponding video on a suitable display. This is a frustration that could have been avoided by retaining one of the micro-HDMI ports.
With the Pi 4 at the heart of the DeskPi Pro, and with a cooling system installed, you might expect top quality performance from the Pi. I certainly did, but on the 4GB Pi 4, consider overclocking.
The DeskPi Pro, overall, offers everything you could imagine from a Raspberry Pi desktop case. It has the storage option, the ports, the power button, the cooling. With a Raspberry Pi 4 8GB model installed in the DeskPi Pro it really feels like a genuine desktop PC.
DeskPi Pro: The Raspberry Pi Desktop Replacement System
Issues aside, the DeskPi Pro does something that no other Raspberry Pi case beyond the Raspberry Pi 400 can do: turn the Pi into a genuine desktop replacement system.
Consequently, I absolutely must recommend this case kit. Heavy enough to sit on a desk or set-top area, flexible enough for computing or entertainment, the DeskPi’s GPIO port ensures the Pi remains accessible for electronics development. Build quality is outstanding, and while a few aspects of machining clearly need some attention and better quality-control concerning the screws, it’s a satisfying device.
With space and power for an additional HDD or SSD, the DeskPi Pro seems to be the answer to the dreams of anyone intending to use the Raspberry Pi as a primary computer. At such an affordable price point, it’s worth serious consideration.
DeskPi Pro: The Key to Unlocking Raspberry Pi published first on http://droneseco.tumblr.com/
0 notes
Text
Phrozen Sonic Mini 4K: Highest Resolution Budget Resin 3D Printer Yet
Phrozen Sonic Mini 4K
10.00 / 10
Read Reviews
Read More Reviews
Read More Reviews
Read More Reviews
Read More Reviews
Read More Reviews
Read More Reviews
Read More Reviews
Read More Reviews
Read More Reviews
Shop Now
With a larger than average build-plate and 4K resolution output, the Sonic Mini 4K simply produces the best prints we've seen yet from a budget device.
Specifications
Brand : Phrozen
XY Resolution: 3840 x 2160 (4K)
Build area: L5.2 x W2.9 x H5.1 in
Light Source: 405nm ParaLED Matrix 2.0
Layer Thickness: 0.01-0.30mm
Printer Size: L9.8 x W9.8 x H12.9 inches
Pros
Incredible print resolution
Industry-standard ChiTu firmware
Larger than average build plate
LCD monochrome screen for fast layer exposure times
Cons
No network connectivity
Buy This Product
Phrozen Sonic Mini 4K other
Shop
<![CDATA[ // Bottom var galleryThumbs1 = new Swiper('.gallery-thumbs-1', { spaceBetween: 10, slidesPerView: 10, freeMode: true, watchSlidesVisibility: true, watchSlidesProgress: true, centerInsufficientSlides: true, allowTouchMove: false, preventClicks: false, breakpoints: { 1024: { slidesPerView: 6, } }, }); // Top var galleryTop1 = new Swiper('.gallery-top-1', { spaceBetween: 10, allowTouchMove: false, loop: true, preventClicks: false, breakpoints: { 1024: { allowTouchMove: true, } }, navigation: { nextEl: '.swiper-button-next', prevEl: '.swiper-button-prev', }, thumbs: { swiper: galleryThumbs1 } }); ]]>
The Phrozen Sonic Mini 4K is a desktop-sized, budget resin 3D printer with phenomenal print quality, thanks to a 4K monochrome LCD screen. It's also fast, needing as little as two seconds per layer. If you thought resin 3D printers were already incredible, the Phrozen Sonic Mini 4K turns the dial up to 11.
youtube
This Isn't a Kickstarter
It's a shame I even need to add this note, but given the number of failed Kickstarters nowadays, I will anyway: this isn't a crowdfunding campaign. The Sonic Mini 4K is shipping from the end of September, and can be pre-ordered now directly from the Phrozen website or any number of retailers worldwide. Phrozen isn't new to the world of 3D printing, so you should have no concerns about a product actually being delivered. Phrozen is, in my opinion, one of the top three brands in the consumer resin 3D printer market, and the Sonic Mini 4K is the evolution of their original Sonic Mini.
Sonic Mini 4K Design
The design of the Sonic Mini 4K has changed little from the original Sonic Mini, and in fact, resembles nearly every other desktop resin printer in this price range.
With a footprint of just under 10 inches square, 12 inches height, and weighing 5KG, this compact printer can comfortably sit on the corner of any desktop.
A translucent brown acrylic cover protects from dust and sunlight, and must be lifted off fully to get to the print area–there is no hinged lid or other convenience. The machine arrives fully assembled, but you must perform manual bed leveling before you can print.
Leveling involves removing the resin vat (secured with two thumbscrews on either side), and unscrewing the build plate so it sits loosely on the Z arm. Then place a sheet of paper on the screen, and power on the machine. Locate the "zero" button in tools, allow it to move down to screen level, and press down on the build plate such that the paper can't move. Tighten the bolts, and you're done. The build tray should move back up, then you can re-attach the resin vat. These steps sound more complicated in writing than they actually are, but it's an essential step that you'll probably only need to do once. If you skip this step or allow one side of the build plate to be a bit higher than the other, you'll have failed prints, so take the time to get it right.
A fully metal resin vat and Z-axis lifts the Sonic Mini 4K above some cheaper printers, but also isn't uncommon in this category nowadays. Again though, this is an improvement over the previous Sonic Mini, which featured a colorful plastic tray.
A 2.8" touchscreen is also typical and required since there is no network connectivity. All designs must be loaded in using the USB port on the side.
A full set of tools is provided in the box: plastic spatula, metal scraper (though I'd recommend actually not using this, as it tends to scratch the build plate), and a hex key to tighten the four bolts that hold the build plate to the chassis.
What does stand out is the larger than average build plate. Compared to other printers in this class, the 135x75mm allows you to pack more in. However, the total build height of 130mm is actually a little smaller than other printers.
That said, for most purposes, you won't need height, but you can always use an additional tray space to print more at once. The Sonic Mini 4K seems to be aimed directly at those printing a lot of small, highly detailed miniatures, jewelry, or perhaps dental work. If you need the height to print, say, tall vases, this isn't for you.
In terms of detail, the 4K resolution screen results in an incredible 722PPI (pixels-per-inch), while a minimum layer height of 10 microns results in the highest detail we've seen yet.
Of course, we expect other manufacturers to follow suit soon, but for now the Phrozen Sonic Mini 4K sets a new standard in budget printing, and ships at the end of September.
The Need for Speed
Requiring no more than 2 seconds per layer, you can pump out a full tray of little miniatures in less than 3 hours, such as these pictured below, which were printed at 0.05mm layer thickness.
If you're wondering, pictured above are the latest Valour Korps minis from Maker's Cult, which you'll find on Patreon and CGTrader. I spray primed them, and started painting with some Games Workshop Contrast, just to highlight the details.
This speed is enabled through the use of a monochrome LCD display, which allows a greater intensity of light through compared to color LCD displays. More UV getting through to the resin results in a faster cure. This is in combination with a 405nm ParaLED Matrix 2.0, for smooth and even light distribution across the screen.
Is This a Revolution in 3D Printing?
The Sonic Mini 4K isn't so much a revolution, as an iterative upgrade on the original Sonic Mini. That's not to diminish the significance of a 4K screen and fast monochrome LCD– those result in incredible quality prints, for sure. But in every other aspect, the Sonic Mini 4K doesn't innovate.
It runs the same industry-standard ChiTu firmware as nearly every other resin printer on the market, so the workflow will be familiar to anyone with experience in 3D printing. For those new to ChiTuBox software, this boils down to load in a model, position it as desired, and add supports (either manually, or using the automated profiles). Then slice (the process of splitting the print into thin layers), and save to disk.
The fact it uses off-the-shelf software isn't a bad thing (quite the opposite in fact, given the huge support community you'll find out there) but does limit any innovation Phrozen might have performed to the hardware side of things only.
There is no Wi-Fi built-in, so you still need to copy your files to a USB drive and physically manipulate the touch panel screen in order to initiate a print.
The design is all metal, including the resin vat, leading to more reliable prints and greater durability, but it's certainly not the first printer to feature that.
Should You Buy The Phrozen Sonic Mini 4K?
The Sonic Mini 4K is fast, reliable, and produces incredible prints. I can't find fault with anything in particular, so if you need a tiny bit more detail from your prints, it's certainly worth considering. It's an iterative upgrade for sure, but a significant one none-the-less.
However, if you're new to resin printing, you could probably get away with something even cheaper and still get satisfying prints. At least, it might be worth starting with something cheaper just to see if resin printing is right for you.
Is Resin Printing For You?
The print quality you can get from resin printers is generally stunning, and the Sonic Mini 4K even more so.
But if you're new to 3D printing or specifically to resin printing, there are some other factors you may want to consider before investing in one.
Like all resin printers, the FEP film on the base of the resin vat is a consumable and will cost around $10-15 per sheet to replace (as well as some effort to actually swap it out).
The screen will also need to be replaced after about 2000 hours–though this is longer lasting than the previous generation of color screens. A new screen costs around $90 for the Sonic Mini 4K.
You'll need some 99% isopropyl alcohol to wash excess resin off of your prints. That's about $30 for 5L, though prices vary wildly at the moment since everyone realized it was the main ingredient of hand sanitizer.
Then you'll need some sort of UV curing device. I picked up a simple nail curing station for around $30, but it's not ideal. A proper cure and wash station can cost a few hundred dollars.
And you'll probably want some disposable gloves, and various tissues.
Resin printing is messy, can be dangerous, and involves a lot of effort post-processing your prints. If you're not prepared for the mess or effort involved, but want to learn about 3D printing anyway, a filament-based FDM printer might be better (though the results you'll get it out of it aren't comparable). Read our complete beginner's guide to 3D printing.
Phrozen Sonic Mini 4K: Highest Resolution Budget Resin 3D Printer Yet posted first on grassroutespage.blogspot.com
0 notes
Text
Top 10 Best Portable Air Conditioner With Thermostats 2020 – Best gaming pro
Featured Post in Water Filter India dot com - Water Filter India
PRODUCT INFO
Reside Gamer DUO
August 18th, 2020
Sort Inside HDMI Video Seize Card
Value $249.99
AVerMedia continues to be one in all many chief innovators referring to creating video seize devices aimed towards content material materials creation. The AVerMedia Reside Gamer 4K that I reviewed two years prior to now was a strong PCIe card that will take care of recording as a lot as 1080P240 HDR at a inexpensive price than its closest Elgato counterpart. With the Reside Gamer DUO, AVerMedia has provide you with an inside seize card that will let console gamers improve not solely their sport content material materials however moreover their social content material materials too.
Because the title could recommend, the Reside Gamer DUO is the first seize card I’ve gotten my arms on that choices two simultaneous HDMI inputs. Whereas solely the first one is handed by way of to a secondary monitor, every HDMI inputs is perhaps accessed concurrently and dealt with as separate video sources. In case you’re savvy enough to hotkey in scene modifications in your seize software program program, you’ll effortlessly transition from full-display gameplay to an overlay that options your digital digital digital camera for image-in-image. And I’m not merely talking in regards to the similar top quality of video you’d get off of your fancy webcam; with the Reside Gamer DUO, you’ll be capable to mix an accurate DSLR or MFT digital digital camera for educated attempting headshot as you play.
AVerMedia Releases The Reside Gamer DUO Seize Card
The Reside Gamer DUO marks AVerMedia’s second return (in current instances) to an inside seize card, requiring comparable specs to run as a result of the Reside Gamer 4K. You could desire a motherboard with an open PCI-Categorical Gen 2 x4 slot for the interface and a minimum of an i5-3330 or Ryzen 5 1600 CPU along with a graphics card additional extremely efficient than a GeForce GTX 650. Fairly modest specs for capturing 1080P60 on a faithful streaming PC nonetheless it’s greatest to really for sure you’ll almost definitely have to exceed a minimum of a GTX 1060 for those who want to sport and seize on the same time. AVerMedia’s seize taking part in playing cards aren’t normally too CPU/GPU intensive nonetheless they do take up pretty a bit little bit of RAM to take care of every your sport and seize software program program concurrently.
As quickly as as soon as extra, the LED lighting from the Reside Gamer 4K returns in AVerMedia’s latest seize card. Whereas not considerably shiny or notable, it might each be set as a lot as give you a visual readout of recording standing, or for those who want one factor with a bit of additional aesthetic, is perhaps set to 1 of some fully totally different biking color outcomes inside RECentral. My related criticism from the Reside Gamer 4K persists with the DUO: there isn’t any method to sync these lighting outcomes with the other devices in your case. In case you’re working Aura Sync or totally different RGB software program program, the Reside Gamer DUO can’t be constructed-in into these lighting routines, attempting barely out of sync with the rest of your elements besides you merely disable the onboard lighting.
Very like AVerMedia’s totally different line of seize devices, the passthrough going to your television or monitor is not going to be impacted and the primary enter will bear to your present at 2160P with zero added latency. When you’ve acquired two consoles hooked as a lot as your Reside Gamer DUO, please observe that solely the first enter will doubtless be despatched out to your television; you’ll have to manually swap the cables on the seize card for those who want to ship the second signal out in its place. There isn’t any toggle swap on the cardboard itself to change the HDMI output, nonetheless honestly, I might not have to be fumbling spherical behind my PC in any case.
ASUS Unveils Its ProArt Show PA32UCX-P & PA27UCX 4K Screens
What the Reside Gamer DUO lacks from the counterparts identical to the Reside Gamer 4K is the flexibleness to grab video at a greater choice than merely 1080P. For many content material materials creators which will be going to stream on to Twitch with out making an archival backup, this might not be a problem. Because the Reside Gamer DUO will seize 1080P60 with HDR enabled, you might be nonetheless going to get an unimaginable attempting stream coming by way of this small seize system.
Interface: PCI-Categorical x4 Gen 2 Enter 1: HDMI 2.zero * 1 Enter 2: HDMI 1.4 * 1 Output 1 (Go-Via): HDMI 2.zero * 1 Output 1 Max. Go-Via Decision: 2160p60 HDR /1440p144/ 1080p240 Max. Recording Decision: Enter 1: 1080p60 HDR* Enter 2: 1080p60 Supported Decision: Enter 1: 2160p, 1440p, 1080p, 1080i, 720p, 576p, 480p Enter 2: 1080p, 1080i, 720p, 576p, 480p Document Format: MPEG 4* Dimensions (W x D x H): 140 x 125 x 22 mm (5.51 * 4.92 * zero.87in) Weight: 209 g (7.37 oz)
There’ll come some extent the place, within the occasion you’re extreme enough about streaming on Twitch or Fb Gaming or regardless of totally different platform and mix a facecam into your streams, $50 webcam merely will not be going to be enough in your streams. You are going to want to swap out regardless of fancy USB webcam you could have acquired and swap in an accurate digital digital digital camera. In spite of every little thing, that’s the reason merchandise identical to the Elgato Cam Hyperlink have been so in fashion with influencers over newest months. With the correct digital digital digital camera, you’re going to get the correct focus in your face whereas together with in a pleasing right bokeh affect for the background without having to utilize a inexperienced show or overlay. For my very personal streams and podcasts for Wccf Talks Gaming, I simply recently transformed from the Razer Kiyo webcam to the Panasonic Lumix G7 that I’ve been taking to commerce reveals and conventions for the earlier 12 months. With a pleasing 14mm pancake lens, my G7 has was the correct webcam and stuck silent take care of my face whereas blurring out the background in a way that seems a lot better than one thing a webcam would possibly produce.
That is the place the AVerMedia Reside Gamer DUO is on the market in. Whereas I’ve my PlayStation 4 and totally different consoles working into HDMI Enter 1 and being despatched out to my TV, I’ve my Lumix G7 set to the second enter. Admittedly, I did have some factors getting my Panasonic digital digital camera to initially sync up with the Reside Gamer DUO with the pre-launch software program program (there could possibly be no signal coming by way of and the viewfinder on the digital digital camera itself would blink in and out). Nevertheless, with the latest software program program patch that dropped when the seize card launched, that single concern disappeared. Usually I might not level out an issue that’s been mounted ahead of launch in a consider, nonetheless for individuals who would possibly select up the seize card and run into an identical concern, merely have in mind to always exchange your software program program!
RECentral 4, the software program program suite for AVerMedia’s Reside Gamer DUO and totally different enter devices, stays the similar as from my earlier opinions on the Bolt and Extremely seize taking part in playing cards. The HDR seize that was carried out with thought of one in all AVerMedia’s older seize taking part in playing cards nonetheless stays most likely essentially the most distinctive additions to the software program program. It stays a robust albeit barebones program that will help you to get your streams setup all through quite a lot of inputs and devices nonetheless influencers aren’t locked into using RECentral in the event that they’re accustomed to totally different purposes. The Reside Gamer DUO is completely acceptable with Xsplit’s Gamecaster, Streamlabs OBS, and even enterprise meeting software program program resembling Zoom and Microsoft Groups. Every HDMI enter on the Reside Gamer DUO reveals up as a separate enter system, so that you’ll be capable to safely proceed having fun with Tony Hawk’s Professional Skater 1+2 on the side whereas your digital digital camera on HDMI Enter 2 comes by way of throughout the meeting and no person could be the wiser.
Exterior of some rising pains that had been shortly alleviated with patches, AVerMedia has undoubtedly created thought of one in all my favorite inside seize taking part in playing cards so far. That is arms down the proper seize card accessible in the marketplace correct now within the occasion you’re a console streamer and have to diploma up your social sport with a additional expert attempting livestream. With help for Streamlabs OBS and virtually every totally different content material materials creation suite out accessible in the marketplace correct now, there isn’t any objective to not enhance your streaming setup to a minimum of thought of one in all these Reside Gamer DUOs.
9.zero
The addition of a second HDMI enter on the Reside Gamer DUO gives it an on the spot edge over the rivals. Content materials creators is not going to have to worry about looking for a second seize card or juggling HDMI inputs to get the correct stream setup of gameplay and DSLR facecam.
Efficiencyeight.5
Worth9.5
Design & Aesthetics9
Options9
Execs
HDR seize, larger framerates, and extended choice on HDMI Enter 1 Each HDMI sources current up as separate video feeds for regardless of software program program you propose to utilize Small form problem must match on any motherboard with a spare x4 PCI-Categorical slot Seize every gameplay and DSLR video without having to place cash into two seize taking part in playing cards Help for Streamlabs OBS, Xsplit Gamecaster, additional out of the sector Larger choice/physique value passthrough whereas capturing 1080P60 HDR video
Cons
No selections to change output provide LED lighting is not going to mix with ASUS Sync or totally different platforms Second HDMI enter is proscribed to 1080P60 most Firmware exchange necessary to utilize Panasonic cameras
The hyperlinks above are affiliate hyperlinks. As an Amazon Affiliate, Wccftech.com would possibly earn from qualifying purchases.
Click Here to View or Learn More - Top 10 Best Portable Air Conditioner With Thermostats 2020 – Best gaming pro .........................For more Details,Please Visit our Water Filter India dot com - Home Page Link - Water Filter India
from WordPress https://waterfilterindia.com/top-10-best-portable-air-conditioner-with-thermostats-2020-best-gaming-pro/
0 notes
Text
The Best Cycling Camera for Cyclists in 2020 | Bike Camera Reviews

Hence which is the Best Cycling Camera? Is there a product that can pretend to be the best bike action camera? Let us see what we get. Recently action cameras have transformed into the staple of mountain biking, several cycle tourers went intensively into vlogging, and even road cyclists are beginning to use action cams, particularly cycling safety cams. You infrequently see a single rider who does not have one of these strapped on his helmet or the handlebars. Because of this immense and ever-growing need, several companies have introduced a new Best cycling camera in the store. The GoPro is a world-renowned brand, but is still GoPro the best cycling camera? There are several others like Sony, Garmin, and Olympus which are becoming ours with exciting stuff. And then a plethora of cheap Chinese brands that are getting better and better. We put together a list of the Best Cycling Camera (in our opinion) for cycling. Several of these we examined ourselves, while for others we relied on reviews from friends and online. Read on to find the one to take the most thrilling moments of your life.
The Best Bicycle Camera in 2020

The Best Bicycle Camera In this article, we at BestComfortBike will give the complete guide on Best Cycling Camera. Check out ten of our top picks below, or scroll deeper for longer reviews of these Best Bicycle Camera and other high-ranking options, plus buying advice. Here is the list of Top 10 Best Cycling Camera: GoPro HERO7 Black GoPro Hero5 Session Spytec Mobius Action Camera 1080P HD AKASO V50 Pro Native 4K30fps 20MP WiFi Action Camera APEMAN A80 Action Camera 4K 20MP Wi-Fi Sports Cam 4X Zoom EIS 40M Waterproof Underwater Camcorder Garmin VIRB Ultra 30 Action Camera Cycliq Fly12 CE HD Bike Camera + Front Light Cycliq Fly6 CE HD Bike Camera + Rear Light Crosstour Action Camera 1080P Full HD Wi-Fi 12MP YI 4K Action and Sports Camera Editor's Note: We will update this list as more Cycling Cameras hit the market.
1: GoPro HERO7 Black — Waterproof Action Camera with Touch Screen 4K Ultra HD Video 12MP Photos 720p Live Streaming Stabilization
GoPro HERO7 Black — Waterproof Action Camera with Touch Screen 4K Ultra HD Video 12MP Photos 720p Live Streaming Stabilization

PROS The HyperSmooth: Get the gimbal‑like stabilization—without the gimbal. HERO7 Black right for camera shake to deliver crazily stable footage TimeWarp: It Captures super stabilized time-lapse videos while you move about a scene. Enhance the speed up to 30x to turn longer activities into shareable moments Live Streaming in 720p: Share while you are there. It provides live stream in 720p on social, gets HyperSmooth stabilization as you broadcast via the GoPro app and store footage to your SD card to review later Rugged + Waterproof: Share adventures you can not take with your phone. The HERO7 Black is rugged, waterproof without a residence to 33ft (10m) and up for any experience SuperPhoto: Take excellent images automatically. With SuperPhoto, HERO7 Black effectively applies HDR, local tone mapping or noise reduction to optimize your shots Voice Control: Go hands-free with the 16 voice commands like “GoPro, capture a photo” and “GoPro, turn on.” it can Understands English (US, UK, AU, Pakistan, and India), Chinese (Mandarin), French, German, Italian, Japanese, Korean, Portuguese (BR), Russian and Spanish (EU and NA) 4K60 Video + 12MP Photos: The HERO7 Black shoots stunning 4K60 video and the 12MP photos that are as wonderful as the moments themselves CONS It has no cons.
2: GoPro Hero5 Session
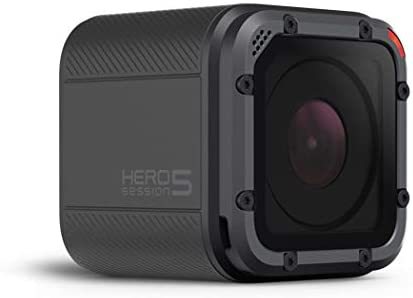
GoPro Hero5 Session
PROS The GoPro Hero 5 session includes Hero5 session camera, standard frame, curved adhesive mount, flat adhesive mount, mounting buckle, and a USB c cable; the Waterproof to 33 feet (10meter) without a housing; does not add an sd card Be assured your GoPro is charged; To charge your camera, use USB cable and a computer or charge device made by GoPro; If your camera freezes, press and hold the menu button for about eight seconds till your camera powers off; This reset stores all of your content and settings Extra GoPro Hero5 session features + advantages below on item page; the Photos are taken at 10 mp with a 4:3 aspect ratio A single press of the shutter button powers the camera on and starts recording automatically Refer user manual and installation manual below for software update instructions; The Operating system adaptability: MAC, PC CONS It has no cons
3: Spytec Mobius Action Camera 1080P HD 60fps 131 Degree Wide-Angle Lens Mini Sports Cam with Loop Recording - C2 Lens

Spytec Mobius Action Camera 1080P HD 60fps 131 Degree Wide-Angle Lens Mini Sports Cam with Loop Recording - C2 Lens
PROS The Wide-Angle Mobius Action Camera is one of the most advanced mini cameras around. At 2 x 1 x 1 inch and weighing just 1.3 oz This camera can simply fit in any pocket Press record and you will take astonishing HD video Its Quality usually only found on devices 5 times the size. CONS It has no cons.
4: AKASO V50 Pro Native 4K30fps 20MP WiFi Action Camera with EIS Touch Screen 100 feet Waterproof Camera Web Camera Support External Mic Remote Control Sports Camera with Helmet Accessories Kit
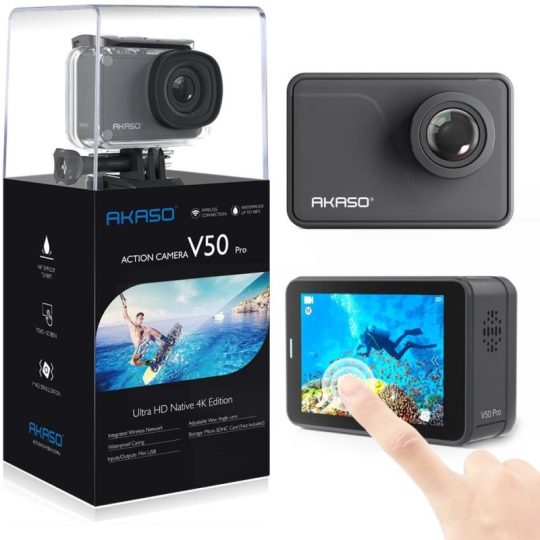
AKASO V50 Pro Native 4K30fps 20MP WiFi Action Camera with EIS Touch Screen 100 feet Waterproof Camera Web Camera Support External Mic Remote Control Sports Camera with Helmet Accessories Kit
PROS SUPERB IMAGE QUALITY: Its Featuring 4K/30fps and 20MP image, your AKASO V50 Pro action cam can take every aspect of your amazing outdoor experiences and give immersive footage of you and your world. ELECTRONIC IMAGE STABILIZATION: The Built-in Electronic Image Stabilization (EIS) with a 6-axis gyroscope detects position and motion changes. When the camera tilts, moves, shakes, or adventures impact, this action camera can still produce stable videos. OPTIONAL VIEW ANGLE: You can modify the view angle of this action camera according to your requirements between Super Wide, Wide, Medium, and Narrow. This action camera additionally has a distortion calibration feature, which allows image distortion improvements. BUILT-IN WIFI AND HDMI OUTPUT: Simply download App(iSmart Pro+) on your phone or tablet and attach it to this action camera, you can share your amazing moment on the social media instantly. The HDMI port enables you to attach it to TV. FREE VALUABLE ACCESSORIES: This underwater camera comes with the 2 rechargeable 1100mAh batteries, chargers, and remote control wristband and many accessories kits. The kits fit most cameras even Gopro. CONS It has no cons.
5: APEMAN A80 Action Camera 4K 20MP Wi-Fi Sports Cam 4X Zoom EIS 40M Waterproof Underwater Camcoder with 19 Accessories and Carring Case, for Yutube or Vlog Videos, PC Webcam
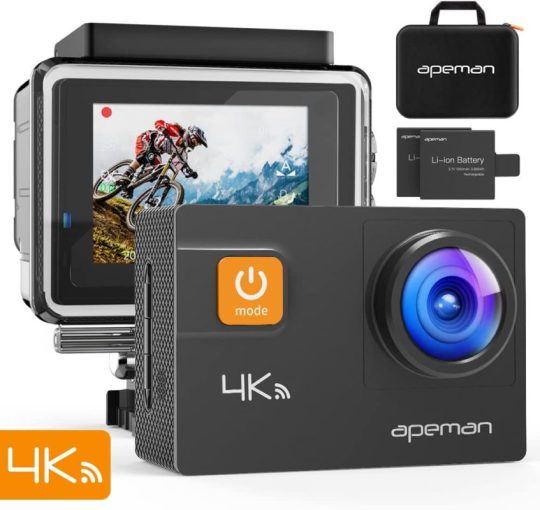
APEMAN A80 Action Camera 4K 20MP Wi-Fi Sports Cam 4X Zoom EIS 40M Waterproof Underwater Camcoder with 19 Accessories and Carring Case, for Yutube or Vlog Videos, PC Webcam
PROS 4K ACTION CAMERA WITH 20MP: The APEMAN A80 action cam emphasizes 4K 24FPS, 2K/30fps, 1080P/60FPS video, and the 20MP image resolution allows you to capture unbelievable photos and take every interesting moment. ADJUSTABLE WIDE ANGLE AND ANTI-SHAKING: This sports cam gives you 4 view angles(170°, 140°, 110°, and 70°) to pick from, gives you with a much wider marvelous perspective. The built-in smart gyroscope and anti-shaking mode deliver steady and smooth videos. It is Perfect for shooting outdoor activities. BUILT-IN WIFI and HDMI OUTPUT: Share and edit videos or images efficiently. Just download the free app (OK Cam or FN Cam) on your smartphone or tablet to get full control of the camera in real-time. The HDMI, USB, and AV video output are ready for connecting computers, TVs, and projectors. VARIOUS PHOTO and VIDEO RECORDING MODE: The Support Loop Recording, Car mode, Diving mode, Timer-shoot taking modes like Time Lapse. By picking a time interval, you can enjoy and record a process of the transformations that take place at every moment in every corner of the world, like sunrise and sunset, flowers bloom, tide ebb, etc. HIGH-QUALITY WATERPROOF CASE and MUTI-ACCESSORIES: The High-quality waterproof case can perform this camera work usually for even underwater 40 meters. Dual 1050mAh batteries, special designed compact carrying bag, and multiple accessories can meet your requirements for any outdoor activities CONS It has no cons.
6: Garmin VIRB Ultra 30 Action Camera

Garmin VIRB Ultra 30 Action Camera
PROS ULTRA HD VIDEO - The Crystal clear 4K/30fps footage, 1080p or 120fps, or slow-motion ability at 720p or 240fps G-METRIX - The Built-in GPS and outside sensors with the connectivity to Garmin devices to take special data like speed, elevation, heart rate, and G-force LCD COLOR TOUCHSCREEN - The 1.75-inch show is simple to operate; fully functional in and out of the waterproof case VOICE CONTROL - Shoot hands-free by using voice instructions to start or stop recording, capture a photo or tag footage 3-AXIS IMAGE STABILIZ3-AXIS IMAGE STABILIZATION - It can Capture steady footage up to 1080p or 60fps CONS It has no cons.
7: Cycliq Fly12 CE HD Bike Camera + Front Light
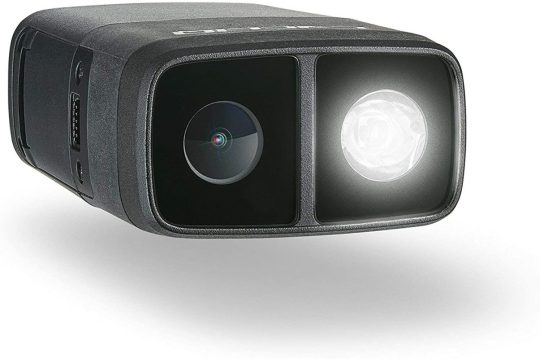
Cycliq Fly12 CE HD Bike Camera + Front Light
PROS The 1080p full HD bike cam with the 6-axis photo stabilization and the high Dynamic Range (HDR) The bright 600-lumen bike front light with the home-Safe mode The heavy 8 hours run time or battery life (camera only mode). Simple 1/8th turn mounting. It fits 31.8mm, 22.2mm, and tapered handlebars. The black box conflict security technology and the looping video The bike alarm, Bluetooth, Strava integration, water-resistant, USB-C fast charge CONS It has no cons.
8: Cycliq Fly6 CE HD Bike Camera + Rear Light
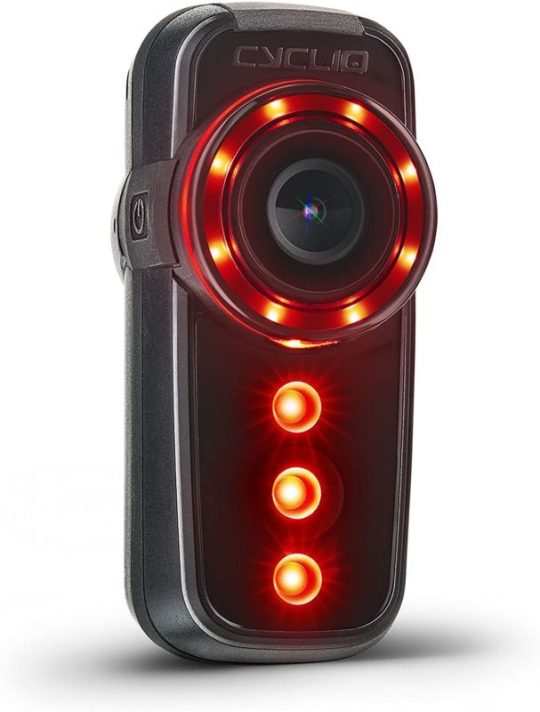
Cycliq Fly6 CE HD Bike Camera + Rear Light
PROS The 1080p Full HD Bike Cam with the 6-axis picture stabilization (sd card not added) The bright 100-lumen tail light with Home-Safe mode The massive 7 hours run time or battery life (camera only mode). It mounts with 1/8th turn to the seat post. The black box conflict security and the looping video The bike Alarm, ANT+, Bluetooth, Strava integration, water-resistant, USB-C quick charge CONS It has no cons.
9: Crosstour Action Camera 1080P Full HD Wi-Fi 12MP Waterproof Cam 2-inches LCD 30m Underwater 170 degree Wide-Angle Sports Camera with 2 Rechargeable 1050mAh Batteries and Mounting Accessory Kits Webcam

Crosstour Action Camera 1080P Full HD Wi-Fi 12MP Waterproof Cam 2-inches LCD 30m Underwater 170 degree Wide-Angle Sports Camera with 2 Rechargeable 1050mAh Batteries and Mounting Accessory Kits Webcam
PROS FULL HD VIDEO AND PHOTO RESOLUTION - The 12MP 1080P ensures you capture high-quality photos and videos every time. The 170-degree wide-angle lens enables you to take more of your surroundings. 1080P LIVESTREAM WEBCAM - This 1080P webcam allows you to have a video chat or living streaming at an angle you like. And the 170-degree wide-angle lens of the camera will provide you a more extensive field of vision. 30 METERS WATERPROOF PERFORMANCE - With the firm and enduring waterproof case, you can dive into water up to 98 feet / 30 meters. It is ideal for water sports, such as swimming, diving, surfing, and so on. You can search for the unknown underwater world. WIRELESS REMOTE CONTROL CONNECTION - With Wi-Fi, you can attach your phone to instantly operate the camera and video options using the “iSmart DV” APP. Also, you can download, delete, and view files. 2-inches LCD AND MOUNTING ACCESSORY KITS - A 2-inches LCD screen enables you to view videos or pictures more prominently. The 18 multifunctional accessories allow you to fix your camera to helmet, bicycles, wrist, etc. A great companion to shoot the exciting moment. CONS It has no cons.
10: YI 4K Action and Sports Camera, 4K or 30fps Video 12MP Raw Image with EIS, Live Stream, Voice Control – Black
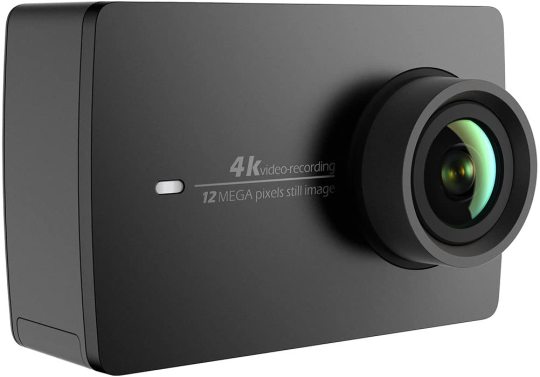
YI 4K Action and Sports Camera, 4K or 30fps Video 12MP Raw Image with EIS, Live Stream, Voice Control - Black
PROS Superb Image Quality – It records 4K or 30fps (100mbps), 2. 7k/60fps, 1080p or 120fps, 720p or 240fps video, and the 12MP raw picture with the built-in Sony IMX377 image sensor and the Amarelle dual-core A9SE75; It is provided with the advanced video stabilization (EIS) can capture super-smooth footage at 2. 7k/60fps. Long battery life – The high capacity rechargeable lithium-ion battery records up to 120 minutes of 4K or 30Fps video with a single charge. The high performing cooling system stops YI 4K Action Camera of overheating and allows stable video recording. Intuitive touchscreen UI - The built-in 2. 2 inches high responsive LCD Touchscreen with the 640 x 360 high resolution for the easy setting, previewing, and shooting. Anew released voice instruction makes shooting even easier than before. The touchscreen is made with Gorilla Glass Retina to resist scratches and daily impact. Instant sharing -- The built-in Bluetooth and high-speed 5GHz/2. 4GHz Wi-Fi help for wireless remote control and the YI action app for instant photo and video editing, sharing, and live streaming to social media. Advanced features – always Update to the latest firmware (1. 8. 25) to enjoy the extra features. CONS It has no cons.
The Best Cycling Camera Buyer's Guide
The extra advanced something becomes, the more complex it becomes to decide between opposing versions. Nowhere is that more true than in the best cycling cameras. With numerous models from multiple producers, it will take a while to decide between then all. Even with this list of the best performing cameras for cycling, your analysis is not done. What follows are some important characteristics of performance cameras. Most are vitally important to the user's expertise while some are delightful to have.
Here are Some things to examine before purchasing your next cycling camera.
1. Photo and Video Quality of Cycling Camera

Photo and Video Quality of Cycling Camera Typically, the more costly a camera is, the better the image quality. The least you would demand a modern action camera is 720p but it is only sensible to fix a minimum of 1080p. Every camera on this list is capable of 1080p as a minimum. The UHD or 4K is additionally possible but particularly worth specifying if you have a 4K monitor or TV to saw it back on. As most maximum of us view our footage on a smartphone or laptop, the 1080p is a realistic option for most users. If you do have a 4K kit or desire to future-proof your camera, the 4K is the gold standard right now. One such example is the GoPro Hero 7. If you cycle for more extended periods, you may need to hop 4K for now as it has a damaging effect on battery life. As 4K needs more processing power to record, the battery has a lot more work to do. If you are going to be out on your bike for a while, lessening the resolution to HD might be the order of the day. The other side of video quality is frames per second or fps. This is a test of how multiple frames the camera can manipulate each second. A reasonable minimum is 30fps as this is the speed of various TVs. The higher fps, such as 60fps in some of the cameras here allow a much more fluid video with more limited blurring. The image quality is too important if you want to capture stills with your camera. The video is excellent but sometimes it does not tell the whole story. Some action cameras do not take stills while others do. It is not their main function so the camera would not have many of the features of a smartphone or dedicated camera. The GoPro has a stills camera and the two in this list are fitted of 10 or 12 megapixels (MP). That is a lot enough for an action or landscape shot! TIP: Aim for best cycling camera with at least 1080p and 30fps capabilities. 2. The Picture Stabilization The picture stabilization is a feature on most action cameras we use for cycling. The technology will utilize either gyro image stabilization or the optical image stabilization to even out the video to present it more fluid and remove some of the jerky actions you may endure while out on your bike. The gyro utilizes an electronic movement sensor to reduce camera shake while optical stabilization movers the lens to prevent the movement. Neither is more useful than the other though. If you ride bumpy roads or paths, some sort of image stabilization can make the viewing experience a much more fluid affair! TIP: The Picture Stabilization will guarantee you get to record better videos while cycling. 3. The Field of View with Bike Front Camera You may see the field of view named in some camera specifications. The Field of View (FoV) is measured in degrees from the front lens. Therefore an FoV of 140 degrees indicates the camera will capture the image 70 degrees either side, up or down from the lens. The field of view can influence the quality and immersion of a video by adding more of the surroundings. If you are utilizing your action camera for cycling safety, it will further add more of your surroundings and cover more angles of the road. TIP: The more extensive the FoV, the more the video covers. Aim to have at least 120 degrees of view. 4. Efficiency of Use The efficiency of use in the context of action cameras leads more to how simple it is to use the bike camera while on the move or while wearing gloves. Whether you are turning the camera on or off, take a still image, or make immediate changes while on the bike, the buttons have to be quickly accessible. Some action cameras appear with a hands-free operation or an optional remote such as those from GoPro. This can further suggest simple voice commands can control the camera without your hands ever lacking to leave the bars. If you believe you might be setting your camera or will require to make changes on the fly, this could be helpful. Contrarily, cameras are usually set and neglect. Set your chosen mode, set it to record, and let it run until you finish. 5. Battery Life The battery life is a sticking subject for most action cameras. The need for more petite, lighter cameras with ever more accurate images indicates batteries are always going to be under pressure. The battery technology lags after all technology right now so our choices are very limited. You can fairly require a battery life of within, 2 hours, and 8 hours depending on how you utilize it. Most maximum companies give you an average expectation but do not count on it. TIP: Think of a bike camera with user-replaceable batteries if you are preparing for a long video shoot session when out riding. 6. Connectivity Unusual high-end action cameras combine WiFi, Bluetooth, ANT+, or near-field communication (NFC). While not required for regular operation, having these connectivity possibilities allows you to watch or live-stream your ride or join it to other devices. The WiFi, NFC, and Bluetooth can attach your camera to your phone and from there to cloud storage or social media. The ANT+ can attach your camera to bicycle computers, heart rate monitors, and other sensors you may have on your bicycle. None of these are strictly required but if you have cooperative accessories, they can give another dimension to your movies. 7. Size and Weight Whether you drive road or mountain, are a weight weenie or not, the size and weight of your camera will affect the user activity. Firstly, size and weight can direct where you mount it. The heavy cameras will not sit well on a helmet while larger ones may influence how easy you are using it. The GoPro Hero 5 Session is a good example of a small and compact bike camera. The Frame or bar mounted cameras are less affected by size and weight but you yet do not want a big, bulky camera making your bike seem unpleasant. 8. Mounting Place There are two main mounting areas for an action camera in cycling. The Helmet mount allows a much more immersive adventure for the watcher as the angle shifts with your head and the POV is much more engaging. The Bicycle or bar mount allows a less engaging but much more solid view. You may lose the shock absorption of your body but your view would not move with every change of your weight on the bike or pan the shot every time you watch around. The mounting location reaches down to individual choice. There are numerous options out there for all varieties of cameras that you can pretty much mount it wherever you like. 9. Waterproofing The Bicycle camera waterproofing is a value-add point for cycling. Most maximum bike cameras will survive a light splash or a little rain but require security from more. Some cameras are naturally waterproof and will come with a particular depth capability. The GoPro Hero 7, for example, is waterproof up to 33ft. If the camera itself is not waterproof, you can purchase waterproof cases as accessories. These will add weight and a little weight but are usually more affordable than paying the extra for a waterproof camera. 10. Built-in GPS GPS is added optional extra. It indicates the camera can geotag your stills and video and show specifically where you were when you recorded it. The Garmin Virb Ultra 30 has GPS built-in and enables you to cover some of that data onto your video. You can combine speed, location, or altitude to attach another dimension to the video. If you have a cooperative bike computer, you can sometimes overlay other data too. Utilize a Garmin Virb and a Garmin bike computer and you can calculate heart rate, temperature, and other metrics to an overlay on the video too. 11. Storage Size Most bike cameras use microSD cards to store your footage. Some cameras can be finicky about the cards they are fit with while others will simply work with limited sizes. Some cameras will not work with such large cards while others will. If you believe you will be storing plenty of footage, from a multi-day event, for example, using a larger microSD card is more efficient than taking many cards in your jersey pocket. As you can view, there is a lot of taking action cameras for cycling. At least now you should have a great sense of some of the best around right now and what to look for when doing your research! TIP: You would require a Class-10 microSD card at sizes around 128GB and up.
Disclaimer
"All brand names and images are Registered Trademarks of their respective companies. All manufacturers names, numbers, symbols and descriptions are used for reference purposes only, and it is not implied that any part listed is the product of these manufacturers or approved by any of these manufacturers." Read the full article
0 notes
Photo


okay so i’ve actually gotten a couple of requests to do like a masterlist of the skyrim mods i use/would recommend for people new to the modding game, so that’s what this is. this is essentially going to be a list of the mods i personally use and is not meant to be like the be-all end-all of mod recs. i play a load order that prioritizes graphics improvements and immersion. if that’s not your thing this will be pretty useless to you. Note: this is for skyrim classic. some of these mods have been ported over to SE but not all of them.
[now under a cut because it’s getting long]
Requirements/Utilities:
SKSE
SkyUI
USLEEP (or the Unofficial Patches for whichever DLCs you own + the base game. USLEEP is for Legendary edition)
Tools: ModOrganizer, LOOT, TES5Edit
*these utilities are needed to basically run everything on this list. if you plan on installing any of the recommended mods, make sure to check the requirements.
Looking for a certain type of mod? Use Ctrl + F to search for the following categories:
Textures/Graphics
Character
Immersion
Armor/Weapons
Gameplay
New Lands/Quests
Note: All of the mods listed in this write-up will be compatible with every other mod on this list unless otherwise noted. Pay attention to the markups next to mod names for special requirements and/or considerations when installing.
[TEXTURES/GRAPHICS] mods within this category are mostly standalone texture mods that may or may not have an esp. take note of your system specs and what your rig can handle before installing, as installing improved textures will put a greater strain on your system.
Verdant - a Skyrim Grass Plugin: increases the amount and variance of skyrim’s grass. Pfuscher’s Parallax: adds parallax textures to the game. 2k/4k aMidianBorn Collection: will edit everything from houses to armor if you’re installing all the packages. it’s a pure texture replacement however and won’t add a plugin to your load order. Real Roads Real Ice Realistic HD Collection (there’s like 5-6 texture packages for this but its mostly miscellaneous items) Static Mesh Improvement Mod (SMIM) Ruins & Clutter Improved 2 Skysight - Simply Bigger Trees Ultimate HD Fire Effects Better embers PELTAPALOOZA Vivid Landscapes - All In One Realistic Water Two Alternative Snow Immersive Fallen Trees HD Ore and Ingots HD Teeth HQ Paper
ENB Boost & Crash fixes are highly recommended to allow your system to run higher graphics without crashing constantly from running out of available memory. note: some mods on this list will recommend you to download a memory patch--this is obsolete as it is now included within SKSE.
[CHARACTER] mods in this category make edits to characters - appearance, dialogue, companions, etc. almost all of these will include an esp. > mods marked with an asterisk (*) are mods i am not CURRENTLY using in my load order, but have used before without issues. asterisked mods may not be compatible with other mods on this list, and you will need to check compatibility within your load order to ensure it will work properly. i will make notes about compatibility if i happen to remember. > mods marked with (N) are NSFW, but can be found on the nexus. > mods marked with (N+) are NSFW and are not available on the nexus, must be downloaded elsewhere. (@ LoversLab) > mods marked with (O) may require manual adjustments to load order outside of LOOT due to editing the same values as another mod on the list, but are compatible. > mods marked with (L) are Large mods, meaning the download is going to be massive (think gbs rather than mbs.) will take a while to download and setup depending on your internet speed.
(APPEARANCE/CHARACTER CREATION)
Enhanced Character Edit(*)/RaceMenu: these are both popular options for overhauling the character creation menu. either one is fine and really is a matter of preference. adds a huge amount of options for customization. (pictured above: racemenu) CBBE(*)/UNP(N): these are nude models for female characters. both are compatible with almost every armor mod out there, though some may require patches. matter of preference. Better male nudes(N): again, just a nude character model. basically it adds dicks to the characters so that they actually have a nude model when you snatch their armor. pretty useless unless you care about naked characters not running around in dirty loincloths. has options for build like slender/muscular etc. SOS (Schlongs of Skyrim)(*/N+): pretty unnecessary but adds variation to dicks. BUT it does support transgender options for the UNP female skeleton. so i thought it was worth including for those who might be interested in that sort of thing. SG Renewal: texture replacement for female bodies. relies on a particular file from ECE. check the mod description for details on how to set this up if using with RaceMenu. (it’s very simple, don’t worry.) True Eyes: adds new eye textures. True Brows: adds new eyebrow textures, mostly female. No More Blocky Faces: self explanatory Apachi SkyHair(*): adds a bunch of hair options, mostly female. KS Hairdos(*): more hair, mostly female KS Hairdos + HDT physics: the same as KS Hairdos, except some of them will have physics attached (aka your hair will move with movement.) Female Facial Animation BVFE Serana & Family: appearance replacers for Serana, Valerica, and Harkon. also includes standalone options. Bijin Wives/NPCs/Warmaidens (or Bijin AIO): replacers for various npcs such as delphine, hulda, aela, etc. keep in mind this is NOT compatible with any mod that edits the same NPCs. Brothers(*): replacers for vilkas and farkas. i don’t currently use it but they cute tho. AelaSylvanMK(*): actually my favorite aela replacer but i switched to bijin recently. not compatible with the bijin AIO or the specific bijin module that edits aela. (i think warmaidens? i’m not 100% sure on this - check to be certain)
(ADDITIONAL NPCs/NPC BEHAVIOR)
Inigo: new companion who can be recruited from the riften jail. he’s a must have for me, has a pretty amazing voice actor, and will comment on your travels and actions. his AI can also be managed as far as how you want him to approach combat. Serana Dialogue Edit(O): restores some of serana’s dialogue that was cut from the final version of the vanilla game. Guard Dialogue Overhaul(O): makes the guards treat you realistically. they won’t automatically respect you, especially if you’re playing with an alternate start mod. Relationship Dialogue Overhaul(O): sort of the same thing as GDO, but edits other npc dialogue. npcs will treat you according to your relationship rank. 3DNPC(L) Inconsequential NPCs(L) Immersive Citizens - AI Overhaul Player Size Adjuster: unnecessary fluff, but it allows you to edit your characters height and movement speed. also allows editing height of vampire lord/werewolf forms. cool for roleplay. Height Adjusted Races (with True Giants & Mammoths): there are a couple of different modules for this, i use true giants/mammoths. edits the height of various races in the game for more variation with npcs. if you use the TG&M edition, giants and mammoths will be, well, fucking giant. Player Voicesets: adds voicelines to your character. there’s a few different options but essentially it adds npc lines to your character based on whats available that randomly trigger upon entering battle, finding treasure, or spotting a cave etc. Marriable Serana(O): lets you marry serana. obviously. fluff mod.
Honorable Mention - Vilja: this is a new companion that is very popular on the nexus, however i’ve personally never used her. fully voice acted. i can’t guarantee she will be compatible but you might want to check her out.
[IMMERSION] mods in this category are geared towards making skyrim a more immersive, “realistic” experience. some of these will introduce new gameplay mechanics that may not be for everyone. your mileage may vary. > mods marked with (S) are script heavy mods and will put extra strain on your system. take care for how many script heavy mods you install, as too many will introduce script lag. > mods marked with (D) may be dependent on another mod in order to function properly. dependencies will be clearly marked. > mods marked with (P) may require patches, either included in the installation, or found in a separate download, in order to work properly with other mods on this list.
Frostfall(S/D): honestly, frostfall deserves its own writeup post that i might actually make later on, but the gist of it is that frostfall makes the weather of skyrim matter. the cold climate of skyrim will be just as dangerous as any enemy you may encounter. exposure to the elements may result in frostbite, penalties, and even death (the death option can be toggled & replaced by npc rescue). frostfall is dependent upon Campfire. both most be installed in order for frostfall to work. (frostfall has its own website here that does a better job at explaining its core mechanics.)

Campfire: can be used as an independent mod - frostfall depends on campfire, but campfire itself can be used standalone. allows you to build campsites and campfires, put up tents, etc. probably not a mod you’d need to use without frostfall. (pictured above: campfire; you can see the frostfall atmosphere meter on the upper right--my character is a bit chilly)
Tentapalooza for Campfire: adds more tents to campfire crafting etc.
Hunterborn(S/P): adds realistic hunting options to the game ex: you’ll have to skin and quarter animal carcasses etc. may require patches to work with other mods in this list. (pictured above: the processing menu that hunterborn adds to animal corpses)
Holidays(P): adds lore holidays to the game that have attached events and decorations around the different settlements. requires a patch to work with mods that edit cities. (pictured above: rorikstead with an “active” holiday event, the town will have lanterns and such around the holidays. this is the expanded towns and cities version.)
Take Notes: provides you with an in-game journal to record your adventures. Time Flies: makes actions take a realistic amount of time. Realistic Humanoid Movement Speed Dead Body Collision Realistic Animation Project - Idles Bathing in Skyrim(S): i’ve heard of some people having occasional ctds with this, so install at your own risk. i personally use it because it adds dirt textures to your character that makes you get dirty, and haven’t had any major issues with it. Showers in Inns: only really useful for bathing in skyrim, adds a bathhouse to inns. Touring Carriages(S*): allows you to actually ride the carriages rather than just the fade to black. it can be a bit wonky physics wise sometimes. i only uninstalled it cause i needed to shave a few esps off my LO. never had any issues. Wearable Lanterns: adds equippable lanterns. almost a necessity with mods that change lighting so that nights are darker, such as climates of tamriel. Drop Lit Torches: torches that are dropped remain lit. very useful for lighting mods that change interiors - caves can be incredibly dark with some of the lighting mods. Wet & Cold: adds drip shaders and fogged breaths. works seamlessly with frostfall. i’ve heard this can be harder on lower end pcs, but even on my former pc i never had an issue running it. Animations(S/D): adds animations to normal actions such as harvesting, lockpicking, etc. if running alongside hunterborn, disable the looting animation via the MCM as hunterborn messes with the looting on animal corpses. these animations are tied to scripts, however, which execute upon activation of an enabled action. can strain your engine if you’re on a lower end pc. iHUD: allows you to disable certain elements of the hud such as the crosshair or compass. recommended alongside immersive first person. Immersive First Person View: gives you a visible body while in first person. WILL change the way aiming works in the game and makes combat harder (especially melee), so ymmv. is a dependency for one of the combat overhauls (Archery Gameplay). Go to Bed: your character actually climbs into bed instead of just the menu pop up. Footprints(S): your character and npcs and animals will leave footprints. the script is constantly running so it will put extra strain on your system. i would go without this if you’re running a lower end pc. FNIS Behavior: basically any mod that adds animations will require this as a dependency. this is more of a tool than a mod, and has an application that must be run every time you install or uninstall animations from the game. fairly easy to use. also a dependency for some gameplay overhauls that edit combat. Hearthcraft: allows you to basically build just about anything you want, building wise. you can build your own damn farmstead in the boonies if you want to. requires hearthfire dlc iirc, but check the mod page to be certain. iNeed/Realistic Needs and Diseases(P/*): both of these mods add a survivalism mechanic to the game that requires your character to eat, sleep, and drink in order to survive. RND is sort of the “legacy” edition, it’s older and more involved, but also a heavier load and requires patches. iNeed will work out of the box with just about any mod under the sun and is designed to be lightweight. i’ve used both and prefer iNeed, but its up to you. Last Seed(*): this is a needs mod by Chesko, the author of frostfall. it is still unfinished and in early alpha, with only the eating mechanic applied just yet. i’ve given it a try and loved the system, but ultimately missed managing drink/sleep so i decided to wait until the full release. Religion - Prayer and Worship: adds religion and worship into the game. you can incur favors and even curses from the gods and daedric lords depending on your actions, pray at shrines, and meditate. i thought it was cool on a roleplay level, but this is fairly new in my LO so i can’t say i have extensive experience with it yet. Simple Actions: adds a book of spells to riverwood inn that allows you to activate a power to use simple actions such as laying down or sitting in places you otherwise wouldn’t be able to. imo a must have in a survivalist run when you start out without a bedroll so that you can sleep without a tent. Skyrim Unbound/Alternate Start - Live Another Life(*): both of these are alternate start mods, allowing you to skip the intro in helgen. alternate start has more modules to work alongside other mods (such as death alternative), but i’ve personally experienced issues with it in my current load order, probably due to the mod Go to Bed. if using ASLAL, disable go to bed until after you’ve started your game. Skyrim Unbound is configurable through the MCM and just easier to navigate with more specific options imo, so i prefer SU. Immersive Patrols: adds patrols to the roads, so you’ll see dawnguard, stormcloaks, imperials etc. you’ll also see battles. can put a load on your engine due to loading in large battles sometimes so be wary. even with my system i have occasional ctds with this when i load into an area with a largescale battle going on, but i’ve honestly forgotten what skyrim looks like without this mod installed and wouldn’t go without it.
[ARMOR/WEAPONS] [WEATHER/LIGHTING] [GAMEPLAY/COMBAT] [NEW LANDS/QUESTS]
*i’ll also eventually add links to the nexus for each of these mods but i want to get it all written up first.
#screenshots are using mods from this list + the NLVA enb#skyrim mod recs#my modlist#this is gonna take a while i have like 180 mods ajkdfhkjh#long post
25 notes
·
View notes
Text
QNAP QSW-1208-8C-US 12-Port Unmanaged 10GbE Switch


Gigabit Ethernet is starting to show it's age. With storage devices such as NVMe drives able to transfer data at over 1 gigabyte per second, it's easy to saturate a single gigabit link. 10 Gb/s has been the solution to faster data rates but until recently was cost prohibitive for most consumers. Multi-gigabit networking, which was announced in 2016, is a new networking standard that supports speeds of 2.5 gigabit per second, 5 gigabit per second and is backward compatible with both 1 gigabit and 100 megabit per second speeds. Personally, I've been waiting on consumer multi-gig networking gear since the standard was announced. A few manufacturers have jumped on the 10 Gb/s bandwagon as well, Asus and Netgear both offer consumer level switches with two 10 Gb/s ports and cost right around $200.00. QNAP recently announced their new unmanaged 10 gigabit switch which is also multi-gig capable. This switch will run at 100 Mb/s, 1 Gb/s, 2.5 Gb/s 5 Gb/s and 10 Gb/s. The QSW-1208 unmanaged series of switches come in two options, 8 and 12 ports. The switch we will be reviewing is the 12 port version. The switches have a mixture of SFP+ (small form-factor pluggable transceiver) ports and ethernet ports, some of which are dedicated and some are combination SFP/Ethernet ports. Simply plug in the devices and you're good to go. The unmanaged switch means there is nothing for you to configure to get the switch up and running. I can't wait for a faster switching network as I have fiber runs for long distances and I do have a lot of devices that are plugged in. I also tend to create large files for some of the projects that I do. However, most people will see a limited benefit depending on their network layout. I'm going to go out on a limb and say that most networks are going to have a few devices on them. Things like tablets, cell phones, a PC or two as well as a console. For most home networks a 1G network is fine. As more wireless devices become available and new wireless protocols get ratified, moving to multi-gig will help with the congestion. The limiting factor in these particular networks is going to the connection to the internet. Having a multi-gig or 10G switch in your home will not make the internet faster unless you have an internet connection faster than 1G. The bandwidth increase is all internally. Then you have content creators, photographers, videographers, and other users that may need to transfer very large files from their PCs to their networks. These power users need something that's faster than 1g. Some may be able to utilize the benefits of going to a full 10G network. Packaging Most of QNAP's products ship in a plain box and don't need the artwork that adorns other products that we review. Typically, these products won't be on a retail shelf. The box shows a graphic of the QSW-1208-8C. Near the bottom of the box, the features are called out as well as a sticker showing that 10G/5G/2.5G/1G are all supported.

Internally, the QSW-1208-8C is protected by a rigid foam insert. On the left side of the box are the accessories. A multi-language quick start guide is included as well.

The accessories for the QSW-1208-8C include a power cable, a quick installation guide, 19-inch rackmount ears and screws, and rubber feet. This switch can be installed as either a desktop switch using the rubber feet or can be installed in a standard 19-inch rack.

Specifications 10G SFP+ (fiber) ports 4 10G SFP+ (fiber) and RJ-45 (copper) ports (combo) 8 Form Factor Desktop/rackmount Switching capacity 240 Gbps MAC address caching capacity 27K Number of priority queues 8 Jumbo frame support Up to 9K packet size Power Supply Unit 100 - 240 V AC, 50 -60 Hz, max. 2.5 A Power Consumption (W) All ports used, line-rate traffic: 49 W Link-down standby: 21W Fan 2 low-noise smart fans Sound Level @ 25°C: 18.7 dB(A) Operating Temperature & Relative Humidity 0 - 40 ̊ C / 32 - 104° F 10 - 85%, non-condensing Electromagnetic compliance Class A LED Indicators Per switch: Power Per port: Speed, link, activity Dimensions (H x W x D) 43 x 285 x 233 mm Weight 2.15 kg Limited warranty 2 years Supported standards • IEEE 802.3 Ethernet • IEEE 802.3u 100BASE-TX • IEEE 802.3ab 1000BASE-T • IEEE 802.3x Full-Duplex Flow Control • IEEE 802.1p Class of Service • IEEE 802.3az Energy Efficient Ethernet (EEE) • IEEE 802.3an 10GBASE-T • IEEE 802.3bz 5Gbps and 2.5Gbps Ethernet Over Copper Twisted Pair Cable • IEEE 802.3ae 10-Gigabit Ethernet Over Fiber • IEEE 802.3aq 10-Gigabit over Fiber (10GBASE-LRM) • IEEE 802.3z Gigabit Ethernet 1000BASE-SX/LX A Closer Look at the QNAP QSW-1208-8C The QSW-1208-8C has 12 ports total. Four of those ports are dedicated SFP+ ports and the other 8 can be used with either SFP+ modules or RJ45. The shared ports are labeled with the same port numbers. The switch measures in at just over an inch and a half tall, 11.2 inches wide, and 9.1 inches deep. The smaller size fits well on a desktop without taking up too much real estate. For those that have networking racks, the switch includes ears for mounting it in a standard 19" rack.

On the front left of the QSW-1208-8C is the status panel. LEDs light up beside their corresponding port numbers when connected. SFP+ and Ethernet ports are labeled separately. Each LED color shows the speed at which the connection was negotiated.

There are a total of 12 ports on the QSW-1208-8C. The 1st four SFP+ ports are dedicated and are not shared with any of the RJ45 ports. The remaining eight ports are shared between SFP+ and RJ45. Only one of the shared ports can be connected at a time. The SFP+ ports are compatible with most SFP and SFP+ GBICs as well as DAC (Direct Attach Copper) cables.

The RJ45 ports support 10G over CAT6a. If the run is shorter than 45 meters (148 feet) then standard CAT6 can be used. Although, I have successfuly run 10G on CAT5e at short distances, it is best to stick with manufactures recommendations. In order to reduce the total cost of upgrading, multi-gig was designed to run on CAT5e cabling. You can fully utilize 2.5G and 5G on your existing cables. The left side of the QSW-1208-8C features two 60mm fans. Traditionally with most switches, the fans run at high speed and sound like a jet about to take off. While airflow is necessary in this switch, the fans are designed to be silent. Silent fans are also important as QNAP touts the switch as a desktop switch. The switch is also 802.11az (Energy Efficient Ethernet) compliant which, means that when a connected port is at low utilization, power consumption is reduced as well.

The right side of the QSW-1208-8C features a large mesh area to facilitate airflow. Through the mesh, you get a peek at the large aluminum heatsink inside. The fins on the heatsink run left to right. This allows the fans on the left of the switch to pull air in from the right side and across the heatsink.

The rear of the QSW-1208-8C is pretty bare. It has a Kensington lock port to secure the switch to the desktop. There is also a COM port. At this time, I'm not really sure what exactly it does. I've tried to connect to the switch however, I didn't get a response. Power to the switch is provided by a standard power cable.

Removing the two screws on the top edge of the rear of the switch will allow you to access the internals of the QSW-1208-8C. Towards the front of the switch, there is the mainboard with a large aluminum heatsink covering about 1/3 of the motherboard. To the right are the dual 60mm fans. Under the black cover at the back of the switch is the power supply. Four screws secure the heatsink to the main board and after removing them, the heatsink comes off very easily. The heatsink is cooling the three Ethernet controllers. There is also a thermal couple on the right side helps control fan speeds.

There are two Ethernet controllers onboard the QSW-1208-8C, the modules are Marvell's Alaska X 88X3340P 10G Base-T controllers and one switch controller, the Marvell Prestera 98DX8312A0 Ethernet controller. The Marvell 88X3340P is responsible for managing four of the combo SFP/RJ45 ports and is six-speed capable (10M, 100M, 1G, 2.5G, 5G or 10G) while switching and switch functions are managed by the Marvell Prestera 98DX. System Setup and Testing Test System #1 Component Product Name Provided by Processor Intel Core i7-8700K (Retail) Intel Motherboard Aorus Z390 Pro Gigabyte Memory G.Skill SniperX 2x8GB @ 3400MHz 16-16-16-36 (XMP) G.Skill Drive Kingston HyperX Fury 240 GB SATA SSD (OS Drive), ADATA SX8200 M.2 NVME (Test Drive) Kingston & ADATA Video Card Nvidia RTX 2080 Founders Edition Nvidia Monitor BenQ EL2870U 28 inch 4K HDR Gaming Monitor 3840×2160 @ 60 Hz BenQ Case DimasTech EasyXL DimasTech Power Supply Cooler Master Silent Pro M2 1500W Cooler Master Operating System Windows 10 x64 Pro with latest patches and updates Test System #2 Component Product Name Provided By Processor Intel Core i7-7800X (Retail) Intel Motherboard Gigabyte x299 Designare EX Gigabyte Memory Corsair Vengeance LPX 4x8GB @ 3000MHz 16-18-18-36 (XMP) Corsair Drive Kingston A1000 480 GB M.2 NVME (OS Drive), Intel 660p 1 TB M.2 NVME (Test Drive) Kingston & Intel Video Card EVGA GeForce GTX 1070 TI SC EVGA Monitor BenQ EL2870U 28 inch 4K HDR Gaming Monitor 3840×2160 @ 60 Hz BenQ Case Fractal Design Meshify S2 Fractal Design Power Supply Corsair RM 850x Corsair Operating System Windows 10 x64 Pro with latest patches and updates For this review, I used two PCs connected to the QSW-1208-8C-US via two CAT6a cables. For the networking cards on the PC, I chose the Aquantia AQtion 10G Pro for one PC and the Asus version for the other PC. During the 10 gigbit test the cards were left at their default settings in Windows. For the multi-gig testing, I manually set the speed of one of the cards to the appropirate setting (1g, 2.5g, and, 5g).

When it comes to network testing at these speeds, your local storage can be your bottleneck. I chose to use an NMVe M.2 3x4 drive in each PC. Each of the drives is rated for more that 1500 MB/s read speeds and 1200 MB/s+ write speeds. For parity, I also created a RAM drive on each of the PCs to ensure that testing with my chosen local storage option was not skewing the testing results. To start off, I loaded up JPerf. JPerf is a Java-based test for IPERF. This application tests network bandwidth between two hosts. I set PC #1 as the host and PC #2 as the client. I did up the TCP window size in JPerf in order to test a single stream.

The test was run for 60 seconds. During that time frame, the application transferred 69.1 Gigabytes at an average of 9.89 GB/s. For the next test, I fired up Performance Test 9.0 and used the network benchmark. Again, I set PC #1 as the host and PC #2 as the client.

By default, the test runs for 60 seconds. Though Performance Test's network benchmark, an average of 8930.0 Mbps or 8.93 Gbps. The final test I performed a file copy from PC #2 to PC #1. I have a test file that I created and zipped (uncompressed) containing multiple large files for a total of 12 GB in size.

In the Windows copy test, we were able to send and receive data at 9.6 Gbps which equates to 1 Gigabyte per second. Since the QSW-1208-8C supports multi-gig, I ran a quick copy test from PC 1 to PC 2. I set the network card speed in the card settings and manually set it to 1, 2.5 and, 5 Gigabit per second. At 1 Gigabit per second, I was able to copy a 12 gigabyte file at 118 megabytes per second. At 2.5 G, the copy speed came in at about 298 megabytes per second, and finally at 5 G, 583 megabytes per second was attained. Conclusion and Final Thoughts I've been waiting for 10-gigabit networking equipment to come down to the "non-enterprise price level". For me personally, I guess that would be the prosumer level as far as price. But still, I didn't really want to pay over $1000.00 for a switch. I don't know too many people that would pay the price for a piece of network gear in their house. We are starting to see the first 10-gigabit networking accessories becoming affordable. There are a few switches on the market that include a couple of 10-gigabit ports for under $200.00. Which is great for most consumers. What if I need more that two 10G ports? The options you're left with are a bit limited and can cost upwards of $800.00.
The QSW-1208-8C-US is a great option to fill the gap for users needing/wanting more than two 10G ports and don't want to spend a bunch of money. There are two versions of the QSW-1208C. The 8-port version currently retails for $469.99 and the 12-port version is $100.00 more at $569.99. This is not a terrible price when you consider the actual per-port cost. The QSW-1208 also gives you the options to use your existing wiring and RJ45 ethernet, you can choose to use fiber cables with SFPs, or your choice of DAC (Direct Attached Copper) cables. SFP+ modules, fiber cables, and DAC cables are dropping in price as well. Options are good. The QSW-1208-8C is multi-gig capable as well. Gigabit ethernet has served us well since the '90s it is time to move one. Wireless is a great example of why we need multi-gig. Wireless network bandwidth is starting to outpace wired networks. However, at some point, the wireless access point still needs to connect to the wired network. 802.11ac Wave 2 access points are not quite at 10G levels and without multi-gig, the connection automatically negotiates down to 1G. Multi-gig solves this by adding 2.5G and 5G speeds over existing CAT 5e or CAT 6 cables. Wireless is only going to get faster and with 802.11ac Wave two access points in the market, they are going to need something more than a single gigabit link. The QSW-1208-8C is an unmanged, plug and play switch. Plug it in and go. It is as simple as that. If you're a content creator with large network storage, you'll be pretty pleased with the simplicity of the QSW-1208-8C. For me, I'm extremely pleased with the QSW-1208-8C. I don't have to fuss with a configuration on my network, although that can be both a blessing and a curse when something isn't working properly and I want to gather logs from my switches. Overall, I'm very pleased with this switch. The price sits in that sweet spot for me and opens more speed options on my network. You can pick up the QSW-1208-8C at Amazon. Read the full article
0 notes
Text
Asus GM501GM-EI007T Zephyrus (i7-8750H - 2.2 Ghz, 16GB RAM, 1TB+256GB SSD, 15.6" Full HD - 144hz, 6GB GTX 1060P, Bluetooth, Camera, Windows 10) | GM501GM-EI007T
Description for Asus GM501GM-EI007T Zephyrus (i7-8750H - 2.2 Ghz, 16GB RAM, 1TB+256GB SSD, 15.6" Full HD - 144hz, 6GB GTX 1060P, Bluetooth, Camera, Windows 10) | GM501GM-EI007T

View larger

View larger ROG Zephyrus is a revolutionary gaming laptop born from ROG's persistent dedication to innovation. Despite being thinner than all previous ROG laptops, it has the hardware to rival high-end gaming desktops: NVIDIA GeForce GTX 1080 graphics with Max-Q Design, a 7th Generation Intel Core processor, an optional 120Hz wide-view display, and Windows 10 Professional. ROG slimmed the body to a mere 16.9-17.9mm while maintaining powerful cooling thanks to a clever new air-flow design: Active Aerodynamic System. The sleek chassis also includes an RGB keyboard that will feel familiar to gamers who typically play on desktop PCs. What's in the Box ASUS ROG Zephyrus Laptop AC Adapter User e-Manual Warranty Card

View larger

View larger

View larger

View larger Slim and Sleek with Max Q Design Max-Q design is an innovative approach to designing the world’s thinnest, fastest, and quietest gaming laptops. Everything’s engineered for the ultimate thin gaming laptop experience, including the laptop, chip, drivers, thermal and electrical components, and more. ROG Zephyrus takes thin-and-light gaming laptops to a whole new level. It has a slim profile just 16.9-17.9 mm thin and weighs only 2.2kg, but that doesn’t stop it from packing the latest NVIDIA GeForce GTX 1080 graphics. Play it Cool ROG Zephyrus is armed with an exclusive Active Aerodynamic System (AAS) that breaks all the rules. AAS combines intelligent design with innovative technologies to give gamers what they want: an ultra-slim laptop that runs cooler and quieter without sacrificing performance. When the laptop is opened, a portion of the bottom flexes to create 20% more open space for air circulation. Along with our unique AeroAccelerator technology, this gap improves airflow by 40% and reduces temperatures by 20% compared to conventional cooling. You can game for hours on end with impeccable stability and no throttling. ROG Zephyrus offers the highest level of performance in the smallest chassis. Breath Deeply AAS incorporates a unique AeroAccelerator (AA) technology that increases the speed and efficiency of airflow through the laptop. It starts with the carefully shaped aluminum alloy shroud around the intake, which has curved edges and raised guides that channel more cool air into the fan. The fan blades are made of a special liquid crystal polymer that lets us reduce the thickness by 33% compared to traditional designs. We can add more blades as a result, improving airflow through the fan by 26%. Cool air passes over heatsink fins just 0.1 mm thick - half the thickness of typical fins. The thinner profile reduces air resistance while letting us squeeze in more fins to increase the surface area for better heat dissipation. Make Your Keyboard Unique With Aura RGB ROG Zephyrus' keyboard is positioned at the front of the chassis to allow better cooling for the internal components and offer a more comfortable, familiar position for gamers accustomed to desktop keyboards. Aura RGB lighting lets you customize colors and dynamic effects for the entire keyboard, and you can adjust the QWER and WASD clusters separately to adapt to MOBA, FPS, and other games. Anti-ghosting tech ensures your commands are interpreted instantly and correctly - even if you hit up to 30 keys simultaneously. The ergonomically designed keys have 1.4mm of travel for greater comfort and accuracy when gaming and typing. With an expected lifetime of 20 million presses, the keys offer exceptional durability and reliability for heavy use.

View larger

View larger

View larger

View larger Ultimate Gaming Performance ROG Zephyrus is all about bringing innovative technologies and incredible gaming performance to an ultra-slim, portable, and stylish gaming laptop. Intel's 7th Generation Core i7 processor and NVIDIA's GeForce GTX 1080 graphics let the machine go toe-to-toe with the most hardcore gaming laptops - and even high-end desktops. Break all the rules with a true game-changer. Rog Hyperdrive For Blazing Fast Storage Speeds ROG Zephyrus features an extraordinary 512GB HyperDrive SSD based on the latest NVM Express (NVMe) and PCI Express technologies. With ultra-fast access times and blistering transfer rates, the M.2 drive loads games, apps, and other data at warp speed. Its copious capacity has ample storage for everything you need. 120Hz Display for Impeccable Visuals ROG Zephyrus’s 120Hz display lets you enjoy exceptionally smooth gaming at a true 120 frames per second. Everything feels fluid, especially fast-paced games. With wide viewing angles and 100% sRGB gamut coverage, the panel also produces outstanding colors regardless of where you're sitting. Seamless Gameplay with NVIDIA G-SYNC NVIDIA G-SYNC technology synchronizes the display’s refresh rate with the GPU’s frame rate to make gameplay silky smooth. G-SYNC minimizes perceived stuttering, reduces input lag, and eliminates visual tearing all without affecting system performance. You get the smoothest, fastest, and most immersive experience across a broad range of games.

View larger

View larger

View larger Ultimate VR Experiences Take the plunge into virtual reality. With the latest NVIDIA GeForce GTX graphics, ROG Zephyrus delivers smooth, stutter-free VR performance with frame rates exceeding 90FPS. Compatibility with leading VR headsets like the Oculus Rift and HTC Vive let you easily enjoy fully immersive VR environments. It’s time to explore a whole new world of games and experiences. Extensive Connectivity ROG Zephyrus is jam-packed with the latest connectivity to give you blazing-fast transfer rates and maximum compatibility. The USB Type-C port delivers up to 40Gbps to Thunderbolt devices - four times the bandwidth of USB 3.1 gen 2 - while four USB 3.1 gen1 ports are ready for all your existing gear. With HDMI 2.0, you can connect to 4K TVs at 60Hz. Immersive Sound ROG Zephyrus equips Smart Amp technology to optimize audio output. In most cases when pushing the volume to the limit, speakers can break down easily because of excess heat and excursion. Smart Amp technology protects speakers by setting thermal and excursion thresholds, and monitoring variations due to loading and temperature influence.

View larger

View larger

View larger The Choice of Champions For more than a decade, ROG has channeled its passion for gaming into building innovative products and working closely with esports teams to ensure they have the right tools to pursue victory. Get Rewarded for Being a Republic of Gamers Fan Become a member of the ROG Elite Rewards loyalty program and earn points for being an active Republic of Gamers fan. There are many ways to earn points including purchasing ROG gear, and a selection of rewards that can be redeemed with points, tailored to the ROG community. Rank up with ROG Elite Rewards. Note: Terms and conditions available at the official ROG Elite Rewards website. Void where prohibited. Your Always on-call PC Medics One year Accidental Damage Protection with 30 days Zero Bright Dot Guarantee is the most comprehensive coverage available. Gives you protection against drops, spills and electrical surges while ensuring a flawless display with zero bright dots. Something does happen, there’s a free 24/7 technical support line and 2-way free standard shipping for repairs. Free 24 Hour Delivery in UAE We offer express delivery to Dubai, Abu Dhabi, Al Ain, Sharjah, Ajman, Ras Al Khaimah, Fujairah, Umm Al Quwain, UAE for Asus GM501GM-EI007T Zephyrus (i7-8750H - 2.2 Ghz, 16GB RAM, 1TB+256GB SSD, 15.6" Full HD - 144hz, 6GB GTX 1060P, Bluetooth, Camera, Windows 10) | GM501GM-EI007T. Best Price Guarantee We offer the best price for Asus GM501GM-EI007T Zephyrus (i7-8750H - 2.2 Ghz, 16GB RAM, 1TB+256GB SSD, 15.6" Full HD - 144hz, 6GB GTX 1060P, Bluetooth, Camera, Windows 10) | GM501GM-EI007T in Dubai, UAE. Buy now with the best price! Read the full article
0 notes
Text
Some words about the Dark Souls Remaster.
Man, oh man. I did not want to make a thing about this, but I think it’s worth voicing an opinion on.
Let’s get it out of the way, I’m excited about it... Well that’s a bit strong, I’m cautiously optimistic about it. I’ve got no real expectations or any wants or desires about the kind of mechanics or graphical overall that’s going into it.
If it just plays like the original and I can play it on my PS4, then that’s fine by me. I’ll take that.
I don’t have the resources to play it on my PC with graphical mods and 60 frames and presumably a dedicated multiplayer user-base.
Hell I’m lucky if my PC lets me get 5-10 frames on any game, let alone Dark Souls. For context, my computer is a work tool. It’s good enough to do the things I NEED it to do, not necessarily the things I would LIKE it to do.
So, on that grounds alone, the remaster is definitely something that I would like, as a console gamer by necessity, as well as someone who first played the original Dark Souls two years after release on the Xbox 360. I never had the “release experience”. I didn’t have too much issue with invasions or much luck joining others in Jolly Cooperation.
So again, the remaster looks to potentially bring me another experience I would like to get.
And I genuinely can’t wait to start SunBroing Gargoyles again.
By this point I would hope that I’ve indicated that those with the means, shouldn’t be getting excited about the remaster. Because for those people, it’s not really bringing anything new to the table and believe me, I understand that.
But what I don’t understand is all the whiny children getting their huff on because the game wasn’t completely remade from scratch in Unreal 4, whilst paradoxically being made in Dark Souls 3′s engine (Which one guys? You get Havoc or Unreal 4, you can’t have both...) with bloom obscuring every minute detail, four ring slots and omni-directional rolling and Dark Souls 2′s PvP...
That’s not Dark Souls by that point, you... You do know what a remaster is, right?
A graphical overhaul is all you’re really entitled to in this instance.
And that’s not even touching on how ridiculous it is that these people are requesting all of these things in the first place.
You know that just including omni-directional rolling would drastically affect how the game is played and the overall challenge would take a massive dip as a result?
You don’t agree?
Well then plainly, you’re fucking stupid. Probably well-intentioned. But still stupid.
Dark Souls was originally developed with cardinal rolling (4-directional) in mind when creating combat and boss encounters.
Bosses were specifically built to combat a players ability to dodge in the 4 directions allowed. You throw in the ability to roll in any direction you want, then you run the risk of having to re-work bosses’ moves to account for these new directions the player can avoid damage with. Or you could just leave the bosses alone and risk them becoming antiquated doormats that can’t even begin to retaliate against a more nimble and mobile player.
Also, you can roll in any direction you want. You just have to not be locked on to do it. Which brings it’s own challenge or manually keeping track of your target, but that’s the price you pay for freedom of movement and I wouldn’t change that.
A similar but admittedly more manageable problem would arise with two additional ring slots.
Now, I fully agree that if a character has 10 fingers they should use them Heck, if I lived in the Souls universe you can bet that I would be wearing rings on my toes.
The fact of the matter is that Dark Souls was made with the players ability to wear only two rings in mind.
Rings in Dark Souls are specifically balanced (to varying degrees of success) to fit the two slot structure.
For example
Havel’s Ring in DS1 gave you a 50% increase to equip burden.
Fast forward to DS3 where Havel’s Ring+3 only gives you 19%...
(I know this is percentage increases, so it’s more about the base values you attribute them to, but DS1 Havels just gives you more, flat out.)
But what does DS3 also have? More than two ring slots and more rings that increase equip burden and also an unbreakable FAP ring.
Things were re-balanced to suit an updated system.
And throwing that retroactively onto Dark Souls would justifiably anger the community more than if it wasn’t included.
I know that people don’t often think about what would need to be changed to implement the things they want in their game that they claim to love and never want to change, whilst citing all of it’s flaws and shortcomings in the same breath. But I think it’s a worthwhile exercise to maybe just actually try doing exactly that?
I’m going to break focus for a second to bring up, what I personally believe to be one of the most classic examples of a remake built with the fans in mind before anything else.
Metal Gear Solid: Twin Snakes.
The original Metal Gear Solid is, by today's standards, not a looker. I won’t argue against that.
And while on paper a re-imagining of the classic game in the Metal Gear Solid 2 engine is a great idea. the implementation was disastrous.
For one, they made no attempt at keeping true to the design of the original game. while the birds-eye camera angle and lack of first person aiming might seem a little antiquated and clumsy now. The original game was built around these limitations.
Level design and obstacles were put in place to keep the player on their toes, security cameras and enemy patrol routes would often be hidden just outside of frame and in the case of security cameras there was specific tools set aside to specifically deal with them.
Mastery of the enemy AI gradually became more necessary as a skill than the stealth action that the game was made for.
But then you throw that all into MGS 2′s engine, without altering any part of the layout, enemy routines, or obstacles whilst also bringing over mechanics built into the new engine, the first person aiming, the tranquilliser pistol...
These two things made Twin Snakes a cake walk.
Security camera about to potentially spot you? No issue, just shoot them in first person to permanently put them out of commission.
Guard standing in the way of your objective? Tranq ‘em and move past them.
Certain bosses were made into complete jokes because you could aim at them manually. Vulcan Raven’s second boss fight is nothing on Twin Snakes.
The fight with Revolver Ocelot loses all of it’s tactical flare because you can literally just aim at him from the door and shoot him a couple of times to win.
You don’t even have to move to beat Psycho Mantis in Twin Snakes, thermal goggles + first person pistol = win boss fight.
And I hope it’s this kind of negligence of a games fundamental design that’s helping to illustrate my point about why you shouldn’t put too much stock in someone implementing all the neat ideas that weren’t in the game previous when attempting a remaster.
The guys handling the Dark Souls Remaster are so far doing a decent job, as far as I’m concerned.
Does the game look drastically different? No, not really, but it’s got just that little bit of extra effort and hardware it needed to make what was already a pretty decent looking game (even by today’s standard) look a few steps better and run a damn sight smoother.
And as long as they keep the already shown quality of life changes, like the ability to use multiple items at once and a option at bonfires to change (and potentially manage) your covenants as well as integrated UI scaling, optional button remapping and password multiplayer functionality.
That’s good enough for me. I’m buying the remaster for a classic experience with a few less stressful oversights and limitations in place and potentially a release-like mulitplayer experience. Maybe I’ll finally start to see the appeal of PvP now that I’ll likely get to do it more often while playing.
And also so I can play it on my sofa with my PS4 controller that I openly prefer using over any other controller.
And if what I’ve heard is correct the company out-sourced for the remake is the same team that remastered Dragon’s Dogma Dark Arisen. So I know that they have relatively decent experience with these kinds of games.
To summarise, If you already have access to Dark Souls on PC and mods that allow you to upscale the resolution to 4K with HD texture mods and a consistent 60fps. Then yes, as I’ve seen plenty of people saying, the remaster is not for you. Congratulations on being a sensible consumer.
If you were one of the hopeless dreamers who somehow misread “Remaster” as “Remake” and was expecting this grand, full-effort re-imagining of a modern classic in an entirely different engine to it’s predecessors with all the bells and whistles, despite how much that would actively ruin the challenge and overall experience. Then certainly yes, you will be disappointed. But then again, I think you’re probably used to that by now...
However, if you’re like me and you just want to be able to play one of your favourite games with a jazzed up, new look and some of the creases ironed out with a re-energised community of players to cooperate with in a jolly kind of way. Then I look forward to playing alongside you.
And for those of you on the Switch. Have fun chaining back stabs on the toilet.
Praise the Sun.
0 notes