Don't wanna be here? Send us removal request.
Text
REFLECTTCELFER
• What process(es) did you use?
During this course of fundamentals I used indesign, photoshop, illustrator and tumblr to create and show my understanding in an online workbook. I should’ve been better with my organising processes to keep track of all my work and tasks still needing to be done.
• What did you know about this process before you started?
I had a small understanding of image adjustments and a couple selection tools.
• What problems did you encounter?
I encountered lots of issues with saving my files on the same computer and I kept losing saves and work when sharing between different adobe accounts. This meant I was having to inspect computers I had been on to try and find my lost files and images and screenshots of work I had for my tumblr. This was because I was not prepared with a hard drive to store everything correctly for this course and kept switching computers.
I also encountered problems when using the mask tool, at first it was hard for me to get my head around using the coloured brushes and coloured background and being aware of what each did
• How did you solve these problems?
Because I got them mixed up a lot of the time I decided on using only two opposite end colours and matched them to either the subject or the background so I associated each colour with the parts of the image I was editing. I couldn’t properly solve my file loss situation as the damage had been done at the start but I retrieved some of my files and images of my work from the computer by goin in to see what I had saved. After this I mde sure I had folders set up properly and was sticiking to one computer to work on as I still hadn’t bought a hard drive to freely work across devices.
• What did you learn during the process?
I learnt lots of helpful skils and techniques on how to be accurate and efficient on the software’s we used.
Illustrator: I am very confident on illustrator when creating vectors and objects with the shape and pen tool. I have used the knowledge I learnt in fundamentals to go onto create vectors and illustrations for other classes and other projects. I have enjoyed using vectors the most as they can be scalabe, easily changed, coloured and can be pasted very easily onto other softwares.
• Who/what influenced your process and how?
Toby did as he taught me lots of new and cool things to develop my current skills. My flatmates also influenced my process as I created vectors and edited images for them and they would have a say in what I would make with what I crated in class. Such as the lamar drawing and backwoods poster. Instagram also influenced me as I would see something on how to make a cool graphic and then I would take into account what I learnt from the video into how it could help for in class.
• One thing I would like to improve on ...
Is practicing the keyboard shortcuts more and developing a good dictionary of shortcuts in my head to result in efficient and comfortable working.
• What resources did you use to investigate/complete this project? moodle, teams, tumblr, classmates, Instagram, adobe hwo to, youtube and google search.
• How would you use this process again?
With a lot more organisation with my notes and what I learnt and next time to focus on using the skills I learnt and new shortcuts on my own for a personal project so that I have a full undertstanding of what I learnt and still need practice on.
• What were some of the most challenging moments?
The very tedious tasks such as selection with images as this can get very time consuming to try and get your selection the most accurate and not having parts cut out. It will also quite hard to match what I cut out with the image im placing it on as sometimes ill need to blur out the edges to make it look realistic
• What is the most important thing I learnt, personally?
How to use the pen tool how curves and shapes go together to create an image or an illustration. This was the most important thing I learnt as now I can make all sorts of graphics and posters and images without having to use someone else image. I can now create what ever illustration I like. This skill is create for me to have as now I can focus on my ideas for projects and not have to worry about my skill level in what I can draw because now I can make it how I want using points and curves.
• What most got in the way of my process?
My Time management and keeping track of what I had done. It was very hard for me to mentally keep track of the processes I had done and what I learnt the day and then reflecting on it. Sometimes what we had learnt was overwhelming and I was not able to reflect on each step as I had forgotten what we had done earlier
0 notes
Text


THE VERY HUNGRY CATERPILLAR
skills i used
vector objects
cutting images out using selection tools
removing backgrounds/parts i dont want in it.
added shape eclipse to food to show holes.
i really like my remake of this story however i did not follow the brief as when i started with my idea and making the book i didnt fully look over the brief so i do not have contents in my book
i tried to best show my understanding of text and how to wrap round objects space out lines and alignment, orientation of the text with the amount i had to work with. i couldve better shown my understanding of text hireachy and coloumns and grids of text if i had followed the brief and wouldve had more text and contents etc.
0 notes
Text
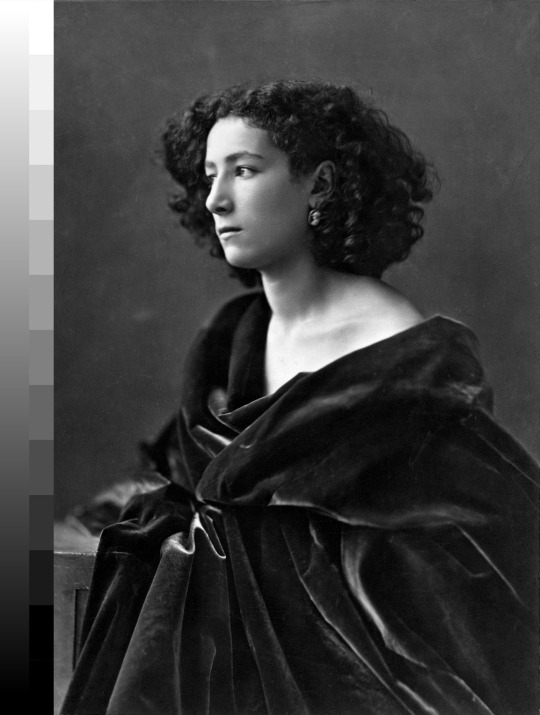
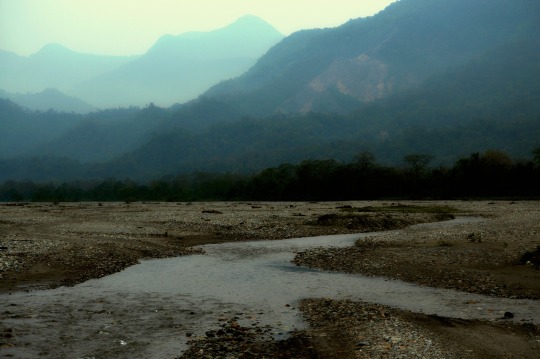
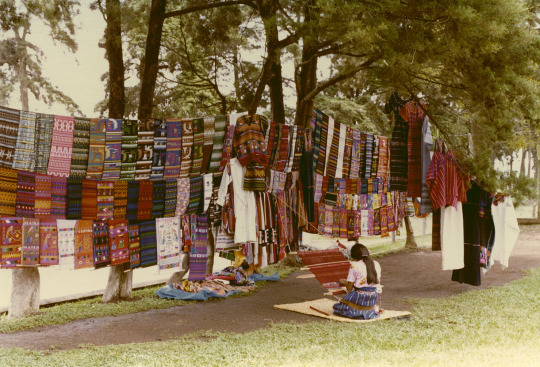
Photo edited these images to change exposure and level out the photo so that lighting and colour inaccuracy is fixed
0 notes
Text

Vase vector
Used clipping mask to cover the vector in a background/pattern
0 notes
Text
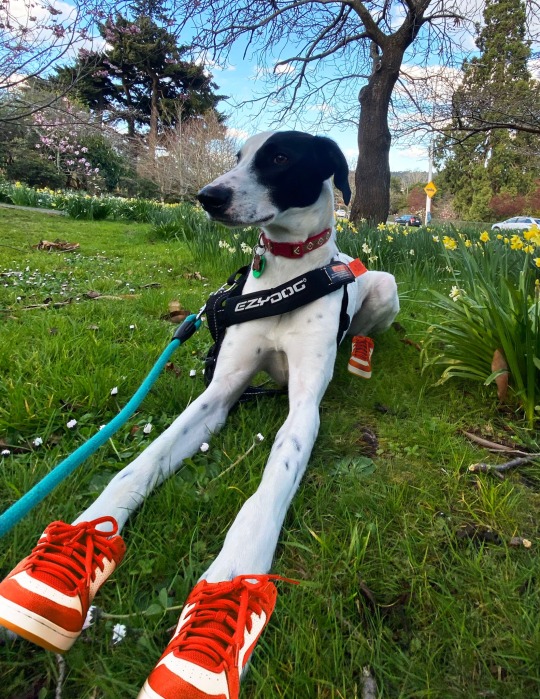
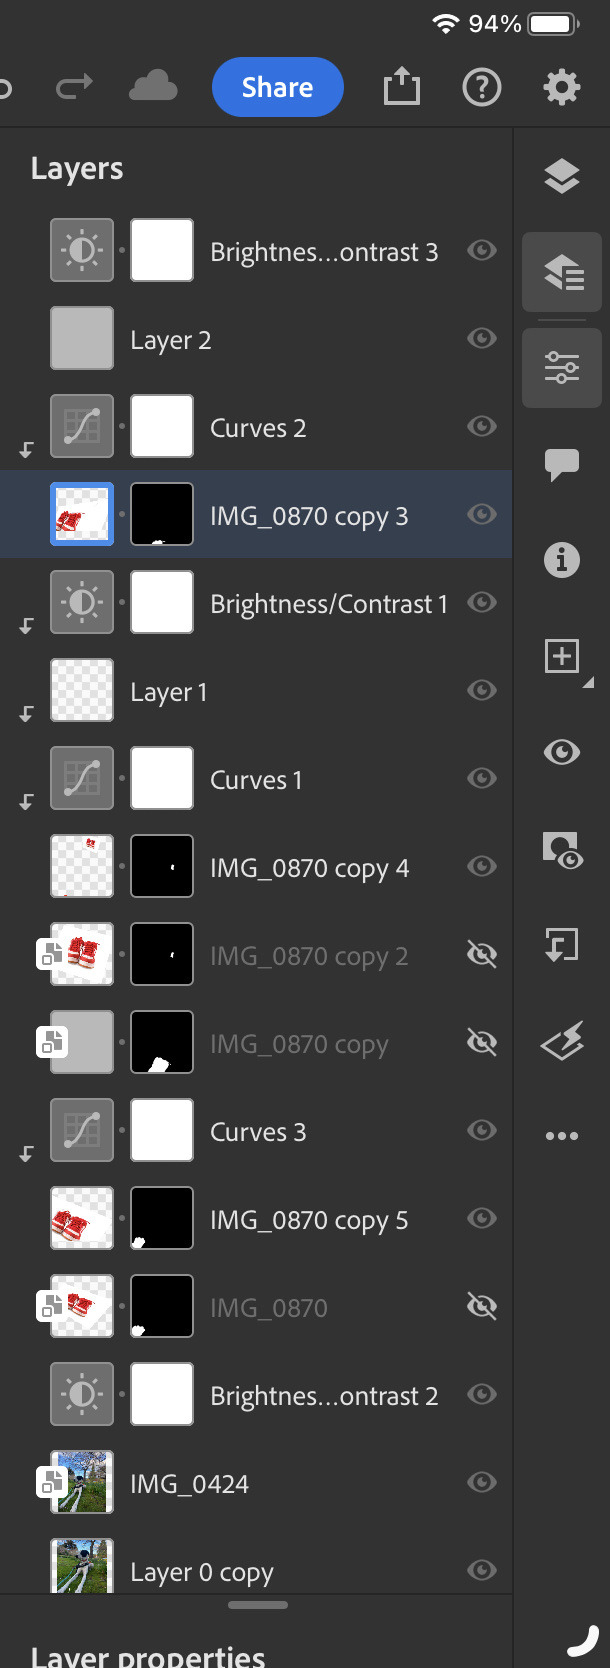
Cut out shoes from a background using the mask tool and brushes to smooth out selection
Photo editing to make the shoes pop at the front but also blend in with the photo so it suits.
0 notes
Text

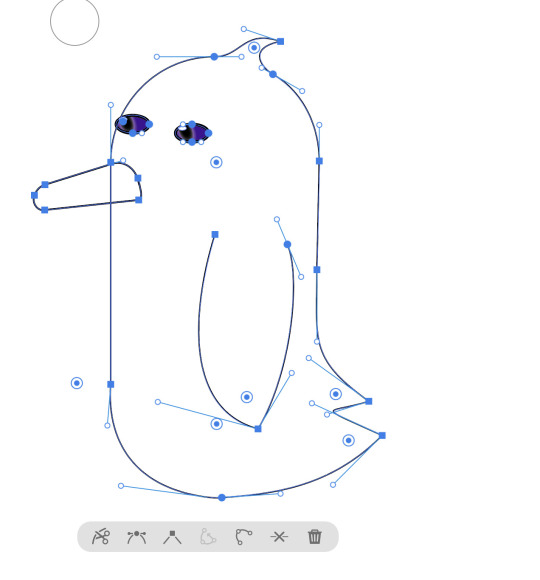
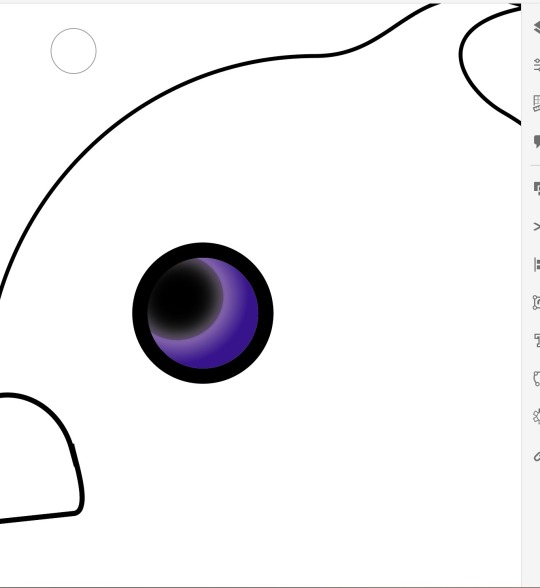
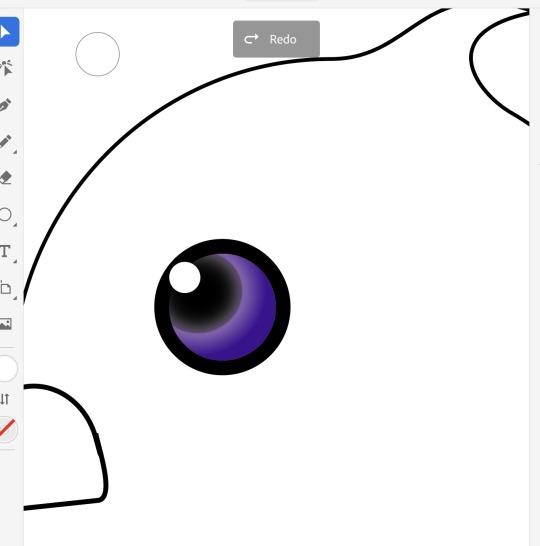
Added anchor points to body to create wing, tail, tuff, beak.
Now to create a tail. I added anchor point with curves to extend and change the body. Add more points to create desired feathered tail.
Drag handles
Option to change angle of other handle to create corner.
Then add three points pull the middle point out and add curves to create a lil hair piece
for the wing i placed three points with a corner point at the bottom the wing.
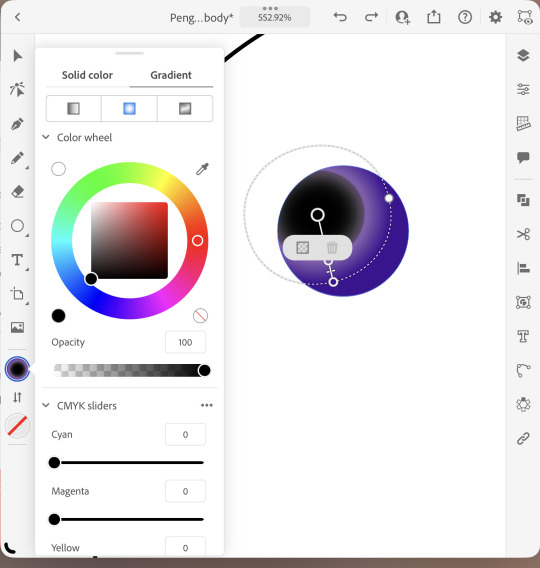
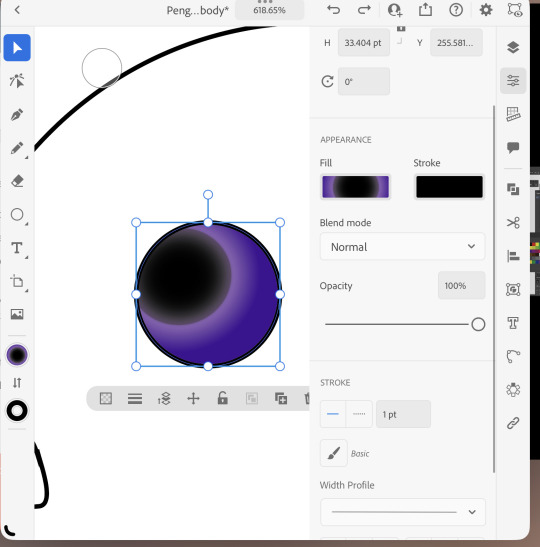
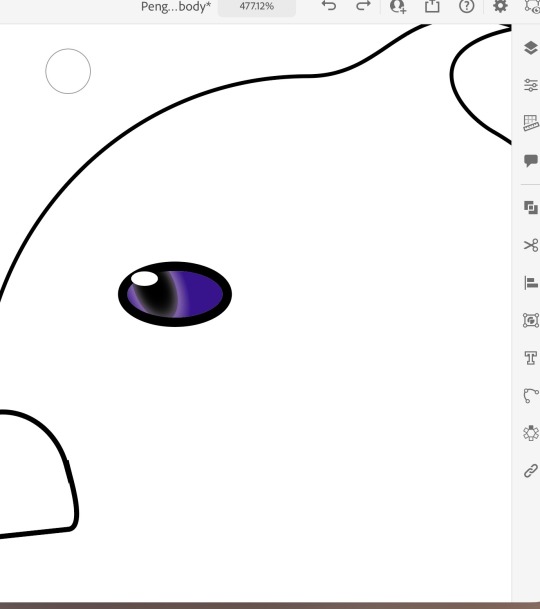
eyes: circle tool, with outline black stroke. added gradient to center to create inner eye and then dragged the gradient from the pole part to the desired eye direction.
distorted the eye down to be oval and duplicated then using shift constrained diagonal moved the eye.
0 notes
Text

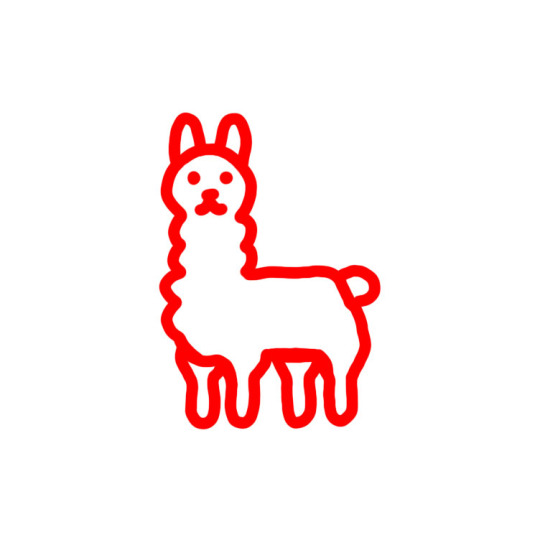
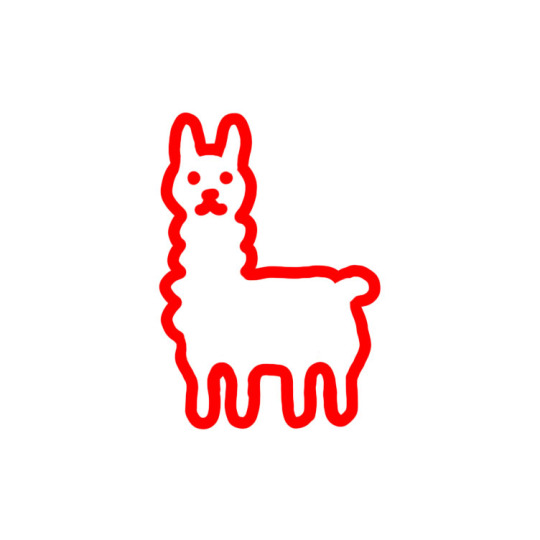


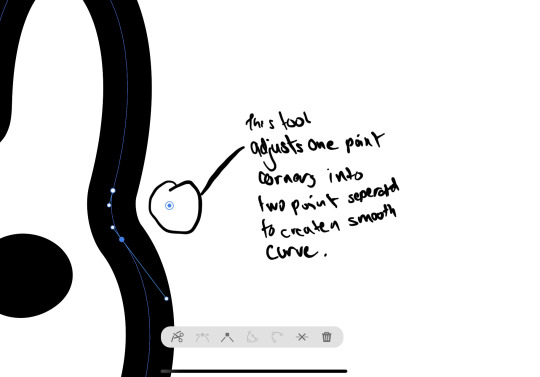
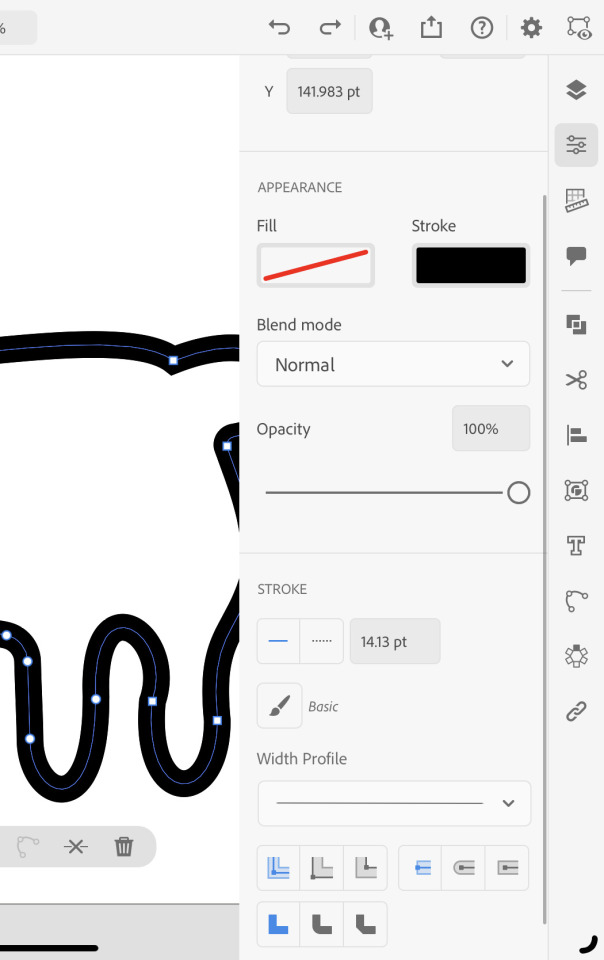


LAMAR DRAWING MADE VECTOR
I found this Lamar simple drawing on noun project then drew the Lamar digitally and then decided to simplfy the drawing to make it easier to draw expected points and handles.
I then put the drawing on a layer on illustrator and then started creating points and curves to make my Lamar vector.
This illustration was good to practice for as it had a good variation on curves with straigh t lines and sharp inward corners, lots of change of direction handles.
I then put the Lamar vector on a grass hill made from curves on the pen tool and played around with gradients for background and fill of Lamar.
0 notes
Text
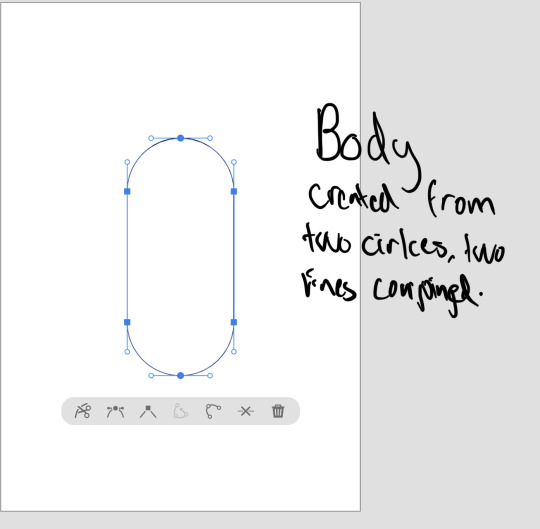
Penguin body
First to start off I used the circle shape tool and held shift while making the circle to constrain it to an equal circle. Then used my selection tool to select the bottom half of the circle and copy then delete then paste the separate half.
Shift command v. Paste in place
Holding shift to move it down constrained. Then select each side to the other to join the eclipses.
0 notes
Text


VECTOR VS BITMAP
A vector consists of shapes lines and curves which together creates a picture.
Whereas a bitmap images is a grid of pixels where each square has info of colour and are placed in directed positions to create an image
A vector is resizepable and can be scaled small or big and it will keep it's original look and quality.
A bitmap image can look pixelated and unclear when altered and enlarged/rescaled.
0 notes
Text

For this typography design on Indesign I experimented with reflecting the text the transform tool to play with the word “front” literally. I then incorporated the word “cover” into each letter of “front” by fill the box with white keeping the text black. To accurate get each letter inline with the other I used the space between each each line mm tool adjuster. I added mm where needed to each line to ensure they were aline.
0 notes
Text

COLUMNSSSS
we then learnt how to do columns and how these can be a useful tool when distributing text and figuring out the layout of your text across a page.
menu, layout, margins and columns
in this tool you can set number of columns and the gutter (space) between columns and margins for the whole page.
0 notes
Text


Todays morning we created a demonstration book on Indesgin. we started with 8 pages and that entail 2 pieces of paper.
on indesign there are parent pages and a none section. these are very useful as you can duplicate an element onto numerous pages. if you didnt want a page to have the same elements you can just drag the none pages to the pages you don't want duplicated elements on.
we then looked at numbering our pages. first you go to the parent pages and then you type page onto each page. then you go menu bar , type, insert special character, markers. then you will see the pages in your book are now numbered correctly.
0 notes
Text
keyyyyboard shorties indesgin
w = window, preview
v = selection tool
a = direct selcetion tool
OPTION AND SHIFT=
TO COPY AND CONSTRAIN AT THE SAME POINT
command + a = select all
T = go into type tool
0 notes


