Don't wanna be here? Send us removal request.
Text
Week 13 Update
This week I have been finishing off all of my written work so it is ready to be sent off to be marked. I have been focusing on developing what I already have like my ideas and research booklet. For this, I have been told that they would prefer the power point to be in an A4 paper format. So, I have been rearranging the objects in the slides to fit the page properly. This took me a while because I have 51 slides in total.
The second thing that I have been working on this week was my critical evaluation. This was supposed to be 3000 words but I have written a bit too much by about 1500 words. I had so much to write about. I put a lot of good points but also a lot of bad points. This was because it was a critical evaluation and I needed to focus on improvements and what I could do if I had more time and what I could have done differently.
I have also been putting a PowerPoint together so I can pitch the demo to my tutors. My PowerPoints information has purposely been kept to a minimum. The main points have been mentioned. This is because when you are up there the audience will be focusing on one thing, it will either be you or looking at the information on the slides. If I keep the information on the board to mention the main points then they can focus more on me and what I am saying.
I will be now focusing on making very slight improvements to my work to bump it up to the highest grade possible. I want to achieve the best grade from this project.
0 notes
Text
Critical Evaluation
The outcomes that I set myself at the beginning of this project
· A very detailed 50s sci-fi environments that you can walk around and inspect. It needs to showcase all the time and effort that we have put into it.
· To create detailed and consistent textures as well as concept art.
· To create all the pictures and ideas needed to give a clear picture of what to do.
Detailed 50s sci-fi environment
Our main goal of this project was to create a 50s-sci-fi living quarter that you can walk around in and interact with objects. I think we did a very good job considering what we set out to do. In the beginning, we planned to create a bedroom, kitchen, living room and office which we have done. However, we also wanted to create a lot of smaller objects and little effects to the world to make it come to life a bit more. We started to do this. We got as far as creating smaller objects like milk cartons, plant pots and so on. So, if we had any more time then I would try to get all of that done. If we ever did go back and finish it with all the little objects in, it would look like it has a lot more history, because now it is almost like a blank canvas that is ready to be painted on.
However, we did do a very good job on what we actually finished. Everyone put a lot of time and effort into it and it shows. The models that Aaron did were very consistent to the style that we were going for and he listened to my design instructions very well. He has created something that is very close to my original idea. His models were also of a very good standard for modelling terms, his polys were cut down to the basic so that it could run in engine easily.
James has done a very good job with the lighting and piecing together of the level. At first, when I started to piece the level together for testing purposes, I was worried whether the level would look good enough because of the quality of the textures that I did. But at the end when James finished off all the lighting it transformed it into something that looked amazing. It is just a shame that he could not do anymore in engine effects to make it more interesting.
On the original project idea, we set out to create not just a demo, but something that you could interact with to make the demo interesting. We wanted to add a zero-gravity system, working lights and interactable items that you can pick up or turn on or off. In the end, we did not manage to do this. This is a shame. We just ran out of time because we didn’t actually estimate how much we would all have to do.
Creating concept art and textures
When I started the project, my main goal was to create detailed and consistent textures and do a few pieces of concept art. I can say that I have achieved this.
In my opinion, the concept art went very well. I managed to do five in total. This was the original number that I set out to do so I can say that I have reached my goal but only just. I feel that if I had had more time I would have been able to do more concept art pieces. I was also a bit disappointed with the quality that I did the concept arts in, especially the first one, for how long it took me; it should have come out much better. However, once I got into the swing of doing the concept art I was painting very quickly in better detail. I feel that, with my first concept art, I made everything far too glossy and shiny. At first, I thought it looked good, so I put the gloss on everything but it looked terrible. However, once I started on my second concept art, I had improved massively having learnt from my mistake.
From my proposal, I said that I would create 5-10 concept art pieces, I did not mention what quality that I would do them in. This was because I was not sure if I would be able to finish that many to a good standard in that small-time frame. I did manage to do it. I am very happy with my dramatic improvement in the speed and the quality of the work.
I think that my textures also went very well too. When I made a point in my proposal about doing about 40-50 textures, I went overboard and I ended up doing 105 textures in total. This was double the amount that I expected to do. Considering that I didn’t have a lot of time to do these to an amazing standard, I did very well. If I could have done anything differently, I would have tried to keep the model count down. This would have allowed me to do my textures to a better quality.
The actual quality of the textures was not bad, but you could tell that they were slightly rushed. They could have used a little finishing. However, I did manage to keep the textures consistent throughout the whole project. This was a very good thing to do in my opinion because then everything looks like they belong together.
Creating all of the items needed for my team to get an idea of what I am thinking for the project
At the beginning of the project, I was set to come up with a final outline for the rooms and a layout of the whole place. We were all brainstorming and discussing ideas with each other on what we would do. After that, we combined and mixed the brainstorms till we found a combination that we all liked. Finally, I took it away and designed a load of 2D birds eye view layouts to pick from. Then we all picked one and I modified it so everyone was happy with it.
The second step was to create a load of 3D sketches of the different rooms so everyone had a clear image of what was going on. I feel that at first, Aaron did not get what I wanted really, which was my fault for not doing more views of the room. I should have been more precise with the drawing. Aaron eventually got the idea after I explained the different parts to him. So, this all went very well in the end. I am happy with how the team took my sketches.
Is my game suitable for my game genre that I set in my proposal?
Our game demo is very suitable for any age. As it is a showcase demo, there is no real need to have a rating on it because it is suitable for any age. We have still kept to that from the beginning. The graphics on the game are more in the style of a cartoon than realistic. This appeals to the younger audience. It also does not have any hint of violence or any bad or negative things involved with it. We did not intend to take it any further than a simple showcase. Our demo can relate more to any type of showcase game that shows off graphics in an engine.
Things that I would develop if I had more time
If I had had more time on the project I would have improved my concept art colouring and shading. I really like my concept art designs but I feel like there is a lot of room for improvement. I have always had a problem with learning how to paint environments. A little bit before the project I learnt how to draw environments. But I never knew how to paint them. It was a bit of a learning curve for me but I managed to make it work, so If I could improve on anything in my concept art it would be the actual colouring and shading. I could have added more detail like furniture and smaller details that give a good ambiance. I feel that if I went back to improve on them, it would make me learn for next time I do environments. It would also count as a lot more practice.
My textures were lacking as I said before. This is another main thing that I came across that I could have done a lot better in. if I had had more time, I would have put more details into the texture. They look too plain and simple, even with some shading and highlights. I could have already done this in the first place if there had not been so many textures to do, I had to rush a lot of them. I wanted them to be at a very good standard with a detailed cartoony/ realistic style. It kind of worked, but with more time I could have made this outcome more obvious.
Once I started to come across a few issues with Aaron not being able to identify which part was which and what It would look like in 3D for my ideas, I knew that I needed to improve on it. so, if I was given any more time or I could develop on what I had I would make a lot more perspective camera angles to show exactly what I want from it. this would mean that he could possibly make a mistake or misinterpret it.
What problems did I encounter in the FMP and how did I overcome them/ work around them?
One of my main problems all around was running out of time. In a way, the demo is not finished yet. Although we have done all of the main parts for it, it still could use some work. Earlier on in the project, whilst we were working on early texturing, we realised that we were falling behind our time plan schedules and dates. This was not because we were slacking in our work but it was because we were overloaded with work. So, we decided early on before it was too late, that we would finish all the walls and all the entities attached to them and then do the main furniture pieces. We would then have done the main furnishings for it. In the end, it looked partly finished but could have used more work.
Another problem that I encountered was spending too much time organising folders and documents. For each model, I needed to create a texture, save the photoshop and jpeg version, then take it into 3D coat and save each individual texture (roughness, metal, diffuse and normal) and then export it all into unreal to test it out. I had to keep everything organised so it was easy to find, but this took a lot of time up which could have been spent on developing textures. I got around this by not spending as much time on the textures as I planned. This isn’t the most efficient way to get around it but you cannot do much to solve the issue.
An issue that I also had was uploading finished work to google drive. When I had finished the main room and bedroom textures I wanted to send them off to James so I went to google drive to upload them for him and they would not upload properly. When I say properly, I mean that they would take all day to upload and still were not done. We solved this issue quite easily though. After the weekend, we transferred the files by USB instead.
One of the harder problems at the beginning that we came across was that we all took a very long time on deciding what outline and what layout we wanted. The deciding of all of this took a very long time. James was quite picky on what he chose. Aaron and I were quite open to what we wanted. So, I catered towards what James wanted more. Once we had a layout, I proceeded to develop it and show him a few different options. Once he had picked one I started the concept art. So, to sum it all up, we solved this issue in a way by going with what James wanted more so the whole team was happy with what we had.
What research methods did I use?
When I began my research, first I wanted to look at sci-fi environments to look at the way that they have been shaped and the way the designers have decided what to do for their designs. I collected a mood board full of different sci-fi environments that related to our original idea. This would then be a structure onto which I could develop my ideas and shape them into a vivid sci-fi apartment layout. When picking out the images, I was looking for at least one thing that stood out and would be a suitable choice.
My second method of research was looking through art station at sci-fi art. I wanted to do some concept art for part of the project so I would have made sense if I stripped down the art work and analysed it carefully. This is what I did. I did this for three images, I made sure that they were all very different to get a feel for how different artists presented their work and what techniques they used. I found this method very useful in the long run because I can see what the professionals do and how their paintings look good. I took all this away and tried to implement it into my concept art.
My third research method that I used was by looking at YouTube videos on the type of environments that we wanted, as well as downloading a sci-fi bedroom demo for unreal engine and looking at that. These were very useful to all of us because we can see what would look good to add and what would not be so good.
My fourth method was going out in the real world and doing my own primary research. This involved me going out to various places to take pictures of things that are linked to our style or could be developed to look that way. In the end, I ended up taking a lot of pictures of pipes and wires and how they all ran across the walls and ceiling.
Production process
Process of texturing a model (in order):
· Check the unwraps in 3DS MAX
· Save the unwraps and models
· Make the textures in photoshop
· Take the model and texture into 3D Coat and paint the roughness
· Check that the texture is ready in unreal engine and then send the files to James
When I started the production for the level, the first thing that I did was create a 2D layout design that would create a starting point to draw it all out in 3D. From this I could decide where I would want the camera in the room. I would know what to draw in the field of view and not what to draw.
Once I had decided on where I wanted the cameras to be set up and positioned, I would go into photoshop and start to draw it out lightly, so it is rough. To draw it out the right way I used one point perspective drawing for most of the sketches, apart from the living room; that had to be 2-point perspective. I would first use the shift and click tool as there are no rulers in photoshop. To start off, I sketched out the room’s basic shape. After this, I started to add in furniture and different bits on the wall that I thought needed adding in. Next, I went into more detail with the sketches, constantly taking a step back to see if anything could be added to it. Once I was happy with the sketches, I passed them on to Aaron so he could analyse them and build a rough level from the sketches. This sketch took me most of a day to get it done and polished and ready for Aaron.
When Aaron started to analyse the pictures, he went around them in a green and red marker to identify all of the different parts. He started to struggle on designing the assets that I wanted from the picture. I feel like I did not make it clear enough for him. I should have done more angles of the room.
After Aaron had done all of his models, he then started to unwrap his models. He started with the locker room and worked his way round to the bedroom; he did this, because if he did the smallest room first, it would mean that I could start earlier than normal. When I started to look at the unwraps that he did as he was doing them, I realised that I would need to tweak some of them to make them easier for me to texture. Once Aaron had finished the main room textures and below I started to texture them. I waited for Aaron to get a head start with the unwraps because if I was close behind him he would have panicked and rushed the unwraps even more. By the time Aaron was finished with his unwraps for everything, I was on the main room.
The way I went about doing my work was Aaron had to give me his 3DS MAX file that he has done all of his unwraps on, then I went into the file and looked at each of the models unwraps. If I thought they were good enough to texture from, I would save them at a ratio that suits the model. If they were bad and I could not use them, then I would edit them so they could be used. If there was a big model I would use a bigger texture size and the opposite for a small object. When I saved them, I always saved them as a PNG. This was because when I went to edit the picture in photoshop, I could see the lines of the unwraps over my texture, so I could accurately make the texture. This is a very efficient way to do it because then you do not have to mess with any selecting tools to have your textures within the lines.
Once I had done a texture, I would save the photoshop document and save the image as a JPEG. This was so I could go back and edit anything I needed to, and for when I wanted to put the texture into a different software that does not accept photoshop documents.
Once I had the texture saved, I then took it into the unreal editor and applied the texture to its model. If everything checked out well then, I would go into 3D Coat and put the model and its texture in there. I used 3D Coat to paint on the roughness textures for my models, it is very useful for painting textures with because, you can see what the final product will look like in the software so there is no messing about with going back and forth from photoshop to the game engine to get it perfect. Once I start painting, I usually let the default smart texture cover my model so it did not blend into my model; this was because I could cover any areas that had not been painted, It would be easy to spot them. Once I have painted it all on, I would then turn the opacity of the texture down so it would just leave me with the roughness. After that, I would then export the models’ textures in three separate parts into one folder. This would include the diffuse, roughness and metallic textures.
After the files had been saved and ready to import to Unreal engine, I went into unreal engine and imported them in. They each went into their own separate folders for each model to keep things organised. After this, I applied the texture to the model by messing around in the blueprints of the diffuse texture and added the roughness and metal onto it. Then I checked the texture to see if it would pass for the final design. From then, I would pass them on to James so he could put them in engine for the final product.
What production methods would you do differently in a different project?
If I had to change any of my production methods in the future I would make my roughness and metal maps in photoshop. This is not because it would be quicker, it would probably be slower. The reason why I would do it is because it is good practice and you can make things more detailed and life like, instead of something that has not been made for your model. It would give the whole thing a more polished look.
If I were to work on a group project again, at the start, to save a lot of time, I would get everyone in a group. I would ask everyone what they would want from the project and we could all develop a design together, instead of coming up with our own ideas and looking to see which one we all prefer and then developing on that idea. It would be more efficient to work together.
Explain how your skills developed over the FMP
At the beginning of my FMP I went in with a clear mind of what I wanted and how I was going to do it. I had no idea that working in a team was a lot different than working on my own. When we started to do ideas and research for the project, it was very difficult to work around what people wanted at first. As I was getting used to it I realised as much as my opinions matter, the rest of the team’s opinions matter too. I need to be more open-minded in order to be a successful team that function well together. So, I started to listen to people a bit more and design what they wanted from the project, as well as what I wanted.
From the start to the finish of my concept art work, I can tell that I have improved a great deal on painting environments. When I started the concept art colour versions, I did not really know what I was doing and how to go about it so, my first drawing took me a very long time to do; however, once I had come up with a useful and effective strategy to paint the picture, I was going through them very easily. At the end, it was taking me a couple of hours as opposed to about 10 or so hours on my first one. Once I did this, I was accustomed to drawing the materials the right way, so it set me up very well to being able to draw textures like metal or wood or plastic. So, I found my textures a lot easier. I know I have improved with my textures too because I have not only done more textures than in my previous project, but they are of a better quality and I have done double the amount in the same amount of time. In the long run, from this FMP, my art skills have improved, as well as my knowledge in engine and the 3D software that I used. My art skill has got better because I have managed to learn how to paint environments quickly and well.
As well as all of this my teamwork skill has improved. At the start of the project, I was so used to working by my own rules that I did not pay much attention to anyone else’s input on my work, but this project has woken me up to the fact that everyone’s opinion is equal and should be taken a note of. This improves the whole team’s skill working together. It makes us efficient. So now I am a lot more used to working in a team than I was ever before.
My time management for the FMP has been all over the place. On my last FMP, I almost completely ignored my time plan and worked on my own way of going to do tasks. but this year I have been trying to stick to my time plan a lot more. At the beginning of the project I did not stick to it much but as I started to realise that I needed to work as a team more, I tried to get a lot of the work done by the different deadlines that we set. It did not always work, but that was because we had more work to do than we originally thought.
How will you see your skills and interests developing in the future?
In the near and distant future, I can see my artistic skills and knowledge getting better as I go through the different educations. Next year I will be focusing more on my art than any game design element. I will be spending a year, studying foundation art. This will help me to develop my art skills and to better understand everything behind a piece of art. These two years were about gaining the basic knowledge of game design so it would set me up for the future, it would also set me up for what sort of job I would want in the industry. For a career, I believe that I want to be a concept artist, or just an artist in general. As long as I stay on the artist path then I can see my skill developing and I will enjoy the process of creating art even more.
0 notes
Photo
Week 12 recap
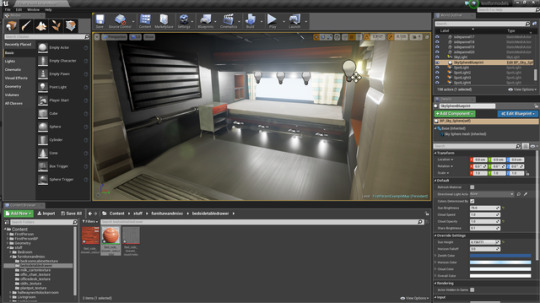
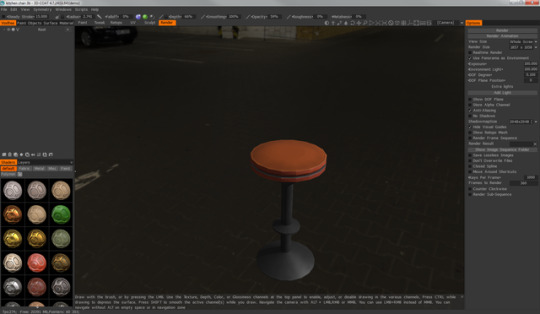
This week I have managed to complete what I said I would do from last week, which was to complete the bedroom textures along with the roughness textures. I have also completed all the furniture. It is all ready to be passed on to my teammate who will piece it all together then do the lighting to make it look even better for the final renders.
I have managed to do all of this in this much time because I did not really have many bedroom textures to finish so it allowed me to go onto the roughness for them in no time. I think I have made an improvement in how fast I can do all of this compared to when I started it all. The quality got the work is also staying at the same level, although that is essential otherwise it will look out of place. The bedroom was quite an easy room to do because I already had all the textures ready to put in, all I would have to do is the highlights and shadows.
After the bedroom, I started the furniture. I found the furniture more testing of my skill and more difficult, I had to make the seams seamless otherwise it would not be good enough. The unwraps were sometimes quite difficult to work around so my textures were not as good. the unwraps were not organised and some parts could have been joined together. I also had a few difficulties deciding on what sort of colour schemes to go with. In the end, I did a lot of brown leather, metals and woods. I put these in the engine along with their roughness textures and they look good enough to be used for the final design.
Next week I will be doing more written work and any improvements on previous work.
0 notes
Photo
Week 11 recap
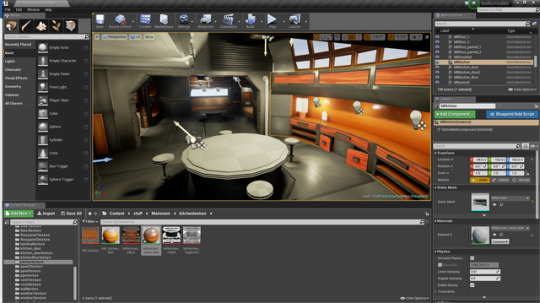
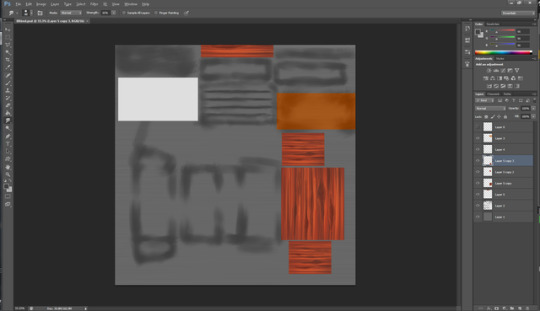
This week, I have been finishing off my roughness textures for my main room, and I have made a start on the bedroom textures. now that the main room textures have been finished, it means that the hardest and most time-consuming part has been done. The main room took a lot more time and effort than I expected. I was hoping to be finishing off the bedroom textures off now and get ready to do the roughness but that hasn’t gone to plan. I should be able to Catch up now. Whilst I was doing the main room I soon realised that I was spending more time in the engine and fiddling with folders than the actual painting. If I could change anything about this for the future, I would see if there is another way to do it all. That makes organising folders and files easier and putting models and textures in the engine.
Since I have finished the main room textures, I have started the bedroom textures. at the moment, I am getting through the bedroom textures very fast, a lot of this is because there are not as many objects that are involved in the bedroom. It is also easier because I already have a pallet of textures.
By the end of next week I hope to have finished the bedroom roughness and textures, plus, I hope to finish the furniture textures.
0 notes
Photo
Week 10 recap
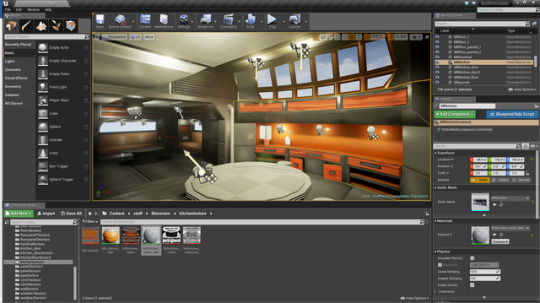
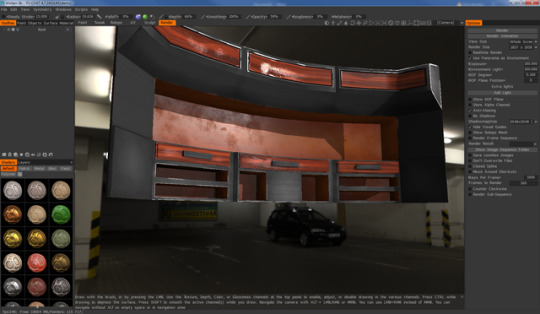
This week I have finished off my textures for the main room, I have also started to do the roughness textures in 3D coat. Going through the textures and painting them, I still had trouble knowing which parts go where so I always had to look on 3DS max to be sure. I eventually got there in the end, as I have been working a lot harder to keep up with my time plan, I am now on track to be able to say that I am following the time plan, I will be keeping to the schedule because it keeps me in order with my work ethic and gets things done. This will need to stay consistent through the rest of the project. As I was finishing my main room textures, I was having doubts about them because I think they are boring and plain textures. I feel like when I do textures in the future, I need to put more effort into them.
The roughness textures for the main room are getting easier each time I do one. I am getting a lot of practice and I am learning a lot from using the software. I am getting faster too. I’m not really having any major issues with the software, but one thing that does time waste a bit is the saving of the files, you need to save each file separately, so this includes the diffuse, roughness and metallic texture. This all takes valuable time up and in the long run, I could have been a lot further ahead than I am now. When I am designing the textures, they come out different in 3D coat then they do in unreal. This is a little bit annoying for me because every time I do a new texture I need to check it in the engine before sending it off to my teammate for the final product. The main problem was things being too shiny so I have fixed that by always using the same technique for all of the roughness textures.
Next week I should be finishing off my roughness textures and be making a start on the bedroom textures.
0 notes
Photo
Week 9 recap
This week I have been making a start on texturing the main room and putting the models in the engine ready for the textures to be applied to see what they look like.
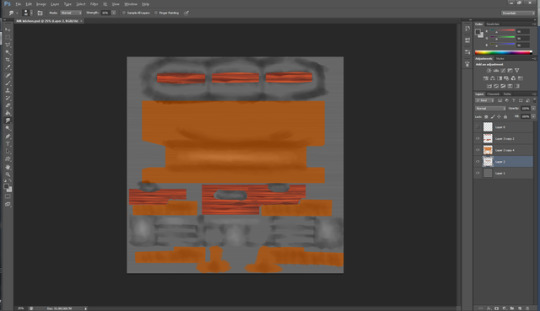
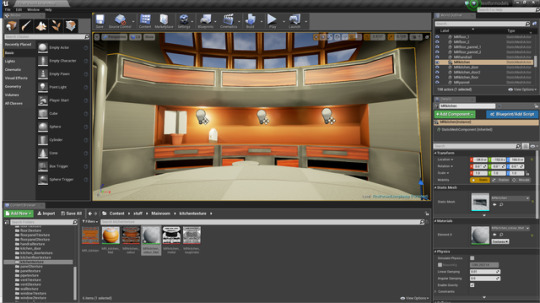
When I first started to add the FBX files into the engine I soon realised that there were well over forty models just for the main room, this was a wake-up call to get my head down and do some work and really catch up. So far, I am keeping to that promise and I have been keeping up the work ethic. However, I feel like I am rushing the work a bit. Currently, I have made about 35 textures, they are at an acceptable quality, I don’t think I will have time to go back and improve on them.
My teammates so far think everything is consistent and at the same quality level. Another thing which has really helped me in the long run is using the same pallet for the textures. this benefits me in two ways if I use it throughout the project. It will keep things looking very consistent and at the same skill level. It will also make my job a lot quicker. This allows me to texture these models.
When I was texturing the models in photoshop, I did come across a minor issue that probably costed me quite a bit of time. This was the unwraps. When my teammate passed me all his unwraps, they were unwrapped to a good standard, but the organisation of them was quite poor, this led me to going on to 3DS MAX and looking which part was which. I did report the issue to him and he has started to improve. If I had to do anything different to get around this issue in the future, I would ask him to organise it in groups and send screenshots to me for me to check.
Next week I will be finishing up on the main room textures and starting to create all the roughness textures for them.
0 notes
Photo
Week 8 recap
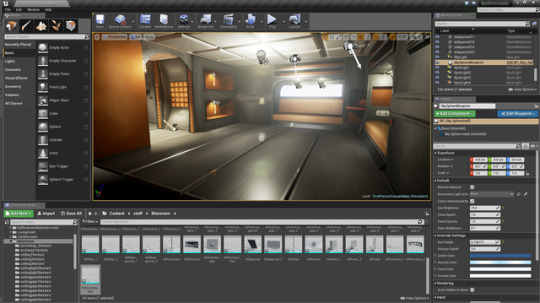
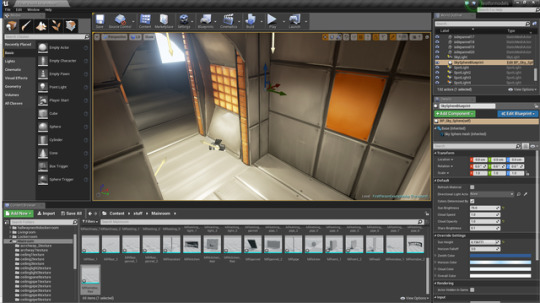
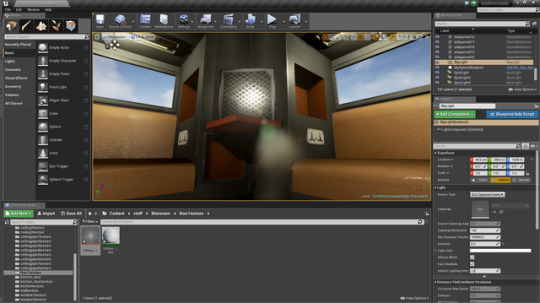
This week I have been finishing up on my living room, hallway and locker room. this is what the final design for all the walls will look like.
Making the locker room took me quite a long time. This was because it was the first group of textures that I was making. I kept coming back to my team so they could suggest improvements to make on the textures. this was mainly to develop what I had already done to make it better and also to make sure everyone was happy with the style of texture that I was going for. After a few changes to the texture, I had complete the look that I was going for. Doing this allowed me to create a pallet of material textures to use for the rest of the objects. This would save me a lot of time and allow me to add better detail to the models instead of rushing things. It also allowed me to keep colours consistent throughout the whole thing. Before I moved on to doing the rest of the rooms, I added roughness, normal and metal maps to the texture. I took these designs back to the team and they were all very happy with it doing the rest of the rooms, I added roughness, normal and metal maps to the texture. I took these designs back to the team and they were all very happy with it
Ever since then this method of working has worked really well for every room. I will definitely be using this method of texturing in the future until I find something better. To do the roughness I have been using a software called 3D coat. This allows me to add a number of material typed to my models to make it realistic. This has worked really well so far. However, one problem that I did come across was that when I was designing a speaker, the grills were not made 3D they were 2D textures. when I put it through 3D coat, it got the metal texture that I wanted, but it did not have the shine on the grill and the dullness on the gaps. I took this into photoshop and fixed the problem, in the end, it looked very good. I think I should do this for more models. I definitely think that this would make my models look more realistic.
Now I will be making a start on the main room and using the same methods that I have already been using.
0 notes
Photo
week 7 update
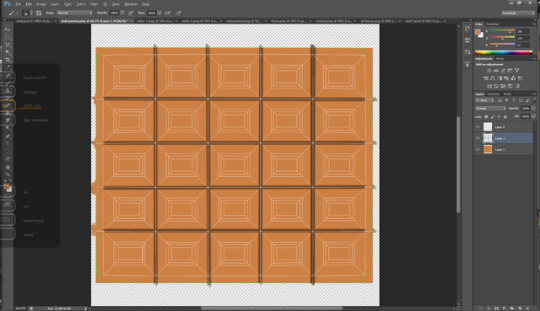
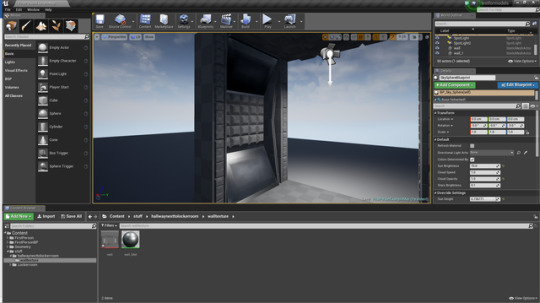
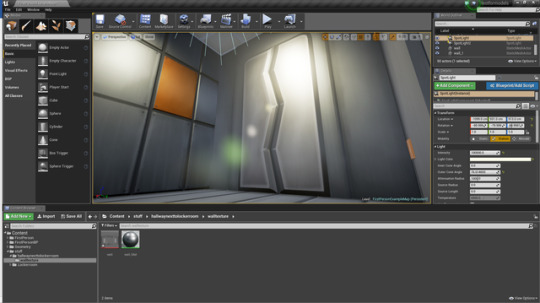
This week I have moved on from all of the concept art and drawing for the moment. I have moved on to my other main job which is texturing. I was supposed to start the texturing a few weeks ago now but I have finally got onto it and I am making good progress. As you can see from the screenshots above, I have finished with the textures for the locker room for now. They are not complete yet. My plan of action is to create all of the textures for the models we have done so far. Then go back and add roughness and all the other effects that make it look a lot more realistic. I have briefly done this with my textures, just to see what they would look like. they should look a lot better than this in the future. I used this method of doing the textures in my last project. That previous project turned out well. I don’t want to take many risks with trying new things and methods as my time is short and I cannot waste time.
I ran into a few problems whilst doing the textures. the first was creating a metal texture. I looked at reference images online to see how other people did metal textures and I found out that I could use the same sort of method that I did with the wood. Once I had created the texture, I added detail and made it look more like metal. I showed the texture in unreal on a model to see what my teammates thought of it. I was given some constructive criticism about it. So I improved on it and then they were happy with it. Now, with a base hand painted metal texture, doing the majority of the level will be a lot easier.
Once I have finished my textures, I will be taking them into 3d coat to make all of the roughness, metallic and normal textures for them.
0 notes
Text
Week 5 Recap
This week I have been focusing on finishing my ideas and research booklet and my proposal, whilst trying to get them up to the top standard.
As I have been saying before, I have been developing my booklet to make it better and more detailed. I have been adding and adding to it. I have been putting in comparisons, analysations, conclusions, references and more detail on previous annotations. I have also been gathering more mood boards and other media to gather ideas and knowledge. I have tried to research into at least 3 different things within each topic. For example, I have researched into 3 movies instead of one which I previously did. After doing this, it allowed me to do a comparison and conclusion to say what my thoughts were on them, how this could go into my work and what I will take away from it. Before trying to do the 3 from each topic and then the comparison at the end, I did not really have any methods or guidelines to follow, but as I asked around I got more and more advice to improve so I took it all and made a guideline to follow. This allows me to easily know what to write about.
I have taken a lot away from finishing my ideas and research booklet. Since my research, I have been constantly developing my ideas and making things better. I am still doing this now even though I have finished my final design and layout. I can image that the finished product will have quite a few changes along the way compared to my early concept art. This will show that we have been doing even more developments.
Since I have been focusing on the writing side of my project to get things out of the way, I have made changes to my proposal, which explains what the project will be about. I used the same method as I did for my ideas booklet, I took it around and asked people what they thought and what they did not really like. from this, I took the feedback away and developed it. I ended up developing my time plan, which really needed improving. Also, I went in more depth with my writing and description, as some of it was basic and too simply put.
Speaking of my time plan, recently, I have not been sticking to it more than I should have. I have spent way too long on my booklet and concept art. However, I have already recognised this problem and now I am on track to getting back up to speed with it. In the near future, I will try harder to stick to the plan and follow it faithfully.
0 notes
Photo

Week 4 Recap
This week I have been focusing on finishing my First coloured concept art and finishing my ideas and research booklet.
This is the finished piece that I have been working on. I do think it went well from what doubts I had at the beginning before I did it. I doubted myself because my experience with art has barely touched environments. So, at the beginning, I thought it would be very challenging. But I was partly wrong. I did not have any trouble drawing it all out in black and white. But when I started to colour in, I came across a few issues. One of the issues was doing the metal textures. I had tried to practice metal before and I did learn a lot before I did this but I found myself focusing too much on what the reflections looked like and this caused a lot of timewasting. However, as I started to get towards the end of the painting I had the odd few areas where I was very quick and I never needed to go over it again and again. Hopefully, this happens more frequently as I do more paintings. Another problem that I had was with the magic wand tool.
When I started to colour everything in, first I blocked out the areas in the colours that I wanted for it. When I went to add detail and shadow in I selected that specific area so I didn’t go outside of the box onto other areas. After I get rid of the outline when I had thought I had finished, it created a very pixelated edge going around it. So, after I had coloured each area in I went around it again on the edge. I had to make it blend in properly too. I would say about halfway through my project, I thought that it would save a lot of hassle if I just used the pen tool. This worked very well. Although it did take a little longer to outline an area. it saved me a lot of valuable time.
In week 4, I am starting to complete my ideas and research. I am trying to put as much information and annotations into my work. I am developing and constantly going over my work to develop it. I am making a lot of good progress with this piece of work. Each time that I think I’ve developed it to the max, I go and ask around from people to critical evaluate my work. They give me a lot of feedback and I take it and develop on that feedback more. I have been doing more movie, game concept, texture and tutorial references. Not to mention making more development sketches to show steady progress to my final design so it gives whoever’s looking at it a clear representation of what ideas I had and how they turned into what they did. I think my booklet will be done by next week if I get a move on. I want to cram as much information as possible into my work to show and prove that I really have researched into a lot of sources and come up with the ideas that I have because of them.
0 notes
Text
Ideas and research booklet update
28/03/2017
Since I have gone back to my teammates and asked for advice on what to improve and develop for my booklet, I have been given a lot of good points that would develop my work and make it better. My main improvements were that I expanded my visual research by doing more concept art analysis, movie inspiration, texture research and texturing techniques. I’m also in the process of comparing and concluding at the end of each research group, for example, I have analysed 3 concept art pieces and at the end of it, I have compared and concluded everything about them. I am also in the process of making some rougher sketches of possible ideas to further my ideas development. This is also handy to develop my perspective drawing skill more. I have been advised to look back at what I’ve done already and make comments on what I’m going to take away from this research to my project. I didn’t think about this before really and it makes perfect sense. So I’m trying to do this with everything that I research.
0 notes
Photo

Week 3 recap
This week I made a start on colouring my concept art from the main sketch that I did like I said I would. I had to decide the colour scheme so everyone would like it. They told me that I was the designer and it should be up to me but I felt like they needed to like it even just a little bit. So I started off by blocking out the picture with the colours that I wanted and where they would go. They both approved the decision. I am happy enough with the colour scheme at the moment. However, I feel like when I do the final thing I could do with making some of the oranges a bit subtler. Otherwise, they could be too overwhelming and just make it look like that is the focus of the room. this is not what I am after. When the player looks around the level, I want them to look at all of the objects in the room and think about what went on before he was looking around, rather than the colours. I am very happy with the colours so far though. But I feel like I need to balance all of the colours out, otherwise, it could look completely wrong. On the detail that I have done so far, some of it looks half done, so when I have done the detail for the whole picture, I will go back over it and change and develop what I’ve already done for the best result.
Later on, in the week, I carried on with my ideas and research booklet. At this stage, I could say that I am finished. I have annotated everything and referenced everything. It is all up to a good standard. But I feel like I need a lot more in the to be satisfied. So, I’m going to look at my previous PowerPoint that I did last year and look at what I did there, see what I did well and not so well and then implement it into my PowerPoint and make it better. I want to do better than I did last year, as nothing is perfect and there is always room for improvements. In addition, I will ask people to look at it and give feedback and suggestions for more content to add into it. Building the ideas and research booklet is very good for the development of the project because it gives it structure on why we did everything that we did and it shows a lot of development.
0 notes
Photo


Before I did all my 3D sketches, I did a lot of layout and outline sketches first. This was to ensure that I did not go into the 3D sketches blind and to make myself know exactly what was going where and how to go about it. Starting at the bottom, my team told me to draw anything that comes to mind for a layout. They wanted quite a few of them that were all different. At first, it seemed like we were getting nowhere because there was always someone that was unhappy. But we decided that the top left design on the bottom picture was the design we all agreed on. From then on, we all put in different ideas on how to tweak it. So, we tweaked it. I drew 5 designs with this one. We were not all happy with it. So, keeping to that sort of design, we tweaked it even more. That led us to the third image up. We were all happy with this one but we decided to develop it more. This was the final time we developed it. I do not regret how much time we spent on this part of the project because it is a big part of it. Plus, we all need to be happy with the design otherwise one or a couple of us wouldn’t be as motivated to do it. Also, it wouldn’t be fair to the person that did not like it.
0 notes
Photo


Week 2
In the past week, I have been discussing possible wall, floor and ceiling designs with my teammates. As we had the outline and basic layout completed, it made designing it in 3D a whole lot easier. At first, I struggled to come up with original and interesting ideas that fitted our style that we are going for. So, I looked at my mood board as well as talking to my teammates about it all. One of them showed me a level that is very similar to our design idea. This helped me a lot. I was really struggling to come up with cool ideas and designs for the walls. Once they showed it to me I made big improvements on my designs. I did not really have any trouble actually sketching it out. This is because I already know the basics of perspective drawing. Although, this is helping me to improve. Next, I plan to make an ideas and research booklet, as well as separating all the walls in each room so they are all in line, drawing the detail on them, and then letting my teammate look at the designs and 3D model them.
0 notes
Text
Week 1
During week one I have been working on the project research, proposal and my essay to start the project off. My project research really helped me to come up with cool ideas to work with for the layout and design of the room. The only trouble was that I could not find many images that were just sci-fi living spaces. But to replace them I just found room designs just to have a look at the way the walls, floor and ceilings were designed. That worked quite well for me for idea generation.
After that, I started on my proposal. This was basically just outlining what our team was doing for the project. I mentioned how I was doing the concept art and the texturing and why I wanted to do concept art. We also designed our time plan so we can keep track of what we are doing and when we are doing it. This will keep our workflow organised. I think we designed well and in a logical order.
In my essay, I just did my proposal but in a lot more detail and I explained the mechanics and everything about the project. I also did some artist research on a site called art station. I researched 2D artists because that’s what I will am mainly focusing on. My essay was a good and detailed way to show off my first ideas for the project and will be useful because I may be sidetracked by my ideas and the essay explaining what I will do will help me stay on track and not go overboard.
0 notes