Olá, sejam bem-vindos a DPS. Criei este tumblr para ajudar vocês com dicas e tutorias sobre edições e como organizar sua page, além de disponibilizar themes (em psd) e materiais a maioria feitos por mim. Sejam bem vindos/Be Welcome.
Don't wanna be here? Send us removal request.
Statistics
We looked inside some of the posts by shiningbrightps and here's what we found interesting.
Average Info
Notes Per Post
190K
Likes Per Post
108K
Reblog Per Post
81K
Reply Per Post
722
Time Between Posts
4 months ago
Number of Posts By Type
Text
6
Photo
10
Note
1
Last Seen Tumblr Blogs


Fun Fact
Tumblr was named as a finalist in Lead411’s New York City Hot 125 in Aug 2010.


Photo


Fansite 004 by ShuDesigns
[ STATIC PREVIEWS ]
Home Page Preview | Permalink Page Preview
You can use the customize button on bottom left to preview different options!
[ DOWNLOAD ]
Download 1 | Download 2
Please check the documentation of how to customize this theme.
[ FEATURES ]
Fixed navbar
Custom navbar title
Custom navbar links (maximum 5)
Search bar
Full width banner
Slideshow (shows on home page only) / page banner
Slideshow with maximum 3 slides
Custom slideshow text
Sticky sidebar
Sidebar position: left / right
Sidebar width: 380px / 405px / 430px
Fixed to the side on scrolling
Mutiple custom sections (intro, links, events, projects, affiliates)
Blog posts
Post width: 540px / 500px / 400px
Unnested caption
Like / reblog buttons
Others
Scrolling animation (optional)
Footer with disclaimer and site info
Scroll to top button
[ TERMS OF USE ]
Please like or reblog if using.
Do not use as a base.
Do not republish / claim as your own.
DO NOT REMOVE MY CREDIT.
[ IMPORTANT NOTES ]
Optimistic for Google Chrome.
I do not help customizing / personalizing this theme.
Please do check the docs before asking.
You can edit the theme all you want but please DO NOT remove my credit or even republish the theme.
[ CREDITS ]
Feather Icons by Cole Bemis
Animate.css by Daniel Eden
imgLiquid by karacas
Parallax.js by PixelCog Inc.
Slick by Ken Wheeler
Sticky Sidebar by Ahmed Bouhuolia
Extended photoset by PixelUnion, modified by bychloethemes
Video width fix by shythemes
[ CHECK ALSO ]
Need help? | Donate | Other themes
If you have any problem please message me.
948 notes
·
View notes
Photo

VENUS: FANSITE THEME BY ETHEREALTHEMES
Preview: here \ Code: here
This fansite theme is highly customizable. In line with my other themes, probably too many options. This theme is adapted from a requested custom theme that’s no longer being used.
Images; 60X60 Avatar, 1300X500 Header, 360X280 Sidebar
Basics; 6+ Navigation Links, 500/540px Posts, Custom like/reblog
On/Off; All sidebar tables, Topbar Avatar, Post Author, Simplified Permalink Pages
Tweaks; Font Size, Opacity Hover Tumblr Controls
Everything you see can be edited including colors, margins, texts and much more. This theme was made with fansite (resource, rp, ect) blogs in mind, but you can remove most of the “fansite” settings and use it for many types of pages.
Basic - Advanced HTML to edit depending on what you’re editing. Please reblog or like if using. And let me know if you come across any issues.
392 notes
·
View notes
Photo

Hello, here is my photoshop cc 2017! It is already cracked, extended version, please like or reblog if you download. Thank you!
How to install? After you unzip the file, look for the file named Photoshop that have the ps icon, then right-click Run as Administrator.
Contains timeline? Yes.
What is an extended version? The extended version contains all the photoshop tools, and may be a little heavier than normal.
Download (mf)
12K notes
·
View notes
Photo


Set de Actions de Nitidez-Imitadoras de Topaz. Model: Chloe Bennet. 06 actions.atn Filtros Usados: Todos padrões do PS.(Gausian,motion,box,stylize,etc.) Download:http://www.mediafire.com/file/7w6tsi9447hglgn/Nitidez-Filters.atn/file
1 note
·
View note
Photo


☑Psd WonderGaldot 41
☑(click at the number to download) ☑ Se usar ou gostar de like/reblog.
☑Psd amadeirado,com ênfase no saturação,contraste e brilho para facilitar a iluminação e melhorar a qualidade de imagens mais obscuras com cores fortes.
- Tips4u Scarlett.
eu testei em outras fotos com cenários diferentes e saiu igualmente bem então se esse efeito ficar ruim em fotos com tons diferentes das cores dos filtros usados no exemplo por favor tente escolher outra imagem. , qualquer problema ou erro avise na ask.
8 notes
·
View notes
Photo


☑Psd RedGaldot 40
☑(click at the number to download) ☑ Se usar ou gostar de like/reblog.
☑Psd avermelhado,com ênfase no saturação,e em tons pretos,laranjas e brilho intensificado nos brancos usados, na imagem.
- Tips4u Scarlett.
eu testei em outras fotos com cenários diferentes e saiu igualmente bem então se esse efeito ficar ruim em fotos com tons diferentes das cores dos filtros usados no exemplo por favor tente escolher outra imagem. , qualquer problema ou erro avise na ask.
5 notes
·
View notes
Photo
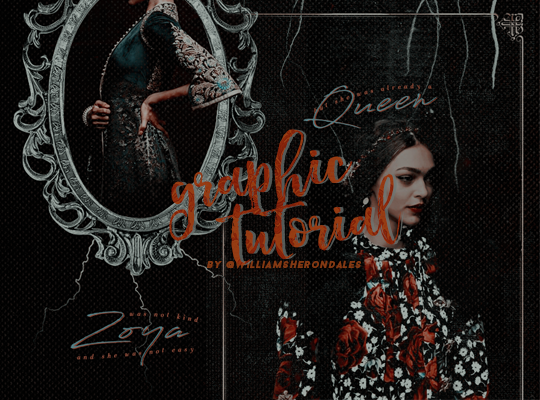
so i got an ask if i could do a tutorial on how i made this zoya edit, and this is my attempt at that. to follow the tutorial you’ll have to have photoshop installed (i use photoshop CS6) and have some basic editing knowledge.
the first thing i do when i’m editing is finding pictures and i often spend hours searching on pinterest, and more often than not i have to go back searching for different pictures after i’ve started editing bc the original pictures just didn’t work out. i usually never end up with the result i imagined when starting the edit akndkasn, but that’s how editing is i guess
first: here are the pictures i ended up using: (x) and (x). These are the textures i’ve used (x) and here are the credits for them (x) (x). Here is a lightning pic it’s not the same as i used but close enough
i’ve also used a few psds, here is one of them (x), the other i unfortunately can’t find the link to, im so sorry! these may do the trick tho or come close enough: (x) (x) (x)! but in this tutorial it isn’t really the psds that matter anyway.
now to the editing!
1. create a new file, in this one i used 540x650 px as dimensions.
2. fill in the whole layer with the color black (#000000)
3. open the first texture (the one with a crown on) and adjust the placement so that the crown isn’t in the picture. set the layer to screen

4. i used a gradient map next, but i have no idea how to share that with you so if you go to adjustments and create a “solid fill”, with the color #20284d and set the layer to “color” and the opacity to 48% it should be basically the same

5. next i want to put in the first picture, set the layer to lighten, resize and place it like below:

6. next i take in the two psds, and i place photoshowski #2 on top of the other psd.
7. put in the frame texture, resize if necessary and place it like below. make sure the layer is below the psds!

i want the arm/sleeve to be in front of the frame, so i create a layer mask. if you don’t know how layer masks works read this. i use the color black and choose a small enough brush size and draw over the arm where the frame is. important: make sure the layer mask is the chosen layer!

8. i want to create i layer mask on the picture with the person in too, to make the transition of the dress and the border of the layer a little smoother. this time a choose a bigger brush

9. i wanted to add some lightning too since that is something i associate with zoya’s character. find the lightening pic and resize and put the layer to lighten. make sure the layer is below the frame layer. duplicate the lightening layer two times and rotate and place them like shown below:

10. now all that’s left is text! some think this is the fun part, others think this is the hard part adnsaddka, but usually you have an inkling on how you want the text to be. i usually find the quote even before i start the edit, since the quote is the thing that often inspire me the most!
in the end i decide to place the text below the frame, with these settings and font, with the color #527c82: (i almost always have the text layers above the psds, i find that psds often make the quality of the text worse)

i duplicate the text layer and place it below the other text layer. i move it 4px to the right and 4px down. i set the color to #874432:

11. i create a new text layer and use the settings like below:


and do the same for the next text layer, with these settings:

pHEW, now the first picture is done!! feels pretty good right?? but we’re only halfway there rip, still a picture left to go:
12. repeat step 1 and 2.
13. open the second picture.
14. open the third texture, the one with the name starting with “planet-…”, and place it like shown below, and set the layer to “lighten” and the opacity to 70%.

15. take in the last texture with the “golden” border. set the layer to “lighten”. Create a layer mask and erase the middle part, so that only the border is left:

16. take in the same two psds as in the first edit
17. i personally think the psds make her a little too pale, so i put in a solid color layer with the color #754c24 and only make the layer visible where her face and skin is, using the layer mask. i set the layer to “linear burn” and the opacity to 40%:

18. i then take in the first texture we used in this tutorial and set the settings like in the first edit.
19. Only the text left now!! We’re so closeeeee
repeat step 11, but now woth the text “Queen”, and place it like below:

20. then it’s just the last text layer, i use these settings:

bim badabom we’re done!! i hope this was somewhat helpful, and that you all learned something reading all of this nadkjsdnkajs
important: i did not make this tutorial so that you would copy my edit, but rather so you could learn something from it and make your own, original edit. If you use this edit as a ‘base’ pls link either this tutorial or my original edit as ‘insp’ on your post, thank you :’)
292 notes
·
View notes
Note
I see, the topaz search only shows me options to buy topaz. Your 16 like me so i doubt you paid 200bucks for it
i downloaded the trial from the official topaz website and then got a key by simply searching “topaz clean key”. otherwise just search “topaz clean free download” lmao
edit: p sure this is where i got the key. thanks @remiiry !
46 notes
·
View notes
Photo


MotionPictureSource’s Event: Christmas Countdown: 24 Days Until Christmas Whenever I get gloomy with the state of the world, I think about the arrivals gate at Heathrow Airport. General opinion’s starting to make out that we live in a world of hatred and greed, but I don’t see that. It seems to me that love is everywhere. Often, it’s not particularly dignified or newsworthy, but it’s always there - fathers and sons, mothers and daughters, husbands and wives, boyfriends, girlfriends, old friends. When the planes hit the Twin Towers, as far as I know, none of the phone calls from the people on board were messages of hate or revenge - they were all messages of love. If you look for it, I’ve got a sneaky feeling you’ll find that love actually is all around. Love Actually (2003)
853 notes
·
View notes


Photo


Christmas fonts Please, like or reblog if you download it
Boulevard saint denis
The perfect christmas
Merry Christmas
Warm snow
2K notes
·
View notes
Text
coloring tutorial #1 by alyciadebnamcarey
for anon, who wanted a tutorial for this gifset. i’m very bad at explaining things. but let’s do this. i’m using photoshop cs5 for this.

Keep reading
187 notes
·
View notes
Text
Reblog if
You are still going to be here after the change. If your characters and relationships you’ve made on this shit storm of a site, is too important to abandon.
33K notes
·
View notes
Text
Backing up your Tumblr blog to WordPress
In this tutorial we’ll teach you how to make a copy of your Tumblr blog onto WordPress.com to act as a backup.
The first two steps don’t need to be followed if you already use WordPress.com.
1. Sign up for a WordPress.com account
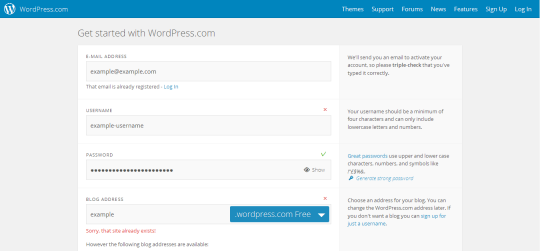
You need a WordPress.com blog, simply follow the steps to select your username and confirm your account via email.
2. Open WordPress Admin
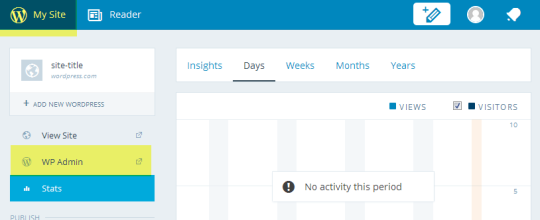
Click on My Site
Select the WP Admin you wish to import into
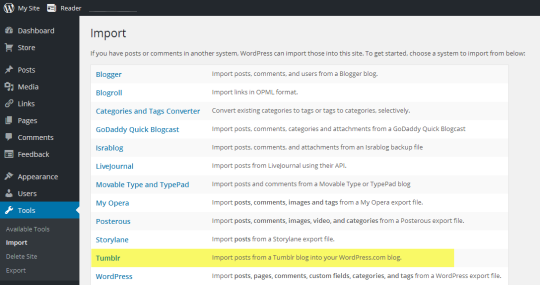
3. Visit the import tools page

In the sidebar menu select ‘tools’ and then ‘import’.
4. Select import from Tumblr
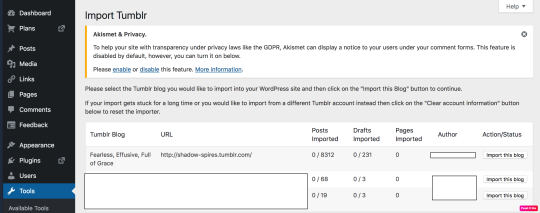
5. Allow Tumblr access

Click the ‘Connect to Tumblr to begin’ button. You may need to log into Tumblr if you haven’t already. Be sure to allow access to WordPress.com
6. Start the import!

Once authenticated you can select your Tumblr blog from the list of your blogs and click on ‘Import this blog’.
And you’re done, WordPress.com takes care of the rest and will create a copy of your posts onto your WordPress.com blog.
18K notes
·
View notes
Text
Save The Blogs!
Okay, folks. So. Tumblr’s jumped the shark in a big way, and I’m not even just talking about indiscriminately blocking all “adult” content on a platform that IS, in fact, primarily 18+.
Many blogs, like the wonderful @blackkatmagic , that are not especially NSFW have vanished.
(And I for one LIKE being able to go to curated porn blogs run by actual people and have a chance of finding stuff to my taste, it was one of the things that kept me on this hellsite, but that’s another issue entirely.)
I know lots of people are talking about migrating, but none of us are sure to where yet. Pillowfort seems to be an option, some people are talking about Twitter. But for now, it’s a mess, and even if we knew where we were going, it’s often a huge process, and a lot of us have stuff on tumblr that ONLY exists there. One possible quick solution to save your blogs, both NSFW and personal, is to import it to WordPress. I found this solution through from frantic googling on how to save an entire blog, text posts an all. There are several apps for downloading all the pictures from a tumblr, (Plently for Windows, but only a few paid ones for mac, of which Tumbelog Picture Downloader is working for me so far) but this is the only solution I’ve seen so far that allows you to save EVERYTHING. I downloaded my NSFW blog in like 10 min. My regular blog, which is significantly larger, is in the process of importing, but I don’t anticipate any problems. I will, of course, update you if I have any.
This tutorial I found worked really easily. http://quickguide (.) tumblr (.) com/post/39780378703/backing-up-your-tumblr-blog-to-wordpress
I put parenthesis around the .’s like we’re back in FF-Hell, just in case tumblr’s new thing about outgoing links kicks in. You know what to do. To break it down, just in case:
Sign up for a WordPress.com account at wordpress (.) com/start You’ll have to create an account, with your email, a username, and a password. They should send you a confirmation email immediately, check it, activate it, and you’re good to go. On the site, it will ask you for a site name. That page asks you a bunch of other information too, but you only have to fill out the site name.

Then you have to give your site a URL. If you’re lucky, your tumblr URL is still available, if not you’ll have to come up with another one, sorry.

It will tell you if that option is still available for free.
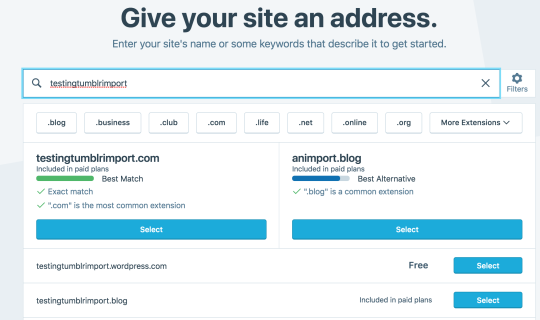
Then it will ask you to pick a plan. Free is really good enough, I swear.

Now you’re set up! You can import your tumblr! The only differences from the linked tutorial are that the Import button is now on the first level menu, not in tools.

Hit Import, then you have to follow the link for “other importers” at the bottom, to find the option for Tumblr.


Then you’ll have to sign in with tumblr, using your normal tumblr credentials. You’ll be redirected there automatically. You’ll have to allow Wordpress permissions on your blog.

Then your blogs, including all your sideblogs, will show up in wordpress.
Hit import, wait a WHILE depending on the size of your blog, and you’re done!
ALSO!!
I made my NSFW blog private for now, since I don’t know WP’s policy on NSFW.
This means that to access it, someone has to have an account and request access. But hey, part of our problem on this hellsite has been people going places they aren’t wanted, so I don’t personally see this as a bad thing. They can send a request from the landing site on your blog, you get an email, click a link in the email, and PRESTO, they have access. To make it private, go to Settings > Reading > Site Visibility. Go back and check, it took me changing the setting twice for it to actually stick. tl;dr, you can import your entire blog to wordpress in just a few steps. I’m going to tag the hell out of this, in no particular order. PLEASE reblog this and spread the word so people know it’s an option. If you’re having trouble, PM me, and I’m happy to help.
@gallusrostromegalus @kaciart @lena221bee @deadcatwithaflamethrower
@norcumi @deandraws @morn-art, @thebisexualmandalorian @kristsune @marloviandevil @punsbulletsandpointythings @protagonistically @cris-art @elfda @fish-ghost @godtierwonder @heartslogos @haekass @iesika @incogneat-oh @itispossibleihaveissues @jaegervega @jhaernyl @the-last-hair-bender @kleine-aster @latenightcornerstore @lectorel @medievalpoc @mgnemesi @me-ya-ri @myurbandream @peskylilcritter @cywscross ,@cheshiresense @varevare @victoriousscarf @whatsmeantobe @swpromptsandasks @gabriel4sam @stonefreeak @brighteyedbadwolf @pumpkin-lith @puzzleshipper @suzukiblu @myurbandream @lacefedora @jademerien
There are a whole bunch more, but that’s a start. Please reblog the hell out of this, so people are aware of this one simple option.
59K notes
·
View notes