Digital Fabrication for Fashion & Textiles (Re-design)
Don't wanna be here? Send us removal request.
Text
Reflection of paper 197228 Contemporary Design Project A
The purpose of this paper was to :
Learn to design with digital fabrication techniques for fashion and textiles.Be introduced to a range of technologies and applications used for the design, construction and reverse engineering of garments. Look at the application and integration of pattern and texture to your wearable outcomes. (Massey stream)
I really loved this paper and the amount of textile development we were able to do. This paper has really opened my eyes to reasons and ways I can be more sustainable as a consumer and designer.
By working collaboratively we are able to discuss, learn and teach each other hacks and tips to potentials better our final outcomes quicker than doing all the work by yourself.
As an aspiring Fashion designer I have been influenced by those that surround me and that has helped shape me to the person I am today. This works the same way with creative design as I have learnt from my peers and solved set backs together the process has been faster.
I started with a polyester dress that transformed into a top and developed a toile/sample and then finished off with an Apron filled with motifs of techniques Ive learnt and will continuous add to the apron and I develop my skill set.
As a fourth year student I has seen the amount of waste that is made through the design process and perfecting pieces to create a final. With this in mind I hope to find ways to create less waste and share my work and process publicly to gain feedback from potential customers and understand my market more. Many designers hid their sample process and only show final pieces which is understandable with fast fashion being a big competition but I hope that in the future I can develop a way to create less waste and be more sustainable.
The different machines I worked with throughout the last 3 weeks have helped me understand the possibilities are endless and there is always a faster way to do things you just need to research.
0 notes
Text
Final Outcome

LASER CUTTER
(Samples to final)
For my Final Outcome I wanted to combine all the samples that I had created into my last garment.
Using the laser Cutter for my final week I wanted to showcase the different methods and techniques taught in the 3 weeks of this paper.
by using my samples it meant less waste. Transforming Samples into finals was simple because the only thing that needed to change was the purpose which came down to placement.
For my final garment I created an Apron.

The reason an Apron was the perfect Idea was because it allowed me to create multiple pockets using the laser cutting technique and because the laser cut pockets needed a back material so things could stay in I found this the perfect opportunity to place all my toiles in the background.
the idea of creating 3d pockets really became the design detail of this whole garment.
I think an apron is very useful as a design who needs multiple tools with them at all times. But added samples to this piece I feel it will never really be done as in this apron can continuously be added to and create a more personalised and meaningful design that demonstrated the amount of tests and samples that go into creating amazing finals

This apron has a second function as a “shelf” or pocket wall for organising tools etc.
The waistband has removable clips that can be placed within curtains or hooks to attach to the wall
The material is waterproof which allows a longer durability.
0 notes
Text
Laser Samples

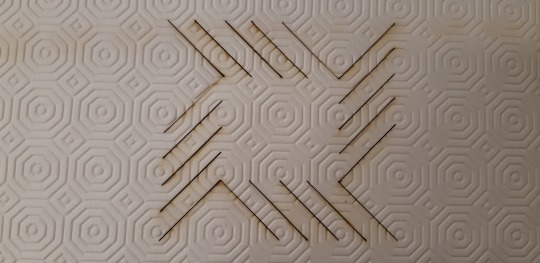
I was given a foam type fabric that was left over from a friends DiY project she did at home.
This was my final and sample fabric.
With the small amount of fabric that I had I wanted my tests to be similar shapes so the aesthetic of my final piece will be the same.
I really liked the way the fabric transformed when lifted so I wanted to continue with that and try create pockets for my final garment.
0 notes
Text
How to use the Laser Cutter

Begin with a design made on illustrator. On the fab lab computer the laser cutter size will automatically show. This allows me understand the scale of my designs.
Once design is ready set it up to print
Illustrator color settings: BLACK – Engraves, follows the line. RED – Cutting mode, cuts the line. BLUE – Engraves / raster WHITE – Does not cut as accurately as the red.
The stroke needs to 0.1
But a quicker option is going to window and select graphic style and the computer will the the right options in the colours you need.
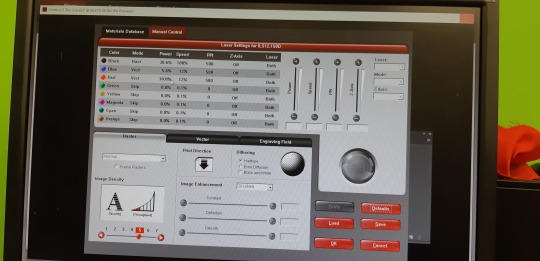
LASER CUTTER STEPS TO PRINT: 1. FOCUS TOOL (on the laser cut machine before printing) before printing prep- make sure to flip the BED EXTRACTION and TOP EXTRACTION switches for safety ON. Shut the laser cutter lid and press print when ready to proceed its laser job.
2. Set up Illustrator FILE
3. PRINT
4. SETUP Select ILS….
5. LOAD
6. C-DRIVE
7. Go to LASER SETTINGS
8. SELECT MATERIAL TYPE (the recommended setting for materials select type).
9. OK
10. PRINT.
It is important to know the width of your material and select the option that is close to your material. YOU must test because it may burn more or less than you want. To change select the colour that you want to adjust and set when finished before pressing apply and ok.
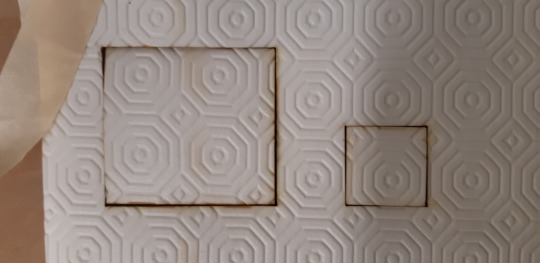
This image shows the big square bing burnt too much and the smaller is it adjusted.
***What I plan to do with the lazer cutter is create no to little waste.***
0 notes
Text
Pattern Opportunities
LASER CUTTER
What can I do what existing garments?
What can I do with fabric and a laser cutter?

0 notes
Text
Laser Cutter Ideas
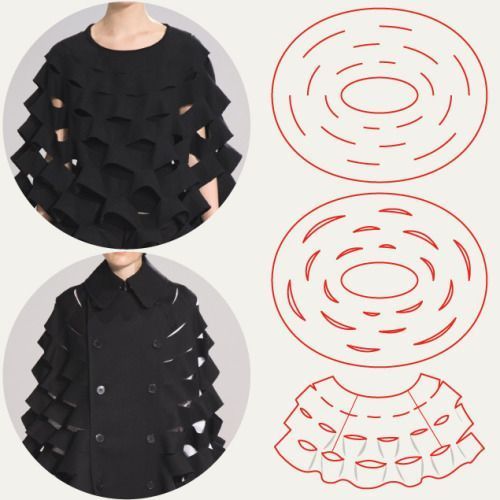
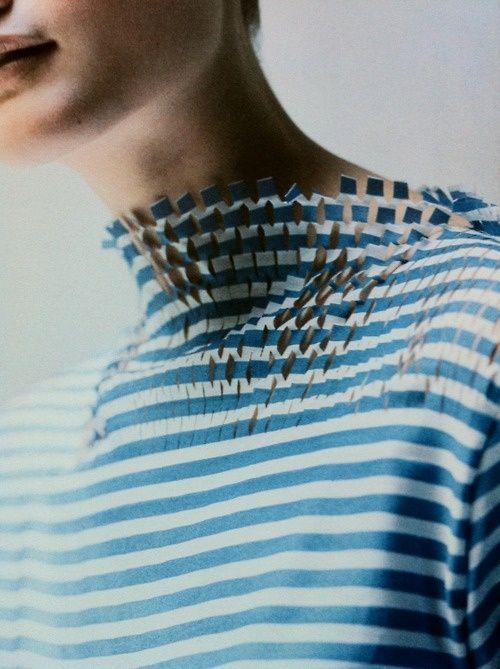
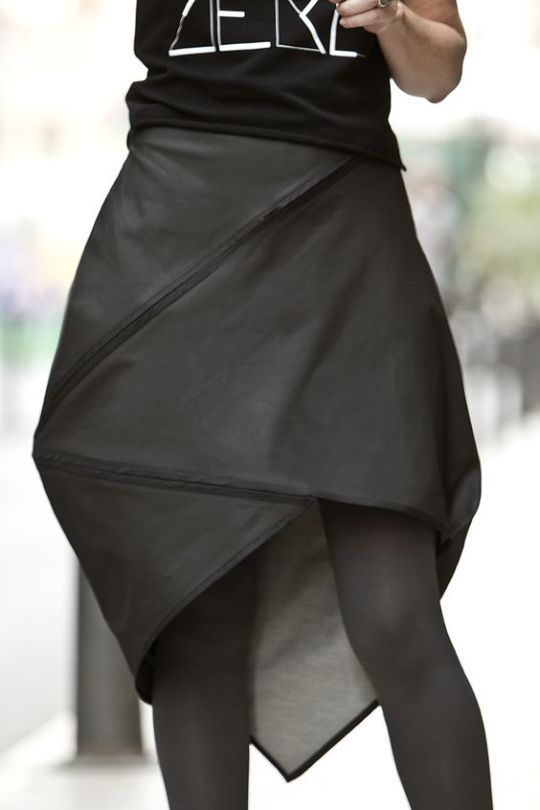
Idea: With the Laser cutter I am interested in creating a garment that can transform by draping onto a body. What has sparked my interest through my last tests is thinking about how I can reduce waste and changing the purpose of materials.
Pinterest search:
https://www.pinterest.nz/pin/315744623856352679/
https://www.pinterest.nz/pin/172051648241653658/
0 notes
Text
Sample or Final?


For this weeks wearable garment I wanted to use a piece that wasn’t necessarily useful. SO when looking in the fabric bins (Massey Block 10 fabric bins) I found multiple toiles/test garments
With the garment toile I found I wanted to use embroidery to make it look less like a sample and more like a finished garment.
NOTE: I did not make this garment I just wanted to redesign and give this garment a new purpose (The applique in this image is were I started). Found in Massey fashion block - Toile
Toiles are practise garments fashion student create before making real/final piece in the right fabric this allows designers to test and understand the shape and movement of the garment.
By using different embroidery techniques I hope to transform this piece.
The applique was done with the domestic machine and the little pleat I added in the leaves was to create a more 3D look.
While creating this garment with no samples I found that to cut out all my individual leaves Its created a lot of waste So I left with garment with only the bottom row done.
I tried to create as little waste as possible and liked the jacket with just the bottom detail and potentially dye the garment because if I did the shoulders like I intended I don’t think I would want to wear it making it useless for me.
Because I was no longer adding more embroidery to this garment I wanted to add embroidery in my last week machine outcome (laser Cutter)
0 notes
Text
Free Hand Embroidery

Using a domestic machine
To create drawings you just need to move the fabric where you want the needle to draw.
Domestic Machines have multiple settings that create different stitch types.
Also I tried applique
I really enjoyed using the free hand technique over the other machine because I tend to change my mind alot and by choosing the direction the needle ends up I will be able to do whatever I like, where as the digital machine will do what is put through and if it is wrong you will not know till its on the fabric. Samples create alot of waste because once a sample goes well that technique is transformed into the final garment and the sample is forgotten.
0 notes
Text
Embroidery Machine

Place fabric and backing in the ring. Backing is to help support the stitches with the multiple ways ..foam for puff embroidery Black backing do not iron Slide hoop into machine
Machine prefers usb instead of hard drive Machine.. Turn on and touch screen
Lower the foot with button then press green light button 3 pauses allows you to change the colour of the thread Press green button to pause if you need to Plus or minus to help go back and forward just in case
My sample did every error the machine could do but helped my understand things to ensure I do before starting.
Making sure the bobbin has enough for the design because it not it will end up the my sample were it is brown. Also it is important to make sure the fabric is secured right in the frame with backing to hold the stitch.
10 stitches are not enough when going back on the design it will create a gap do 20 to be safe.
Cut the extra thread last. And while on the computer group the shapes that you would like in the shape colour if changing them was something you wanted to do.
This method is precise and quick. The get your embroidery right you must understand the placement when creating design on computer.
What can I do with the embroidery machine that is beyond the purpose of decoration?
0 notes
Text
Embroidery Computer Design


Computer Vector - inkscape like illustrator Ink stitch In an . Svg file from illustrator then bring to inkscape
File size Understanding the frame size for the embroidery machine is important because the size of the frame is the size you will make the document.

Straight
Fill no Stroke flat Stroke style dashes
Extension Inkstitch English and pramas
Zigzag
Fill no Stroke flat Stroke style change to mm
Shapes
Fill flat Stroke no Stroke leave
To export Extension English embroider and paste name in Extension ink stitch English
satin tool
convert lines to satin Satin stitch No fill Flat stroke Thick width
Note if you want to use the satin tool you can not have any sharp points
0 notes
Text
Final Outcome (Vinyl Cutter)
TOP AND EARRINGS
I wanted to use to my advantage the sticker side of the vinyl to create shapes for my final product.
The earrings I think turned out great!! But the down side would be the durability of the earrings.
I really liked the buttons on the dress and wanted to make them the main design detail of the garment so I flipped the dress upside down and created a top. The method of creating a garment out of an exsisting garment was to change its use from a formal retro dress I wanted to create a top that has a funky retro style but with a modern twist.
The stickers didnt hold onto the polyester that well which is why I resulted in the earrings as my final piece.
Note: After Final presentations I was told about a vinyl that is attached by heat so that would be more ideal for this piece.
Maybe the earrings might work better in a different material in terms of durability.


0 notes
Text
Vinyl Cutter Final Pattern

I decided to create simple lines and shapes to create different shapes and patterns on fabric. While sampling I found putting fabric through the vinyl cutter was something I did not want to do since the polyester dress was the material I really wanted to work with. And Learning about zero waste garments I wanted to do that with the dress and try use the fabric for one or two wearable garments.
My designs were made on Inkscape and illustrator as svg files. By playing with the dpi allows the size to change and deciding where to start vinyl cutting was crucial.
The reason I decide to create simple shapes like circles and horizontal lines was because I would have alot of freedom to play with the material and try create something unexpected through trials...
*Trials into final*

I wanted to create irregular lines so instead of creating a huge image and having different sized sheets of vinyl I decided to play with the origin of the vinyl cutter and changing where I start the cutting process making the lines reach the different lengths of vinyl cut.
0 notes
Text
Vinyl Cutting Trials
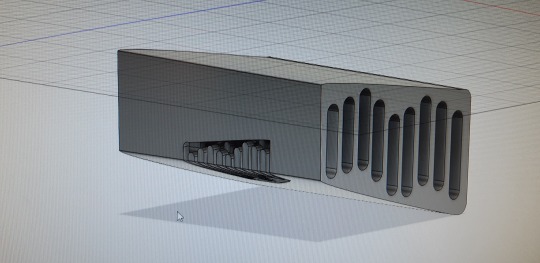
I was very inspired by the 3d printer trial image I did and the shadows and shapes it created so i wanted to do the same with the vinyl cutter.
I also wanted to see what shapes I could creating using vinyl.
Alot of the images shown on pinterest while search digital fabrication shows different structures.
Because the polyester dress fabric wasn’t that great in the vinyl cutter I wanted to either use it as a structure of create something using vinyl to place on a garment made out of the polyester dress fabric.
These samples are my attempts to make vinyl 3d.

0 notes
Text
Zero Waste
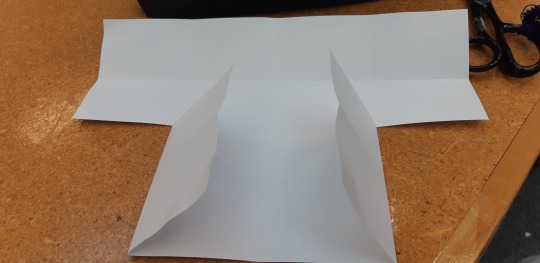
Start with a single sheet of paper. Fold in half long ways then half again in the opposite direction. Unfold and one by one fold each side to the centre lines created by the first two folds. This will create 4x4 grid. Unfold paper and have it landscape. Fold the top to the centre lines (Creats the sleeve and top half of top) and cut along the bottom half up to one square on each side. This will allow you to fold the bottom half sides in to begin your zero waste top from there.
Once you have played around with this basic start you are free to play more with the folds on paper changing length etc.
I love this idea of zero waste garments because not only is it good for the envirnoment in the long run but also brings out our creative minds and see what we can actually think of creating the potential process to make that.
Thought: I think it would be good to use already made garments and create zero waste patterns from there.

0 notes
Text
Intro to 3D Printing

SETTING UP FILE
From flat to 3D
Start with a SVG file
Create a Autodesk account
Open the svg file once account is created and insert image
The create and extrude a 3D shape. This programme allows you to see all angles
For the sharp edges modify and filter the edge to make them more curved
Another option is cutting our of your 3D shape
Go to create and insert image can me the same place where you want it and cut it out.
THE FABLAB WELLINGTON has workshops to learn more/for yourself....


0 notes
Link
0 notes