
Statistics
We looked inside some of the posts by prophbuilds and here's what we found interesting.
Average Info
Notes Per Post
93
Likes Per Post
68
Reblog Per Post
24
Reply Per Post
1
Time Between Posts
1 month
Number of Posts By Type
Text
17
Last Seen Tumblr Blogs


Fun Fact
Tumblr has a 66 index score for customer satisfaction in the US.
Text
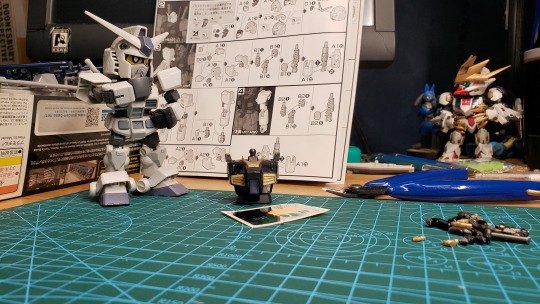
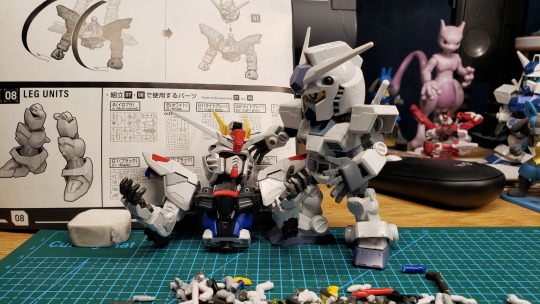
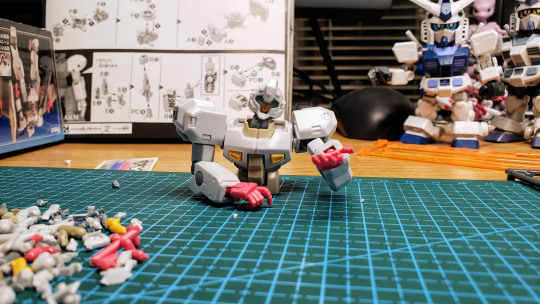
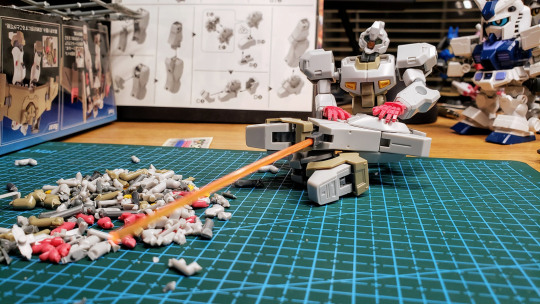
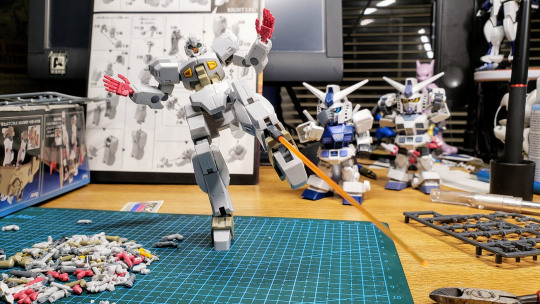
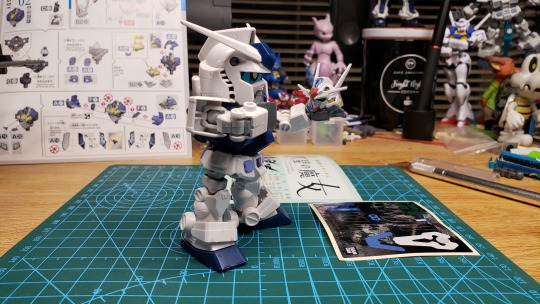
HG RX-178 Gundam Mk-II (21st Century Real Type Vers.) – A Review
As you might guess from the kits here - both reviewed and listed in my Backlog – I have a thing for the later Gundam series and my dips into the Universal Century designs in High Grade and above are rare. Well, this seems to be the year where I beat that wrap as this is the second UC Era kit in as many builds.
Bonus: It’s in my colors so I didn’t have to paint a thing!
Without further ado, here’s my review of the HG RX-178 Gundam Mk-II (21st Century Real Type Vers.).

Like I mentioned earlier, I rarely dip into the UC Era suits. This is partly a design thing, as I like the more modern mobile suits more than most of their earlier counterparts. Another reason is many of the older mobile suits are very brightly colored. The OG Gundam is mostly white with bright reds, blues and a school bus yellow. I cut my modeling teeth with military planes and car models and Batman vehicles so… I kinda’ drift more toward stuff like the Deathscythe or the Over Flag – stuff with a lot of black and golds and accents of white – or the alternate colored stuff like the Gundam G-3 with it’s grays reminiscent of a battleship’s paint.
This version of the Mk.II, a design which I actually like better in the more classic Gundam White than the Titans Blue/Black from the series, hits Just right. It’s gray is a bit bluer than I was expecting but the dark blues, gloss black, and metallics are right up my alley and Very close to what I’d have picked for myself.
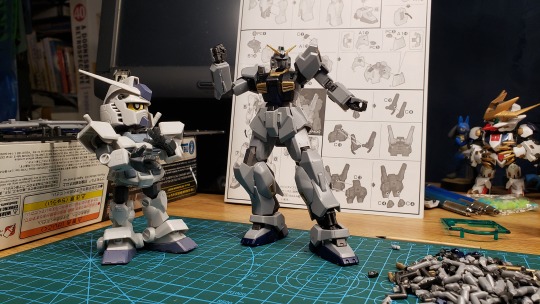
The build is fairly straightforward. It’s a modern print of the Mk.II so it has the range of motion one would expect for a gunpla model made in the last 10 years. It has a nice mix of both polycaps and plastic joints – a topic I have to do a write-up on later – so you get that ease of movement only polycaps can give in some areas and that stiffer plastic on plastic movement in others. This mix means it can absolutely hold a pose without too much sagging or snapping over time.
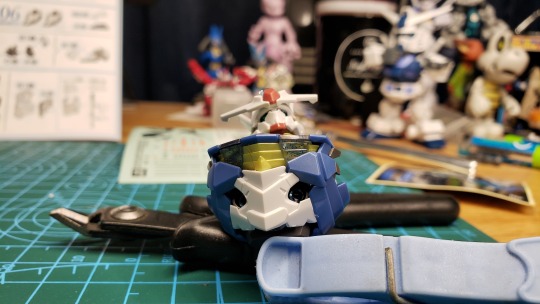
One word of caution: The Eyes are deceiving! It’s a little clear green piece all on its lonesome. The sticker sheet is super light (always a plus in my book) but it comes with an option – the good ol’ massive eye sticker you’d find in most Gundam kits OR! Two shiny chrome stickers to add the plastic behind the eyes. I guess the idea is the clear eyes would act as light tubes and the chrome would bounce it back out the front so they “Glow”.
The reality is the actual eyes are too small to pull it off properly and set back too far to catch enough light to make even the classic shiny eye sticker visible. I even painted black around the molded eyes to try and help the look. Needless to say, I ended up popping the whole head apart to remove the paint and add the classic eye sticker.
It's great for those with LED skills but something to watch out for if you're like me and don't wire their kits up like that (yet).


I enjoyed this build but I do have some reservations at recommending it to folks. At least… I don’t think I can recommend this version of the Mk.II to folks.
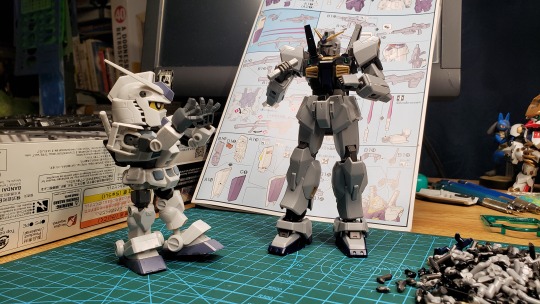
This is a fun kit, no doubt. It’s in a neat “Realistic” color scheme that, for me, made it a must buy. The thing I have to caution folks about are nub marks. The particular formulae of plastics used seem more brittle and prone to marking than the standard Gundam plastics. These are easily handled with a bit of touch up sanding but, unless you have the right tools, you’ll always see some of the nubs.
Same thing goes for the metallics used. They look great to me but it’s still a metallic flake filled plastic and you will see natural swirls that come from the injection molding process. This is a harder fix that would require paint.
In fact, you could fix both problems with paint.
At that point, you could save your money on this special edition P-Bandai kit and repaint a standard Mk.II to match it. To go this route – getting a P-Bandai limited edition kit that tends to sell out quickly Just for the color scheme – is one of those things you Really have to want to do. Even the neat Real Type waterslide decals that this comes with are something I’m sure you could source if you were so inclined.


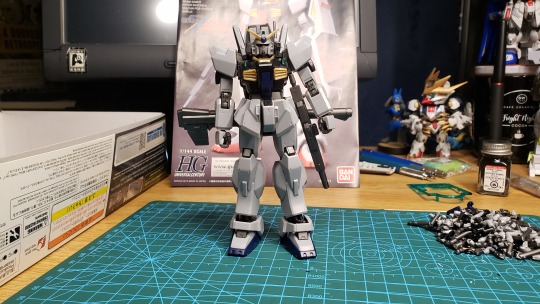
For me, this kit was totally worth the P-Bandai Tax. I’m not sure When I’ll add the extra markings but I’d like to add those on in the future. When I do, you know I'll post a little photo shoot here.
At the moment, I’m just digging how nice this came out and trying not to dwell on the mistake with the eyes again.
#Gunpla#MS Gundam#Universal Century#HG#RX-178#Gundam Mk.II#21st Century Real Type Vers.#Straight Build
6 notes
·
View notes
Text

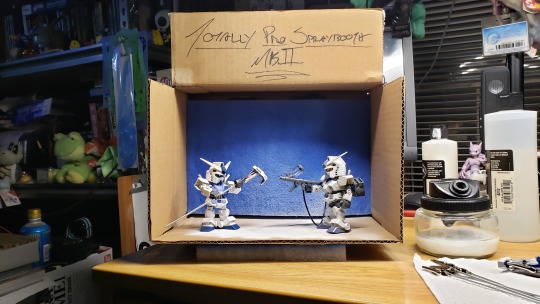
When you overpack for a short trip & have to carry Everything... o.O
#Gunpla #HG #RX178 #RealType #GundamMkII #StraightBuild
1 note
·
View note
Text
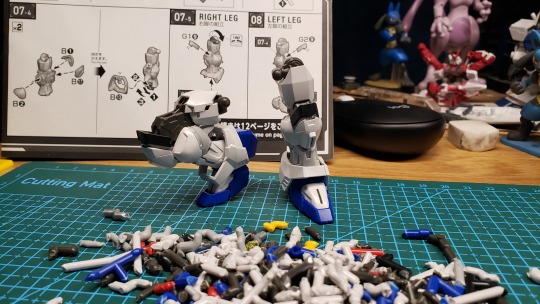
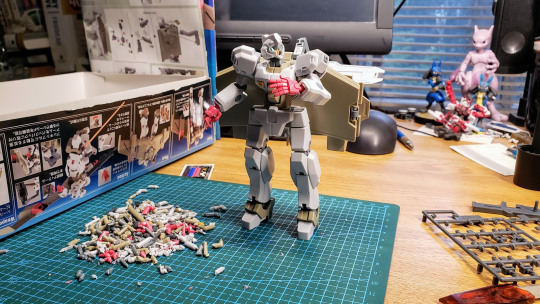
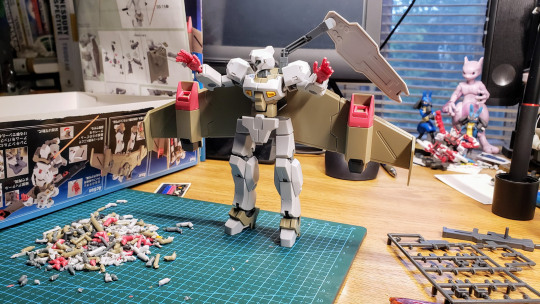
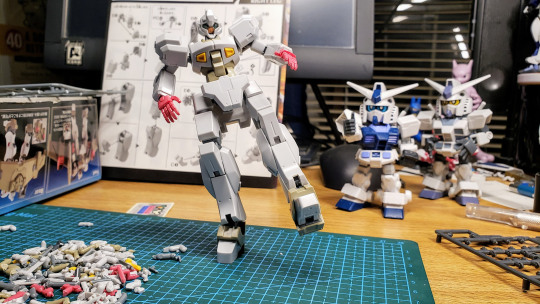
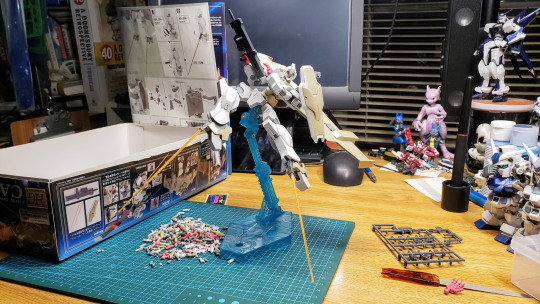
HG RX-78-2 Gundam [Beyond Global] Gundam Base Colors - A Review
It’s rare that I actually go for the OG Gundam kits. It's not that I don't like the classic design; it's more that the more accessible High Grades are rather stiff. This has gotten better over the years and HG kits in general have become easier to pose. This means builders like me – folks who also use his toys as drawing reference – can get both that fun easier build and that extra poseability generally found in the larger Master Grades and the more complicated Real Grades.
With that in mind, let’s jump right into the HG RX-78 Beyond Global. Bandai's answer to how flexible can they make a HG without breaking the bank.

Back when I ordered the White Base Hanger set from P-Bandai, I dropped this little kit into the order along with it. As you might have guessed from the colors on the site, my icon or the M1A Astray I use for the banner here but I have a thing for mobile suits in a blue and white color scheme. When it comes to Bandai, they seem to have similar tastes as they use Really nice blues on their Gundam Base edition kits.
I’ve wanted to check out the Beyond Global kit anyway so getting the Gundam Base version just seemed like the right way to go. = )
The build itself was nice. Nothing too terrible came up save for I apparently put the cuffs on wrong. I clocked them so the design was one off from how it was supposed to be. Not a kit breaking mistake by any means but it does bring up something about this kit that is very different from past OG Gundam I’ve built. This one has an extra ball joint in the forearm to give the wrist the ability to flex more than the standard set of hands that it comes with will allow. It’s not a fantastic amount, either, so things stay remarkably tight and stable.
A similar gimmick is built in the shoulders. Not unlike the HG GBN-Guard Frame from the Build Divers line, it has a pivot to allow the arms to move forward. This combined with the extra motion built to allow the shoulder to rise up lets the kit do things like grab the Beam Sabers on the backpack or cross the arms in front of the body.


Instead of doing a bunch of drawn out paragraphs about the various neat tricks in this, I’m going to do a rundown instead. It’ll be faster, I promise.
The feet have an interesting ankle system. There’s a plastic not-polycap that allows the foot to flex down and remain planted despite not having a proper toe bend.
Ankle armor has a solid connection into the ankle instead of the general ball joint coming off either foot or leg.
The knee armor acts like a kneecap and separates independently from the shin and thigh.
Drop down hips are on a full pivot for extra distance and flex in the legs.
Torso has a significant crunch. Not the greatest by current standards but you can see where those newer kits got it.
Waist armor is fully flexible! No petrified butt flap! = D
Only one sticker for the eyes. Aside from some extra Gundam Base exclusive stickers, this is completely color separated.
As much as I can sing the praises of this kit and how it feels like a turning point for where many current HGs have gone, it’s not without its issues. The plastic on plastic joints can be more than a bit tight at times. When posing the legs, you can really feel it. It’s also fairly loose where it connects to the hips. I’ve actually taken to popping the body from the legs to get things posed up right. On the legs, there is One thing stopping them from being perfect and that’s the front skirt armor. The kit could absolutely do a full crunch if the front skirt armor wasn’t stopping it. Not a terrible thing but one to be aware of. I could force it if I tried but I’m worried about stressing the plastics beyond their natural amount of flex.
This next part is very much a Gundam Base version issue but the nice dark blue is a pain with the stress and nub marks. Same with the brighter white plastics. It comes down to them being a harder material than the usual Gunpla plastic. It’s not quite Figure-rise hard where a side glance will cause some of their plastic parts to shatter but Ho Boy! Was I feeling the stress clipping the thinner parts off.


The question now becomes “Would I recommend this kit?”
The short answer: Yes.
The long answer: If you’re confident enough in your building skills and you want a nice kit that's HG sized but not RG complicated, then I would buy this. If you’re looking for a starter kit, you should hold off on this one for a bit.
The Beyond Global is one of those great ideas that I’d love to see Bandai walk across to the grunt suits and the Zeon kits. You know… at least give us a Char’s Zaku to go up against the classic Gundam. If you’re a fan of Bandai's blues and you either have a chance to hit up a Gundam Base store live or during their annual online sales, scoop this. If you’re an artist who likes to use their desk toys for pose reference, take the plunge and grab one. The stuff I’ve been able to pull off while it stays stable is incredible. It has the balance and the right amount of friction in the many joints to not only stand in goofy poses but also not sag while doing them.
Although I do worry about wearing things out with use as I have a feeling this little kit will get quite the workout. Like the SDCS Gundam I built before it, I think this will end up a part of my ever-growing army of helpers. = )

4 notes
·
View notes
Text

I swear... I think this kit has better flexibility than I do. o.O
#Gunpla #HG #RX78 #Gundam #BeyondGlobal
17 notes
·
View notes
Text
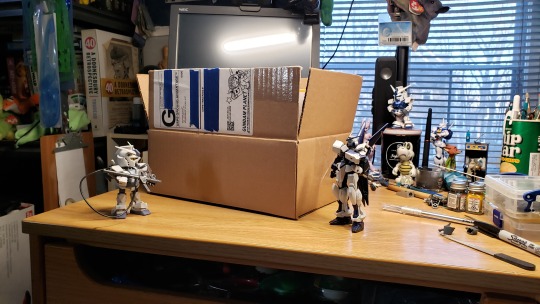
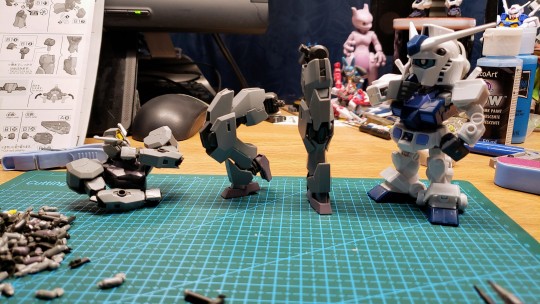
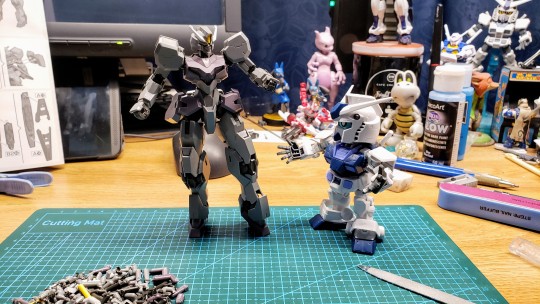
White Base MS Hanger Set – A Review
Last day of 2024 and the last build is… A Stand?
Yes. That’s exactly what it is. In fact, it’s More than just a stand! It's also Less than a stand. It's... complicated.
Join me in my confusion as I snap up the White Base MS Hanger set! A Gundam Base exclusive kit for some unknown reason. O.o

“Hey Proph," I can hear you say, “Why are you reviewing a stand? You have a whole list of stuff on the page you haven’t gotten to yet. Don’t you have better kits to build?”
Well, dear reader… you’re not wrong. I Do have a list of kits – some half finished and others simply not built yet – that I could’ve chosen to make on this last day of the year. Instead, I pulled from the top of the pile and snapped up what I thought was going to be a stand for my HG’s based on the little transport thingies in the White Base’s hanger bay. Before I get into the Why, let’s get into how the build went.
It’s a simple runner’s worth of parts with a single page of instructions. Not really any different from the other stands I’ve made in the past. This one has the neat gimmick of being able to recline the object on it so as it’s leaning back - not unlike the stored position seen in shots of the anime and other artwork from the original Gundam series. Having a bunch of kits, I figured this would be the perfect geeky thing to have on my shelves for my displayed HG kits.
I was Mostly right.
The Hanger Set is as the name suggests: It’s a set of three stands. When I tossed the kit into the cart during the annual P-Bandai sale, I didn’t think much of the “Set" part. I figured it’d be a single stand with some extras. I was pleasantly surprised when I found it was three of them and I didn’t have to pay for the others when I would eventually need them. Where things get sticky is the build of the little beds.
Simply put: These are made for early UC kits. If you try to put anything with a backpack bigger than a Guncannon’s, you’re going to have trouble. And these are not Technically stands. Not in the classic sense, anyhow. They are straight up props that would fit in nicely with the White Base Catapult deck or the other full on Hanger sets that were released. At least… they Would be if they also didn't have a flat chunk of platform that they connect to instead of the larger platforms of those other sets. They have no way of holding the kits placed on them. They just sorta’ lay on them without any extra supports or pegs to place stuff on. Any easy fix but a curious one to have to do, ya’ know?


So what can I say about these? Well… if you’re like me and you want to have something fun or funny to place your kits on, this is an okay buy. Despite my previous paragraphs of mild complaining, I like this little not-quite-a-stand and I think it’ll be the perfect thing to display my simpler HGs on my shelves. If I use it on my desk, it’ll have to have something like double-sided tape on the feet to keep things stable and prevent stuff from falling over but that’s not a terrible issue for me.
The one thing I can say that’s confusing to me is that age-old question, “Why was this a P-Bandai and Gundam Base exclusive?" aside from getting three in the box. Nothing about it really screams “Exclusive!" It’s a stand alone (Ha!) set that wouldn’t really work with other White Base displays. It’s great for rolling your own but the other sets don’t require the extra little plate on the bottom with bits of the hinge built into it.
Kind of a weird way to end the year but Hey! Making that stand leads into what I’m hoping will be the first build of 2025 – the Gundam Base colored HG RX-78-2 Beyond Global kit that I got at the same time as those "Stands”. = )

0 notes
Text
State of the Blog – 12.2024
It’s the end of the year and I’m feeling talkative. So! Let’s look back at the last few kits and whatnot I’ve done here, take a look at what’s next and maybe make some plans on what gets done.
Now… On with the Show!
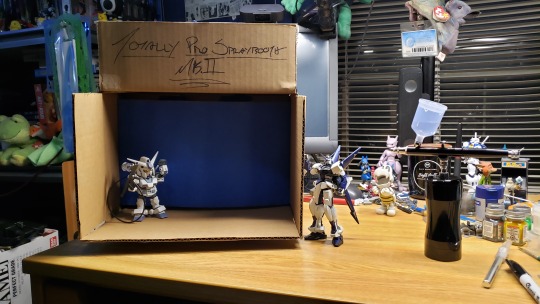
The “first” build of the year was making my ‘Totally Pro Spray Booth Mk2’. A simple cardboard box stuffed with spray booth filters powered by a simple desktop fume extractor. The unit works surprisingly well despite not seeing much action this year. Although my booth was shockingly solid, my airbrush mix was not. In the coming months, I’m going to give it a better test of air sucking power and use my rattle can paints. It’s not how I wanted the setup used (Never been a big fan of spray painting indoors) but it’s the option I have left if I want to get my mods done without waiting ‘till the weather is both warm and not windy. -.-
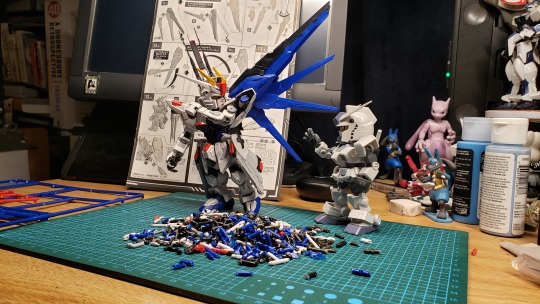
The next build was one of the two HG Catsith kits I got during my test of the Buyee proxy service. As I stated back then, this was my Dream Gets – an Unobtainium kit that rarely ever popped up Stateside for anywhere close to retail price – and I had somehow found a listing for Two of them. The kit is still shockingly tight despite using it to help figure out poses for artwork. I also have not given up on my plans to build a modded version using the other copy I got. I’m still working out the details but I’m leaning toward a cold weather kit styled after some of the concept artwork with a few extras tossed in for good measure. These things 100% look like I could make a bear out of it and I Think that’s what I’m going to do.
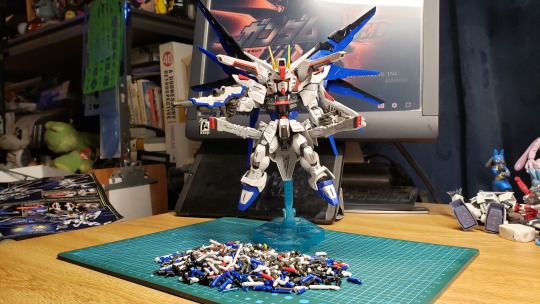
The last build was me Finally finishing off the MGSD Freedom kit. That thing kinda’ killed me, honestly. The results of a hurt shoulder and my back disliking life, I got a very solid little kit. The MGSD Freedom has some seriously tight joints that are… worrisome. Say what you will about polycaps and how sloppy they are, the sheer amount of plastic on plastic friction in this kit makes me think I’m going to have to just put it in a pose and just sorta’ leave it like that. Or use a dab of grease and hope that doesn’t send things All the way in the other direction.
Now, you Might have noticed that – on the Spray Booth – I said it was the “First” build. Well… not exactly. Turns out I did a write-up for the HG Gundvolva that never made it up here. I’ve corrected that mistake and I'm going to see if I can somehow fudge it with the dates here to get it in the right order at some point.
So what’s the future look like for the ol’ Build Blog?
That’s the question, honestly. While cleaning things the past week, I kept on running into the same thing: I have a backlog that Needs to be burnt through yet I just got in a new RX-78, a whole set of stands and the MG Freedom as an Xmas gift. It keeps filling up. I also just went through and consolidated a bunch of my Backlog shelf to see just what and how much I actually have left to build. I have five active mod projects in with all the Straight Builds that I need to paint up and finish out in some way/shape/form.
I’m thinking about making a plan to get at least six Straight Builds done this year. It’s not much by any means but it’s two more kits than I finished off this year. I'm not going to count any Mods I complete as those are very much dependent on me finding the time to put in work beyond clipping the parts and snapping things up.
I also want to review some more extras. I still haven’t done anything with the 30 Minute Missions Hand set I got. Mostly ‘cause I never finished the mods on the Gundvolva – one of the main reasons I got them. I also never did a write-up for the Builder Parts Blade kit. Again, another one I got for the Gundvolva mod with plans to do a review after I got the mod finished. The one I can do immediately is the White Base MS Hanger set. I might even set that as the last “Build" for this year.
In a way, I also want to get that Gundvolva done. It’s not a terribly complicated mod by any means. It needs paint. That’s the whole “Use my rattle cans” comment earlier. I have some parts that need to be primed and get a coat of either black or something dark. I might even try some Gundam markers if I can find a set at a decent price.
So that’s about it on this “State of the Blog” post. Here’s hoping I can get through more of my Backlog without adding Too much to it next year. = )
0 notes
Text

Got some "help" w/ the desktop Xmas tree. o.O
#Gunpla #XmasTree #HappyHolidays
1 note
·
View note
Text
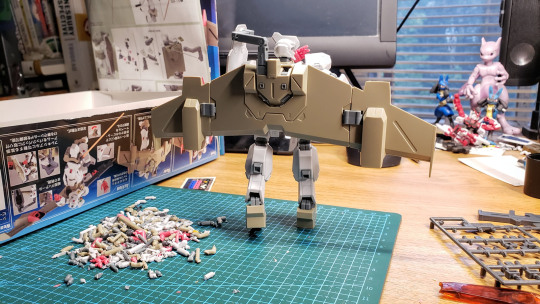
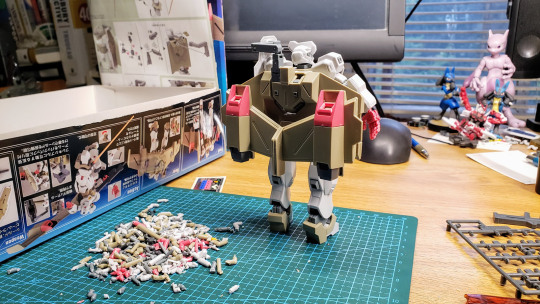
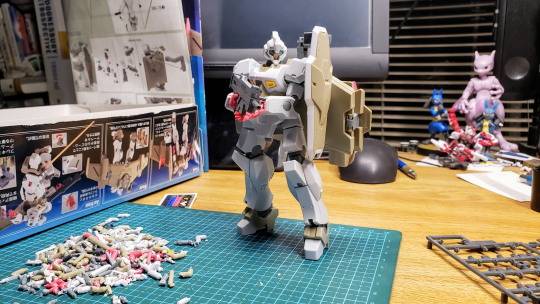
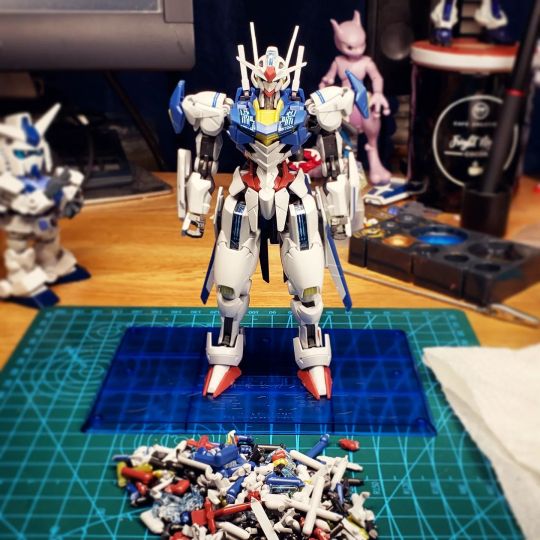
MGSD ZGMF-X10A Freedom Gundam - A Review
This is a kit review that’s been a long time coming. This was Technically started all the way back in the June of 2023. Not unlike the previous Master Grade – the MG Astray Blue Frame D – this was started and stopped and moved all over the place around my room. Its box taking up a fair amount of space where ever it landed. Smash cut to a few nights ago. I’m buried under art supplies and old empty boxes. And while I’m moving things around… I come across this old chestnut.
Without further ado, here’s my review of the MGSD Freedom Gundam.

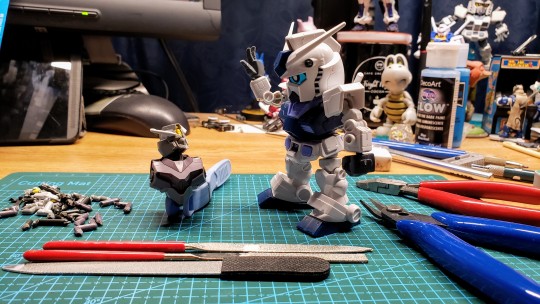
If you follow me elsewhere or have seen my other posts or just look at the kits in the pic at the top of this very post, you might know that I've become a fan of the SD Cross Silhouette line of Gundam kits. When I heard about what’s effectively the Master Grade version of their SD kits, I was confused but happy. I figured the SDCS line was the "Master Grade" version of their SD kits. After seeing the gimmicks and seeing how it's more of a build up than the kits I dig, I knew I had to try for one.
I get it in May of 2023. I polish off my long standing MG Astray build. Instead of doing the Smart thing of doing a smaller and/or less involved kit from my backlog, I crack this one open and start it. I shortly pack it all back up and set it aside because my shoulder was on fire from working on it. The “Fun” of a lifetime of drawing and a good couple of decades of not properly taking care of myself is things like my arm hurting after a night’s worth of work - be it hobby stuff or Art stuff.
Months go by and so do other builds. This one just kept moving from place to place with a promise that I’d get to it "Someday".
That Someday finally came a few night’s ago. I needed the room and it needed to be finished ‘cause, apparently, the Finished Kit is Smaller than The Box it Come In.
Enough yappin! Here’s the Build!

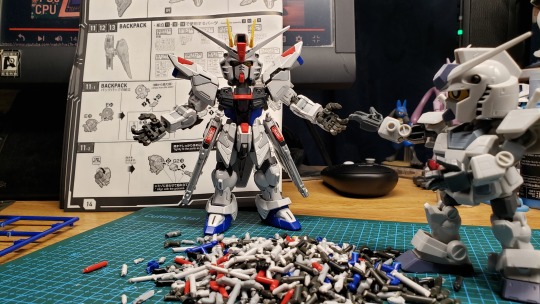
This was a bit of an interesting build. The kit itself snaps up very well but everything was Tight. The lenses for the eyes? Awesome but Tight. The tiny opening cockpit? An incredible detail for such a small and different shaped kit… that’s Tight. The little separate feather-type bits on the backpack? You get the idea.
There were times where I had to bust out my pliers and wrap the jaws in a cloth to help force parts together in that last little millimeter to get them together without putting marks on it. Although this was a pain (and almost wished they’d have chosen to use polycaps on some of the movable parts), this isn’t a bad thing now that it’s built.
The Freedom is a plastic on plastic build. With how tight the joints are, I don’t think I'll have to worry about it coming loose any time soon. If anything, I’ll have to worry about the joints bonding over time and the thing locking up or some parts possibly flexing themselves into breakage. The backpack is nearly as heavy as the Freedom itself making it want to lean back on its wings when not supported by a stand.
That said, this little guy is every bit a Master Grade as its 1/100th scale counterparts. I Love that it had a metric ton of hidden details no one will ever see once it was built. There’s detailing on the inside of the armor pieces, there’s details on parts of the frame that you’d never seen if unless you just keep everything separate. I know folks like to talk up the reflector bits in the wings but the eyes? The detailing on the eyes is next level. You can make out the camera bits in them without the need for lighting (Which I Wish this could’ve had all the same).
The other fantastic thing that this little kit has that’s directly attributable to the Absolute Tightness of the bits is it can take and hold a pose like no one’s business. It takes a minute to find the sweet spot for balancing it but, when you do, it looks so cool doing it. That’s thanks mostly to the scale. With everything either squished or exaggerated in some way, all the details are accentuated. It uses the MG style ball jointed poseable hands. But of course, it does. It is still a Master Grade, after all.
Some of the selling points for MGs are the extra bits and details color separation that you don't see in the standard HGs with an added size. This MGSD is much the same way. There’s a ton of nice color separation and moving gimmicks. It’s also almost as tall as an HG. Kinda’ funny considering it’s Technically part of the Super Deformed lineup. A line famous for its small cute size.

Ultimately, I really enjoyed this kit. Sure it was a bit of a pain at times to build and actively hurt me (Seriously. Kids, take care of your arms and shoulders Before issues arise.) but I can’t complain about the outcome.
I Can complain about the absolute Mountain of [Forbidden Sprinkles] it leaves behind, though. I’m going to be cleaning those little plastic bit out of my gear for weeks.

2 notes
·
View notes
Text

Ha HA! I'm Finally Done! = D
Only took me like...
*Checks Notes*
Over A Year to Finish It! O.O
#Gunpla #MGSD #ZGMFX10A #FreedomGundam #StraightBuild #GunplaBacklog
2 notes
·
View notes
Text
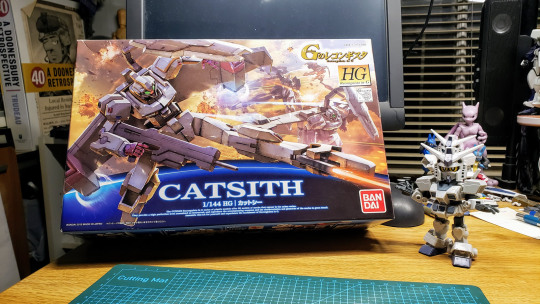
CAMS-02 Catsith – A Review
After my little Test of Buyee and Finally getting my grubby little paws on not one but Two(!) HG Catsith kits - essentially a double dose of personal Unobtainium - you know I had to build one eventually.
Well… this one left me with more than a few questions when I was done.
So sit back, relax and join me as I enjoy my rare recent win. Here’s my review of 2015’s G-Reco grunt suit from the Capitol Army, the HG CAMS-2 Catsith.
So… what can I say about a kit that, at the time of writing/building, is almost a decade old?
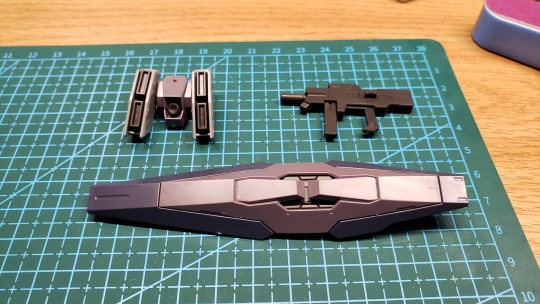
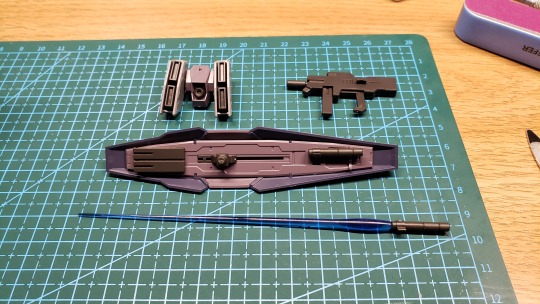
Well, the Catsith has all the earmarks of a classic Grunt Suit. The back has the now fairly standard two-peg system for the High Grade backpacks. It also has a little long square hole above those that looks to be another type of mounting point (not the blocky one of some of the old SEED kits but possibly another locking point?). Aside from the big ‘ol flight pack that it almost always had in the show, it comes with that very basic load out of a shield, a gun and swords - a staple of a number of Gunpla but the hallmark of a basic grunt unit.
Before I get too deep into that rabbit hole, let me talk up the build a bit.

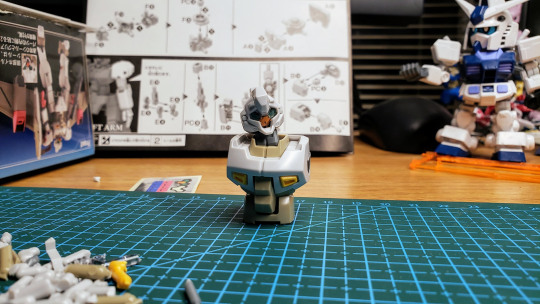

The build went really smoothly. It’s a 2015 kit so it relies on polycaps for stuff that’d be better served with a plastic-on-plastic connection but it’s still an amazing solid kit. It's even disturbingly well balanced. The Catsith even has one of my fave gimmicks – leg based beam sabers! I mean, I love the when a mobile suit has beam weaponry in places that isn’t just the backpack. I Really love when it’s someplace that can be used defensively – a hole in the palms, a spot on the forearms, etc.
The Catsith one-ups other suits by hiding them in a moving flap on the front of the shins. The toes move down, the handle of the saber flips out from behind the moving flap and it lays in a groove along the front of the foot. It’s absolutely a neat gimmick and I love it.
So here’s my final thought on the kit before I get back into the rambling from the beginning…
The Pros:
It’s a simple kit. Not super complicated to stick together. Not a lot of stickers that you couldn't just paint in or ignore.
You have options for the optics. You can place them over the clear lens or use the smaller one on the head directly and have it behind the “glass".
It can balance like nobody’s business. I didn't have to do much to get my goofy pics. It’s a tad back heavy with the full flight pack installed but it's Super stable.
The Cons:
There’s flexibility just left on the table. This tends to be a thing with certain G-Reco kits. The designs are unique and I love them but they’re a pain in plastics. The knees could bend more with a few tweaks and the arms could have a better range in the elbow. Same with the waist.
It’s an HG so it suffers from a lack of hands. I love that it comes with three hands (and hand backs) for stuff but it lacks a basic holding hand. It’s two open hands and a trigger finger. I get that the leg-mounted sabers are Technically a part of the suit but they’re still beam sabers. They’re even used in the hand in the show. A bummer not to have a set as they are molded in a very nice pink color. Hard to just grab a Hand kit and replace them without work.
Overall, this is a fun kit. There’s just one issue that confuses me about it… why is it not one of those kits that gets reprints and alternate versions?
This thing has all he trappings of a GM style suit. It’s simple but not so much that a builder couldn't do something with it. It's got a gimmick, sure, but it’s an easy enough fix if you didn’t want to deal with the flip out sabers. It even has a bunch of artwork for alternate versions and You Know how Bandai likes to take a kit, mold it in a new set of colors and drop it on P-Bandai. The Catsith doesn’t even get that.
The G-Self is the Hero suit of G-Reco. It makes sense that it’s going to hang around a bit despite the series not being that popular. But it’s not the only one to get a different version. The Grimoire – the Zaku to the Catsith’s GM in this universe – got a nice modded version in the third Build series, Gundam Build Divers. It makes no sense.
Instead of going off too much on stuff that no one can use, how about I wrap this up.
Overall, the Catsith is a fun little build. It’s a solid kit that has a good range of motion in the hips and neck. A nice little base kit to mod into the mech of your dreams…
If you can find one.
3 notes
·
View notes
Text
Buying through Buyee
OR!
How I Found a Pair of Unobtainium Kits and used a Proxy Service to Increase My Backlog by Two
First and foremost, this is not sponsored. I don’t even take sponsors for my comic – the thing that is effectively my career – so there’s no way I’d do so for the thing I do as a fun hobby. This is all me and my personal experience using a proxy service to buy stuff from Japan.
Anyhoo! What follows is my experience using the proxy buying service called Buyee to purchase a pair of Catsith kits on the Japanese version of the Mercari website. I went into this knowing that many a Retro Tech and Gunpla YouTuber I’ve watched has used it to get stuff. Figured I’d give it shot.

I have had on my old “Kits to Buy” list the HG Catsith – a cute looking grunt suit from the series Mobile Suit Gundam: Reconguista in G (G-Reco for short) – for a while now. It's been sitting on one of my Amazon Wish Lists for so long it’s kind of become a marker for old stuff that never really comes up for a decent price. I say “Decent" because the lowest price it’s ever popped up at was around like $40? It usually runs around $60 or more if it ever pops up for sale.
This is a kit that's Supposed to be priced between $15 to $24 give or take where it's coming from.
Unlike the Hero suit, the G-Self, the Catsith is stuck in relative obscurity thanks to Bandai never reprinting the thing. It may be a Grunt suit but it’s not like a GM or a Zaku. Most of the other characters ended up with fancier mechs that got their own kits. That and G-Reco isn’t all that popular compared to some other Gundam series so you don’t end up with random reprints for the toy hungry fanbase.
Time passed and I’d recently found that it’s harder to find neat stuff for my various family members and myself for the holidays and whatnot. My getting the younger folks into Anime and video games is proving to be double-edged sword. Now… I've known about proxy services like Buyee for a while now. They tend to be talked up in Retro Tech and Gunpla videos as a place through which the various YouTubers have purchased stuff. Having seen their results so many times, I figured it was time to give it a try.

Setting up an account was easy enough. Nothing really too different from setting one up at any other online shop. The one thing that’s really different is it's more akin to the old Metacrawler search engine. You can select the shop you want to search but I kinda’ just winged it and tried out Mercari. No rhyme or reason to it. Just the one I though might have something neat that wasn’t a straight up auction site.
At first, I just kinda’ popped in “Gundam" and saw what dropped. Then I remembered something important: It's searching Japanese sites. It makes more sense to use the language of the folks who post things there. So I took a leap and looked up the Catsith’s Japanese name and BAM! I got a whole bunch of hits. Not just the usual “This is a Gundam Kit” results that I normally get searching English language sites but actual kits – both prebuilt and unbuilt kits. It was here I found a listing for two unbuilt kits.
Needless to say, I bought it as soon as I could.
Now things get fun.

Whenever I do something like this (buy something through a site I’m personally unsure of), I use my PayPal account. It acts as a buffer between my personal bank account and the site if things get squirrelly and, if it works, acts as a buffer between my personal bank account and the site if I decide to go on a spending spree. The more steps I put between myself and buying things, the better I am at not putting myself into debt.
I say this because I’m kinda’ to blame for the added time on getting these into my grubby little hands. It took a bit to transfer funds into my PayPal account to use on both buying the items and paying for shipping. -.-
The price for the two kit bundle came out to 4300 Yen or $30.50 at the time of purchase. That’s 3800 Yen for the item, 300 Yen to Buyee to buy the item, 500 Yen for their in-house checking and a 300 Yen coupon to save a Little bit of money on the whole dealie. This all gets the package to Buyee’s warehouse. They can hold stuff there free of charge for 30 days. You can also buy more and consolidate it later… but this time I did a single package.
After some doing and some waiting on money transfers on my end, we get to the hardest part of any international buying: Shipping!
Buyee gives a Bunch of options for shipping. Everything from fairly quick choices to ocean shipping that will take months. Needless to say, I took them up on their Buyee Air service that would take around a week to get here. It cost me 5188 Yen or $37.05 for the one package. Again, Proxy Services (or just international shops that let you consolidate items) tend to work best when you buy multiple items. That’s when shipping gets low enough to not be more than the original item.
All in all, I’m in $67.55 for two kits that would’ve run me about $7 less if I could find and buy just the one on a site like Amazon. The time from start to finish was a little under two weeks. I ended up with not one but Two unobtainium kits and a way for me to shop for the Holidays when my nieces and nephews ask for items that just never come to or came stateside. = )
3 notes
·
View notes
Text
Totally Pro DIY: Spray Booth Mk.2
It’s been a joke with me that my gear is “Totally Pro". My dollar store brushes? Totally Pro. My craft store acrylics? Totally Pro. My makeshift SDCS box filled with cardboard scraps I use to hold my parts? Totally Pro.
All of it is just me doing what I can with what I got.
One area where this doesn’t really work well is my spray booth. It's a cardboard box that I used in the summer months to spray parts outside. It was - at best - a glorified windscreen. It is currently holding a bunch of random stuff as it’s too cold to do anything outside what with it being the middle of Winter where I'm at.
This left me with one option…
I needed to make a new Totally Pro Spray Booth.
The idea was simple: I needed an actual spray booth that I could use indoors with my acrylics. It had to have all the parts of a proper desktop booth without being big or expensive. I have been searching for something to fill this spot in my equipment for Years. My Art Desk has little to no room so most commercial booths are out of the question.
Even if it did, I needed something that could be packed up and put away no problem as I have little space to store things. Again, this knocks out most commercial booths out there.
Then there's the price. Small-ish desktop booths cost over $100 for the cheapest entries. You are getting $100+ worth of equipment for some of these but it's still too pricey for a bit of kit I'll use once in a great while.
On the Maker side of things, I’ve seen Plenty of DIY booths made from storage bins and bathroom vent fans and LED strips for lighting. Same with ones built from plastic foamboard. They're too big for my needs or needlessly expensive at some point in the process - usually the fan as it needs to be able to handle possibly flammable vapor.
Again, my biggest worry is Space – both packed and in-use. Those fans eat up the bulk of it. That particular way of building a booth was scrapped, too.
I needed a better solution.
Enter the Solder Fume Fan.
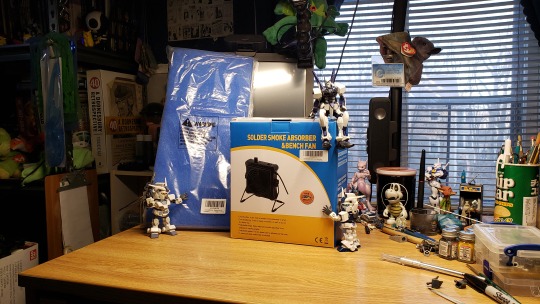
Although rare that I do electronics, I do love watching folks make stuff. I was going through some repair videos while writing one night and I noticed that the person was using a little boxy desktop fan – a 140mm computer fan in a little blue box with a filter - to pull the smoke away from them as they worked. It was a commercial product, too. Unlike a homemade piece, I could actually buy that.
This gave me an idea.
Find a cheap and super basic solder fume fan with a speed control. I toss that into a box big enough to hold a replacement booth filter. It's small enough to fit on the desk and I could use the fan elsewhere if I needed to.
And thus the Totally Pro Spray Booth Mk.2 was born! = D
I had a small 12 inch by 8 inch by 4 inch box from the last batch of parts I’d bought from Gundam Planet. It's shorter than most spray booth filters but a pair of scissors made the filter fit.

The fan unit I bought has a little wire base so I planned that into the design. It keeps the box from sliding around. The unit has bump out on the front and back with one holding the thin charcoal filter. That’s the side that pulls air and the side I had to cut a hole in the box to fit. A little slice and dice later and I can stick the whole box onto the fan with a good mechanical fit. It acts as another air seal, too. The filter just goes right into the box and the thing is ready to rock.
The easiest part was holding the flaps open so I could use the thing. I just unbent some paperclips and slid them in-between the layers of the cardboard to make everything both stay open and easily removable when it’s time to pack it away.
Now… you might wonder if this was a good idea. Well, the suction from the fan is more than enough at 2/3rds speed to draw the paint spray from my little airbrush. The filters catch any particulate that’s at risk of making my Art Desk a pain to clean (I placed a bit of paper behind it to check if it was doing the job I needed it to). The fan is theoretically Electrostatic Discharge (ESD) Safe so that should make it less of a fire risk.
The whole thing cost me like $50. Only extra thing I didn’t need to do was bring a different box to this project. You could literally buy the stuff and just use the box it shipped in.
Overall, I’m happy with this. It works like I need it to. I can now use my airbrush on stuff and in the comfort of my own home, no less!
Totally Pro equipment, indeed. = )
0 notes
Text
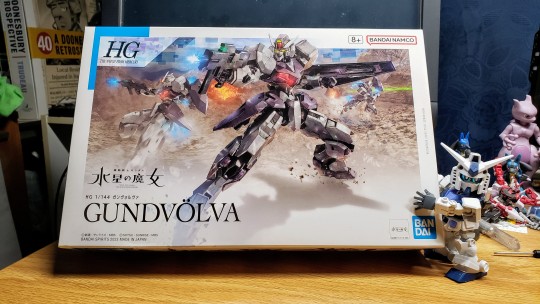
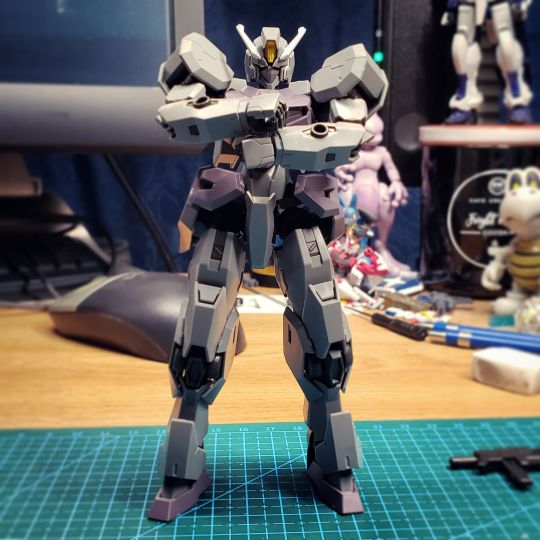
HG EDM-GB Gundvölva – A Review
I’d be lying if I said this wasn’t at some point going to be a “For Me” gift. I picked this up while taking advantage of some year end Holiday sales after seeing reviews from some popular gunpla YouTubers. Normally, I don’t go in for Grunt Suits (or Bits in this case) as they tend to end up being either Really plain with the variations being the bigger draw or the one I want ends up being stuck as a P-Bandai exclusive for some unknown reason.
Then there’s the Gundvölva.
It’s a fairly basic kit with some nifty tricks up its sleeves and a design that hits like an Astray, GM or Zaku II - an excellent Base Kit for mods.
So join me as I snap up (and fix) the HG EDM-GB Gundvölva. = )
So, I scooped this kit in like November (?) of last year. It’s no big secret that I’m a fan of ‘The Witch from Mercury’ series. I dig the mech designs and I’m Slowly making my way through a couple of the kits. Despite digging the Gundvolva’s design, I was hesitant on getting one. I’ve still barely scratched the surface of my backlog and I’d just barely started on the MGSD Freedom kit. I really didn’t need a new one.
After watching a few vids on it, I figured it’d be a fun addition to my desk toys. It was fairly Human shaped and it’s got little to no armor so knocking it down to a “Basic Human Figure” for pose reference is a matter of popping off the big ol’ shoulders. Just that easy. = )
So what’s in the box? Not much, really. The Gundvolva is all of four large runners, a small one Just for the face and a handful of stickers. It really is that plain. In the end, that’s a good thing. This is definitely a beginner friendly kit. It’s also one that’s Full of Possibilities… in that is has a couple of mounting points and a super basic backpack with a modern two peg mount.
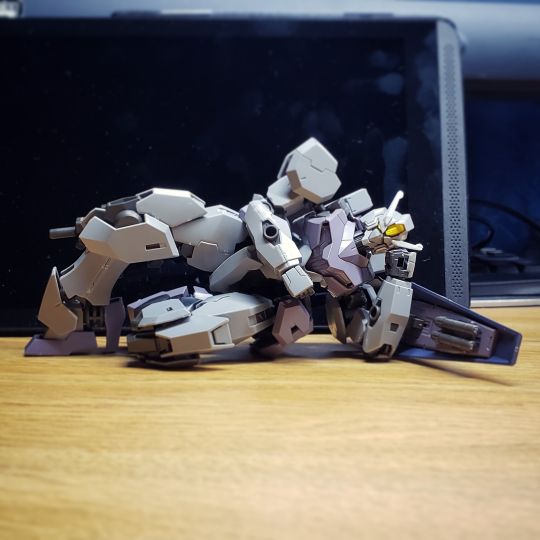
Snapping the kit up was a breeze. Like the other Witch from Mercury kits, it has some good movement. The shoulder mounts are built like some older kits in that they have a pretty great range of motion. You can actually cross the kit’s arms across its chest! Can’t say the same with the elbows, though. They’re not the double bend like on the Astrays – the closest kit I can compare it to shape-wise.


Another area that was good but could be better was the neck. It has great movement with a solid range both front/back/sides and moving the head up and down. It suffers from a familiar issue with the latter in that it really can’t look up all that far. The head clips to the neck with a ball joint but the back on the helmet bumps into the back of the neck. I ended up shaving a bit off of both to get it to be able to see what’s above it.
My fave part of this kit is something that it didn’t need to have. It has moving knee armor. It’s not a very complicated trick, either. The Gundvolva is using the C-Clip design Bandai has been using on their 30 Minute Missions kits. The trick is done by simply connecting the knee pad to thigh armor and making a little sliding rail on the double-jointed knee. This lets it rotate when you bend the legs. The one part that’s kinda’ fun is the load out. It has a little assault rifle dealie with a removable magazine. It also has two extras stashed on the back of the shield. At first glace, this is a weird thing as the two spare mags are connected. Turns out you can split these into singles. Once separated, they fit in the weapon no problem. Seeing as this kit doesn’t have a standard skit with the little split bead that you can clip apart, I guess this it the Gundvolva’s version. = P
Overall, this was a neat little kit. It suffers from the standard lack of hands that most HGs based off of Grunt suits or basic army builder kits suffer from. It’s also an excellent platform for modding. The Permet sections in the head and chest are simple stickers with the details in the plastic. I think the only other stickers are the eyes and the camera in the rifle. It’s very Straight Build friendly.
As for mine… I have other plans. = )

8 notes
·
View notes
Text
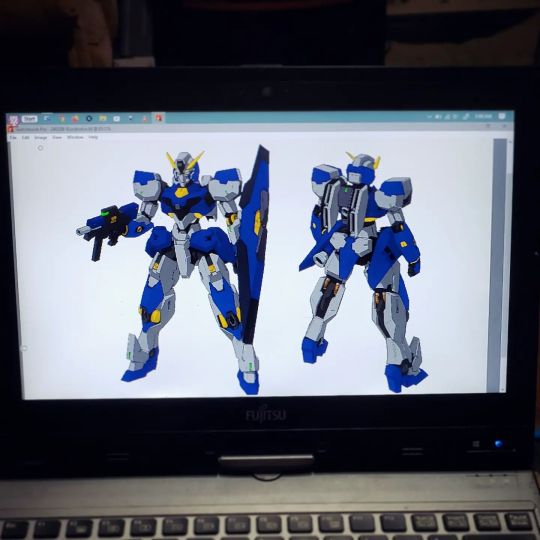
After carefully draining the color from the original promo artwork (again), I took another go at planning the paint job.
This time I remembered to set the original art as the base, the "Painting Model" art to Multiply & lock them so I didn't accidentally work on those layers. I popped my colors in-between them so I could both see the changes I wanted to make alongside the kit's original colors.
I think I like where it's at for now. Next step is to build the thing & see if I'm still down for painting it afterward. = )
#Gunpla #Gundvovla #ColorTest
6 notes
·
View notes
Text
A little something something I decided to pick at after A Lot of work trying to drain all the color from the Gundvovla's official artwork. Something I'll definitely post up later for folks as a coloring book style page.
I know it's probably the Cartoonist in me but doing a color test like this helps me get in the ballpark of where I want to take a paint job & if it's even a good idea before mixing and/or buying paints. = )
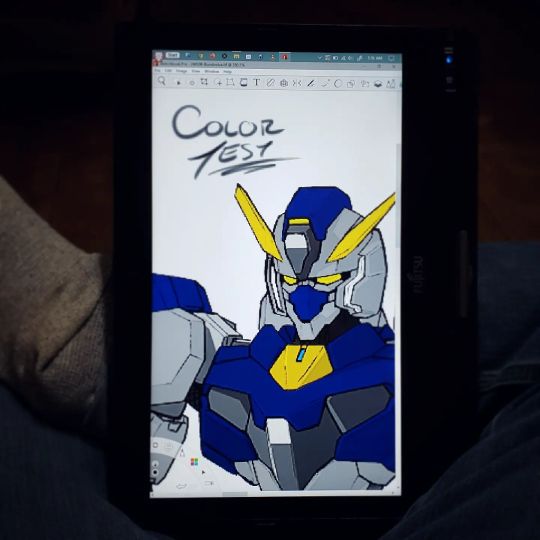
Spent some time tonight planning out how I want to paint my Gundvovla kit. I like the goldenrod (a stand in for metallic gold) but I'm oddly not sold on the blue this time. o.O
#Gunpla #Gundvovla #ColorTest
8 notes
·
View notes
Text
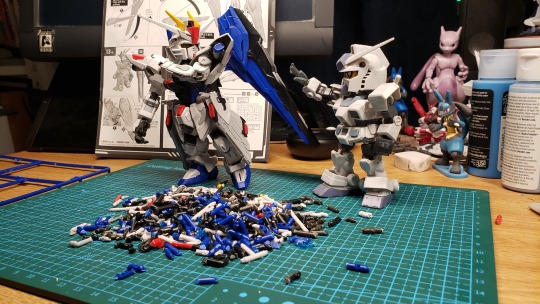
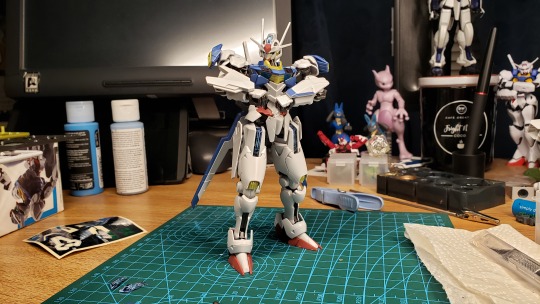
XVX-016 Gundam Aerial [Permet Score Six] – A Review
If you follow my blog, you’d see that I’d recently started in the one MGSD Freedom kit.
You also probably noticed that this Isn’t a review of that kit.
Well… here's the thing. The MGSD is very much an MG kit. I wanted to just do a nice quickie build and there’s nothing better than an HG to scratch that itch without eating up a majority of my time.
So I popped over to my Leaning Tower of Gunpla, snatched the second newest kit off the top and snapped it up. Here's my review of the P-Bandai exclusive HG Gundam Aerial [Permet Score Six].

I’m not going to mince words… the Aerial is just a very solid kit. It snapped up easy, the color separation is excellent and it has only a few flaws in when it comes to the use of C-clip style attachments on the ankles. It's very much a New Kit and it holds up very well.
Comparing my build to reviews of the regular Aerial from others, I can honestly say that this is a kit for folks that want the alternate colors. If you’re the person who like things like the Trans-Am active versions of the Gundam 00 kits, the powered down version of the Gundam SEED kits or the Many many alternate color versions Bandai like to make of other kits… this is for You. If you want an Aerial for your collection... this is a pass.
With that out of the way, it’s on to the rest of the build!

In the box were the expected runners for the Aerial kit. Nothing really new or surprising from what you could find in the basic version. The only extra piece is the Not-A-Base nameplate that was added for display. It’s a Really nice clear blue nameplate with plenty of holes for displaying the shield bits… if you have the extra pieces for that. There’s not much the “Runner" it comes on so you can use that for plastic to make your own. There also isn’t any parts/pieces for a proper base. It is just a nameplate… but I’ll get to all that at the end.
The colors of this kit are neat. The standard Aerial is the classic Gundam color scheme – White, Blue, Red and that odd slightly orange-y Yellow with Dark Grey for the “metal” bits. For the Permet Score Six, Bandai tweaked things a bit but not in an extreme way. The white is a bit greyer. The blue and red parts are a bit more subdued and sneaking toward an almost royal tone. The orange-y yellow is the thing that’s changed the most out of the classic batch. It's now a kinda’ fluorescent yellow-green with a metallic sparkle to it. Same kind of change was made to the dark grey parts. They printed those in the standard metallic Gun Metal Grey that Bandai uses for their “metal” parts.

The big noticeable change from the standard Aerial (and what makes it a Permet Score Six version) is in the clear parts. The Red and Smoked Clear bits are now Blue and Clear with little Blue Sparkly bits respectively.
So how was the build? It was relatively smooth. This was going to be a bog standard straight build but I did come across a small issue. On the Aerial are little bits on the chest that a normally done up in that smoked clear. Since those are now done in the a clear plastic with bits of sparkly blue pieces in it, it goes from being a noticeable part of the chest design to looking like you forgot a piece.
The quick fix I came up with was to use a mix I was going to use on another project of florescent blue and glow-in-the-dark blue acrylic paint. Since these are nearly completely clear parts, I just dropped a little bit of the paint on the back to make it visible without ruining the original sparkly blue effect that Bandai was going for in the plastics.
This brings me to a bit of an odd part when it comes to the big “Special Piece” that is kind of the trademark for the 'Witch from Mercury’ line - the embedded decal.
On the standard Aerial, this is a nice clear with the glowing red Permet effect embedded in the back. This is actually a plus considering the clear plastics on those parts are a smoked color. This lets you see the colors clearer than if you used the reversed metallic stickers on the chest pieces. With this version of the Aerial, the plastics don’t have the extra added smoked color. In fact, it barely has anything beyond a smattering of blue sparkles. Using the special reversed metallic stickers on the plastic works just the same as the special gimmick piece only with that extra sparkle to it.

For mine, I’m going to keep the stickered plastic parts installed on the kit and keep the gimmick parts on hand elsewhere as this is actually a viable option for this version of the Aerial.
Overall, this is a solid kit. I love the slight color changes Bandai made but I’m also one of those builders who actively seeks out Alt Colored kits. As of the writing of this review, I have an RX-78 Mk2 on my pile that’s done in the "Real Type" colors. I like having kits that are slightly changed from the originals. I also paint my kits from time to time so that’s not a terrible surprise. What makes it so I wouldn’t outright recommend folks buy this kit over the regular Aerial is what’s not there.
There's nothing that screams Premium Bandai in this P-Bandai kit.
Here are the changes in a nutshell:
A Slightly shifted color scheme.
Almost completely clear plastics.
Blacklight reactive green effect parts for the beam sabers and the gun.
A clear blue nameplate that could be used as a base.
A sticker sheet with some nice tech/warning decals, the title in black on white (Possibly for the nameplate for some reason?) and a whole set of large logos for the various factions from the show.
That’s it. That’s not really “P-Bandai”. That’s like a Gundam Base Exclusive – enough changes to make the trip worth it but nothing to terribly amazing that the average builder would feel like they’re missing it from their collection. Hell, even the box art (as beautiful as it is) is the standard style for a regular release. P-Bandai box art is nice but monochrome and generally clear kits or have extra parts and pieces or are straight up kits you can’t get elsewhere like the GP00 Engage Zero or a basic RG Astray Blue Frame that isn’t tricked out with more blades than a knife shop.
If this kit came with Anything extra – A pair of open hands like the ones that come with the (sold separately) Mirasoul Flight Unit, posts to make the Not-A-Stand Nameplate into an actually usable stand, maybe some waterslide decals (?) – then I'd say it's a valid option and it’d feel more like a P-Bandai release. As it stands… the best I can say is buy it if you want the Aerial in with blue Permet parts. If not, you can totally buy the regular Aerial kit and not miss anything important.
Still! This was fun build. If alt colors are your jam and you don’t mind paying the P-Bandai tax, I say go for it. If you’re like me and you have "Plans", this is kind of a must buy so you can have the whole family looking proper. = )


14 notes
·
View notes
Text
And DONE! >.<
I'll do the write up later but the short answer is it's a solid kit w/ a small but neat change to the regular version.
#Gunpla #HG #GundamAerial #PermetScoreSix
18 notes
·
View notes