Photo


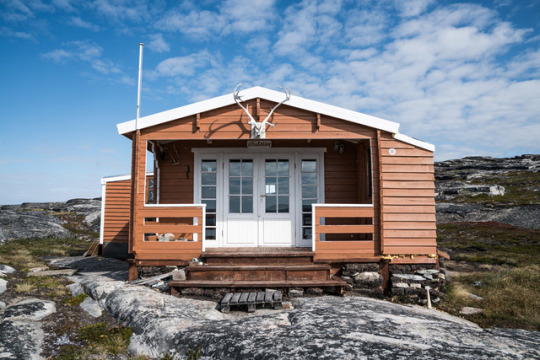
Seen amongst the glaciers in Greenland
Contributed by Kain Mellowship / @wander___boy
2K notes
·
View notes
Text

We’re gearing up for our annual fall bulb sale. If you live here in the States be sure to mark your calendar for next Monday, September 24th (sorry, but we cannot ship bulbs internationally at this time). We’ll have 100+ varieties of specialty tulips, daffodils, ranunculus and other spring flowering bulbs to choose from. Get ready! If you aren’t already on our newsletter list, click the link in my profile to sign up and get the full scoop early. #growfloret #floretbulbs
Erin Benzakein
https://www.instagram.com/floretflowers/
321 notes
·
View notes
Photo


Gary Walton - http://www.thelittleredgallery.co.uk/our-artists/manufacturer/gary-walton/by,mf_name?filter_product= - http://www.beaulieufinearts.co.uk/walton/walton.htm - https://twitter.com/garywaltonart?lang=es
2K notes
·
View notes
Photo


Nancy Liang - http://nankliang.tumblr.com - https://vimeo.com/user35843727 - http://cargocollective.com/nliang - https://twitter.com/nanckliang - https://www.instagram.com/under_over_themoon
3K notes
·
View notes
Text
Hourglass Block Addiction... and a tutorial!
Lately, I’ve been really into making hourglass blocks. I’ve made them in a variety of ways for a variety of projects (including pillows, baby quilts and this black-and-white quilt). I have been constructing the blocks in a pretty traditional way - by making two half-square triangle blocks, then sewing them together.

I thought for today - since it’s my turn for the Finish-A-Long tutorial - that I’d share a basic method on how to make two 4″ (3.5″ finished) hourglass blocks from two 5″ squares of fabric. Of course - this method can be adapted to any size!
You need:
2 - 5″ square (also known as “charm squares”)
Marking tool
Pins
Cutting tools, sewing machine, etc!

1) First, place one square on top of the other, right sides together. Pin.
2) Draw a line diagonally across the blocks.
3) Sew a line ¼ inch from each side of the line.

4) Cut down the line that you drew.

5) You now have two half-square triangle units! (or, HSTs!) Using an iron, press the seam allowance towards the dark fabric for both of these.

6) Now, place one piece on top of the other, right sides together, so that the opposite colours match up.
IMPORTANT! Nest the seams together: Since you’ve pressed the seam allowances to either side, when you place one block over the other the two blocks will kind of fit / interlock together. Make sure that the two pieces are nested all the way along the seam prior to pinning the two blocks together. (Random side note… Nesting seams is one of my favourite parts about piecing.. I don’t know why but I find it oddly satisfying! Ha ha!)

7) As you did before, draw a line down the centre - this time, perpendicular to the sewn seam.

8) Sew a line ¼ inch from either side of the seam, then cut down your drawn line.

9) Press blocks to one side. You now have two hourglass blocks!

But, not quite done yet!
10) Squaring up: It’s important that you square up blocks before putting them together. Squaring up blocks is one of the keys to getting perfect points! Here are some tips for squaring up hourglass blocks -
Line up your block so that the very centre seam is at ½ of the final (unfinished) block size. In the photo below, see that the centre of the block is right where the 2″ mark is - horizontally and vertically - and the diagonal is lined up with the diagonal line on my ruler:

Trim the exposed ends off, then flip the block around so that the untrimmed side is out.
Do the same thing again! Line up the centre at the 2″ mark, then trim the exposed edges.

Then when you’re done, you have a 4″ block that is perfectly centred!

Repeat for your second block!

And then… if you’re like me… you might get obsessed and just keep going! I just chain-piece a bunch all at the same time.

There are definitely other ways to make these blocks, but I’ve been enjoying taking the time to put these together. It’s nice to have a project that I can take my time with!
Have fun!
125 notes
·
View notes
Photo


LOVE this! The effect is really interesting.
Illusion Blanket
by
Poppy & Bliss (Michelle Robinson) - pattern available via Ravelry, to purchase for a small fee. I just bought it!
buy it now
166 notes
·
View notes
Photo


Crochet Collar
Chart and pattern
Source: http://diy-100ideas.com/9-easy-crocheted-collar-patterns-free/
142 notes
·
View notes


