
Don't wanna be here? Send us removal request.
Statistics
We looked inside some of the posts by patrickkkb345 and here's what we found interesting.
Average Info
Notes Per Post
0
Likes Per Post
0
Reblog Per Post
0
Reply Per Post
0
Time Between Posts
2 days
Number of Posts By Type
Text
15
Last Seen Tumblr Blogs


Fun Fact
Tumblr was attacked by a cross-site scripting worm deployed by the Internet troll group GNAA on Dec 3, 2012.
Text
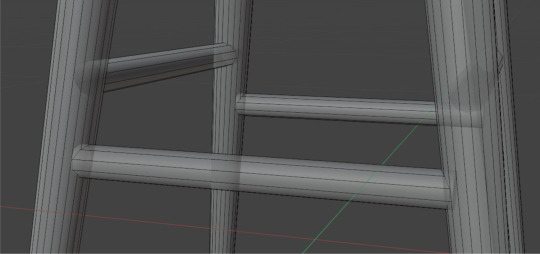
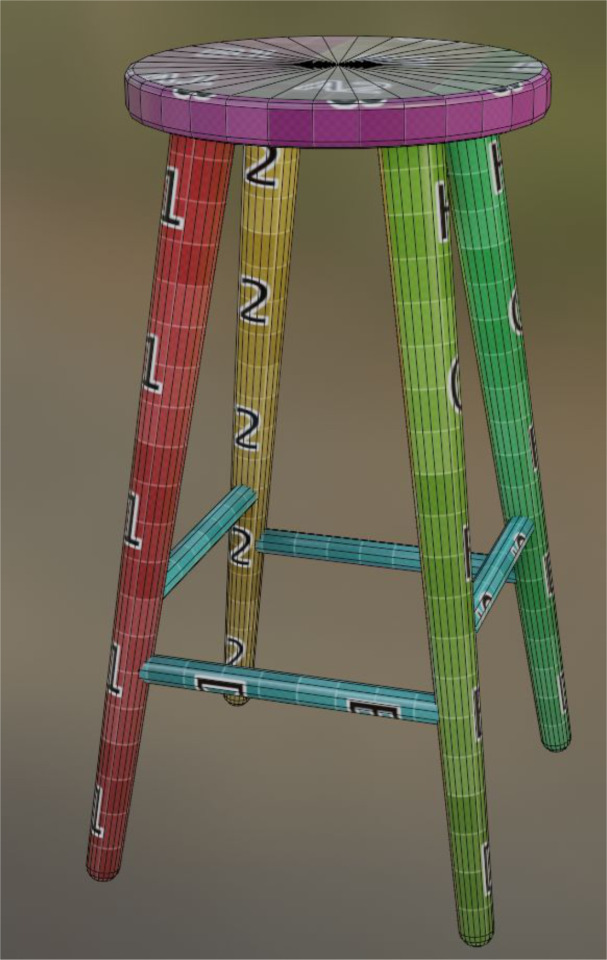
#15: Stool
Interior round barstool. A refreshingly straightforward task in contrast to the vent. Christian sent me an image to work off of.
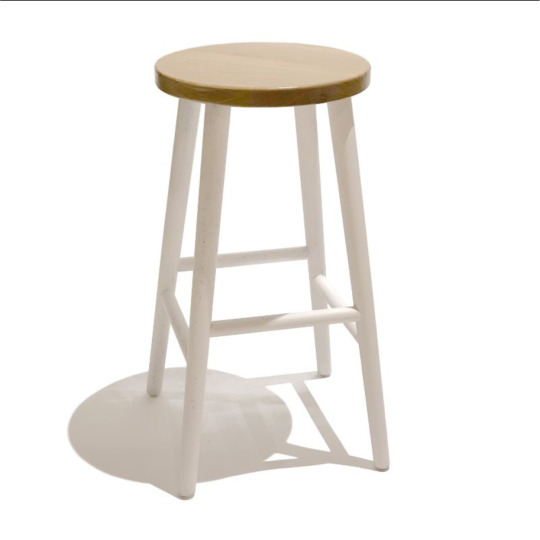
Since the prop isn’t ever that close to the camera, I decided to simply put the stretchers in place without bothering to connect the topology.
0 notes
Text
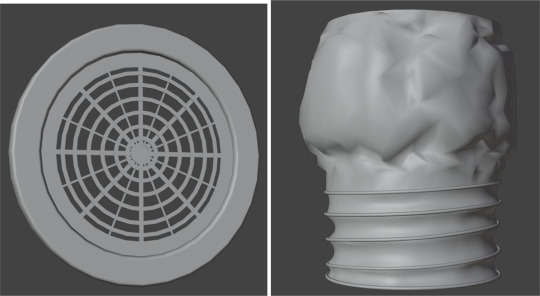
#14: Vent
Midway through the film, the Possum enters the house through a vent in the ceiling. Christian sent me a TikTok video that shows exactly that; a possum hanging out of a ceiling ventilation duct.
I quickly modelled a vent cover based on some reference images.
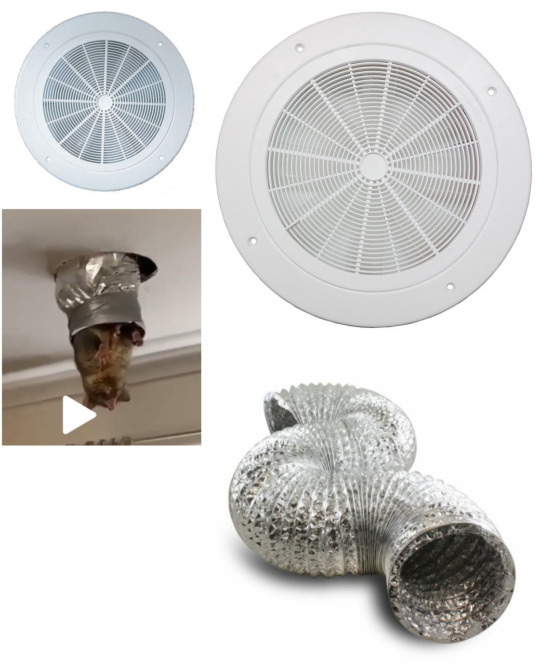
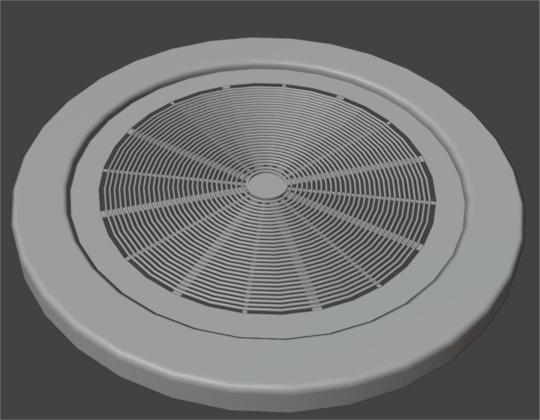
For the main crumpled section of the duct, I set up a cloth simulation in Blender, pinning the lower vertices, as well as the very top, and using the various sim settings to get the shape I wanted.
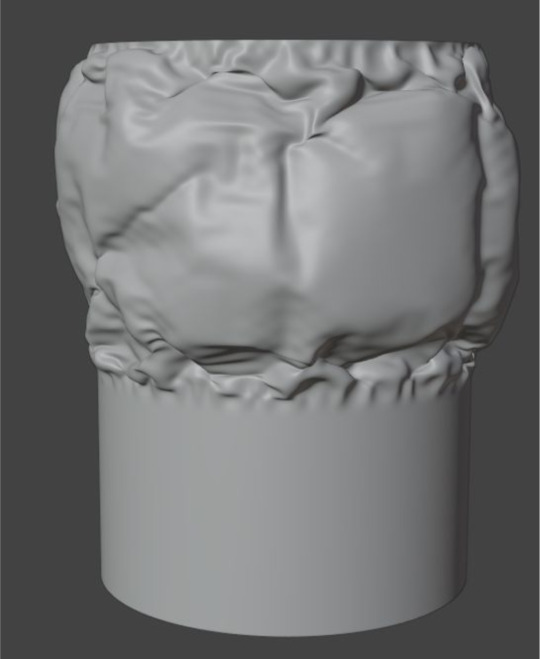
Feedback from the team were to detail the bottom half of the vent (which had to happen anyway), and reduced the detail on the vent cover.
0 notes
Text
#13: Shed Debris
A destroyed version of Angus’ shed model. This is where the Possum will be in the beginning of the film. When I received the model from Angus, I imported it into Blender, and using images from the storyboard, tried arranging the pieces so they can allow the intended acting in the storyboard to be performed.
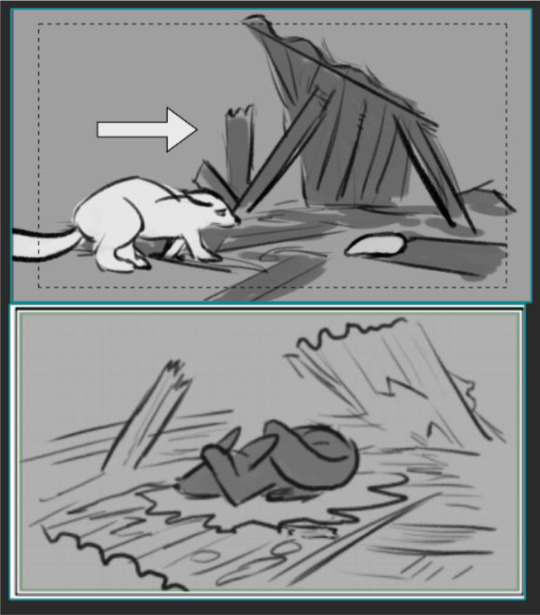
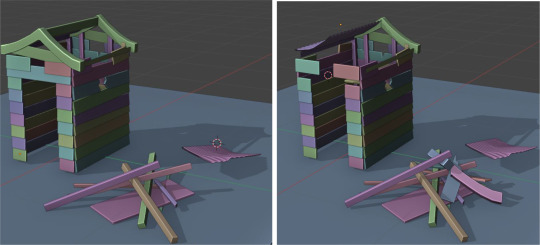
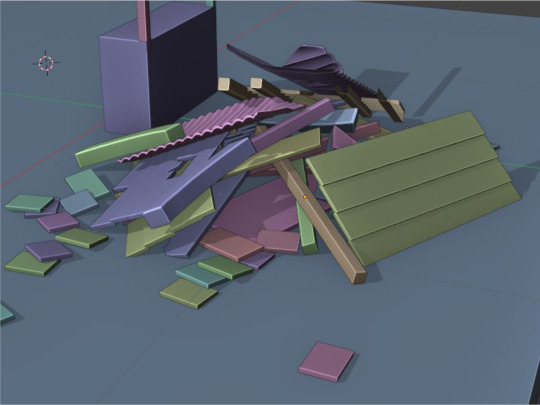
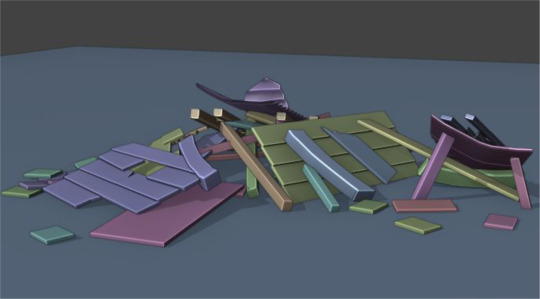
Following a meeting with Sorin, I scuffed up the smaller wood planks to make them look less like floor tiles.

Christian said that the composition lacked clarity, namely where the Possum is supposed to emerge from after the shed collapses.
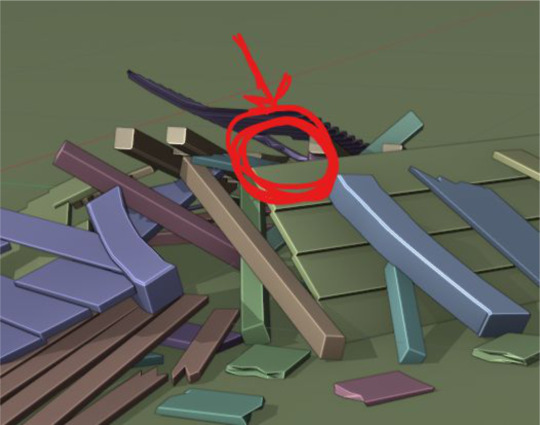
This will likely need adjustments later. It was unclear to me from the storyboard how many different angles the shed would need to be visible from, which would have better informed the composition. In the future, I would have asked for more detailed descriptions/illustrations of what a prop’s composition needs to convey.
0 notes
Text
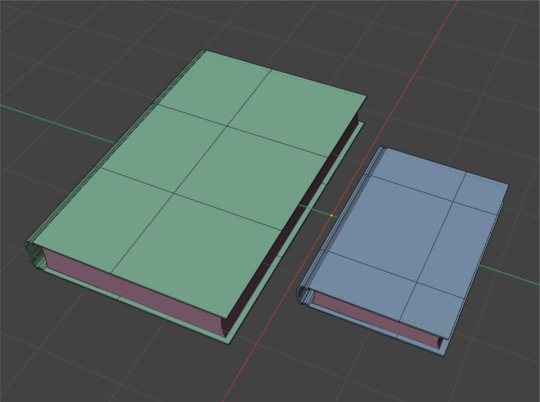
#12: Books
More background props. Made different sizes again. I was in a rush to finish multiple assets during this time frame, so I didn’t bother with reference, which I would be sure to resolve next time.
0 notes
Text
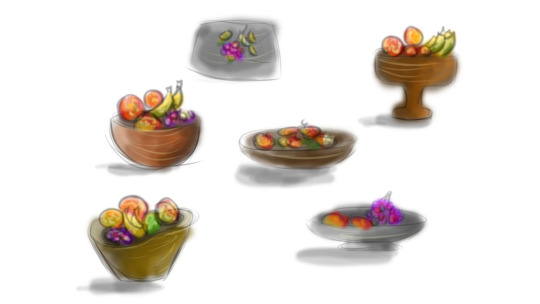
#11: Fruit Bowl
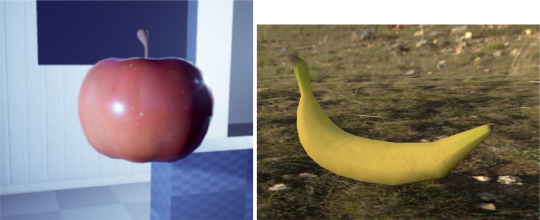
The bowl that sits on the dining table in the house. The bowl itself was trivial; modelling the fruits was more involved.
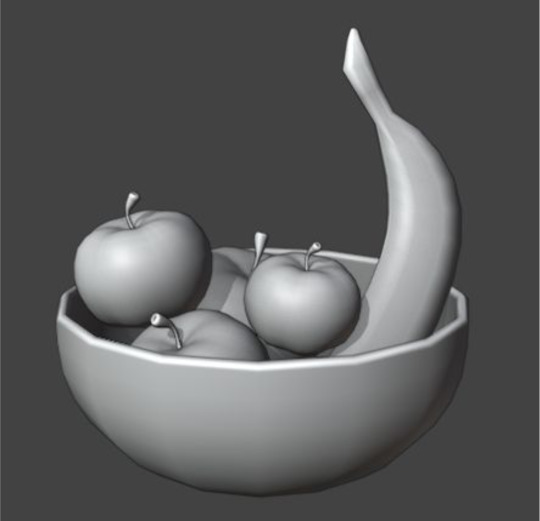
This prop in particular required me to think a little more logically about how UV’s affect different texturing processes. The fruits are served fine by a typical Angle Based unwrap, but I wasn’t as sure about the bowl. When I saw Christian’s textures come back, the fruits look good, but the bowl was clearly off.
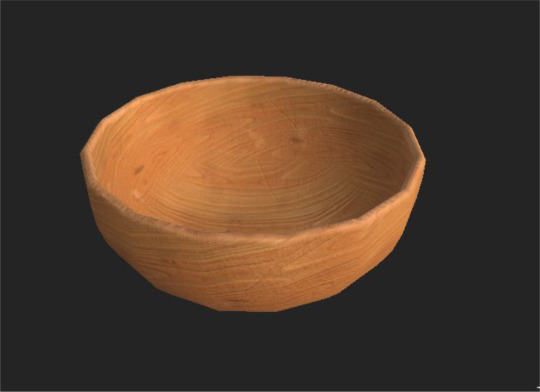
For textures that rely more on hand painting, the Angle Based unwrap is fine, but for more procedural, directional textures, like the wooden bowl, a grid unwrap would have been more suitable.
0 notes
Text
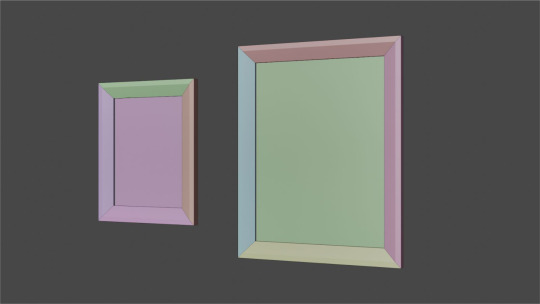
#10: Picture Frames
Picture frame background props. Very simple. Modelled and UV’d in the day. There is a mesh plane behind the glass with its own material, so that any picture that a set designer wants to use can be inserted easily.
0 notes
Text
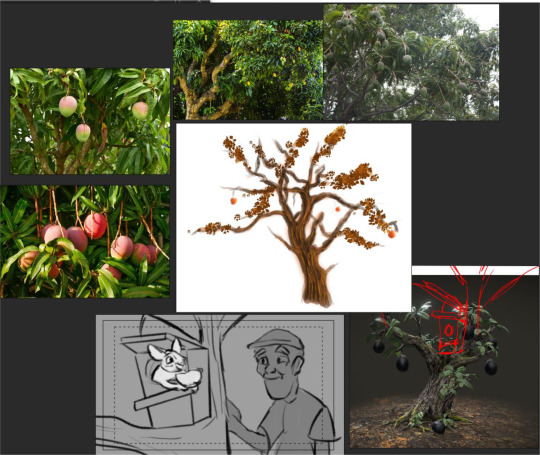
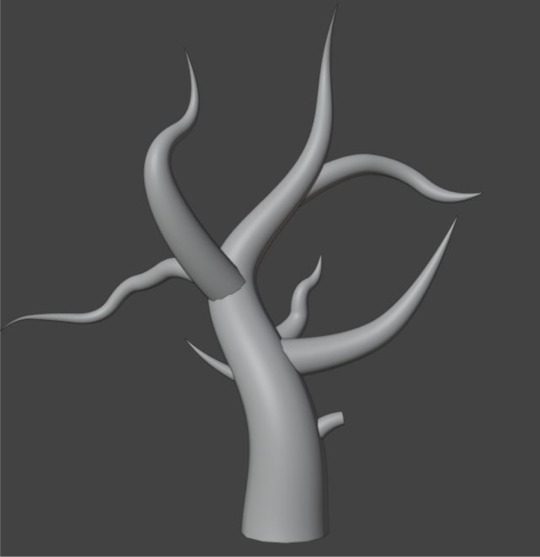
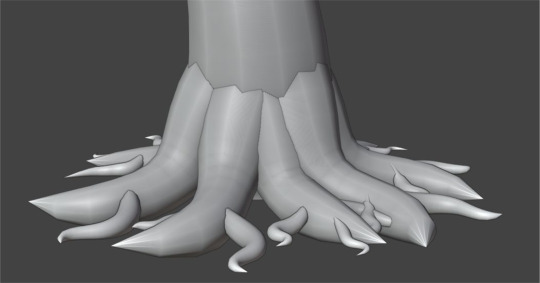
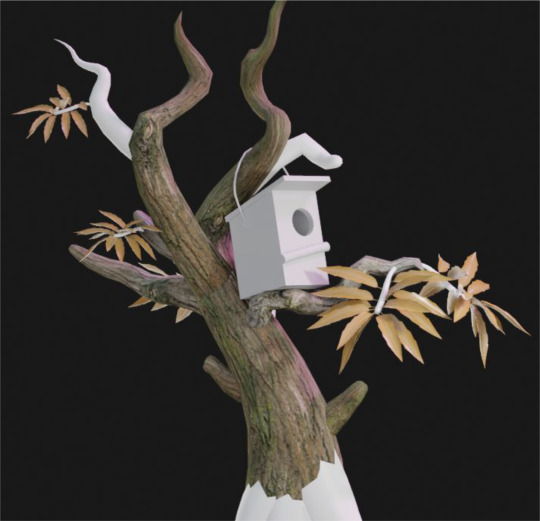
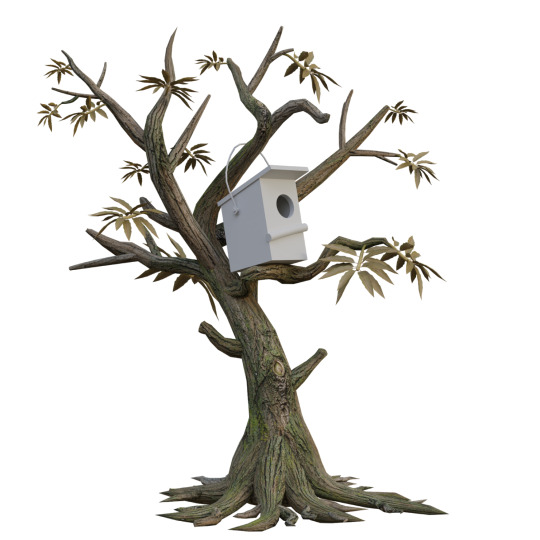
#9: Mango Tree
One of the more prominent props in the project. This is where the Old Man will place the Possum box at the end of the film. I grabbed some images online of mango tree’s, but the most useful pictures were Elisha’s concept image, and a Sketchfab project by Kate Bogush of a similarly shaped tree.
I started by making curve objects in Blender, trying to match the shape of Elisha’s concept art.
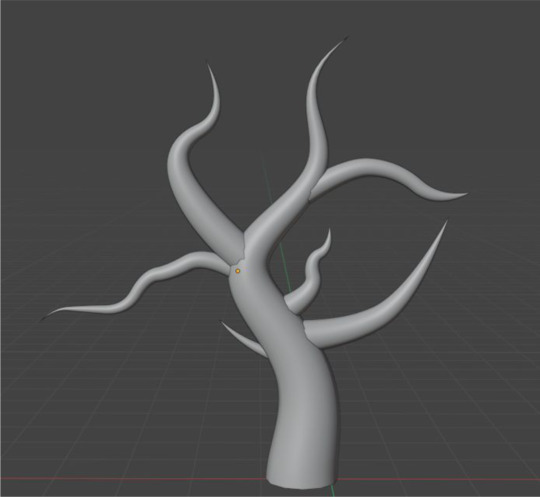
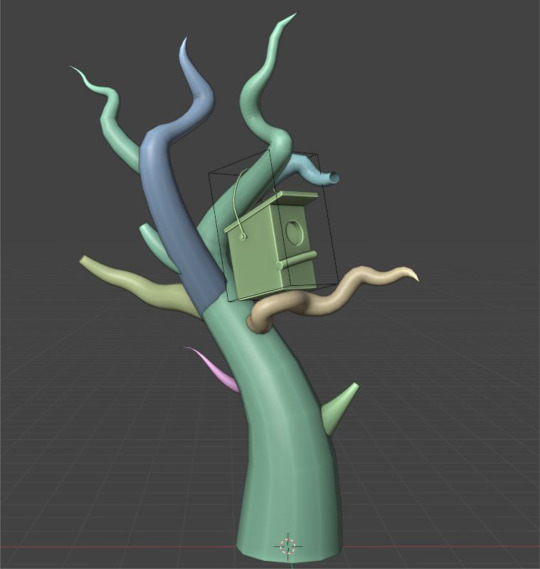
Smaller branches:
Fitting the branches to the possum box:
Making the leaves:

Creating a branch using instances:
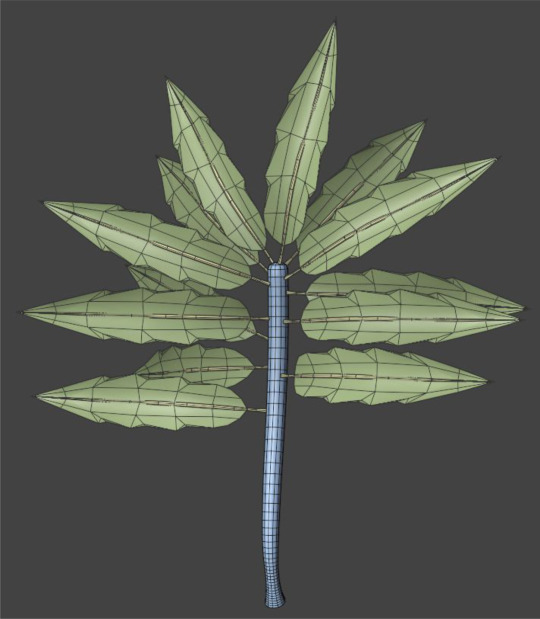
Placing leaves:
Modelling roots:
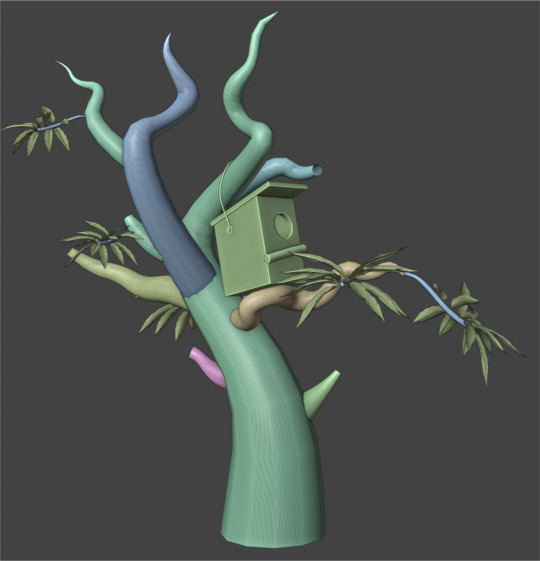
Testing out textures:
Leaf texturing:

Christian made a number of suggestions for changes to the tree; make it thinner (to more closely resemble the concept), straighten out some of the crooked branches, and add more short branches and leaves.
0 notes
Text
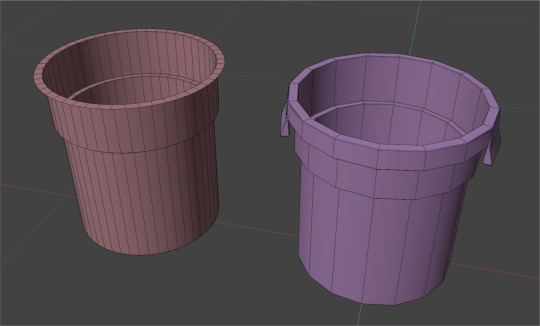
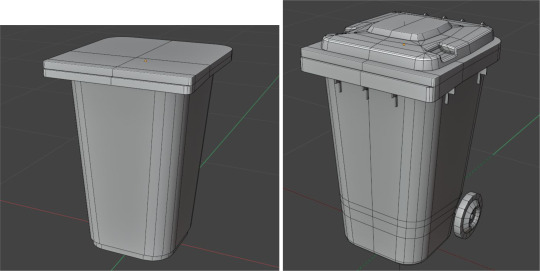
8#: Interior Bin
Garbage bin for an interior shot where the possum falls inside. This means that both an exterior and interior model are required. I used an image of a bin with a liner in it, but we decided that animating the liner to deform under the possum’s weight wasn’t worth doing, so I omitted it. I also added oversize handles as a stylised detail.
0 notes
Text
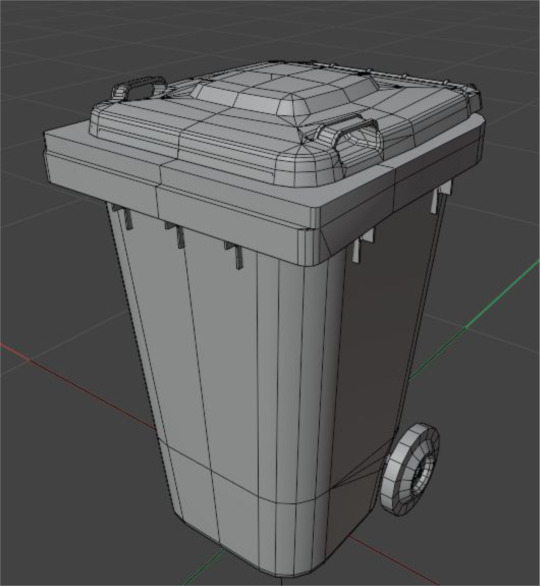
#7: Bin
Exterior wheelie bin. I couldn’t find amazing reference images from every angle, so I took many pictures of my own bin.

0 notes
Text
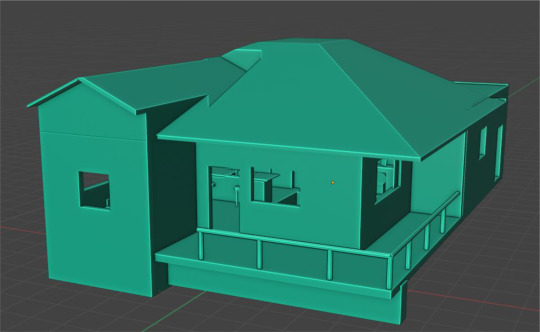
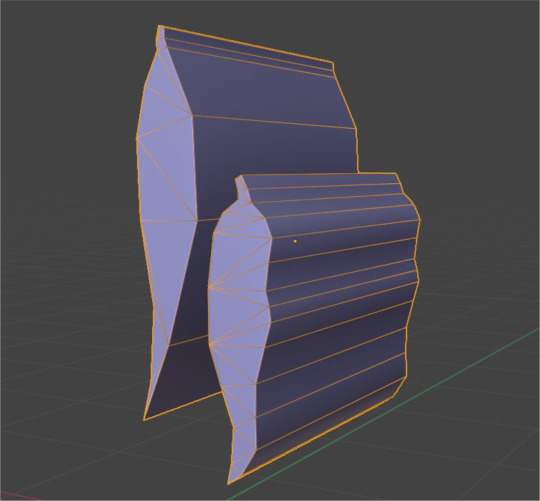
#6: House Exterior
The next task was to model the exterior of the house, based on Christian and Elisha’s designs. Importantly, I imported Mikka’s greybox from the UE4 project to create scaffolding for the modelling process.
I then gathered some images on the internet for reference.
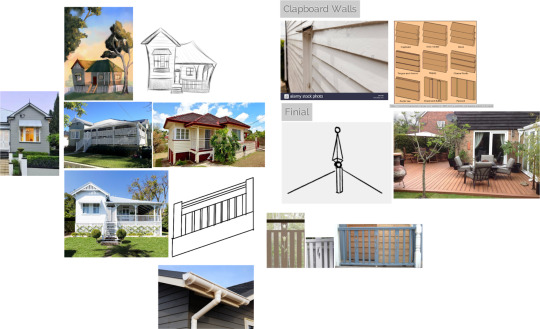
The first thing I did was model the walls. In the concept art, they look like clapboard walls, so I used an Array modifier to place the planks, and Booleans to cut out holes for the windows and doors.
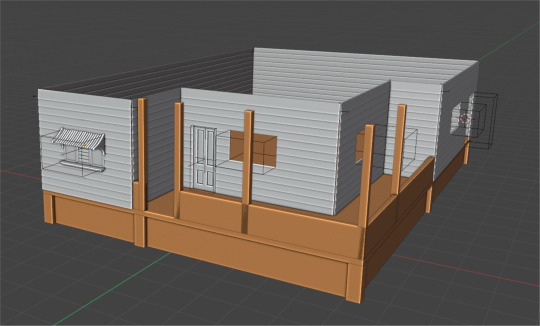
After a meeting with Sorin, it was suggested I increase the size of the front window, and make the planks larger. I also added covers for the corners of the house.
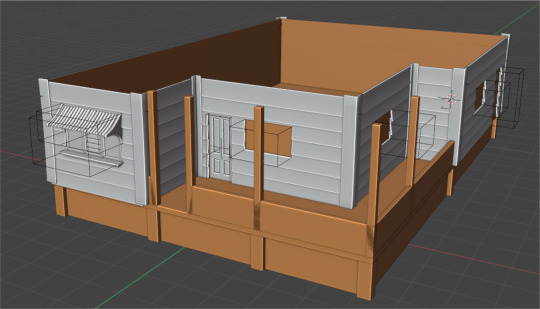
Adding the skirting boards with Array’s. I also used other modifiers to bump up the boards, but we later decided that the effect was too small to justify the increase in polygons.
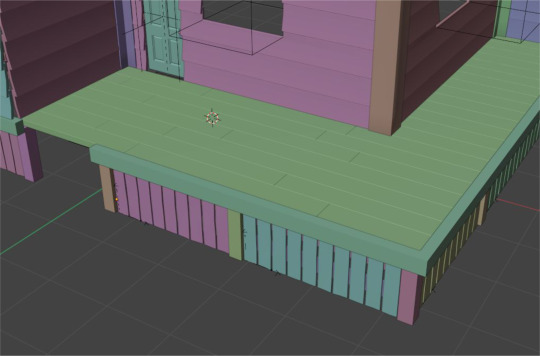
Decking boards:
Stairs:
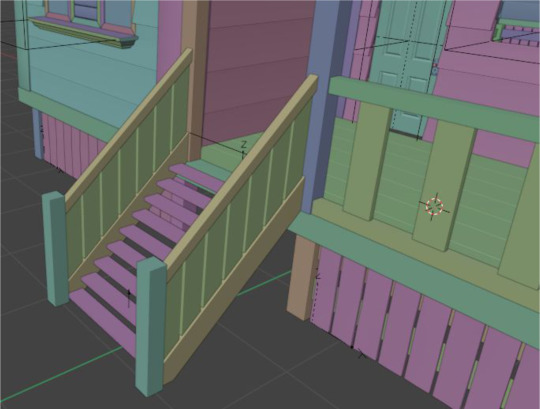
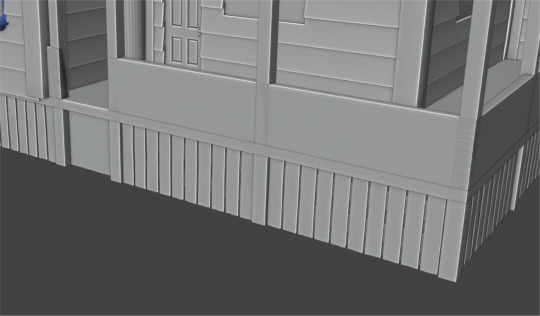
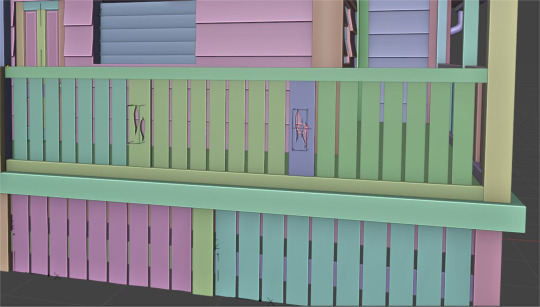
Railing:
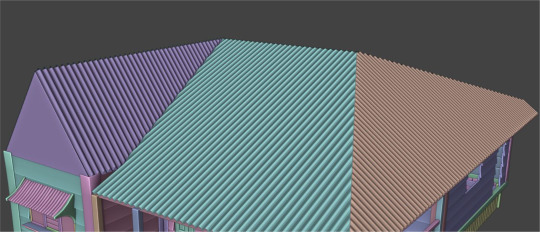
Roof Scaffolding:
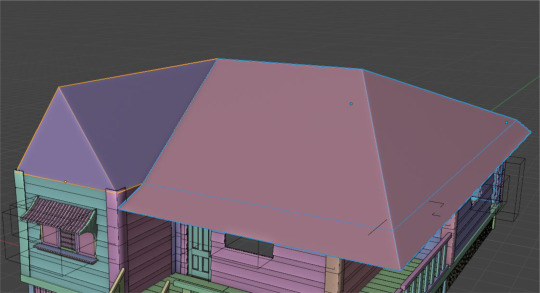
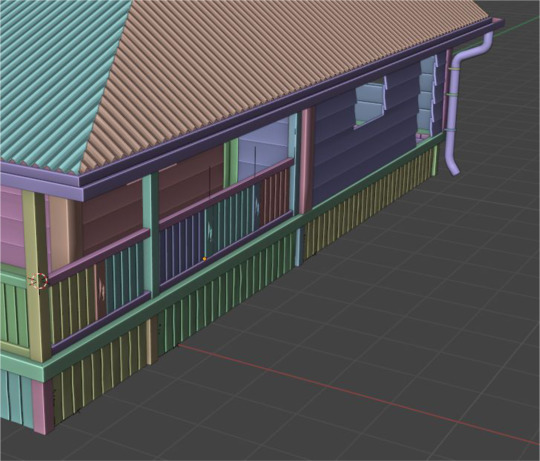
Using Array’s and Booleans to make the corrugated metal roof.
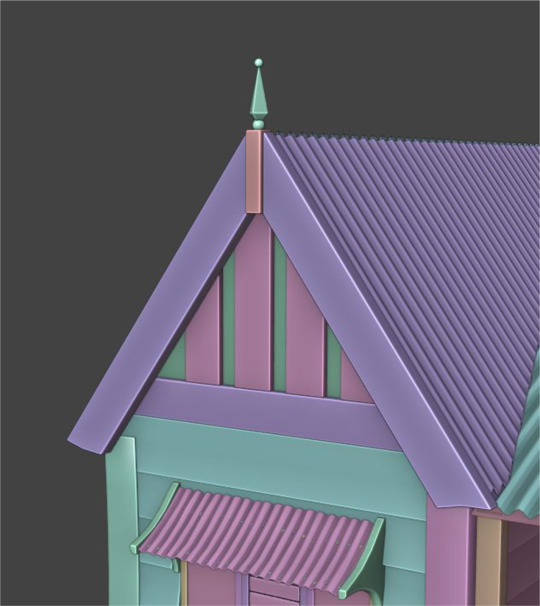
Gable:
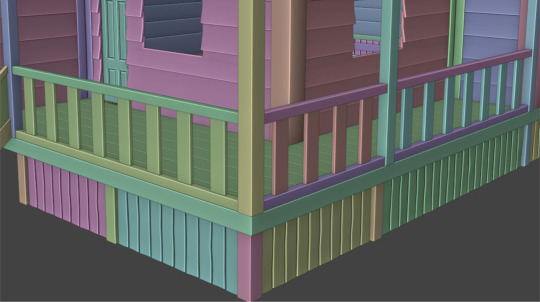
New railing:
The gumleaf motif was an idea in the Discord for a few weeks at this point, inspired by real Post-War Queenslander houses.
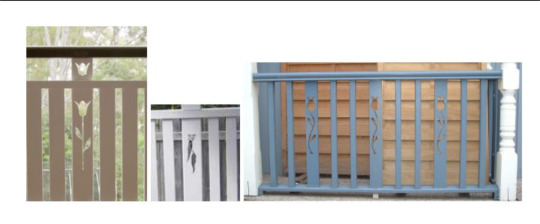
I made an SVG version in Affinity Designer and then imported it into Blender to use as a Boolean.
Gutter:
Adjusted spacing of railing planks and stairs after feedback from meeting.

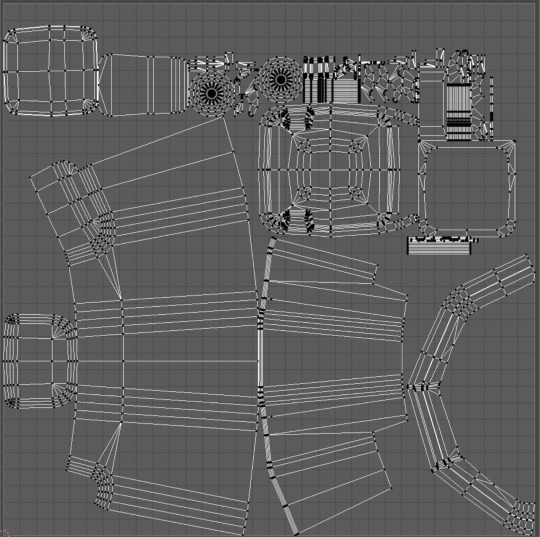
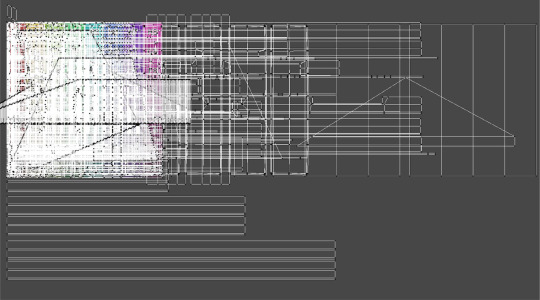
I unwrapped the UV’s to use repeating textures, since the size of the model could have resulted in low texel density.
Roof covers:

After flattening all of the modifiers and deleting unnecessary geometry, I did the UV’s.
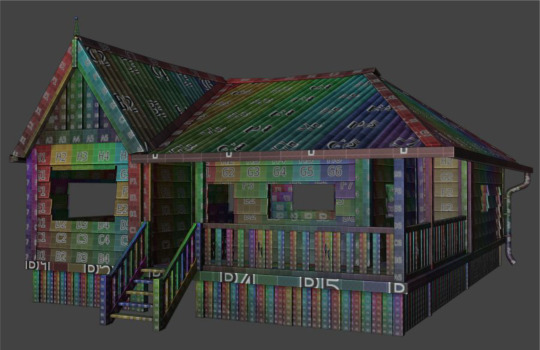
Christian instead wanted the uv’s not to overlap, so that he could paint the model in Substance Painter. So I reorganised them into multiple materials.
0 notes
Text
#5: Door Model (3)
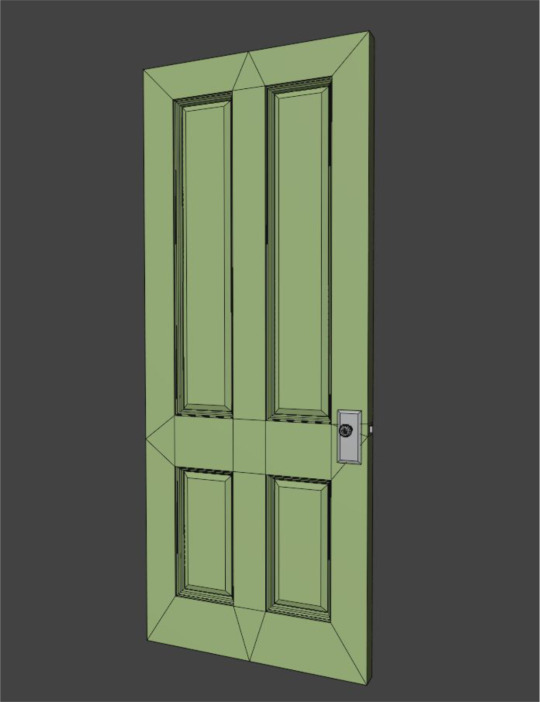
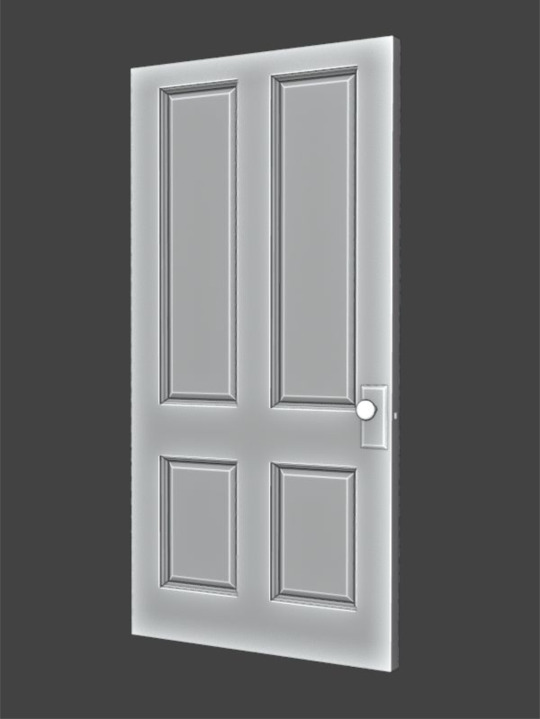
After speaking with my teammates, we decided that the polycount of the door was too high. Some cited performance, which I disagreed with, since GPUs and game engines are designed to handle millions of polygons, but others pointed out that larger files means the Unreal project will take longer to load, which I found more compelling.
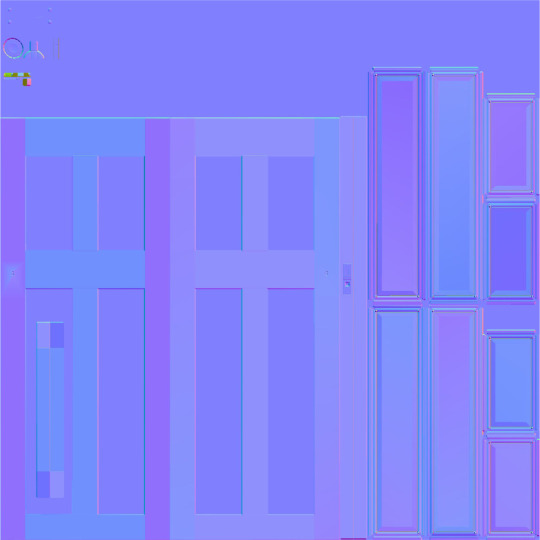
I used Blender’s snapping tools to match a low poly shell to the old model, and let a normal map bake handle the gaps and bevels.
Christian also asked me to resize the dimensions of the door and increase the size of the handle.
0 notes
Text
#4: Door Model (2)
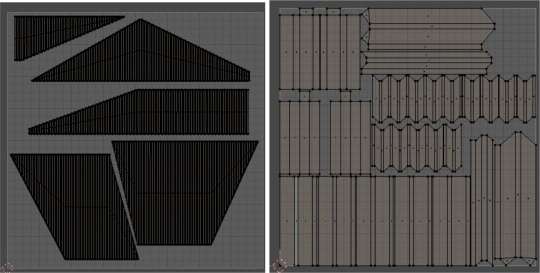
I fixed some minor details with the door lock, and mirrored the handle to the other side. I also quick UV unwrapped the door, making sure that the rotation of the islands corresponded to the grain direction.

I decided that fitting all of the islands of the planks and the handle/lock would require a texture too large for decent texel density, so I separated them into two UV maps.

0 notes
Text
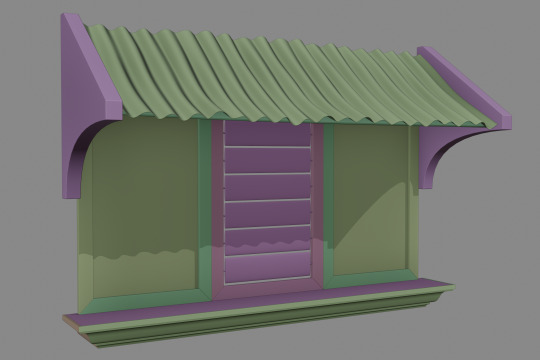
#3: Window Model (2)
Following a meeting with Sorin, he informed me that the window needed some more fine details. I decided that the first thing to do was add nails to awning. I randomised the rotation of each nail, making them look displaced due to wood expansion.
0 notes
Text
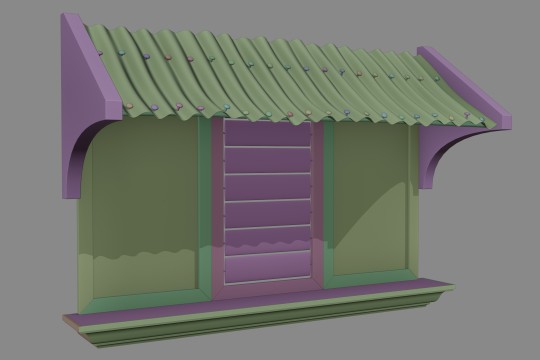
#2: Window Model
Elisha and Christian’s concept images depict a front window with two panes, a window sill, a shutter (apparently, without a window behind it, according to a meeting with them), and an awning with the same kind of corrugated metal as the roof.

I modeled this more freeform than the door. I made the corrugated metal unrealistically warped to emphasise its curvature and age. I tried to make sure that pieces were placed in a logical way, adding planks under the metal as supports. I left the awnings themselves as simple shapes, imagining them as painted pieces of solid timber, rather than multiple affixed planks. I separated the molded window sill into pieces in the same way as the door planks, so that each part can be beveled to catch light.
https://australia-explained.com.au/site/assets/files/1165/photo_4.720x0-is.jpg
https://res.akamaized.net/domain/image/upload/t_web/c_fill,w_1200/v1568263774/old_gristock7_vqugdx.jpg
Rough House Sketch by Elisha Thornton
House Colour Concept Painting by Christian Staats
0 notes
Text
#1: Door Model
Shotgun Link: https://cif-fsa.shotgunstudio.com/detail/HumanUser/652
There wasn’t a concept image for the door available, so the team just suggested making it in a typical four-panel style. I grabbed some reference images from Google, and plugged them into PureRef.
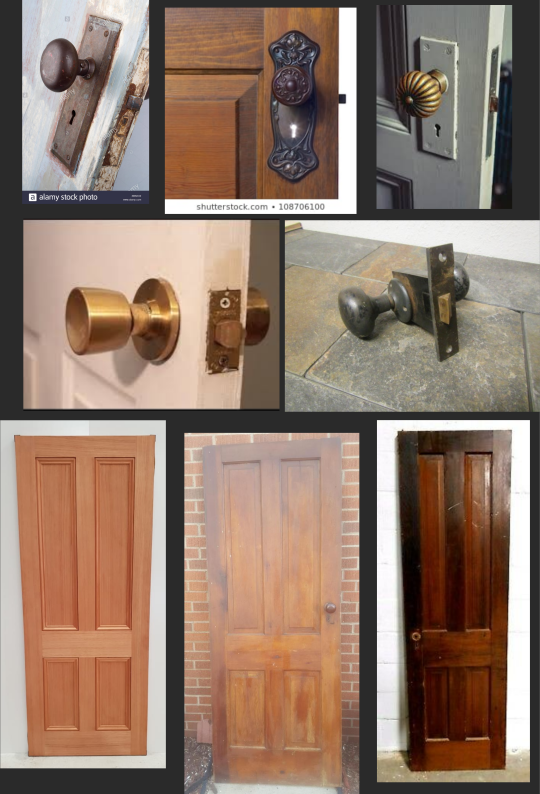
I looked at a few different handle designs, considering which one would best suit Frank’s character. The rusty, flat style (the first one) looked the most appropriate to me; old and uncomplicated.
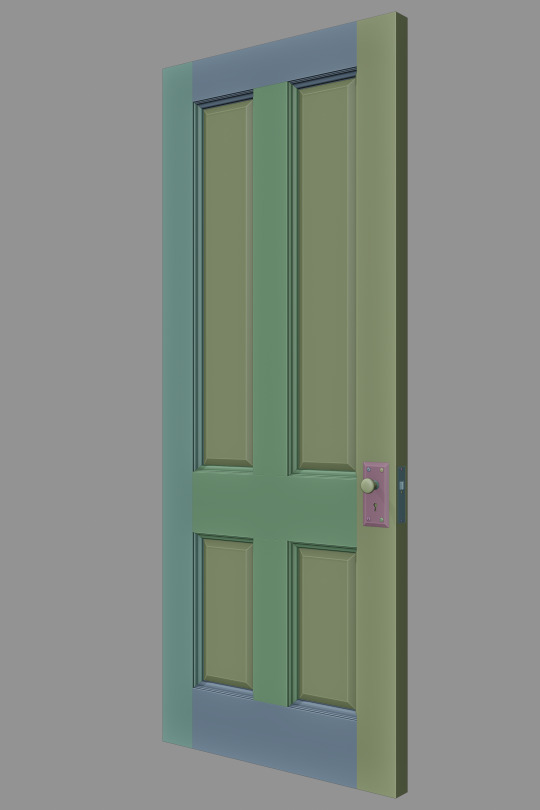
I made sure to separate the individual planks and panels of the door so that they could receive a Bevel modifier for catching light. The flat shapes of planks mean that they don’t require many polygons beyond the edge bevels. It will be rendered in semi-realtime in UE4, so I balanced the bevel resolution to be higher than might be present on a game model, but as high as a film-level asset, to reduce memory usage and make UV mapping less cumbersome.
https://uptons.net.au/wp-content/uploads/2018/11/Beaded-four-panel-Internal-Door-Malapoga-820-and-770-x-35-copy.jpg
https://i.etsystatic.com/11053221/r/il/08587c/1297252927/il_570xN.1297252927_3i0l.jpg
https://i.ebayimg.com/images/g/FnsAAOSwNDBcs0fj/s-l400.jpg
https://i.etsystatic.com/7825345/r/il/276f25/1205449625/il_570xN.1205449625_kk7l.jpg
https://www.shutterstock.com/image-photo/old-antique-door-handle-illuminated-key-108706100
https://c8.alamy.com/comp/XBAG12/beauty-in-the-old-antique-door-knob-and-latch-XBAG12.jpg
https://encrypted-tbn0.gstatic.com/images?q=tbn%3AANd9GcRa9p7FL0I6dAS4CeGkE-_Yhcf2TUXOTly7RSUhY3Qq0DeoCJc3&usqp=CAU
https://encrypted-tbn0.gstatic.com/images?q=tbn%3AANd9GcQCFiQ7TByKq0cWarRsych_7WwH_twKd895Cf_PjreLuZgC6F4u&usqp=CAU
0 notes