
How to make origami, origami arts, how to make paper arts
Don't wanna be here? Send us removal request.
Statistics
We looked inside some of the posts by origamiarts and here's what we found interesting.
Average Info
Notes Per Post
0
Likes Per Post
0
Reblog Per Post
0
Reply Per Post
0
Time Between Posts
13 days
Number of Posts By Type
Text
17
Last Seen Tumblr Blogs


Fun Fact
Tumblr Inc. is using 66 technologies for its website.
Text
Origami Paper Bowtie

Have you noticed that paper folding is serious business? See below. Yes, the butterfly is made entirely of paper! Also, just because summer is approaching doesn't mean you can't look totally elegant. Want to try it yourself? Download PDF Download! To find out about strange formatting, DO NOT download us directly from your browser. And make sure you have the latest PDF viewer installed. Tries everything and still feels wrong, does not always appear. Template Below ⬇ I can't promise that this DIY is so easy to learn. If you don't have much experience with folding, I highly recommend trying this bracelet yourself first. This will help you understand how these folds work. Good luck! https://youtu.be/qnSWIgOnHWM Click to download Read the full article
0 notes
Text
EASY ORIGAMI PUMPKIN

A simple origami pumpkin is a basic modification of a face. The model itself is quite simple to manufacture, it takes about 5 minutes to manufacture. You also have the option to drag the trunk over the pumpkin: these steps require a little more skill, but are still quite satisfying. Simple pumpkin origami instructions Stage 1: Take a square piece of paper, fold it diagonally and unfold. If you are using origami paper, load it with the white side facing up. Step 2: Turn the paper over (gray lines "crumpled lines" indicate indented spaces where the paper is folded and unfolded. Scene 3: Fold the paper in half (left to right) and unfold. Step 4: Fold the paper in half (top to bottom). Step 5: Grasp the upper corners of the model and slide them together. Pay attention to the location of the blue dot. Continue until the model is square. Step 6: Put this paper cover back on the left side. Step 10: Working on the right wing: Turn the right wing of the paper to the left. Step 11: Fold the top left edge so that it lines up with the center of the model. Step 12: Fold the lower left edge so that it is flush with the center of the model. Turn the paper flap to the right. Step 13: Fold back the top and bottom of the pattern to create a pumpkin shape (mountain fold). Step 14: Fold back the left and right edges of the model (mountain fold). Origami pumpkin is made. Decorate the eyes and mouth to make a pumpkin lantern. Read the full article
0 notes
Text
EASY ORIGAMI PUMPKIN

A simple origami pumpkin is a basic modification of a face. The model itself is quite simple to manufacture, it takes about 5 minutes to manufacture. You also have the option to drag the trunk over the pumpkin: these steps require a little more skill, but are still quite satisfying. Simple pumpkin origami instructions Stage 1: Take a square piece of paper, fold it diagonally and unfold. If you are using origami paper, load it with the white side facing up. Step 2: Turn the paper over (gray lines "crumpled lines" indicate indented spaces where the paper is folded and unfolded. Scene 3: Fold the paper in half (left to right) and unfold. Step 4: Fold the paper in half (top to bottom). Step 5: Grasp the upper corners of the model and slide them together. Pay attention to the location of the blue dot. Continue until the model is square. Step 6: Put this paper cover back on the left side. Step 10: Working on the right wing: Turn the right wing of the paper to the left. Step 11: Fold the top left edge so that it lines up with the center of the model. Step 12: Fold the lower left edge so that it is flush with the center of the model. Turn the paper flap to the right. Step 13: Fold back the top and bottom of the pattern to create a pumpkin shape (mountain fold). Step 14: Fold back the left and right edges of the model (mountain fold). Origami pumpkin is made. Decorate the eyes and mouth to make a pumpkin lantern. Simple origami pumpkin with stem To make Read the full article
0 notes
Text
ORIGAMI WATERBOMB PUMPKIN

This origami water bomb pumpkin is a water bomb. The only thing that makes it a pumpkin is that you use orange paper. A green "body" protrudes from the top of the model. and draw the eyes and mouth for the pumpkin lantern. This is a fun model: You need to drill a hole to inflate the model. It can be used as a table decoration because it is 3D. Pumpkin origami with water bomb Stage 1: Take a square piece of paper, fold it in half (left to right) and unfold. Repeat the folding from top to bottom; open. If you're using origami paper, start with the colored side above. Turn the paper over. Step 2: Fold the paper diagonally. Open. 3rd level: Shrink the paper along the existing fold lines. To do this, bring the top edge of the paper to the bottom. Connect the left and right sides of the paper sheet at the same time. Continue until you get a triangular shape with two valves on the right and two valves on the left. Step 4: Work only on the upper wings: fold the corners to form a triangle on top. Step 5: We are working with the top level of the model. Fold it in the middle so that the left and right corners touch each other. Step 6: Fold the top corner of the paper down (connect the blue dots) to align with the fold just above. Open the right side of the pattern and repeat the process. Step 7: Open small "pockets" and place a piece of paper in the pockets. See the next picture. Step 8: Place the strips of paper securely in the pockets and press firmly to soften the Read the full article
#easyorigamipumpkin#origamipumpkin#origamipumpkininstructions#origamipumpkinstepbystep#origamipumpkinsteps#origamipumpkintutorial#ORIGAMIWATERBOMBPUMPKIN#Simpleorigamipumpkin
0 notes
Text
Money Easy Tree Origami

This easy money tree should really be written as "Simple $ tree". Making an origami tree is easy; Making Money can be difficult. This tree has a trapezoidal base so it looks like it is inside a box or channel. With a few decorations (like colored circles with holes), this money-saving tree can be turned into a Christmas tree. Florence Temko created another similar tree, but with a straight trunk.The tree seems to grow from the ground. You can see it here. Money Easy Tree Instructions Start with a clean dollar bill, black side up. Move the coin vertically (up and down How about making an easy origami tree together today? I wish it could grow easily on trees, if it would turn green ... For the most beautiful videos, follow my channel, do not forget to subscribe and do not leave your actress without comment :) origami christmas tree Christmas trees are a ritual from Pagan traditions. The present-day Christmas tree is thought to originate in western Germany. The main setting of a play that portrays Adam and Eve in the Middle Ages was a pine tree with apples, representing the garden of Eden. On the feast of Adam and Eve (December 24) the Germans would plant such a heavenly tree in their homes and hang thin pieces of doughless bread on it symbolizing the blessed bread in the Communion; these were later replaced by donuts in different shapes. During the Christmas season, the Christmas pyramid was also located in the same room as the tree. In the 16th c Read the full article
0 notes
Text
Origami santa claus
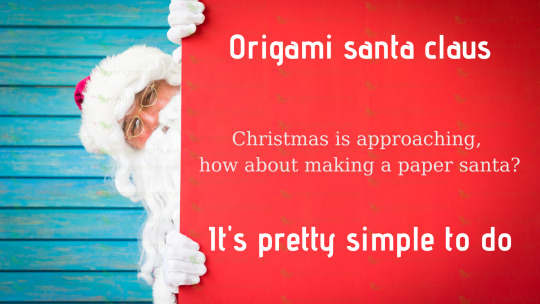
Paper folding santa claus In this article, we'll show you how to make an easy origami santa claus out of paper. This three-part Santa Claus is a political model. I call it "three parts" because you have to divide the paper into three parts. According to Santa Claus, it consists of three persons: a head, a body, and a toy sack. It is the cutting mold in which the square to be obtained is taken and the smaller one is brought together with 3. How do you make a origami Santa Claus? How do you make Christmas Santa with paper? How do you make Santa? How do you make cute Santa? How do you make a small Santa hat? How do you make cotton Santa Claus? How do you make a 3d Santa Claus? Instructions for Three Part Santa He is a legendary character who is believed to bring gifts to good-natured children on Christmas night or morning. Santa Claus, which has a different name in the mythology of each country, is the most widely known name in the world. Take a square sheet of paper that is red on one side and white on the back side. Red origami paper works well or if you don’t have that, you can use red wrapping paper that has been cut into a square. Step 1: Imagine the paper to be divided into three sections. Cut one third off. The size does not need to be exactly 1/3, just approximate. Step 2: For the skinny segment, cut that into three small squares. There might be a sliver of paper left over, if so, you can throw it away. Read the full article
0 notes
Text
3D Origami Swan instructions

3D Origami Swan is one of the most elegant 3D origami models you can make. Modular origami swan Although you can do almost anything with enough triangular units, a4 origami swan the swan remains a favorite. To get started, make about 500 to 600 triangular units as shown here. Put it in a box or bowl. Don't worry about the quantity, start folding and after a day or two you'll have enough pieces to swan. These large birds also have enormous long necks that they bend backward while swimming. Some species are white while others can be black, off-white or black and white. Instructions for 3D Origami Swan Body Subtract 30 to 32 units from the ready-made pile of triangular units. These will be the 1st row. If you've purchased a set to make a swan, look for the exact number of units to use in each row here. Row 1 & Row 2: Place two of the row-1 units side by side. Bring another unit from the pile of already made units. This 3rd unit will be for row-2. Insert the two row-1 units into the row-2 unit. This is how it looks. Bring one row-1-unit (from the group of 32 units) and one unit from the pile. Continue to use row-2-units to connect the row-1-units together. This is how it looks. Note that the units may look more like this: the end flaps tend to flare open. Continue adding the row-1 units. After a while, the structure will start to curve around. When you have connected the 32 row-1 units, use one more unit from the pile to connect the structure into a ring. Read the full article
0 notes
Text
HEART WITH WINGS How to make origami from paper

I would like to tell you about a very fun and easy work with making origami hearts with pictorial writing. You can prepare this work, which you can prepare in a simple way with the folding techniques most frequently used in origami studies, with fun. Without further ado, I want to move on to the stages of making origami hearts. To make a paper heart, you need to use special origami paper. You can find these papers in all hobby stores or stationery stores. Cut and prepare square sized papers according to the size of the hearts you want to make. Afterwards, you can prepare paper hearts by folding by paying attention to the folds and folding features according to the steps in the picture below. You can evaluate the hearts you get with origami heart making in different ways. I'm thinking of using these lovely hearts for wall decoration, baby bed ornament, refrigerator ornament, or decorative item decoration. You can create very nice works according to your imagination with many paper hearts in different sizes. Now I am sharing the best illustrated explanation for the question of how to make an origami heart. I hope it helps and you can come up with such nice work. Good luck with. Heart with Wings Instructions Step 1: Start with a square sheet of paper with the white-side facing up. Fold in half (left to right) and unfold. Fold in half (top to bottom) and unfold. Step 2: Fold the top-edge and the bottom-edge towards the middle crease. Read the full article
0 notes
Text
Origami Cat step by step

ORIGAMI CAT HEAD instructions This easy Origami Cat step by step tutorial is easy to make. Easy origami cat step by step, Its simplicity is countered by the fact that it doesn’t look exactly like a cat head, it can be the head of almost any animal. You need to decorate the origami piece to make it look more like your animal of choice. Nevertheless, it is a great project for young children since they are imaginative and forgiving. Instructions for Origami Cat Head Many people love cats, they are moved by them, take pictures, including needlework, but also occupy places of honor, make figurines, knit from threads, draw, make soft toys in the form of cats, etc. Today, we will make a paper cat using the origami technique, making it completely full size with its head, paws and elegantly curved tail. This paper cat will definitely appeal to all lovers of these cute and funny animals. https://www.youtube.com/watch?v=5hqXC7oRSOE Step 1: Take a square piece of paper and lay it towards the "diamond" (balanced on one of its corners). If you are using origami paper, load it with the white side up. Fold it in half (left to right). Interest. Step 2: Fold the paper in half (bottom up). Step 3: Fold the left and right sides of the model with the corners up like a cat's ear. Make the folds so that the distance from each ear to the vertical fold is the same. Easy origami cat step by step Step 4: Fold some paper between your ears. This will be the top of the head. Read the full article
0 notes
Text
How to make an origami cat step by step instructions

Easy origami cat instructions This time we will introduce How to make an origami cat "three-dimensional cat" made from a piece of origami paper. Standing up tail cute ♡ Easy to do so you will want to make many different colors. If you want to try 3D origami but it's too difficult, why not enjoy it? You are free to challenge. We'll show you how to fold a cat, from simple things that even little kids can do to works of art. Origami is popular abroad A classic origami that kids can play with from ancient times to the present.It is getting more and more popular abroad as well! Cat origami Here's how to make simple origami paper and how to make a lot of art. We will introduce various studies on cats! Origami is a must-see destination for those who just know the jackpot. With this opportunity, you can get addicted to the art of origami! ? Starter Edition-Let's fold a cute cat easily! ~ We have collected the easiest folding methods! For beginners and young children, please see this. Please write a cute face while folding How to make an origami cat out of paper, step by step instructions: Stage 1: Fold the sheet in half, and then cut the sheet across the fold, we need only half the sheet to form the cat. Step 2: Place the created strip of paper in front of you and fold the sheet in half again. Stage 3: Now bend the top side down, turn the sheet over and repeat on this side. When viewed from the side, the paper now takes the shape of the letter "M". Read the full article
0 notes
Text
How to make origami rabbit face

How to make origami rabbit Today, we will make an origami rabbit face that is easy and fun to make with you. With these building instructions, you can make a rabbit head or face. If you are ready, how to make origami rabbit? lets start.This origami rabbit face is a smart design that uses both sides of the paper for the best effect. You can use origami paper with a colored face and a white back. Or you can use double-sided origami paper in different colors from the front and back.No double-sided paper? No problem, you can still make the model and a few sheets of paper are enough to give the impression of eyes and noses. Big ears help determine what a rabbit is. It is not difficult to make this model, but if you are using thick paper, you may need to put it under a heavy book for a day to protect wrinkles. Origami rabbit instructions You can do the origami rabbit face production steps step by step with the video or you can prefer the illustrated expression. https://youtu.be/g1xdED4hGYQ 1st stage: Start with a piece of origami paper. Place the colored side up. Place the paper in the diamond position (balanced in one of its corners). Fold the paper in half. Step 2: Fold the bottom corners of the triangle. Turn the model over. Stage 3: Overlap one layer of paper down as appeared. Stage 4: Overlap this layer of paper back up towards the center of the model (red speck). Stage 5: Overlap during the time layer of paper. Read the full article
0 notes
Text
Rabbit Head Origami instructions

How to make origami rabbit head instructions. Easter bunny construction stages, easy tutorial with step by step instructions. Origami is a hobby that develops manual skills and attracts attention. Rabbit Head Origami instructions, rabbits are very sweet. The meaning of rabbits for humans is something else. You can examine other origami animals on our site. Rabbit Head instructions Step 1: Start with a square piece of paper. If you are using origami paper, start with the white side facing up. Put the paper in the "diamond" position (balanced in one of its corners). Fold the paper in half (bottom to top). Step 2: Overlay the triangle into equal parts (left to right). Intrigue. Step 3: Overlay the base of the triangle. This collapsed edge will have the ears of the hare, so overlay it as thick or slight as you can imagine. Roughly 1/4 of the tallness of the triangle is a decent beginning. Step 4: Overlay the base left and base right edges until the inside wrinkle made in sync 2. Step 5: Turn the model over. Step 6: Overlap back the top corner and base corner (mountain up) to shape the essence of the bunny. You can stop here and begin adorning the bunny. Or on the other hand you can overlay back the left and right corners (mountain overlap) to get an increasingly adjusted face. THE END https://www.youtube.com/watch?v=JiZ2DTAxmXs Read the full article
0 notes
Text
Easy Dollar Bill Origami Heart

Easy Dollar Origami Heart There are many origami hearts on the Internet. Easy dollar origami heart instructions, step by step. Easy Dollar Bill Origami Heart, The eagle circle is the symbol of the states. The circle in which the pyramid is located has no other name, but the eye in the small pyramid belongs to "divine eye" and means that God sees everything. These two circles are called the Great Seal of the United States. This origami model is made from both sides of the United States of America Great Seal and belongs to a kind of chimera. Money Aligned Heart Cash gift - always welcome, but if you're something like me, you may feel like a gift giver has to try even more. Then learning to fold the notes into their origami hearts becomes a valuable life skill that highlights your gift. It's easy and takes less than a minute after hanging. https://www.youtube.com/watch?v=ozky7JMFPbg How do you make a simple dollar into a heart? Lay your bill flat and fold it in half to create a crease in the middle. A fresh, complex bill is best. Money dollar Fold the left and right margins inward to align with the middle crease. Easy Dollar Bill Origami Heart, Fold the two lower corners at a 45 degree angle until they merge. Wrinkles are present. Fold the top of the bill down so that it touches the previous folds but does not overlap. Easy Dollar Bill Origami Heart Use your finger to separate the layers of folds from creating the previous step. Read the full article
0 notes
Text
Origami owl easy

Origami owl easy How to make origami owl easy from paper, instructions and step by step tutorial. Origami owl easy, ring, wrap bracelet, birthstones, 8.5 x11 paper known as paper folding, is an entertaining art activity. The art of creating shapes by folding paper without glue is called origami. We will mention simple origami work here. Origami can be used to discover children's skills. Entertaining and simple origami work can be done at home and in the classroom. After a while, they do their own origami work to achieve the result in 7-8 steps that are not too long. Origami owl easy instructions Before making an owl from paper, you should make a sample mold. Origami owl instructions For this, the mold we offer in the example can help you. Before you make your owl, sample the papers you will cut for the owl according to the pieces. Cut the pieces from your paper according to the owl mold you removed. These pieces can be any color you want! It is entirely up to your taste ... If you are going to make a magnet, stick the owl that you have prepared properly on the magnet with the silicone on the frame. https://www.youtube.com/watch?v=E3CC49HrDvU Origami owl easy step by step You can use owls you make from paper as magnets. paper owl step by step You can stick the figures you make from paper to the tiny magnets that you can buy ready, and design wonderful magnets for your refrigerator.You Read the full article
0 notes
Text
Origami Koala

How to make an origami koala How to make an origami koala instructions and step by step or the habitats of koalas are Australian forests. Origami koala bear 3d. Unfortunately, they don't like people very much and they are very satisfied with their living spaces. So it is very difficult to tame them. It only hurts How to make an origami koala if they separate them from their habitat and take them to the zoo. Origami Animals People who previously settled in Australia were hunting for soft fur. They were very easy to hunt because they were quite lazy and still. In this case, of course, they don't like people. Origami koala instructions Koala are marsupials, just like kangaroos. Another interesting information about them is pregnancy processes. Koalas, who had a very short pregnancy, only carry their offspring on their stomach for 35 days. The puppies who were born 3 - 5 cm enter their mother's pouch and continue to grow and develop here. The purse life lasts 6 months. But it does not end, this time they Origami koala instructions continue to live on their mother's back. For 2-3 years, the young koala, who grew up on the back of their mothers and tried to learn life. Origami koala step by step They only eat eucalyptus leaves. Like many animals, there are special bacteria that digest these leaves, which are extremely toxic to humans. In the evolutionary process, koala step by step these bacteria and koalas have a mutualist relationship. Read the full article
#Howtomakeanorigamikoala#Origamikoala3d#Origamikoalabear#Origamikoalastepbystep#Origamikoalatutorial
0 notes
Text
Origami ninja star

Origami ninja Star Today we will learn how to make an origami ninja star. Shuriken is a type of weapon known in English as a ninja star. The word means "real knife at hand". It has traditionally been used by ninjas. Made of star-shaped hard steel, it includes air bending with a hole in the middle or weight. Since it rotates when launched, it has cutting functions other than studs with sharp edges. It has been used to compensate for being immersed in poisons that paralyze the nervous system or infect the infection, as they are not affected in humans. With the introduction of firearms, shuriken was accepted. Paper ninja star Paper ninja star making is quite simple and consists of several stages. You can easily make a paper ninja star by following these instructions from the videos or images on our site. During the Tokugawa era, known as Edo, official documents were briefly on the agenda, briefly mentioning the activities of the ninjas. Kawakami says that ninjas not only kill people as described in the movies, but also the work they do during the day. How to make origami, "You can't survive as a ninja," continues Kawakami. "In the Edo period, some ninjas were samurai. They should be included in one of the four class categories that were used during the Tokugawa era: warriors, peasants, artisans, and commercial classes. How to make an Origami ninja Star How to make an origami ninja star, We seem to hear how to make an Origami ninja Star. Read the full article
#HowtomakeanOrigamininjaStar#Origamininjastar#Origamininjastarinstructions#Origamininjastarstepbystep#Origamiweaponsninjastar#Paperninjastar
0 notes