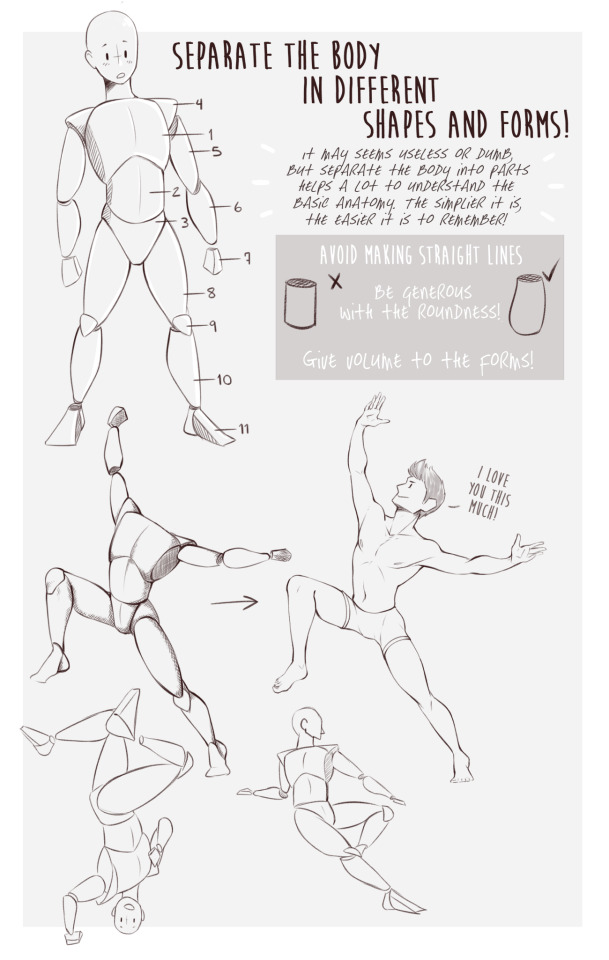
This is a mashup of my art, other people’s art, and tips that I want to save
Don't wanna be here? Send us removal request.
Photo

• HALF-ASSED ANATOMY TUTORIAL •
926 notes
·
View notes
Photo

Though I might not understand a word, but it’s still that helpful !
2K notes
·
View notes
Photo

How to draw bodies.
Art blog : artisinspiration
| photos | poses | drawing tutorials | wallpapers | amazing art |
2K notes
·
View notes
Photo

Drawing the legs.
See how the upper and the lower leg curve and how they relate. Front and side view are male, the right one is female (1st & 2nd row). If you bend the leg, it helps to mark the direction of the cylinders (away or in your direction) with curved lines. When I do that, I get a better feeling of how the leg actually is placed in 3D space. The trousers show that you might not need all the muscles and details for your drawings – but to know how it works inside helps to find the correct shapes anyway.
2K notes
·
View notes
Photo

More exercises on moving legs. The stripes may look like funny tights but they really do help my understanding of the geometry.
666 notes
·
View notes
Photo

STEP 1
First you would want to start off with a stick figure drawing lines of Arms and Legs into the position that you want the figure in. Then you would add simple shapes like circles and triangles for the joints, hands and feet of the figure so you know the areas the body bends and the distance from one point of the body to the next.
69 notes
·
View notes
Photo

STEP 2
Here is where we begin to connect the shoulders to the center whist circle creating a triangle to identify where and how the torso is positioned on the body.
57 notes
·
View notes
Photo

STEP 3
In this step we now add the placements of circles and cylinders to give us a better idea of what the body will look like. By doing this are now beginning to establish mass for the image.
49 notes
·
View notes
Photo

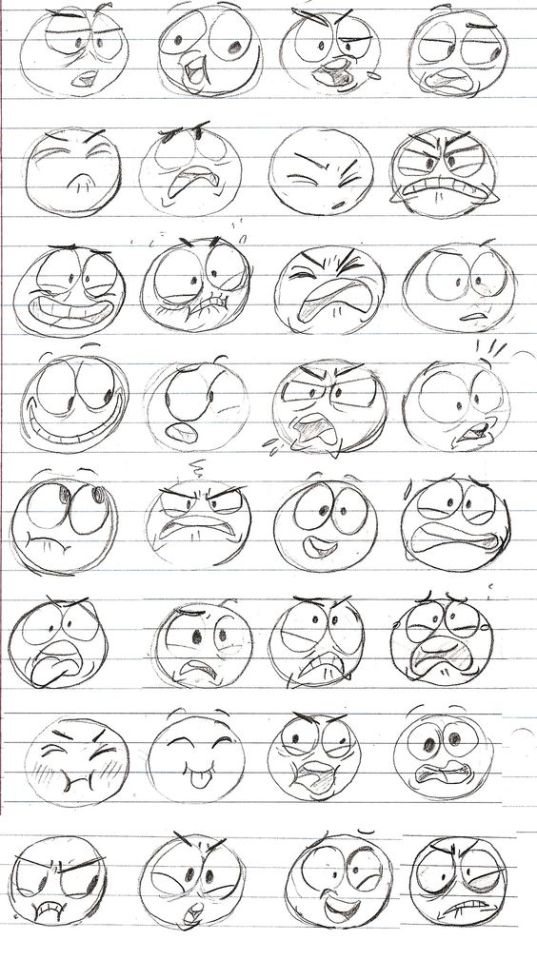
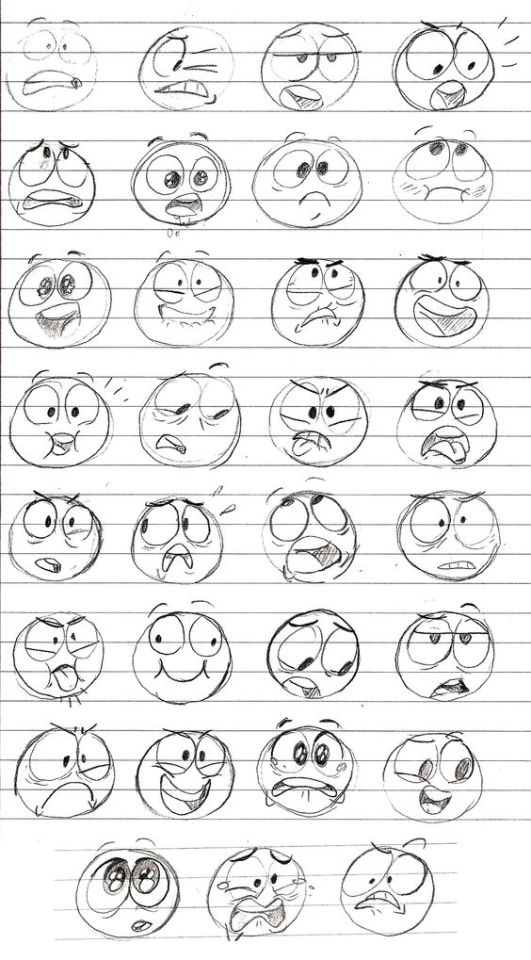
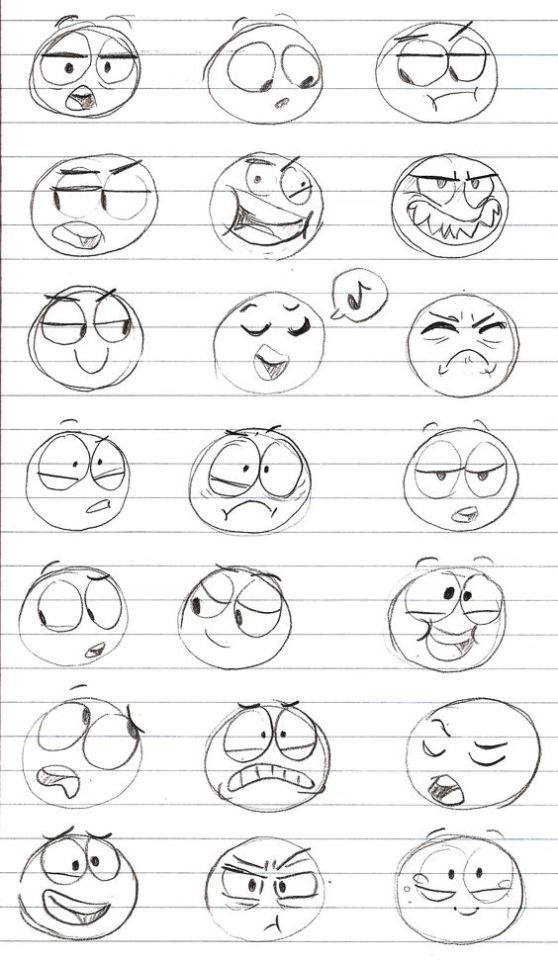
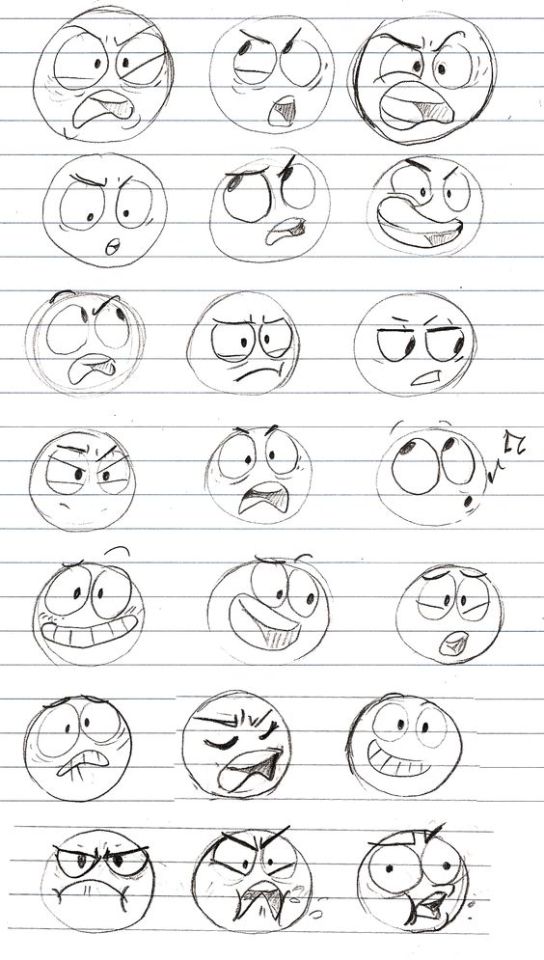
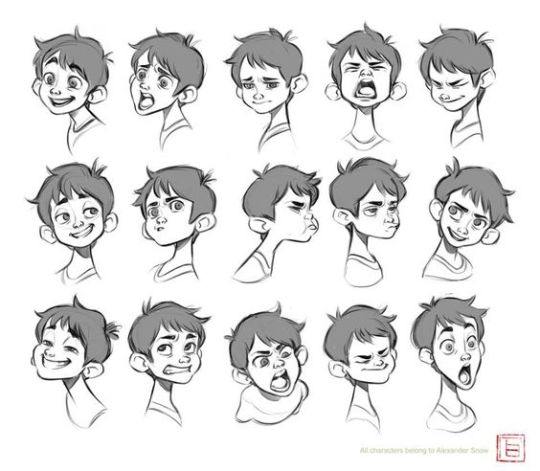


Facial Expressions Top Image Row 2 & 3 Row 4 Row 5: Left, Middle, Right Bottom Image (Source Unknown)
45K notes
·
View notes
Photo


i just found myself using this random trick that one of my art professors taught me and i thought other people might like it!
other tips: -at rest, the elbow hits the bottom of the ribcage, and the wrist hits the bottom of the crotch -the distance from your inner elbow to your wrist is about the same length as your foot -the length of your hand (from wrist to the tip of your middle finger) is about the same length as the distance between the bottom of your chin and your hairline
so, if you have a feeling that proportions are wrong on something, those work as quick gauges. like, if a character’s forearm looks too long, try to visualize their foot being the same size and see if that works. if the hands look too big, look at their size in relation to the face.
hope this helps someone!
94K notes
·
View notes
Photo

Preview page of a book I once started to write/illustrate. I should really pick this project up again sometime… (The hylian font is just there as placeholder for the preview image.)
174 notes
·
View notes
Photo

Practicing
13 notes
·
View notes
Photo
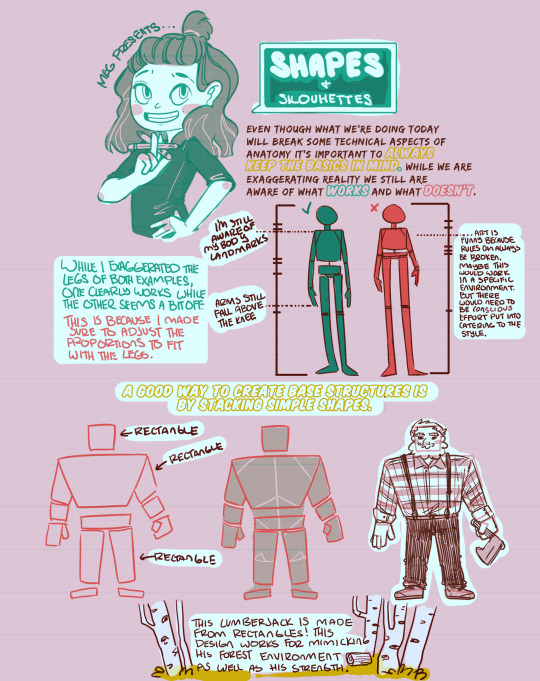
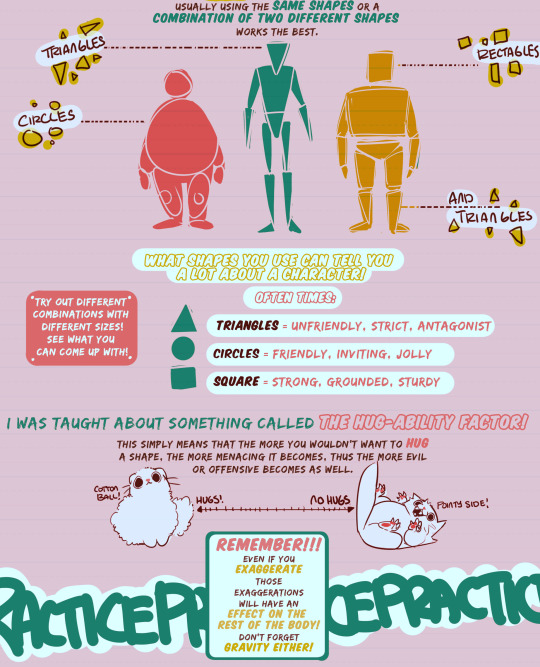

Hello, friends!
It’s Meg again and welcome back to this weeks TUTOR TUESDAY! Today we take a look at how to create characters using shapes and exaggeration!
Have any recommendations for tutorials? Send a message either to this blog or my personal one. Keep practicing, have fun, and I’ll see you next Tuesday!
3K notes
·
View notes
Photo


Hey, friends!
It’s Meg and I’m so happy to be back! Special thanks to Paul for giving us two wonderful tutorials!
Today we’re going to have a little conversation about the dreaded ‘art style’ everyone seems to be in search of! As I was writing this I realized much of it is what I wish I could tell younger me, so excuse me if it gets a lil’ sappy!
As always,if you have any recommendations for tutorials send them in to this blog or my personal blog. Keep practicing, have fun, and I’ll see you next Tuesday!
3K notes
·
View notes
Photo


Hello, friends!
It’s Meg with Part 2 of our two part TUTOR TUESDAY, where we look at expressions. If you missed it, you can find Part 1 here where we discuss specifics of the mouth. If you have any recommendations for a tutorial, let me know here or on my personal blog! Keep practicing, have fun and I’ll see you next week!
13K notes
·
View notes

