Combining heart + science as we renovate our 1890s hunting lodge in Atlanta, GA.
Don't wanna be here? Send us removal request.
Text
Recent progress, as of late July
We've made a ton of progress getting the house framed out and rough completed.


Our beautiful new front doors are in, plus significant progress with three new windows getting more light in our dining room.


Our new den / library now has new windows, with the prior windows facing our neighbors closed in.


Plus, our courtyard work is progressing with the new windows and doors in.


Our kitchen framing is complete with the new window in which the sink will center on.

Excited to see everything come together!
0 notes
Text
Aerobarrier: the secret weapon to air seal an old home
The key to anything from Energy Star to net zero to Passive House is air sealing -- i.e., ensuring that the air in your home stays in your home and you have control over the interior environment. As is said in building science: "build tight, ventilate right".
From prior blower doors during our energy audit, we knew that we had over 12,000 CFM50 of leakage, even after our encapsulation of the attic.
With the older 1890s-vintage part of the house, there are areas of the house that didn't have sheathing or weather resistant barrier. In order to get the energy savings we wanted, we were going to have to find a way to air seal the house in a much more drastic fashion than one can do with a couple of cans of spray foam.
We also didn't have the budget to pull off all of the exterior. Like most of our renovation, Matt Risinger made me aware of a new product that would significantly change our renovation path.
youtube
Aerobarrier works by pressurizing the house with a blower door and then spraying an aerosolized caulking that closes up all of the gaps and cracks in your building envelope.
We got two quotes, and ended up going with SEI Group, a large insulation and air sealing distributor with an Atlanta office.


Their installers had to spend substantial time protecting all of the horizontal, historical surfaces of the home that we were going to preserve, which would otherwise be covered by the caulking.


It took several attempts to get our house to pressurize (SEI had to manually spray foam some areas to get us to a point where the equipment could get the house up to pressure).


At last though, SEI was able to get our house pressurized and start the process. It took over 6 hours, but we were able to get our house down from 15,000 CFM50 to around 300 CFM50, or ~3ACH50.

We’ll do another blower door at the end of drywall for our “final” test out. We’re eager to see the results as we’ll have our spray foam insulation but the penalty of having our doors and windows not covered.
0 notes
Text
Renovation Progress!
As of late February / early March 2024, the breezeway had been demolished, most old doors and windows, soffits, etc. had been pulled out.


As we entered April, new doors and windows started to be installed.


Plus, the entry foyer was poured and framed!


0 notes
Text
Demolition is well underway as of mid-December!


0 notes
Text
Our Renovation Scope
Our house is an odd one! Originally a 1890s vintage hunting lodge when Buckhead was hunting ground, it has been through several rounds of renovations.
In the 1920s, the kitchen and two bedrooms were added on to the main hunting lodge. Later, the front historic home was combined with the rear guest home. In 1994, a major update was done to bring things to then-modern standards.
When we bought the house in 2015, there was significant deferred maintenance, with many things untouched since the last 1994 renovation.
The core heart of our renovation — that is, improving the architectural value while staying true to its roots are:
Enhancements to the facade, with new centered doors and windows with a distinctive trim
New entryway and courtyard
Complete kitchen renovation with new appliances
Built-ins in the den, making it more like a library
Total renovation of five of six bathrooms
Hardwood floors throughout the home
New garage doors
The science of our renovation — the nerdy details to make us as efficient as possible — include:
Crawlspace encapsulation
Adding solar panels and a Tesla PowerWall
Reglazing of all original single pane windows
Adding hot water recirculation to front house
Tankless hot water heater for rear house
Slight zone changes and new rigid metal ducting for the front house Daikin VRV Life system
Daikin Fit heat pump replacing rear house's AC and furnace
New dehumidifiers and energy recovery ventilators
New low voltage
We'll be sharing our progress along the way. Stay tuned!
0 notes
Text
Energy Audit & Spray Foam
Prior to our renovation starting in December of 2021, shortly after installing the Daikin VRV Life system and Rheem heat pump water heater, we got an energy audit from Shane Matteson at Energy Conservation Solutions.
Shane's team performed a blower door test while walking around the house, extensively reporting on various features of the house — from air sealing (using a thermal camera) and insulation, to window quality, duct leakage, etc.
The result is a 24 page report prioritizing the various items that we need to address, most of which will be tackled during our renovation. Select excerpts from the report include:
Our overall blower door score

At 1.05 ACHnat, this is truly horrible. More on that later.
Window & door leakage


Our windows and doors leaked significantly, which is unsurprising given many are single pane from the early 1900s.
Missing or poor insulation


Given that work was done in the 1970s or 80s on parts of the house, much of the insulation in the attic, walls, and subfloor was poorly installed, resulting in cold spots. No wonder we were using the average energy usage of an American house in a month during winter.
What we did next
Since we were planning to originally embark on our renovation in '22, for a while, we did nothing. For background, we were working with an architect and general contractor at the time to kick off our renovation, but put the project on hold until mid-2023.
As we approached 2023, we decided to go ahead and do anything that wouldn't conflict with the renovation, which meant spray foaming and doing some basic air sealing in January '23.


We hired Better R Value, a partner of our energy consulting firm, to do the work, installing 5.5" of open cell spray foam on the roof rafters to encapsulate the attics. They were very thorough, and we wouldn't hesitate to recommend them.
The results
We ended up reducing our blower door score to .74 ACHnat, down about 25%. It was a lot of progress for just one small change, and we're going to try and get below .5 ACHnat with our renovation.


This helped put another huge dent in our energy usage. Having completed it in Jan '23, we cut our energy usage February through March about 40% while in May to September we've decreased it by 8% versus prior year.

This is on top of the better efficiency of the heat pump we installed in October and December '21. Here is another view of all our projects. Keep in mind that the spray foam work was completed in January.

What an improvement we've made with this old hunting lodge!
0 notes
Text
Heat Pumps, Part 2 | Installing a Rheem Heat Pump Water Heater
When we bought the house in 2015, it had two hot waters heaters in the front and rear, both 50-gallon tanked gas hot waters from 2006.
Right as we were starting to think about the scope of the renovation and what we should do to our home, I saw this Matt Risinger video:
youtube
Clearly, I had heard of heat pumps but hadn't even realized that this technology had been applied to hot water! In Atlanta, the "efficient" choice that plumbers hawk is a tankless natural gas unit. This is better than tanked for many, as it provides endless hot water, but still doesn't help you decarbonize.
We decided to get Rheem's 50 gallon hybrid heat pump hot water heater for $1699 + tax & shipping. We qualified for a $250 rebate from Georgia Power.

Overall, the unit has been fantastic. We've seen a large reduction in our natural gas usage (in tandem with the Daikin VRV Life system we installed), while also being able to dehumidify our basement.
The only real qualms we had were:
1. Finding Installers - I don't even want to tell you how much we paid to have this installed. First, we had to find an electrician to install a 30-amp circuit for this.
Then, most plumbers turned down as they didn't know what a heat pump hot water heater was. The ones we did find would only give a 90 day labor warranty.
Looking back on it, I would just tell people they were installing an electric hot water heater.
2. Size - The unit was much taller than the outgoing gas hot water heater, so we had to pull some trim off of the door to our basement to get it down.
3. Whine - While no one else in the house has noticed, I do find that when the compressor is on there is a noticeable whine. This may be related to the release of the fifth generation, although since it's in our basement we haven't contacted Rheem.
Here it is next to one of our Daikin air handlers:

We would do this again in a heartbeat, but be more careful with how much we paid for the install. You can now get a 30% tax credit (up to $2000) for installing one of these.
In '22, according to the Rheem app, we've used just 1180 kWh, or about $70 of electricity at Georgia Power's lowest residential rate.
0 notes
Text
Heat Pump, Part 1 | Installing a Daikin VRV Life Multi-Zone Heat Pump
When we bought the house, it came with unbelievable energy bills: $300-400 electric bills in the height of summer, $300-400 gas bills in the height of winter.
As we got to know the house, we realized it had four separate HVAC systems, the majority of which were mid-grade AC with natural gas furnaces. With the house renovated several times over its life to expand it, these were all done piecemeal, without any regard for energy efficiency.
The front house had 6.5 tons of cooling and 180k BTU of heating across three units - way too much for the approximately two thousand square feet!
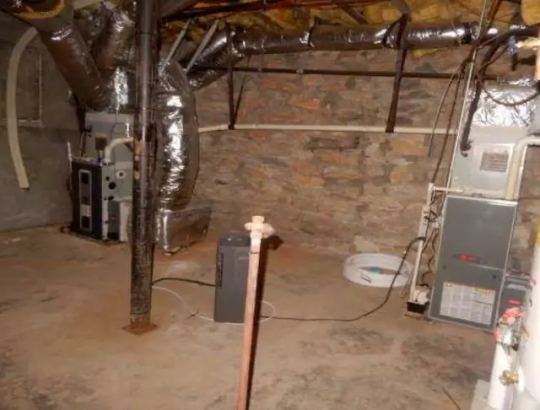
The master bedroom had a 15 year old unit with mold present on it and the guest & den's unit was a decade old with some of the duct work chewed through by mice.

I had lived in an apartment building with Daikin heat pump system and experienced $20-30 cooling and heating bills in the peak of summer and winter — something that was unheard of growing up in Atlanta!
With two of the three front units in need of replacement, and as I read more about heat pumps and passive house, I convinced the family to make the leap.
We got quotes from two contractors to install a multi-zone Daikin VRV Life heat pump. In this new system, we'd have one condenser running all of the loads for the front house zones.
After much back and forth, we landed on this:

We had issues with the kitchen being too hot in the summer, so we broke the prior 3-ton unit into two different zones. We added a furnace to make sure we could "keep up" when it got bitterly cold, although looking back on it I'm not sure that we needed such a large one.
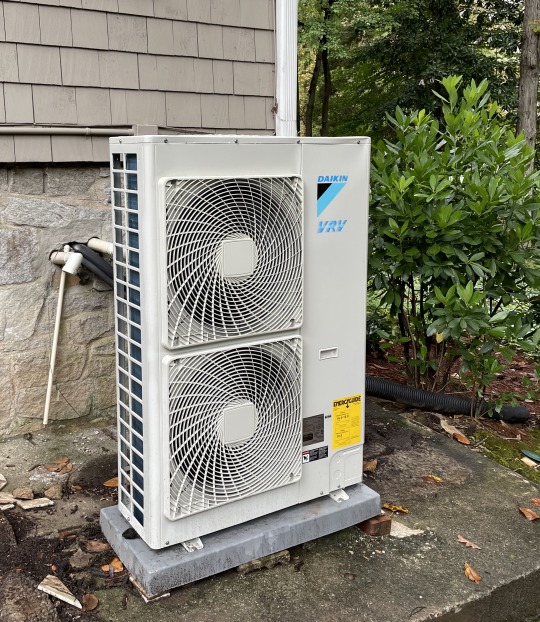
The three outdoor units totaling 6.5 tons now turned into one five-ton unit, the below Daikin VRV Life:
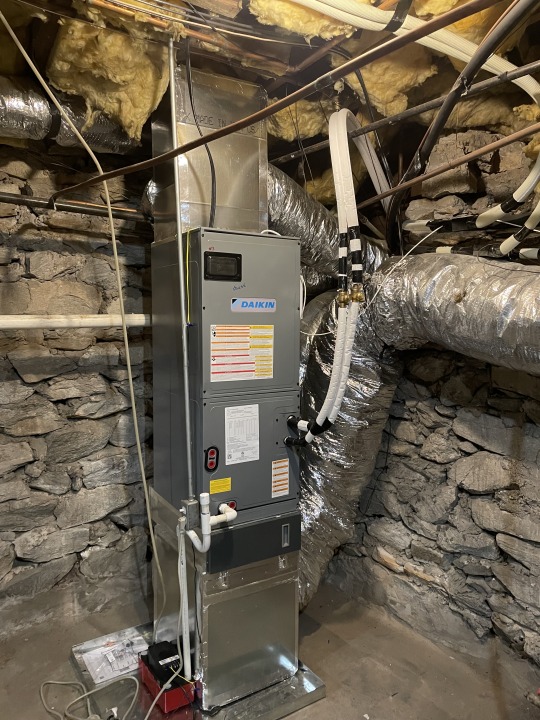
The guest and master bedroom 1.5 ton systems air handlers were well installed by our mechanical contractor on the existing ducting:
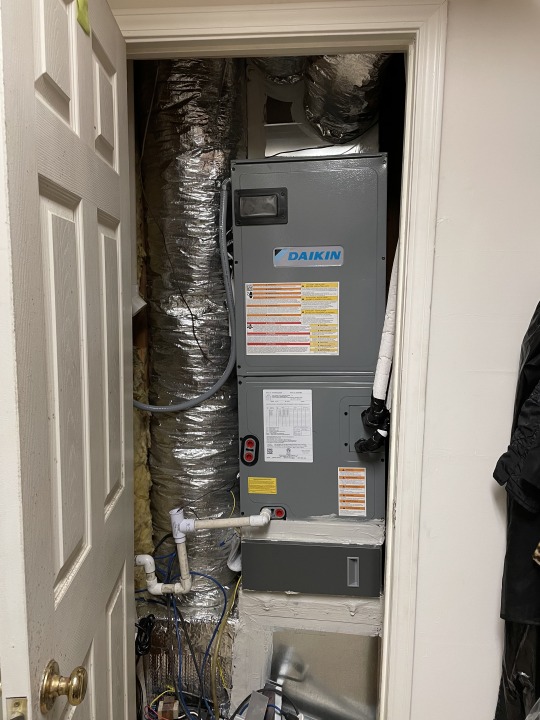
Here is the newly split up kitchen + dining room and living room units.

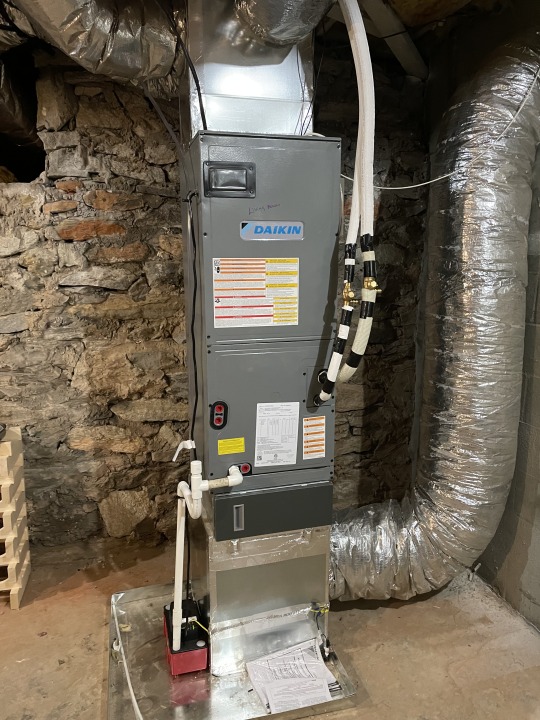
Huge shout out to our mechanical contractor Comfort Zone Heating & Cooling. Travis and Eugene did an amazing job with the install and we're thankful for their persistence in getting us up and running! They'll be our mechanical contractor for the renovation going forward.
The rear house still has a 2-ton AC with a 60k BTU furnace that we'll be replacing as a part of the renovation.
The first year with the system showed dramatic energy usage reduction versus the prior year. Note that this is electrical + natural gas (converted from therms to kWh).

As you can see, in the winter we peaked at about 13,000 kWh prior, and averaged 11,000 kWh December to Feb. Now, we were down to around 6000 kWh down about 45-50%. Summer usage has been consistently 15-30% less than before.
While we've seen savings in our electricity in the summer, this hasn't translated to "real" savings overall year-over-year since natural gas prices spiked in 2022. That said, it would have cost a lot more to heat and cool on the prior system at these higher prices.
Here is our Daikin One app, which gives us easy control over the zones:

Looking back at this, I do have a couple of things I would have done differently:
First, on an old house I would slow down and do an energy audit first. It's really important to understand what you're starting with. In our house, basic air sealing and looking at our insulation would have helped tremendously with reducing the heating and cooling loads. We ended up doing this after, which was a bit out of order.
Second, our sizing (Manual J) for this project was done by the mechanical contractor instead of a mechanical designer. They did the best they could, but since those reports are only as good as its inputs, the loads were artificially high, especially around our heating.
Live and learn!
0 notes