Video
youtube
I still think the 2022 performance is the most epic among these - plus it brought out Elden Ring theme so seamlessly.
0 notes
Video
youtube
Amhband- Sweet child of mine (Guns N' Roses) (Cover) (Tik Tok)
0 notes
Text
What is it like to play the snare drum for a performance of Ravel's Boléro?
My favourite answer because it finally gives me a glimpse into the percussionist's world during this piece.
Copied from this Quora post.
Philip Howie orchestral & wind band percussionist & drummer for 15 years
Very, very exposed.
The first minute or so is incredibly nerve-wracking. You’re playing close to the limit of your ability - literally as quietly as you can play. Each stroke must be carefully controlled, because it will be obvious to everyone if one doesn’t sound properly.
Somewhere around the third or fourth woodwind solo, you start to relax a little. You’re playing at a comfortable - if still very quiet - dynamic, and you’re still feeling fairly fresh and alert. At the same time, you’re constantly questioning your playing. You’re intensely aware that once you’ve increased your dynamic, you can’t go backwards, and you’ve got a long way to go. You don’t get a lot of help from the conductor.
Several minutes of tedium follow. Here, the challenge is to stay focused on the music. Your mind starts to drift. It’s very easy to lose concentration and realise halfway through a bar that you have no idea whether you should be playing the first or the second bar of the repeating pattern. The conductor ignores you completely.
Somewhere around the seven or eight minute mark, you notice that your nose is itching. Or there’s something in your shoe. Or the hall is really hot and you’re starting to sweat uncomfortably. Or you have a touch of cramp in your leg. Or your left stick isn’t in the perfect position in your hand. There’s literally nothing you can do about it, and you still have five minutes of this to go. You spend at least a minute trying not to think about it.
Into the closing minutes though, something else takes over. You’re no longer playing within that comfortable dynamic range, in which you spend 98% of your playing life. The music is starting to get really LOUD. Your technique is being tested in a different direction. You may have a lot more company than in those opening few bars - and even a friendly second drummer - but you’re once again feeling incredibly exposed.
The last two bars of the piece are the most terrifying part of the whole experience, because you have a rest of about a beat and a half. For the first time since you started the piece (about an hour and a half ago, by your recollection) you are not the one in control, and whether or not you land that final downbeat with the rest of the orchestra is entirely in the hands of the conductor.
Your colleagues in the percussion section gently pry your sticks out of your grasp and turn you round to face the rapturous applause. You’ve joined an elite group. You feel drawn out and used. It was worth it.
…you probably have the rest of the programme to play. ;-)
===========================================
and I found this:

===========================================
And then LOTS OF respect to this young lad ❤️ :
youtube
0 notes
Text
This is how Hedgie eats her normal food, nom nom nom…
And how she eats from a plate~
1 note
·
View note
Text
Made a new friend 🦔
It's the 3rd day in a row seeing this fella out during the day. Judging by how busy it was (very) and the way it moved (fast), I guess it's just hungry? Internet says it could be pregnant or a nursing mum.
we decided to call it Hedgie.

Hibernation season is starting. I'm a bit worried that Hedgie is not eating enough as they really shouldn't be out during the day. Internet suggested cat food, so I took out some samples and a bottle of water.
We then shared a very joyful 20 minutes together. She curled up when I placed the food next to her. But when I stepped back a metre and stood in downwind, she soon started sniffing, found the plate, and ate enthusiastically.

2 notes
·
View notes
Text
I find this really ironic...

source: https://universaldependencies.org/u/pos/INTJ.html
1 note
·
View note
Text
I have a long hallway.
Tonight I felt like running. The hallway seems a good place to do mini-running exercises.
But there is The Cat. The one who is easily spooked by everything.
So I whooshed past him (who was sitting in one of the rooms) in a return trial (ah, running feels so good, and I miss exercising, too busy).
When I stopped, The Cat was standing by the door frame, staring at me with huge eyes, looking REALLY worried.
Alright, we are not going to evacuate or abandon you. I guess this is the last time I can enjoy running inside the house...
0 notes
Text
How dare I to harness a cat
May the 4th (be with you) 2024.
☑ Made a H-shaped DIY cat harness using two robe belts.
☑ Successfully applied it to The Cat, who was complaining occasionally and seemed not to mind it too much.
☑ Took The Cat to the back lawn for a test. A bird screamed and he dashed to the bird / hole in the fence to the outside world.
☑ Pulled the leash. The Cat rolled and tried harder to dash in different directions.
☑ Got hold of one of the cat's arms. That's when he was completely out of the harness/leash.
☑ Held The Catatonic Cat back with multiple bleeding spots on my arm.
☑ The Cat is still staring at me in the far corner of the house in case I go nuts on him again.
0 notes
Text

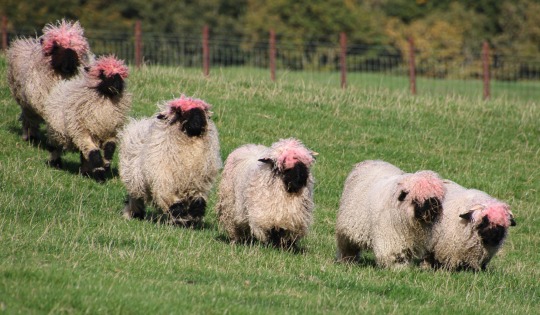

The Swiss Valais Blacknose have been rubbing themselves against the red feeder while eating and it managed to dye their wool pink.
28K notes
·
View notes
Text
Can't wait to build my own~
The Permaculture Spiral Garden - A Great Starting Point
There is probably no other structure as popular for illustrating Permaculture in practice as the Herb Spiral. Okay, I guess I could mention the lasagna sheetmulching method or also the cob oven that tends to be the first hands-on project at a typical Permie intro session. But when it comes to showing how landscape design, zones and sectors, stacking functions, and efficient use of space and water come together in one unique structure, the Spiral Garden is unbeatable.
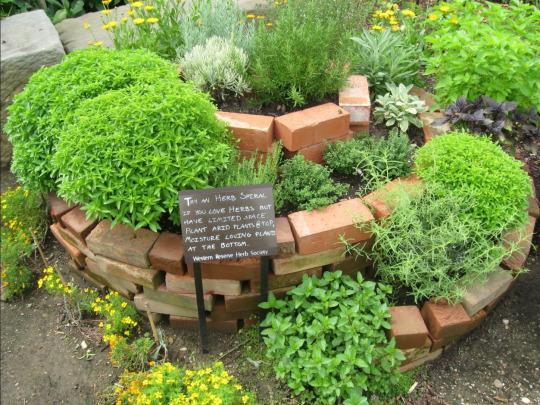
Turning Theory into Practice
In typical Permaculture Designer Certificate courses, but even in brief intro weekends to Permaculture, there tends to be a lot of theoretical discussions. Since the numerous design principles can be applied to any climatic region, from the tropical to the subarctic, and on any scale from the humongous to the tiny, the practical aspects of the ideas can easily get lost. That's where a good hands-on application comes, where the participants get to move around rocks and dirt, while realizing how much it ties in to the concepts they've just discussed. This way the apparent "main purpose" of "building something to grow all your kitchen herbs on", becomes a neat side feature.
Adjust Your Landscape!
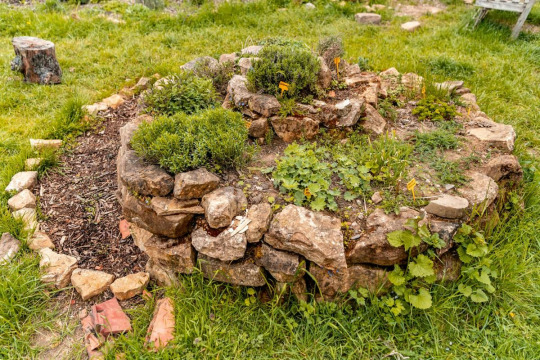
The first thing to realize that landscape is welcome to be modified and adjusted to bring out the best in it. Clearly, while it is important to work with what's there already, it doesn't hurt think about mounds and valleys. And before you bring out the excavators for your large-scale farm, it makes sense to start small… say on a circle of 2-5 meters (6-16 feet) diameter. In other words, the Spiral Garden is a hill with a spiral shaped surface, leading down to ground level, or further down into a water hole. It can be made out of rocks, bricks, concrete debris, or anything else you have lying around that can hold your soil.
Design According to Your Scale
Looking around for existing Herb Spirals it's easy to get confused. Some are so big you can actually climb on them (that is, you have to in order to reach what's growing on top). Others are so tiny that you may not even want to step on them. The question is: which size is the right one for you? Since this is something you will have to decide almost daily in Permaculture, it doesn't hurt starting out with this important question.
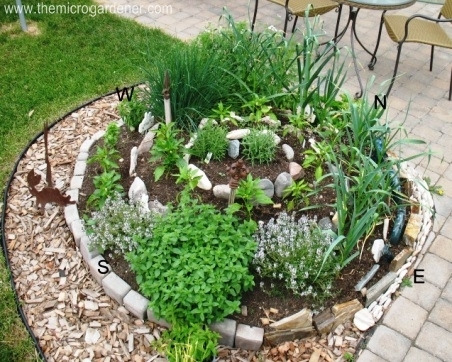
Organizing Your Spiral Garden
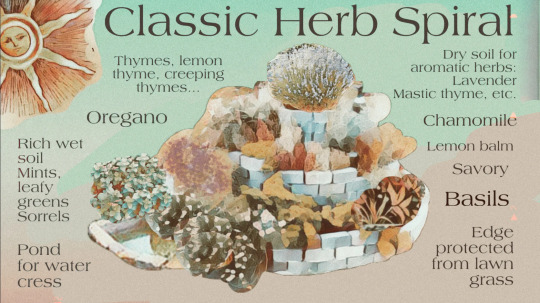
While there are seemingly endless types of Spiral Gardens, there are a few things they all have in common: They all start out with a region on the top, where water is bound to run off right away, leaving the soil relatively dry. This area is also the most exposed to the wind. Keep this in mind when choosing the plants that are going to live here. Ideally, the spiral should start sloping toward the East from here. Delicate plants that benefit greatly from the morning sun will appreciate this region. As the slope continues toward the South and West, it becomes more suitable for sun loving species. Finally, as the spiral reaches the ground level in the shady Northern part, it will be perfect for herbs that prefer less sun, more shade and more water, since the soil tends to be wetter here. (Note: This is for the Northern Hemisphere. In the Southern Hemisphere North and South are reversed.) To make full use of the runoff water, many people add a small pond at the base of the spiral, where additional aquatic plants, such as watercress, can be grown.
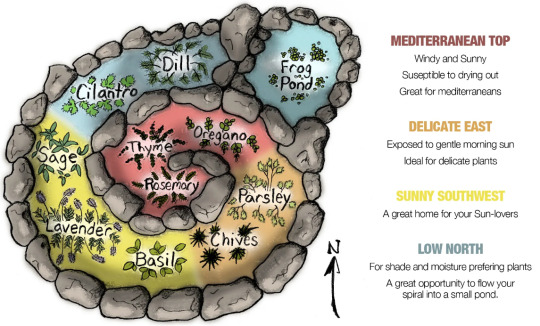
The given illustration offers a good number of herbs for a nicely diverse kitchen. Depending on what else you want in your Herb Spiral, you can add it in the most suitable region. Mint and lemon balm love the cooler, shady part with more water. Lemongrass is great in the sunny area, and tarragon and estragon prefer the dry top of the spiral. Of course, the idea is not limited to kitchen herbs. For maximalists, the same theory can work with a mountain you might want to terraform into a spiral farm. But right now I'd prefer to stay small scale.
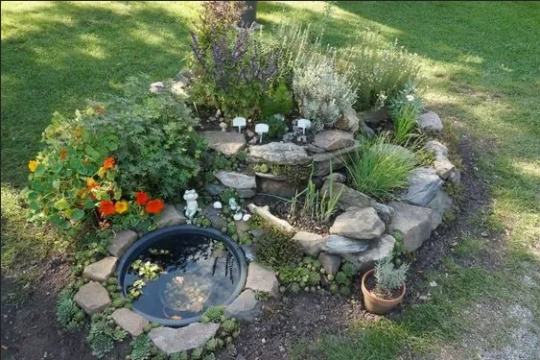
Plenty of Benefits (That's Why It's Permaculture)
As explained above, the main purpose of the Spiral Garden is not only to increase your gardening area by making use of the vertical, but also to create diverse climatic conditions, which do make a difference on the smallest scale. But as Permaculture tends to be, there are many other benefits to it. The structure itself offers great habitat for numerous animals, such as frogs, salamanders, lizards, but also pollinating insects, and of course others that may not directly benefit us, but by feeding on others they all add to the stability of our ecosystem. The structure itself will suppress weeds and make use of material that you're not likely to use elsewhere. Finally, depending on the size and location, it will be an ideal place to grow all your kitchen herbs right where you can access them most easily.
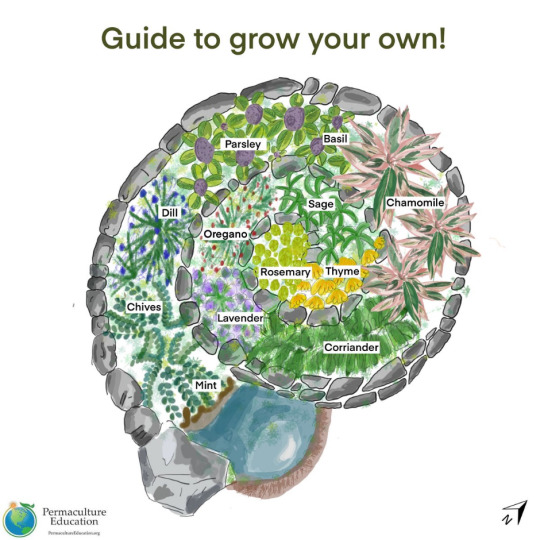
Some Things to Keep in Mind
When building the structure, make sure it will contain the soil in a nice trough, slanting slightly inward. That way bits and pieces that fall off will roll towards the center, until contained by the main mound.
Make sure the slope is always nice and gradual, avoiding sudden drops where the water can rush down quickly, eroding the soil.
If you're going to walk on your spiral, include a separate walkway that won't compress good soil. Most importantly, it should be sturdy enough to provide stability and make access safe.
Don't forget that while the structure is important to keep the soil in place, it is the soil that you'll be growing plants in. So it should have a good depth of 20-50 cm (8-20 inches) throughout the entire spiral. This can be the trickiest part!
Apply your own observation to which plants do better in which parts of the spiral. Also, with time you will find many other plants growing in it that you didn't plant. Before removing them, consider how much they actually bother your herbs, and whether their benefits may not outweigh their drawbacks.
Go Out and Build Your Own!
I hope this brief overview got you inspired to go out and try building an Herb Spiral yourself! I would love to hear your experiences with it!
Sources: 1, 2, 3, 4
3K notes
·
View notes
Text
Things to Do that Aren't Related to Growing Plants
This is my second post in a series I’ll be making on how to increase biodiversity on a budget! I’m not an expert--just an enthusiast--but I hope something you find here helps!
Some of us just don’t have much luck when it comes to growing plants. Some of us simply want to aim for other ways to help that don’t involve putting on gardening gloves. Maybe you've already got a garden, but you want to do more. No problem! There’s a couple of options you can look into that’ll help attract wildlife in your area without even having to bring out any shovels!
Provide a Water Source
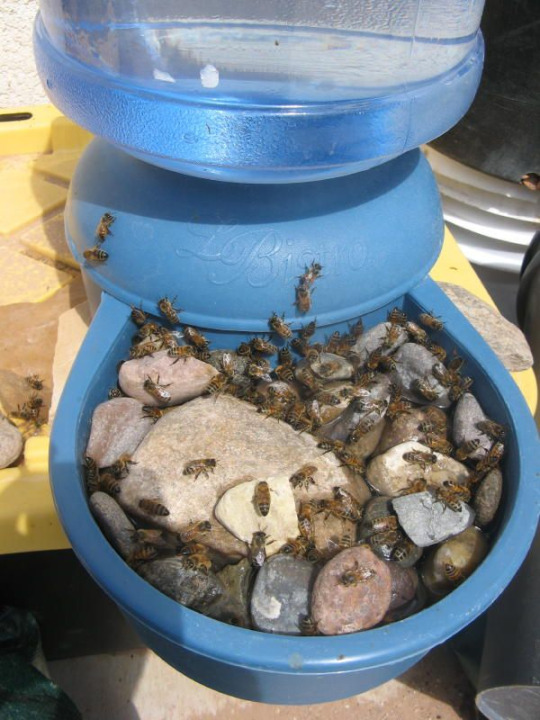
Oftentimes when I see ‘add a water source’ in informational articles about improving your backyard for wildlife, it’s almost always followed by an image of a gorgeous backyard pond with a waterfall and rock lining that looks expensive to set up, difficult to maintain, and overall just… not feasible for me. Arguably, not feasible for a lot of people. And that’s okay! There’s still ways to add water in your garden for all kinds of creatures to enjoy!
There’s tons of ways to create watering stations for insects like bees and butterflies. A self refilling dog bowl can work wonders! Add some stones into the receiving tray for insects to land on or use to climb out, and you’ve got a wonderful drinking spot for all kinds of insects! You can also fill a saucer or other dish with small stones and fill it, though it’ll likely need refilling daily or even several times a day during hot times.
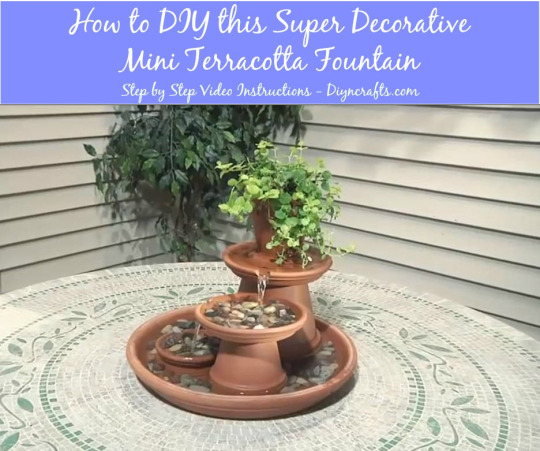
I've seen people online use all kinds of things to make water features. Some go with terra-cotta pots, pebbles, and a cheap pump to get a small and simple fountain. Others use old tires, clay, and a hole in the ground to create an in-ground mini pond system. If all else fails, even a bucket or watertight box with a few plants in it can do the trick--though do be wary of mosquitoes if the water isn’t moving. In situations like these, a solar-powered fountain pump or bubbler are great for keeping the water moving while still making it a drinking option for wildlife (it not even more appealing for some)--and these items can be obtained fairly cheap online!
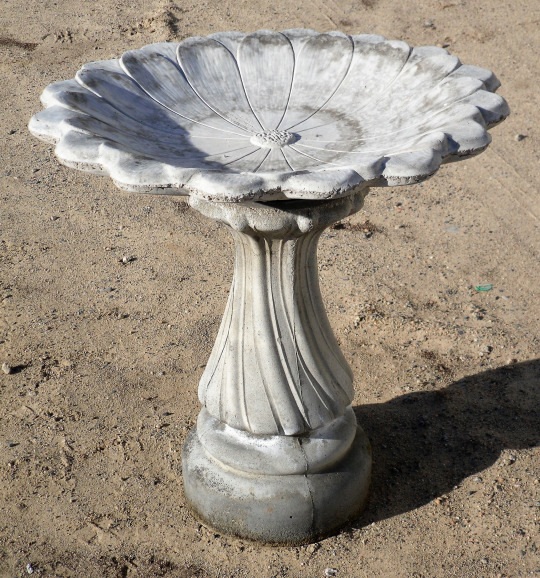
Bird baths are an option as well--a classic way to provide for birds in your area, they can be easy to find online or in a gardening store! The only downside is that a good, quality bird bath can be pricey up-front. However, a nice stone bird bath should last a long time, be easy to clean and refill, and be enjoyed by many birds! I’ve also seen tutorials on how to make your own with quickcrete! Bird baths will be a welcome sight to birds, as they provide a space for them to drink and bathe to regulate the oils in their feathers for flight and insulation. Putting a stone in the middle will also help insects to escape if they fall in, and provide a place to perch so they can get their own drink. You’ll want to change the water and clean the baths regularly--as often as once a week, if you can manage it.
If possible, it’s highly encouraged to fill and refill water features with rainwater instead of tap water. Tap water is often treated, so instead of using hoses or indoor kitchen water, collecting some rainwater is a great alternative. Collecting rainwater can be as simple as leaving cups, bins, or pots outside for awhile.
Butterflies and other creatures will also drink from mud puddles. If you can maintain an area of damp soil mixed with a small amount of salt or wood ash, this can be fantastic for them! Some plants also excel at storing water within their leaves and flowers (bromeliads come to mind), making them an excellent habitat for amphibians as well as a drinking spot for insects and birds.
Bird Feeders and Bird Houses
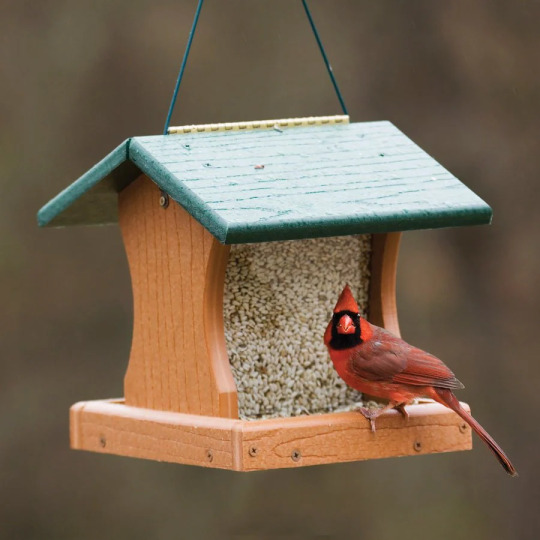
Some of the fancy, decorated bird feeders are expensive, but others can be pretty low-cost--I got my bird feeder from Lowe’s for around 10 dollars, and a big bag of birdseed was around another 10 dollars and has lasted several refills! If you don’t mind occasionally buying more birdseed, a single birdfeeder can do a lot to attract and support local birds! If you’re handy, have some spare wood, and have or can borrow some tools, you may even be able to find instructions online to make your own feeder. You may not even need wood to do so! Even hummingbird feeders, I’ve found, are quick to attract them, as long as you keep them stocked up on fresh sugar water in the spring and summer!
An important note with bird feeders is that you have to make sure you can clean them regularly. Otherwise, they may become a vector for disease, and we want to avoid causing harm whenever possible. Also keep an ear out and track if there’s known outbreaks of bird diseases in your area. If local birding societies and scientists are advising you take your birdfeeders down for awhile, by all means, do it!
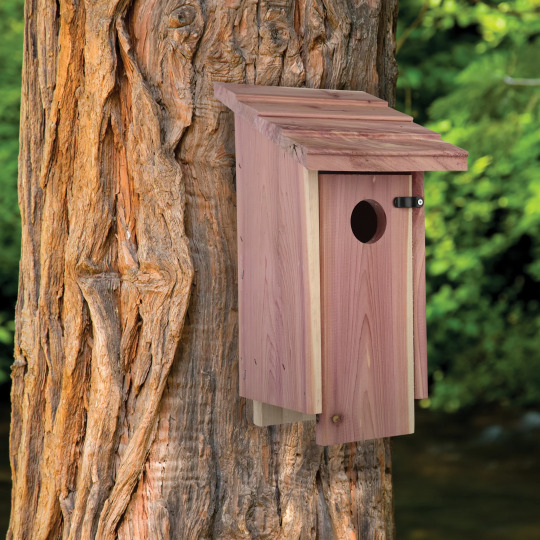
Bird houses are naturally paired with bird feeders as biodiversity promoters for backyard spaces, and it makes sense. Having bird houses suited to birds in your area promotes them to breed, raise their young, disperse seeds, and generally engage in your surrounding environment. Setting them up takes careful selection or construction, preparation, and some patience, but sooner or later you might get some little homemakers! Keep in mind, you will need to clean your birdhouses at least once a year (if not once per brood) to make sure they’re ready and safe for birds year after year--you wouldn’t want to promote disease and parasites, after all. But they could be a valuable option for your landscape, whether you purchase one or construct your own!
Again, do make sure you're putting up the right kind of boxes for the right kinds of birds. Bluebird boxes are some I see sold most commonly, but in my area I believe they're not even all that common--a nesting box for cardinals or chickadees would be far more likely to see success here! And some birds don't even nest in boxes--robins and some other birds are more likely to use a nesting shelf, instead! Research what birds live in your area, take note of any you see around already, and pick a few target species to make homes for!
Solitary Bee Houses
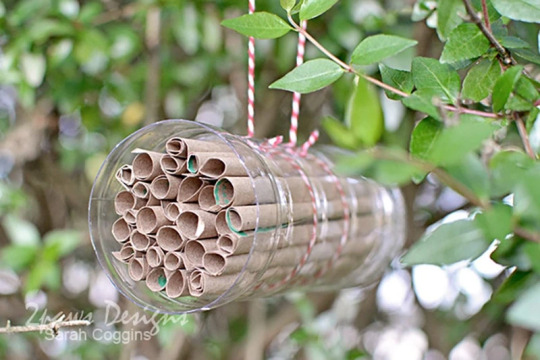
A bee house or bee hotel is a fantastic way to support the solitary bees in your area! For a few dollars and some annual cleaning, you can buy a solitary bee house from most big box nurseries. Alternatively, you can make one at home, with an array of materials you may already have lying around! You can even make them so that they’ll benefit all kinds of insects, and not necessarily just bees.
Though you don’t even necessarily have to break out the hammer and nails, buy a ton of bricks, or borrow a staple gun. Making homes for tunneling bees can be as simple as drilling holes in a log and erecting it, or drilling holes in stumps and dead trees on your property. You might even attract some woodpeckers by doing this!
Providing Nesting Area
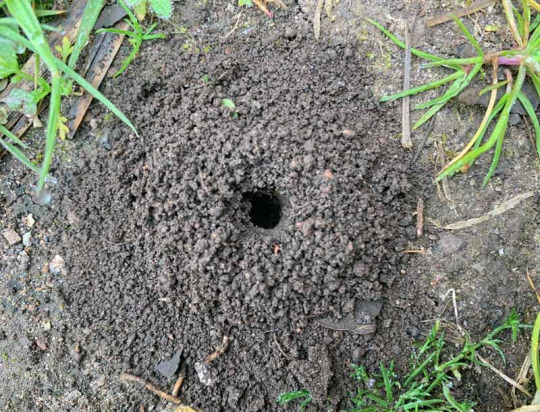
There are tons of different kinds of bees, and they all make different kinds of homes for themselves. Not all of them make big cavity hives like honey bees, or will utilize a solitary bee house. Bumblebees live in social hives underground, particularly in abandoned holes made by rodents--some others nest in abandoned bird nests, or cavities like hollow logs, spaces between rocks, compost piles, or unoccupied birdhouses. Borer, Ground, and Miner bees dig into bare, dry soil to create their nests. Sparsely-vegetated patches of soil in well-drained areas are great places to find them making their nests, so providing a similar habitat somewhere in the garden can encourage them to come! I do talk later in this document about mulching bare soil in a garden--however, leaving soil in sunny areas and south-facing slopes bare provides optimal ground nesting habitat. Some species prefer to nest at the base of plants, or loose sandy soil, or smooth-packed and flat bare ground. They’ve also been known to take advantage of soil piles, knocked over tree roots, wheel ruts in farm roads, baseball diamonds and golf course sand traps. You can create nesting ground by digging ditches or creating nesting mounds in well-drained, open, sunny areas with sandy or silty soil. However, artificially constructed ground nests may only have limited success.
Providing Alternative Pollinator Foods
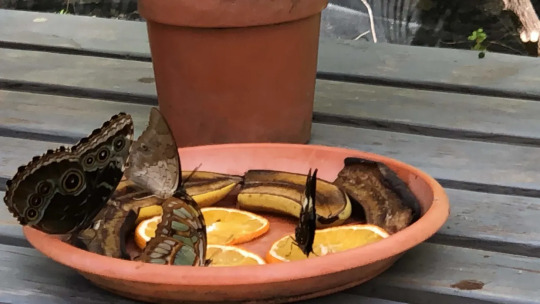
Nectar and pollen aren’t the only foods sought out by some pollinators! Some species of butterflies are known to flock to overripe fruit or honey water, so setting these out can be an excellent way to provide food to wildlife. You may want to be cautious about how you set these out, otherwise it can help other wildlife, like ants or raccoons. Butterflies may also drop by to visit a sponge in a dish of lightly salted water.
Bat Houses and Boxes
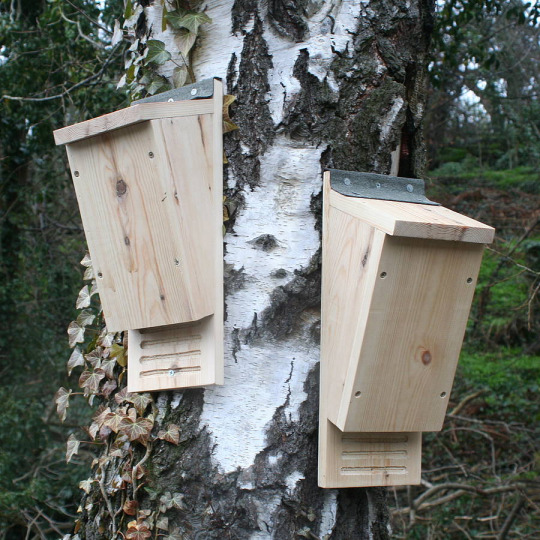
Big or small, whether they support five bats or five hundred, making bat boxes and supporting local bats is a great way to boost biodiversity! Not only will they eat mosquitoes and other pest species, but you may also be able to use the guano (bat droppings) as fertilizer! Do be careful if you choose to do that though--I’ve never had the opportunity to, so do some research into how strong it is and use it accordingly.
Provide Passageway Points
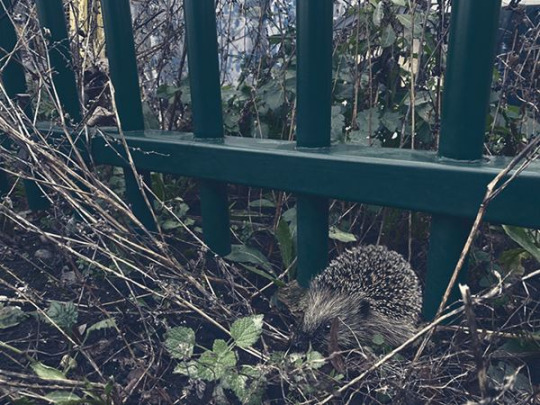
If you want your area to be more accessible for creatures that can’t fly or climb fences, allowing or creating access points can be an excellent way to give them a way in and out. Holes in the bottom of walls or fences can be sheltered with plants to allow animals through.
In a somewhat similar manner, if you’re adding a water fixture, it’s important to provide animals a way to get into and out of the pond--no way in, and they can’t use the water. No way out, and they may drown. Creating a naturalistic ramp out of wood beams or sticks, or stepped platforms out of bricks, stones, or logs can do the trick.
Get or Keep Logs and Brush Piles

I’ve already mentioned logs a good handful of times so far in this post. To be used as access ramps, or as nesting areas for solitary bees. But they have value as much more than that! Logs on the ground provide shelter for all kinds of animals, especially depending on size--anything from mice, reptiles, and amphibians to things like turkey vultures and bears will use fallen logs as shelter. Inside of a decaying log, there’s a lot of humidity, so amphibians are big fans of them--meanwhile, the upper sides of them can be used as sunning platforms by things like lizards. Other animals can also use the insides of logs as nest sites and hiding places from predators too big to fit inside. Fungi, spiders, beetles, termites, ants, grubs, worms, snails, slugs, and likely much more can be found inside rotting logs, using the rotting wood as food sources or nesting places. They can then provide food for mammals, amphibians, reptiles, and birds. They can also be regarded as a landmark or territory marker as wildlife get more familiar with your space.
So how do you get logs for cheap? Try Chip Drop! I talk about them more in a future post, but you can mark saying that you’d like logs in your drop, so they’ll give you any they have! In fact, you may even get a drop faster if you're willing to accept some logs. You may also be able to approach arborists you see working in your area and ask for logs. There may also be local online listings for people selling logs for cheap, or just trying to get rid of them. If there’s land development going on near you, you may be able to snag logs from trees they cut down to make space. Do keep in mind, you don’t need to have huge gigantic logs laying around your property to make an impact--even small logs can help a lot.
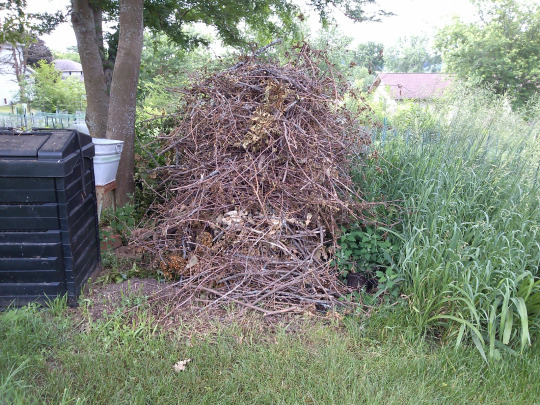
If possible, creating and leaving brush piles on the edge of your property can be a great boost to biodiversity--even if you may not see the wildlife using it. They’ll provide shelter from weather and predators, and lower portions are cool and shady for creatures to avoid the hot sun. The upper layers can be used as perch sites and nest sites for song birds, while lower layers are resting sites for amphibians and reptiles, and escape sites for many mammals. As the material decays, they also attract insects, and as such they’ll attract insect-eating animals too. As more small animals find refuse in your brush pile, their predators will be attracted to them as well. Owls, hawks, foxes, and coyotes are known to visit brush piles to hunt. Making a brush pile can be as simple as piling branches and leaves into a mound, as big or as small as you want. You can even use tree stumps or old fence posts near the base, and keep stacking on plant trimmings and fallen branches. Do note that you don’t want to do this near anything like a fire pit.
Don't forget, with all of these, your mileage may vary for any variation of reasons, so don't worry if you can't take all of even any of these actions! Even just talking about them with other people may inspire someone else to put out a bat box, or leave a few logs out for wildlife!
That's the end of this post! My next post is gonna be about ways to get seeds and plants as cheaply as possible. For now, I hope this advice helps! Feel free to reply with any questions, success stories, or anything you think I may have forgotten to add in!
5K notes
·
View notes
Text
Hyperbolic beauties


↑ Source and more interesting readings: The Hyperbolic Geometry of Mental Space

↑ Source and more interesting readings: Gravity Waves, Noble Prizes, and Crochet

↑ Source and more interesting readings: Annular Hyperbolic Surfaces
And
youtube
0 notes


