Don't wanna be here? Send us removal request.
Video
tumblr
10-20 SECOND 3D ANIMATION PROJECT - FINAL ANIMATION
This is my final pan or track for this project.
0 notes
Video
tumblr
10-20 SECOND 3D ANIMATION PROJECT - CHARACTER TURNTABLE
This is the final turntable render of Udi’s character model.
0 notes
Text
10-20 SECOND 3D ANIMATION PROJECT - ENVIRONMENT MODELLING: BUILDING & TEXTURE
After finishing the modelling of the character, I am modelling the environment of the animation. Here is what the buildings would look.
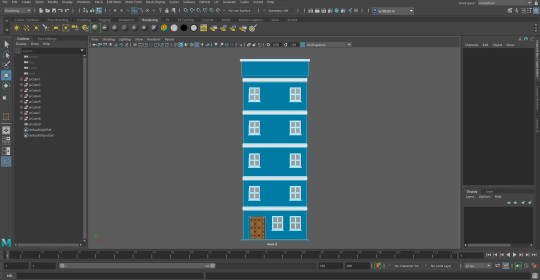
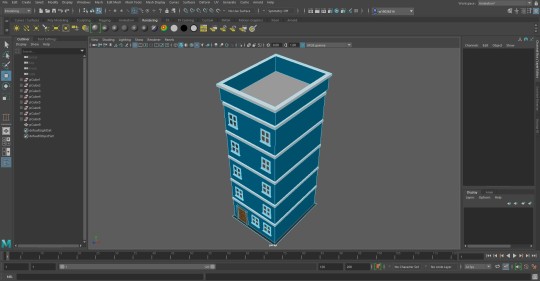
I am adding textures to some of the surfaces in the environment. For the door, I am using the texture below, which can be found from the website SketchUp Textures, and it is free to use.
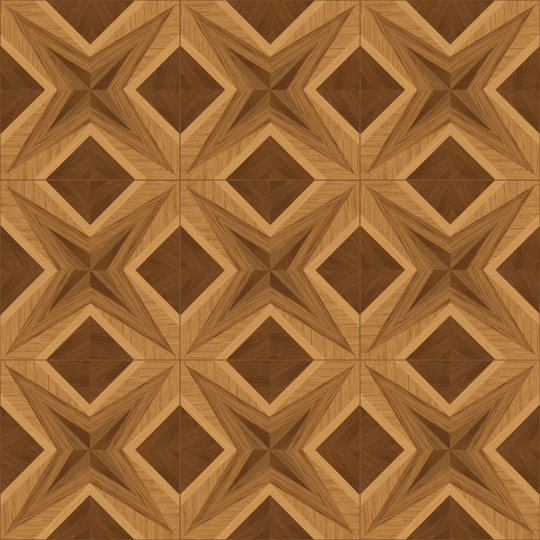
(Photo from: https://www.sketchuptextureclub.com/textures/architecture/wood-floors/geometric-pattern/parquet-geometric-pattern-texture-seamless-04768)
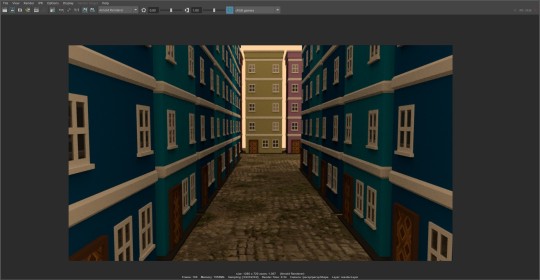
Here is the street view in the final environment. However, I am not including this view in my scene because the cameras are focusing on the main characters at the rooftop. Therefore, I am uploading this snapshot of the street to here, showing about the texture of the road and what the environment would be.
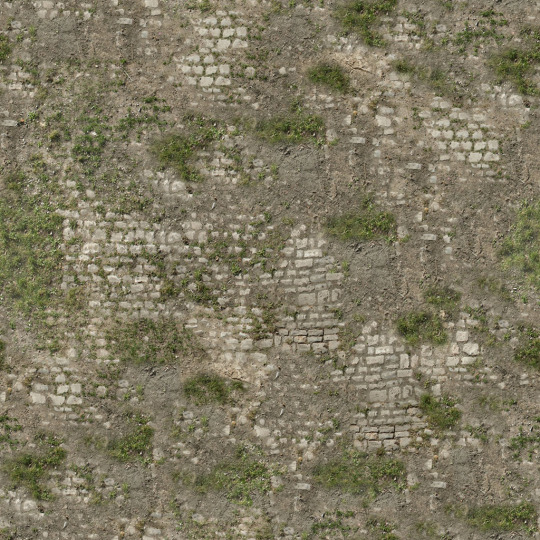
(Photo from: https://www.sketchuptextureclub.com/textures/architecture/roads/paving-streets/damaged-cobble/damaged-street-paving-cobblestone-texture-seamless-07466)
0 notes
Text
10-20 SECOND 3D ANIMATION PROJECT - CHARACTER MODELLING: PROCESS 9
Painting the skin weight has almost driven me crazy, but I can still manage the problem and generally solved it.
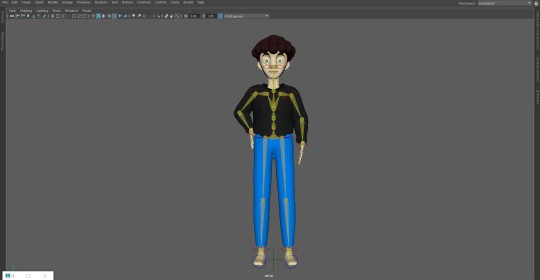
Here is the problem-fixed version of the rigged character. Although there are still some tiny details mistakenly moved, they won’t affect the general view of the character. I am making a pose for the Udi model, just like he is saying, ‘Finally, I can move!’
For the rigging of the clothes, I followed the tutorial below to combine them with the skin of the character. There is a script provided in the video, which is the function of selecting all the moving parts of the joints and so the clothes can combine with the skin perfectly.
Modding Rigs with the "Copy Skin Weights Tool" - Maya Rigging Tips by Daniel Arata
youtube
0 notes
Text
10-20 SECOND 3D ANIMATION PROJECT - CHARACTER MODELLING: PROCESS 8
The problem of the skin weight painting is still there, however I want to finish the UV mapping first. Therefore, I am ignoring the rigs at the moment and focusing on UV mapping of the character.
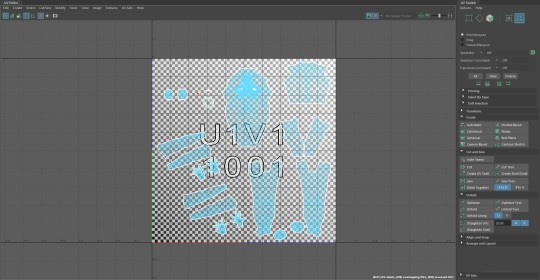

Here are the unwrapped body parts of the character model. I can cut out these parts because I watched a tutorial on making them and create UV mapping for them. There are some parts at the top-left corner not expected to be cut, but it is okay not to care about them as I only paint for the character’s head.
Autodesk Maya 2018 Quick UV Mapping and Unwrapping Tutorial by Aneta V
youtube
UV Mapping Texture
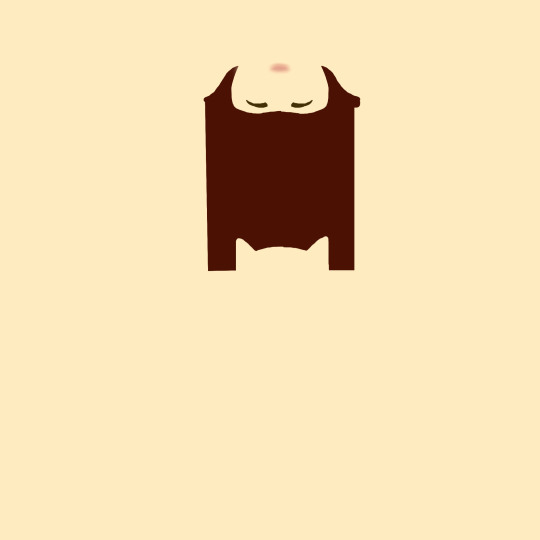
Final Outcome
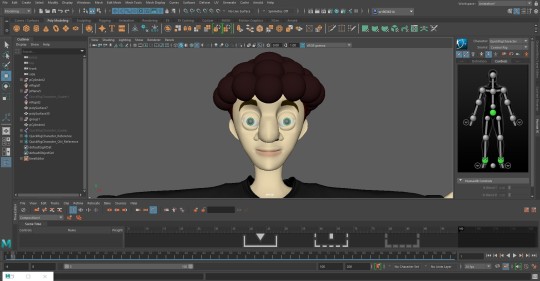
In the above, there are the UV mapping texture and the final outcome of the character’s head. The texture I drew is fitted the head perfectly. Finally I can see Udi’s eyebrows also the hair under the spheres. Besides, I have added colours to his lips.
It takes a bit longer to cut out the parts than I expected. Luckily, the outcome is what I am expecting to show.
0 notes
Text
10-20 SECOND 3D ANIMATION PROJECT - CHARACTER MODELLING: PROCESS 7
It comes to the process of adding rigs to the character model. I modelled the hoodie, and haven’t model the jeans yet. I want to try moving the characters with the rigs first.
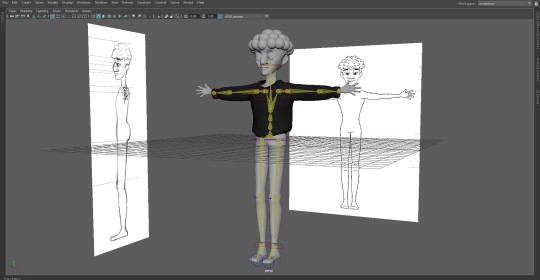
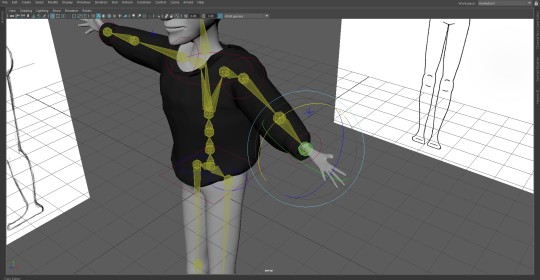
Quick Rigging and Skinning a character for beginners by Maya Learning Channel
youtube
I am following this tutorial to create the rigs for my character. I found that the process of adding rigs to the characters can be simple or complicated. You can add the rig automatically with only a click, or you can add rigs manually. However, the problem is that it is difficult to paint the skin weights. Painting a specific area white for a joint part means the area would move together with the joints, and the unpainted parts will stay at its position. I took a really long time to do the painting, but there are still problems when I am moving or spinning the joints, like when I am spinning the hand part, another tiny areas are mistakenly selected and spin together. I am going to continue the process until the problems can be solved.
0 notes
Text
10-20 SECOND 3D ANIMATION PROJECT - CHARACTER MODELLING: PROCESS 6
For now, I have finished modelling Udi’s body, and it is ready to be rigged.
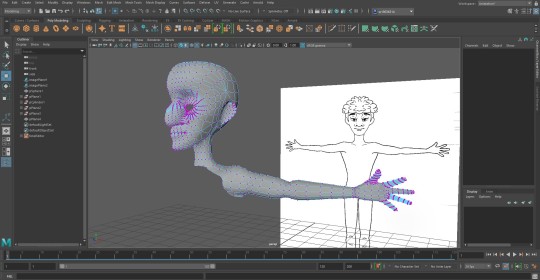
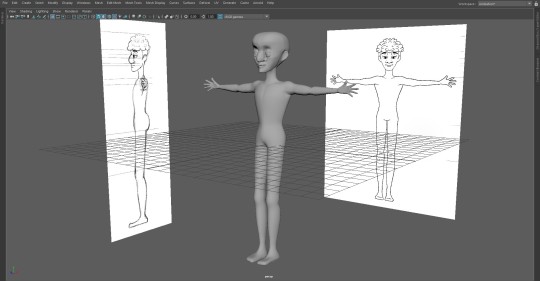
I haven’t made the hair for the model yet, and I am thinking of combining a few spheres to create the ‘curly effect’. Moreover, I didn’t model the detail of his feet, so it will be like two flat rectangles moving if the character is walking.
I’ve made a mistake when locating the direction of his hands, and I realized that after finished the model. I will try to find a way to change their direction downwards, or else there would be a big problem when rigging the character.
0 notes
Text
10-20 SECOND 3D ANIMATION PROJECT - STORYBOARD
Considering the overrun animation of the original scene, I am deleting some of the content and the final adjustment of the story would be this:
The angel got up too and looked down into the street. He opened his mouth to say something. Suddenly, Udi gave him a little shove from behind, and the angel lost his balance. Udi was just fooling around. He didn’t really mean to hurt the angel, just to make him fly a little, for laughs. But the angel dropped the whole five floors, like a sack of potatoes. Stunned, Udi watched him lying there on the sidewalk below. His whole body was completely still, except the wings, which were still fluttering a little, like when someone dies. That’s when he finally understood that of all the things the angel had told him, nothing was true. That he wasn’t even an angel, just a liar with wings.
Also, I drew a storyboard for the final animation.
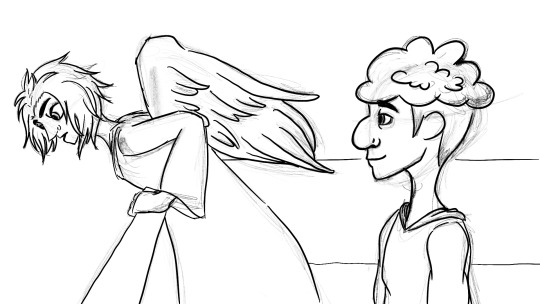
1: The angel is looking down to the street. Udi is looking at the angel, ready to give him a little shove from behind.
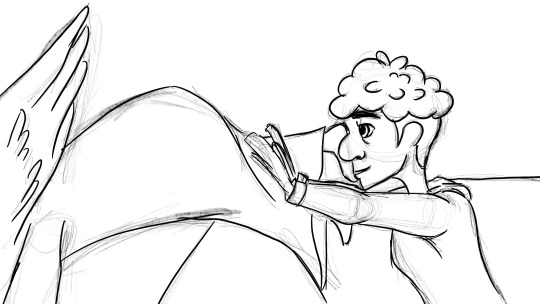
2: Udi pushes the angel down to the street, wanting to see him fly.

3: Udi looks down to the street.
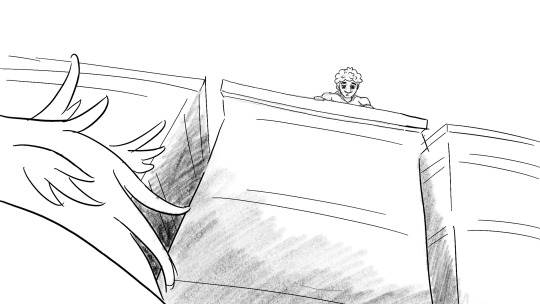
4: The angel is covered in blood and not moving. Udi finds that the angel is a liar.
Considering the limited time to finish the project, I don’t have enough time to model the angel character, so I am making the final animation in 2D and 3D blended style. Udi and the environment would be in 3D, and the angel would be in 2D.
0 notes
Text
10-20 SECOND 3D ANIMATION PROJECT - CHARACTER MODELLING: PROCESS 5
Finally, I finished drawing the head of Udi!
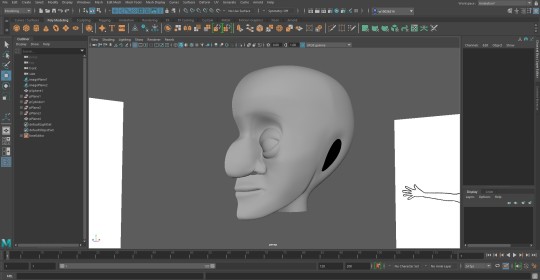
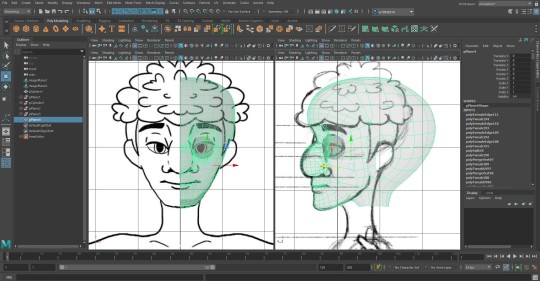
I am so happy to see myself making a head of a character, a character designed by me! There is still a lot for me to improve, like the design of the T-pose draft, also the structure of a human head. This is the first time for me to create such project, and I can’t wait to see a whole rigged character making by myself!
When I am drawing the faces of the head, I don’t know if I have pressed the wrong button. When I want to combine the vertices or the edges, there are two surfaces with one I am seeing when I was drawing the faces, and the another one is bumpy. I just hope that it won’t affect the process later on, as I don’t want to redo the whole process again......
0 notes
Text
10-20 SECOND 3D ANIMATION PROJECT - CHARACTER MODELLING: PROCESS 4
This time, I didn’t follow the exact draft to draw the back head. As you can see, the size are not matched.
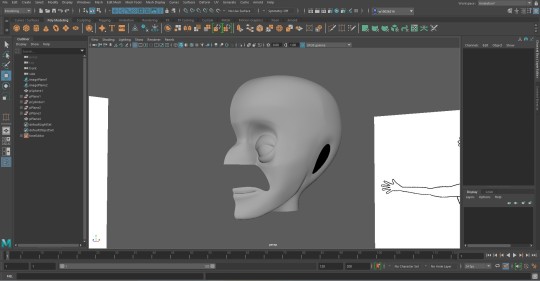
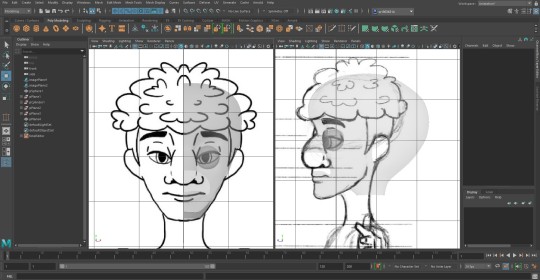
I tried to move the vertices following my intuition. It turns out a quite nice result. I will move the head forward to make the neck and the rest of the body parts, after I finished modelling Udi’s nose and the jaw.
0 notes
Text
10-20 SECOND 3D ANIMATION PROJECT - CHARACTER MODELLING: PROCESS 3
In this process, I am seeing a huge improvement on the time I used to model. At the same time, the rough shape of my character is coming out.
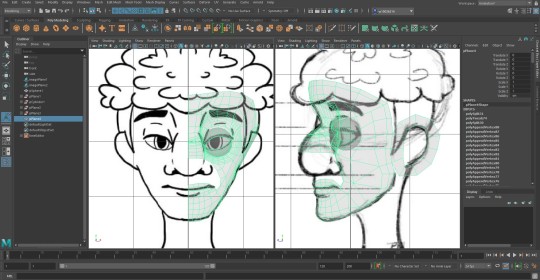
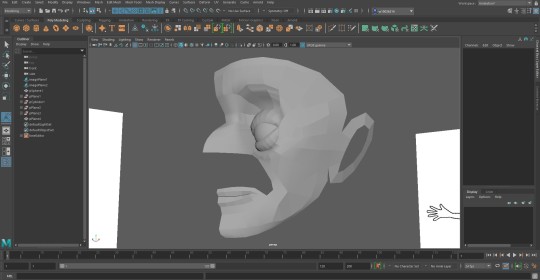
Comparing to the last two process, I used less time to finish this part. However, I found that my T-pose draft had a little problem. Sometimes the parts are not in the same level and I need to adjust it without a guide. Moreover, the head I drew is too flat. The back head should be a bit further away from the forehead. I will try making adjustments when I am modelling to see if it comes out a good look at last.
0 notes
Text
10-20 SECOND 3D ANIMATION PROJECT - CHARACTER MODELLING: PROCESS 2
Having the experience of making the complicated eye, this time I am not making too much edges for other parts on the head, and it seems that I am having improvements on modelling.
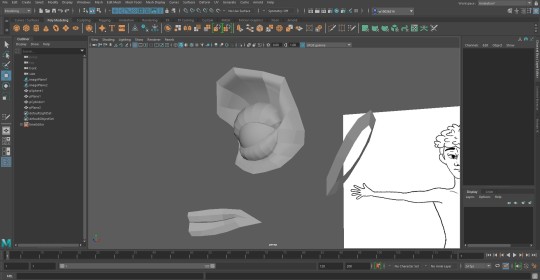
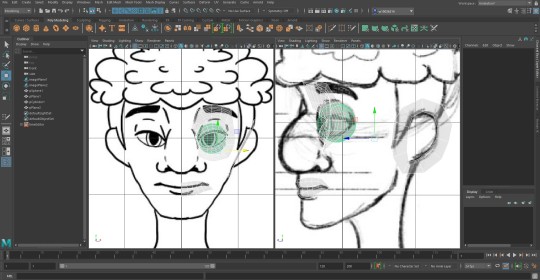
I followed the instructions from Gary’s Head Retopology Tutorials, and finally I am having progress! What I made is that I extended the eyelid part till to the eyebrow’s position, and I drew the lips and the connection between the head and the ear.
There is one difficulty when modelling in this time. It is hard for me to adjust the vertices between the eyebrow and the bridge of the nose. It takes me a longer time to finish the adjustments. I suggested that it might be the face design problem, or maybe it’s just me not familiar with modelling in Maya.
0 notes
Text
10-20 SECOND 3D ANIMATION PROJECT - CHARACTER MODELLING: PROCESS 1
Finally, we are going to model our characters. Before starting the modelling process, I drew a T-pose of the character Udi.
Udi’s T-pose
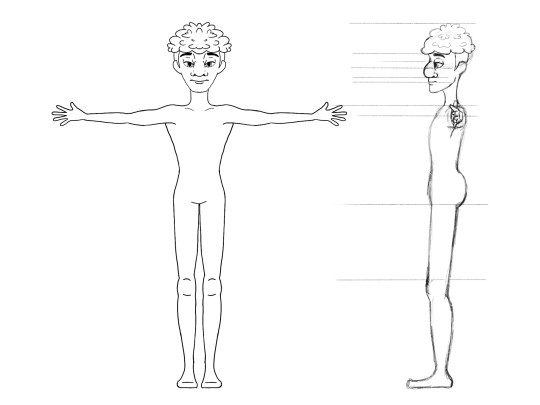
I drew this using Procreate, and it is hard for me to draw the exact same level of the organs between the front view and the side view. Therefore, I tried drawing some lines to help with the adjustments.
Eye Modelling
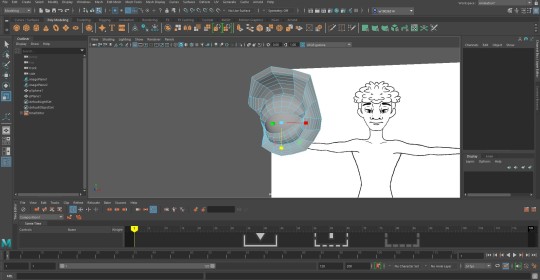
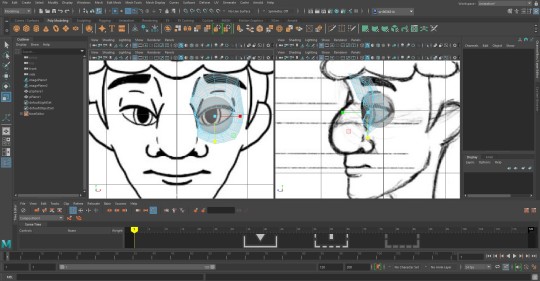
For now, I have modelled the eye and the eye only. At first, I didn’t make a sphere for the eyeball when I was modeling the eyelid, therefore the eyeball cannot suit into the eyelid due to the wrong size of eyelid. So, I redo the process again.
This shows the eye model for the second time and finally, it gets better. Nevertheless, I was too focused on the shape of the eyelid and I draw a lot of edges. This will complicate the later-on process but, I am giving it a try.
0 notes
Text
10-20 SECOND 3D ANIMATION PROJECT - ENVIRONMENT DESIGN
Other than designing the characters, we also need to think about the environment.
Draft of Buildings (Environment)
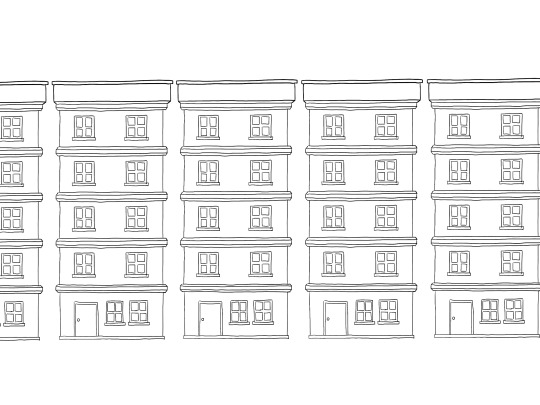
This is the draft of the building design. You can take a look at the post of the first treatment, I am referencing the buildings from the first and the second moodboard, and I combined their elements together and came up with this design. The buildings are five-floors tall and they have a flat rooftop. I am going to make the environment in 3D later on.
0 notes
Text
10-20 SECOND 3D ANIMATION PROJECT - CHARACTER DESIGN: THE ANGEL
The second character is the angel, and here is his character’s design.
Design of the Angel
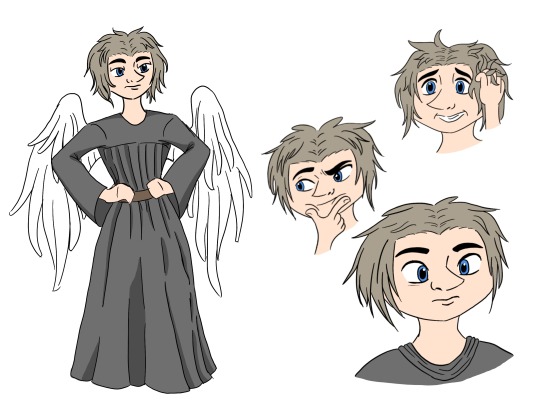
This is the character design of the angel, a guy having blue eyes and a sharp nose tip. I always think that most of the angels are having blue eyes, so I gave him blue eyes to him ‘an angel’, and for his sharp nose tip, it implies his straightforward personality. I will talk more about his characteristics below.
Outfit of the Angel
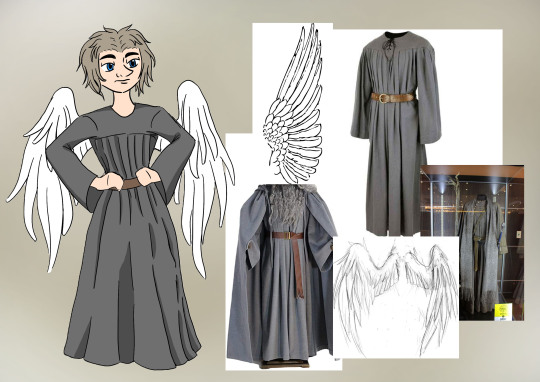
Here is the outfit design of the angel. He wears a wizard robe and has a pair of white, beautiful wings behind him. Considering him not the real angel, I chose dark grey of the colour of his robes instead of changing it to white. The reason I decided to let him wear wizard robes, is that I want to show how serious he is to pretend a real angel. Moreover, it increases the mysterious of the angel, and no one can know where did he came from. For the wings, I searched for eagle’s wings or owl’s wings, also wings designed and drawn by other artists as the reference.
Characteristics Moodboard
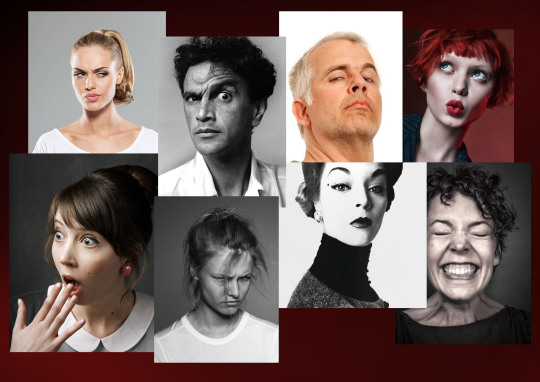
Here is the angel’s characteristics moodboard. As you can see, there are many exaggerated expressions such as surprised or smiling hard, and I want to show the angel’s straightforward personality. He always voices out his opinion and shows his emotions on his faces. Although he only cares about himself, especially his wings, he is not that bad to others. He didn’t accompany Udi when Udi needs him, but he shares his ‘Angel’ stories to him and only let him touch his wings, treating him as a friend.
0 notes
Text
10-20 SECOND 3D ANIMATION PROJECT - CHARACTER DESIGN: UDI
For the characters, this is the design of the main character, Udi in Hole in the Wall.
Design of Udi
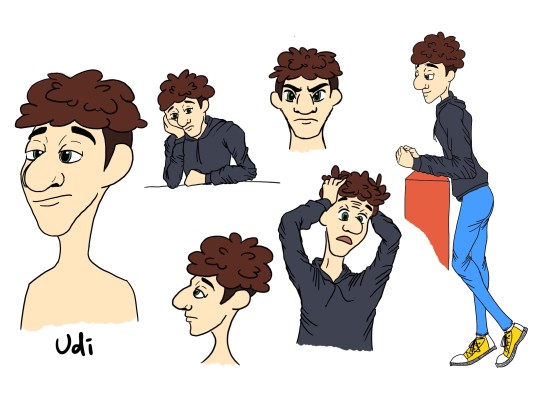
What I think about Udi is that he is always tired and doesn’t have a dream or a target in his life. However, he is playful and naughty because he always tricked passengers on the street with the water bombs, also he likes to observe others. He is just same as a normal people who will be angry or scared.
Draft
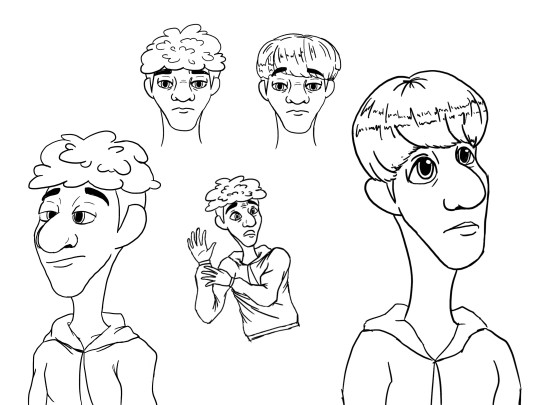
At first, I was thinking which hairstyle suits Udi, therefore I drew two styles, one with curly hair and one with straight hair. It seems a bit strange when Udi is in straight hair, so I chose the curly hair for the final design.
Outfit of Udi
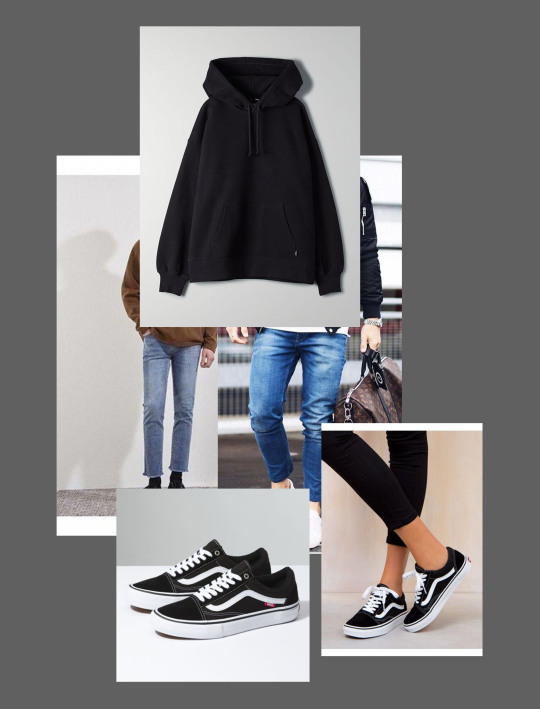
I want to show the ‘very normal’ side of the characters in the story, so I chose the normal outfit of a teenager, hoodie with jeans and a pair of shoes that look like Converse.
Characteristics Moodboard
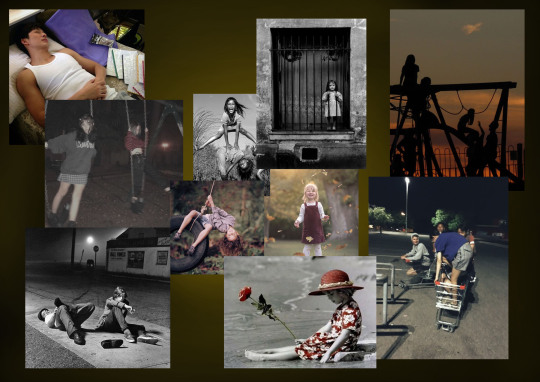
This is the characteristics moodboard for Udi, a guy who was happy and playful at a young age, then becoming lonely and doing as he pleases.
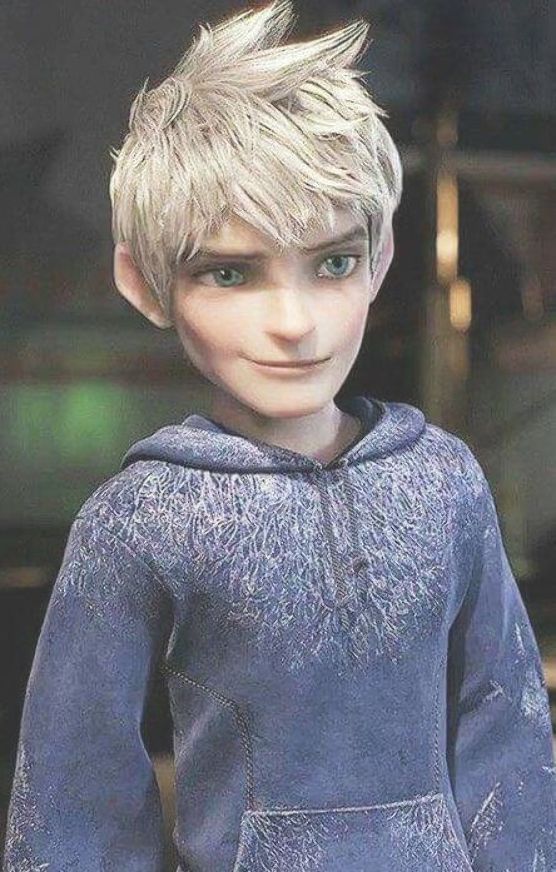
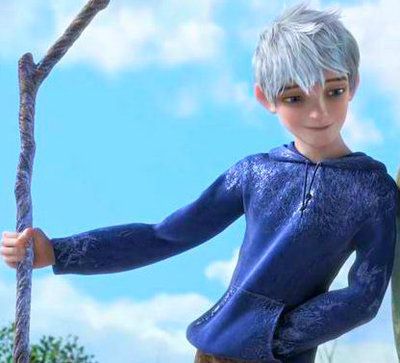
Considering the personalities of Udi, I was inspired by the character Jack Frost from The Rise of the Guardians. He is also a naughty boy who throws snowballs to children and starts snowball fights, but also a guardian who brings joy to others. By the way, he is handsome too!
0 notes
Text
10-20 SECOND 3D ANIMATION PROJECT - 2ND TREATMENT
For the second treatment, I want to change the location to the old part of Hong Kong streets.
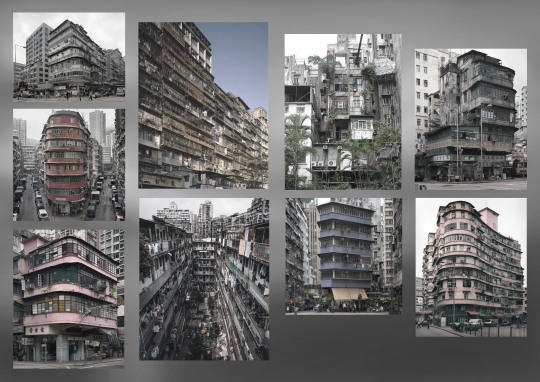
The tenement buildings above are Tong Lau or Ke Lau (唐樓/騎樓), and they were built in the late 19th century to the 1960s in Hong Kong, Taiwan, Southern China, and Southeast Asia. The ground floor is designed for commercial uses, and the upper floors are for residential uses. The buildings are 3 to 4 floors tall, and 9 floors or more in the 1950s, and most of them were built without lifts.
As Tong Lau can satisfy the condition mentioned in the first treatment, I am choosing the old Hong Kong street as the location of the story. The time will also be the sunset, but there would be more shadows as skyscrapers are surrounding (see the moodboard below).
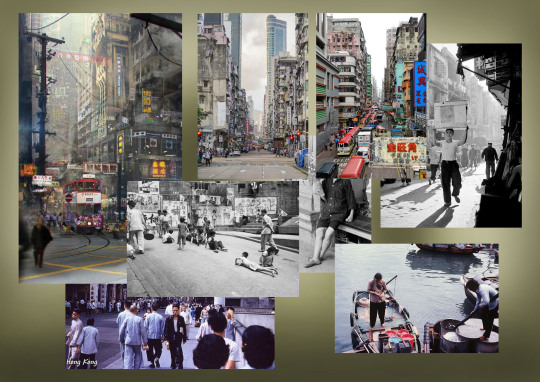
In the above moodboard, there are some views of the Hong Kong streets. You can see there are both short buildings and tall buildings and thus the sunlight will be less than that in the first treatment, also the style of the animation will be darker with more shadows. I am considering adding smoke which has a blur effect because it can increase the mystery atmosphere and enrich the scene, showing in the photo at the top-left corner.
For the characters, I want to use the clothing worn by Chinese people in the 50s so as to match the timing of the scene. There is not much reference in the colours above, as the photos are mainly in black-and-white, therefore I will give colours to each people's cloth in the scene according to their characteristics or emotions.
Reference/Resources:
https://en.wikipedia.org/wiki/Tong_lau
0 notes