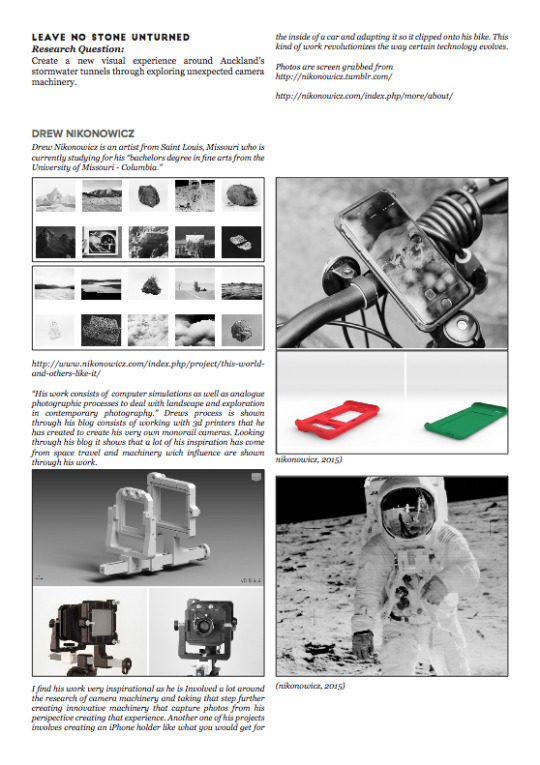
“Create a new visual experience around Auckland's stormwater tunnels through utilising unconventional camera machinery.”
Don't wanna be here? Send us removal request.
Statistics
We looked inside some of the posts by leavenostoneunturnedblr-blog and here's what we found interesting.
Average Info
Notes Per Post
1
Likes Per Post
1
Reblog Per Post
0
Reply Per Post
0
Time Between Posts
4 days
Number of Posts By Type
Link
1
Video
7
Photo
9
Last Seen Tumblr Blogs


Fun Fact
130K people were victims of a chain letter scam that affected Tumblr in May 2011.
Link
This is my final shoot. Unfortunately, I went back to do my final shoot and the weather had been so dry that it had completely dried the tunnel up. This resulted in me having to use the last video and Motion track out the light you can see from the light raft.
I did end up fixing the light raft so that the light could not be seen through the flag I had created but, unfortunately, I didn't get to use it.
From the last video, you can see a few changes. These are things like the colour grading, which is now warmer, a very subtle vignette and as we were talking about before the motion tracked black blur. I did this to show what the final film would have looked like if I had fixed the flag. You will also noticed that I have added sound into this video.
0 notes
Video
tumblr
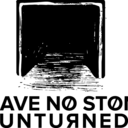
This test I decided to take the lighting from behind the camera that was fixed to the raft and make a new raft for the lights to sit in front of the raft. I had some left over polystyrene, so I cut a slot for the battery to be firmly sat in the middle so the weight was evenly distributed. I then rewired the lights and attached the two rafts together with fishing line. This was so that the lighting was always at an equal distance throughout the shot.
I found that the outcome of the video was much lighter than previous and didn't look so flat. This happened by simply changing the directions of the light from straight down the tunnel to up straight up. What I am going to try next is create a back board/flag for the light raft. It will make the lights distribute the light out and up rather than up and back to the camera. It will hide the raft so you won't be able to see it. I'm thinking of adding tin foil to the inside of the flag to give rebound the light harder.
0 notes
Video
tumblr
Much better lighting in the second test. I had a fully charged battery this time, So I did a full 2k run of the tunnel. The lighting source was fixed to the raft. This is why the image has come out looking flat. I like how it shows the walls and a little bit of the water, it makes it look creepy and intriguing. I am going to go back and do some more shots, this time playing around with people walking in front of the camera with the light source. Also placing the lighting around the corners and shooting it back toward the camera and water. It also got suggested to look into getting a strobe and pointing it toward the roof of the tunnel to give it an arched lighting, then reshoot it again and overlay the two. I think some playing around with the footage on the program is going to be the key to getting the preferred lighting.
Notice from the last video that this time the camera was not swinging, this was because I had attached my raft to a boogie board and attached fishing line to it so that I had control over it. I find that it's not cheating because of the fact that the water levels are so unpredictable. Overall, I think getting the desired shot is going to come down to correct lighting and placement. I am going to make a raft just for the Lights and attach that raft to the other one so that its always at the same distance throughout.
0 notes
Photo

Using gps I found out how big the tunnel is and it expands over a couple of kilometers.
0 notes


Video
tumblr
today I went and did the final test for the prototype int the actual tunnel. After months of inconsistent weather, it has been hard to judge how deep he water level is. One trip out, it was up to my knees and another trip and it was at mid shins. last week and this week brought a bit of sun wich meant that the water was quite shallow to what I had originally designed the raft for.
In the video you see that the camera was swaying side to side, this was because the side hulls with the weight on top were too deep for the shallow water causing it to sway. I am just going to have to hope that when push comes to shove that the water level has risen. On the plus side of things, the lights I have installed were brilliant. It lit up the tunnel for about 250 meters and gave it a view I had never seen before. After the tests, the lights started to dim out a bit and I had troubles with the right light as it kept falling off as well as the wiring was coming undone. Also, note to self, remember to charge the go pro before going out to shoot, I had to risk putting my DSLR onto the raft.
If the water levels were higher, the raft would have floated perfectly to what I thought was going to originally. If the levels are still low for next weekends shoot I am going to take a boogie board to hold it up.
0 notes
Video
tumblr
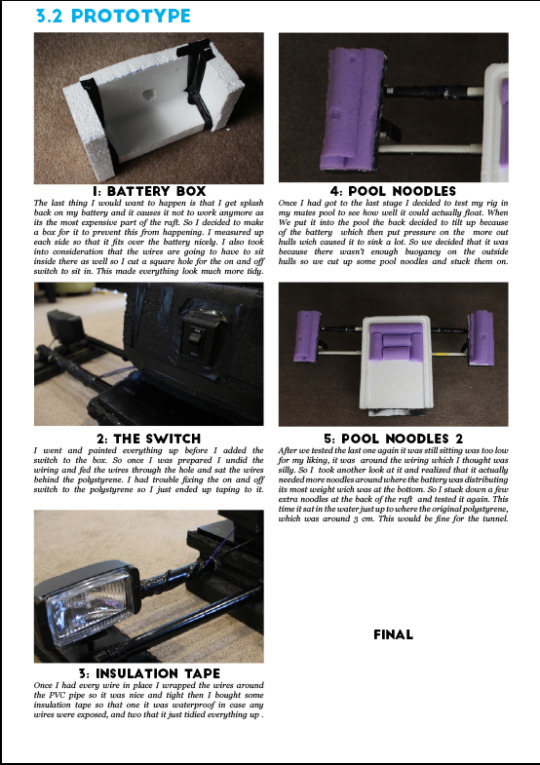
After the last test the sides tended to sink, I went and cut up some pool noodles.measured them up and temporarily stuck them onto the 2nd and 3rd hull of the raft to give it more buoyancy. I also stuck multiple noodles to the back of the raft as it was where most of the weight from the battery was.
We put it into the pool and found that this time it sat a lot out of the water than before. This should be fine for testing it in the tunnel. Also you can see for the original test that once we added more buoyant objects it was much more stable wich will be handy for the tunnel.
0 notes
Video
tumblr
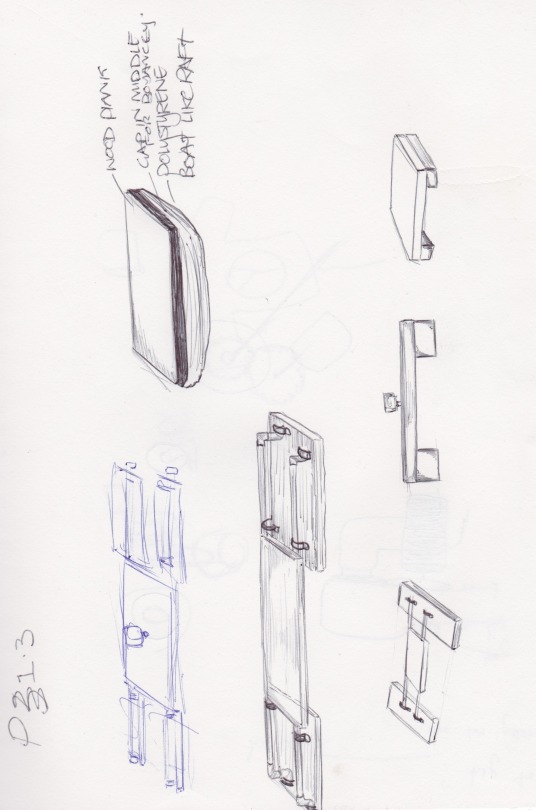
Prototype 3 - I thought that my raft would have enough buoyancy, the side pieces that the lights sit on started to sink. This was because of the weight of the battery wich was all at the back. I will have to extend the back of the raft so that the raft is more buoyant as well as the battery will be more centred.
The main hull of the raft was fine, although it did tend to lift back wich pushed weight to the sides. Other than that the raft supported the video and shot well. After I finish making the raft more buoyant I will have to test it in the actual tunnel as it will be low light conditions and will be a good test for the lights I have installed.
1 note
·
View note
Photo
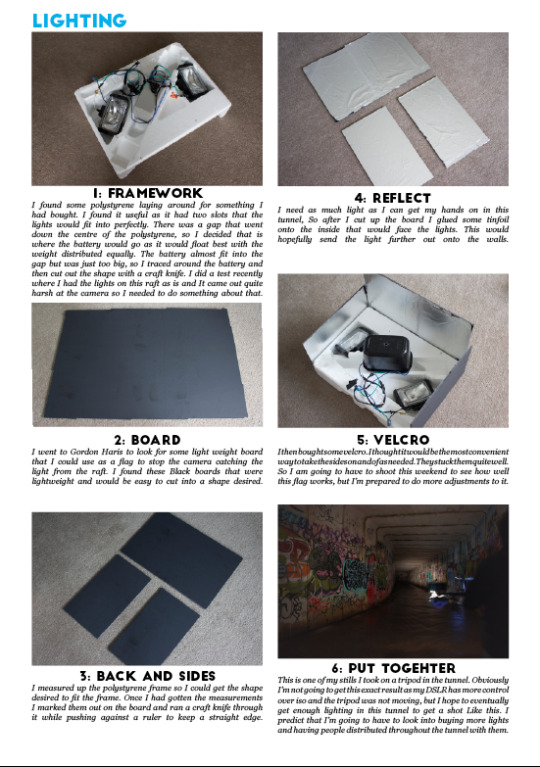
"The hull is the shell of the boat, which contains all the internal components. Its symmetrical shape balances the sailboat and reduces drag, or the backward pull caused by friction, as it moves in the water. Inside of the hull in the stern, or back of the boat, is the tiller, which is attached to the rudder in the water." - http://adventure.howstuffworks.com/outdoor-activities/water-sports/sailboat1.htm
So looking into how boats work in regards to the stabilisation and movement, I have realised I will have to change the Hull or the body of my raft and will have to build a Keel and rudder to make sure it doesn't turn. The rudder ill have to be fixed so that it can't move as I'm wanting a straight shot. I also have to take in that my keel can't be very deep as the water is quite shallow and with drains comes rubbish and other crap on the bottom just like reefs in the ocean.
0 notes
Photo

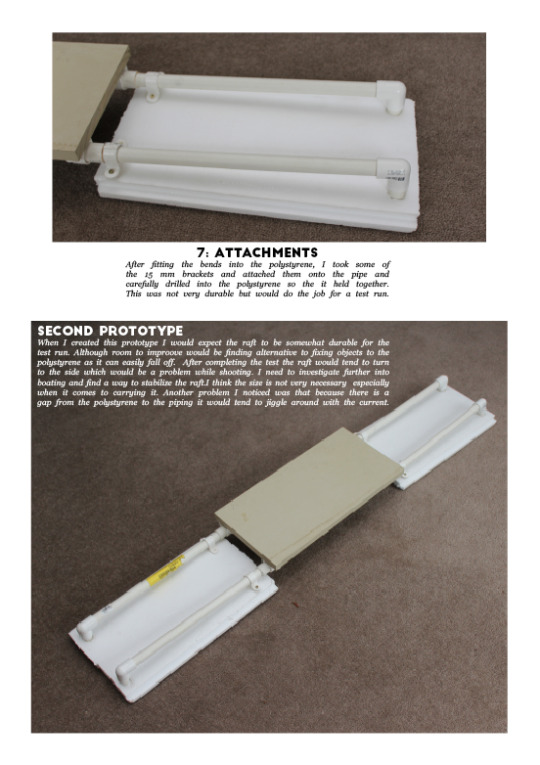
PROTOTYPE 2
0 notes
Video
tumblr
So I decided to go try and test out the 2nd prototype floatation device. It floated fine, but the power of the water tended to push over the polystyrene. The biggest thing I found out was that the direction was totally different to what I thought it was going to be. The reason was that there was more resistance on the front as it was wider so it tended to turn to the side as it was smaller. From this test, I'm going to have to remake the raft as well as look into boating dynamics, things like keels. This will give me a better understanding to how I can keep the raft to go straight which will give me a better shot.
0 notes