Don't wanna be here? Send us removal request.
Text
Self portrait Mixed Media Evaluation
From the beginning, I really liked the idea of this assignment, because it allowed me to be really creative. Unfortunately, I wasn’t able to execute my initial idea of printing out my photograph and manually add elements to it such as drawings, painting, etc., so I had to improvise and add more elements in digital form. if you’re interested you can find all the relevant information under my Self-portrait Mixed Media blog post, where I described my research and my thinking behind this whole process. I have also shown the whole process of taking the photograph and then editing it both in Lightroom and Photoshop and everything is described in detail. I tried to be as clear as possible without leaving out any valuable information and I think that I have succeeded. As for the merits and problems of the subject I have described my struggles through this whole journey, with not being able to realize my original idea and having to improvise. Maybe I should have realized this sooner to give myself enough time to come up with a different solution that I would be completely happy with. Also, I am naturally a very indecisive person and a perfectionist at the same time, so it’s often very hard for me to decide between different ideas. But otherwise, I would say that I knew what I was getting into prior to starting the process. I have worked with Adobe Photoshop many times before, so I already knew how to navigate and I had an established workflow. I talked about my equipment which consists of my Sony a6000 camera, tripod, my phone, and my laptop. I thoroughly described my Lightroom editing techniques and provided an almost a step by step outline of how I got to my final result, supported with visual and screengrabs. If I had to do this all over again and had enough time, I would definitely give a try to my original idea of printing my photograph and modifying it manually. I think that the outcome would be really interesting and I am definitely going to try it once everything opens again. Also, I wouldn’t spend so much time trying to execute an idea, and then realizing I don't actually like it, which means I need to start using my time more effectively and to having a clear idea beforehand.
0 notes
Text
Self portrait Mixed Media
Google drive link:
https://drive.google.com/drive/folders/1afCprP5MXBjSjcWkgj9Cfkcu-VOWBgmb?usp=sharing
For this assignment, we were able to express our creativity to the fullest. Self-portrait mixed media means that there should be different techniques put to use in the execution – both manual and digital. As part of my research, I looked at the previous student’s work as well as on the internet. I have found many amazing pieces of artwork and here are the ones that had inspired me the most.
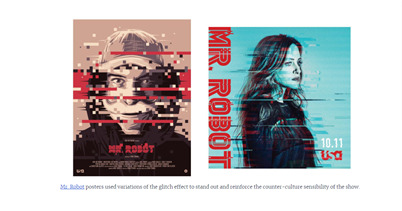
https://www.toptal.com/designers/visual/hot-design-trends-photoshop-tutorials
I really liked the glitch effect and later used a tutorial featured on this site to achieve a similar effect on my own photograph.
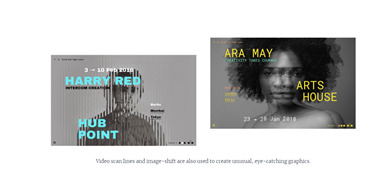
https://www.toptal.com/designers/visual/hot-design-trends-photoshop-tutorials


(photographs from Google)
Our self-portrait was also supposed to represent our personality and signature style. The initial idea I had in mind was to take the photograph, edit it in photoshop/lightroom, and then print it out for some manual edits. I intended to paint over it, glue on some newspaper, and then take the photo again in some interesting location. Unfortunately, the printer we have at home only prints in black and white and the local place with a photograph printing machine is closed due to the lockdown so I had to improvise.
Firstly, I set up a DIY studio in my room using the same good old lamp as for my A to B assignment, but this time I used a different blanket. Also, this was shot during daylight near the window so I didn’t need any artificial lighting whatsoever.
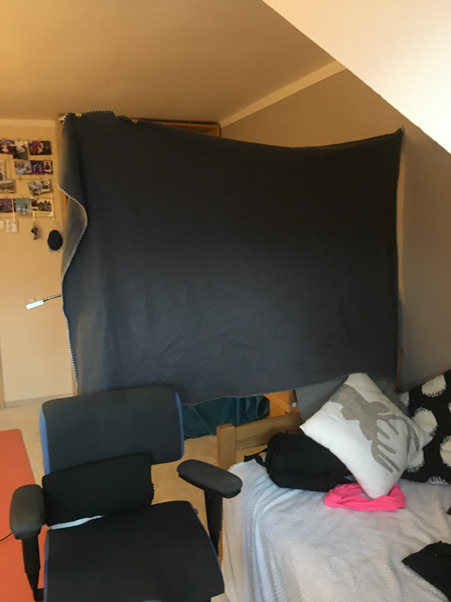

Here is some behind the scenes of setting up the scene. I used little clips to secure the blanket on the lamp and on a little nail in the wall from one of my pictures. I then mounted my Sony a6000 camera to my tripod, put my 50mm f/1.8 portrait lens on, and began shooting. I used a self-timer and my Camera’s built-in remote control that I can access via my phone which enabled me to stay in position and to only change my poses. On the picture below, you can see the exact camera settings used.
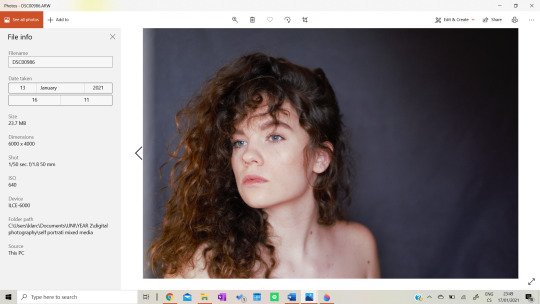
Here is the tree of my favorite photographs already edited in Lightroom.
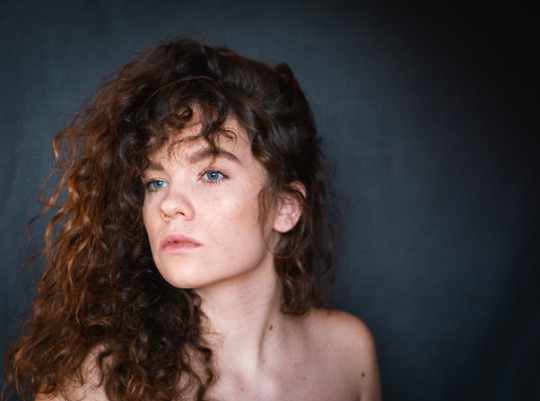

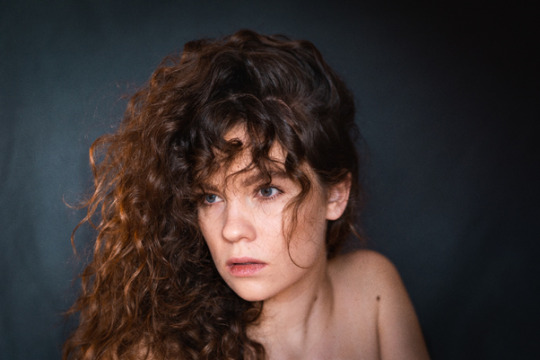
There wasn’t much editing needed, I just increased the clarity, contrast, and tweaked some of the color hue values. By using the brush tool, I made myself stand out from the background. And also no, I am not naked, I am just wearing a strapless top because I felt that clothes covering my shoulders would only distract the focus from what I had in mind.
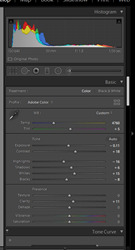

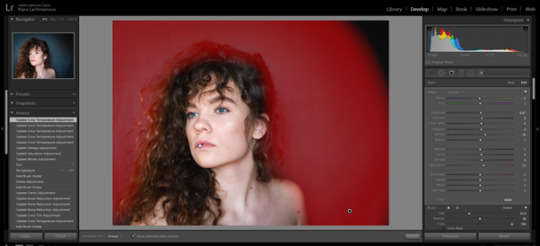
I ended up choosing the first photograph and imported it into Adobe Photoshop. By following this tutorial https://youtu.be/G2BzkQGCFjY I created my desired glitch effect which I absolutely love. Because the assignment should be mixed media I also added some typography and I felt that it complimented the photograph really well.

After having a feedback session with Claire though, I was told that maybe there could be more of the ‘mixed media element’ and that made me think of how could I achieve what I first had in mind without having to print out my photograph. I came up with an idea to cut out letters from an old newspaper that would create the word distort instead of typing it digitally.

I took this photograph of my paper letters and removed the background in Photoshop.
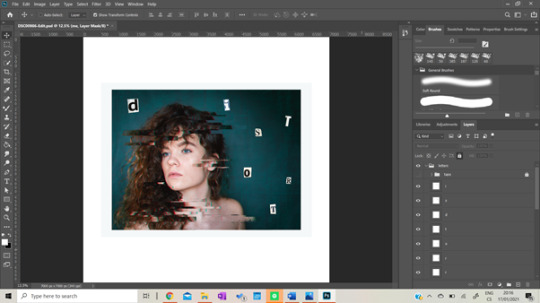
I added some digital tape that I had already created for my website and I thought that it might look good and more ‘handmade’. I have made so many versions of this task and couldn’t decide which one is the best. Originally, I wanted to have a bright painted background but changed my mind later on. Here are some examples of how it went. I used different Photoshop brushes (both wet and dry styles) and experimented with different colour styles. There are two additional ‘distort’ signs with different blending mode options settings. As I have discovered during the process, blending mode can make a huge difference and completely change the feel of the whole design, so from now on I am definitely going to use it more than before.
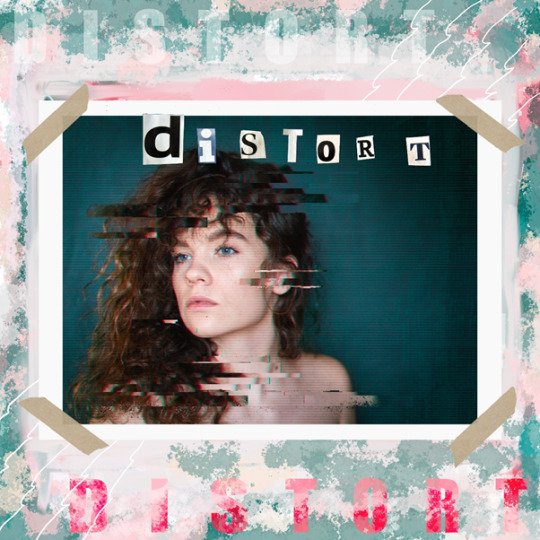
This piece was one of the very first attempts and I felt like it was a little too much, because the red drew the attention from my face. Something I have learned is that it’s never good to have too many focal points in one design.

I got rid of the red but I still felt that the photograph didn't stand out enough.

I removed one of the signs, but then I realized that the background might actually be the problem, and even though I love it, it might not compliment my photograph in the best way. After many hours of trying different versions and a few mental breakdowns, I decided to try a more minimalistic approach.
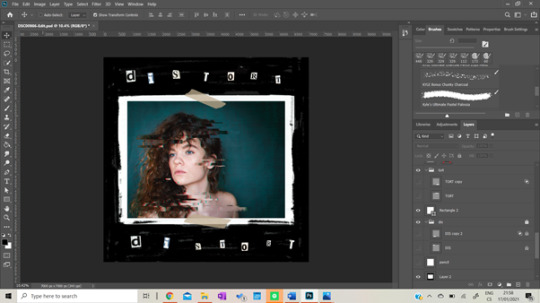

These are my final two photographs and in the end I decided to go for the black version as I feel that it’s more interesting.
Here is the photograph already exported from Photoshop, I am really happy with how it turned out, and although the process wasn’t easy it was definitely worth it.
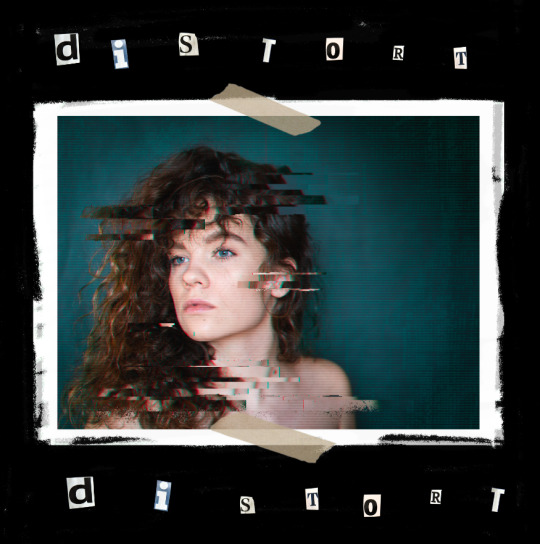
Here is the link to Google Drive where I uploaded the full sized final photograph.
https://drive.google.com/drive/folders/1afCprP5MXBjSjcWkgj9Cfkcu-VOWBgmb?usp=sharing
thank you for reading
K
0 notes
Text
A to B evaluation
For my A to B assignment I decided to showcase a journey of how I got to create a special effect photograph. I have wanted to try this beautiful ‘lighting cloud’ effect for some time already, so I thought that this is the perfect opportunity to give it a shot and document the process along the way. It’s basically a light source covered with cotton wool and it creates this beautiful illusion of a cloud. I took the photograph on my floor using my tripod and my Sony a6000 camera and my 35-50mm f/3.5 lens in RAW format to achieve high-quality results. Fortunately, it has a built-in remote control that enables me to access it via my smartphone so no one's assistance was needed, I was just changing positions whilst pressing the shutter. I used a white blanket as a background and my lamp as both a lightbox and a stand to hold the blanket in place. I covered my fairy lights with cotton wool but then I discovered that I didn’t have enough for my desired effect so I had to improvise. I thoroughly documented the whole process of setting up the scene, as well as putting on my makeup so that I wouldn’t lack material. I put everything under the A to B blog post and I think that it’s very clear and showcases my thinking process well. I knew that I will be using photoshop to cover up the blanks between the cotton because I had far too little. I am quite proud of my photoshop and lightroom color edits, and I think that it’s what makes the photograph unique and interesting. I also showed my camera and settings and then some screengrabs from both Photoshop and Illustrator, so I think that the processes were shown quite well. Apart from the final photograph, 4 more photographs are showcasing the process of how I got from A to B. I created these by merging more photographs in Photoshop and adding some aesthetical effects. I originally didn’t plan to do this, but I didn’t read the brief carefully enough and didn’t notice that we have a 5 photograph limit, so I had way more than that. But now, I am glad I did it this way because I was able to describe the processes even better. I also added hand-drawn text which describes my thoughts throughout the process and also makes the photographs much more interesting. What would I do differently? Buy wayy more cotton wool! I am definitely going to be giving this idea another try, so next time I need to make sure that I have enough to create my desired effect. Maybe I would also improve the lighting conditions to have a better quality of the final photograph. I had to do this digitally, to make my face stand out, but it always looks better if the light is good before the editing process.
0 notes
Text
Advanes in digital photography and how it impacts my industry
In terms of photography, we are very privileged to live in today’s world. As you can tell from the picture below, photography has come a long way, and becoming a photographer has never been easier. Photography equipment used to be very expensive and for the middle class often unattainable.

Today, there are so many possibilities. You can shoot either in digital -smartphones/DSLRs or using film cameras. Not that many years ago, film was the only option available. With the rise of the digital age, the price of becoming a photographer has drastically decreased. You can retake the same photograph over and over again, how many times you want and it won't cost a thing. Formerly, film was very expensive, so people didn’t have the room to waste it. You didn’t have that many attempts and you needed to be quite selective about your shots.


Today, you don't even need to buy a camera to take photographs. Almost every smartphone comes with a camera and although the quality differs, sometimes it’s really astounding how good the photographs can be. Even though smartphones are an excellent choice for anybody who wants to take casual photos, it’s still not enough for those who want to take their photography to the next level. Using your smartphone, you can’t really adjust your settings and it’s just not the same. For me personally, I can still see a huge difference between the photos taken using my smartphone and my DSLR.
The great thing is, today it’s not even very expensive to buy a good DSLR. I bought mine (Sony a6000) for circa £450 and the quality is just amazing. If being a photographer was es expensive as it used to be, I would probably never go in that path, and that would be such a shame because I love photography with all my heart.

Another advance of this world is that not only you can easily purchase the equipment, but you can also learn how to use it for free. The internet is full of tutorials, articles, and courses that can teach you how your camera works, different techniques, and how to improve your photography skills. This is exactly how I learned photography. I impulsively bought my first camera (been dreaming of it for some time though) and then I watched a bunch of educational videos on this subject. Obviously, the most important part is to bring the theory into practice, to go out and shoot, shoot, and most importantly shoot some more. You can only get better by practicing.

As you can see, there are so many options!
This situation also has its cons though. Because buying a camera has never been easier, the market is overflooded with ‘photographers’. In a nutshell, everyone is now a photographer just because they have a camera and the mass consumption of content has never been more evident.
Another great thing about digital photography is the possibility of post production. We now have such powerful software that can transform a bad photograph into a really great one.


Lightroom and Photoshop are probably the most spread software packages for editing photographs. I use both, and really love how powerful they are and how they help me to step up my photography game.


Here is an edited and unedited photograph of mine and as you can see, post-production can make a huge difference. A disadvantage I see in digital photography and post-production is this illusion of perfection. Let's take Instagram as an example. You have a feed full of beautiful people with beautiful bodies posing in beautiful places and sometimes that can make you feel (I beg your pardon) like shit. What you cannot see, are the real colors, maybe crowds of people that were photoshopped out, and often the perfect bodies are the result of photoshop too. It’s sometimes good to take a step back from social media and to realize that not everything you see there is real. That is why I love it so much when people also show behind the scenes and before and afters of their work.
How does photography impact my industry?
I think that visual design and photography are tightly intertwined, and if you want to be a great designer you can easily practice with photography. It trains your eye in terms of composition, color theory, and hierarchy. Working as a visual designer, you often make photographs part of your art, therefore knowing how to take good photos can give you a great advantage in this industry. If you are designing a logo for a brand, why not shoot them some portraits for their website as well – they don’t have to look for another person and you can earn more money.


https://www.toptal.com/designers/visual/hot-design-trends-photoshop-tutorials
Also, you can produce a unique portfolio of stock images that you can then implement into your designs. This shows creativity, and versatility and will make you stand out in the job market. Whether you are a photographer or a designer you can always take inspiration from the other discipline. This can come in handy especially if you're dealing with a creative block.
Overall I am really grateful that I get to live in a digital age despite its cons and I feel that using digital software and equipment gives me the freedom to create. Thank you for reading and see you soon
Klara
0 notes
Text
A to B
Google drive link with the full quality photographs: https://drive.google.com/drive/folders/1j6Tn33T6BeC5omlvtLplxNOnSKV12ECC?usp=sharing
We were told that this assignment could be totally open to our own interpretation, it could be a journey, a process, basically whatever you can imagine that belongs in this category. I really enjoy not being specifically told what to do but to have room for my own imagination and creativity. I chose to display a process of making an interesting and unusual photograph.
When I read through the brief, I thought that this should actually be pretty easy. I immediately remembered how I love looking at people’s before and afters of their photos and behind the scenes of creating. It shows how powerful editing is, and also it brings back a little bit of reality into the perfect world of social media.
I started researching and the first person who was on my mind and whose edits are some of the most impressive ones is definitely Brandon Woelfel. He is the master of Photoshop and I have spent (maybe too many) hours looking at his processes, edits, and behind the scenes.


As you can see, he also often shares the camera settings he used to get a certain look.
Also, I had a cool photo idea in my head that I thought I saw at Brandon's profile. This technique is now quite spread on TikTok, Instagram, etc. It’s about using cotton wool and fairy lights to create a lighting cloud effect and it looks really beautiful.

https://www.youtube.com/watch?v=nOQkqUFpn3M

https://www.youtube.com/watch?v=UOfJmziBZ6Y
I watched these videos as part of my research and they gave me some really interesting ideas for this and future photoshoots, however, this is the look I was mainly going for.


I was definitely not going to do my ceiling or light I could actually hang up, but I really loved this idea for a photo shoot and wanted to give it a try.
Luckily, I got a 20-meter fairy lights chain with 400 LEDs for Christmas, so I didn’t need to buy any. Although I discovered we only had one pack of cotton wool, I was determined to make it work anyway.


Here are two pictures of me, trying to pose with this poor pack of cotton wool for some process/behind the scenes photos. I don’t even know what I was doing here ok, don’t judge me.
I took many photographs displaying the process of setting up the scene for my photoshoot, photos from the actual photo shoot, and thought I was almost done, just needed to pick the best ones. But then I read the brief again and discovered that there is a limit to the number of photographs we are allowed to submit. The brief clearly says up to five photographs for this assignment. Obviously, I had way more, because I didn't notice this before.

That caught me a bit of guard, but it was all my fault, I should have read it carefully in the first place. I could either redo the photographs I already had or come up with a solution. Fortunately, I got an idea about merging several photographs into one, to fit into the given limit.
I wanted to start showcasing my process with a photograph of me, thinking about what should I do, and then me getting the actual idea of the cloud photo.


I took these photographs, but I didn’t really like the background, the lighting nor the colors, so I decided to edit them in photoshop and make them more interesting.

I spent AGES editing the question mark through the letter, but I think it was absolutely worth it and I really like how this photograph turned out.

I thought this one does not need text, and I just wanted to create a simple light bulb to express ‘getting an idea’ . I quickly created one in Illustrator and imported it into Photoshop.
After creating these two edits, I (finally) discovered the limit issue, so I needed to merge them into one photograph only.This took some time, but I think that the outcome is worth it and to me it looks really aesthetically pleasing.

This the first photo of the series and it resembles the thinking process of the final photograph.
Next, I wanted to show some photographs of me, setting up the scene of the photoshoot. Firstly I imported the photos into Lightroom to do some basic color/lighting edits and then into Photoshop to merge them together again.

This shows the process of creating my 'professional' blanket background and trying to make my cotton wool and fairy lights idea work. I added some handwritten notes (aka my thoughts during the process) because I think it adds a little bit of a personal touch and makes it look interesting.
Another part of the process was creating the actual cloud.

As you can see, the amount of cotton I had was really not enough to create something like this (photograph below) but I made it work.

Here some of the photos I took, using my tripod and my Sony a6000 camera. It has a feature of remote control, that lets you connect your camera with your phone using an app called Imaging Edge Mobile. It comes really handy and I use it quite often to take self-portraits.

Here are a few examples of the photos I took and the camera settings I used to create my final piece.


This was my favorite one, so I decided to edit it and use it as my final photograph. This was my favorite one, so I decided to edit it and use it as my final photograph. Even though I liked it, I wasn’t completely happy with the result yet, so I imported it into photoshop to spice it up a little bit.

Here is the merged photograph of me, getting ready for the photoshoot, snaping the final photo, and importing it into Photoshop.
Firstly, I used the clone tool to remove those blank spots to make my background coherent. Then, by playing around with different colors and their hues, I got this colorful look that I really liked but wanted to enhance some of those colors even more.

Because I am more confident in Lightroom, I imported my photo back and tweaked some of the colors more to my liking. I also increased the contrast and made my face stand out more using the brush tool.

This is the final result, and I am so happy with how it turned out. It doesn’t look like my inspiration pictures from Brandon, but it’s unique and I really like its vibe.
I am already planning to buy way more cotton wool and try to create the photo I was originally going for, however I am currently in quarantine so I can’t really go anywhere. But as soon as I am out, I am giving this another go!
Here are my final 5 photographs for the assignment. I had so much fun creating this piece and I hope that this post was interesting for you to read.
Love, Klara


0 notes
Photo

USING SOFTWARE
In this blog post, I would like to talk about software, and more specifically how I use it to improve my photography. As you can see above, post-production can make a huge impact on your photos and turn a photograph that is almost inapplicable into a pretty interesting one.
This is the photograph I am going to be using as an example to showcase my editing process. This photo is one of the series I shot with Wolksvagen for an interview with the young owner of one of their newest models - Wolksvagen Arteon.
Many photographers will tell you that a good photograph doesn’t need much editing and if it does, it’s probably not that good. I must partially disagree because I think that post-production is massively important, even when the original is good itself. An unedited photograph will rarely be as good as what you originally saw with your bare eyes and by editing it you can enhance the beauty of what was lost in the process of taking the photo For me, that is the magic of post-production and if you want to work within the photography industry, learning how to edit your photos is crucial.
After a photo shoot, I always import my photos into my laptop and browse through them to see if any good ones are worth editing. The ones I like the most I import into Adobe Lightroom (sometimes Photoshop for more complex edits) and I start the process.
I do not have presets as I like editing each photo individually but there are a few things I almost always do. I usually bring my contrast, clarity, whites, and shadows up a little bit, and then I work with the point tone curve.

This is what my basic Tone Curve edits usually look like and I always tweak them afterward to make sure that the look suits my photograph perfectly.
For this example I am using, the original photograph was very dark, so I had to increase exposure, whites, and shadows and decrease the contrast a little bit.

After that, I like to play with my colours to highlight the ones I like. I feel that this process can really bring the whole photograph together, but we must be quite careful because sometimes it’s easy to over-edit.

I like changing the hue of some of them, to complement each other more and to create the specific look I am going for.

In this specific photograph, I wanted to enhance the golden colour of the car, which is also the focal point of the photograph, so I changed the hue of yellow to make it more golden and then increased its saturation to make it pop up. I also changed the blue hue, to compliment the gold.

I also changed its luminance to make it shinier and therefore more highlighted.
I always enable lens corrections as I feel that they help to improve the quality of the photograph and in this case I also used a bit of sharpening.

I added the vignetting effect to place focus on my subject.

After my basic edits, I usually use brushes and filters to edit locally.

I used two graduated filters and darkened two parts of the photo to create contrast.

Then I used three Adjustment Brushes to bring up parts of the photos I considered important. Firstly, of course, the car and then the face of the owner, to make it clearer and lighter. I love using the Adjustment Brush because it gives me so much freedom in editing and really enables me to create the photograph I want.
For this photo, I didn’t use the Radial Filter, but sometimes I use it as an artificial source of light or to enhance an existing source of light and it works really great. Here is an example using another photograph of how the Radial Filter was used to highlight the sunlight by increasing its exposure, warmth, etc...


I sometimes use the Spot Removal Tool in Lightroom for small edits but I prefer importing the photograph into Photoshop and using the tools there as they are more advanced and work better for me.
What I also like doing is taking a break after editing and if I want to post the picture I will always do so after the break. I discovered that after 'sleeping on it’ or taking at least 30 minutes of doing something else I then see things with a fresher perspective and I often find stuff to improve or change completely (or sometimes I even hate my edits and have to start all over haha). This way I make sure that I look at my photos critically and that they are not overly edited.
Overall, I love the editing process so much, and sometimes when I’m in my ‘editing flow’ I can spend several hours in a row just playing with different styles and colours. I love both Lightroom and Photoshop because they are such powerful tools to work with and they give me the power to create what I want.
Here is the final photo:)

Thank you so much for reading this post and I hope that it was useful or at least interesting for you.
See you!
Klara
0 notes
Photo

SHOW ME YOUR KIT
For the fourth weekly task we were assigned to take a photograph that would showcase our kit. I took two different photos that are showing my equipment in a bit different way, so I thought it might be really interesting.

My kit contains my Sony Alpha 6000 camera, 32GB Kingston memory card, Sony 50 mm f/1,8 SEL lens, Sony alpha 16-50 mm f/3,5 lens, my HP 360 spectre laptop (+mouse and graphic pen), my retro film camera and my planner.
For the future I am planning to purchase a tripod and another lense (85mm hopefully).
0 notes
Text
SUBJECT ANALYSIS
Self portrait
A self-portrait is a representation of an artist that is drawn, painted, photographed, or sculpted by that artist. (Wikipedia) Capturing self-portraits had started to take off during the early Renaissance when obtaining a mirror started being accessible to more people. Many famous artists used to portrait themselves using different methods, one of the most famous ones is p. ex. Vincent van Gogh,

Rembrandt,

Or Pablo Picasso.

Then, with the advent of photography, Robert Cornelius created the first-ever selfie in 1839.

As we all know, selfies are very popular in today’s world, everybody takes them but most of them are not very good from a photographer's point of view. Taking a good self-portrait is much harder than taking a photo of someone else. Having a tripod and a camera with remote control feature makes this process certainly less challenging, but you still need to figure out good composition, lighting, etc. without seeing your subject in place as you would normally do. If you decide to use manual focus, you need to bring something to replace you as a focal point and then place yourself in the exact same position. It’s a good practice to try as many methods as possible to find out which one works the best for you, so I always experiment with both manual and autofocus.
I found this article, that provides helpful tips on how to take better self-portraits. https://photography.tutsplus.com/articles/100-seriously-cool-self-portraits-and-tips-to-shoot-your-own--photo-5689
It’s 10 years old (whaaat 2011 was already 10 years ago?!), but the tips and tricks remain useful to this date.
And of course, I cannot omit one of Brandon Woefel’s videos on how to take self-portraits, which is super helpful. https://www.youtube.com/watch?v=3bfZPHO5qhQ

I have taken quite a few self-portraits in my life and I always use my remote control feature and self-timer. It enables me to see the whole composition on my phone, so I don’t need to keep getting up to the camera and checking the shot. I didn’t have a proper tripod until recently, but now I can finally confirm that it makes the whole process much easier and you don’t need to waste time by looking for the perfect spot to place your camera. I have carried out some research on this topic, so here are some other resources that I can recommend checking out before your photoshoot.
https://www.youtube.com/watch?v=gTq_syWSeSI – this is a video where professional models advise you on how to pose better (if you’re anything like me and don’t know what to do when a camera points at you – this is the way to go)

https://www.canva.com/learn/10-creative-self-portraits-techniques-will-inspire-create/ - This one is full of interesting concepts and composition ideas if you’re feeling a bit stuck, or just want to try something new

Mixed media
‘In visual art, mixed media is an artwork in which more than one medium or material has been employed. Assemblages and collages are two common examples of art using different media that will make use of different materials including cloth, paper, wood, and found objects.’ – Wikipedia definition. Basically, it means using more than one type of process both physical and digital. It can be anything and you can get really creative. Mixed media often combines photography with graphic design and typography. Or you can print out your photos and paint on them, add handwritten text or take a photo of them in an interesting location. And in the best case – combine all these together. Scrapbooking is the perfect example of mixed media.

(photograph from Google)
From A to B – documenting a journey or a process
People often say that we should not rush to reach the destination but to enjoy the journey and it also applies to photography and art in general. This assignment can either be a physical journey, meaning documenting how you got from one location to another, or a journey in the sense of a creative process. I chose the second option, to showcase how I took a special effect photograph. I love to look at the creative processes of others, and I really enjoy it when photographers show us behind the scenes, so I thought that I would attempt to do something similar myself. The journey is absolutely essential in the creative process, it’s the part where we get to learn as creatives and broaden our skillsets, so I always try to experiment as much as possible and to learn something new.
0 notes
Text
CAMERA EXPLORATION
I started photography a year and a half ago when I impulsively bought my very first camera. I wanted to start for quite some time, but I didn’t have the equipment necessary. One day, when I was in Prague with my boyfriend, we went to Datart (store selling electronics) to look at some cameras (at least the intention was just looking) and I ended up leaving with my brand new Sony a6000 camera. It was the biggest expense of mine at that time (little did I know that paying rent will be much worse lol) but I didn’t regret it once.
SONY Alpha A6000 black + 16-50 mm f.3/5

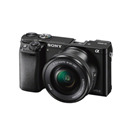
In the beginning, I was so terrified of using manual settings, and in addition, I am that type of person who absolutely hates reading manuals and always tries to figure everything out myself. I somewhat knew that there is something like ISO, aperture, etc, but I only used automatic for the first couple of days. Here are the very first shots I made using automatic only.
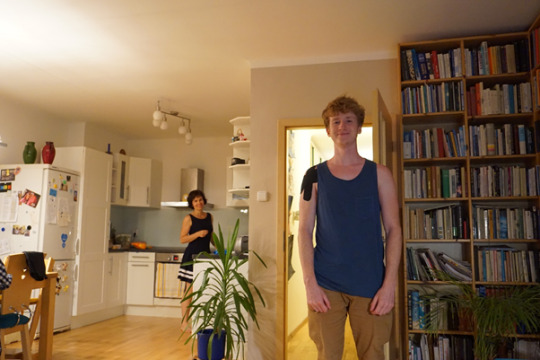

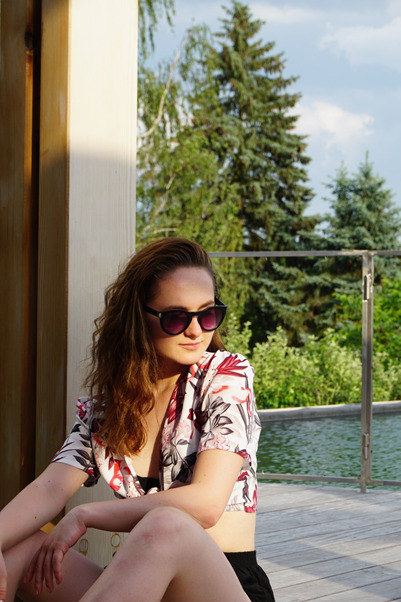
I really loved these shot's quality (which was definitely the camera’s work, not mine:D) but I knew that I couldn't keep shooting on automatic forever. One of my experienced friends sent me a video that explains everything really well.

https://www.youtube.com/watch?v=D92Xizn4MWU
It’s in Czech, but the title basically means ‘The basics of photography’. This had helped me to start diving into manual settings more and more and to fall in love with the process. After this one, started watching videos in English, because I was going to start studying in the UK in about two months and wanted to know all the terms.
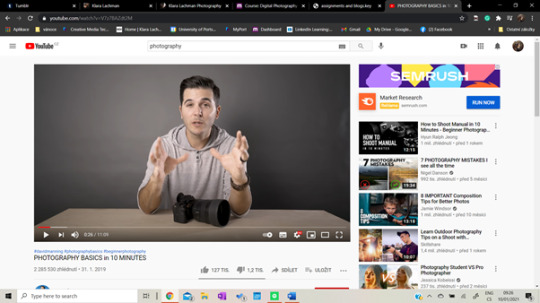
https://www.youtube.com/watch?v=V7z7BAZdt2M
Here are a few more resources I found really helpful.
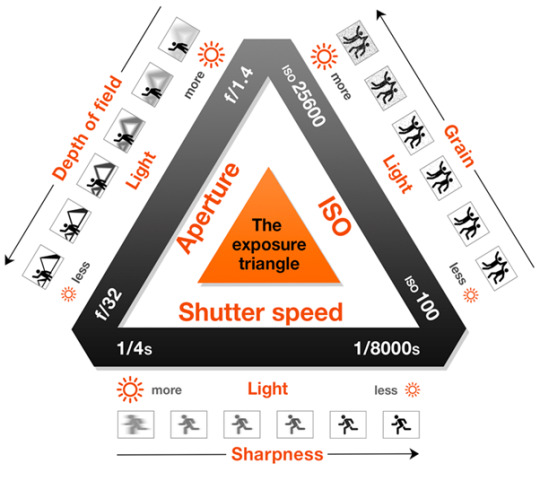

https://www.sony.net/Products/di/common/images/products/qb9a/ILCE-6000_4DFOCUS_Camera_Settings_Guide.pdf
I started slowly familiarize myself with all the terms and after a while, it suddenly stopped being so overwhelming after all.

S: Shutter-priority autoexposure; you set shutter speed, and the camera automatically selects the proper aperture setting
A: Aperture-priority autoexposure; you select the aperture setting, and the camera automatically chooses the correct shutter speed.
M: Manual exposure; you select both the aperture setting and shutter speed. Full control over other picture settings.
Almost right after my big camera purchase, I went on a family trip to Switzerland and took my camera with me. These are some of the very first photographs I took using M/A/S.

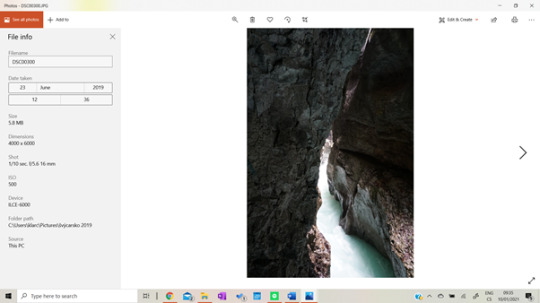
I played with different shutter speeds and was so excited when I actually saw the difference. You know that feeling, when you only read about something, watch videos and then you try it yourself and it actually works? Even though these photographs are terrible I was so excited to finally bring theory into practice.
I started playing with the aperture and it quickly became my favorite thing to do. I really wanted to recreate the effect of blurry objects in the front and in the back and my focal point nice and sharp in the middle. At that time I had no idea what a depth of field was, but I was really happy with the results. And even now, after all that time I don’t think that these photos are too bad...
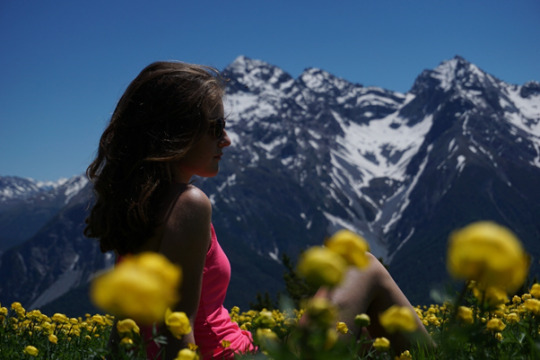
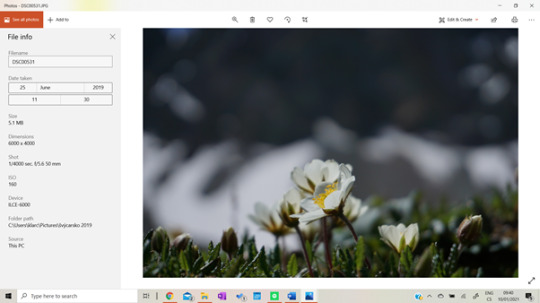
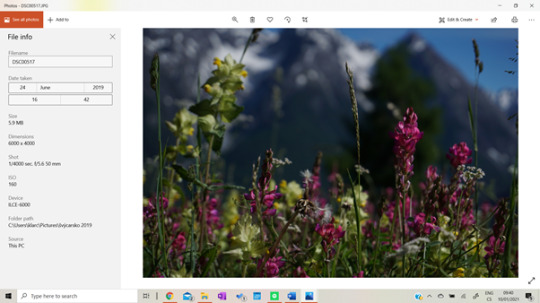
All these photographs are unedited. I didn’t have desktop Lightroom access, I used the free 7 day trial on my laptop, but then didn’t want to pay for the Adobe creative suite, so I would just edit my photos using the free version of Lightroom on my phone. My camera has a wifi feature, so I could just connect it to my phone and send over all the files I wanted. Here are some of the photos I edited using the mobile Lightroom version.


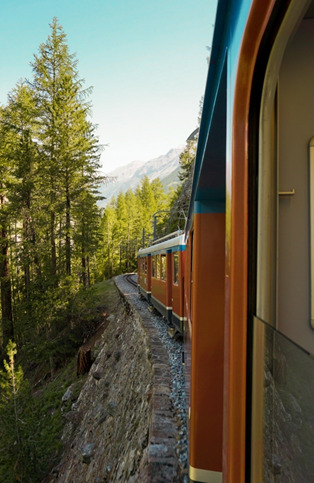

I shot all these as JPEGs and only, later on, discovered that it’s much better to shoot in RAW, as the full quality of the photograph is preserved. I found out watching this video which teaches how to shoot better landscape photographs with the exact same camera I have. https://www.youtube.com/watch?v=hQm8Eh1h7iA

I played with different shutter speed settings and created these photographs that perfectly demonstrate what shutter speed does.


As for the aperture, I didn't find any old photographs that would show me, exploring my camera, so I created a few in my room to demonstrate its effects.

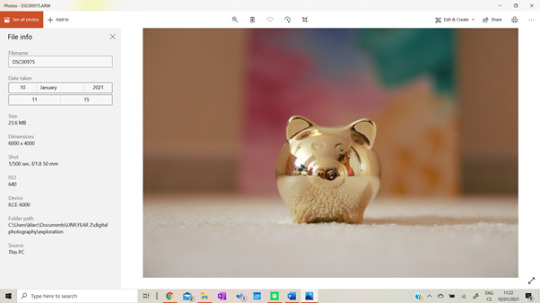
In this picture, you can see how different aperture values look like in practice - a smaller value means a bigger gap.
I have created this example with a golden pig and one painting of mine to demonstrate what the aperture does. As you can see the aperture changes how much light is let into the lens and how big is the focus area. In the first picture, the aperture is at a really low value, therefore it’s opened at its maximum. Therefore, the background behind the subject is very blurry.
In this second picture, I increased the aperture value to 11, therefore it lets only a very small amount of light inside the camera and the focus area is much bigger. The position of all subjects and the camera remained the same.
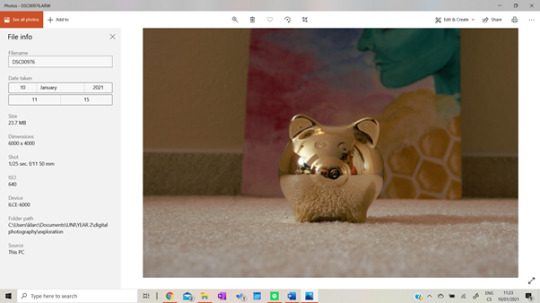
As you can see, the picture looks very different, you can now quite clearly see what is behind the subject.
Another thing to explain is the depth of field. It is closely related to the aperture and it directly affects the amount of background blur.

The closer is the position of the subject to its background, the clearer the background gets, on the contrary, the bigger the distance between the subject and the background, the blurrier the background gets.
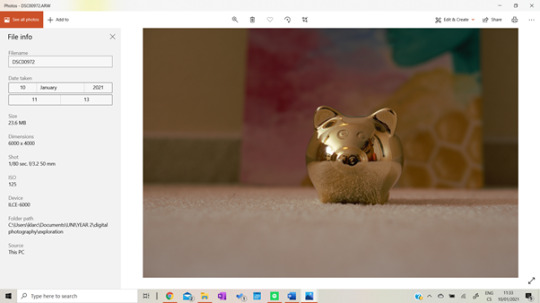
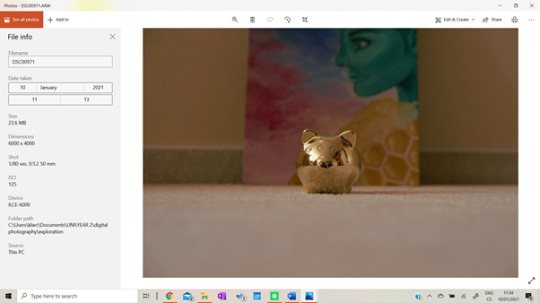
As you can see, the camera settings and its position remain the same, the only thing that changes is the position of the subject. The closer it’s to the camera, the blurrier the background and vice versa. By playing with the depth of field combined with aperture values you can change the blurriness of your background and come up with some really interesting photographs.
Lower values of aperture are perfect for portrait photography as it makes the subject stand out.

Higher values are on the other hand much better for landscape photography, where you want everything to be in focus.

Thank you so much for reading this post and I hope you enjoyed it!
Love Klara
0 notes
Photo

SELF PORTRAIT FEATURING A CAMERA
For the Digital Photography module we were assigned to take a self portrait featuring a camera. I had so much fun with this one, as I love taking aesthetic photos and I also thought that this could be a pretty interesting content for my instagram account.
The camera that is featured is an actual retro film camera that was made in the USSR. Me and my Grandma found it when we were cleaning her closet and she gave it to me because she knows how much I love photography (I may or may have not also begged her for it for like half an hour). It’s not working yet, because the film that was inside was too old, but I am l planning on getting it repaired and buying new film once the lockdown is over. Until then, it is a great prop as it looks really beautiful and gives my photographs retro and unique vibe.
Once we found it, I knew that I wanted to use it for the task, so I set up my Sony a6000 camera and took these photos. I do not have a tripod yet (hopefully I am getting it for Christmas) so I had to use some old books I found in her apartment. I put an artificial flower in front of the camera to create this effect and also used a very wide aperture (f 1/8).
Here is the picture after I took it and slightly edited it in Lightroom, and imported it in Photoshop.

I really liked the outcome, but I thought that the flowers would look really nice if they were on the top as well. I selected the parts on the bottom and copied and pasted them to the top. I also used the Clone Stamp tool to fill in blank spots and made some final edits using Camera Raw. This is the final outcome.


These are the behind the scenes photos and as you can see anything can be used as a tripod with a little bit of creativity.
Also, the final photo was definitely not taken on the first try, I had to experiment with different angles, apertures and styles. Here are few exapmles.


0 notes