Text
Creative Critical Reflection
QUESTION 1
QUESTION 2
QUESTION 3
QUESTION 4
7 notes
·
View notes
Text
First Draft of the Film
The above vidoe is of my elder sister reacting to the first draft of the film along with her feedback and thoughts on this project.
0 notes
Text
Used Sound Links
Coursework and Development
The following sounds and music are the ones that we used in our film in order to enhance a scene or action.
Sounds such as :
1, School bell ringing
youtube
2. Gunshot sound
youtube
3. Typewriter sound
youtube
For music we mixed two sounds in the beginning to give a 'fun' atmosphere a potrya a relaxed college lifestyle
youtube
youtube
As a plot twist was about to be revealed, we used suspense soimd linked below. The track is suspense themed and rhe tension, makes the audience more eager and invested in the film.
youtube
1 note
·
View note
Text
Editing Day 3
Coursework and Development
On the third day of editing we started off by adding the credits and introductions of our film along with deciding where to position these texts.

The above is a draft that I made on Microsoft Word so that the editor would just have to copy and paste the text in order to save time.


We also added our entire team's names and their roles in order of beginning with the director.


Additionally, we gave credits to out actors as well as shown below.

Lastly, we decided to use an animated title four our film.
To make this animated title our editor used two layers. One that said 'It's Him...' and the other layer with just a question mark. I found the typewriter sound and axxoring to that the editor matched the animation.
youtube
0 notes
Text
EDITING DAY 2
Coursework and Development
On the second day of editing, when the first draft of the film was finalised, the cinematographer and I were given the responsibility to find sounds and music for the film.
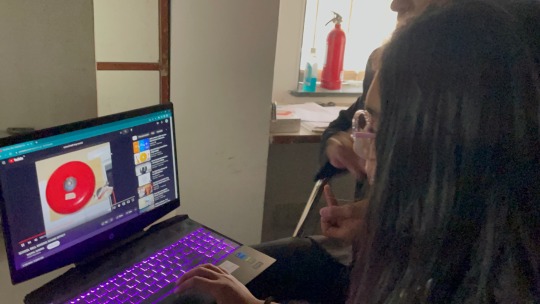
The above photos shows me and the cinematographer searching for the 'school bell ringing' sound. After we found each sound we then got it approved by the director and air dropped the link to the iMac on which our editor was working on.
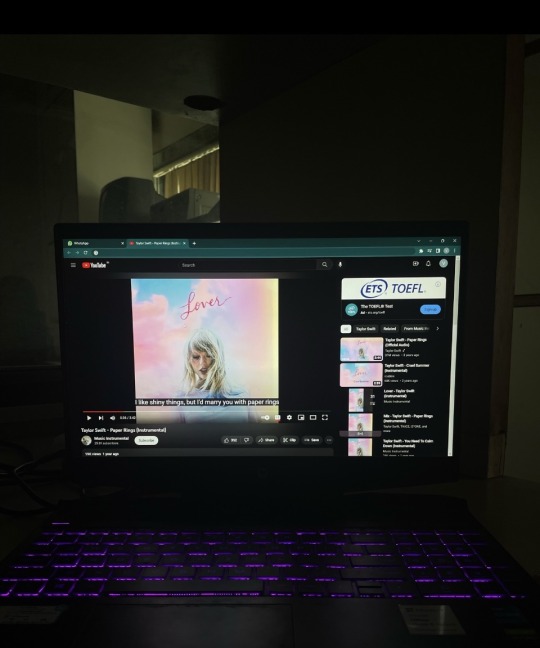
We also chose certain them tracks and suspense tracks to enhance our final product.
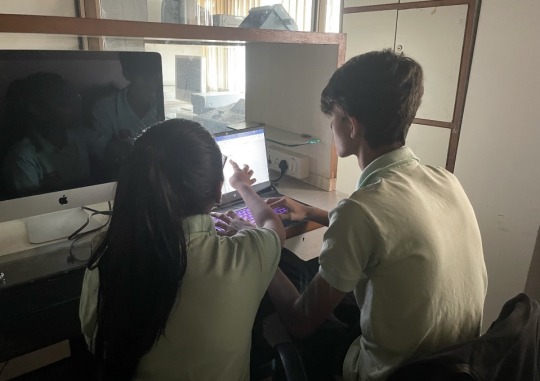
Next we worked on subtitles. We typed out the dialogues scene wide and added in to a word file so that in the end the editor just had to copy paste the dialogues.
Veer (cinematographer) and I also went down to the panty to record a foley sound of the bottle falling. We used the same bottle and the same wooden floor to make the sound seem more realistic.
We also learned about colour grading and how to use it in the FCP editing software.
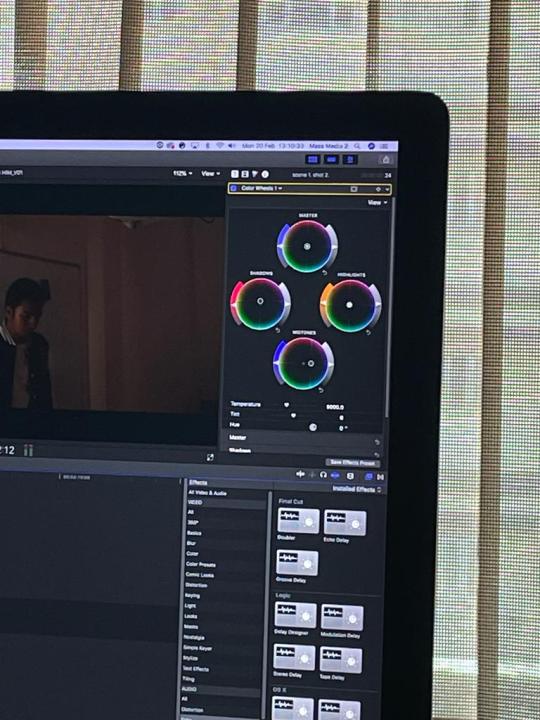
The above picture shows the color grading wheel that helped the cinematographer guide our editor to help enhance our film by manupulating the color wheel. The editor added a cinema scope of 16.9 to add a sort of filter to the film. For each new scene our editor added different adjustment layers and manipulated the saturation, brightness, highlights etc.
0 notes
Text
EDITING DAY 1
Coursework and Development

The equipment that we used for all 3 days of editing was an Apple iMac and the software that our editor was working on was FCP ( Final Cut Pro).

We started off by compiling all the 'OK' shots and then proceed to cutting down frames to make our product within the given limit of two minutes.
These 'OK' shots were noted down by our editor on the day of our shoot.


0 notes
Text
SHOOTING DAY 2
Coursework and Development
On day 2 of the shoot we started off with an interaction scene of Tina and Rohit. As shown in the video above Rohit is holding a gun. This would give the audience a hint on who the killer is. However, we did not add this scene in our final product as we had a 2 minute limit and we wanted to stick to it.

Next the cinematographer took all the OTS shots for the hallway scene where Aaryan is search ring through all the classrooms.

During the shooting of the hallway scenes I started making the blood so that we were on the time for the last scene of the day which was the shot of Mr. Mehta's body laying on the floor. I learnt from my mistakes from the previous time i tried making blood at home and added some extra ingredients like cocoa powder and flour to get the liquid to the right consistency.

After making the blood I made the set at the location where Mr. Mehta's body would be found. The above picture is me setting up Mr: Mehta's desk and all the props on them . There are some Classmate notebooks as they were a part of our brand placement, a few stationery items and a blue mug to show that Mr. Mehta is at a higher portion of authority than his students.

The above picture shows me pouring the fake blood on the actor who was told to lay still and in position so that the liquid would drip naturally.

This is the final look of how Aaryan would find Mr. Mehta's body.
0 notes
Text
SHOOTING DAY 1
Coursework and Development
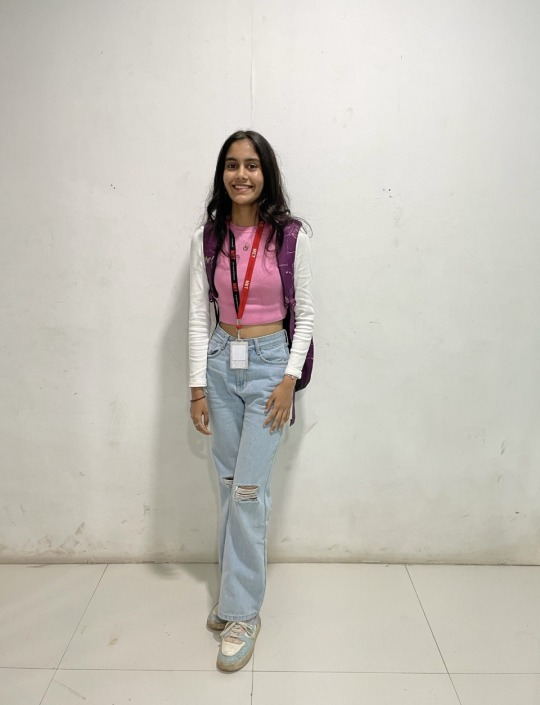
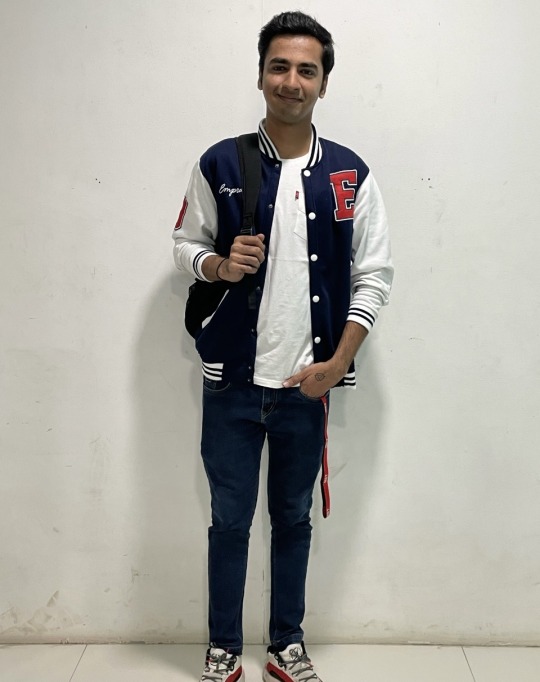
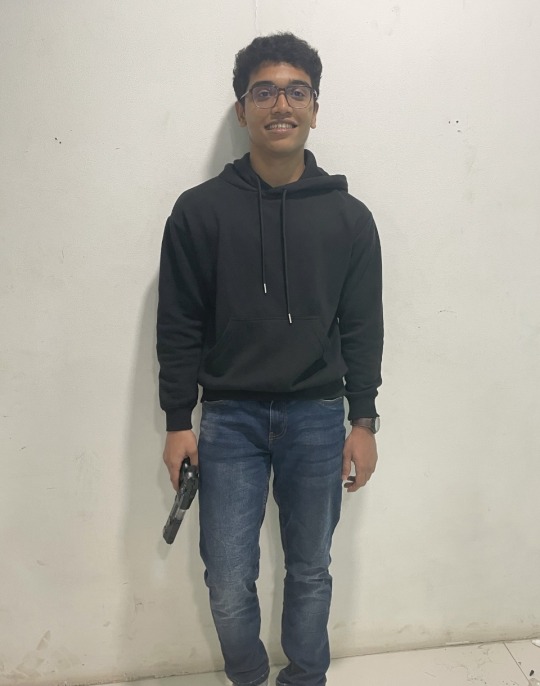
On the first day of shoot, our actors arrived at the location at around 10am. As the production. designer I made sure they were carrying their respective costumes and I quickly got to work and started the actors' makeup.
Makeup used :
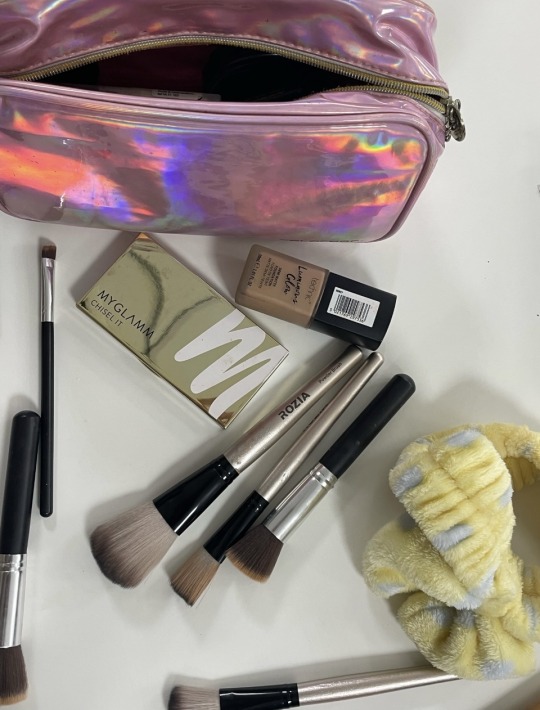
FINAL LOOK OF THE ACTORS :
1. TINA
2. AARYAN
3. ROHIT
During the actual time of the shoot, after I was done setting up the set, I took up the responsibility of taking photos of my team while they were working :
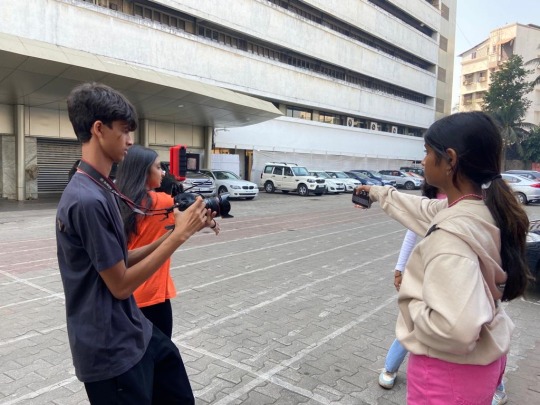
The picture above shows the editor (Tarunya) getting ready for the clap-in while the Dircetor (Prisha) stands behind the camera and instructs the cinematographer (Veer) during the shooting of the pad king pot scene.
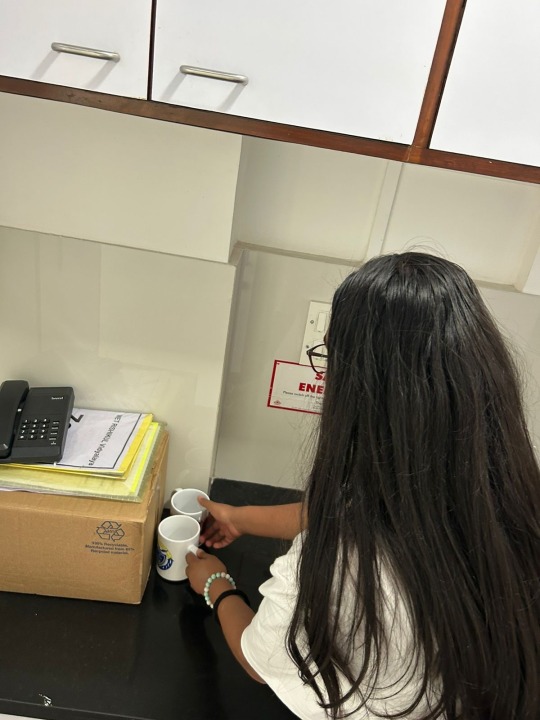
The above picture shows me setting up the location for the pantry scene m. I put props like mugs, cups and silverware in positions of the pantry ay they would be in a school pantry. The pantry scene was one of the most crucial scenes since it was the location where the characters Tina and Aaryan would hear the gunshots.
0 notes
Text
MOCK TEST SHOT
Coursework and Development
Mock test shots are usually taken in the beginning of a shoot to determine the correct exposure, depth of field, lighting levels and to make the actors familiar with their scene.
For example this was the first mock test shot we took of the entire shoot. As shown above, while the actors are getting familiarised with their lines, the director, cinematographer and editor are simultaneously getting used to their roles during filming.
0 notes
Text
FILM TITLE DRAFTS
Coursework and Development
One of the major barriers that we faces as a team was to decide the title's placement, font, colour and time span.
The following images show a few ideas that our team pitched in for the title

First I pitched in my idea of keeping the font legible while making the title colour yellow to show the implicit meaning of 'decay' and 'disintegration' since there a death already revealed in the opening of the film.

Next we thought of adding a background of gruesome and eerie bloodstains. This would give a hint that a murder has taken place. However, when we saw the final draft, the title seemed more a part of a horror genre than to the one relevant to our story.
Then we finally put in our ideas together and finalised an animated title. The full stop changing to a question mark gives a perfect touch of curiosity to grab the audience's attention. As shown in the video we also added a typewriter sound effect to go with the font to make the animation look interesting.
0 notes
Text
Researching as a Production Designer
Research and Planning
As a production designer I was determined to imply all forms of the colour theory into our film. So I started my secondary research from there and scrolled through articles that talked about colour implications and what they mean.
The article above gives a psychological meaning to the 'colours of cinema'. With the help of this article I decided the colour palettes for each of our characters and their wardrobes.
1.Tina

I chose Tina's colour palette to be pink as it matched her character traits of being compassionate, kind and innocent.
2.Aaryan

I decided Aaryan's colour palette to be blue had his character traits described him to be 'teacher's favourite'. This gives Aaryan's character a sense of authority while in his class. Which is why I chose the colour blue.
3. Rohit

I chose Rohit's character to have a black colour palette rad he is the killer and seems to be evil. While we try to show that a character covered in black clothes is bringing death into the plot of the story, we then also challenge the conventions when the audience later finds out that Rohit is in fact a victim of ke tail health problems and did not mean to cause any harm.
PROPS :
one of the main props that we needed was 'fake blood'. I decided to use some homemade ingredients and make some of the blood at home first.

This is the blood that I made at home. I made it with water, red food colouring and hyaluronic acid. However this didn't seem very realistic as it was too runny and bright to be looking like real blood. So on the final day, to make it thicker I added corn flour and to make it darker I added cocoa powder. this made the blood of proper consistency and colour.

Another crucial prop that we needed was a toy gun that looked realistic. For this prop I searched online as well as in my local stores.

I searched for this prop on online shopping websites such as Amazon and Flipkart.
Along with this, I also took inspiration from the internet as to how I can set up the location with props.

College pantry

Mr. Mehta's desk
0 notes
Text
BUDGET
Research and Planning
For this product our team has divided the budget in two parts :
1. Pre-production

2. Post- production

The budget for a ril is decided by a production accountan. The process of budgeting helps a movie crew understand their product's financial capacity and positio. This was the budget decided for pur film so that we could use good quality equipment to give the film justice. Our post production expenses are much higher than our pre production expenses as it is Important to have e a good editior who can make our film look even better.
0 notes
Text
STORYBOARD
Research and Planning
A storyboard is a graphic display that consists of illustrations and images displayed in sequence of the story plot for the purpose of pre-visualizing a motion picture. These visuals help the director guide its crew and make them understand their vision and point of view of how the final product should look like.

The above picture shows our director working on the story board titles with the help of 'storyboard.com'.


This is the final storyboard that we created as a team. It shows the illustrations of the main scenes. These visualisations helped us understand the sequence of shooting during the final day.
0 notes
Text
SOUND & MUSIC
Research and Planning
After having a clear vision for what we wanted for our project, it became easier to identify which sounds we needed and which we didn't.
youtube
We searched for examples of dialogue delivery and how important it is to give our actors wireless microphones while shooting.
youtube
We also explored the options of mode of address where through a narrative, the audience is being directly addressed to by a third person who may not necessarily be on screen.
youtube
We also required Ambience Sound such as chatter and muffled conversations for our hallway scene to establish a noisy setting which is the end of the day at a college building.
1 note
·
View note
Text
FILMING EQUIPMENT
Research and Planning
( ictures taken during shooting days)

For filming we used the Canon 5D Mark 3 DSLR. It weighs around 1kg.

The image above shows our team's cinematographer using the camera on the day of the shoot. We also used a Lilliput monitor that was attached to the top of the camera as shown.

We also used a tripod stand to help stabilise our shots. The above picture shows the cinematographer of our team opening the tripod and adjusting its height according to the requirement of the scene.

This picture shows our cinematographer placing the camera on top of the tripod stand and making sure it is fixed in place to avoid equipment damage.

(Image sourced from Google)
Lastly, we used bluetooth/wireless microphones for our actors while they say their dialogues. As the production designer it was my responsibility to take care of the microphones.

The above image is a picture of me attaching the microphone to one of our actor's' clothing. I had to attach it in such a way that the microphones are hidden behind the clothing so that they are not seen.
0 notes
Text
LOCATIONS
Research and Planning
As the production designer of the team, it was my duty to go location-hunting and get it approved by the director. Since the story is set in a college building I decided to use secluded places of the second floor of our college building :

This would be the corridor through which Aaryan runs to search through the see through gaps of the door to look into the classroom.

This is the library of the second floor, where Tina would have forgotten her bottle and this would be the location where both Tina and Aaryan hear the gunshot.

And this is the physics laboratory where we originally decided Mr. Mehta's body would be found.
However, we were not given permission to shoot in a these locations as entry was restricted due to ongoing examinations. So I decided to change the locations and find the ones that are easily accessible and our own classrooms to make it more convenient for shooting on time.
FINAL LOCATIONS :

I chose the parking lot of our school for the parking lot scene as a location near other sets will be more convenient for the cinematographer to carry all the equipment from one place to another.

Instead of the library I decided to choose our sixth floor pantry as the location where Tina forgets her bottle and both Aaryan and Tina hear the gunshot.

Next I chose the corridor of the sixth floor as with all the notes hung on the doors, it seemed like a hallway with classes full of students and it overall looked like a part of a college building.


Finally I chose one of the classrooms as the location for finding Mr. Mehta's body.
0 notes