kaylafromiowa
64 posts
Don't wanna be here? Send us removal request.
Text
final thoughts on project 3 and the semster
I was excited at the opportunity to try forms of media that I am either not familiar with or marginally familiar with - though I thankfully have gotten a lot more familiar with video through both studios this semester. However, upon reflection I have realized that user experience was the underlying current through the projects. While I try to think about how a user would look at a thing and how/why they would use that thing, I definitely don’t think of myself as a UX/UI designer. This is mostly because I haven’t self taught myself UI/UX best practices or have taken any classes to learn about it. That being said, I learned a lot by looking at an array of formats that recipes can be explained or talk about and felt like I learned a lot about how a user interacts with different types of media and content. While online formats, especially short-form blogs or recipe based website are more widely used due to the expense of buying a cookbook. While they can be checked out from a library, I always find myself writing down the recipe for personal use as to not get whatever ingredient I’m using on the pages.
With project one, while I didn’t hit my learning goals with code, I definitely learned a lot about what people are looking for in how and why they want a recipe blog to work a certain way. While it isn’t always possible because some websites don’t necessarily have the resources for thoughtful web design. Or they have more content without a way to jump to the point of interest so they gain more revenue from ads seen and screentime. Sometimes the content between the title and the ingredients is relating to the making of the recipe. However, in personal baking blogs there is a lot more personal preamble. This could potentially be a format that worked better when people were trying to show their personality as well as recipes with others that were also interested in cooking and or baking. Now, especially with those that gain revenue for the blog, that process just seems unnecessary and creates a negative experience. The unanimous response I got was that they wished the recipe had more direct access, some noted that it would make grocery shopping easier to check which ingredients were needed. I thought it would be a good time to focus and learn a coding language I had very little experience in, but I quickly realized that wasn’t possible in the timeframe as most beginner classes and courses were 7 weeks long as a minimum, which was not feasible.
As for project 2, I had only published one e-pub before. A lot more had changed than I thought from when I made my first (and only) E-Pub in 2014. I’m not totally surprised since a lot has changed in technology since then and some things that were popular were streamlined for an ease of publication and to minimize production time and cost. There are also plenty of paid and free “do-it-yourself” websites that you can format or e-pub or go with a premade design through them or a PDF that you’ve made yourself. With this, I had to think of why e-pubs are made if their production costs can be as much, if not more, than print publications. As for accessibility and usability, anything that is a reflowable pub is preferred. It lessens production costs because the typeface is going to change based on the epub the user is reading. This is great for usability because the user can change the type, the size of that type, and the contrast on the screen. Though I wasn’t able to take pictures for this project, I am not sure the images would have changed that much since I haven’t gained any new props since those images were taken. And I think adding graphic elements would have cluttered up the pages. Looking back, I wish that I would have changed the tab colors so you knew which one was active. But it was a weird transition time for me since I was doubling my hours and training remotely. I was having a lot of emails come in and meetings/visits that would take up most if not all (or more) of the hours I needed to fulfill. That on top of the adjustments that were made quickly and I had to learn all the information was given, the changes to online visits and experiences while organizing the visits. During this I got behind on the project and I feel like I didn’t fully catch up. While I was able to get a final product, I felt like I could have tried more things and tightend up the design a bit. These sentiments go torwards the next project as well.
Finally for project 3, It was great to be able to create video and image content that was specific for this project. Though there were elements that did not go as well as I hoped, it was great to learn about how different media formats can change how a recipe is explained. My initial plan for the video was to have a mix of overhead shots and front shots with a macro lens (mostly to try and minimize background noise, but still add an element of texture that I like to have. I think in the way I shot my video, it made sense. It gave it a sense of place, but it would have been more ideal if that was in a kitchen rather than my living room. Unfortunately, there was no good way to use my kitchen as the space to have me go through a recipe capture the process was just not possible due to the lack of counter space and the width and length of my kitchen. I also need to look into what the lag in after affects is and how i can counter act it while I’m editing. For that I may need to export a video, save a copy, and play it without other programs loaded. As for user experience, I found Instagram Live was best with one person for instructions, or an interview with two. I was baking in my kitchen and had to set my phone on my microwave, which was right next to my mixer. This was problematic for sound, because I couldn’t hear what my mom was saying, which is an important thing to have while you are having a discussion. I also knew that live to IGTV can be a bit of a struggle, I knew I had to work through it to show the end result. However, after trying multiple platforms to upload, I had to upload it to box. That was a process that took over several hours hours (about 1 hour to record the video, 1hr 30 min x2 trying to upload to youtube, and 3 hrs trying to upload to instagram live. this is all not including rendering time, which took about 30 min each time I needed to make file size adjustments.) As far as creating content goes, I am just thankful I could make something out of the take I had. I have found that even when I do plan what do and record changes from what I decided as a story board. It could be a mix of the production (or people) that I was limited to, or I just need to do better prep in between ideation and going for the final recording session. As for the final piece, I added the music through the Youtube editor to save time in finding the royalty free song that I wanted to use to set a mood for the video. I thought this process would be easier, but the longer songs that fulfilled the length of the video were too sad for me to use. The one I wanted to use was too short, and I wasn’t allowed to add a song to the timeline more than once. Overall I think Youtube (though there can be ads if you don’t have Premium or adblocker) can be a great way to make information more accessible. Captions are easier to add and your audience can submit captions for multiple languages. Though I liked having the steps right next to the process, I’m afraid I wasn’t able to use every clip (even if it needed to be shortened) related to all of the steps. I want to explore other formats, such as a voice over, or having readable but more subtle text integrated in the actual video. These all serve different functions and levels of accessibility, so I think it would be a worthy endeavor while using the same content to give a good base to compare and contrast with. The full recipe can easily linked through the endscreen, in a card that can be placed at any point in thee video, or in the description. Through the description the full recipe and easily be copied and pasted to the user can digitally keep it for their records or to paste it into a Word Doc so they can adjust it what they need and print it out to make notes if they’d like. Despite the limitations, I am happy with what I produced despite the flaws of the final. I think the results taught me more than if I created something that was ‘perfect’.
Through all these projects I learned a lot about why and how the process of cooking (in this case 2) recipes was done and what use they could have. It also helped me learn about things that I didn’t think should be a focus through these project because I was looking at them as a means to an end to explore an aspect of a route I could take for my portfolio, but also gave me a larger skill set in the types of jobs I want to look for after graduating.
0 notes
Photo


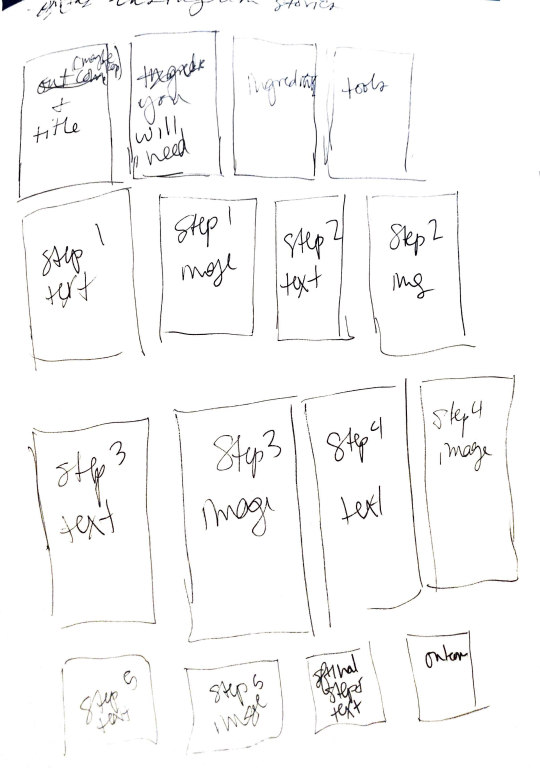
This is the final outcome for the static instagram story. In hindsight, I should have just used the dimensions of my phone and used the dimensions given as a guide for the viewable parts of the screen. I’ve made a few instagram stories through my assistantship, so the dimensions I found in my search as well and when I put them in the artboard were wrong. The thing is immediately after looking at the artboard when I made it, I knew it wasn’t right but couldn’t put my finger on it. I looked at where I decided to use the size and it mentioned that size was so instagram could crop it on the size it needed. After that I figured that I would go with a larger margin as to night loose valuable image details and text. Over all I think sharing the information before the text related is helpful. I also think it would be helpful, especially users that aren’t used to instagram, to include a notice to screenshot the subsequent image. If I were a business that shared recipes, I think it would also work to have this and later on post an instagram carousel. However, they are only 10 slides, so I would mostly just stick to the text slides, title slide to hint at the outcome, and the final size to show the final result. I would also add a photo for the ingredients and and the tools necessary. I would also be able to put a recipe in the description so the user had the option to copy and paste the text when needed.
0 notes
Text
editing process - 5.4


Like I mentioned in a previous post, the baking and recording process was a bit difficult to figure out and took me some time to problem solve. I couldn’t use the softboxes because the chords were too short to reach an outlet with where I needed the table and appliances to be placed. I did have some other studio lights, but with the exposed lightbulb that faces an umbrella, the lighting would be too strong for what sort of details I needed. Thankfully, the editing process went a lot faster. The unfortunate part was that my computer was slowing down when i went to edit the video. This isn’t totally out of place as I’ve had this happen most times I’ve had to edit a video with multiple images. There was enough of a lag in random parts of editing, that I just let it go and went on as business as usual. However, I noticed the timing was off after I uploaded it and needed to move on to other projects. I would definitely go back to this project because I felt like I learned a lot about what sort of information needs to be included.
Thoughts on Instagram Stories:
+ can be saved and shared as a highlight, unlike IGTV in which the process to get it posted to IGTV and/or Youtube is an arduous one. Part of the interest in Instagram Live is that there can be a direct interaction with the audience.
+ users can screenshot and have the recipe by them and go at their own pace
+ businesses can link to the recipe so they have the functionalities of the web site (while I am sure their is the intention of having them find more recipes that they may be interested in to gain more revenue from ads and screen time on their website)
-/+ though the amount of slides/content is limited, it is more than a carousel. This would work for better for more complicated recipes, especially since video can be included
Thoughts on Carousels
+ images and videos can be used.
+ not timed, so user can go at their own pace.
+ there is room to include a recipe under the post so the user can copy/paste into a text editor and adjust for their own use or notes.
+ users can ask questions and it is easy to get responses back.
+ can save to their account through collections to have a way to reference back to that recipe
0 notes
Text
video sketches and process - 5.1


I watched various formats of videos, posts and stories surrounding recipes and food making in general. It became clear to me that the format greatly changes the context and how it is presented. Some of this changes based on the user interface that the content is being uploaded to. Take Instagram for example, you really have to edit/parse down the content for the image limitations for posts vs. stories. For carousels, it is limited to 10 images and/or videos. Depending on the text used, it could be a better option to explain what needs to be told through image and video. I think this is especially true if it is a more involved recipe. Then it isn’t super imperative that you include a list of ingredients or tools within the carousel, since you can place it in the description. I think this would also be easier for users, since they can copy the text from the text in the comment/description. From there they can paste it to a text editor and adjust the type to their liking.
0 notes
Text
video/photo for instagram and video output


This process took a great deal longer than I thought it would. I had planned to be able to have an overhead shot record what I was doing so I could capture multiple angles at once. However, my stand was not tall enough to get everything in shot that I needed to. I instead used the camera suited for that stand to take some images along the way and utilized my phone to capture the content I would need for an instagram carousel post and story. I also used the macro lens on my nikon with a tripod to get the front view of the process. While working through this I was worried I would have to record a different recipe that had simpler steps to explain and record more than what I thought was needed. I’m just starting the edits and it doesn’t look to be the case at the moment, but I’ll have time this weekend to switch the recipe to a simple cookie recipe if need be.
0 notes
Text
instagram live outcome
youtube
Well, it could have gone better and it could have gone worse. In terms of making it instructional, I think it would be best to have one person to maximize the screen space. I also should have done a test run with my mom prior to so she would have been more familiar with how an instagram live would work. I did walk her through the process prior, but not while actually doing the process. There was also trouble connecting her to join the live, which cut into the time that could have been used for instructions or an interview. I also didn’t have my questions with me, so I didn’t get to everything when I wanted to. Though looking back, I talked through most of the points I wanted to.
Overall it was a great learning experience, especially since that was my first time hosting or interviewing in that way. I think that medium is better suited towards sit down interviews rather than ���let’s do a thing and talk about the thing”. Partly because of the clanging of bowls and other baking noises, but also because of what is possible to show and tell the viewer with those constraints.
*sorry this is up so late. to export this, I had to play the video and make a screen recording, airdrop it to my computer, and then upload it to youtube. from recording to upload it took about 4 hours. it’s still processing as I’m posting it, but the link is available so I can finally get it posted)

EDIT: It looks like you have to have a verified account to upload a video longer than 15 minutes. In hindsight, that makes more sense which accounts were uploading instagram lives to youtube. The file is also too big for tumblr, and it likely is not a good fit for other places to upload. Going to try and upload it as an IGTV video on the account i created for this project.
UPDATE - 4/22: It was too big for a tumblr upload, too long for youtube, and I kept having a failed upload on IGTV (though as far I could see it was to the required specifications) so I uploaded it to box. Keep in mind that this is the screen recording, so the view and UI is that of the host, rather than the viewer. It is viewable below:
https://iastate.box.com/s/kxcuhmh5ecd9n45c8tge3lasf2ggyxia
0 notes
Photo

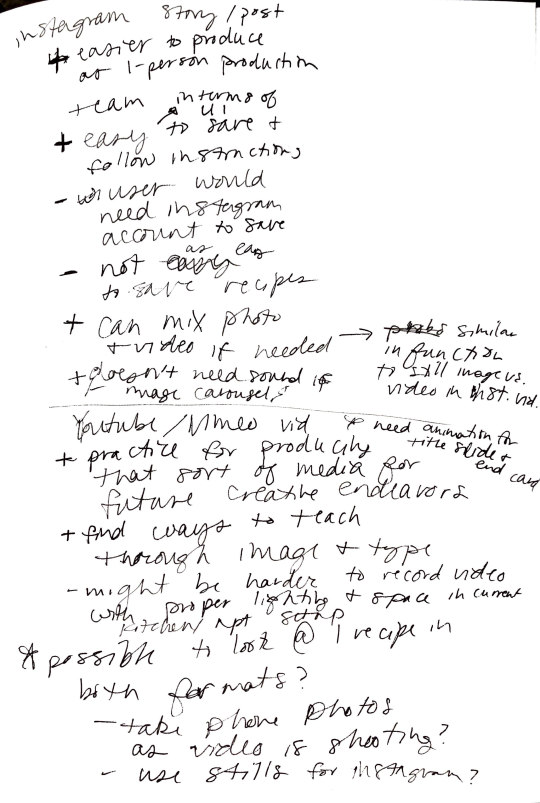
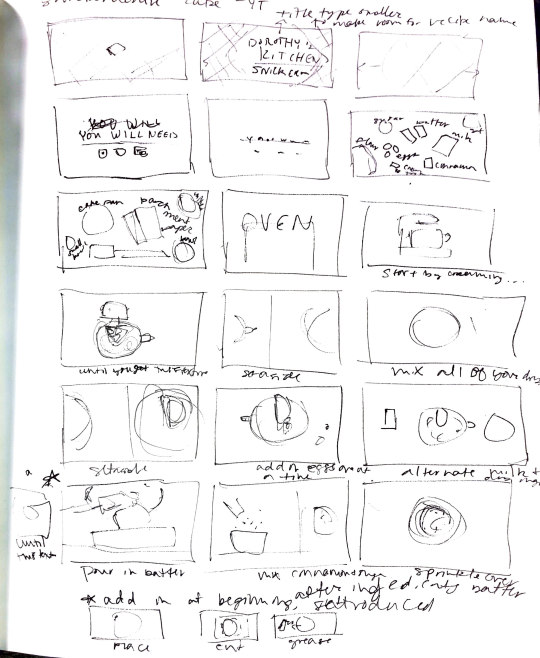
Before I tried out Instagram live as a from of recipe sharing, I wanted to brainstorm other forms of media that have been used by food publications, brands, and people to share recipes. I was looking at what the pros/cons were in terms of user experience as well as my ability to produce them with the production crew I have (a.k.a. me and my apartment) For the instagram live, I found they can be an interesting way to learn about a recipe (maybe not in the most accurate or informative way) and to learn about the people making them. Since more and more publications were using this as a means to produce content, I thought it might be worth pursuing.
They have also used instagram stories prior to the recipe so people can get their ingredients prepared as they followed along. I knew there was a 99% chance that it was just going to be me and my mom the whole time - and for the fact that certain ingredients are hard to find/would need more notice for limited grocery buying schedule. Because of that, I thought it would be better to explore those other avenues through a different recipe and in a context that wasn’t a limited time thing.
The scans above include a list of questions I wanted to ask and the first storyboard for a potential video route. I want to try and storyboard a few more times to get a better idea of what I’ll need to record/take photos of and when. I’ll also be limited to recording the video once in terms of ingredient availability and to give proper time to edit the video and potentially the instagram content.
0 notes
Text
project 3: revised schedule
Week 1: Storyboard for both video formats, record live instagram video/interview
4/13: research instructional video mechanisms
4/15: Storyboard, get promotional video for instagram live. Do instagram live interview Sunday.
Week 2: Lessons, start editing title
4/21: Lessons, title sketches
4/23: work on title sketches in AI, move to AE.
Week 3: Edit & finalize
4/28: have a rough edit from instructional recipe video
4/30: More edits and start prepping for presentation
-----
I switched up how I was going to create content for this project. I still wanted to learn aspects of video production for potential work after graduating and for the creative component of the thesis. However, the situation is much different now than when I made these plans so adjustments have to be made. In a way, this worked out in my favor because I get to try multiple avenues of technology and media production to find creative solutions to tell a story. So I’ll be exploring how food is/can be taught by interviewing my mom while making coffee cake together. The next video I will be creating snickerdoodle cake because realistically it (like the coffee cake) uses buttermilk, so I can have a reason to use that up as to not waste ingredients.
0 notes
Text
project 2 - final thoughts
I thought this project was both fun and rewarding in terms of how much I learned. There were a few tumbles through the project, but I was able to do a lot of problem solving to get to the solution. I would like to explore more with reflowable epub design and rework this project to fit that description. I found that would be the biggest thing for me to learn if I am lucky enough to get a job in publishing because it has the best of the fixed layout and kindle formats. There is more design control than a kindle epub (especially if designed for their paperwhite kindle) but the accessibility is still prevalent. I am pretty pleased with how it turned out despite not having the ability to photograph the recipes while they were getting measured. I think for the more complicated steps, much like with recipe blogs, the illustrated steps through photographs are most helpful for the audience. I picked the recipes that I did to alleviate the need for that since I knew I wouldn’t have enough time to illustrate them properly after formatting the 3 books. But if I were to go back and do this again, I would flesh out the steps a bit more through visual means.
0 notes
Text
process

Okay, so I saw this article listed in a newsletter from Bon Appétit about a week before I realized I couldn’t bake and measure myself. I thought based on the description they had their own measurements listed, but it basically told me to go to google. So I did the math and I wish I had recipes that had the same measurements across some of the ingredients. Thank goodness for calculators. After getting that all calculated, it was time to sketch and get started on design work.
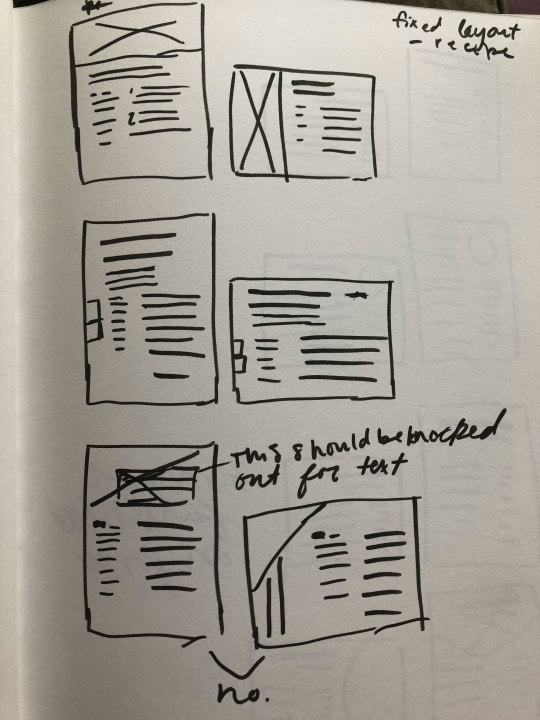
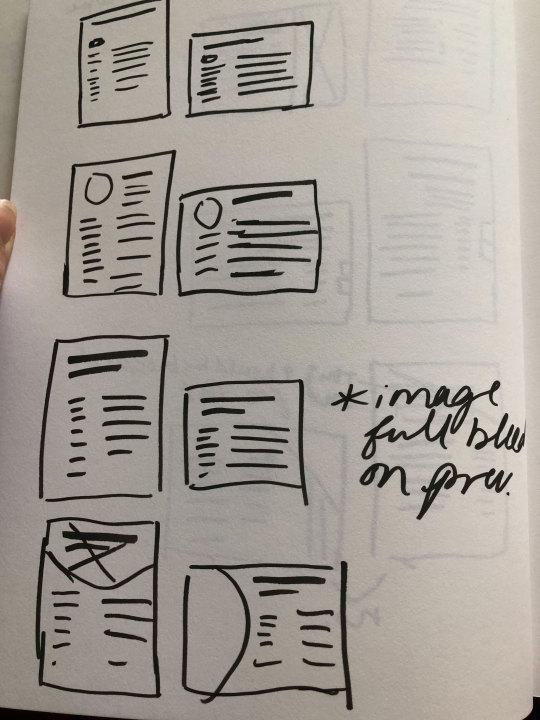
After typing out the recipes in word, it was time to get everything into InDesign. I was all ready to go with my color and type choice because I took the time in the last project to make sure I was set with a system that would be placed over multiple platforms.


I went through a few different cover iterations. I wanted to balance between modern and retro cookbook design sensibilities. Initially I also wanted to. go with a completely text and pattern based cover, but quickly decided against it. I wanted to let the audience know what they were getting into and did not think the tile and cover choice did that efficiently.


Then it was time to design the inside. I took the colors and type system from the first project. 1 - for continuity and 2 - it was a font that was built for web and print, so it made sense to use for a product that could be used in print form. I built an alternate layout, but ran into issues when exporting it. From some google searches and looking for forums with recent inquiries around the issue, it turns out that alternate layouts are not used and reflowable epubs should be used instead. However, when I tried to export it and reformatted it, Indesign would immediately crash when trying to save.


I then moved onto the kindle epub and built it in Word like the tutorials instructed. However, I found when resizing the text, recipes would start on the same page others ended, which I did not want. I ended up having to download Amazon’s kindle builder and imported my text into there. There was minimal formatting due to the restriction to the fonts that are embed to Kindle devices. That being said, you could still differentiate copy by importance or hierarchy with their preset Chapter Title and Heading settings. With that and the Kindle Create app, I was able to get the pages to be where I wanted them to be.
0 notes
Photo
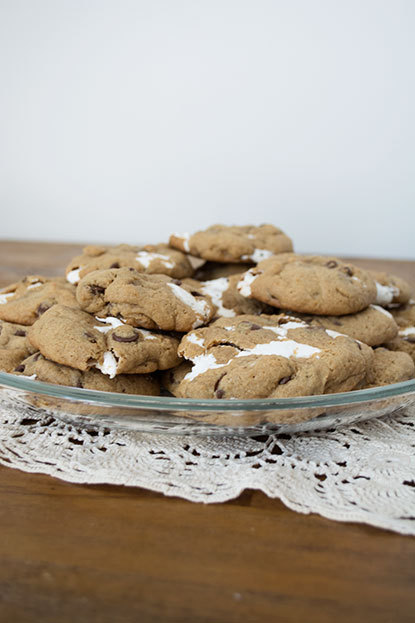
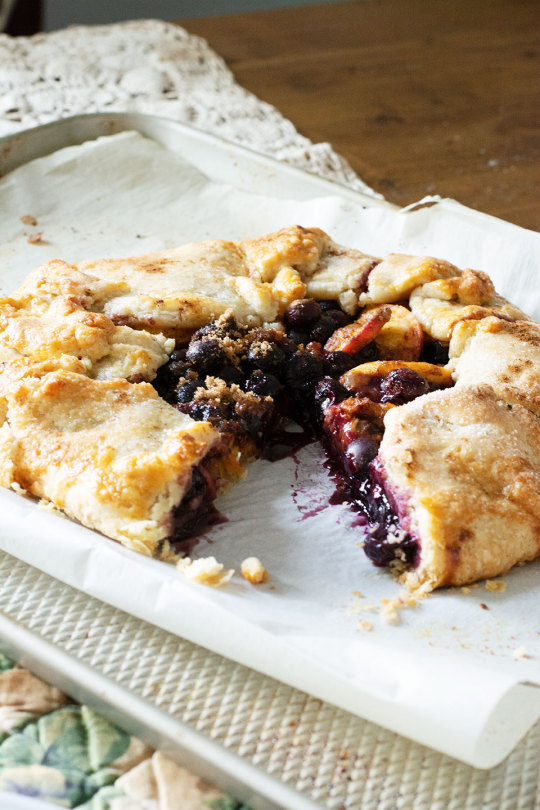
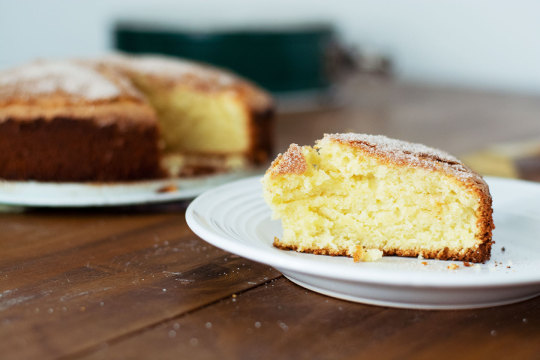
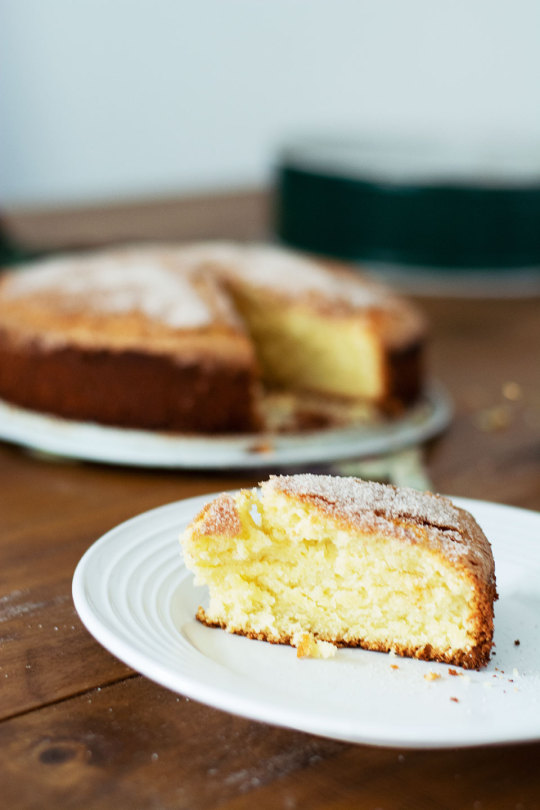
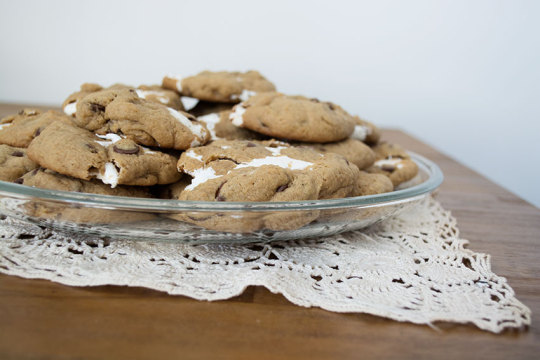
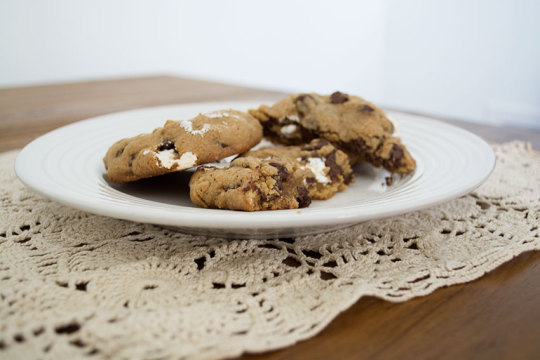
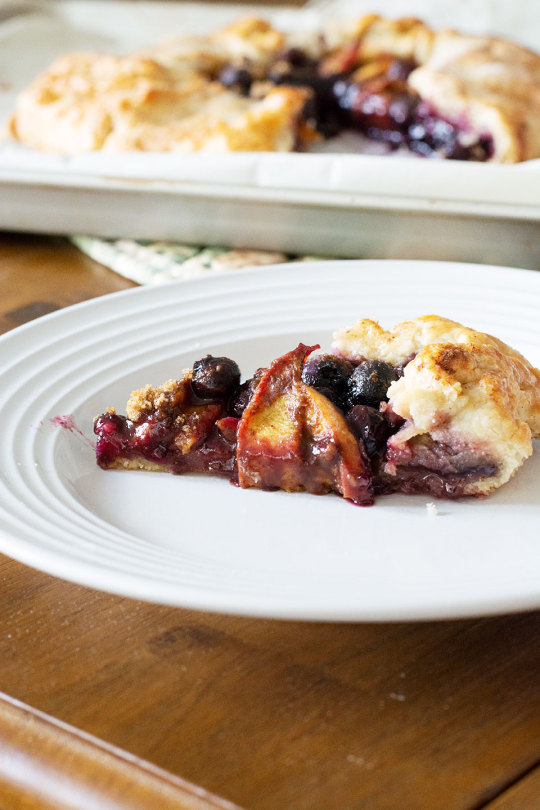
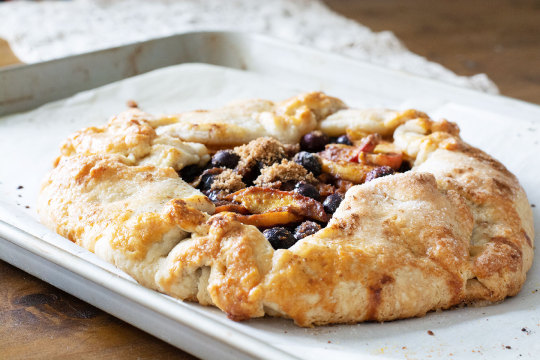
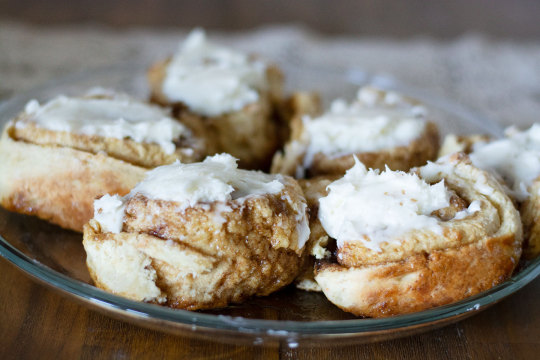

These are the images I had on hand to pick from. I decided not to go with the cinnamon rolls because I thought the other images were more cohesive. And I liked the idea of having 5 recipes in total
0 notes
Text
03.25 - project setbacks and update
Supplies needed to bake were hard to come by in the amounts I needed them by the time I was scheduled to take photos. And I thought it would be best to not deliver/have people pick up baked goods with the state of things as it is. That being said, I do have workable photos for the recipes I need. My main objective in making the recipes was to have a more specific photo direction and to measure out the recipes in grams. I found a useful article from Bon Appetit that includes general measurement equivalents for specific ingredients to be able to convert from cups to grams. That way I can still attempt to utilize some interactivity in the fixed epub like I initially intended. I’ve finished with the tutorials, so now I’m moving on to sketching and then working in InDesign.
1 note
·
View note


