I don't know just random stuff and my drawings. kat / 22 /
Last active 60 minutes ago
Don't wanna be here? Send us removal request.
Text
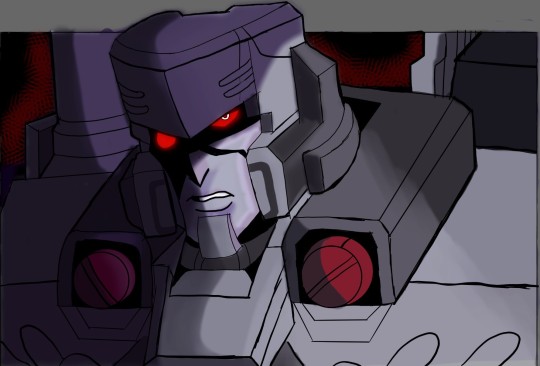
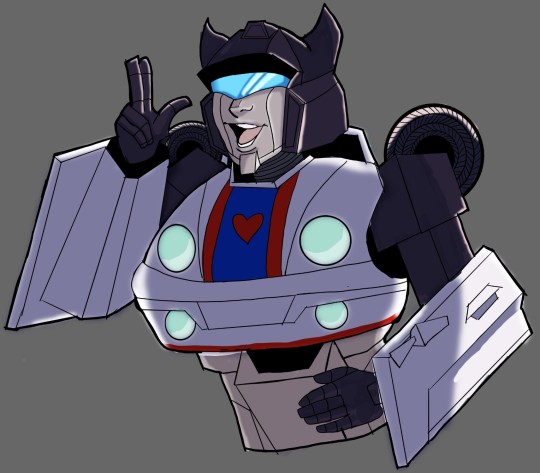
Here's some drawings I did of Megatron and Jazz!
#art#digital art#drawing#fan art#transformers#doodle#megatron#transformers idw#mtmte megatron#mtmte#mtmte transformers#jazz#transformers jazz
37 notes
·
View notes
Text
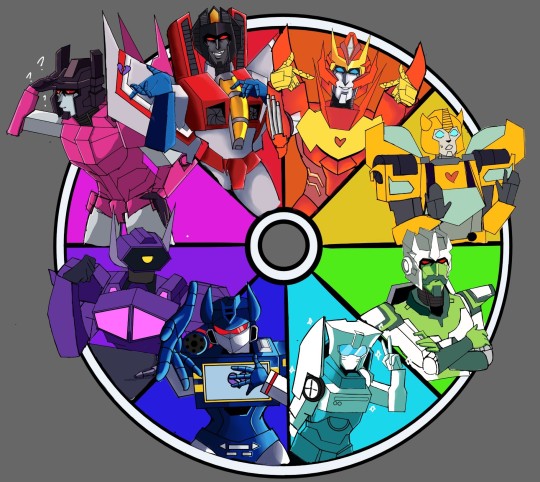
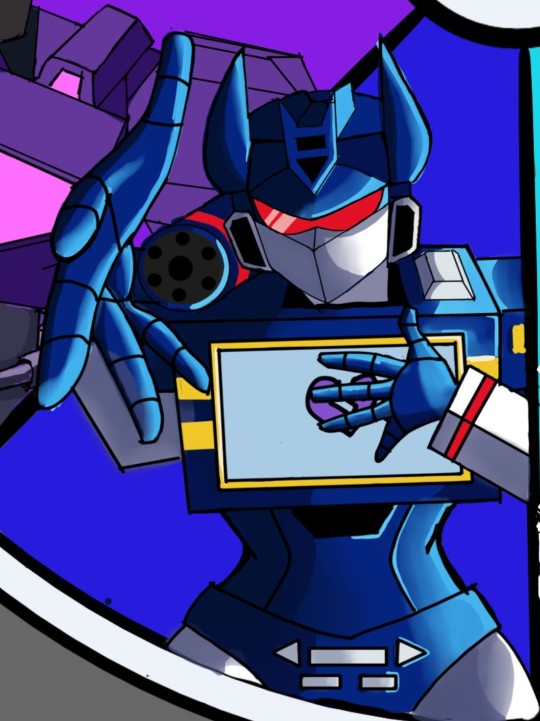
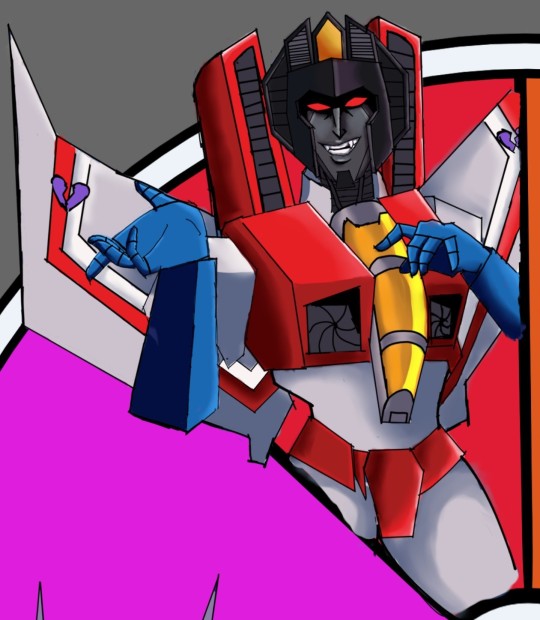
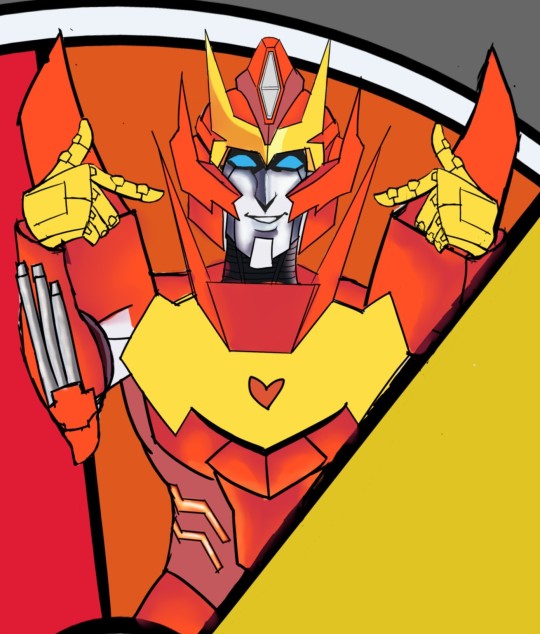


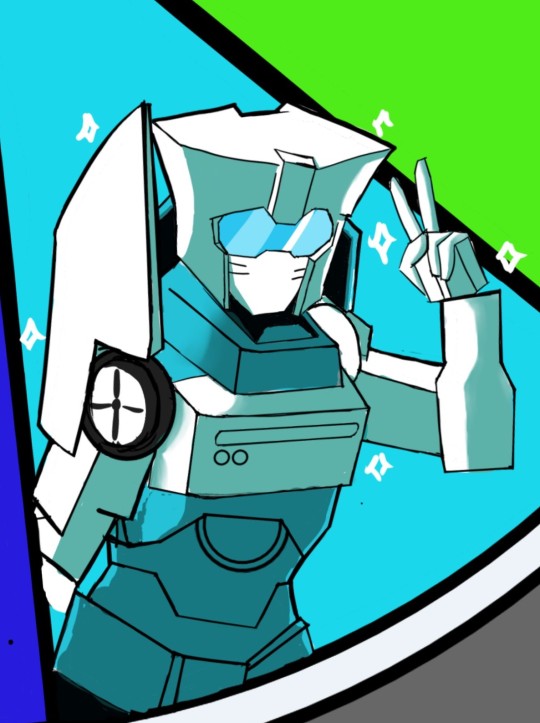
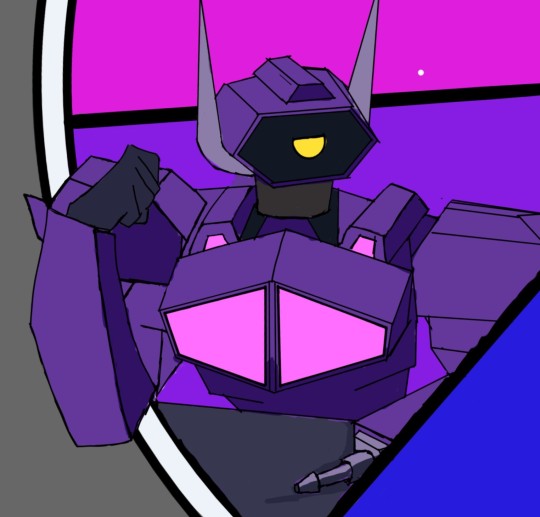
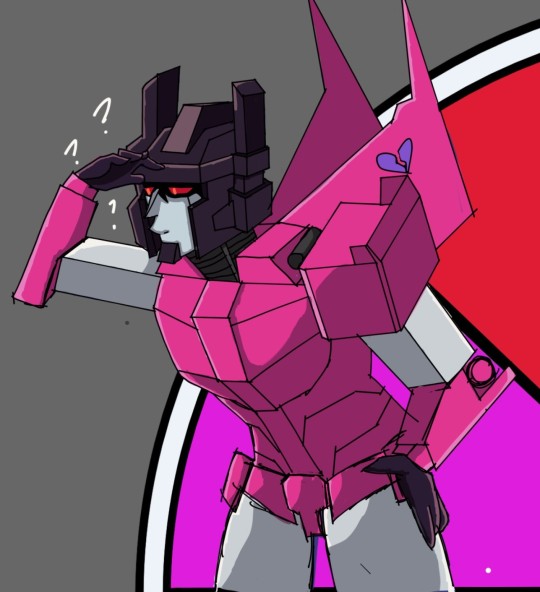
I did the color circle challenge. I decided to do all transformers. I haven't finished all of them yet. I will eventually though. But here they are!
#art#digital art#drawing#fan art#transformers#soundwave#shockwave#bumblebee#starscream#tailgate#misfire#rodimus#minimus ambus#not done
93 notes
·
View notes
Text
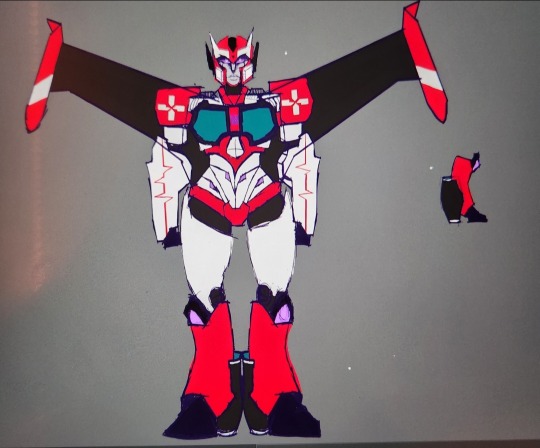
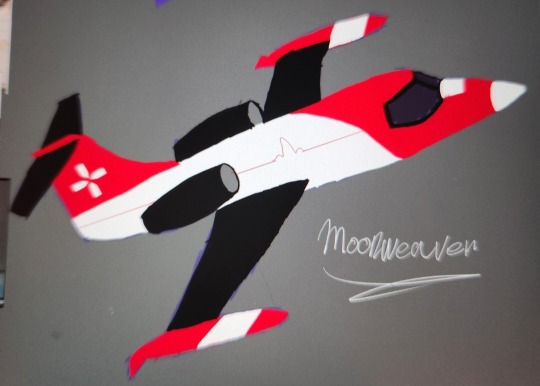
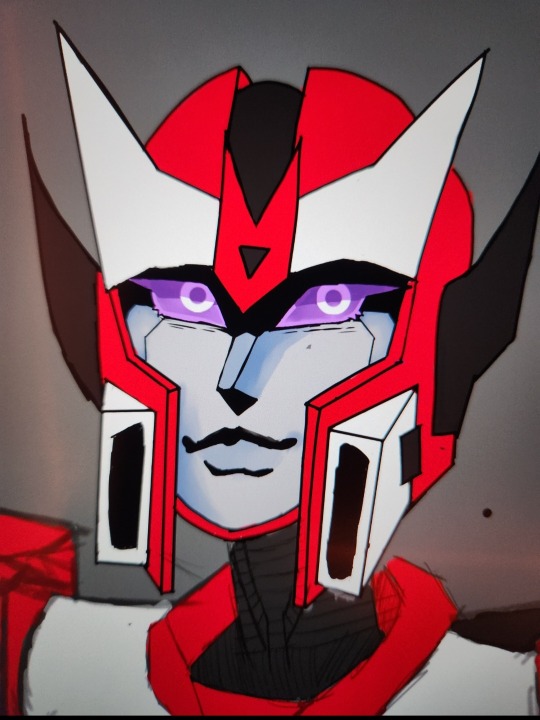
Working on my transformer oc! She's a Decepticon medic name Moonwaver and her Alt-mode is Bombardier Learjet 35A. She still a work in progress so this may not be her final design.
1 note
·
View note
Text
Wilford Motherloving Warfstache!
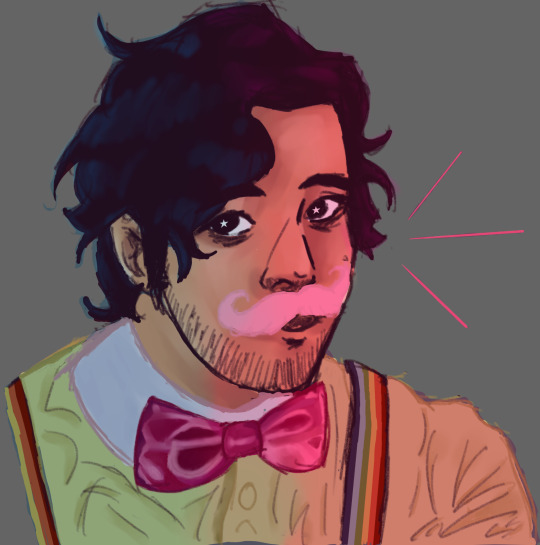
#art#digital art#doodle#drawing#fan art#wilford fanart#markipler egos#markiplier#wkm wilford#ahwm wilford#iswm wilford#iswm
57 notes
·
View notes
Text
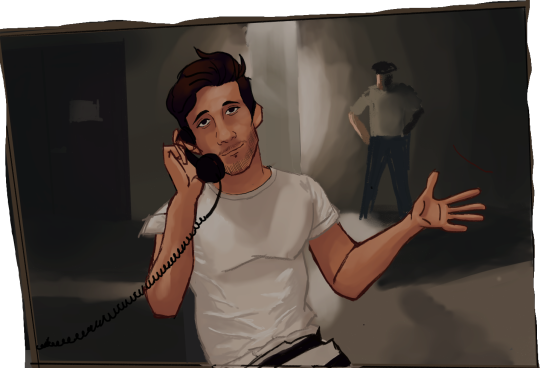
Here's yancy! I'm not fully happy with it so I'll probably will be drawing a new drawing for him.
99 notes
·
View notes
Text
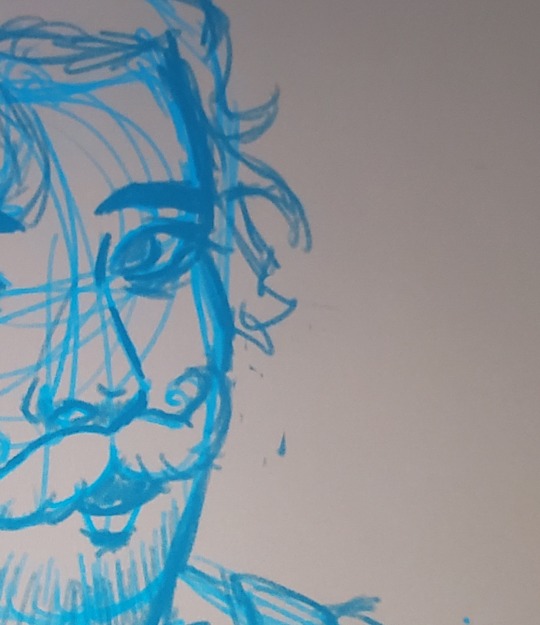
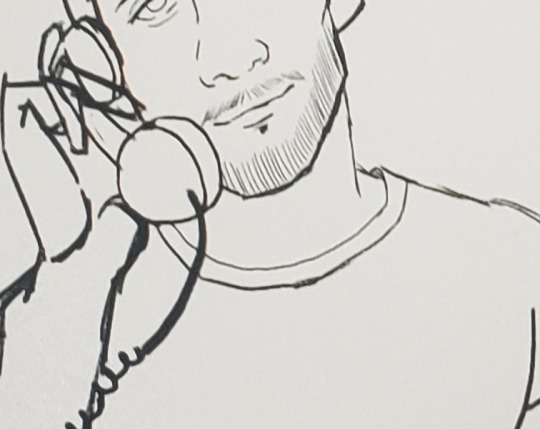
I have two new iswm drawings coming out soon!
19 notes
·
View notes
Text
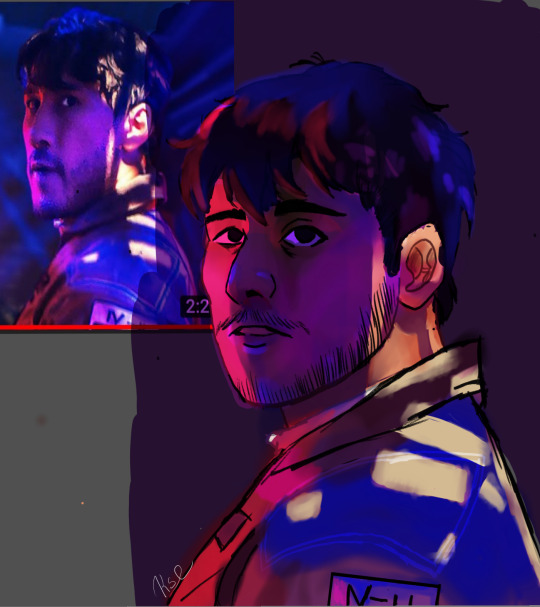
Here is my attempt at drawing mark. I really loved Iswm!! It made me cry.
46 notes
·
View notes
Text
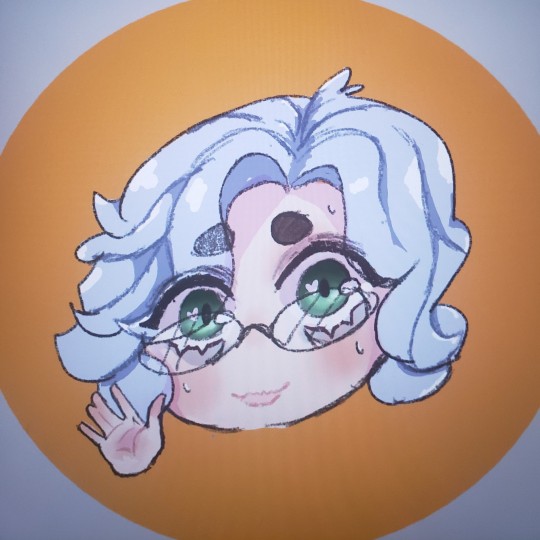
Here's a little chibi of my oc?? Me?? Are they my oc or me i don't know anymore.
110 notes
·
View notes
Photo

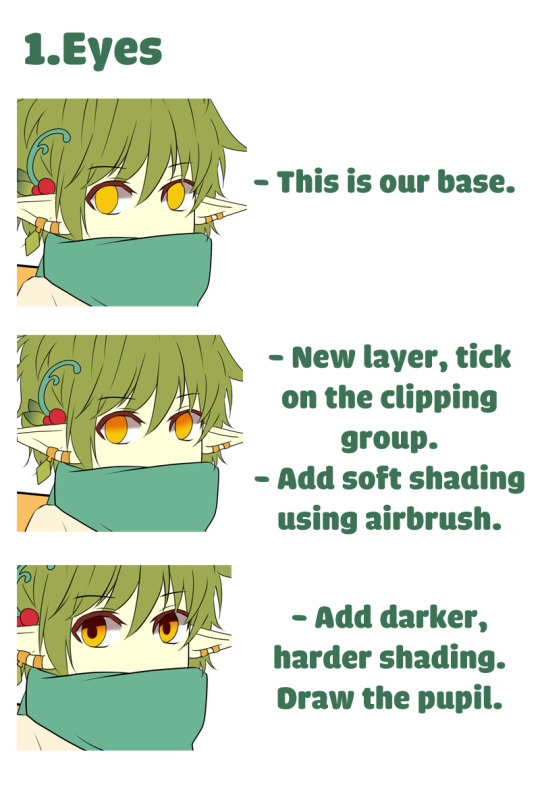
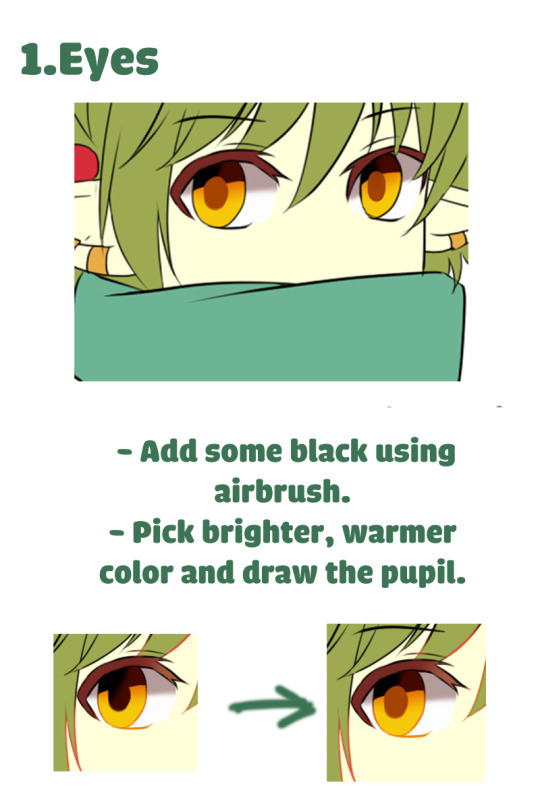

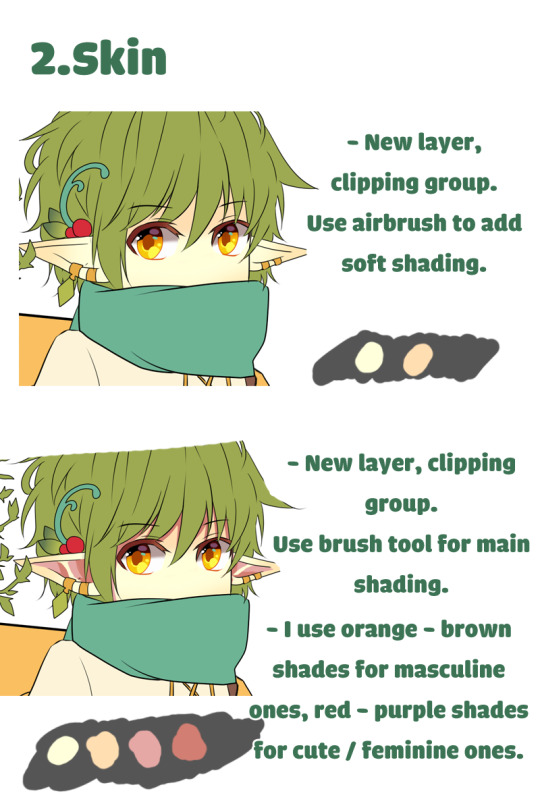
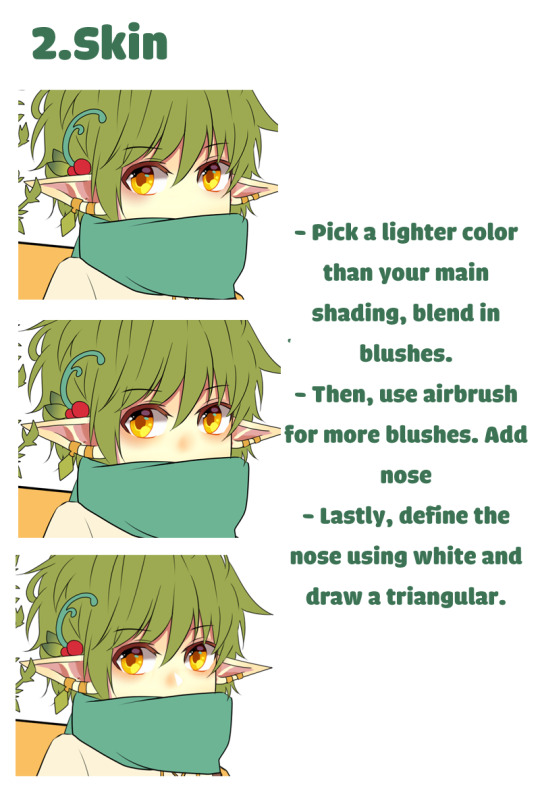
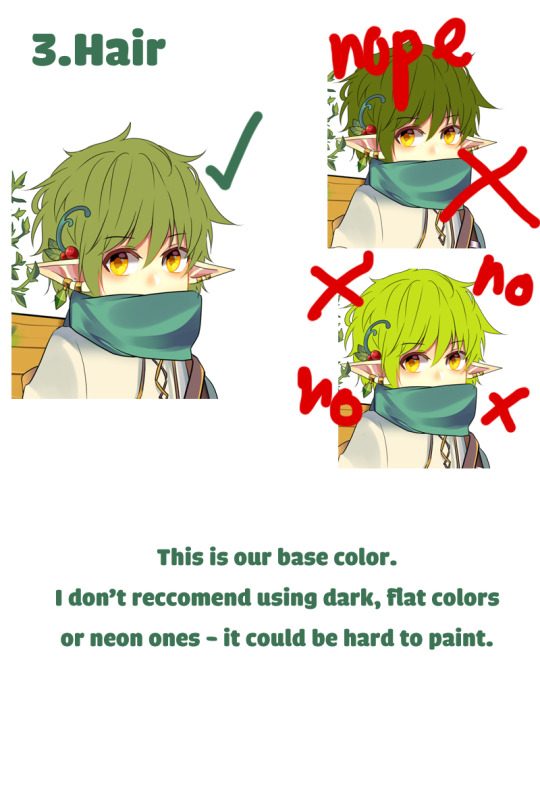


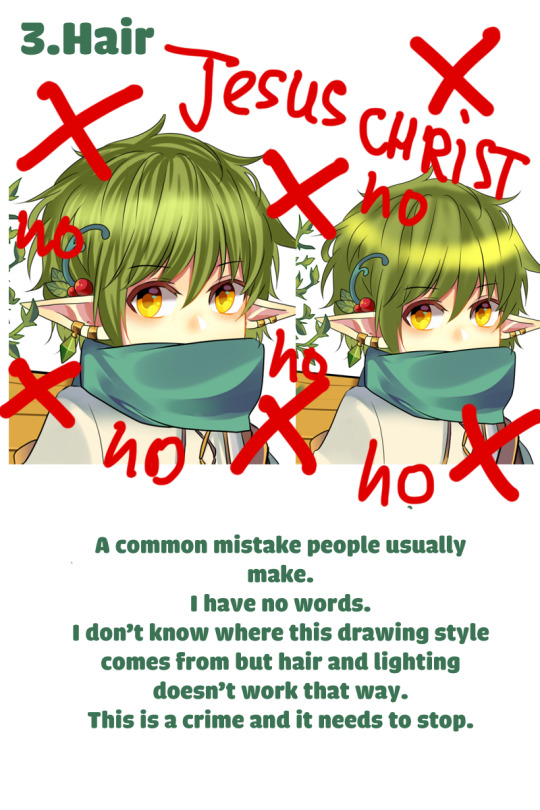
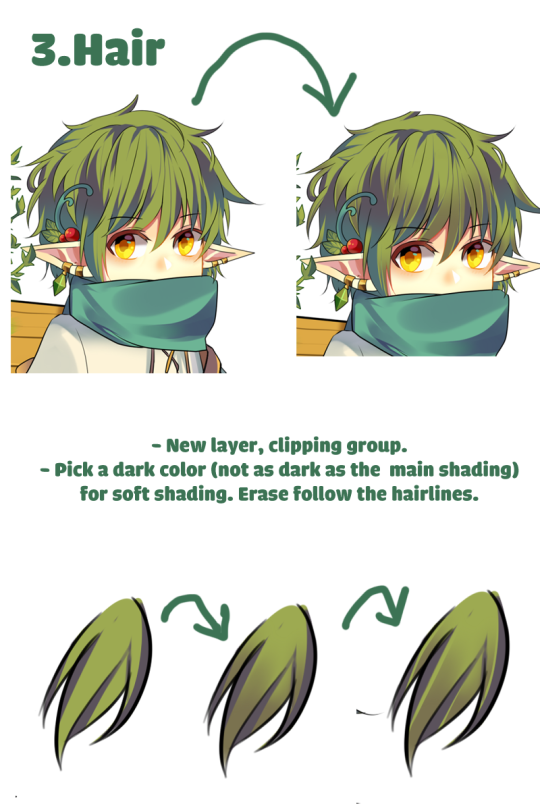

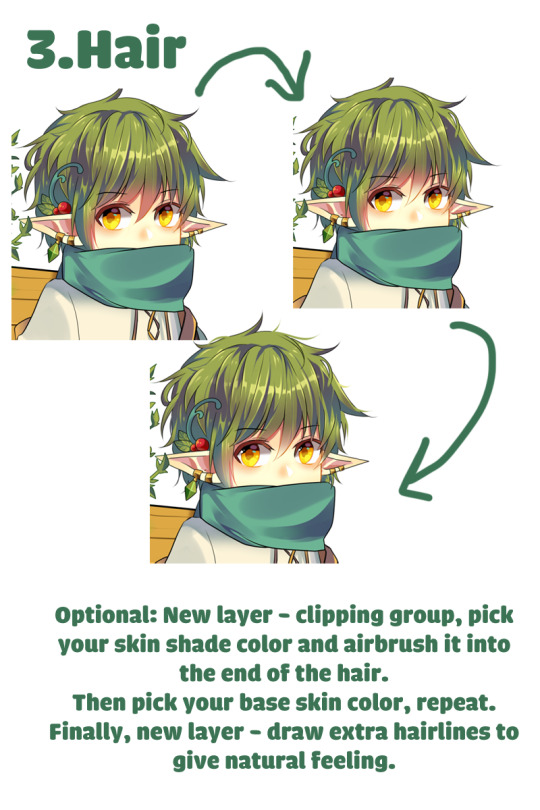
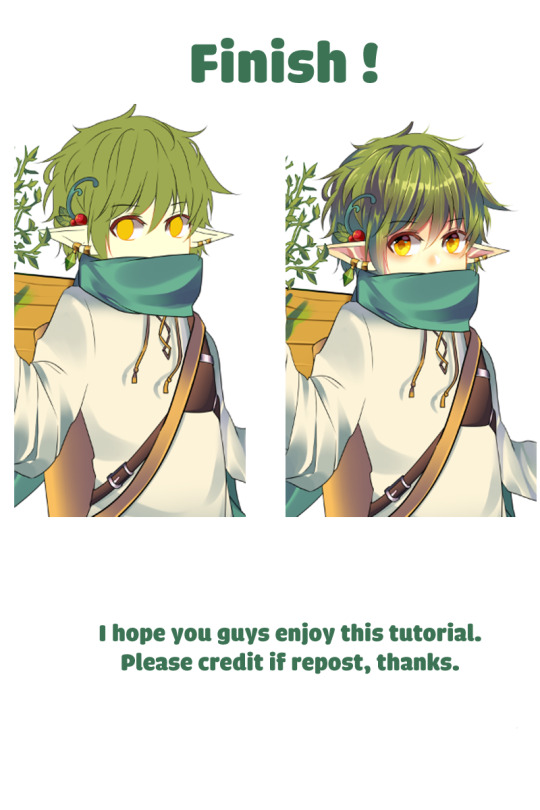
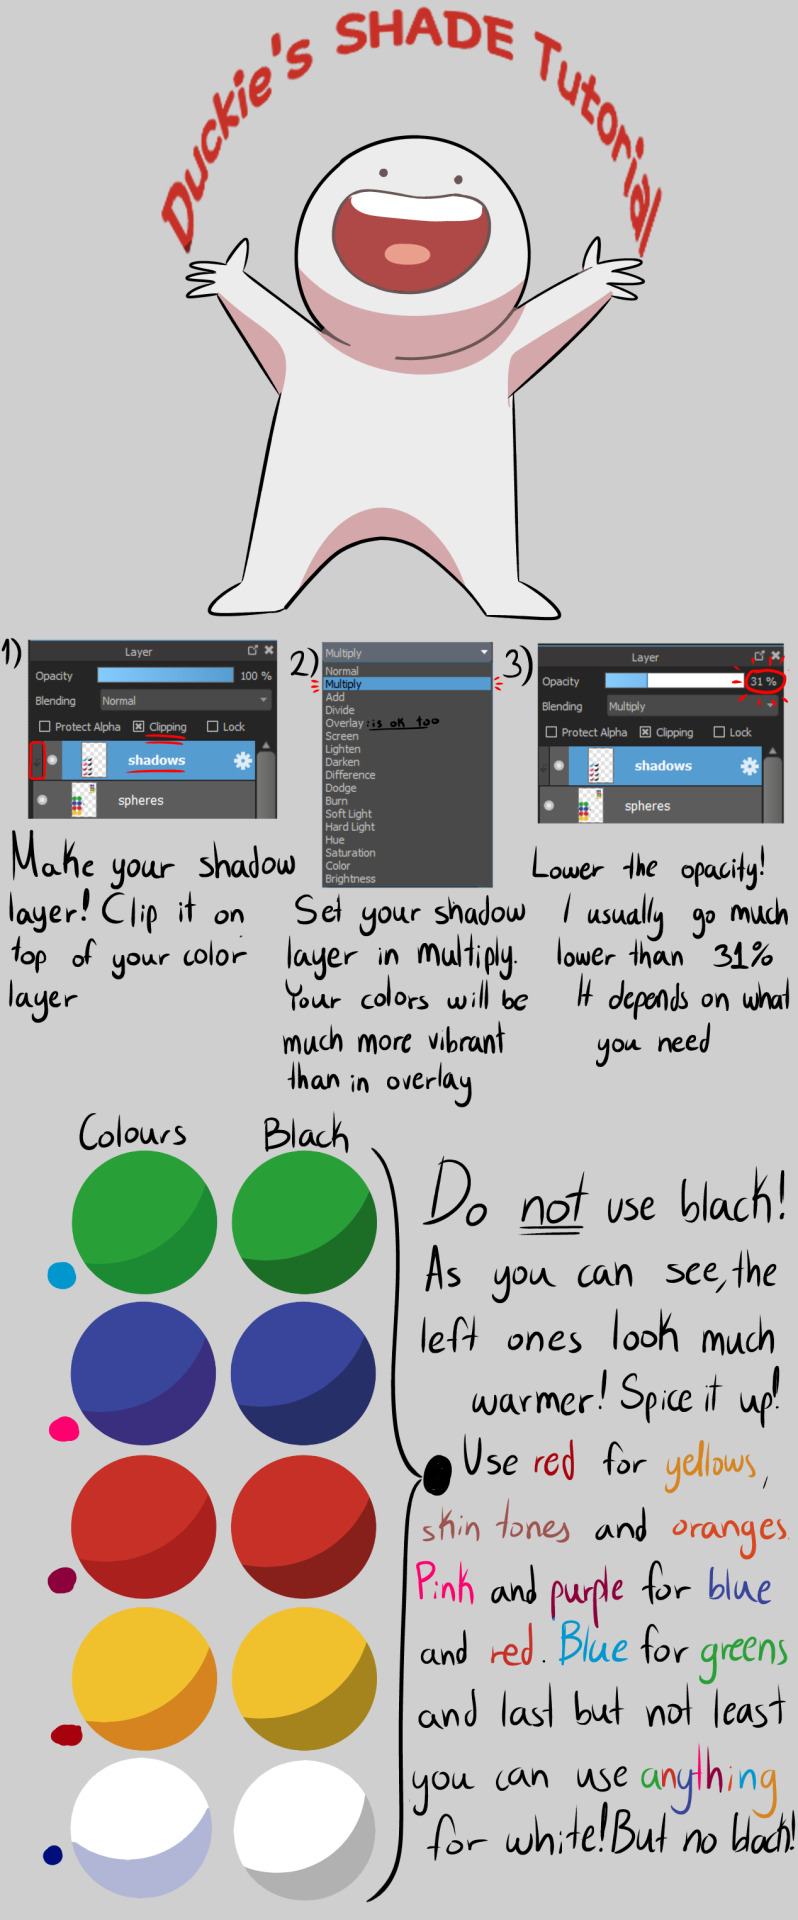
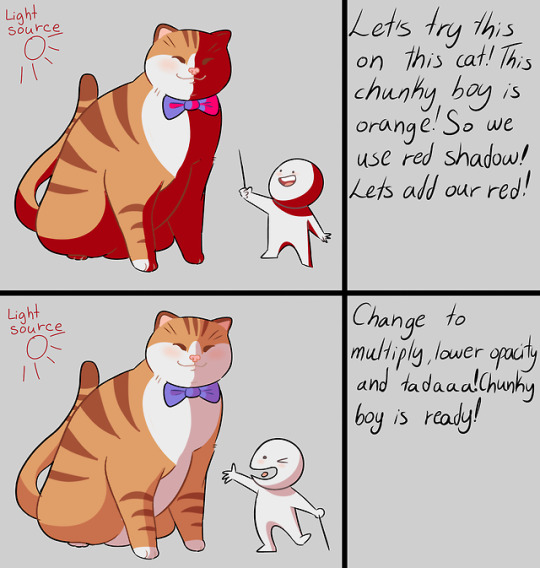
My friends asked me for an tutorial
For Paint Tool Sai users. There should be plenty of guides on how clipper group, preverse opacity/opacity lock works so I won’t be adding them here.
Excuse my lame English, I’m not a native speaker.
26K notes
·
View notes
Note
Hey!! just wanted to say me and my girlfriend love your casino cups and all your artwork too!! I was wondering how you do shading (it’s the hardest part of drawing for me)?
Ayy, thank you! I don’t know how to make proper tutorials but basically-
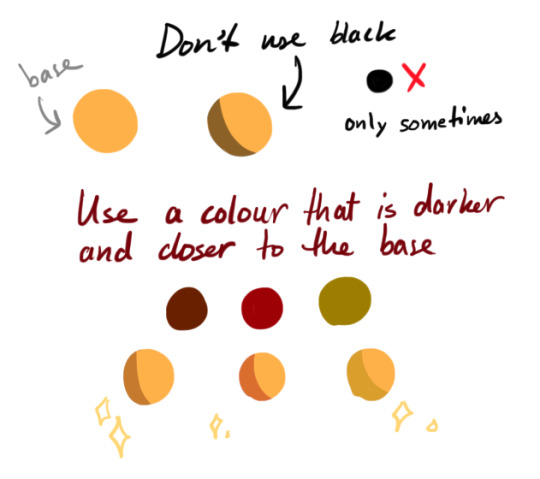
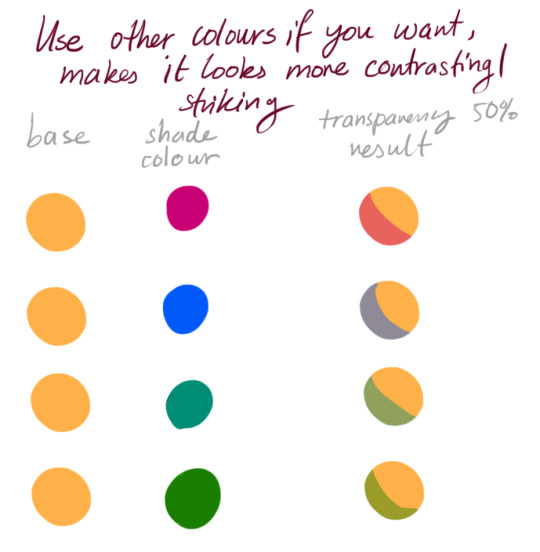
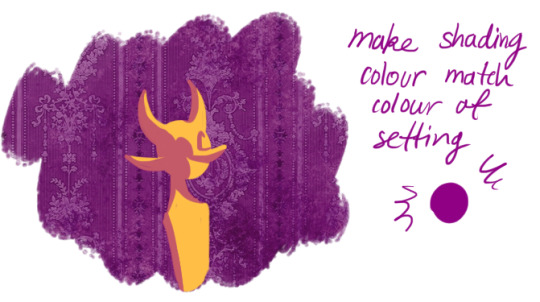
Also use layer masks- I’m not sure how the setup would look on other programs but on krita (the program I use) it looks like this:
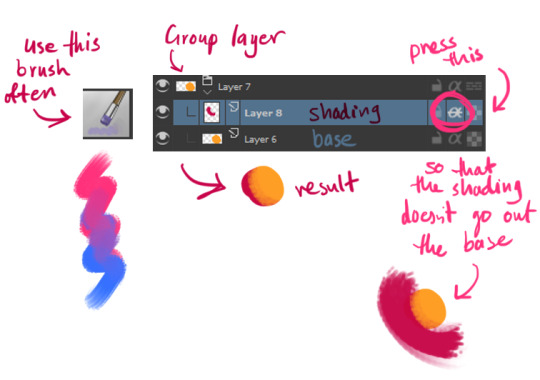
Also…

2K notes
·
View notes
Note
Sorry for bothering, but do you know how to get Krita to let you paint color inside lines? For example, I drew line art and now want to color it entirely purple, how do I make it so the purple doesn't go outside the line art even if my cursor does?
Do you mean you want to color your actual lines, or if you want to fill your drawing with color (like a coloring book)?
Coloring Your Lines
For coloring your actual lines, you’ll want to lock the alpha of your layer. Sounds complicated. But its actually a one button fix. It makes it so that you can only draw on parts of the layer that have already been drawn on.
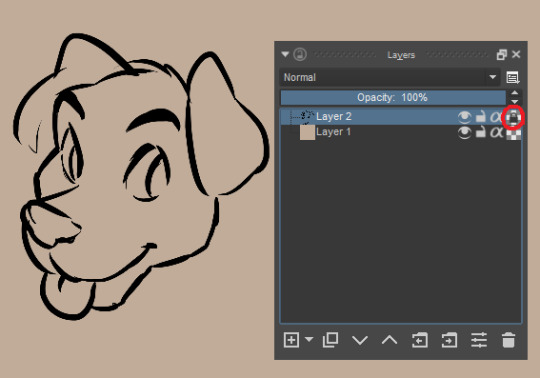
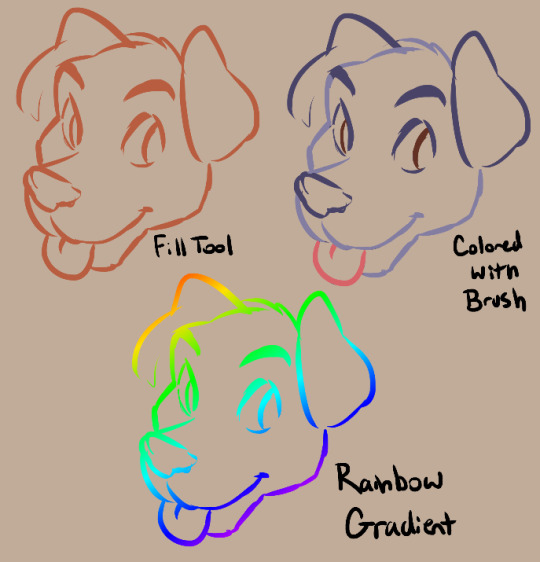
Now you should be able to color your lines any color you want to. You can fill them, use a brush, gradient, etc.
Coloring Inside Your Lines (Fill Tool)
If you have CLEAN line art. You can actually use the Fill Tool.
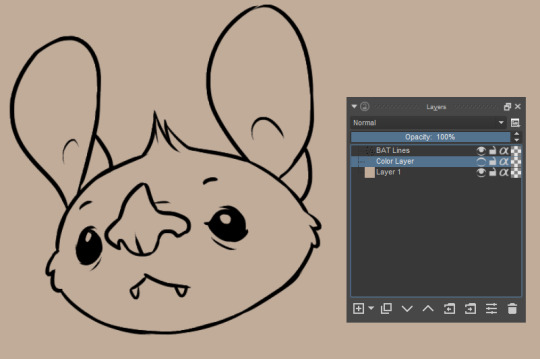
(An example of clean lineart. No breaks. Clearly defined, solid lines.)
Make a layer under your lines for your color.
You can find your fill tool on your Toolbox Docker. (Any missing dockers can be found under Settings>Dockers)

In your Tool Options, there is a setting that can make filling your line art very quick. Its called Grow Selection.
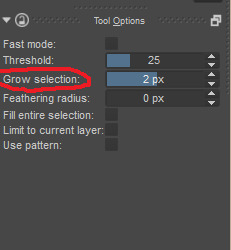
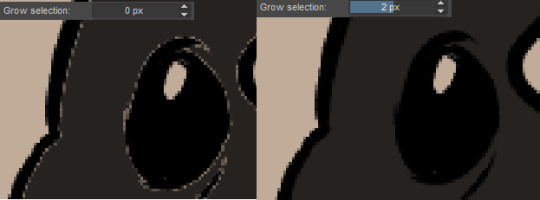
And if you set the number up till about 2 pixels, it should expand your fill tool so that it fills the line art nicely. Here’s an example of what the fill tool will do with and without the use of Grow Selection.
Now you can use the Fill Tool to click inside spaces and fill them with color. You can do each color on its own layer, if you wish.
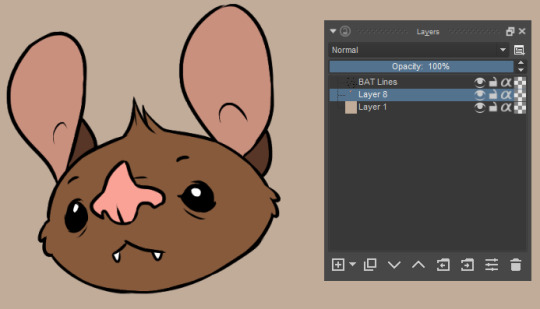
You may have to go in with a brush and clean up small areas that the fill tool may not have reached, but this is a nice way to quickly fill clean line art.
You can also turn on alpha lock for color layers as well, and color inside them easily.
Coloring Inside Your Lines (G’MIC Filter)
If you’re like me, and you use sketchy, pencily lines, or you have a lot of breaks in your line art, the fill tool probably wont work so well. But there is a filter you can use to help.
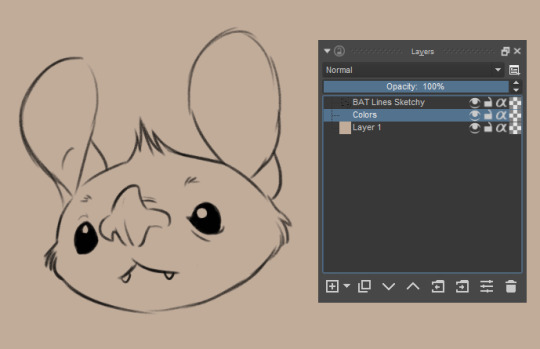
First, create a layer under your lines like you did the last time. Now, fill in spots of the image with the color you’d like them to be. Make sure to set a color outside the lines, otherwise the filter will fill it with one of your other colors and the filter won’t work correctly. The color I used is lime green.
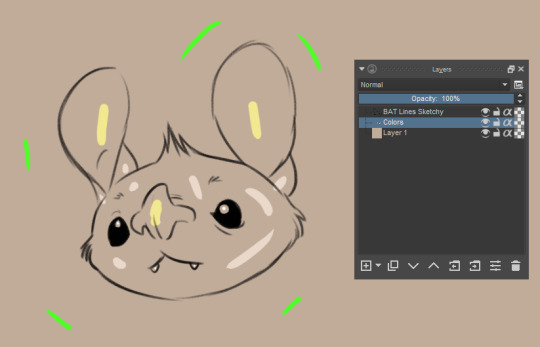
Now. SAVE your file.
Now, with your color layer selected, go to Filters>G’MIC.
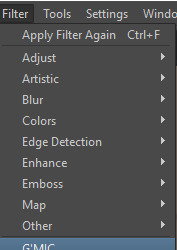
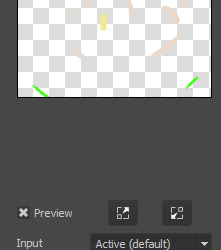
Now choose “Active and Above” for Input. This tells G’MIC to consider your color layer and your lines layer, which is above it.
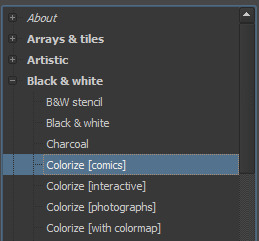
Next, in the filters list, under Black & White, choose Colorize (Comics).
(Don’t worry too much about what the Preview looks like, here. Mine always look chaotic and messed up. The actual filter looks much better)
Now, to the right. I usually have it set so that it creates a layer for each color.
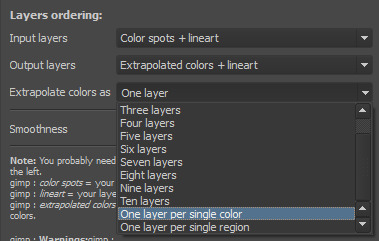
After that, hit OK to run the filter.
Your result should look something like this.
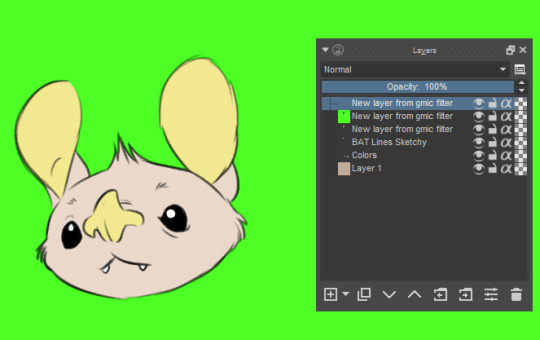
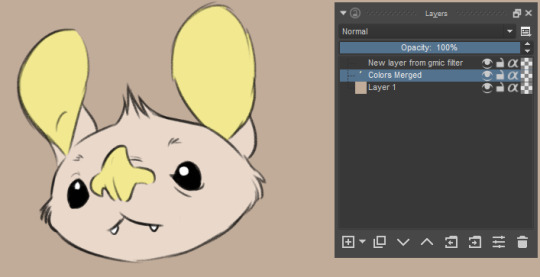
From here, you can delete your background color layer and do any necessary clean up. If you want all of your colors on one layer, you can select them all by clicking on them while holding Shift, and merge them with Ctrl+E.
Now, this extra step is optional, but since my lines can sometimes be thin and see through, I tend to do this.
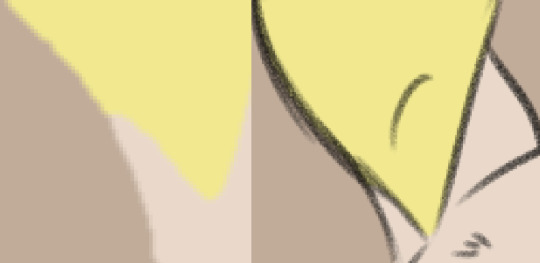
If you turn off your Line Art Layer (Its name is probably different, but it will be the layer above all the colors. You’ll see that the edges of the color are pretty sharp and not anti-aliased.
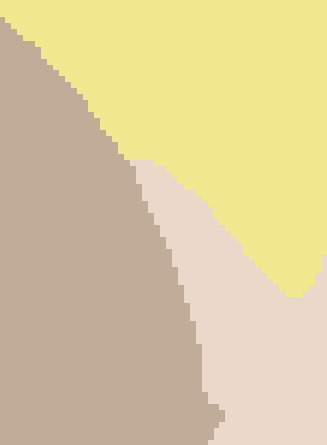
It can look kind of gross behind thin and seethrough lines. I use the Blur filter to fix it.
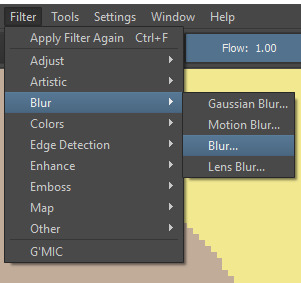
I set it to a radius of just 1 pixel. It usually does the trick.
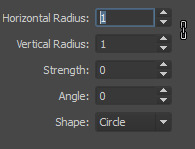
Hit OK and run the filter, and your results should be a lot nicer behind your lines.
For more complicated line art, sometimes I use the filter fill the entire inside with just one color, alpha lock the layer, and color it by hand with a brush tool.
I hope this tutorial was helpful!
3K notes
·
View notes
Photo
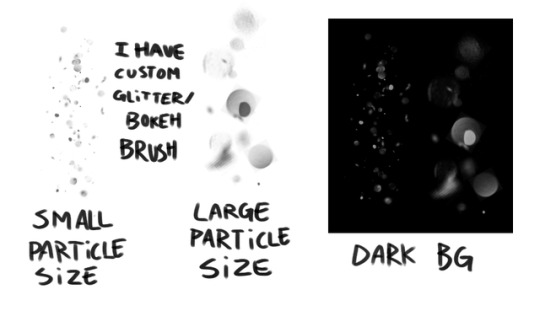
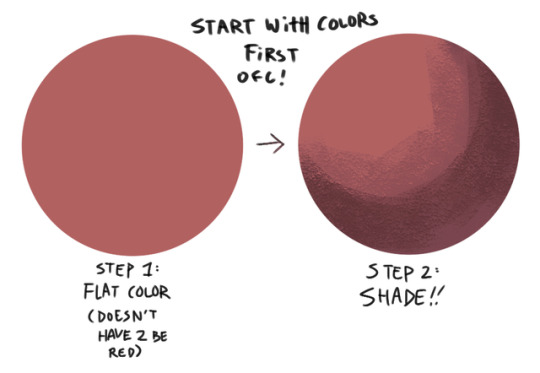
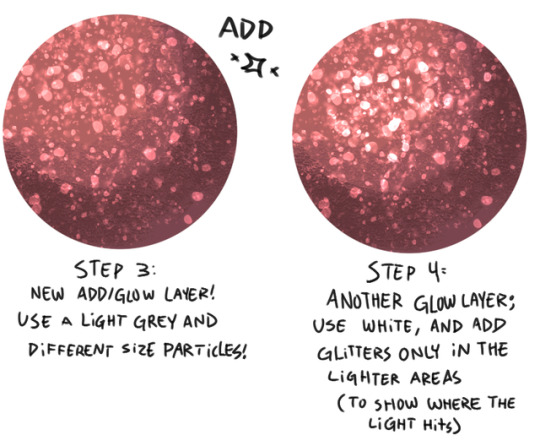
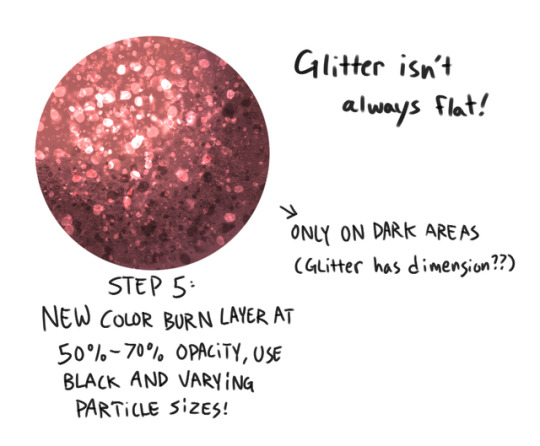
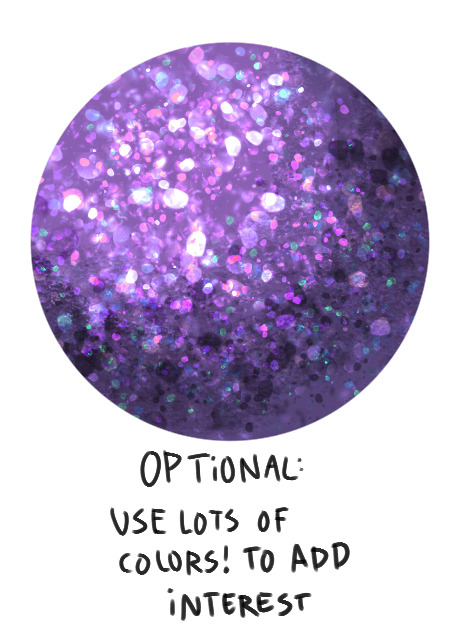
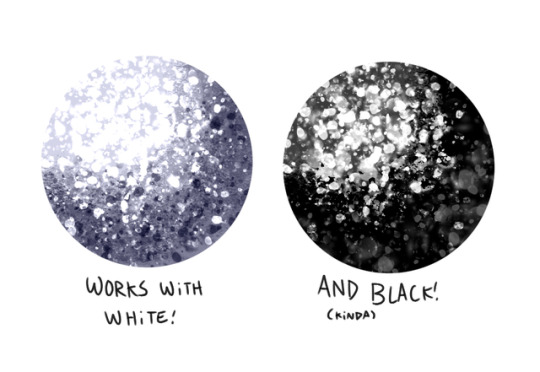
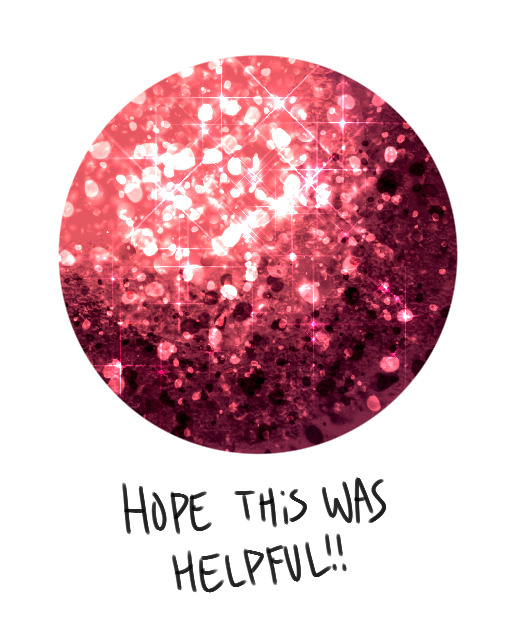
a small glitter tutorial that is badly cropped and vague i am sorry
hopefully this helps some people though!! This tutorial is for clip studio paint or photoshop mostly but im pretty sure you can do it with any program that has particle brushes!
Repost with credit is okay?? yes
26K notes
·
View notes
Photo
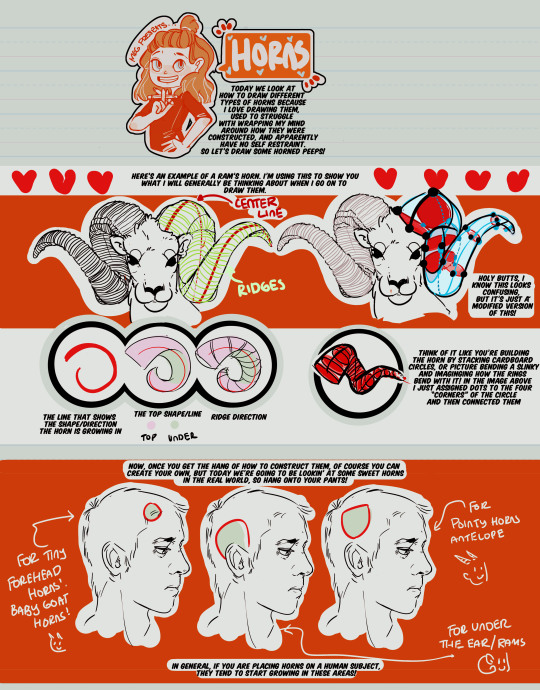
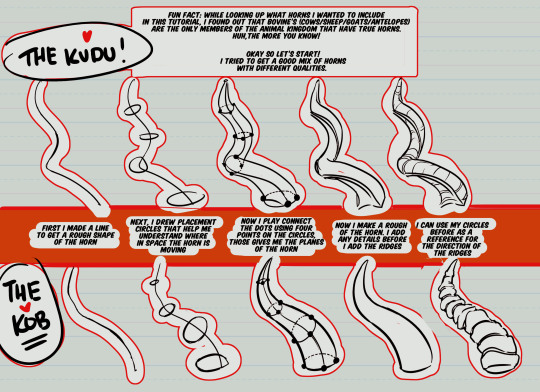
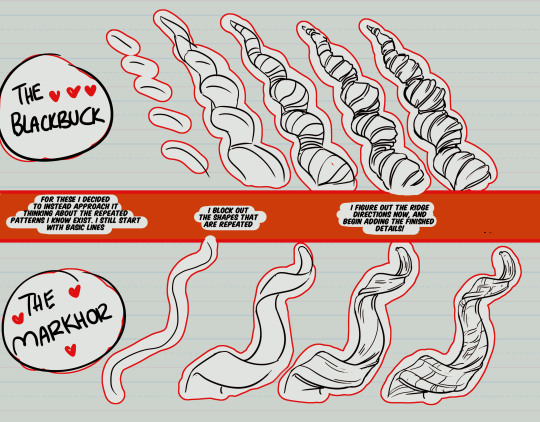
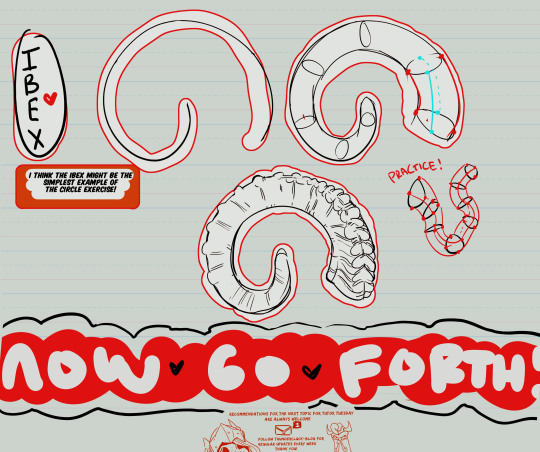
Hey friends!
It’s Meg for this week’s TUTOR TUESDAY! Today we take a little look at hopefully some exercises that will help with drawing horns! So go draw some peeps with horns, my dudes. If you have any recs send ‘em in here or my personal. Keep practicing, have fun, and I’ll see you next week!
48K notes
·
View notes
Text
Some Photoshop Tips
I’ve been getting quite a few asks about the process for the patterns in my stylized artworks, so I decided to put together a couple of tips regarding them.
Firstly, what you need are
— CUSTOM BRUSHES —
Most of the patterns I use are custom brushes I made, such as those:
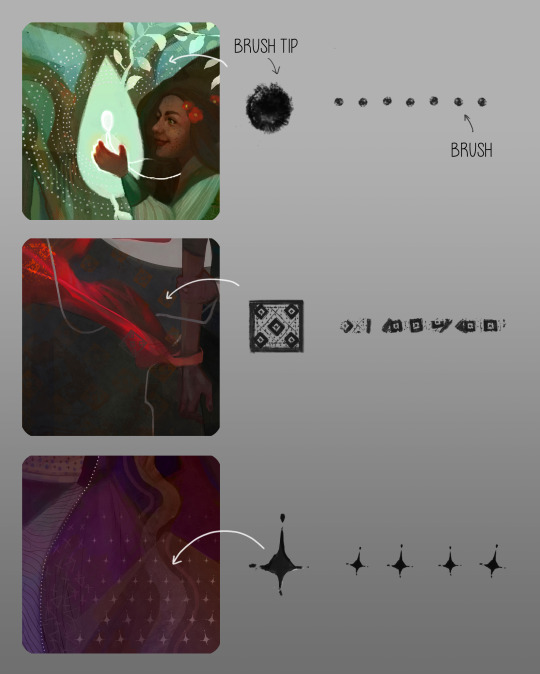
For the longest time I was convinced making brushes must be super extra complicated. I was super extra wrong. All you need to start is a transparent canvas (2500px x 2500px max):
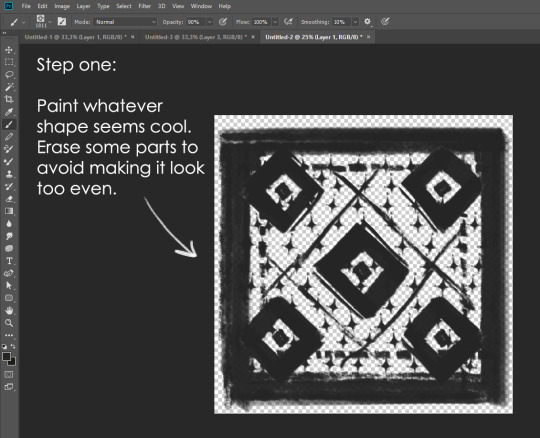
This will be your brush tip. When you’re satisfied how it looks, click Ctrl+A to select the whole canvas and go to ‘define brush preset’ under the edit menu
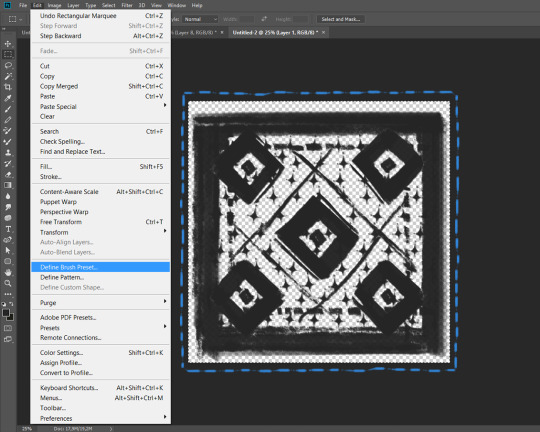
You will be asked to name your new glorious creation. Choose something that describes it well, so you can easily find it between all the ‘asfsfgdgd’ brushes you’ve created to be only used once

This is it. Look at it, you have just created a photoshop brush. First time i did I felt like I was cheated my whole life. IT’S SO EASY WHY HASN’T ANYONE TOLD ME
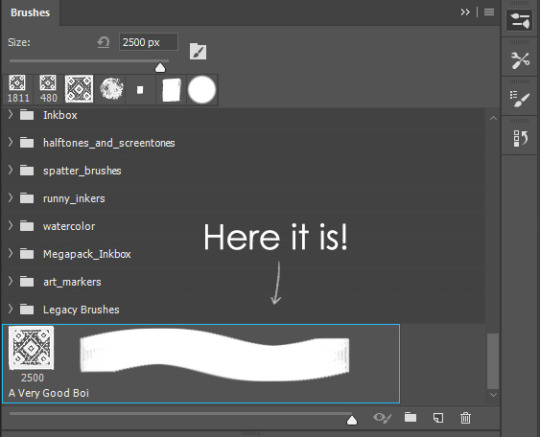
Time to edit the Good Boi to be more random, so it can be used as a Cool Fancy Pattern. Go into brush settings and change whatever you’d like. Here’s a list of what I do for patterns:
- under Shape Dynamics, I increase Size Jitter and Angle jitter by 5%-15%
- under Brush Tip Shape, I increase spacing by a shitload. Sometimes it’s like 150%, the point is to get the initial brush tip we painted to be visible.
- If I want it to look random and noisy, I enable the Dual Brush option, which acts like another brush was put on top of the one we’ve created. You can adjust all of the Dual Brush options (Size, Spacing, Scatter, Count) as you wish to get a very nice random brush to smear on your backgrounds
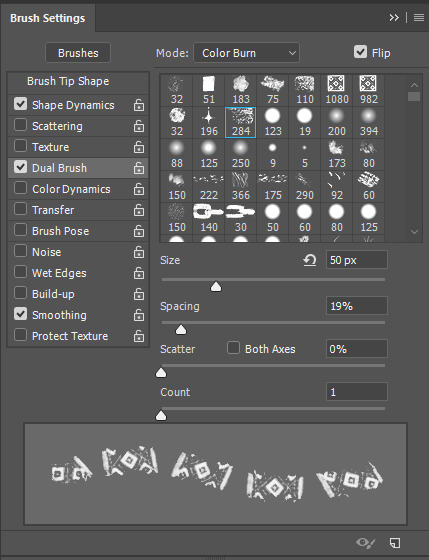
The result is as above. You can follow the same steps to create whatever brush you need: evenly spaced dots that look like you painted them by hand, geometric pattern to fill the background, a line of perfectly drawn XDs and so on.
BUT WAIT, THERE’S MORE
— PATHS —
But what if you want to get lots of circles made of tiny dots? Or you need rows of triangles for your cool background? Photoshop can do all of that for you, thanks to the magic of paths.
Typically, paths window can be found right next to Layers:
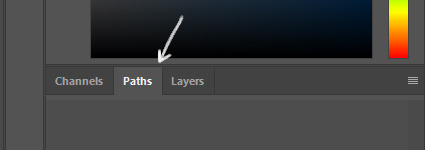
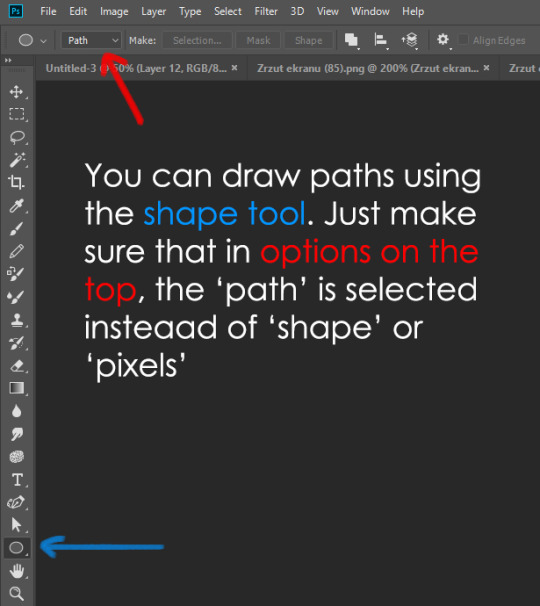
Draw whatever path you want, the Shape Tool has quite a bit of options. Remember, paths are completely different from brush strokes and they won’t show up in the navigator. To move a path around, click A to enable path selection tool. You can use Ctrl+T to transform it, and if you move a path while pressing Alt it will be duplicated.
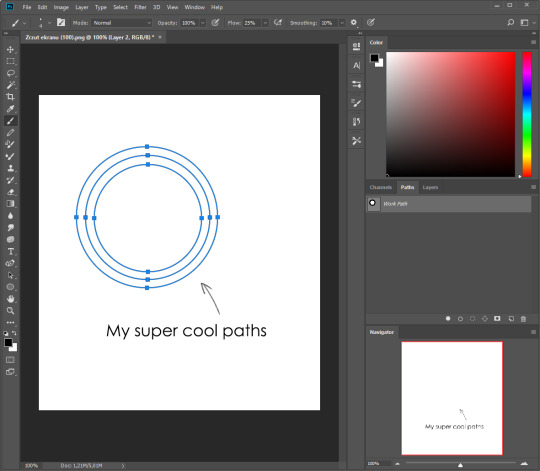
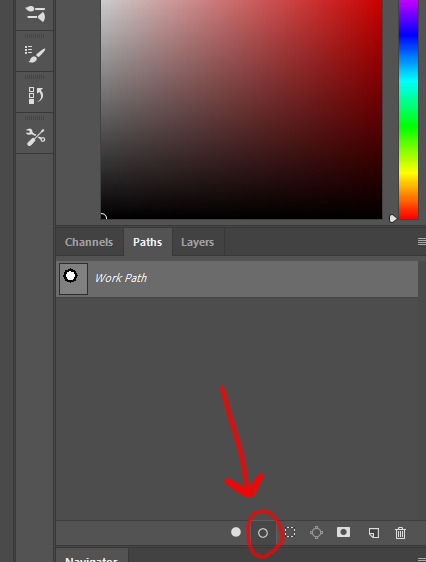
Now, pick a brush you wish really was in place of that path you’ve drawn and go to layers, then choose the layer you want it to be drawn on. Then, click this tiny circle under the Paths window:
Then witness the magic of photoshop doing the drawing for you while you wonder how tf have you managed to forget about this option for the past 2 years
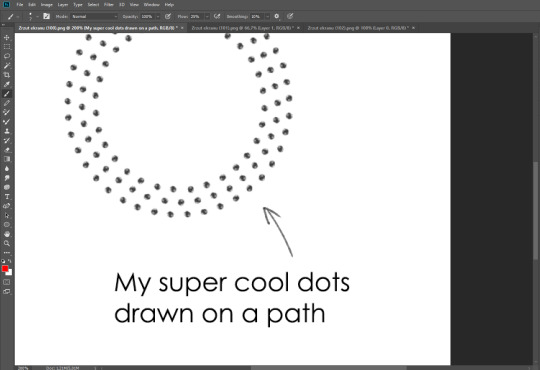
You can combine special brushes and paths for all sorts of cool effects. I mostly use them in backgrounds for my cards, but you can do whatever you want with them.
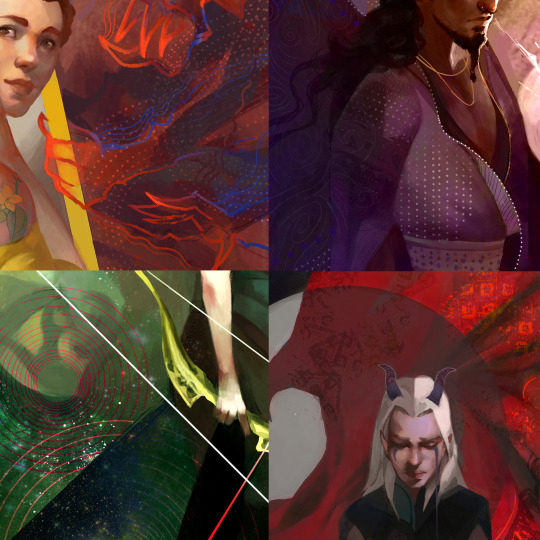
I hope that answers the questions for all of the people who were sending me inquires about the patterns. If you have any questions regarding this or any other Photoshop matter feel free to message me, I’m always up for complaining about how great and terrible Photoshop is C’:
93K notes
·
View notes
Photo
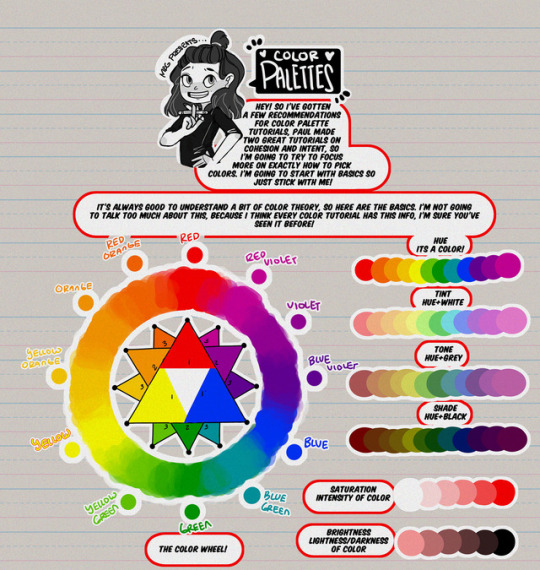
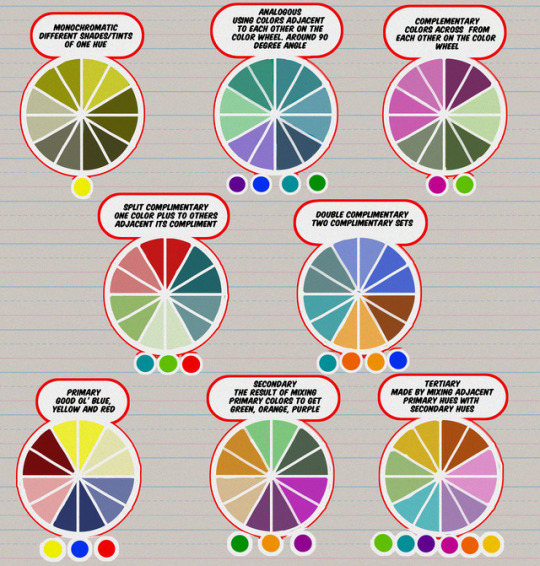
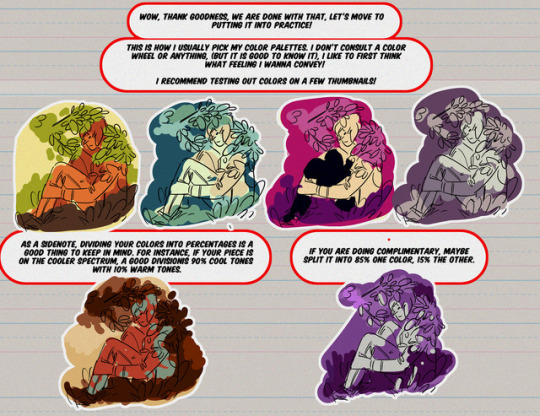
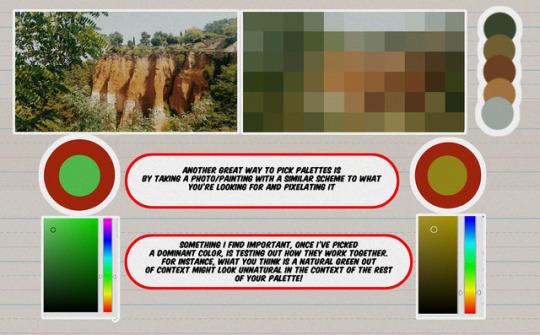
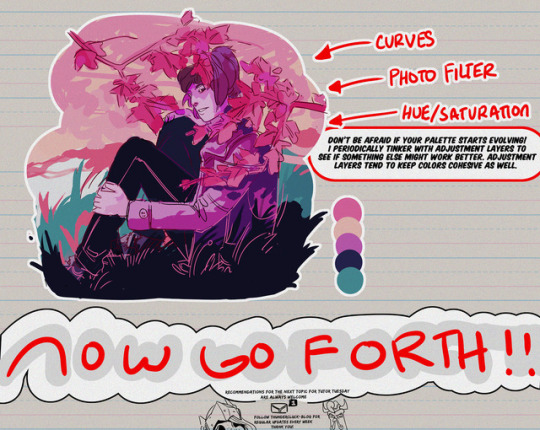
Hey friends!
Meg here for TUTOR TUESDAY! Just a quick beginning look at colors and some color theory! I’ve had a few recommendation for color palette stuff, so I hope this is a start! Paul has done some on color as well! If you have any recommendations send ���em in here or my personal! Keep practicing, have fun, and I’ll see you next week!
58K notes
·
View notes

