Text
Waverider Interactive 3D Model
Project ✤ Creating the Waverider from DC’s Legends of Tomorrow.
Devlog 6 - Now that the initial modular kit is done, I tried my hand at greyboxing the Bridge, kitchen and dining room. Twas pretty fun.

Above is the kit so far, I did some tweaks after testing out how it fits together in maya, and some UVing so that the shaders don't go crazy in Unreal. I also made sure to export it all with the pivot at the world origin.

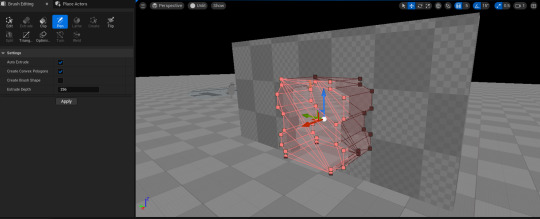
I explored two ways of modelling in Unreal. I chose to model in Unreal for ease of testing :
Brush Editing :
Simple brushes/shapes - additive and subtractive ways to model (basically an modifiable boolean).
Great for walls and doorways - options to make into static mesh/dynamic mesh (dynamic mesh will not add to content browser)
Not so great for props.
Modelling Mode :
Basically like every 3D modelling programme out there but a bit more clunky.
Works well with props.
Collision is already made with the mesh.

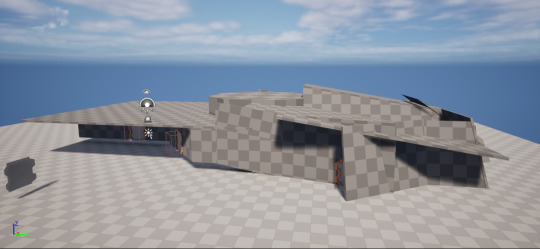
Reflection
A lot of other challenges arose - but it was largely fixed with tweaking.
I've gotten faster at using the brush/modelling tools and can discern which to use for certain areas.
There's a bunch of small details that I've noticed since greyboxing.
It is very fun to finally walk around.
2 notes
·
View notes
Text

Waverider Interactive 3D Model
Project ✤ Creating the Waverider from DC’s Legends of Tomorrow.
Devlog 5 - Worked on a few different things; I was feeling a block as I made more bits for the hallway so I worked on the chair located on the bridge!

While making the corner column, I realised there was some sizing issues, so I remade and resized the door, hallway column and floors. A few things I did on maya :
Learnt how to use booleans to make the grate instead of manually sizing it by hand (used to make the diagonal). I also used it to make the octagon shape of the path as well.
Also resized the detailing (pipes etc).
And UV-ed everything.


Then I put them all into substance - I put the textures into UDIMs to since they all share the same materials.
First time using emission and I found out how to make it very luminous on substance haha.
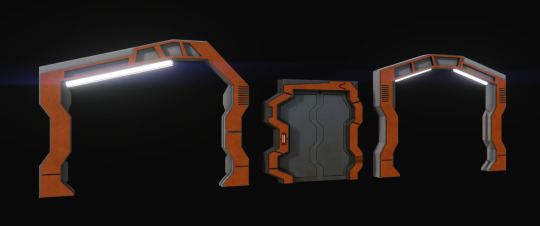
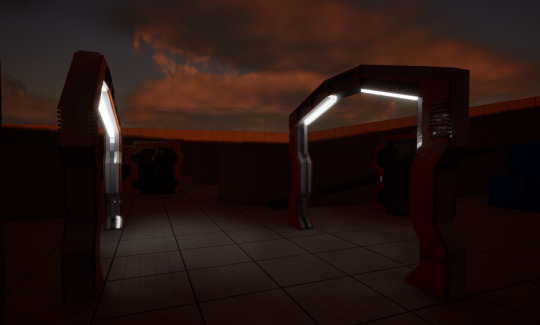
Then I put it into Unreal, and I tested the emission/brightness settings in the materials. It looks pretty cool so far, and I'll eventually figure out how to make the lighting sharper (will probably just be lighting put into the scene).
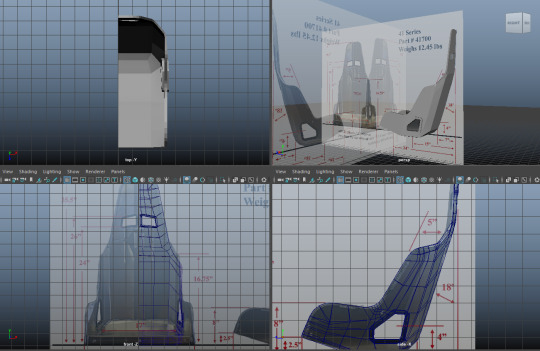

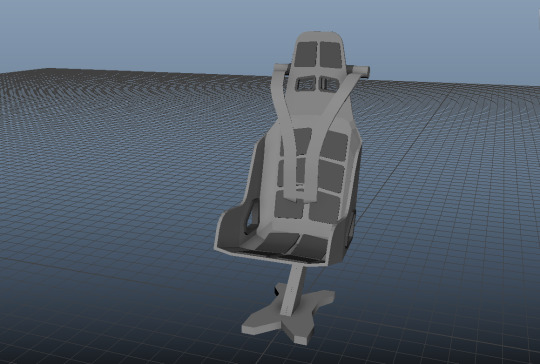
I didn't want to continue with the hallway and I felt myself getting bored with it so I decided to start work on the bridge, starting with the chairs. I'm still deciding which version of the bridge to do (I'm thinking post season 3).
Also the legends of tomorrow season 1 DVD featurette was a lifesaver. I found out the seats were old nascar racing seats the producers found and repurposed lmao.
This meant I could use official side and front views of the chair for accurate measurements!!!

Final look after some texturing on Substance and putting it all into Unreal Engine!
Reflection
I'm actually quite happy with it all so far.
Trying my best not to burn out with the project by taking breaks and off days.
Making fun stuff, not just all the filler stuff in order to complete a to-do list, is much better in terms of progress than remaking pipes for the 5th time.
#legends of tomorrow#maya#makingthewaverider#waveriderproject#slowly but surely#i still dont enjoy substance that much :(#me and UVs are constantly at war istg#uni is creeping in - I can't avoid proper substance practice forever#unreal engine#substance painter
3 notes
·
View notes
Text
Waverider Interactive 3D Model
Project ✤ Creating the Waverider from DC’s Legends of Tomorrow.
Devlog 4 - Some testing in substance painter and unreal engine. I needed a break from modelling so I chose to practice with the door.

My laptop can't really handle substance very well so I just wanted to put some placeholder textures to test in unreal. There were some seams issues but I had to choose between accepting 2k texel density or losing my mind so I moved onto unreal anyway.


Below is a screenshot of inputting textures into unreal using UDIMs. It was very shiny so I adjusted that in unreal. Was happy to see that my 2k textures looked fine, even with seam issues so yayayay no need for 4k textures (my laptop is thanking me)

In unreal I had fun animating the doors. Had some issues but I figured out rather quickly - e.g. bounding box/collision issues. The door felt small but then I remembered that the avatar is 180cm tall - so I guess this is from Ray's perspective aha.

Reflection
Unreal is fun!! Lowkey reminds me of playing with redstone in minecraft.
Substance is not fun. on a weak laptop.
Substance is for the uni labs and uni labs only.
Love nodes and noodles.
Time to return to making the rest of the waverider ehehe.
1 note
·
View note
Text

Waverider Interactive 3D Model
Project ✤ Creating the Waverider from DC’s Legends of Tomorrow.
Devlog 3 - This session (done over a couple of days) focuses on the door.
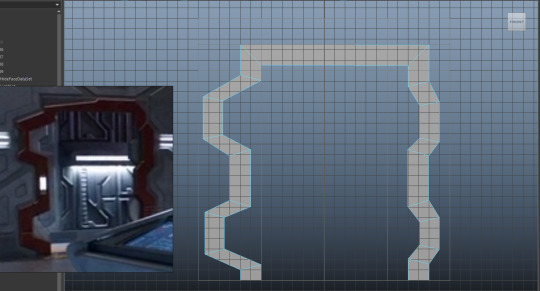

Started with the door frame - a similar approach to the columns. Approached the topology in a couple different ways, I ended up separating the layers into different objects for ease later. Made sure it was all quads - I simplified the geometry multiple times.


Next was the main door - I fought with the topology in the middle a couple times. Lots of extruding/thickness etc to get an equal shape, outline and indent. Used quad draw to get the topology I wanted for the main middle part.
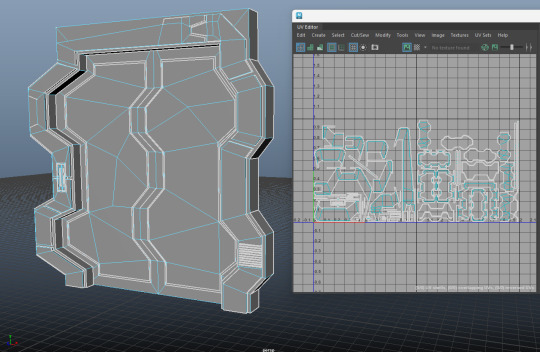

Then UVs. This was a monster I won't lie. The initial unwrapping was fine, it took a while at first but it was fine after the first couple of times (totally didn't have to manually turn on the unfold3D plug in). The worst part was the auto-distribution. Tell me why using Legacy rather than Unfold3D was better????
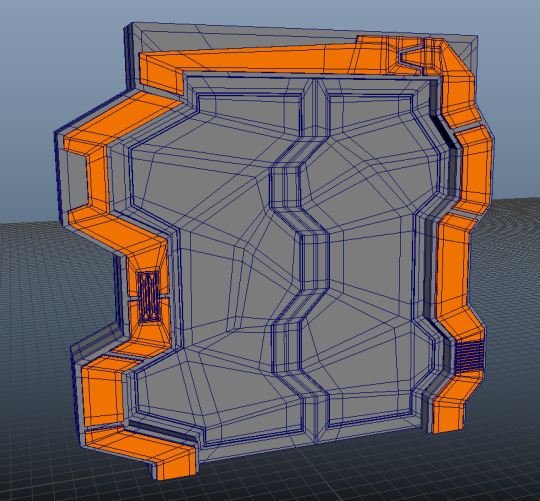
With UVs done, I bevelled it (worked great since my toplogy is clean aha) in order to smooth it. This will be the height map I will bake onto it later in substance.
Reflection
Revisiting UVs was.... okay.
I definitely need to speed up if I want to reach my goal before first sem starts.
I watched videos explaining UDIMs for substance which helped a lot - keep going on forums, don't force through anything when you can follow someone else's solution.
unless it was the UV distribution, Maya was hating on me :(
0 notes
Text

Waverider Interactive 3D Model
Project ✤ Creating the Waverider from DC’s Legends of Tomorrow.
Devlog 2
The modelling I did was largely technical - it took far too long for things that should have been simple.


Grate. I made a grate a billion different ways. Chose this way because less polys - there's gonna be a lot of grates. I'll probably bake it into a normal map though. Then I UV-ed the it. I actually enjoyed it. I did this so that the UV maps would be copied over to the bajillion grates I'll be duplicating later.
I spent way too long on grates. only to have made my final model in like 5 mins.

See? Made some path thingies.

I decided to UV the pipes and stuffs I made earlier, put them all into one UV square to save space - might change later if I choose different materials for substance.


And so began my nightmare. The octagon. I didn't like how the corners didn't line up to whole units. I totally didn't spend 2 days trying every method to the sun to make this hallway layout. Totally didn't bevel a cube only to later realise the sides weren't equal. Then bevelled a cylinder with 8 subdivisions only for my maths skills not working to make the sides whole units.
I just did it manually - making sure to keep 60cm length and subdivisions for the main pathway.


And finally this nightmare. I think I've finally figured out the pivot tool. Did this manually by hand, making it approximately to the angled path. Then using the scale tool to straighten it out using orient pivot.
Reflection
I did not reach my goal of speeding up from the last devlog.
I do feel a lot more confident now though.
I think I'm burnt out from the 900 times I did the grate and octagon.
Also going holiday tomorrow so no devlogs until next week :))
#legends of tomorrow#Maya#WaveriderProject#I've been writing this draft for hours now cos i've been packing/cleaning at the same time#i wanna make a moving door next
2 notes
·
View notes
Text

Waverider Interactive 3D Model
Project ✤ To create the Waverider from DC's Legends of Tomorrow.
Objectives :
Practice modular modelling in Maya.
Scripting in Unreal Engine.
Model optimisation for Unreal Engine.
Texturing in Substance.
Devlog 1
Focused on familiarising myself with Maya by choosing an easier part of the ship to kitbash and model - the hallway. First I collected reference images on PureRef and organised by room type.
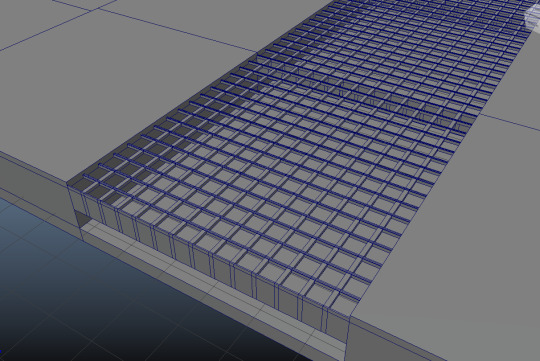
First thing I made was the floor - the grate. After watching some modular modelling/kit bashing videos on youtube, I began modelling. I adjusted grid settings in order for scale to translate to Unreal Engine. Kept model scale to whole numbers to allow kit bashing later by using ctrl + t in order to use precise measurements.

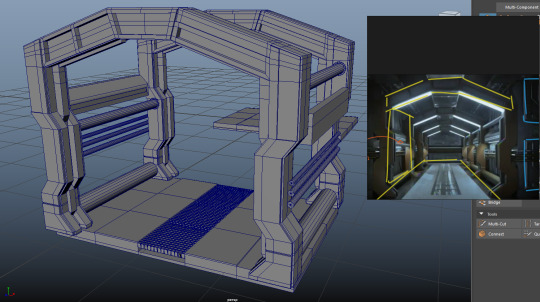
Then I focused on modelling the columns from the hallway. I was quite picky with dimensions - but I had to focus on in-game dimensions, rather than real life dimensions to make kit bashing possible later on. Kept debating throughout whether or not to UV (decided against it for now) but tried to keep things as symmetrical as possible. I used reference images with actors standing next to columns to get height estimation. Also began modelling the pipes and other details.
Reflection
Quite successful but slow start - getting used to controls etc.
Kept to good and clean topology.
Will try to speed up in future sessions.
2 notes
·
View notes