Be introduced to a range of technologies and applications used for the design, construction and reverse engineering of garments. Look at the application and integration of pattern and texture to your wearable outcomes.
Don't wanna be here? Send us removal request.
Text
Hello and welcome to my blog!
To see every post in order, please click to page seven using this side bar here. Then scroll to the bottom for the very first post.
←
0 notes
Photo
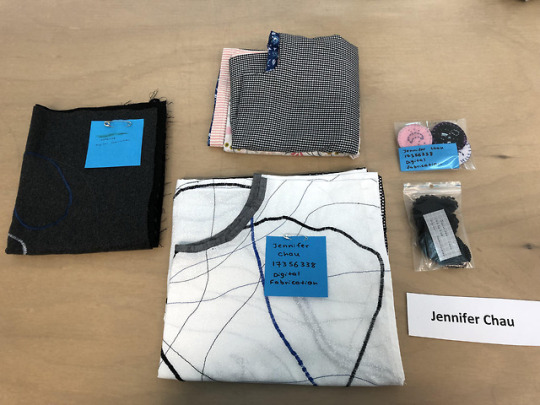
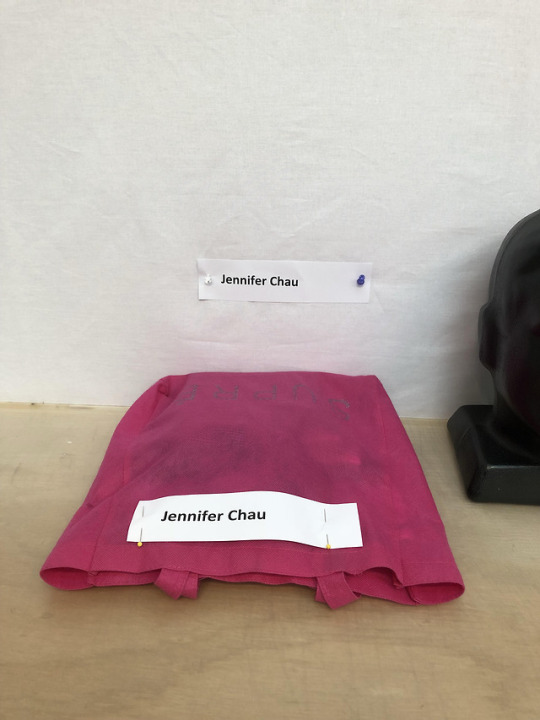
Handing in my work
The work that I hand in will be -
• 3 Wearable Outcomes
- Tassel/Circle Earrings
- Zero-waste Kimono Garment
- Zero-waste Tunic Garment
• Embroidery Sample on wool/quilting fabric
0 notes
Photo

Evaluation
Over the month of November, I have really enjoyed taking this course to enhance my skills as a designer over the next few years of uni. The knowledge of how the Fab lab works and what things can be created are completely endless and open to everyone, I didn’t realize how fast I could cram new information into my brain in such a short amount of time. The four machines that we were taught to use has definitely make me wonder what types of things I could create in the future and that anything is possible. With my outcomes, I was particularly happy with the zero-waste garments I made but using the laser cutter as my first piece of technology to use was quite hard for me to think of something outside of the box - although I wish I had done something much more iterate and fun. Nevertheless this was just the beginning of the course so it’s understandable. The ability for me to have been able to create three different wearable outcomes in such a short amount of time has helped me to become more confident in the things that I can do and that taking risks are always welcome - even if I fail them. I like the fact that in the course we were able to learn about so many new different techniques in such a small amount of time. This has made me value the time and effort that lecturers and teachers put in more as we learnt so many new things and they were of course willing to help me out.
Reflecting back to the video call we had with Wendy at the beginning of the course, it stuck with me about how the Fab lab is a place of complete sharing. I like the idea of being able to share your ideas with other people and them having the ability to download a file off you and customize it to their specific preferences. The Fab lab is definitely a place which I would come back to for future design projects as the knowledge I have gained would certainly come in handy. It is something that I know I will always go back to and this time won’t be forgotten as I move into my second year of uni.
To quickly reflect on myself, I was quite happy with how everything turned out (of course some more than others) but it was a challenge for me as I had a small amount of time to think of something that could actually be wearable. It made me realise the potential that I have and that taking risks is something I should do more often because I would have never known of such things without doing them. Using this knowledge that I know now, I will be sure to consider these pieces of technology when designing in the future.
0 notes
Photo
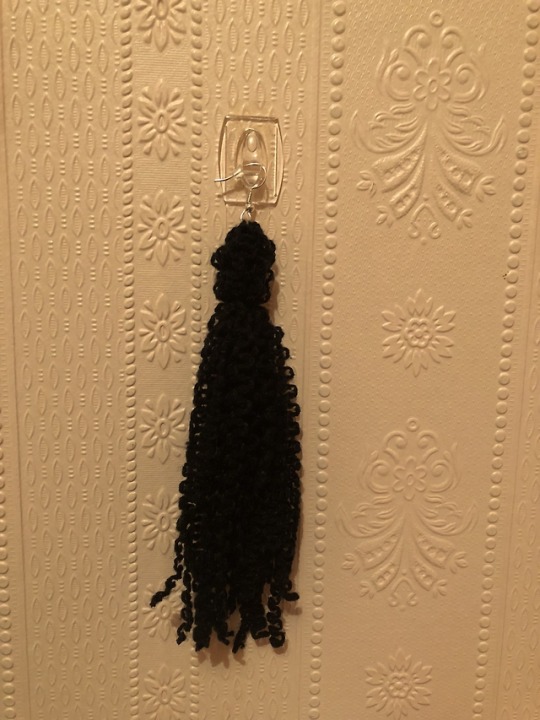
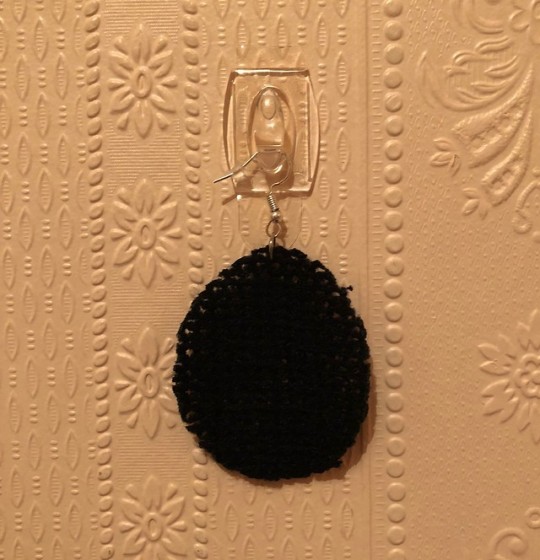
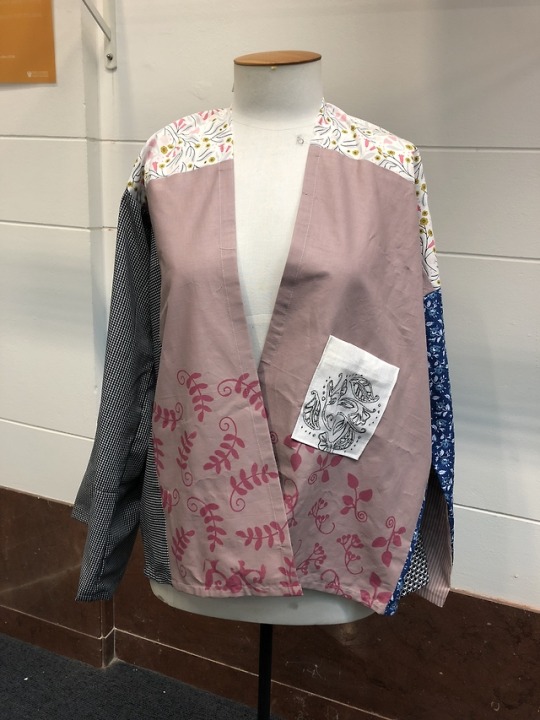
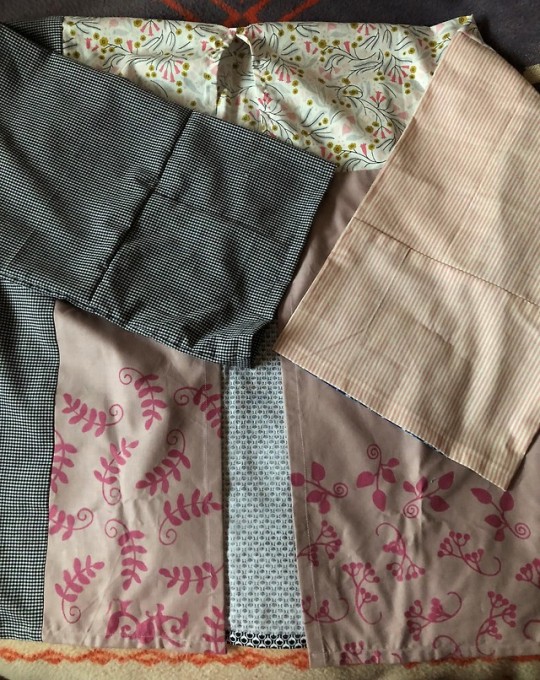
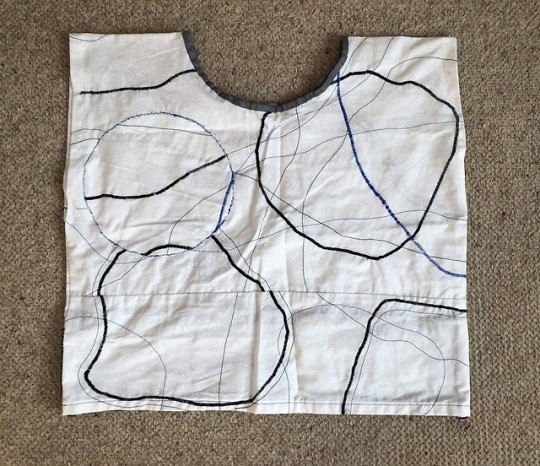
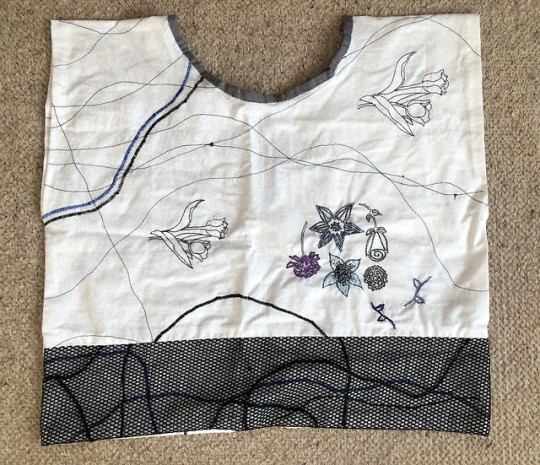
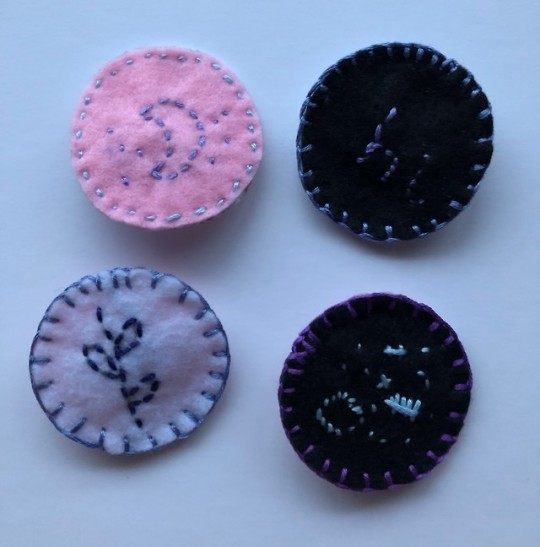
Final Outcomes
Week One - Laser cut/unraveled earrings
Machine: Laser Cutter
Week Two - Zero-waste kimono pattern
Machine: Vinyl Cutter
Week Three - Zero-waste Tunic Top/Felt Embroidery Badges
Machine: Embroidery Machine
These are the outcomes that I created throughout this entire course.
0 notes
Photo
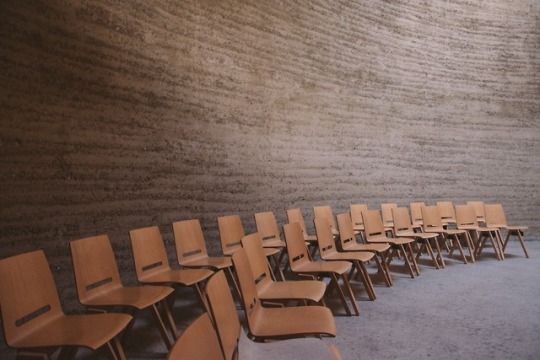
Final Day - Presentation
Today we were able to present our work to the class. The things that we presented were our own personal blogs and the wearable outcomes that we created throughout the entire course. As well as this, we were given 5 minutes to present.
It was really interesting and fun to see what everyone had come up with using the same pieces of technology as me. This goes to show how these pieces of technology can spring an endless amount of designs and ideas.
0 notes
Text
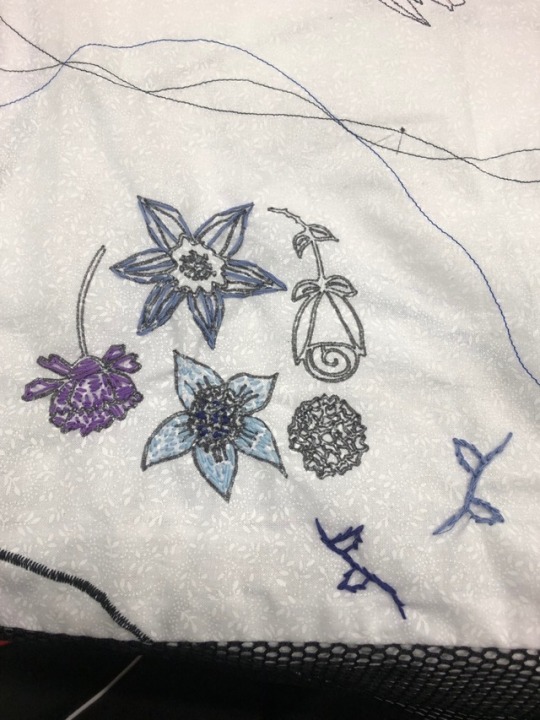
Embroidery
This is just a close up of the embroidery that I did on the back of my tunic top.
Using a basic colour palette of cool colours, I just did some basic stitching around and inside of the flowers. As well as this, I did some freehand stitching of vines next to this.
0 notes
Photo
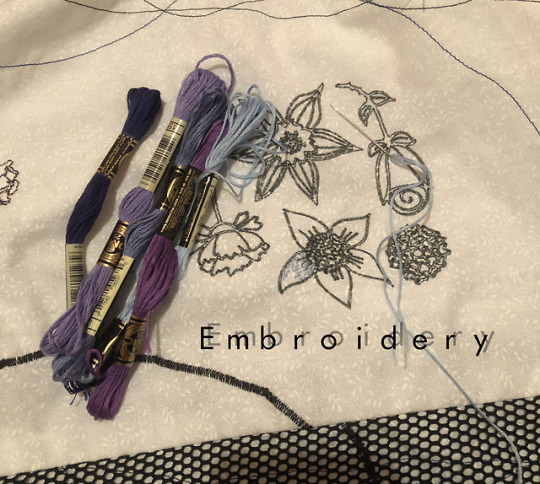
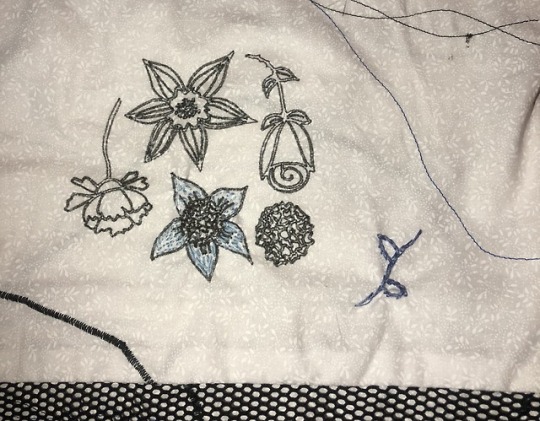
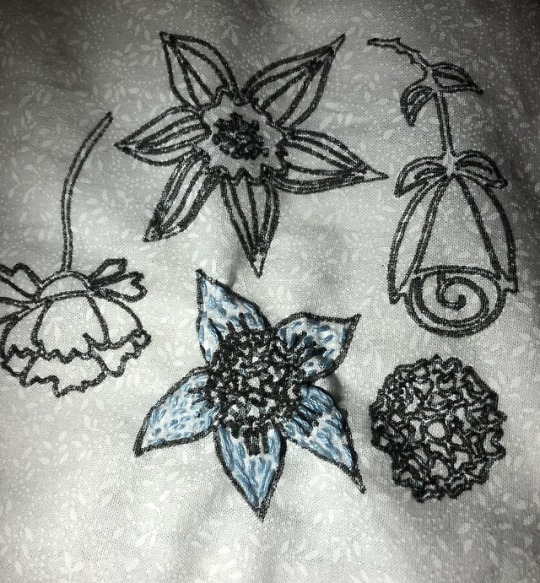
Vinyl Plotting + Embroidery
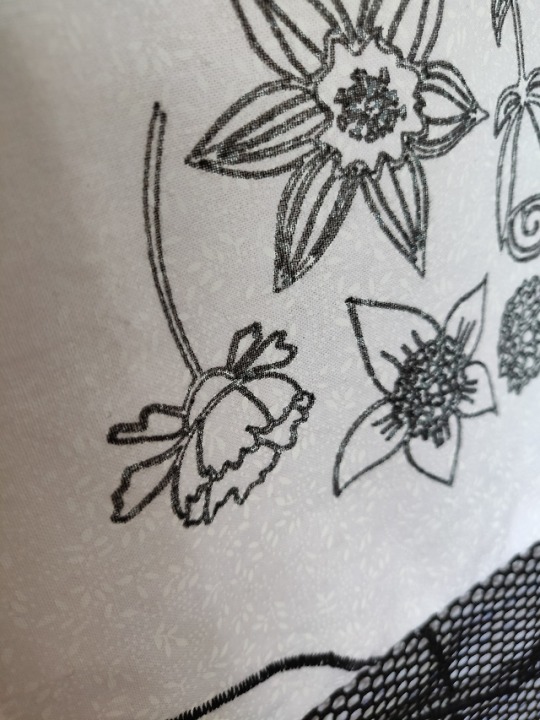
I decided to embroider the insides of the shapes to give them colour and a 3D effect. As well as this, I think that the mix of drawing + feeling the shape makes it more effective and interesting to look at.
0 notes
Photo
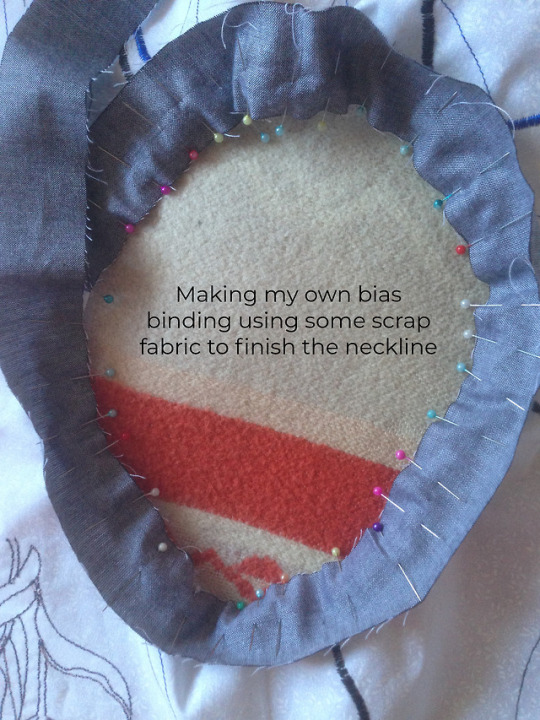
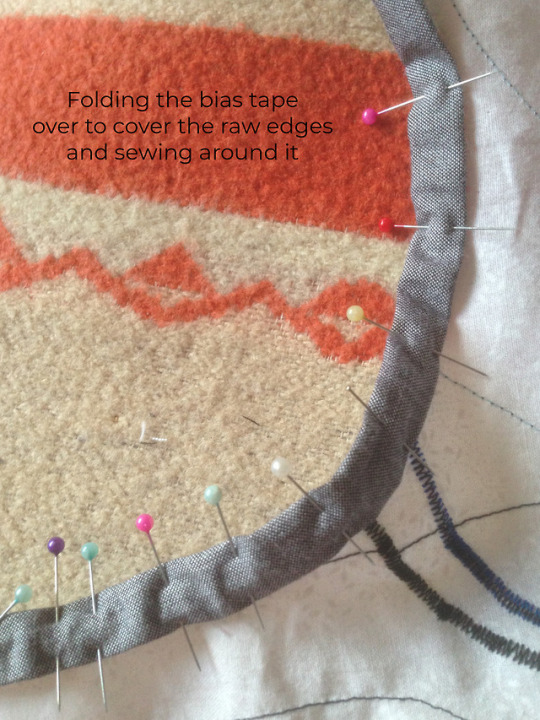
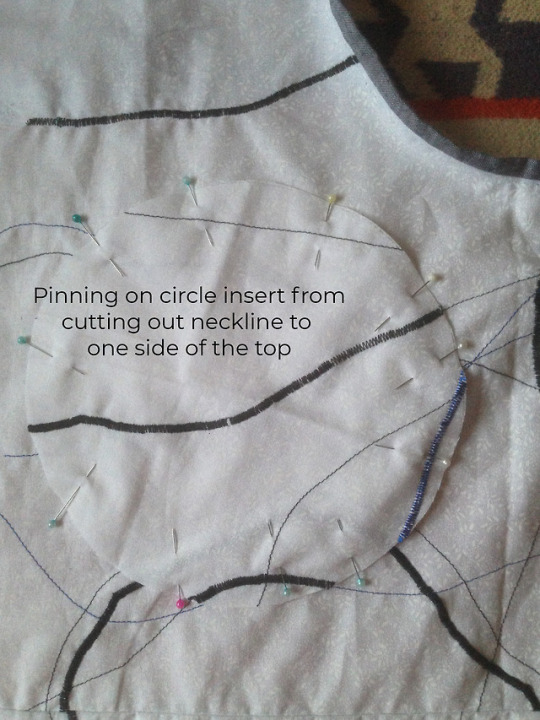
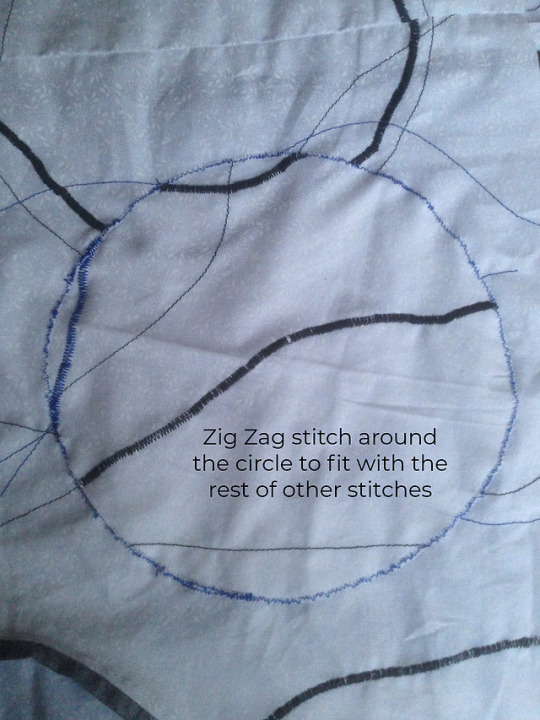
Tunic Top/Zero-waste
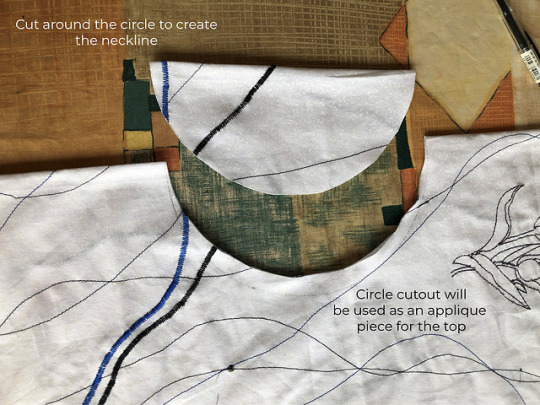
Using some more scrap pieces of fabric, I cut a long strip of cotton fabric that I had lying around to create some bias binding to finish the edges of the neckline.
After this, I sewed on the circle insert to one side of the tunic top and zigzagged around this using some blue embroidery thread.
0 notes
Photo
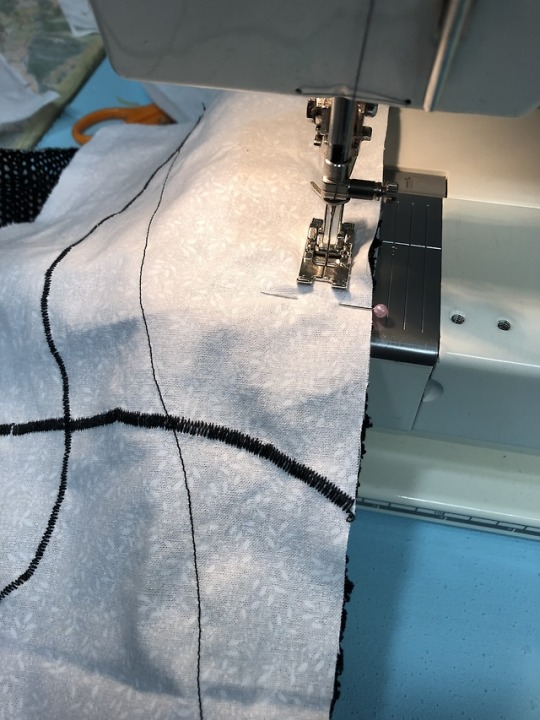
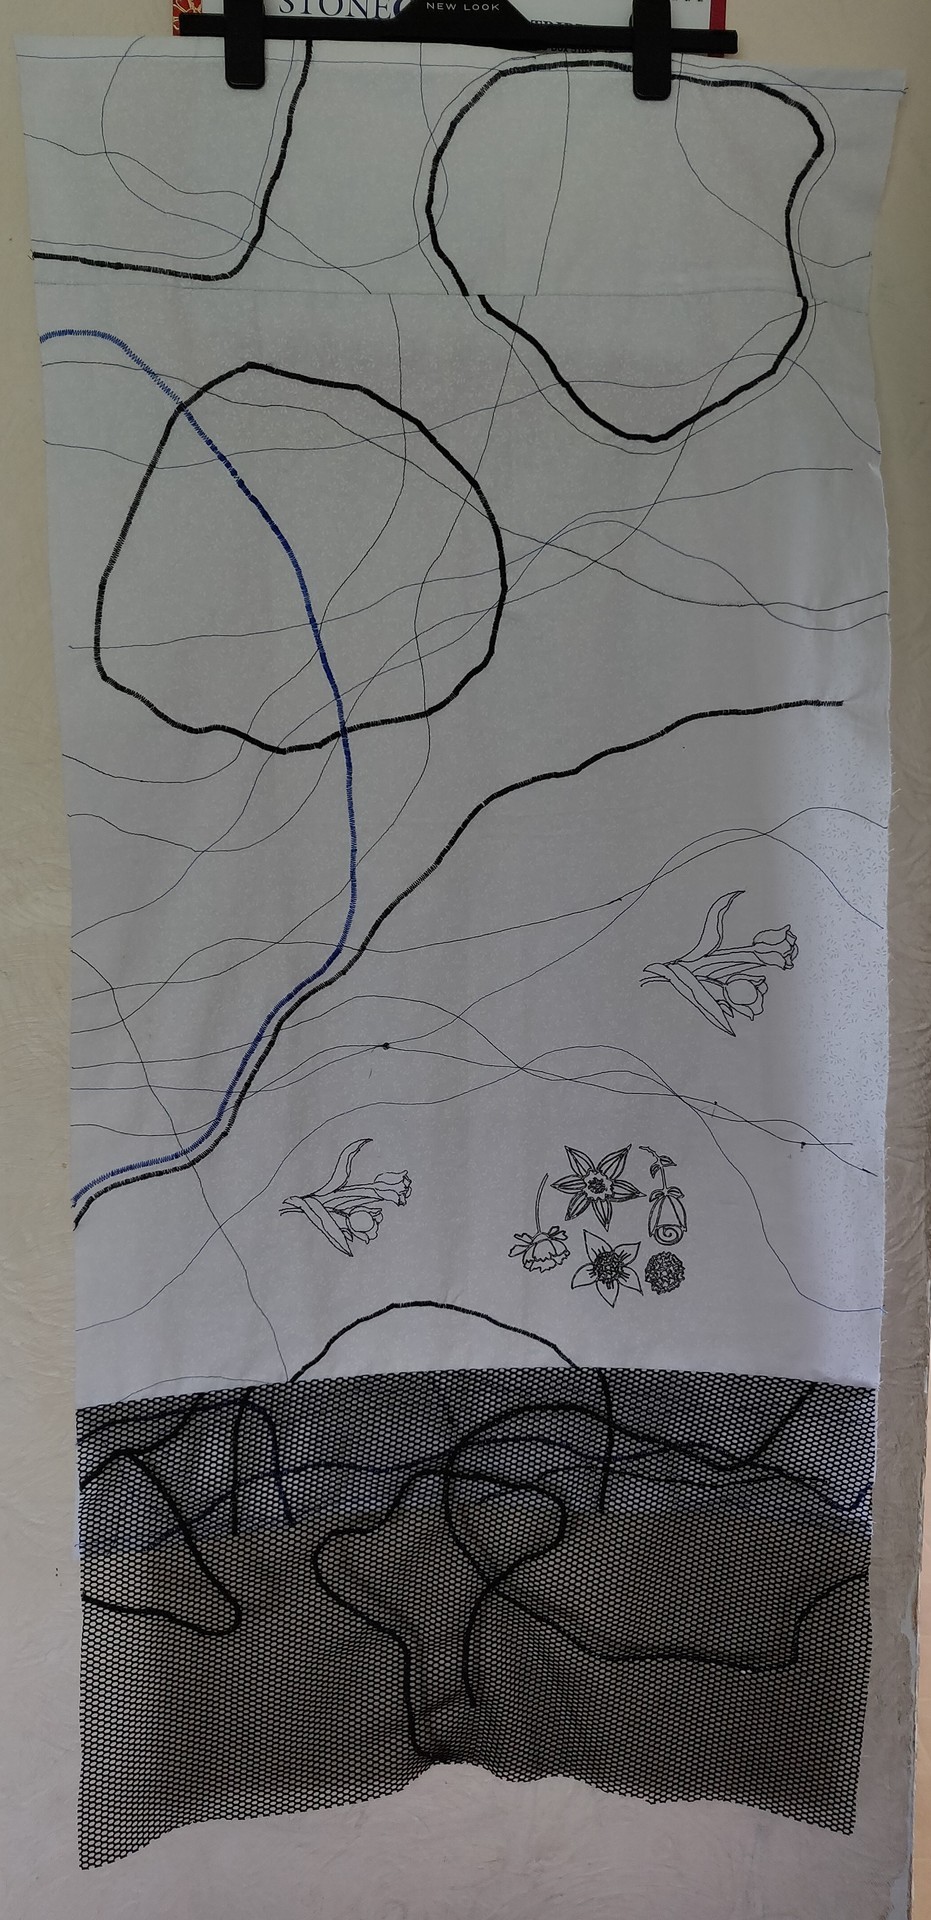
Sewing up the garment for Week 3
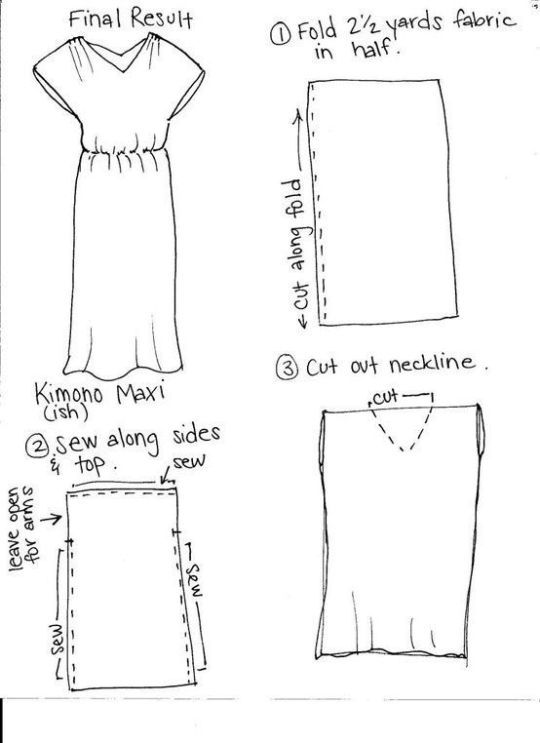
Dress/Tunic Guide - http://modnest.net/2014/03/29/easy-simple-dress-idea-with-one-piece-of-fabric-i-would-fold-at-shoulders-to-reduce-the-first-cutting-sewing-step-ideally-a-piece-of-fabric-25-wide-for-flare-and-80-long-if-folding-in-half-at-shou/
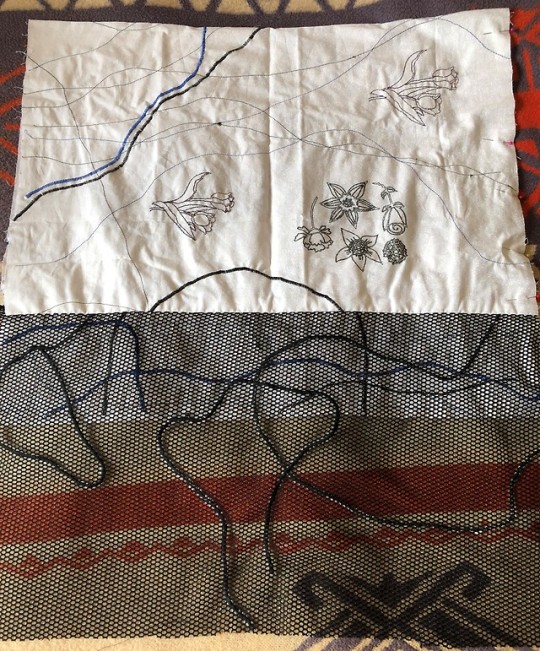
I have a fair idea on what I want to make for this week - but it’s not completely planned out yet. In the Fablab after I had used the vinyl cutter to plot the design of flowers onto my fabric. I moved onto the embroidery machine/freehand machine to sew up my ‘garment’ which was yet to be decided on.
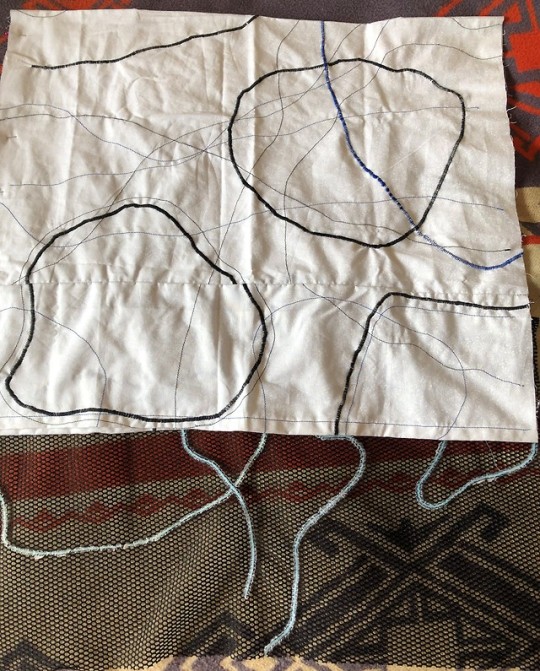
In the Fablab, I just decided to create more of those long satin and running stitches all down the piece of fabric as I knew I would make it into something wearable. Using the piece of mesh fabric, I also sewed this piece to the bottom to be the hem. With the mesh fabric that I used, to get the satin stitch to show up - I used some of the white stabilizer to act as the backing/base for the stitches. I tried sewing a satin stitch without the stabilizer and you couldn’t really see any of it at all.
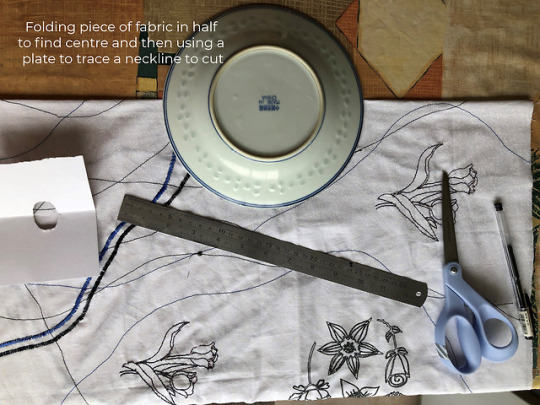
Still feeling unsure and confused, I thought of the easiest way to get a piece of fabric on - cutting a hole? I folded my piece of fabric in half and used a plate to trace around a circle.
After this, I went online to do a bit of research and found this really simple guide drawing created by a blog called, Modnest. I chose to do this as it fit with my singular piece of material and it could be achieved within the time that I had.
0 notes
Photo

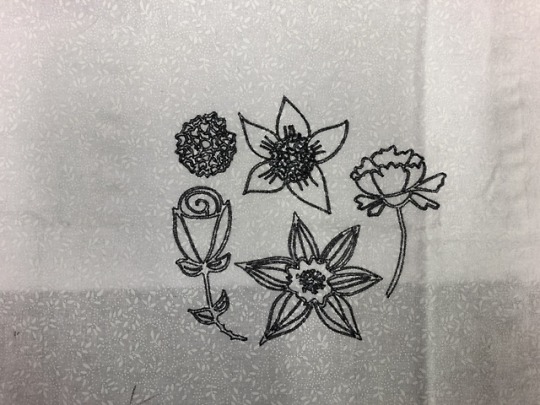
Plotting design from Vinyl Cutter
1. Flower SVG here
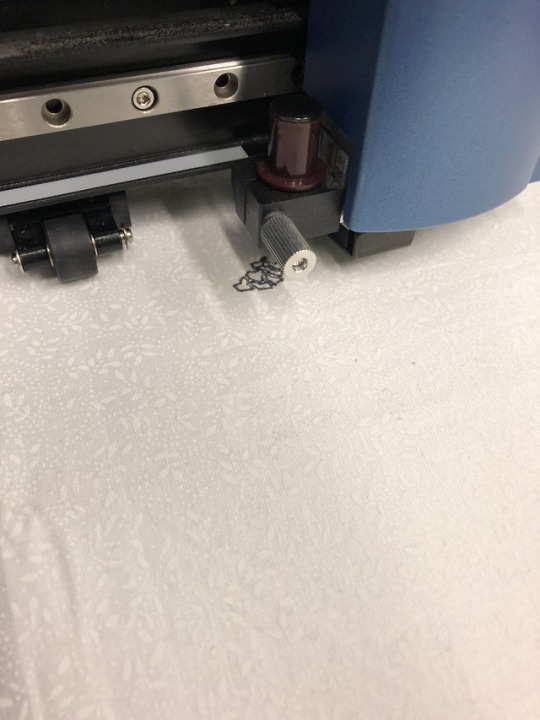
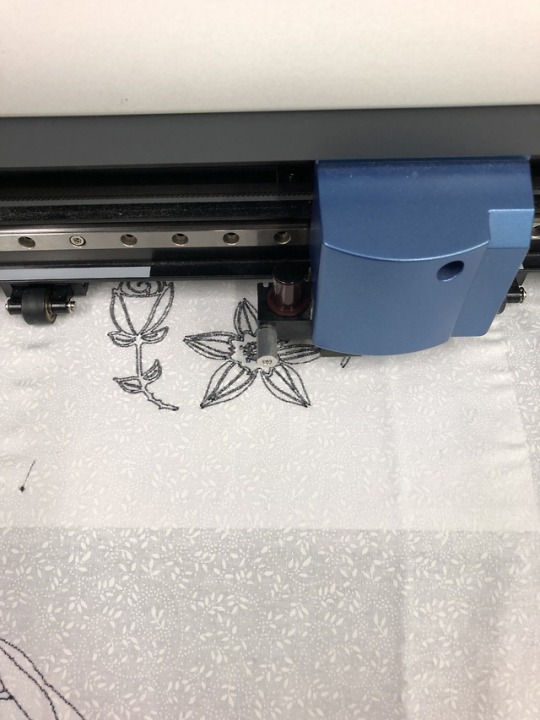
I went into the Fablab to quickly use the vinyl cutter to plot my design onto my fabric. I wanted to plot a design onto my fabric so that I’d be able to embroider over the top of it after e.g. embroider the inside and give it colour etc.
Some of the issues that I faced when I was doing this was that my piece of fabric was quite big so when I put it through the roller - the fabric got completely stuck into the roller. Another issue that I faced was that the pen left a few marks when it was moving into its new position.
0 notes
Photo
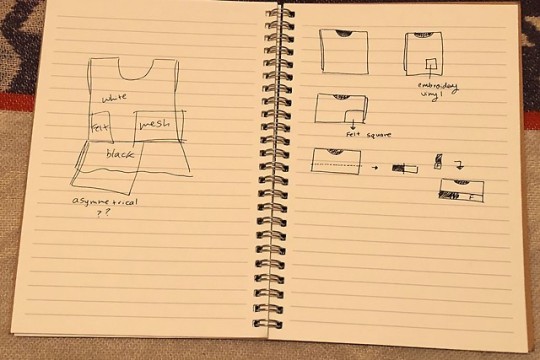
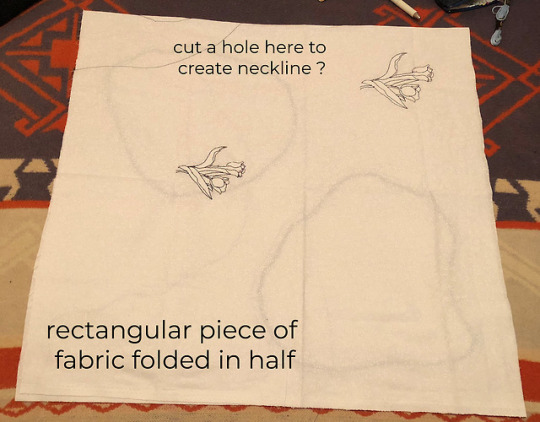
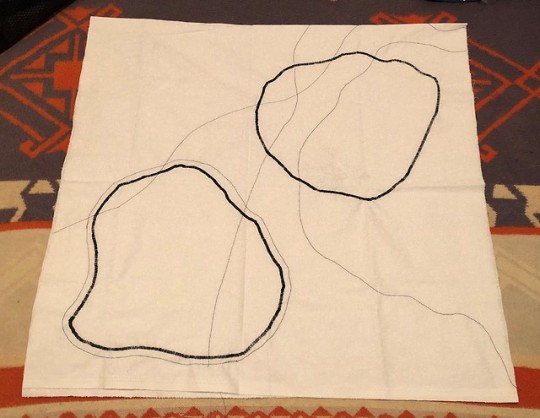
Plan
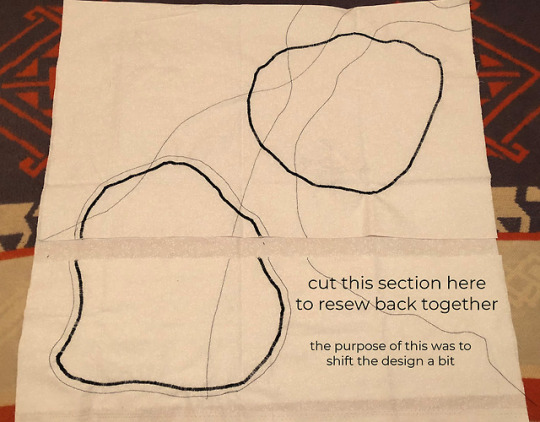
I made up a little plan on what I wanted to make for this week in my notebook - I ended up sketching some ideas on how to make a top with the pieces of material that I had. As well as this, I cut part of the back section as I wanted to resew this part on to make the pattern a little bit different and separated.
I ended up just using my large rectangle piece of fabric and the mesh to create this week’s wearable outcome. With my other samples that I made, I might turn this into something else for hand in next week.
0 notes
Photo


Plan towards Thursday
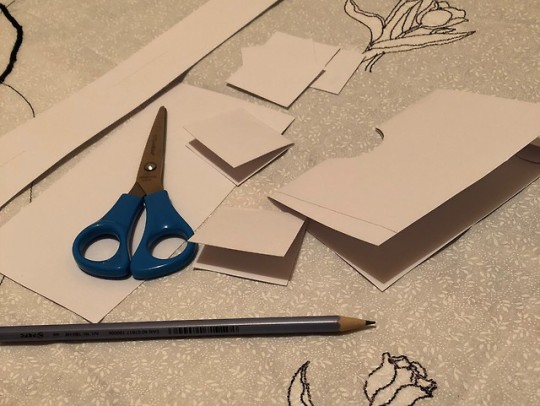
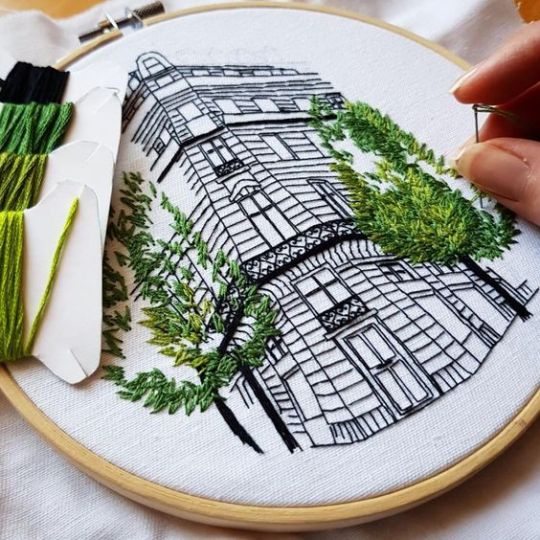
Currently my plan towards Thursday is to figure out what I want to make. I have been looking on Pinterest at zero-waste fashion and how this is effective + how to apply it to my fabric that I have. As well as this, I think I also want to include the use of the vinyl cutter to create a drawing onto my fabric since this was quite successful as a pocket. I have found three different designs from here
1. https://lovesvg.com/2018/06/floral-elements-6755/
2. https://lovesvg.com/2018/07/floral-elements-7042/
3. https://lovesvg.com/2018/07/gems-7039/
I think that once I get at least one of these designs drawn onto my fabric, I will embroider over the top of it to give it some colour as well as a 3D effect. The inspiration for this came from an image from my Embroidery Pinterest board.
The original image for this building came from an Instagram page here.
I would like to try and use all three pieces of technology that I learnt about, but due to time constraints; I’m not sure whether that is completely possible to do.
0 notes
Photo
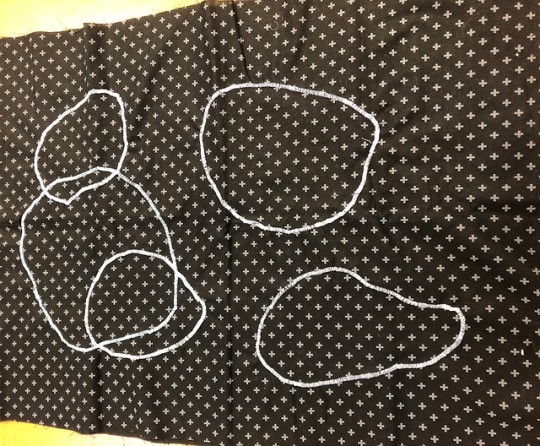
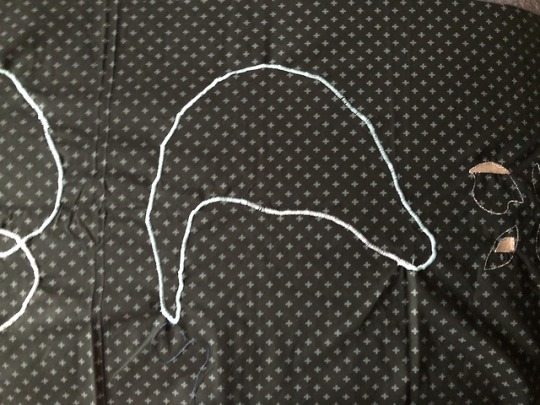
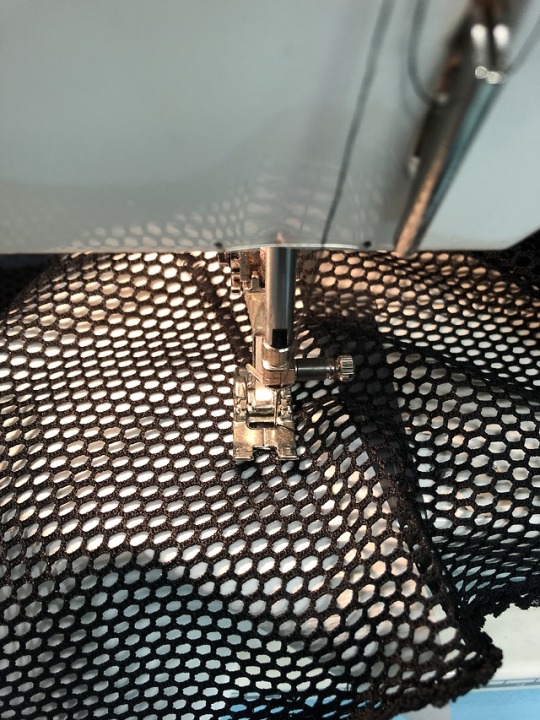
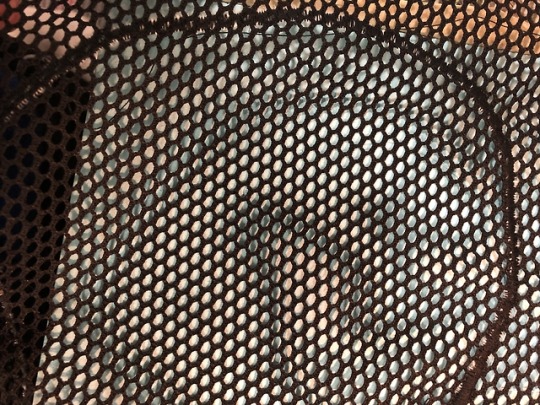
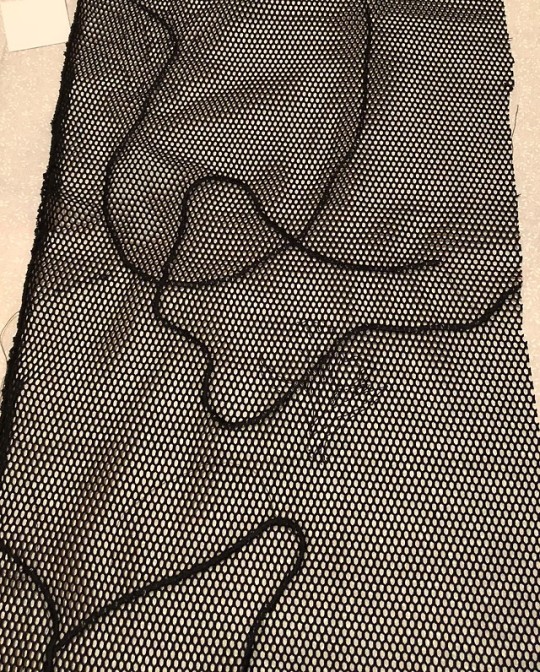
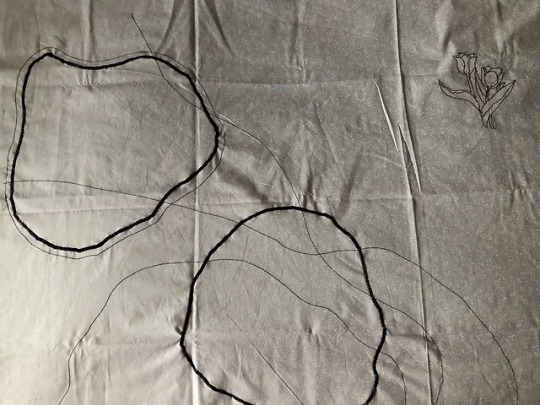
Freehand Embroidery Machine
I spent a bit more time with the freehand machine as it makes it more customisable and you get more control of the machine in real time. From the designer that I found, Gemma Blackwell
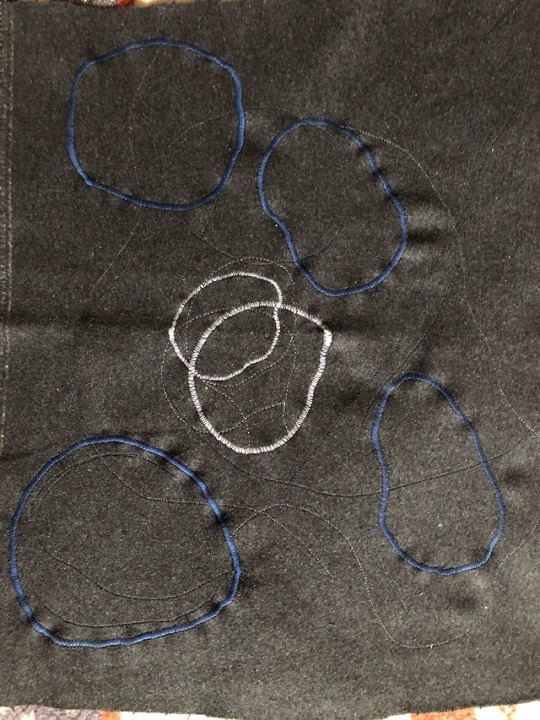
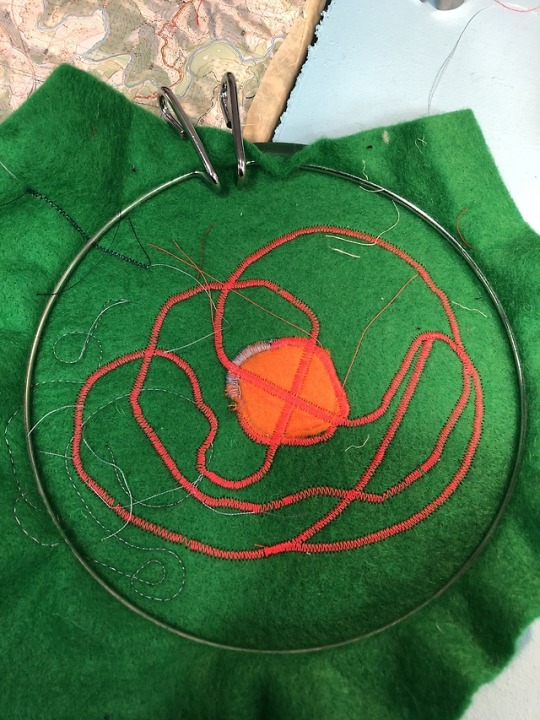
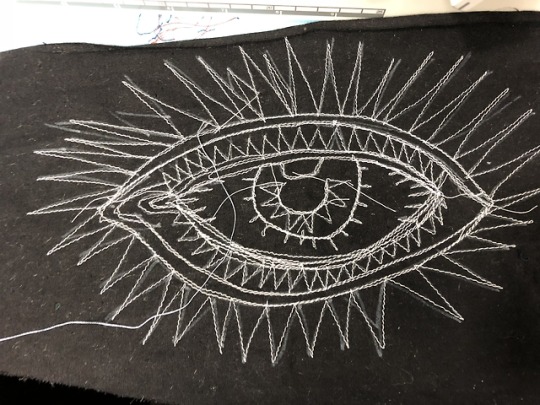
I was quite influenced by her to create simple shapes by using the satin stitch. Therefore with no specific shape or pattern in mind, I just randomly sewed all over different pieces of scrap fabric - white cotton, black mesh and a grey wool. After doing a few large satin stitches all around, I switched to a running stitch to create similar shapes around the satin ones.
Review
I was particularly happy with the outcome of what the embroidery machine can do - pretty much an endless amount of ideas can come from this. But where to from here? I am still quite interested in zero-waste patterns, so I thought I’d continue down this route to see what other patterns I can find online or what I can think of myself. I knew I’d want to make a garment again so I just sewed onto large pieces of fabric.
0 notes
Photo


Digital Embroidery
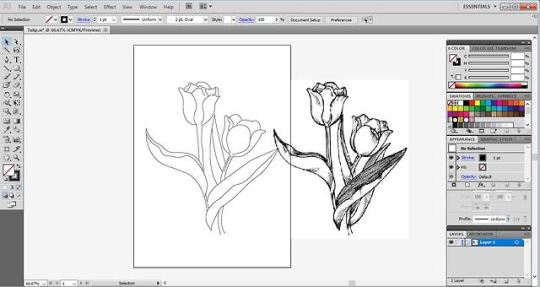
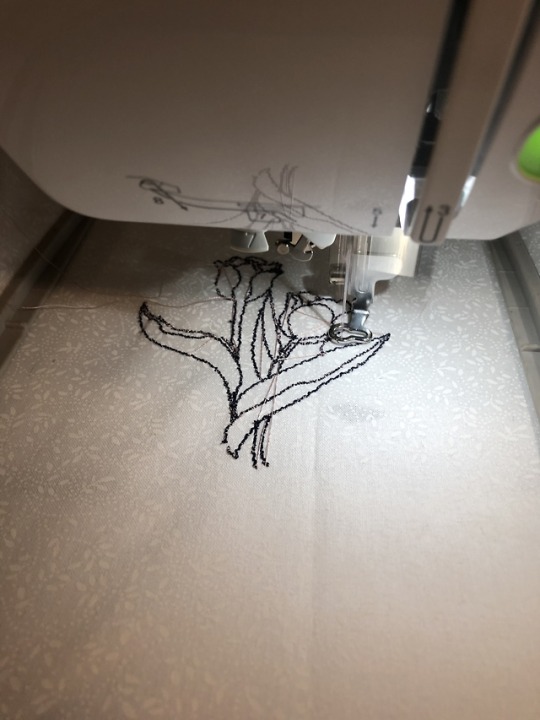
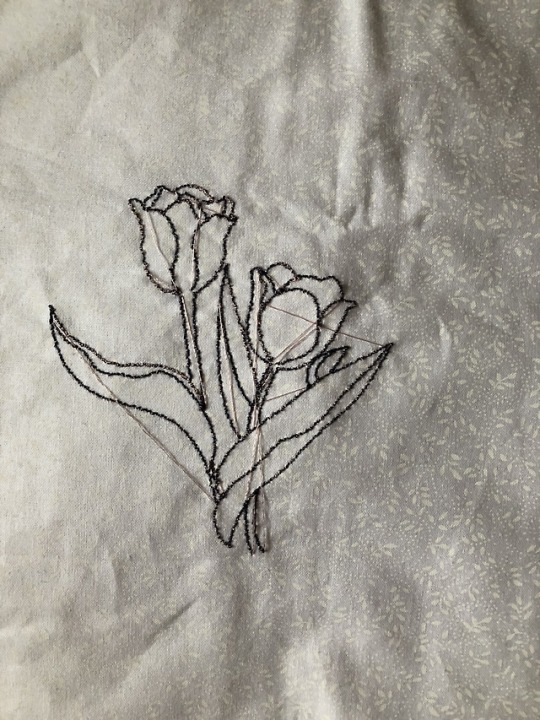
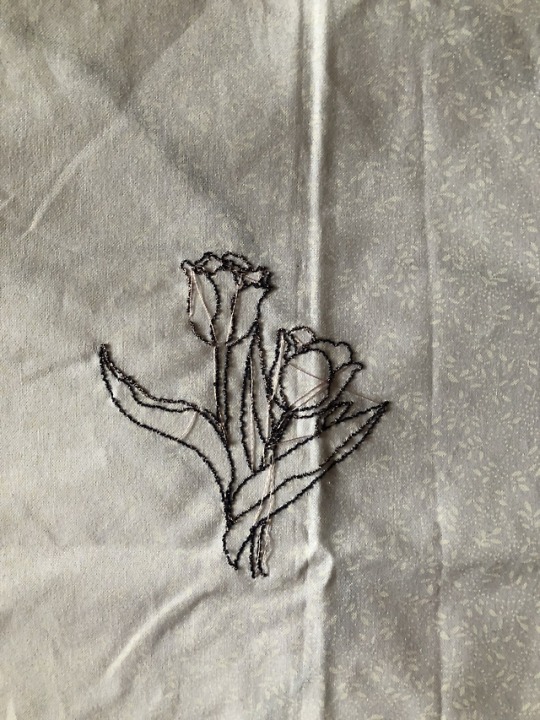
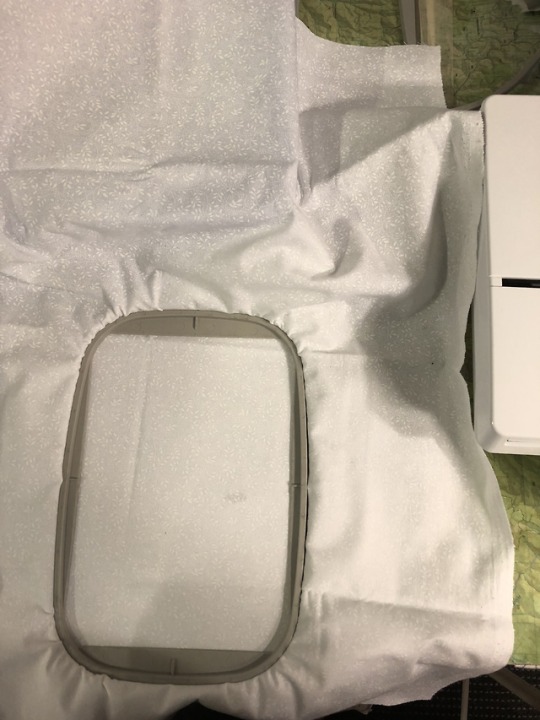
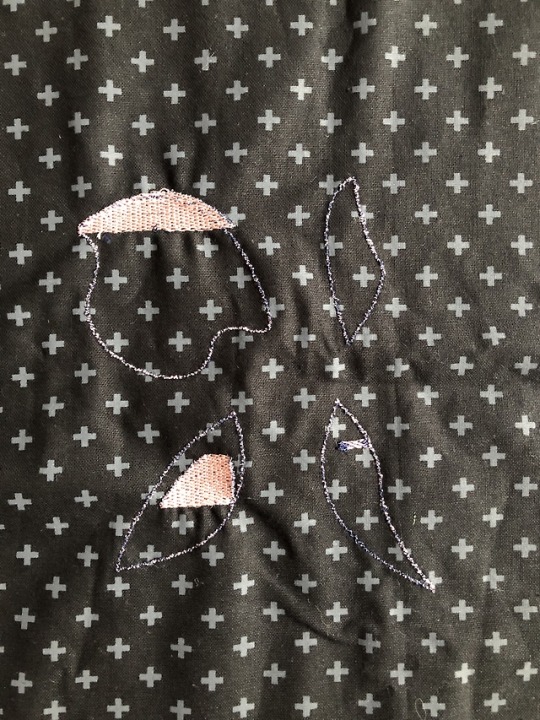
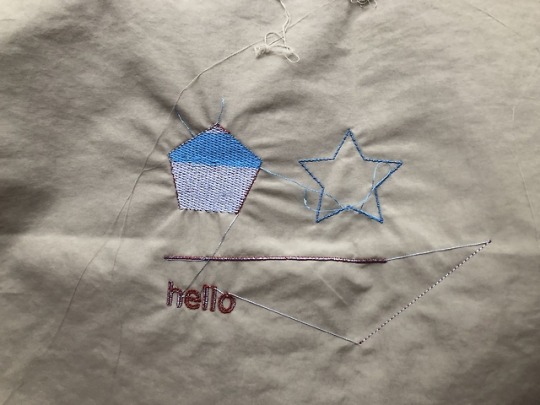
Using the same tulip file that I wanted to use for the vinyl cutter. I decided to try this out onto the embroidery machine. I also uploaded an SVG file of some shapes that I made and created an outline DST and a fill DST file.
When the tulip was being embroidered, I noticed that it was quite small - so I decided to bump up the size to the highest that it could go. After this I was able to embroider the outline of some random shapes and also do the fill. I didn’t do the entire fill as I wanted to just keep some of it with the outlined shapes.
0 notes
Photo
Embroidery Samples
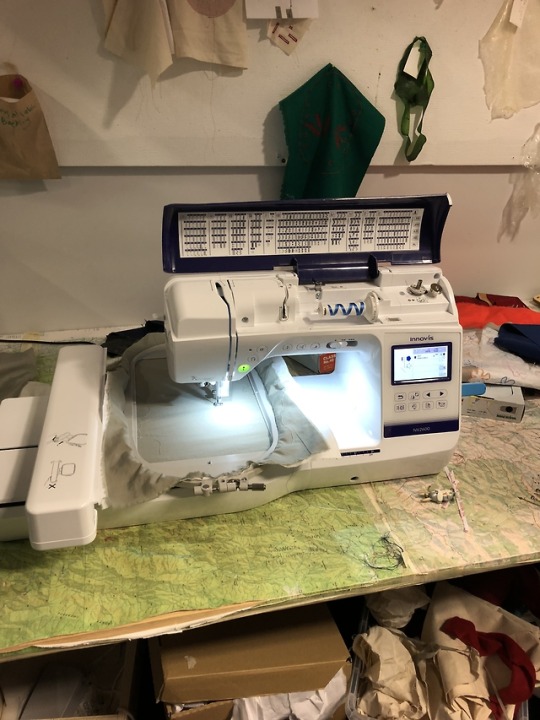
After the session, we were given the chance to try using the machine ourselves. We played around with the satin stitch to create random lines all over this piece of felt.
I was also able to embroider my sample that I made using Inkscape.
Review
I’ve actually already used the embroidery machine before for a different class, so I thought I’d spend a bit more time using the freehand embroidery machine since I’ve never played around with the other settings. I didn’t want to use the embroidery machine too much considering that there were other people in the class who hadn’t used it before.
0 notes
Photo
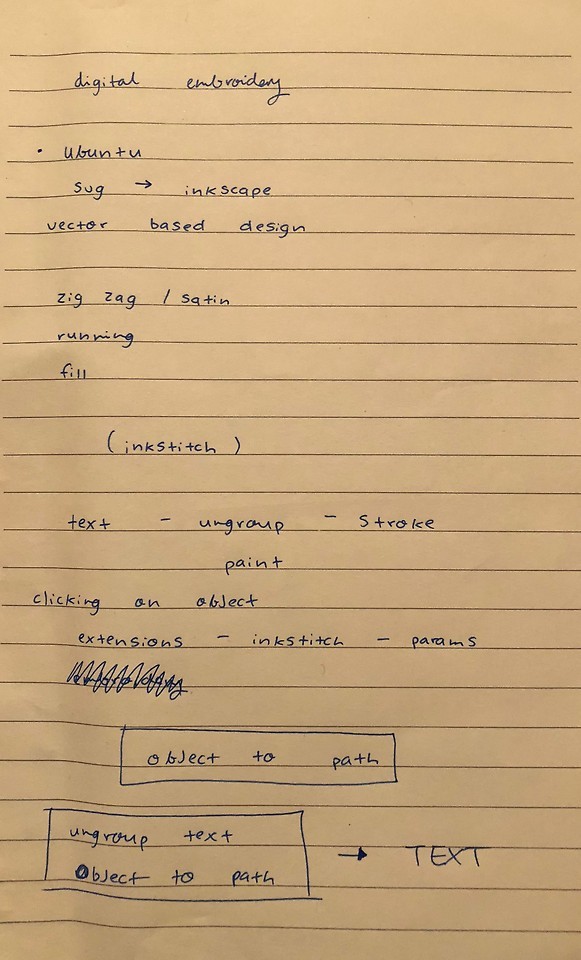
Day Eight - Digital Embroidery + Freehand Embroidery
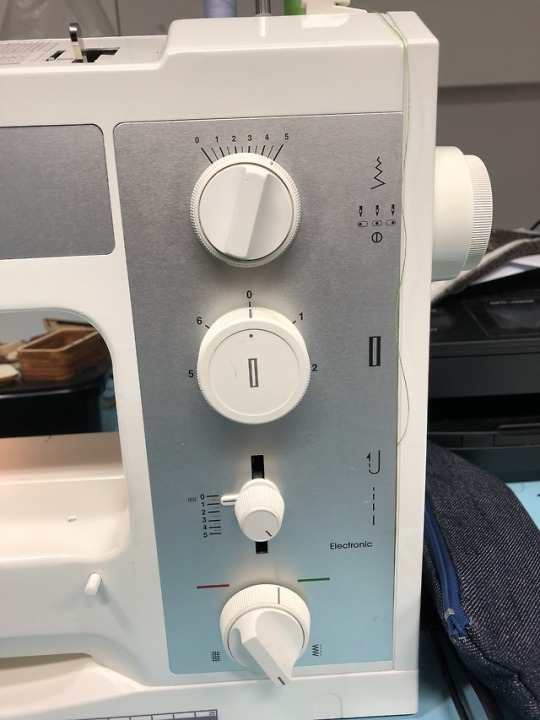
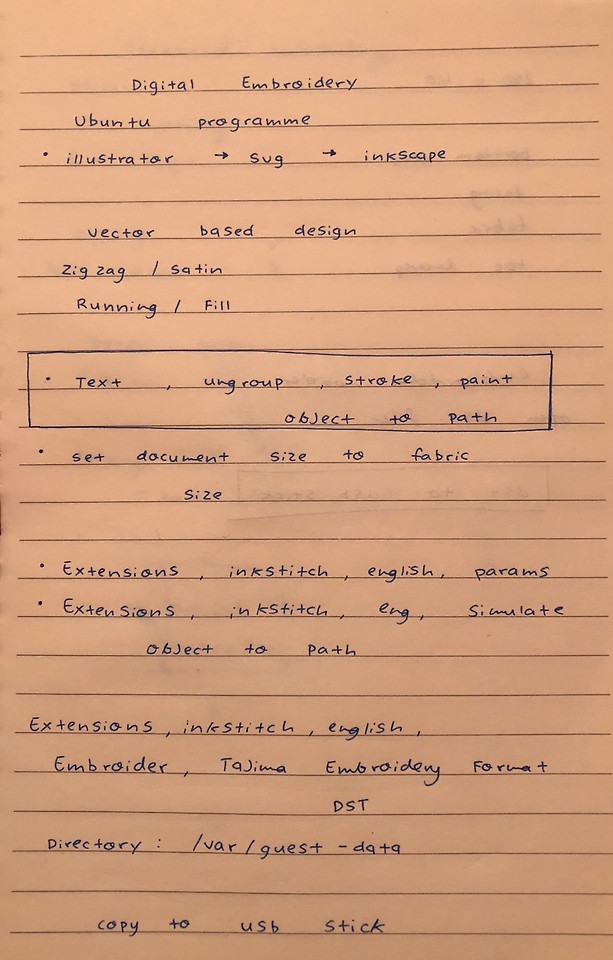
Today we learnt how to use the embroidery machines - each has their pros and cons but there was lots to remember. These are just some notes during the session.
Operating System: Ubuntu
Tip: you can create files in Illustrator and save them as SVG files → transfer to Inkscape
Tip: Ungroup everything
Process
• Draw shapes/patterns/text into Inkscape or insert SVG file
• If you have text, you need to ungroup this, then change stroke, paint, object to path
• Individually highlight each object and do the following -
Extensions → Inkstitch → English → Params → Change settings → Apply
• A following box will pop up giving you options to change settings for the stitch + preview your design being sewn
Once each object has been through this process, the next part is to follow -
Extensions → Inkstitch → English → Embroider → Tajima Embroidery Format DST
Directory: /var/guest-data
After this, it will be saved into the guest-data folder called ‘embroidery’
Tip: Unable to find your file? Search through using the date/time.
To check if your file is working properly, you can follow this -
Extensions → Inkstitch → English → Simulate
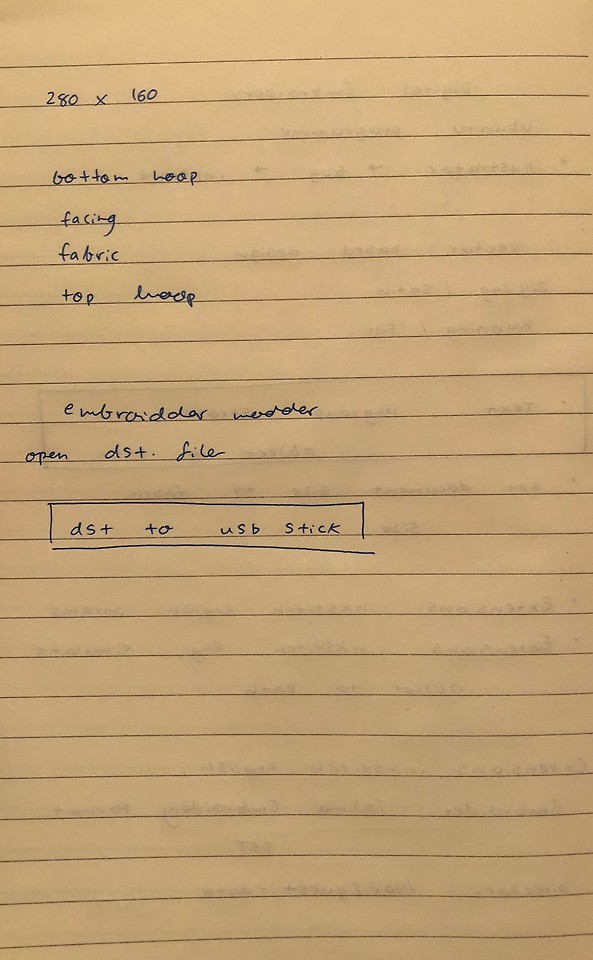
Alternatively, you can open Embroidermodder 2 and open up your DST file.
Copy to USB stick
Embroidery Hoop Size
• 280x160 Embroidery Sandwich
• Bottom Hoop • Facing/Stiffener • Fabric • Top Hoop
Plug USB to embroidery machine → Find DST file → Embroider
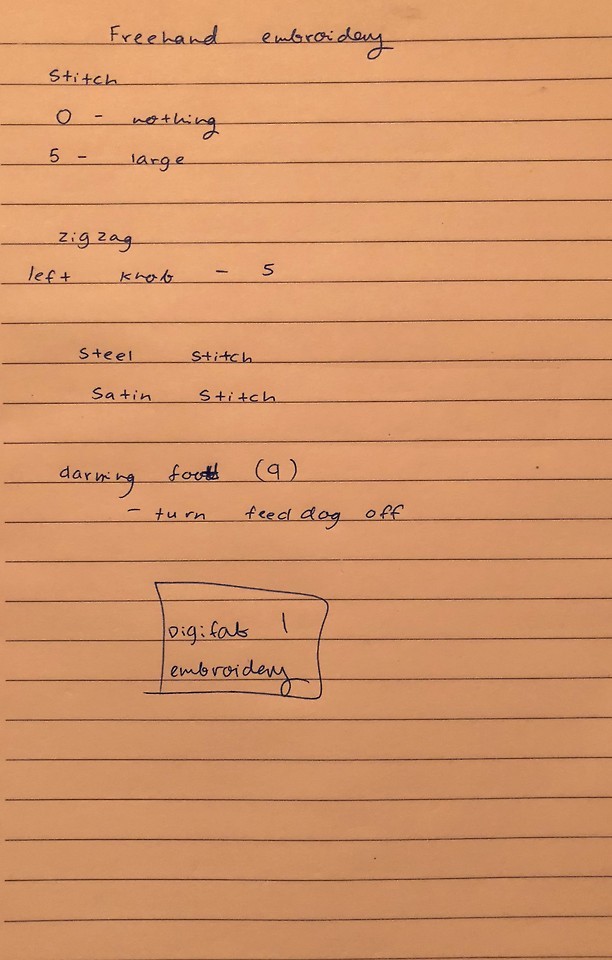
Freehand Embroidery Machine
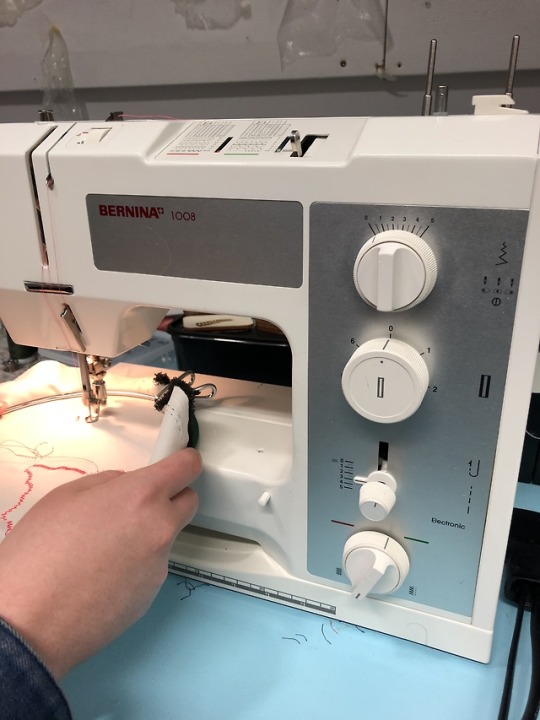
Another machine we were taught to use was the Bernina Freehand machine - I was actually quite familiar with this machine as this is the model I used when I was at college.
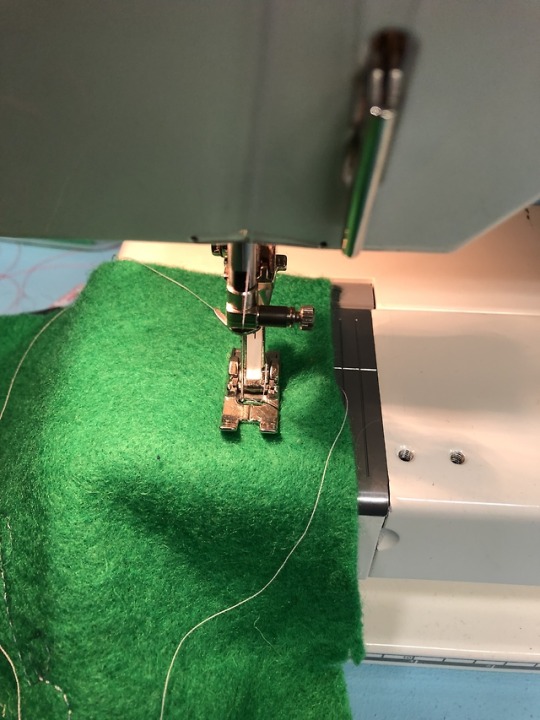
Stitch 0 - nothing 5 - large Zigzag Left Knob - 5 Steel Stitch Satin Stitch Darning Foot (9) - turn feed dog off, turn knob to the green side
Regular Foot (1)
0 notes
Photo
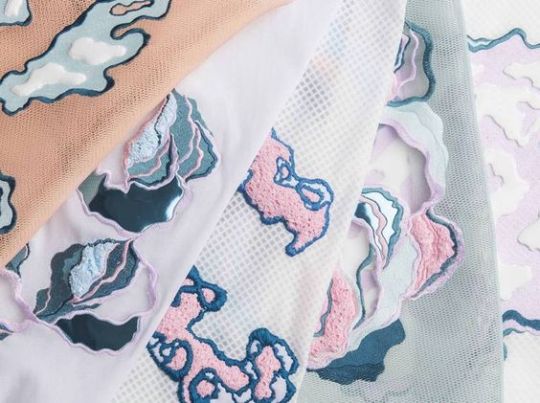
Gemma Blackwell - Oddity
Instagram Page here
Oddity Page here
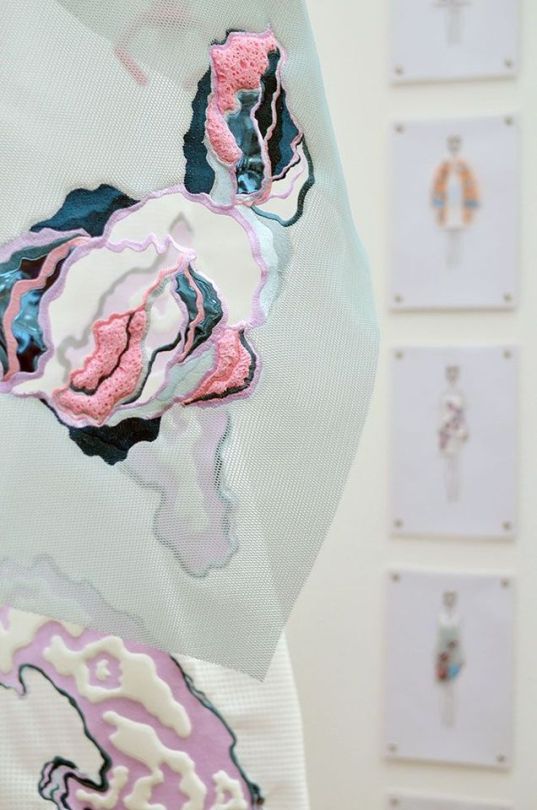
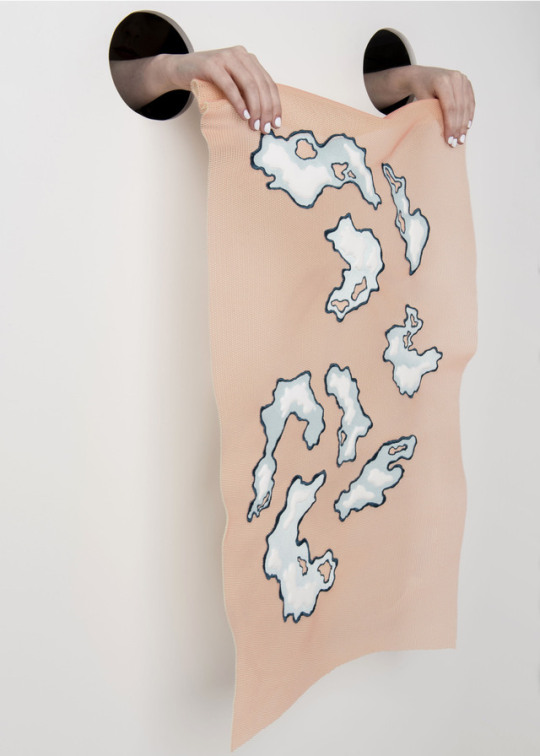
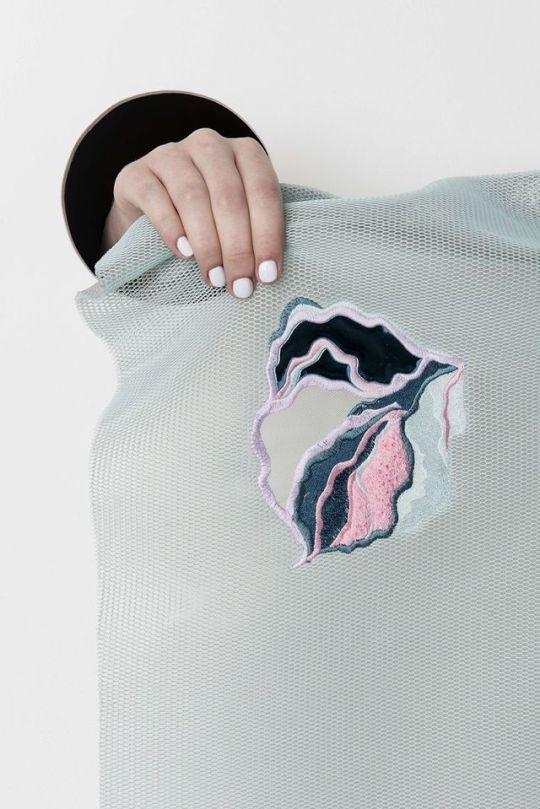
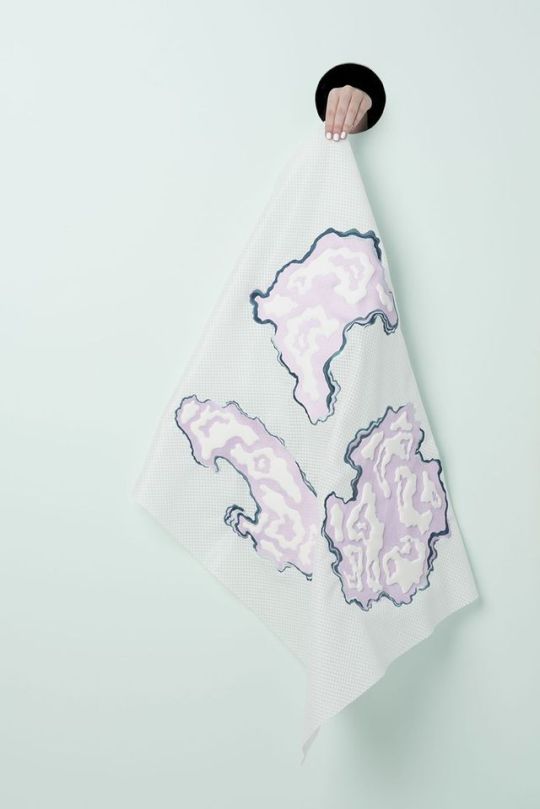
Before using the embroidery machine, I researched and found a designer called Gemma Blackwell who created a collection of pieces called ‘Oddity’. Gemma is a textile practitioner focusing on surface at the University of Huddersfield, United Kingdom. Her specialization entails embroidery, textile innovation/art and fashion.
From her website -
“’Oddity’ adopts a curious approach to the use of materials in relation to embroidery practice, challenging the traditional parameters of this luxury technique. Play is at the heart of this project, as both colour and material are explored and combined in an instinctive way generating unique aesthetic values.“
Her designs really caught my eye just because they’re so different and appealing to look at. I really like the organic looking shapes and how they build upon each other and the use of colour makes different pieces of the design stand out.
0 notes