A log of my progress as time passes. . . This is the only pic of me I have on my PC unsurprisingly
Don't wanna be here? Send us removal request.
Text
Treasure Scene
So I had lots of trouble here. LOTS OF TROUBLE. I WANT TO SMASH MY HEAD AGAINST A WALL. But let me show you my process :D
First, I reversed all that needed to be reversed in the scene. I don’t know what’s wrong with the file, but a bunch of those polygons were inside out. Then, I gave everything in the room a texture. A color. I made the purples a dark red. It looked regal. I swapped the golds to silvers and the silvers to gold. Now that made a little more sense. I played around with ncloths when i discovered the joys of it. I played around with it- simulating lava, honey, chainmail, it was so fun!
Afterwards, I noticed all the coins, (because of the new tablecloth I replaced and generated via ncloth,) were no longer directly on top of the tablecloth, but rather, under or in between. So I pulled it up and had the grand idea of turning every single coin into an ncloth and giving it the preset of concrete so it doesn’t fold.
When I was happy with all that I’ve done, I started adding lights in. Arnold lights. I was in my third light when I clicked Maya as my renderer and it crashed my PC.
6 hours of work, gone. Every item on the table no longer looked the same. Yet, I didn’t click save once, even when i first opened the file.
And so I needed to restart. We love restarting.
This was the only screenshot i had of the remainder of that lost scene.

It was while I was still making the coins into ncloths. Well. No use crying right? But I did cry, boohoo. I yelled. Anyway.
So I restarted, clean slate! I knew what I knew now, and surely I could speed through it?
At least, that was the mentality I took on.
So fine! Then I gave up on making the ncloths after a while. I found you could put in 3D models meant for 3D printing into Maya and thought that would be fun.
So I put a lion, because thats one of the first things that came up to the suggestion.
Right. Well, after importing it, it had about,, uh, 4 hundred thousand triangles to it?
So I try the reduce tool on the mesh.
Three times.
And it provided no results, plus gave me 2 heart attacks for minutes that it Maya crashed and was not responding.
Minutes of my life I will never get back, lol.
But after two hours of trying to reduce it and bearing no fruit, I decided to delete it and find a different model.
It worked well!
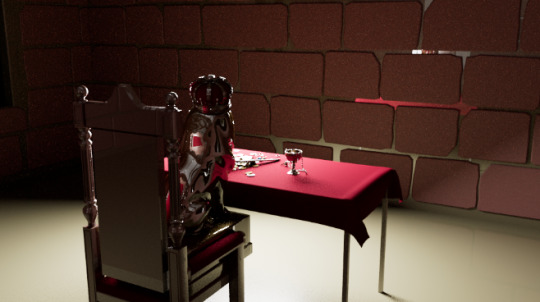
I put the lion on the chair and did a test render to see how it looked in the preview. Honestly, pretty dope.
I continued to play with Arnold’s lightings.
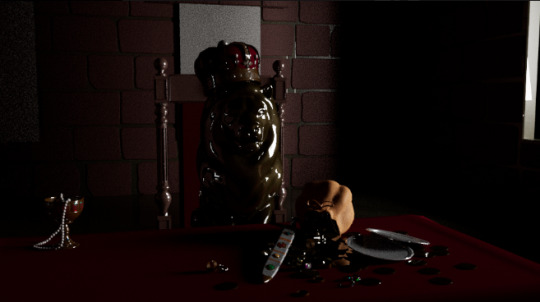
And wow, this was way too dark.
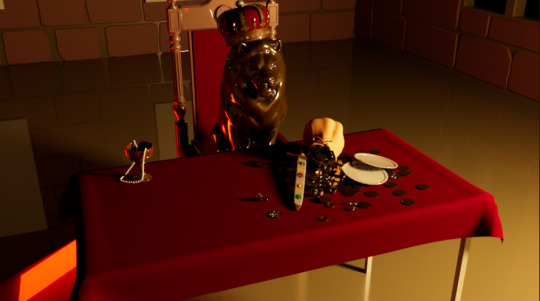
I also played with different colors of the lion, wondering how to make it look more gold than weird fake metallic, and also played around with colors in light. The rim light I had red and the front I had yellow.
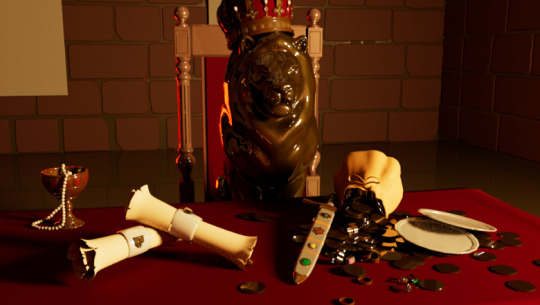
I then modelled the additional treasure I wanted to put on the desk- scrolls.
In medieval times, knowledge was power anyway. A smart man was more dangerous than a rich man, so it reminded me of scrolls. Scrolls that spoke of Physics or Astronomy, early world observations, was what I was thinking of.
Not that lions can read-
-nor is this lion supposed to be real.
Anyways, with that done, I rendered it and then made a separate turntable for the stuff I modelled.
vimeo
I like how it turned out! I gave the scrolls a lil sword crest and everything. It’s cute!
0 notes
Text
Film Language Essay Reflection
I’ve realised that a habit I’ve developed is researching a topic on many different fronts, just so I have a vivid understanding of the subject matter. When I completed writing my essay, and then writing up my bibliography, I had to remove multiple links because they were not directly related to the film language I was writing about- just related to the films I was analyzing.
After this, there is a lot of excess information that I have on both films, which, I suppose, proves that I’ve done research and know what I’m talking about.
Which must only be a good thing, right?
0 notes
Text
Maya Retro Phone
Well Well Well.
Who’s the next challenger?
This Retro phone? Okay.
Well.
Actually, it was pretty decent after the first hurdle.
The first hurdle being.. well..
When I literally did the first step of extruding the edge of the cylinder down, the faces were inside out. Why? Why does this happen? Why does the tutorial go off without a hitch in the video and nothing goes wrong, but everything for me, in the most random of ways, do? Why are my faces suddenly B L A C K ? Reverse tool to the rescue!
Yay!
And then there was something wrong with my mesh again.
So I just decided to restart. I wasn’t knee deep into the project, anyway.
A couple minutes later-
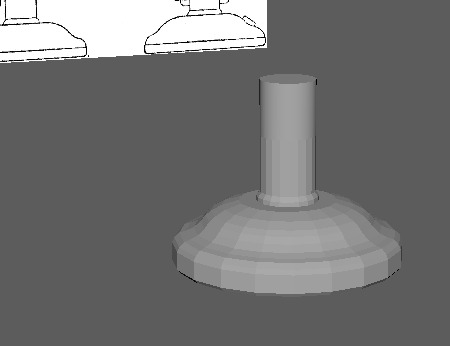
We’re getting somewhere! Even though it’s kinda odd that the middle, original cylinder is smooth and the rest isn’t.
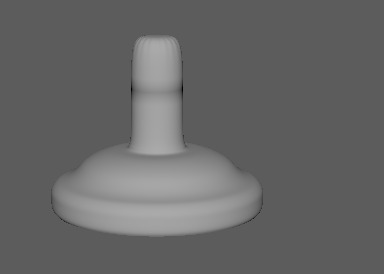
Double check! That’s weird. It didn’t say I needed to delete the bottom faces of the original cylinder, but it seems those faces are creating those black shadows.
Delete!
And that solved the problem!
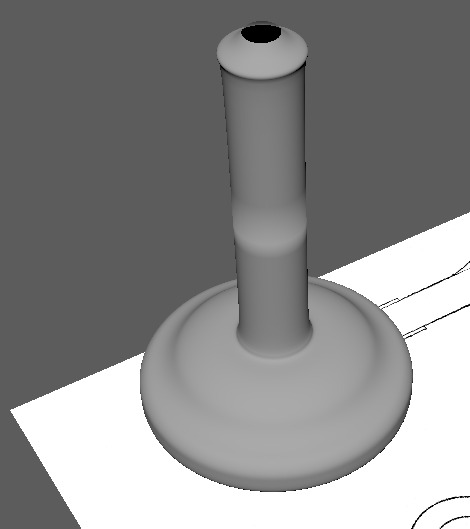
Well, the same problem and solution applied for the top bit.
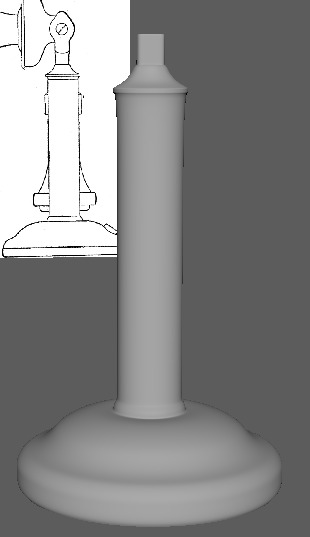
Spicy! It’s REALLY taking shape now!!
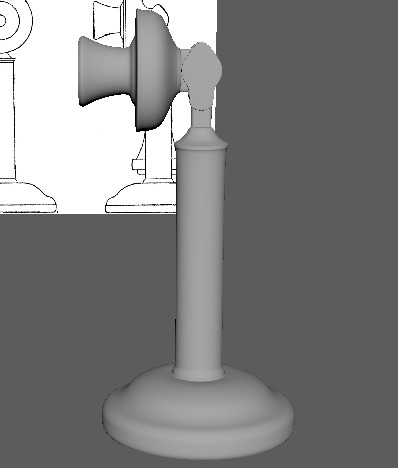
Well, now the main component is pretty much done, and I send a picture of my progress to my friend. He says it reminds him of Mario’s hose.
Here’s a snapshot of the funny conversation.
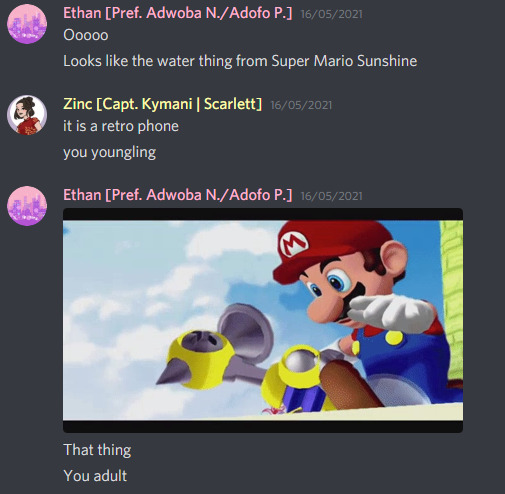
And I sent it to someone else as well.

Well! WE CAN’T HAVE IT LOOKING LIKE AN AIRPOD, CAN WE? What is with this generation!
So we charge forward!
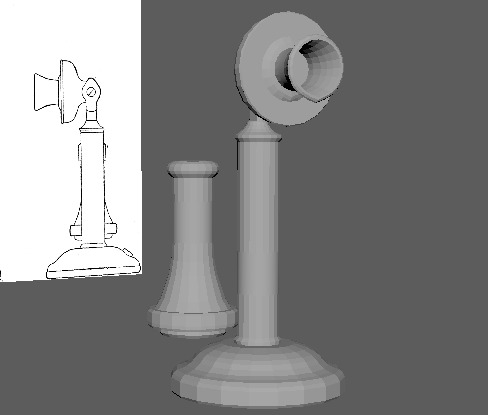
Now we have the mouth piece! Good development.
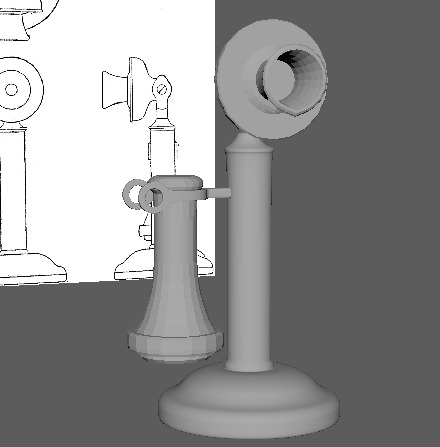
Learned how to use an EP curve. Useful new tool!
Here’s when I scratched my head at the tutorial I was following. We were told to create the bolts with a cylinder and flatten it, but... if my eyes don’t deceive me:
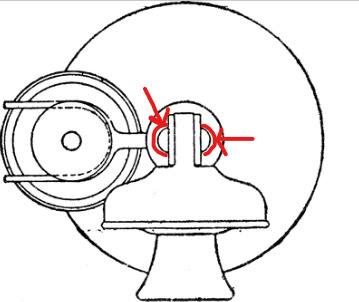
That’s, that’s a round bolt, clearly! There were no other elements in the phone that could account for those two curves, so I ultimately decided to use the power of all that I’ve learned in these previous tutorials about Multi-cut, Fill holes, Connect components- to create the reference accurate bolts. And I got pretty decent results! Perfection. B)
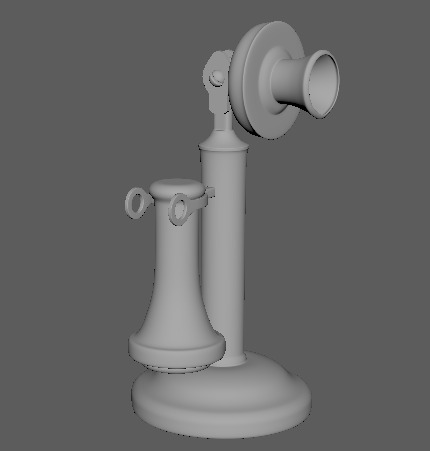
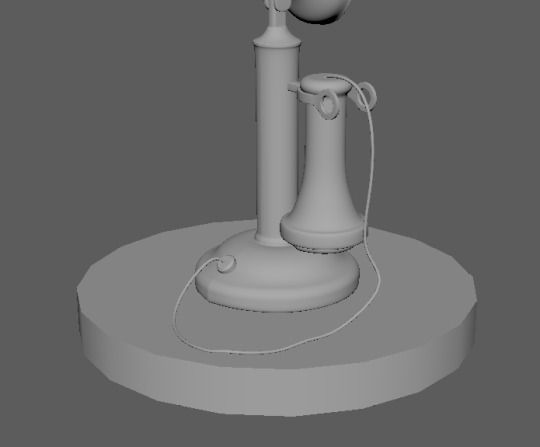
Well, that wasn’t INCREDIBLY hard. I mean, I had bumps in the road, but it worked out!
0 notes
Text
Maya Chair
This chair.
This chair is the first project in Maya that requires precise modelling. And I’ve learnt so much just from doing this, even though I procrastinated for so long; I’ve encountered problems, went on Google, Youtube, tried multiple things (my smooth mesh was messed up and thus when extruded the face of it, it had weird cracks and what not,) pulled my hair out, glued it back in, tinkered around the program, and hailed myself a genius for finding out about the Mirror tool and fixing the mesh that way.
The absolute emotional rollercoaster. Maya is playing with my feelings.
When I finished one leg, I felt accomplished already. Look at how defined that is. Even my boyfriend was impressed, and that made me happy.
vimeo
Then I duplicated it 3 times. Can I just mention the challenge of connecting the legs to the chair? In the video tutorial, it seems easy; you just need to tinker with the Twist tool a little.
Well, nO. THAT DIDN’T WORK FOR ME! I needed to use something called Offset, which worked perfectly, thank you! But then a lot of hours were wasted by then, hah.
vimeo
Well, that was one recording down. Next!
It was the back of the chair, plus the cushions, addition of edge loops, and everything in between.
vimeo
The last part- the cushion. WELL, I TRIED- as previously mentioned, the smooth mesh was meshed up. (Hah, you - you see what I did there? No? Okay.)

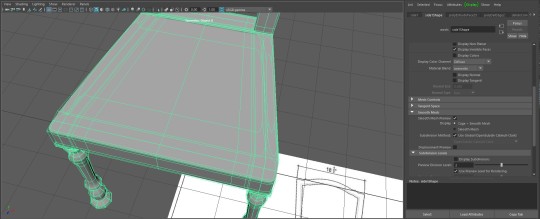
Do you see the mess? No? Look at the random curves on the side. Big RIP, right?
BAM, mirror tool to the rescue!
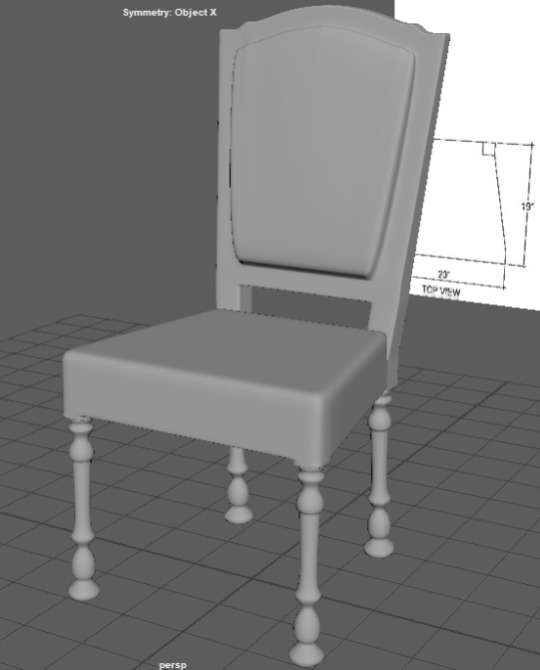
EASY!
0 notes
Quote
I hate Tumblr
me, when I have to upload every single gif to Vimeo before being able to post anything.
0 notes
Text
More Personal Project things
This is a looping background.
vimeo
The black is transparent. This gradient background is behind that.
vimeo
Did the clouds separately in Photoshop before animating and duplicating them in After Effects, playing around with the speed.
Fun!
0 notes
Photo
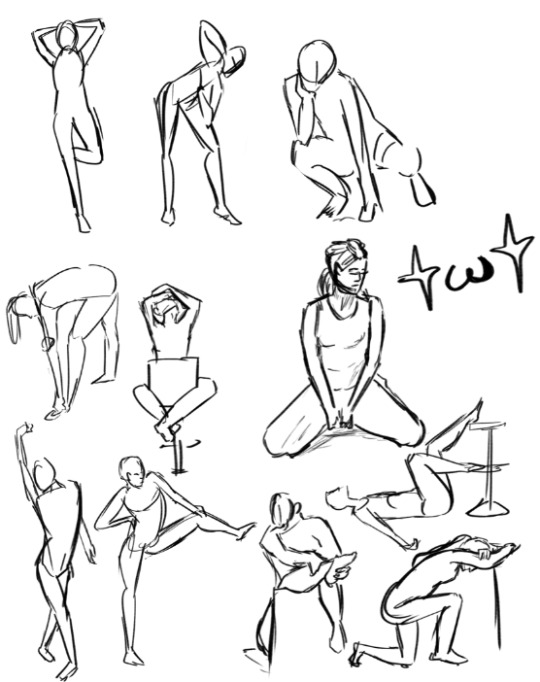
I did this a while ago, capturing poses from a video reference. That was fun, like the results!
0 notes
Text
BRB Scene
After having the knowledge of creating those two transitions, I contemplated and reflected on what I wanted to achieve in the Animated Overlays as it was directly related to my channel.
In the end, I decided I wanted a painterly feel. No clean lines, just very sketchy and well, painterly.
I went into this thinking that Adobe Photoshop was probably the best way for this, as I’d have access to the exact brushes I need to create the effect I wanted.
So I began research on how to animate in Photoshop.
I tried to animate one frame. So far so good.
Then the second. I play it back to check.
Um.............................. what happened there?
vimeo
After an hour or two of tampering, I decided that well, I can’t figure this out. This is terrible. Might as well move to Adobe Animate then.
I searched up how to use custom brushes in Adobe Animate, if possible. I found the paint tool. Except the paint tool - well, while it gave some nice brushes, (and I even found some good textured ones to install), I hated how you couldn’t see how the stroke looked like until you lifted your pen. It displayed as a line as you draw, and then after lifting your pen, it calculates then shows you how it looks.
Which I think is terrible.
I tried for maybe an hour on Adobe Animate to try and make it work for me.
It didn’t.
SO WHATEVER! I’ll just illustrate every single flippin frame in Adobe Photoshop. I’ll just draw everything, duplicate the first frame, put it under the 2nd frame, set 2nd frame opacity to low to act as an onion skin. Clicking through from top to bottom at all the layers was how I’d see whether or not the animation was smooth.
Halfway through, I start exporting them as PNGs and putting them into Adobe Animate- Open PNG, select all, Copy and Paste.
Then I could formally see how it looked.
vimeo
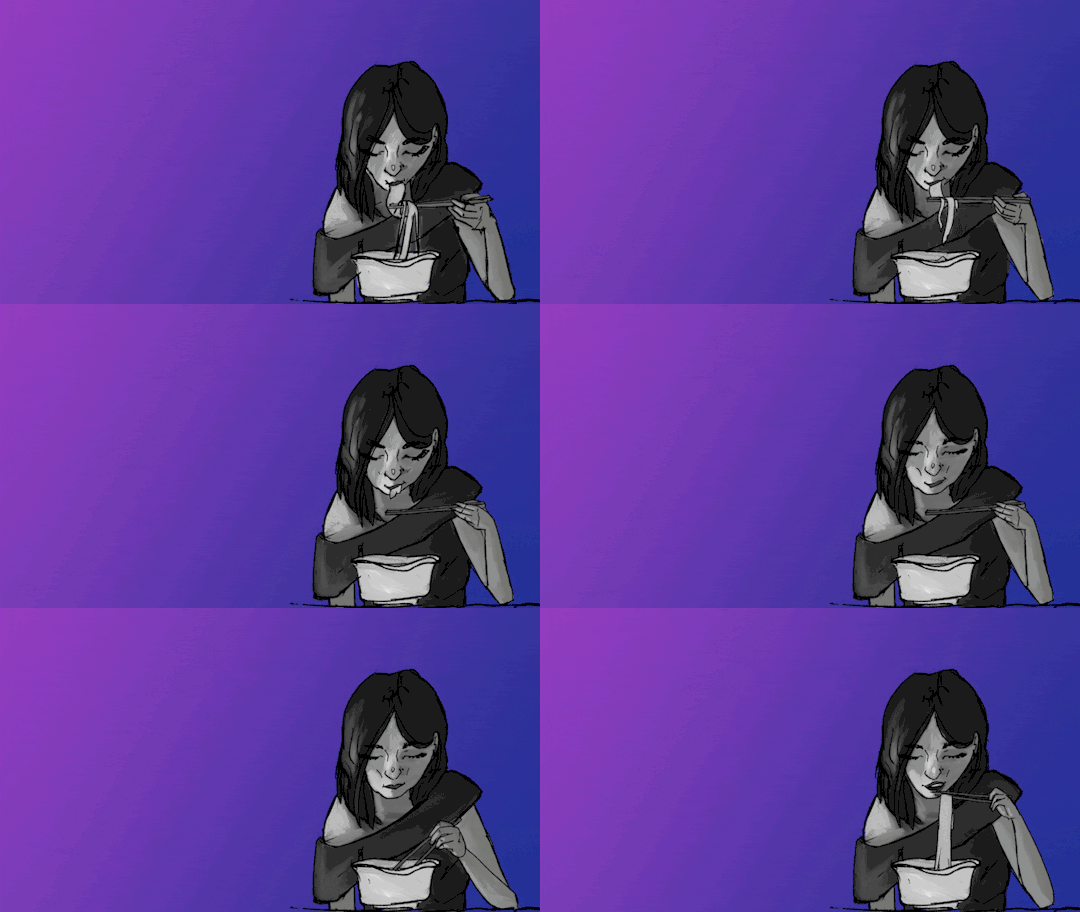
I then went back to color each frame in Photoshop first in black and white to get the lighting right. Then I later overlayed some colors individually. Finally exporting it one last time into Adobe Animate, the character (being me) looked fine. Next I needed to animate the huge ‘BE RIGHT BACK’ words on the side- but I had an idea to have a holo type texture/color to run through the words and loop. So then it was time to export the entirety of the Adobe Animate file into Adobe After Effects.
There, it took me an hour or so to figure out how to get one holo PNG to loop. I decided to duplicate it and flip it, connect it, and then have it constantly loop. It might not make sense as you read it, but you’ll see what I mean.
vimeo
I added in a gradient background done from Photoshop and that was that.
To recap:
1. Tried Animating in Photoshop. > Didn’t work.
2. Tried Animating in Animate. > Didn’t work.
3. Resigned back to Photoshop, drawing every frame normally.
4. Exported those frames back to Animate.
5. Exported from Animate to After Effects.
6. Added in the Holo effect for the words in After Effects. Also used Alpha Matte.
End Result:
vimeo
Yes, it loops. However, Tumblr sucks. :) I’m just glad that in the end, I managed to finish it and have a result I’m quite happy about, even though it took 4 days total and a lot of hours of frustration. I need to strap in though, I still have a bunch to do hahaha why do I do this to myself :’)
0 notes
Text
Haven Transition 2
With the experience of creating the first one, I knew my way around of what I needed to do and how to do it.
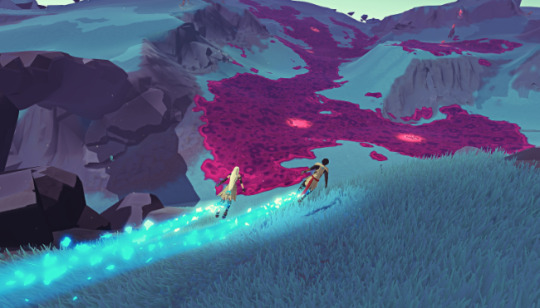
For this idea, however, there is a static image/pose in the transition, to mimic the in-game transitions from scene to scene, examples below.

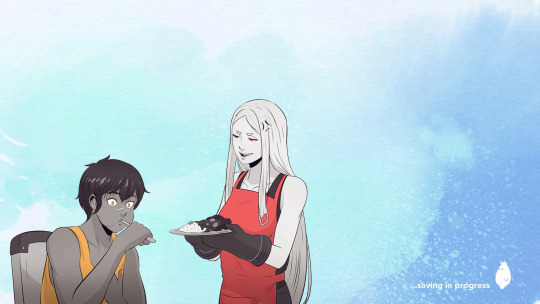

Keep in mind, aside from the bottom right little figure, the characters in the transition are static. I wanted to mimic this type of style, where the characters are mostly black and white save for the singular vibrant color of their clothing and eyes.

This is the pose I chose in the end- from all the poses I had sketched out in my notebook, I decided to use the pose where my boyfriend’s Haven-sona is cutting my Haven-sona’s hair.
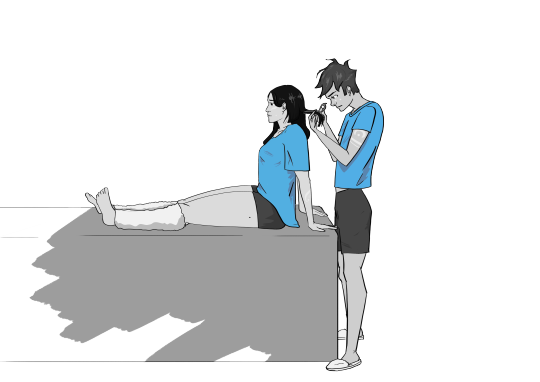
I’m not very good at digital art, but this so called ‘fanart’ was close enough to the Game Baker’s Haven style that I was happy with it.
Next, I saved the photoshop file and exported it as PNG. Then I moved on to Adobe Animate to animate the blue-ish green trail the characters’ boots leave behind in game, in accordance to the thumbnail. Here’s a snapshot of the game:
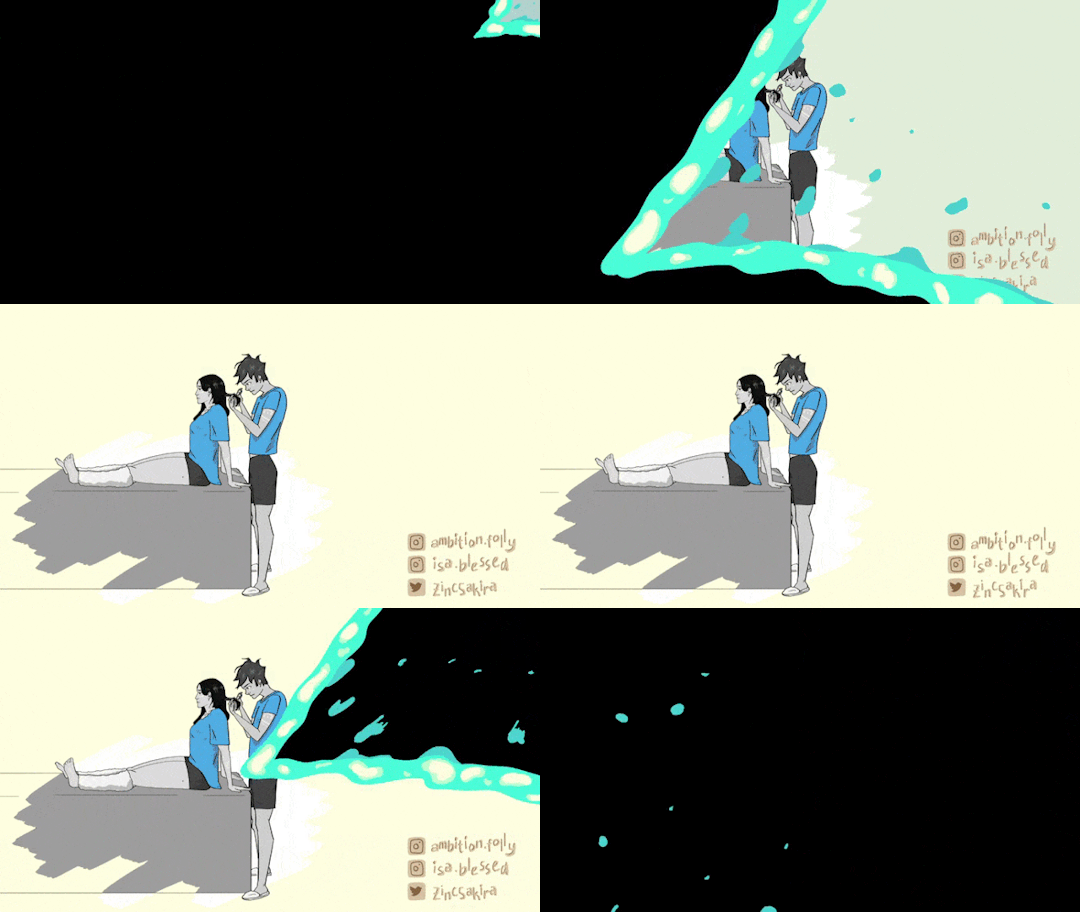
So I animated that trail going across the screen. Then, I also animated my social handles to be put on the bottom right corner, as the static scene seemed a little empty, and the animated social handles would give the scene some motion and interest. When that was done, I went into Adobe After Effects to put it all together yet again. Except this time, I learned this new tool called Alpha Matte. I played around with it a little bit, and I added a background that gradually changes in color. When it’s static for 1 second, it stays that color, before the trail comes in again to sweep it away across the screen to transition into the next scene. To recap: 1. Adobe Photoshop was used to draw the static characters in the pose. Exported to PNG.
2. Adobe Animate was used to animate the trail.
3. Adobe Animate was used to animate the social handles.
4. Adobe After Effects was used to put it all together, where I used Alpha Matte to only have the PNG appear when the trail passes over it.
End Result:
0 notes
Text
Haven Themed Transition 1
Going along the first idea that spawned from looking at one of the posters for the game Haven.

I loved the pastel colors of the clouds in the sky, which is why, by thumbnail, I had the idea of having the logo pop up in the middle, with the colorful blue and pink clouds descending from the top of the screen to the center, staying for a second before the clouds moved to cover the screen entirely, which then shows the next scene, hence being a transition.
At first, I used Adobe After Effects for this, but I didn’t like how static it looked when the clouds dropped down from the scene. Therefore I opted to first go into Adobe Animate and animate the clouds dropping down and crashing into the screen.
In addition, with potential profit in mind, I didn’t want to be copyrighted for having their logo straight in the middle, so I used the color of the logo and still had a circle pop up, but with something of my brand in the middle. As I didn’t have a logo to put in, I decided to make a mini animation of the two characters I created (Haven-sonas, if you will) and have it be in the center of the circle in the end game. So to recap:
1. I tried to do this in Adobe After Effects. > Created the shapes of the clouds with the shape tool. Moved it from top to center with Secondary Action and all, decided I didn’t like it >:(
2. Adobe Animate time!
> Animated the clouds, separated in layers as ‘blue cloud’ and ‘pink cloud’. Much better 👍
3. Animated a chibi style of the characters.
4. Brought all .swf files to Adobe After Effects and put it all together, including the extra animation of the middle circle; added popping effects.
End Result:

Unfortunately, Tumblr doesn’t accept WebM as a format, so the gif version of this does look preeetty crappy, but you get the idea.
And thus, my first Transition was complete.
0 notes
Text
Personal Projects
I have a myriad of Personal Projects, motivated to be created because the aesthetics of my Twitch channel needed to be stepped up a notch if I were to claim to be an art student. Thus, I’ve made several 2D Animated sequences; two being transition scenes and one being a waiting, ‘BRB’ screen.
I had sketches and plans for how many screens I wished to do, and I made some thumbnails. Doing this made me brainstorm ideas for branding, keeping in mind color palettes, overall imagery, what impression I want viewers to have.
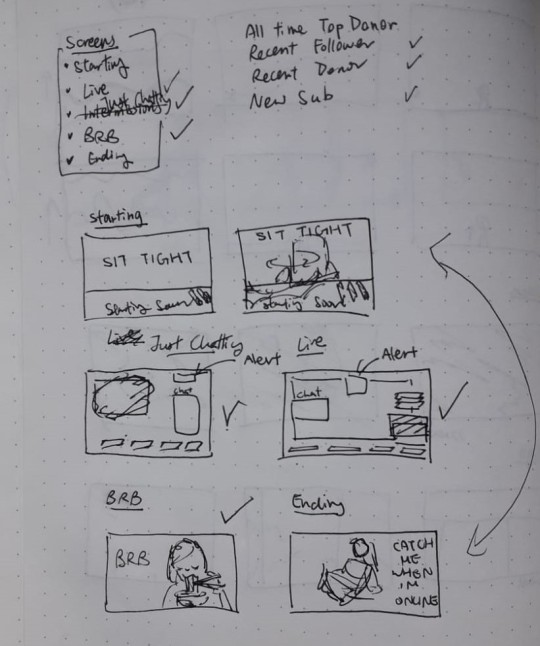
^ Animated Overlays Thumbnails. Bottom left is the concept for the BRB screen that I finished making.

^ Concept poses for the characters I designed in the style of the Indie game, Haven.

^ Costume concepts and facial profiles
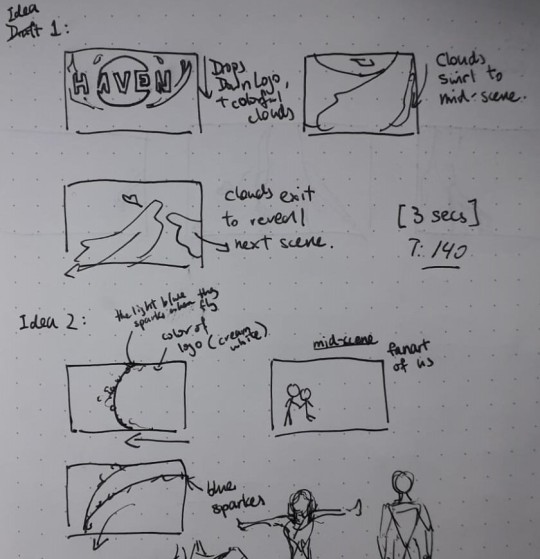
^ Thumbnails of the ideas for the transition scenes


^ Note taking from Youtube tutorials on how to create different transitions.
0 notes
Conversation
Why.. Just Why.
Me: Cool. I've updated my blog.
Blog Post from like, 4 weeks ago: Hehehe lookie here you've got a typo and also, this post isn't formatted consistently lolz.
Me: No. No. No no no no no. How do I edit this?
My Chosen Tumblr theme: lol you can't edit this xd
Me: Fine I'll just leave it be.
My OCD: poke. POKE. P O K E. YOUR POSTS ARE INCONSISTENT IN FORMATTING!!!!!
Me: SJKFHLIUWEHFLEUIWHE F I N E. I'LL JUST REPOST EVERYTHING.
0 notes
Photo
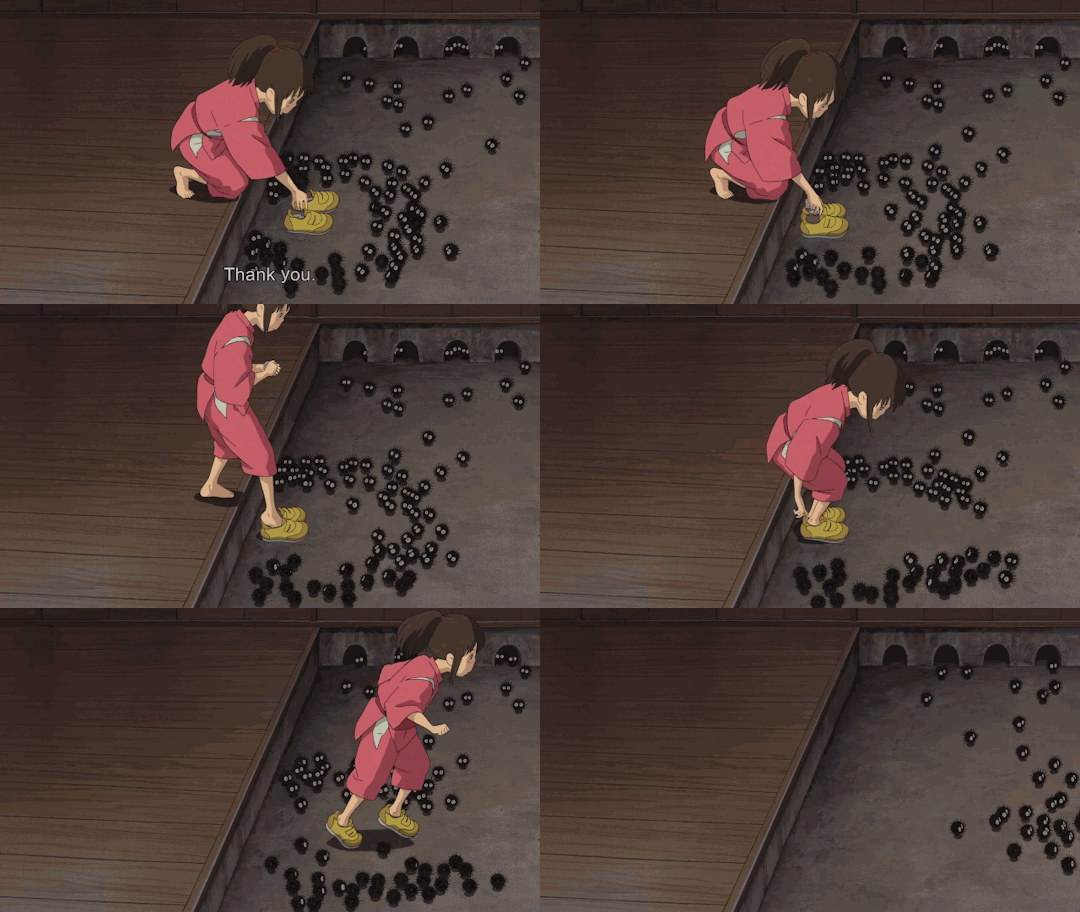
The Beauty of Hayao Miyazaki’s Animations
Studio Ghibli films are famous for being not only beautiful, but having characters that are realistic. There’s many interviews done on Hayao Miyazaki, asking him about the key element of his films.
A lot of his films include his characters in vocal-less scenes, performing small everyday actions. The inclusion of these small things, the small details, are what makes his films so realistic. As seen above, this is just one instant of Chihiro putting on her shoes- she doesn’t wear them perfectly. She brings her fingers down to adjust her heels into the shoes and taps her foot to the ground to fit into them well.
Miyazaki also often says that he lets the stories write themselves, as there never is a set plot- Studio Ghibli starts a movie with storyboards and sketches. Setting the world, Miyazaki then assesses each character’s personal motivations and how they’d personally react to the situations. Then the story progresses- ideas come in, and they continue in Movie production. With the sheer amount of thought and effort put into production, the attention to detail- it’s no wonder that Miyazaki’s films are beautiful.
Anon, (n.d.). The Essence of Hayao Miyazaki Films: A Short Documentary About the Humanity at the Heart of His Animation | Open Culture. [online] Available at: https://www.openculture.com/2015/10/the-essence-of-hayao-miyazaki-films.html [Accessed 20 Oct. 2020].
Anon, (n.d.). How the Films of Hayao Miyazaki Work Their Animated Magic, Explained in 4 Video Essays | Open Culture. [online] Available at: https://www.openculture.com/2016/12/how-the-films-of-hayao-miyazaki-work-their-animated-magic-explained-in-4-video-essays.html [Accessed 20 Oct. 2020].
0 notes
Text
Sketchbook Dump
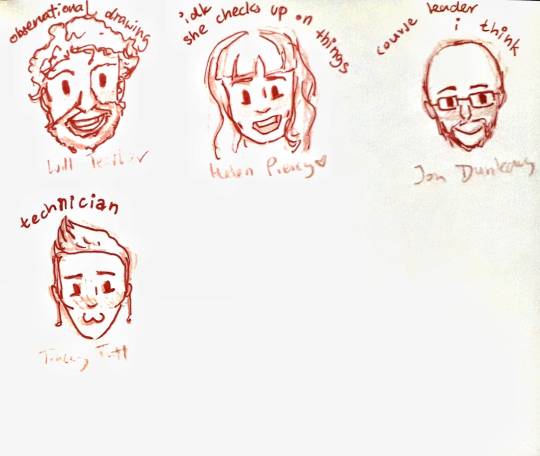
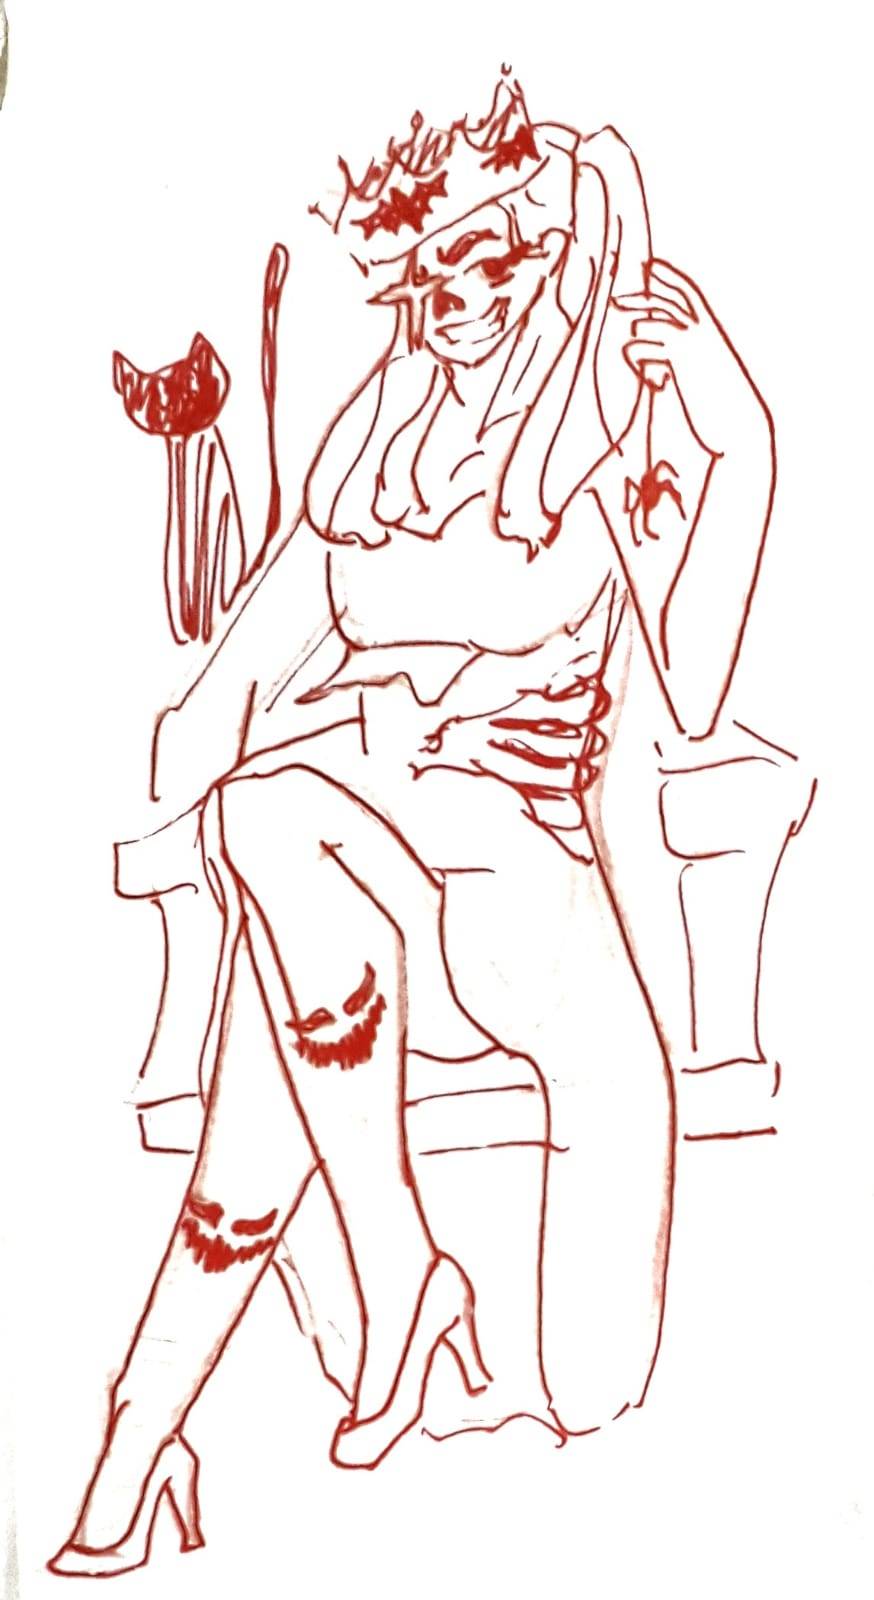
I drew some of my teachers. The second one was from a workshop done during the week of Halloween... I think? The prompt was like, make a character to represent Halloween or something of the sort.
My teachers or cool though.
0 notes
Text
Life Drawing Class Week 6
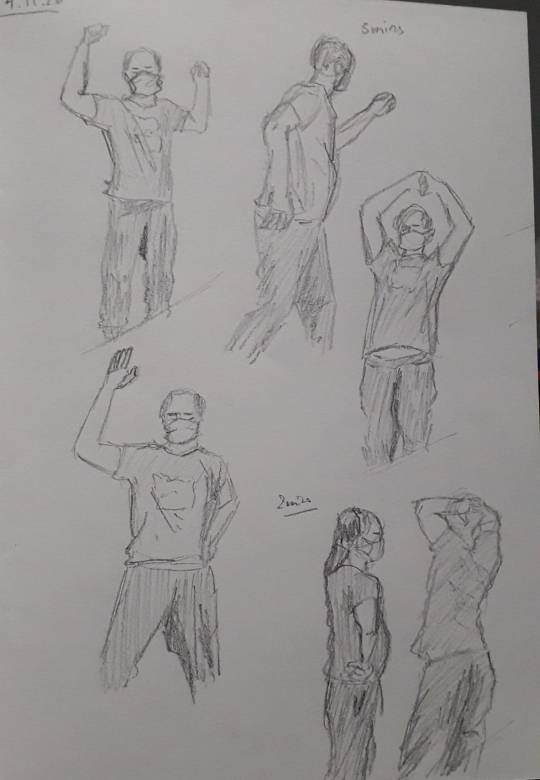


Let me just take a moment to rant a bit- a handful of us didn't notice that the classroom was in a different one, so we got lost for about 15 minutes trying to find the building. Never again. But I now know where the uni's cafeteria is at least.
Shape, Clothing and hands were the focus of this lesson. The "drapes" are the clothing. The folds of the clothes were good practice. I really don't like drawing hands, no one does, but well, at least I know I'm bad at them.
0 notes
Text
Life Drawing Class Week 5

In this class, a lot of things were talked about, such as the rule of thirds, that I had previously heard about. Other things like rules of composition were talked about. Afterwards we were told to go draw outside with the compositions taken into account. The space outside the classroom was reserved for the class to use, but we were also told that we could go outside to draw if we were brave enough- I wanted a different scene than the others, so I decided to go outside and draw the building of my uni. While it came out well, I regretted the decision, simply because it was freezing. My poor fingers will never forget the biting cold. At least the drawings turned out nice. I used the rule of thirds because I liked it.
0 notes
Text
Life Drawing Class Week 4


This class, the lecturer (whom has the best music, btw.) informed us a lot about perspectives: 1 point, 2 point and 3 point perspective. Then we were told to sketch out the specific shapes that were circulating around the classroom. In the most covid safe way... During the lecture part, I started sketching the Effiel Tower, Trying to use 3 point perspective- because triangle=3 points made sense for some reason. Spoiler Alert: It didn't work. So I just disregarded the guiding lines in the end and just tried to make the Effiel Tower look like the Effiel Tower. I did 2 point perspective to redraw this picture of Manhattan. (It's tiny because I like subconsciously drawing things in tiny scales.)
0 notes