
The blog of Jasmine Thompson, recording the creative process of making and researching for the second stage of our BAIS 300 interdisciplinary brief.
Don't wanna be here? Send us removal request.
Statistics
We looked inside some of the posts by interdisciplinary-pt2 and here's what we found interesting.
Average Info
Notes Per Post
1
Likes Per Post
1
Reblog Per Post
0
Reply Per Post
0
Time Between Posts
1 hour
Number of Posts By Type
Photo
13
Text
3
Audio
1
Last Seen Tumblr Blogs


Fun Fact
There were a total of 171.5 billion posts on Tumblr in 2019.
Photo
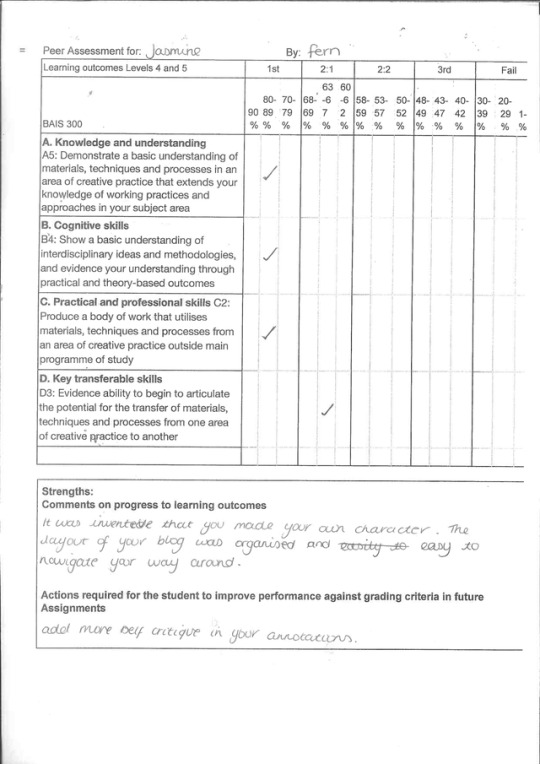
This is the sheet from my peer critique, and I am very happy with this result. I think the Fern was being a little too nice and I’m not expecting a mark this high, however its nice to see that other people value my work.
I believe that this was a good exercise for us as it made me think about my own work and how well I’ve filled the criteria for a certain mark. It was also good to revisit the grading matrix to remind myself of how we are being marked and what I could do to do as well as possible
1 note
·
View note
Text
bibliography
Penney, Darby, and Peter Stastny. The Lives They Left behind: Suitcases from a State Hospital Attic. Bellevue Literary Press, 2010.
“Willard Asylum Suitcases.” Willard Asylum Suitcases, www.willardsuitcases.com/. date accessed: 27/2/18
“Jon Crispin's Notebook.” Jon Crispins Notebook, joncrispinposts.com/category/suitcases/. accessed: 27/02/18
“How to Do Faux Leather Painting.” How to Splice Household Wiring to Extend Circuits - Do-It-Yourself-Help.com, www.do-it-yourself-help.com/faux_rag_painting.html. accessed: 14/04/18
“How to Mix Faux Painting Glaze.” How to Splice Household Wiring to Extend Circuits - Do-It-Yourself-Help.com, www.do-it-yourself-help.com/faux_painting_glaze.html. accessed: 14/02/18
Instructables. “Intermediate Leatherworking Class.” Instructables.com, Instructables, 29 Sept. 2017, www.instructables.com/lesson/Leather-Hardware-Buckles-and-Clasps/. accessed: 4/05/18
0 notes
Text
Critical evaluation
During the first week of this module, I was in a group to design an art school of the future based on sustainability. This challenged me as we had a lot of difficulties finding our roles within the group and not everyone was present on some of the days. Despite this, I feel that it was a good opportunity to make connections across the college and explore ideas in ways I hadn't before thanks to the different perspectives that people from other courses brought. I had the chance to look into and experiment with the idea of sustainability within an institution which I enjoyed as this is a passion of mine. I think that as a result of this my research skills have developed in a direction I hadn’t imagined, as the style was much more scientific than what I’ve done before. I was also challenged during the presentation at the end of the week as public speaking is not something I am particularly confident in and I feel that my nervousness got in the way of really presenting the work. This is something I hope to improve at over time. Overall, I’m happy with the research and work that I produced, in spite of the slightly more challenging group organisation.
I really enjoyed going to woodwork and learning to make the bags as I was introduced to a wide range of equipment and techniques that I know I can use in the future for costume and prop making. I feel confident now going to that department and asking Martyn if I need any help or advice about a project. I liked that we had a lot of creative freedom to decorate our bags and that we could produce something more conceptual to communicate the story of our characters. I’m pleased with the experimental techniques that I used to decorate my bag and feel a sense of achievement knowing that I can assemble things such as buckles by myself.
I wasn’t expecting to enjoy learning about wirework as much as I did, and I now feel relatively confident going down there to ask for help with work; something I know will benefit me in the future when making more sculptural costumes and props. I’m really happy with the outcome of the decoration on the wings. I initially intended to cover entirely with paper feathers, but I quickly realised that this wasn’t achievable with the time that I had. After adding the craft feathers I realised that this produced a much nicer look than if I had gone with my original idea, but it still retains the ideas I was trying to communicate.
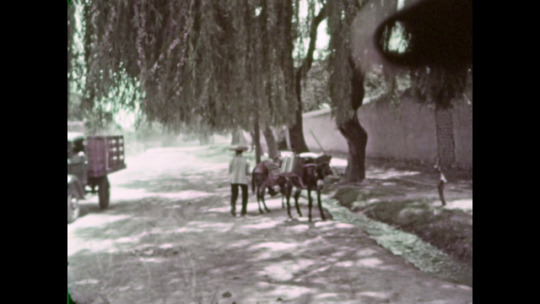
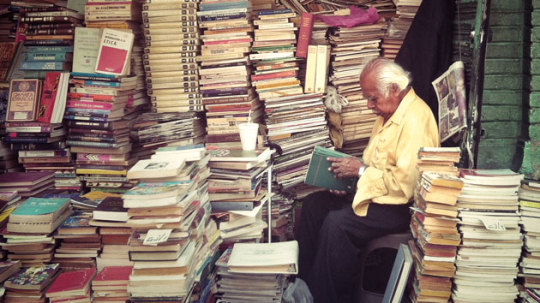
The research into the patients of Willard Asylum was very interesting and seeing the objects the left behind makes me appreciate that these were just people. After choosing my suitcase I did extensive research on Rodrigo. L, discovering details about his amazing life. After this, I found it difficult to separate what parts I wanted to include and which I would be more creative with. After Natalie’s workshop on building a character, I decided I wanted to use a character I had created in one of the 10-minute exercises we did that involved being given one of the suitcases and having to create a character based on the objects inside. I loved creating my character, Flore, as I feel that she is a person I can relate to, despite her life being drastically different to mine. By drawing upon my personal experience with mental health to create the reasons Flore was in Willard, I think that it has given a more authentic and realistic feel to a character whose story is very much like a dramatic telenovela. It was also a pleasure to get to explore Mexican culture and be able to incorporate aspects of it into my work, hoping that I can do it justice.
Working on exhibiting our work was something that I could get enthusiastic about, compared to the first week presentation, as it was with a group of people I knew were eager and cared for the work, as well as creating an interesting experience for the viewers. It was exciting to begin to think of creative ways of presenting our work and how we might add dramatic flare in order to get people to engage with it. I’m very happy with how this exhibition turned out as we were successful at building the atmosphere of the asylum and it seemed to really capture people's imagination. I feel that we did a good job at sharing tasks equally and managed to come to agreements fairly easily on what should be done of the exhibition. I definitely learned a lot about the health an safety risks associated with the room and how to work safely and creatively when dressing a space. After going around the college to see other courses work, it seemed to be a consensus among the class that the others seemed to lack presentation when showing their work and it often came across that they hadn’t put much effort into letting other people know what they were doing. This is a shame as I would have liked to have seen some exhibitions that I didn’t even know where there as they weren’t promoted properly. I feel very happy with our class for working together to create something that we can take pride in.
I know that the skills that I have learnt during this module will benefit me in the industry and in my college work. These skills include working well in a group, communication skills, working safely in an environment with machinery, dressing a room for exhibitions, research and presentation skills, and I also learnt to take pride in my work and how I show it.
0 notes
Text
presentation and q&a for our first week of BIAS300
https://vimeo.com/271373077
https://vimeo.com/271376407
0 notes
Photo

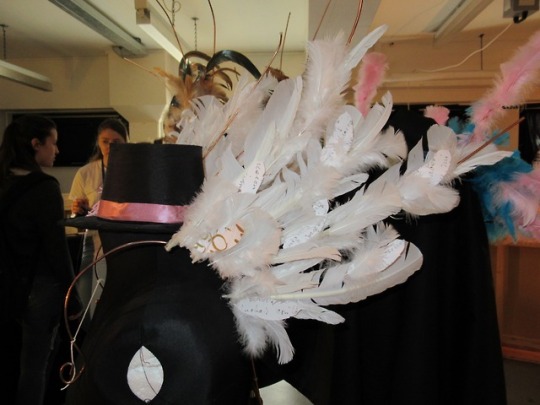
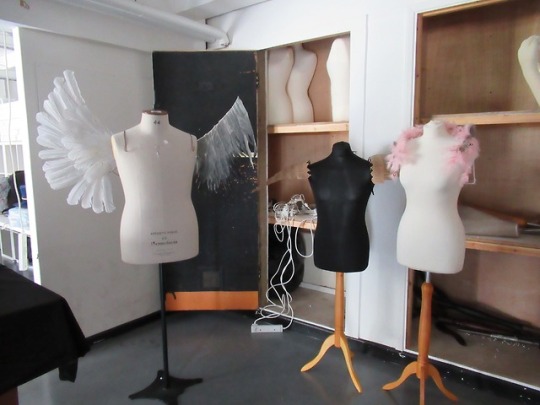
for decorating the wings I used a mixture of different size feathers and cut out feather shapes from pages of a book, attaching them with a glue gun.
The idea behind this is that during hard times in my characters life, literature has set her free. It also brings in religious imagery that is relevant to my character, as they resemble angel wings.
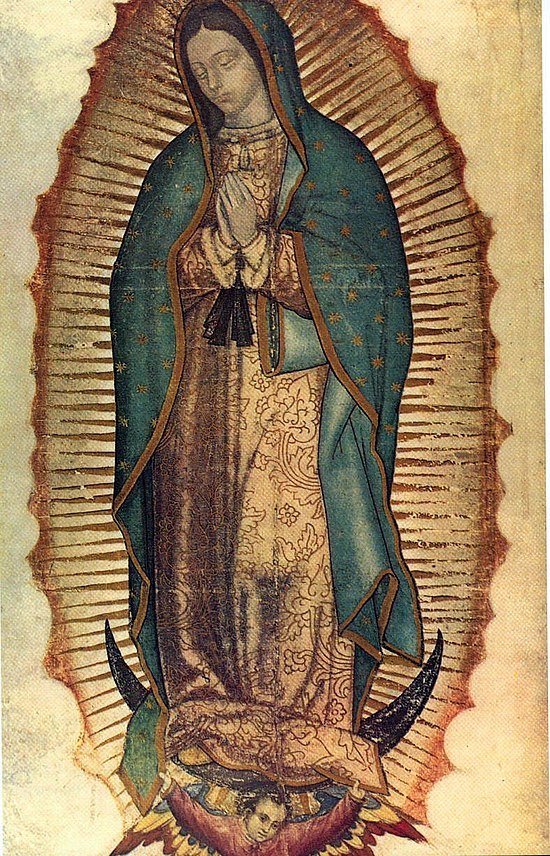
the book I used for the feathers was ‘The Diary of Frida Kahlo’ as I wanted the words to be in Spanish and I think that the handwriting flows better with the piece than if it were solid text. I also included a little of her artwork from the diary on some of the feathers as I wanted to incorporate Mexican folk art into the work.
Kahol is known for paintings depicting her struggles with mental health issues, so I thought that would be an interesting and relevant connection to the project.
0 notes
Photo
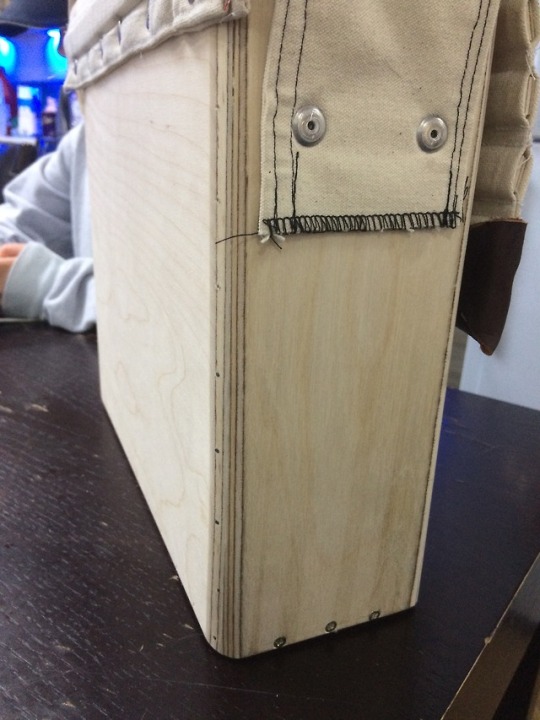
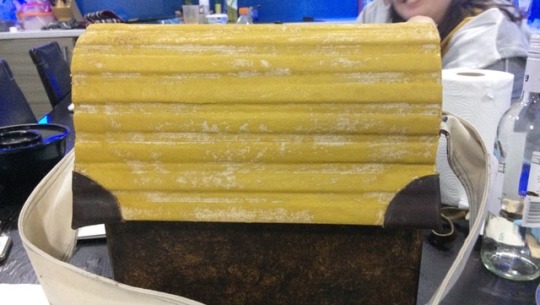


http://www.instructables.com/lesson/Leather-Hardware-Buckles-and-Clasps/Decorating the bag-
For my bag, I wanted it to be simple as nuns do not own a lot and my character was never rich. I decided I wanted it to look like a worn leather bag, but as my bag is made of wood it was a little bit challenging.
I did some research and found a few websites that explain the process, and using these I found a way to use this to create the effect that I wanted.
https://www.do-it-yourself-help.com/faux_painting_glaze.html
https://www.do-it-yourself-help.com/faux_rag_painting.html
I used a matt paint glaze mixed with acrylic paint; this means that the finish will be a little more water resistant.
for the first layer (in yellow ochre), I used 1 part paint to 4 parts glaze and lightly and roughly covered the bag
for the second layer (in mid brown), I used the same ration. I covered the bag roughly with the paint/ glaze mix and then used a plastic bag that had been scrunched up to add texture to the paint. I repeated this process twice.
for the final layer, I mixed black and brown paint with 6 parts glaze to 1 part paint and dabbed it on with a sponge.
after the paint had dried completely I went to the woodwork room and sanded it down, starting with a rougher grit sandpaper and working my way up to a finer grit, so that the finish would be smooth.
I think that this technique has been quite effective after a little trial and error.
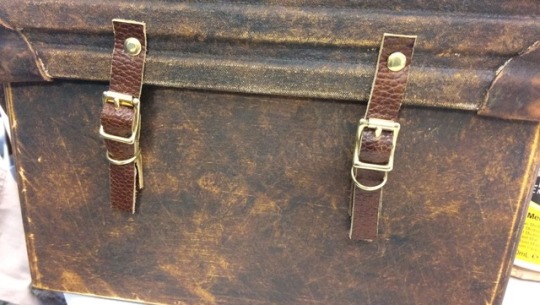
for the fixtures, I used closed headed rivets to attach the leather to the bag lid, and pop rivets to attach the leather and buckles to the bag front. I tried to used rivets on the front of the bag as well but they weren't long enough, and as they're barely seen I dont think it affects the look of the bag too much.
I used this website to figure out how to put together the buckles.
http://www.instructables.com/lesson/Leather-Hardware-Buckles-and-Clasps/
0 notes
Photo


After arriving in America, Flore got to explore where her favourite authors lived, wrote, and died. After being a nun for several years she once again finds her love of clothes, and with the little money she has buys a new hat in her favourite colour.
Despite the escape and sense of adventure her life now has, the grief over her fiances’ death resurfaces as it was never fully dealt with. She develops anxiety and depression and begins to experience panic attacks. Naturally, she was very scared and confused by this and once it had become very severe, she checked herself into Willard Asylum in the late 1940′s, where she stayed for the rest of her life.
0 notes
Photo


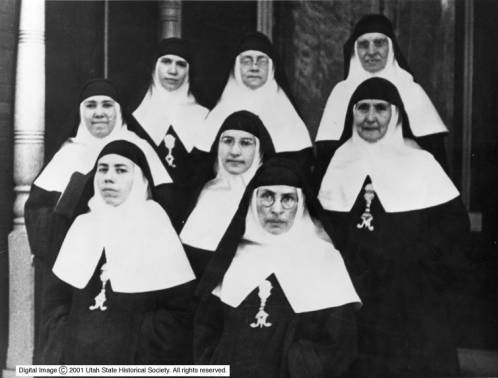
Following the tragic death of her fiance, Flore decided that she never wanted to love again and became a nun to dedicate her life to god instead. She still retained her love of literature, but now it was seen without the same hopefulness and romance as before.
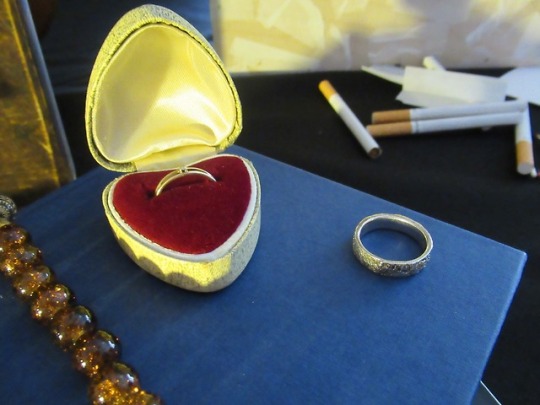
All though she was supposed to give away almost all of her earthly possessions when joining the church, she still kept her engagement ring and what would have been her fiances' wedding ring.
After several years with the church, she found that despite her better judgment, she had begun to fall in love with the priest from their local church. Having vowed to never fall in love again as well as the impossible nature of their relationship, Flore decides to flee to America to pursue her first love, literature. she wanted to explore the North East coast of the USA, where her favourite writers were from.
0 notes
Photo
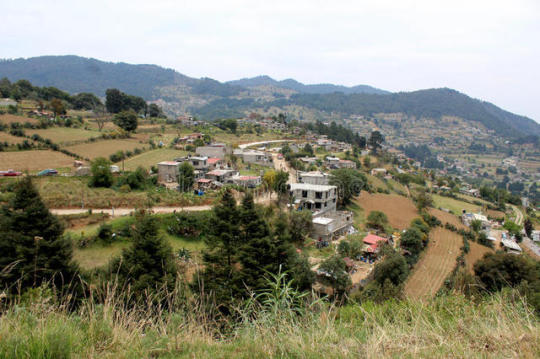
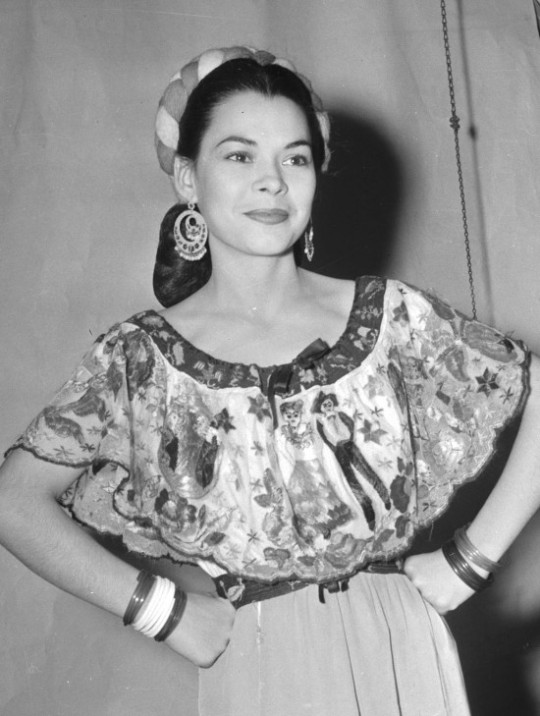
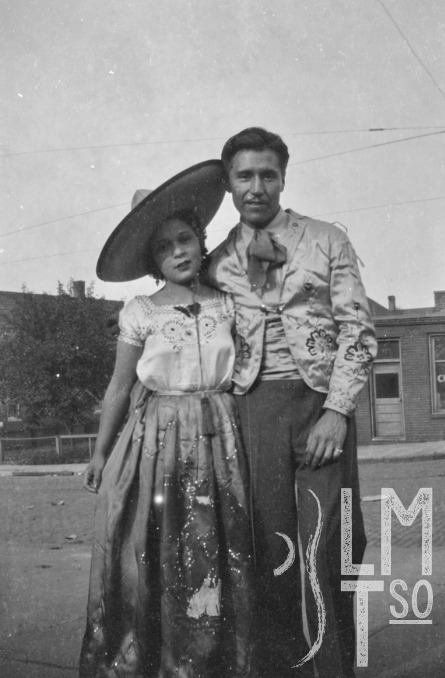

I created this mood board to communicate my characters life before becoming a nun; she lived in a small, rural village in Mexico where she lived with her family and was in love before her fiance was killed in an accident.
She had a great love of literature and I imagine her as quite independent but is also very romantic, inspired by the books she reads and her parent's classic love story.
because of her love of literature, she also read several books in English which helped he once she arrived in America. her favourite authours were Walt Whitman and Emily Dickenson, who were both from around New England; this is why she was near New York when she was admitted to Willard, she wanted to be near where her favourite authors had lived.
0 notes
Photo


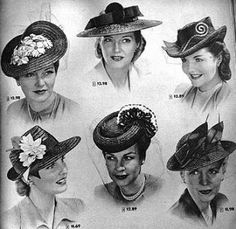

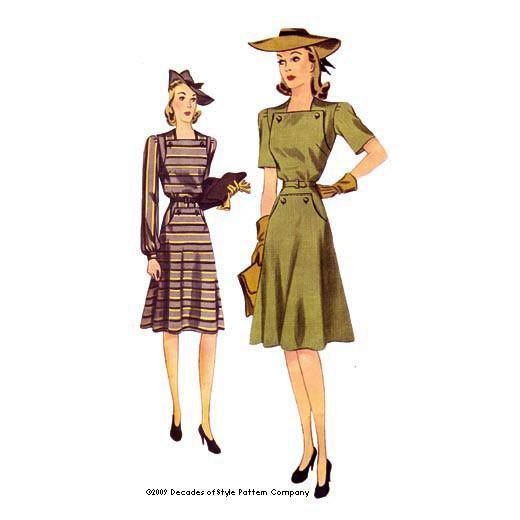
I chose the toque hat pattern as it was most similar to the style of 1940′s hats I imagine my character wearing when she comes to America.
These images give me inspiration for how I will decorate my hat, I think I might include flowers on the stand of the hat too.
0 notes
Audio
this song is the sort of feel that I imagine my story having- melancholic and beautiful
0 notes
Photo
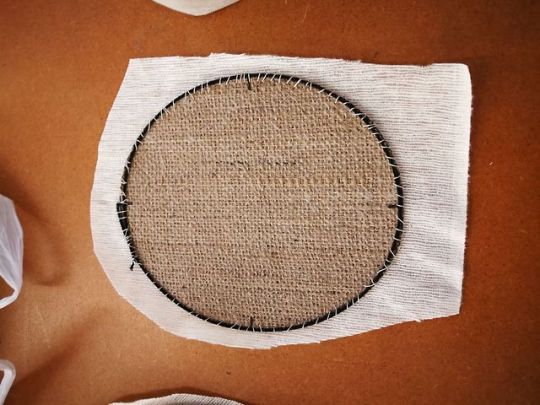


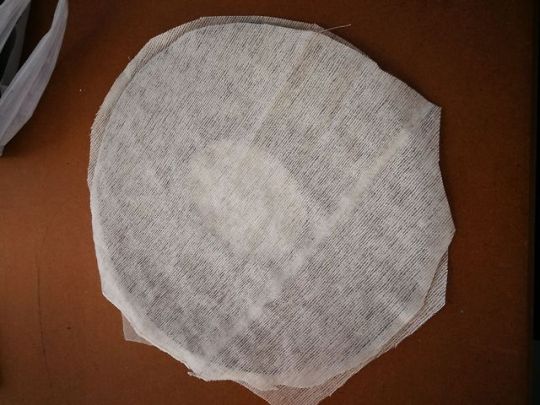
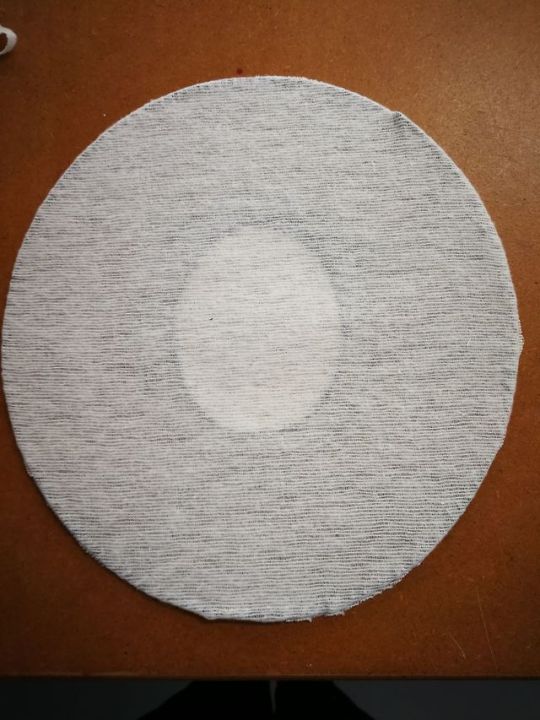
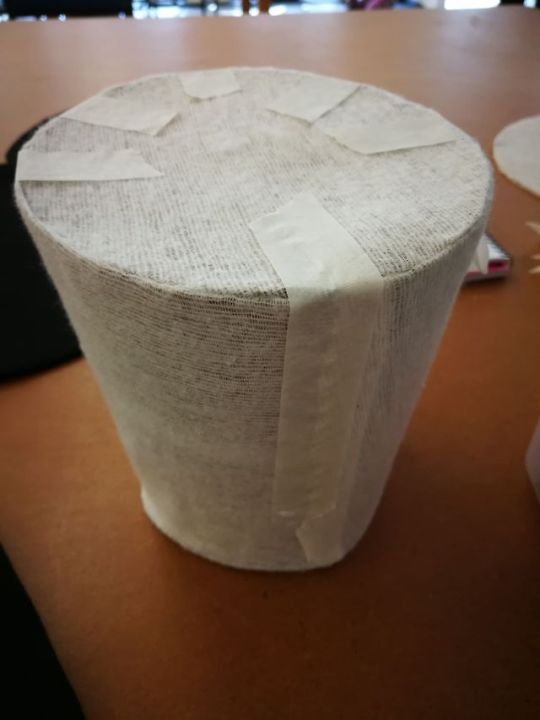
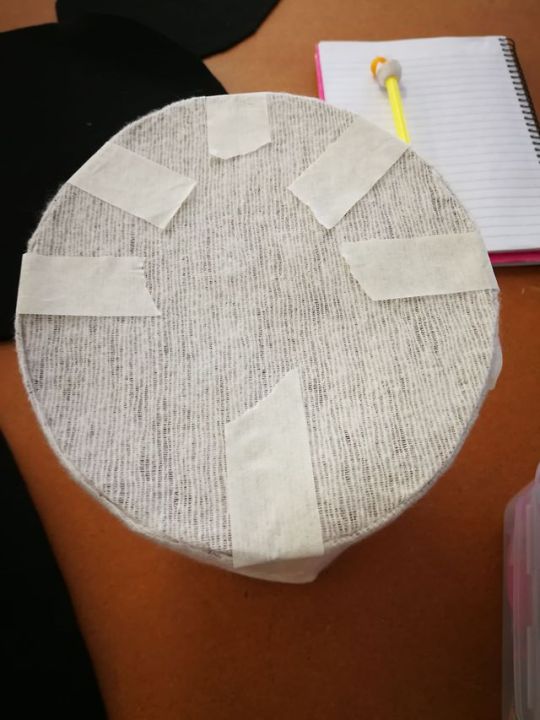
Hat making: pt 1
Cut out and alter the pattern in the previous post using theatrical buckram, then cut a strip about an inch wide and 1cm shorter than the length of the sides of the stand. When cutting out, be as accurate as possible or it will make construction difficult.
use this piece to sew together the sides of the stand on the inside using a zigzag stitch and a strong needle and thread. Stitching here will strengthen the back joint. The extra piece is sewed on the inside so that the join on the outside is smooth and won’t show through the fabric
Wire-
measure the circumference of the outer brim, the millinery wire needs to be long enough to overlap by about an inch to 2 inches
be sure that the wire sits right n the edge of the outer brim, use a blanket stitch to secure and making sure there are no gaps between the edge and the wire
repeat this process for the tip piece of the hat, but have the wire line up just inside the edge so that putting the hat together is easier.
0 notes
Photo
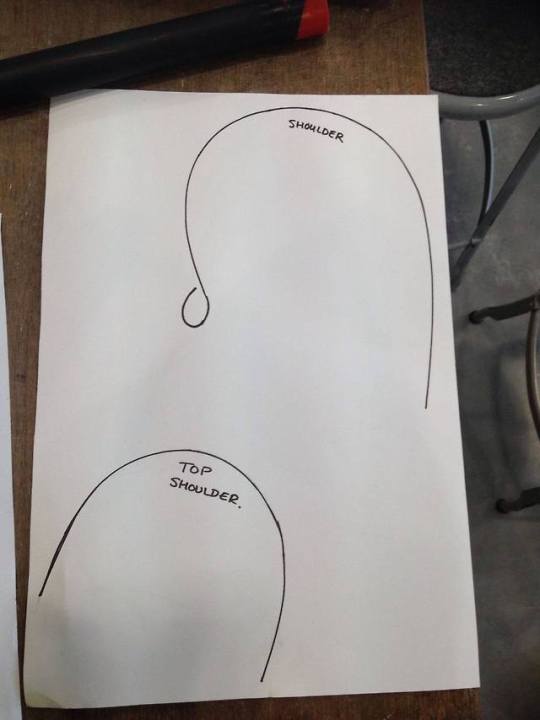
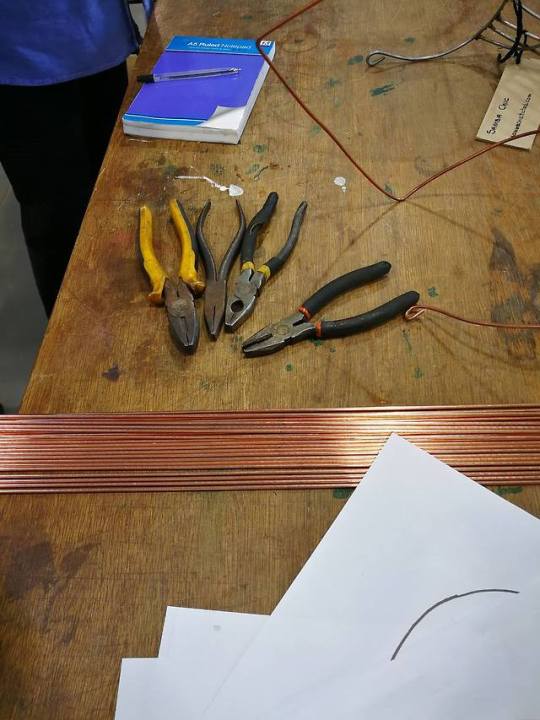
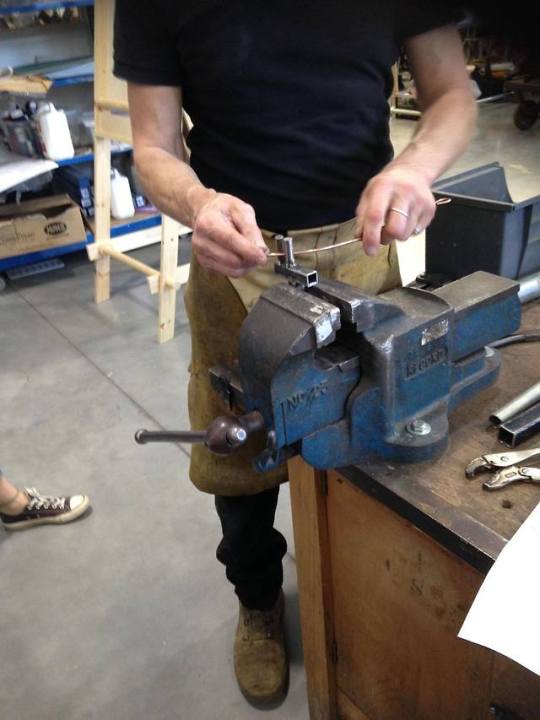
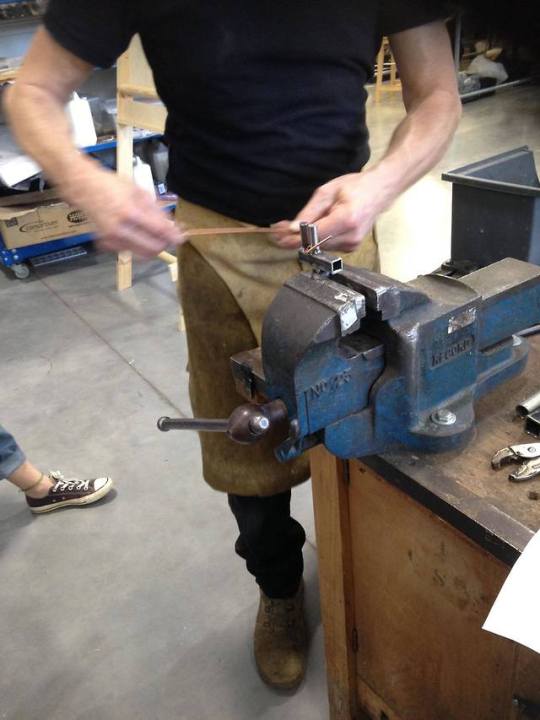

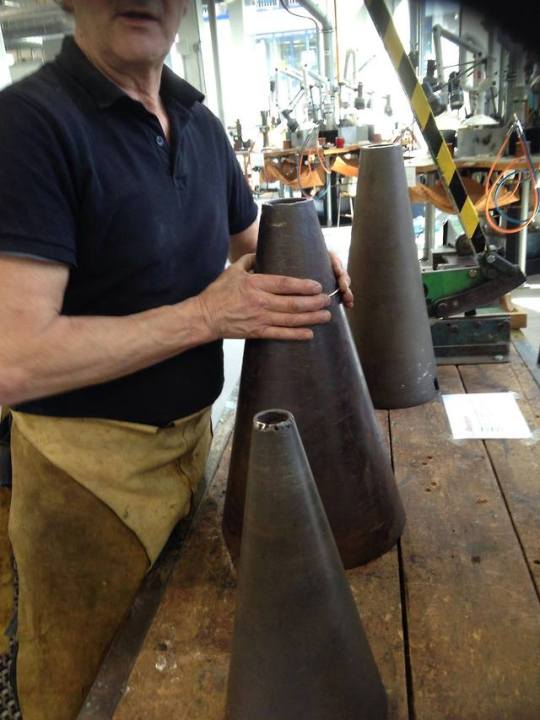
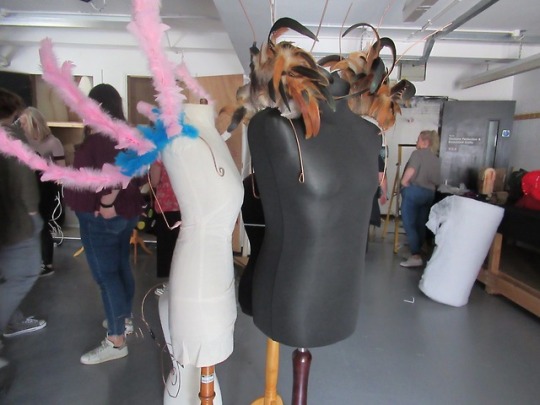
Wirework-
for our wings, we used gas welding rods with a copper coating that keeps the steel clean. (image 2) always cut pieces around 5cm longer than you need, as it can always be trimmed down later
to create the scroll end of the wings we used a needle nose pliers and a metal bending fork that Noah made that fits into the vices to bend the wire. (image 1,3,4)
we used a bending cone to shape the rods to go over the shoulders (image 5, 6)
This shape of wings will work for most people as there is a certain amount of bend to accommodate different bodies. Of course, if making wings for small children or particularly broad people, the shape will have to be altered.
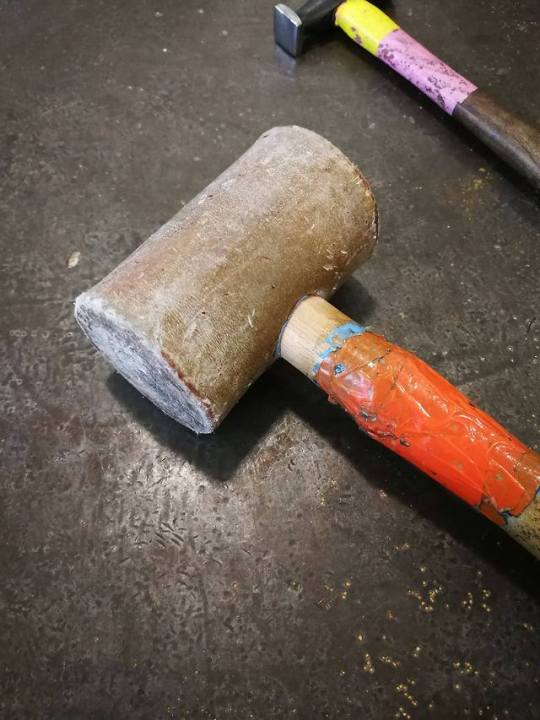
after shaping the shoulder, put the wire in a vice at the point where it will bend across the upper back and bend it to a 90degree angle, giving it a few taps with a mallet (image 7)
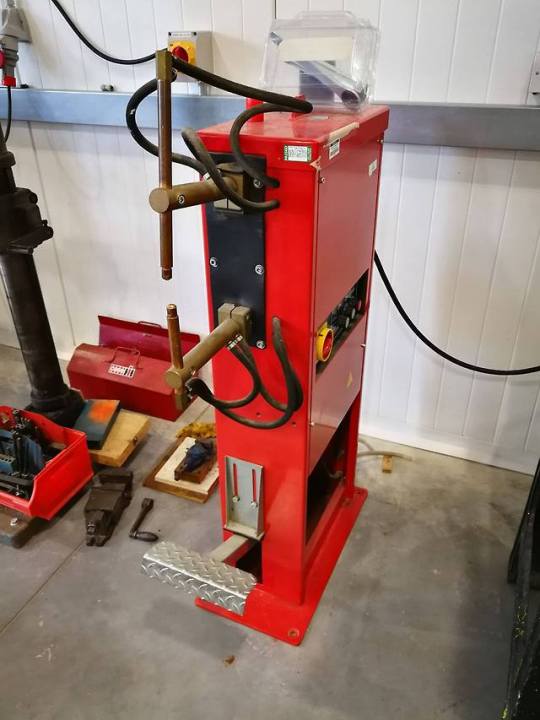
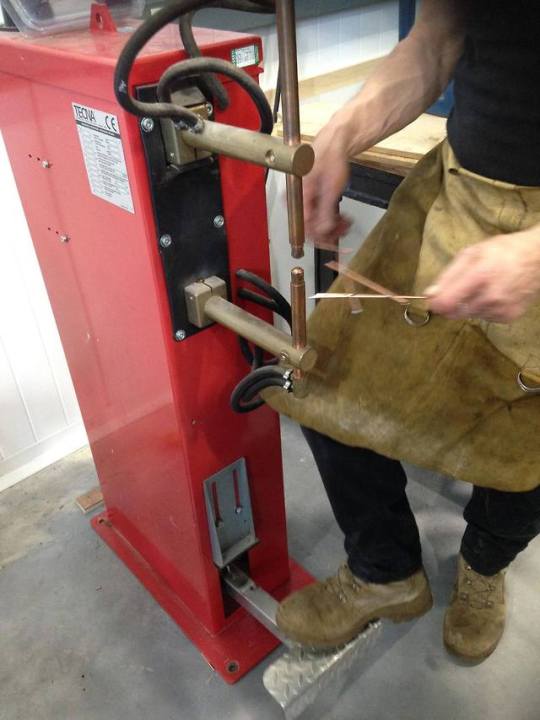
once both sides have been shaped, place the 2 straight pieces on top of each other with a small piece of wire so that when it is spot welded it holds together. (image 8,9) The electrical current of the welder is trying to pass through the metal that is placed in the way, fusing the 2 pieces together
I enjoyed learning about these machines, techniques and gaining new skills, and Noah was happy to guide us. After initially feeling a little fearful of the large and potentially dangerous machines, I gain confidence in using them and even went back down there 2 weeks later to work on my own to finish my wings. I can see this knowledge and access to the facilities be really helpful in the future when constructing costumes.
0 notes
Photo
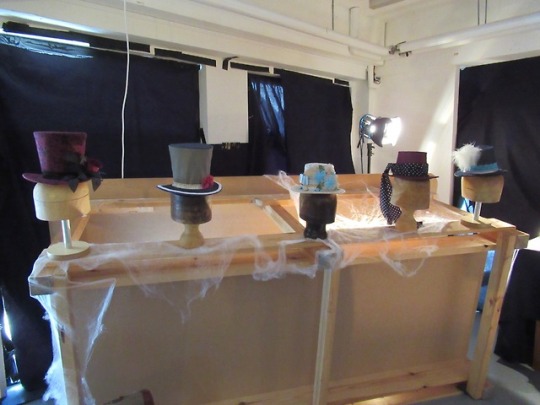


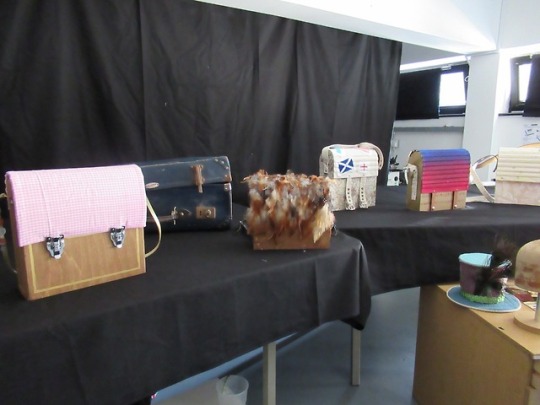
these photos show the exhibition once it was set up. We borrowed lights from the ERC to provide a focused light on the work while still keeping the room relatively dark. Courtney was able to produce a soundtrack that we imagined to sound like the asylum to run in the background which consisted of creaking noises, rats and occasional screams. I think this really added to the atmosphere of the exhibition, along with the dark lighting. It reminded me a little of the type of tours around historic places that recreate with it was like in that period of time.
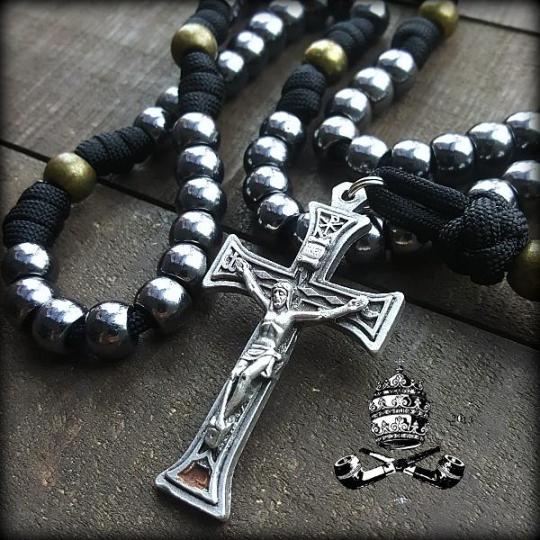
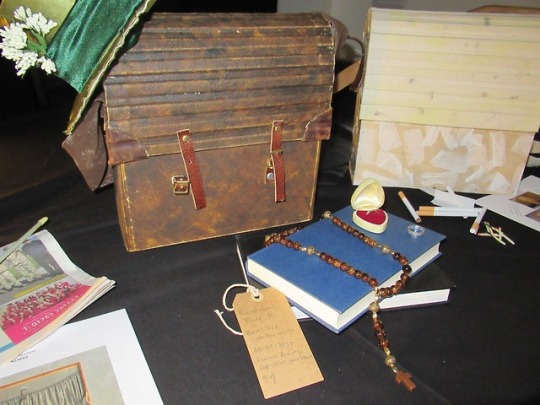
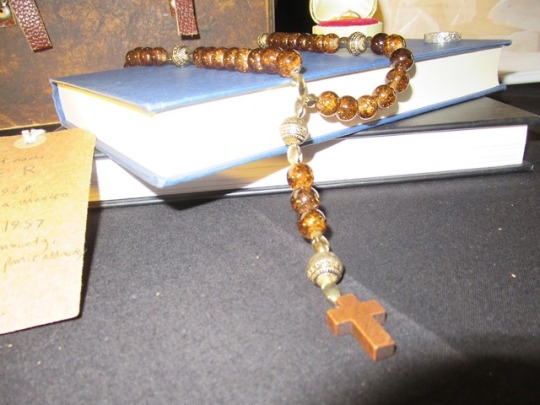
For my part of the exhibition, I displayed my bag with several objects including some books (because my character loves literature), a rosary that I made (she becomes a nun), an engagement ring that I imagine her fiance giving her, and a mans ring (perhaps the ring what would have been her fiances' wedding ring), as well as my hat; although unfortunately I didn't manage to finish it completely in time.
I feel that, as a nun, my character would not have many possessions, even after leaving the church for America. I imagine her holding onto the most important objects in her life (the rings) after the death of her fiance and joining the church, even when she was supposed to give away all her possessions. She also carries with her the symbols of the things she loves the most; god, literature, etc. I imagine the hat is one of the first and only things she bought when she came to America, as her favourite colour is green.
I wrote a label that gave her name, date of birth, date of admission into Willard Asylum, and reasons for being admitted including anxiety, depression, panic attacks, and grief all linked to the death of her fiance. Although I created this character, I have personally experienced these mental health issues after losing a loved one and know how that can affect a person. I feel that drawing upon that personal experience has brought a bit more depth to the character and makes it seem more authentic and realistic as a reason someone might be admitted to an asylum.
0 notes
Photo
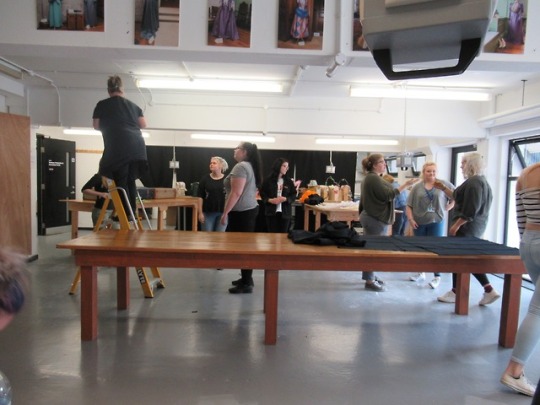
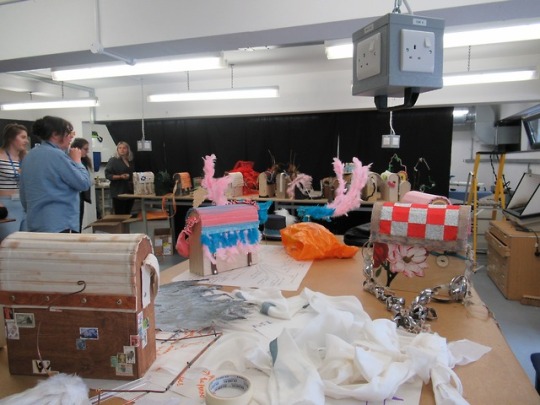
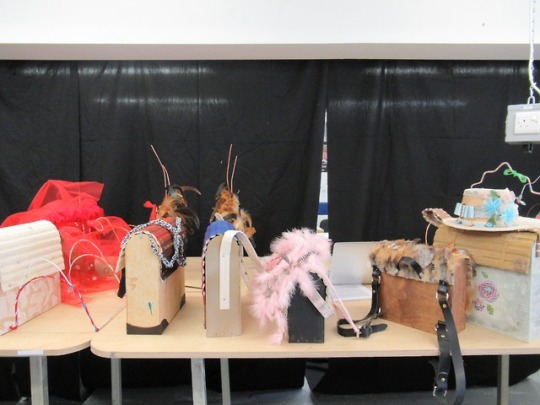
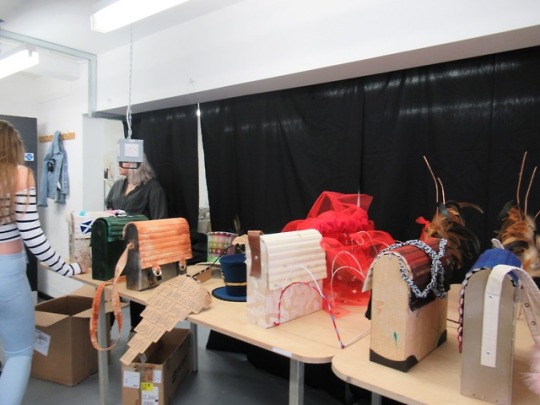
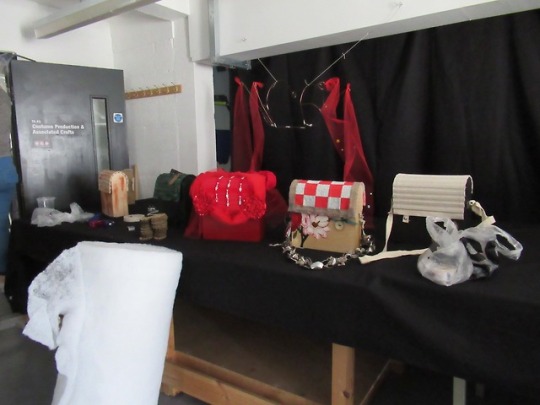

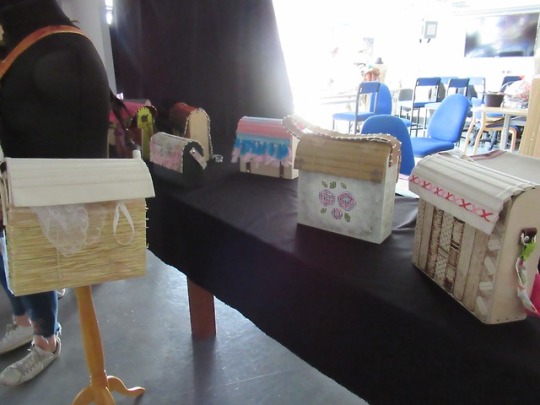
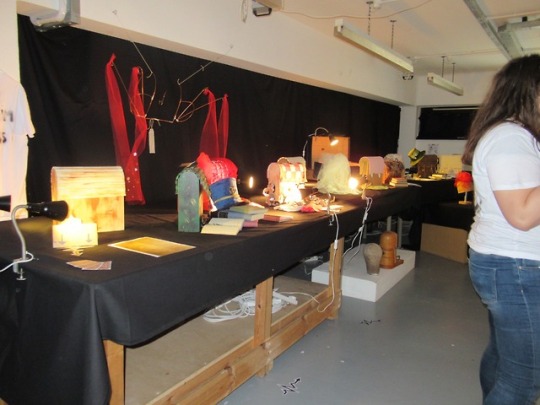
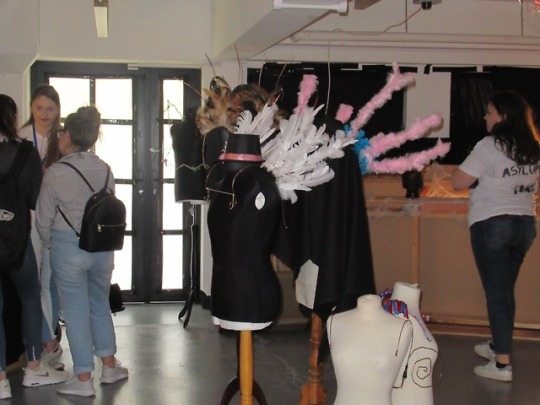
in these images, we are setting up the exhibition for the rest of college to see our work. before setting up we gathered all our objects together and talked through the characters we have created and explored. It was really interesting to see everyone else's work properly as up until that point I’d only seen them half complete and without the context of the characters.
The basic idea of our exhibition is that the room is the attic of the asylum in which the bags were found. We wanted it to be really atmospheric with lighting and sound. We decided to black out the windows and arrange the bags on the tables alongside the objects we have chosen for our characters. the wings will be on the mannequins so its as if there are people standing around, sort of the ‘ghosts’ of the asylum.
0 notes
Photo

instructions for measuring the head for hats and things to consider such as functionality and allowing room for a wig
0 notes
Photo
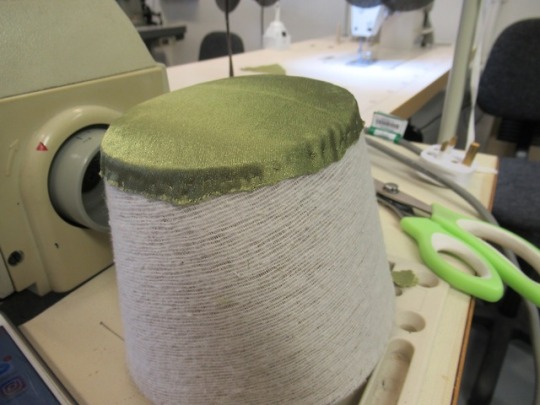
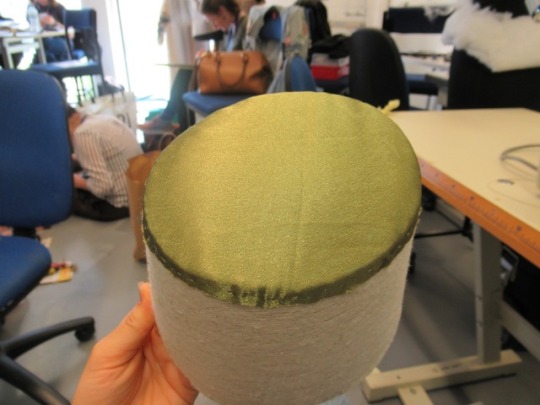
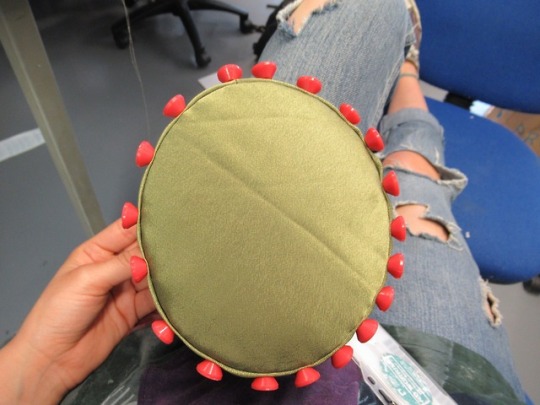
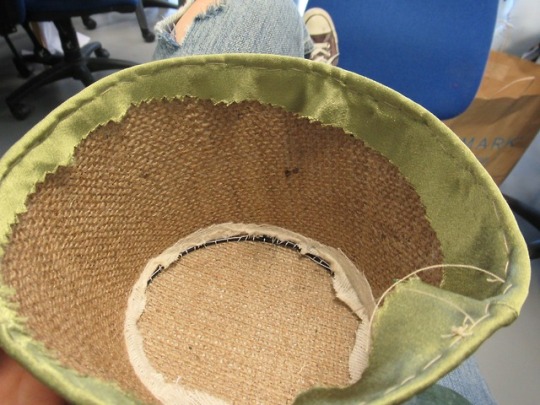
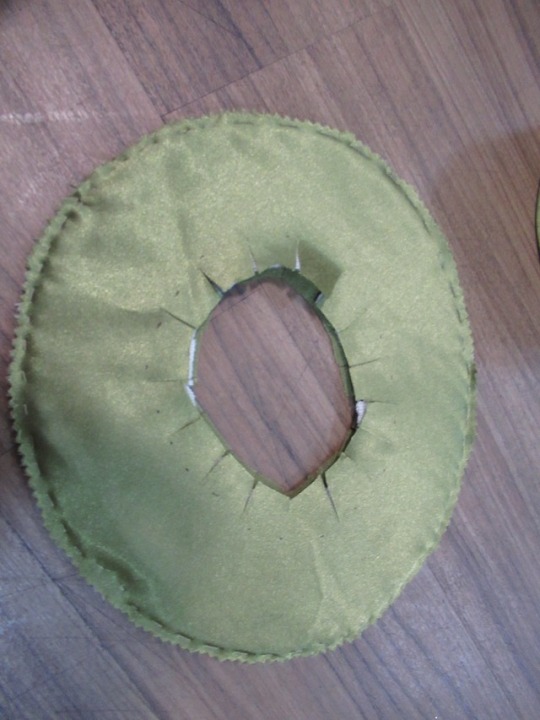
Hat making: pt 2
using the pattern, cut pieces to cover the hat out of the fusible domet and iron onto the buckram. for the brim, cut 2 and fuse the edges together. cut the centre to match the buckram, with a little left to fuse to itself.
for the outer fabric, using the pattern cut pieces to cover the hat like with the domet but adding at least 1.5cm seam allowance.
(image 1 & 2) starting with the tip, pin the outer fabric to the edges of the tip and stab stitch as small as possible so that it is not too visible.
for the stand, sew the fabric piece so that it is as tight as possible when put on the stand. At the top (image 3), fold the seam allowance in on itself and sew to secure as small as possibe so that it is as invisible as possible. At the base (image 4), fold the seam allowance into the inside of the hat and secure. stitching here as much as it will be covered by fabric.
for the brim (image 5), cover the brim with the outer fabric and pull tight, securing by stitching around the outer edge. trim down the seam allowance. cut the middle out up to the edge of the buckram. cut into the buckram and fabric up to the 1.5cm seam allowance, creating tabs. pin the tabs of brim into the base of the hat and secure with running stitch. it might also be good to sew the very edge of the base to the part just beyond the tabs on the brim to make it extra secure.
for the sash around the stand I used the same process as covering the stand and folded the fabric in half, creating crease details.
0 notes