Text
Final Images Layout
I have decided to make 10 typologies of my images after getting some feedback from my lecturer. I was hesitant at first as I thought I may not have enough shots to make these but once I had a good look through them I felt this was the best option.
Layout Option 1
I quite like this layout due to the portrait canvas border. However, my images are not in a square format and I don’t wish to change that either. so they won’t look exactly like this but I am happy to have a portrait format. This is my initial choice so I will be going with this layout unless I find something better.

0 notes
Text
Favourite Images
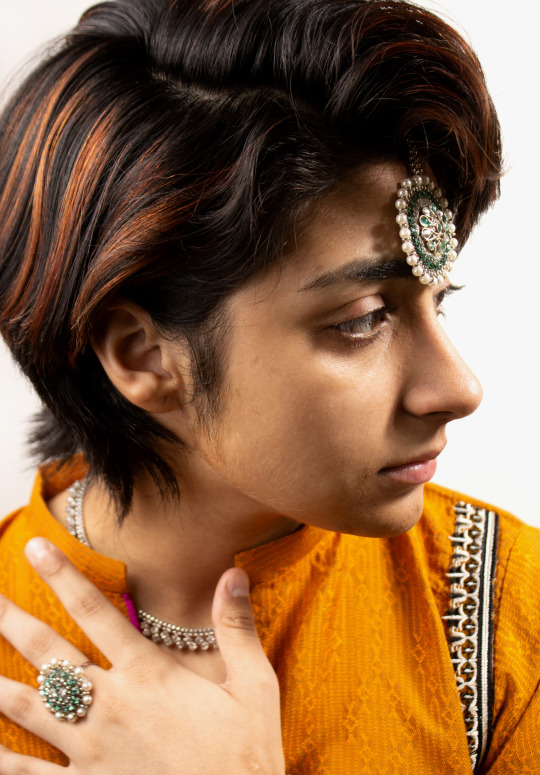
I quite liked this image due to the high vibrancy in it. I also felt orange was a really good colour and worked very well with my skin. I focused on the cultured jewellery in this portrait such as the the necklace, the ring and the “maang tikka” which is a traditional piece of head jewellery which is worn by South Asian women. I believe I did a great job with the lighting as I like the way I have lit this image and I am beyond happy with it. I optimised this in Photoshop and done a little bit of tweaking, nothing extreme. Overall, I would be happy to submit this image as one of my finals because it displays a good idea of the South Asian culture which I am aiming towards!
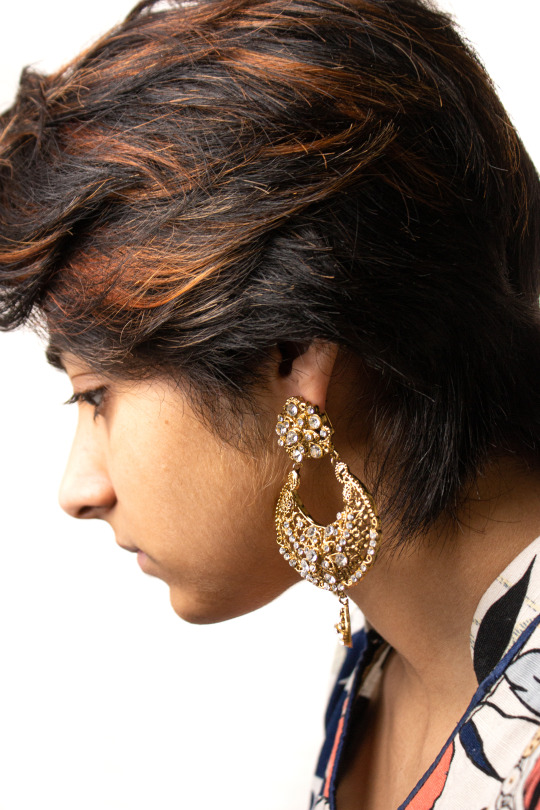
I thought this was a really good image as the main focus is the traditional earring. I believe this would be a good image to display the culture however, I feel that I could do something similar to this but with a different approach for my next shoot. Although I do like it being basic as I do not want to overdo anything and want to indicate my idea as plan and simple. I am happy with the framing as it is not too close but also not too far, I felt the same way about the focus! My face is blurry but not as blurry that it is not visible. I optimised this in Photoshop and kept it completely straightforward. I adjusted the highlights, contrast, texture and made other smaller adjustments.
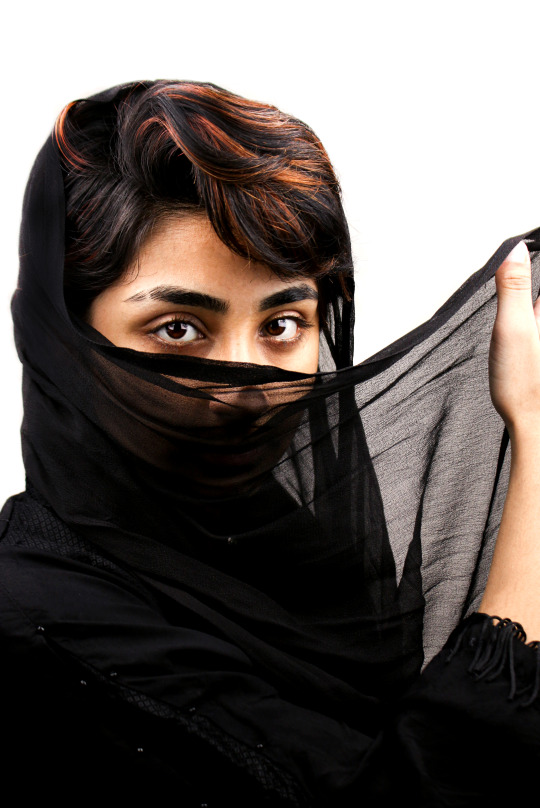
This image is the most traditional It can get I believe. A lot of South Asian women wear veils and cover their heads (sometimes their faces too) as a symbol for “protection and freedom of mobility”. Some may think of this as very empowering. It is also practiced for religious purposes too. I am glad that my skin worked well with black and I am pleased with my blank facial expression and how I have managed to pull it off. The red in my hair is a great contrast to the colour black and I think this enhances my image further and gives it a really nice look and feel to it. Again, this was also optimised within photoshop. I made a few adjustments to begin with. I made the background a little whiter and used the dodge tool to brighten up the eyes slightly. I then, used the spot healing brush tool to do a bit of skin retouching.
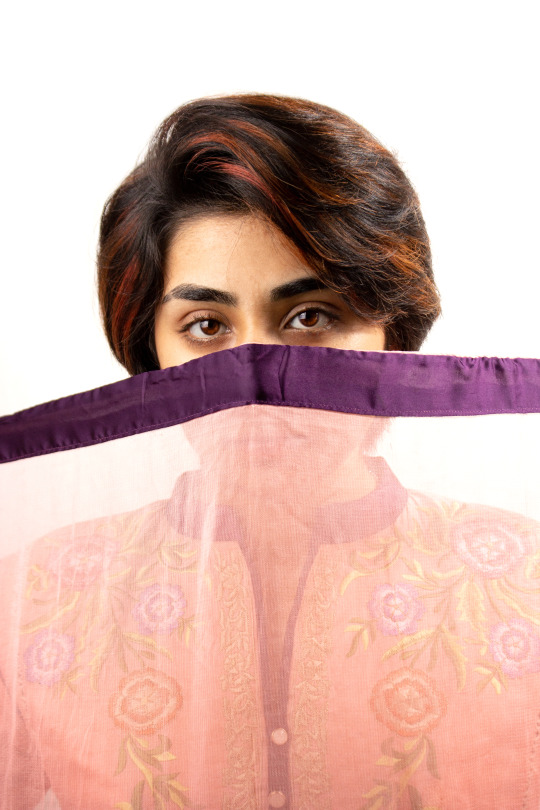
Another Image I thought that met the requirements I needed was this one. Again, I am giving a thought to the idea of the traditional veil. I very much like the colours in this and feel that it is a good portrait. My facial expression is fairly similar to the previous image, however, my eyes are lighter here and the colours are brighter which is why I feel that this gives off a different type of vibe and atmosphere of this image even though it is similar yet different. I adjusted a few things in photoshop. Brightened up the eyes and worked on skin retouching as well as fixing the background and the crop slightly.
1 note
·
View note
Text
Shoot 2 Contact Sheets
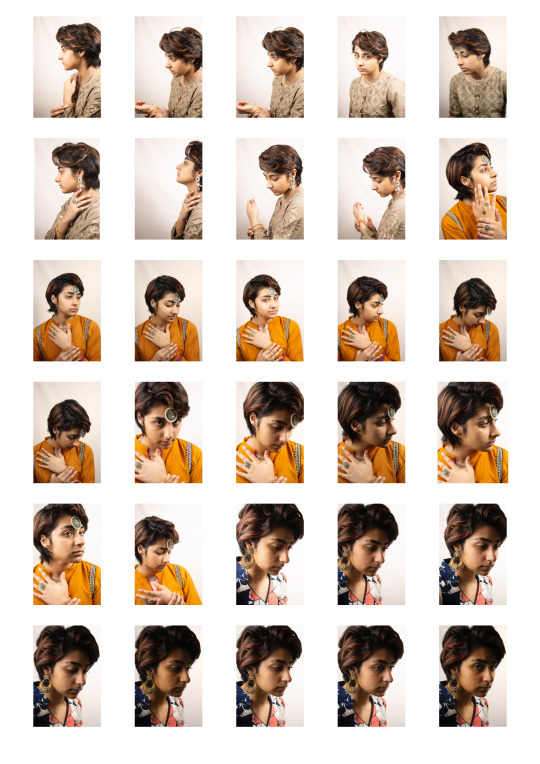
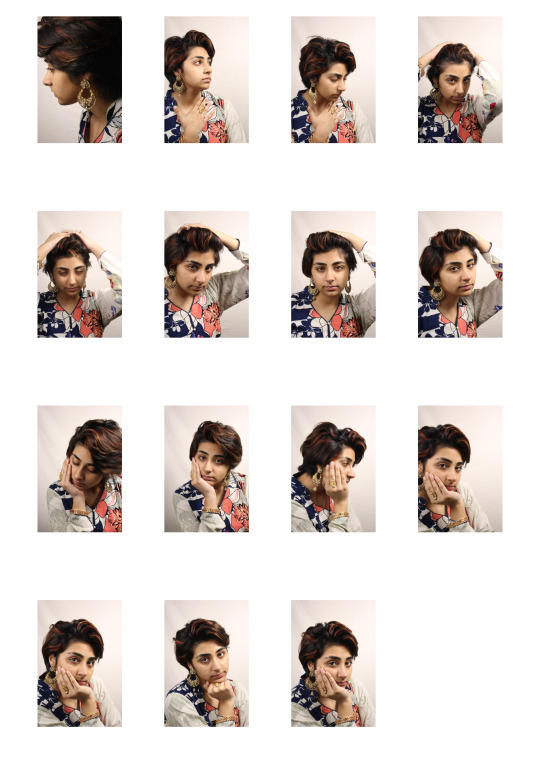
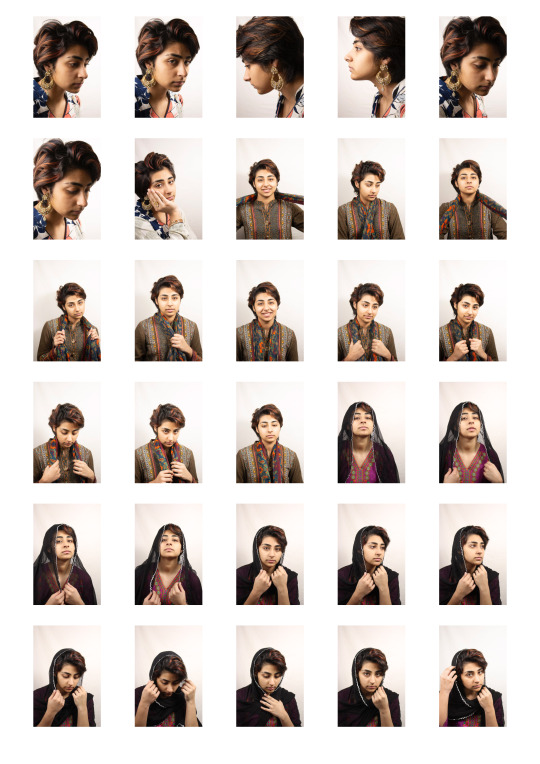
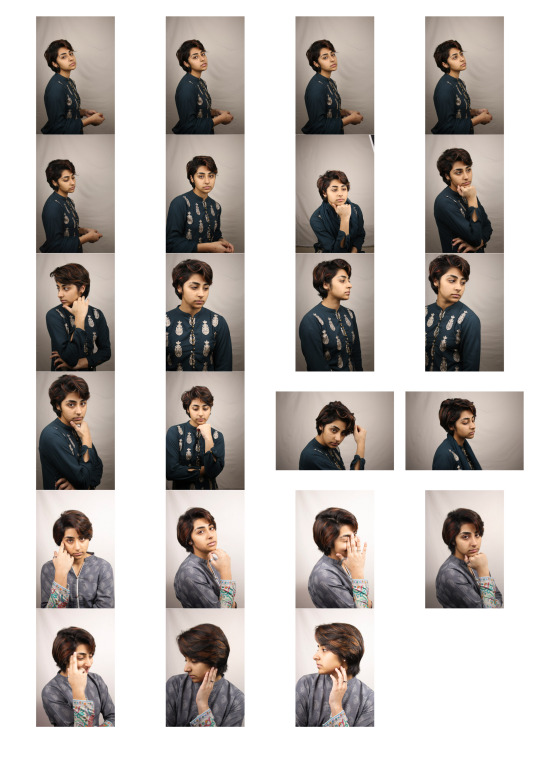
For my second shoot, I decided to add some jewellery and focus on the traditional part of my culture. I feel that I still need to work on my background even though it is much better than the last shoot and I can easily fix this in photoshop but I want to be capable of being a good photographer without relying too much on editing softwares which is why I will keep trying until I get it right. I also focused a bit more on details as it was a “in the moment” type of thing. I did not give this a thought before but I think this is something I might also look towards doing.
0 notes
Text
Shoot 1 Contact Sheets
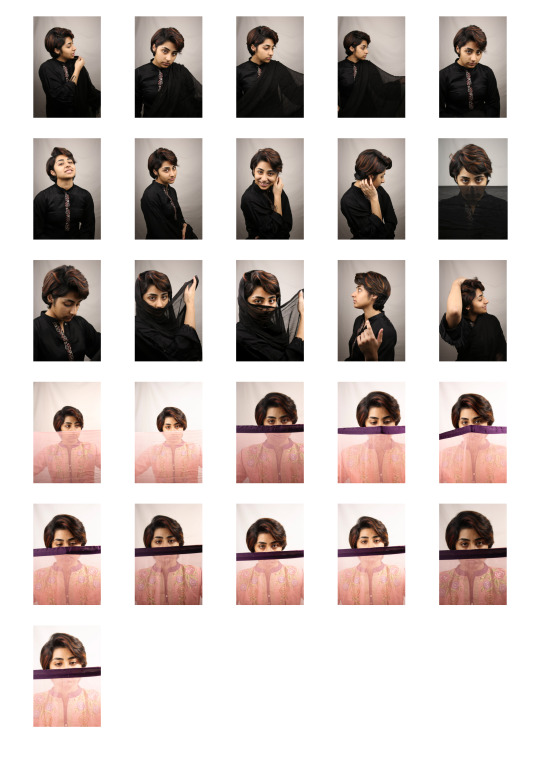
For a first attempt, I feel I have done a good job. However, I had trouble lighting the background. I was okay to have a slightly grey coloured background but I think for my next shoot I will aim to capture it clean white, if possible. I found it fairly to be photographed as this is not usually the case so that was surprising. I had my mum help me from time to time, although, I used the timer as well. Overall, I will aim to take more images and work on my facial expressions as well as my background.
0 notes
Text
Inspirations
I managed to find a few examples of what I am trying to aim towards. Although my images won’t be this extreme but this is an idea of what I want to achieve in a similar way! I will be focusing on close up portraits surrounding the face and the cultural aspects.


References:
http://rebloggy.com/post/photography-beauty-x-u-c-p-indian-i-asia-culture-photojournalism-india-bindi-ind/125619820395
https://www.pinterest.co.uk/pin/402579654191302806/?autologin=true
https://www.browngirlmagazine.com/2019/07/tapatio-in-my-tiffin-swag-true-life-of-a-third-culture-desi-kid/
0 notes
Text
Lighting Diagram
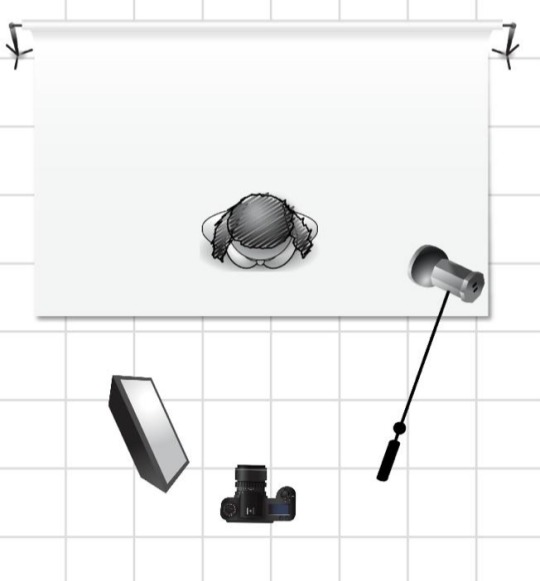
This is my lighting set up. I bought a lighting kit off of Amazon as I wanted to make sure I get the lighting I need for my portraits and I improvised my background using a white sheet which I just hung from the wall. I set the camera on timer to shoot self portraits. Although my mum helped me throughout as well.
0 notes
Text
Personal Project Introduction
I initially wanted to do fashion portraits as my final project, however, due to COVID-19, I have had to change my project. I have decided to remain with the idea of portraits and fashion but, in a slightly different sense. I will be shooting self-portraits at home surrounding the Asian culture fashion using the equipment I have. At first, I was quite reluctant with this idea as I was felt I would not be able to do this and the thought of photographing myself just did not fit well with me. After much contemplation, I agreed to stick with this idea as it is still similar to my initial idea and I am not too far off it.
I did consider just shooting products around the house but I feel that is not my strongest field of work and that I work best with portraits. I also want to challenge myself and aim towards something higher.
1 note
·
View note
Text
Darkroom Final
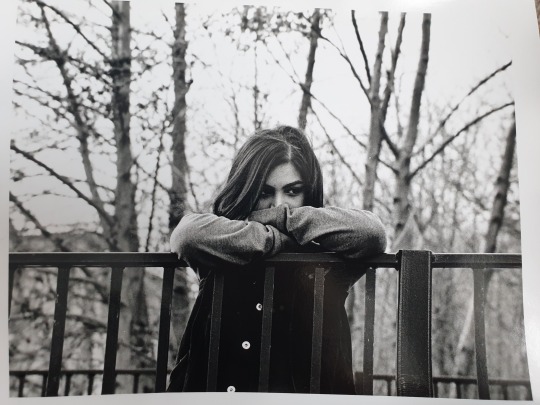
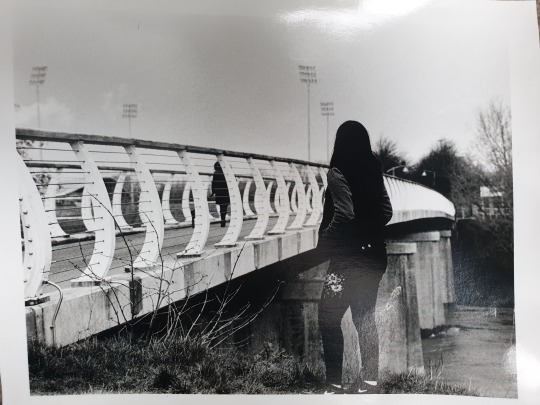
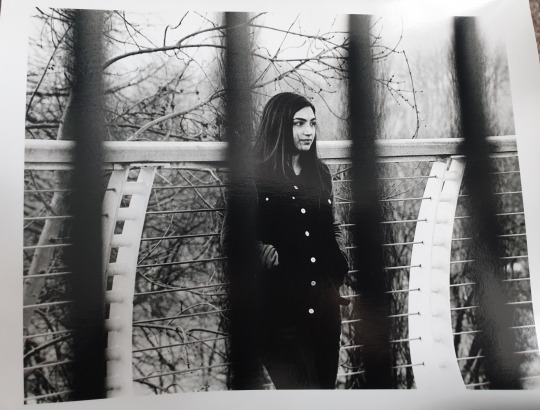
These are my 3 final images for Darkroom.
1 note
·
View note
Text
Artisan Evaluation
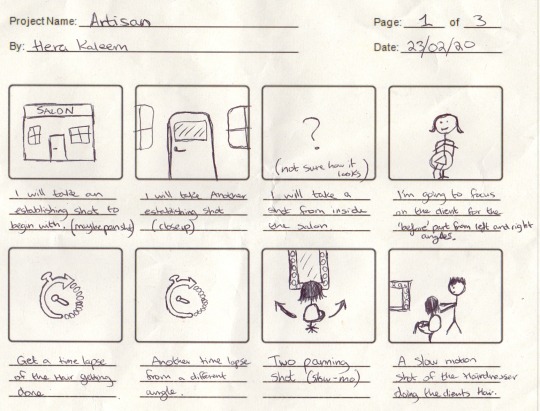
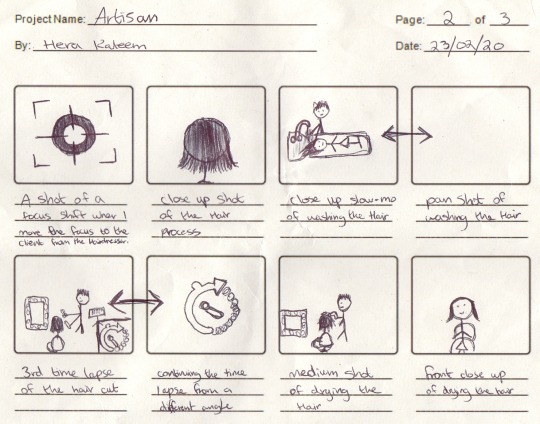
For my Artisan project I shot a short video on a hairstylist in their salon. I was quite hesitant in the beginning with this idea as I was afraid it might not go as planned and I would have to re-shoot. However, I got plenty of shots from all sorts of angles which meant I did not need to go shoot another round. I tried my best to follow my storyboard and I feel that I have achieved to do so. I edited my video on Premier Pro and I quickly caught on how to use it. I used different effects, transitions and other special tools. My video is quite diverse in terms of angles I shot and different techniques I’ve used. I added some background music which I found on you tube and thought it would be perfect with my video. Overall, I feel that I have done a good enough job for this project as It was my first time doing a project based on moving image since last year in NQ. I am very pleased with the final outcome although I am still a bit rusty in video editing and hope to get better at it in the future if we are given more projects like this as I would love to learn more.
0 notes
Photo
Illuminate - Research Task
Group - Jennifer, Katie, Chis and Scott
Our task was to research Digital Noise Avoidance.
Digital Noise Avoidance is
Ways to avoid noise is:
Low ISO
Use a tripod
Larger camera sensor (Full frame)
The exposure depends on the things you are shooting. But it’s better to have Long shutter but use it carefully.
Large aperture, so low number (i.e.F2.8)
Shot in raw
Use in camera noise reduction if it has it.
Keep camera cool
Cover view finder to help expose properly without more light getting into the camera.
Prime lens is better in low light because it uses less light because of less glass in lens, so makes less noise in image.
11 notes
·
View notes
Text
Reciprocity law/ law failure
As there is less light, the silver halide grains will be struck by photons less evenly, causing the a dramatic drop in density after a few seconds of the correct exposure. This severely decreases the response to low light levels aka the films reciprocity failure. Not all film is the same- some will respond better than others.
B&W
Exposure in excess of 1-2 secs can result in reduced depth, resulting in very weak, if not non existant shadows
Colour neg
Exposures in excess of 20 secs, will result in shifting of colour, as the films dye layers can absorb light unevenly during prolonged exposure
Slide film
Exposures in excess of 5 seconds have similar colour shifts to colour negative film. This colour shift is extreme in high saturation film such as Fuji Velvia.
14 notes
·
View notes
Text
Illuminate Research Task
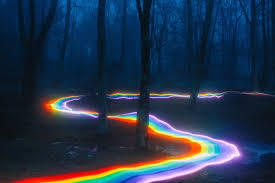
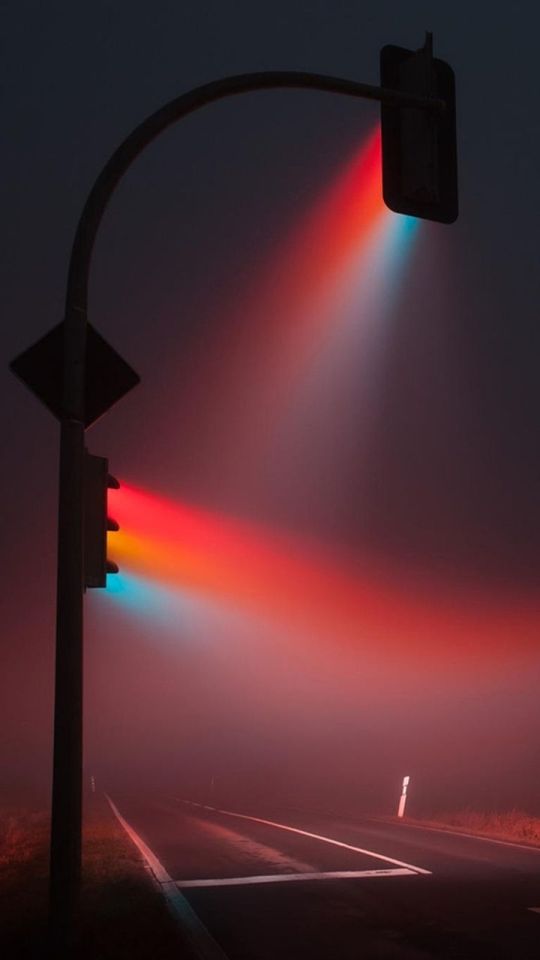
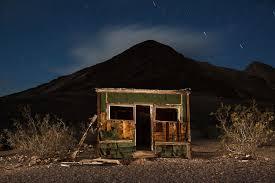
Here is my groups research on 5 photographers who use light painting techniques.
Amanda Friedman
Amanda Friedman is an American based photographer who’s photographic specialty lies between commercial and fine art photography. After receiving a BFA in photography at Rochester University, Friedman moved to LA where she later began photographing a series of night landscapes, using both natural and artificial light to produce creative effects. Friedman first began this series after capturing a night landscape on a foggy night in New York City. She shot a role of 120mm on her TLR and the results proved to be an unexpected surprise, thus inspiring her to produce a collection of beautiful images across a fifteen year time span. She captures all of her images using medium and large format cameras and using no digital manipulation in the process.
Below are some examples of her work.
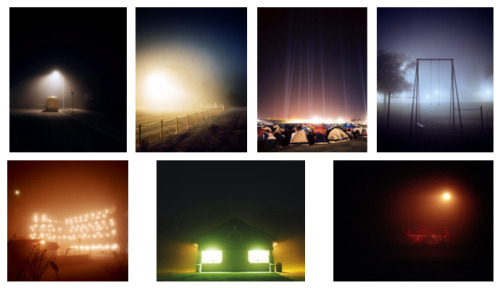
I particularly like the top image of the tents in the campsite. This image is powerful in that the horizontal direction of the lights carries the eye from the bottom of the picture to the top. The brightest part of the photo indicates that white light is being projected from a stadium or arena, which has therefore helped to retain light and color in the foreground. This intensity of light has perhaps allowed the photographer to shoot with a tripod at a low shutter speed in order to achieve the desired effect. The natural vignetting in the photo again focuses the eye to the most interesting elements of the image and amplifies the lighting further. The overall quality of the image is good and presents little noise. This again has been helped by the use of tripod and large format of the camera. Although not directly painting light within the scene, the photographer has used the available light sources to produce a creative effect.
Lance Keimig
Lance Keimig is an American photographer who specialises in night and low light photography. After picking up a camera at an early age, Lance quickly began experimenting with long exposures and how light can be used to enhance this to change the entire mood or feel of an image. After developing a successful career as a photographer, Keimig decided to follow in the footsteps of his mentor and take up teaching. Since then he has taught classes and workshops on night photography across the globe.
Starting on film, his first experience with long exposure photography involved waving torches in-front of an AE1 just to see what happened. This experimentation lead him to explore the possibilities of using this particular lighting technique.

The above images present a variety of Keimig’s work, highlighting a broad range of work, from black and white to large expansive landscapes and some to smaller, intimate buildings. Throughout the images the light has been sculpted and crafted to evoke a feeling and response from the viewer. The variety of colours and tones, along with the direction of light create an effective which may not have came through with the natural light of the place.
O. Winston Link
O. Winston Link was born in 1914 in Brooklyn, New York. His first photograph was taken on a borrowed medium format, Kodak camera and by the time he had left school, he had built his own enlarger. His technique was making ‘posed photographs’ appear candid, whilst still showcasing a creative element. Link had a keen interest in railroads and whilst on commission for an industrial photography project in Virginia 1955, he captured his first night photograph of a railroad. A few months later, steam trains were taken over by diesel and it was then that Link’s work became a realised documentation of the end of the steam train era. By 1960, he’d accumulated 2400 negatives from this project (the below image is one of the most recognised.)
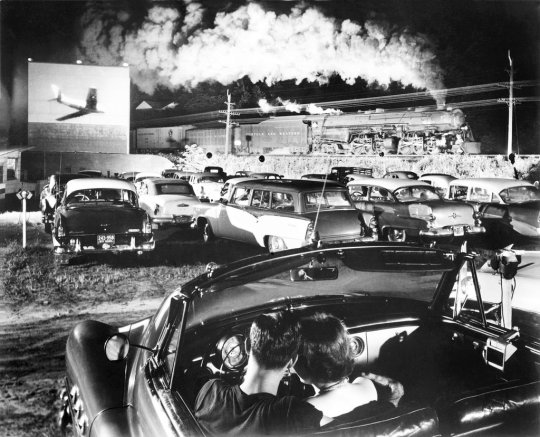
The majority of his work was photographed at night and each of his photos were were always meticulously composed. He once said; “I can’t move the sun - and it’s always in the wrong place - and I can’t even move the tracks, so I had to create my own environment through lighting”.
Link’s vision required him to develop new techniques for flash photography when photographing such large subjects. For example, the movie theater image ‘Hotshot Eastbound’ used 42 flashbulbs, all of which fired simultaneously. He used a large format camera which was loaded one sheet of film at a time. He used bulb lights in large cone-shaped holders (as seen below) which directed the light towards the subject. To highlight the texture and metallic surface of the trains, he used a high powered light directed from an angle to reflect off the train. This was the opposite technique for lighting people in his shots, whereby he would create a softer light source to clearly define both subject matters.

Tim Simmons
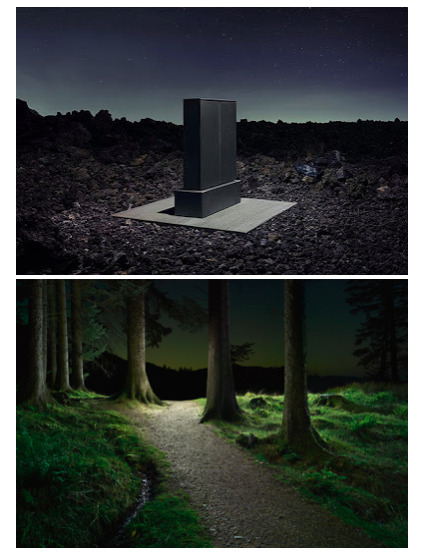
Tim Simmons is a UK based photographer who uses photography and film to explore themes of time, motion and place. Through his images, he aims to encourage a unique perspective of landscapes. Simmons’ images are captured using a large format camera combined with artificial lighting to produce a surreal and peculiar look. He often enhances natural lighting by using artificial lighting to sharpen the image; giving it an intense clarity and a greater sense of mystery and expectation. His locations are always carefully researched.
The below images were taken at twilight, using a combination of natural light with artificial light. The natural light of the sky is helping illuminate the subject/surrounding area and the added light (possibly LED or Flash) is helping control the light falling on the subject/object/area etc. This is especially important in the top image due to the similarity in colour of the object and the background sky. if the object was not lit with an added artificial light then it would be lost in the scene and the contrasting shadows wouldn’t be visible. This is why Simmons uses this particular lighting technique, in order to showcase a strong creative element to his photos which provide great visual impact.
John Hartman
John Hartman is a well accomplished American photographer who specializes in ‘light painting photography’. His use of this technique has won him great recognition, including one of his images being selected as within the top ten photos worldwide in the 2016 international competition of the professional photographers of America.
His highly complex method of shooting involves using special LED lights to compose a series of images of the same subject, but from various vantage points. He then blends the exposures into one single photograph which helps to depict the subject in a way impossible to achieve using any other photographic technique.
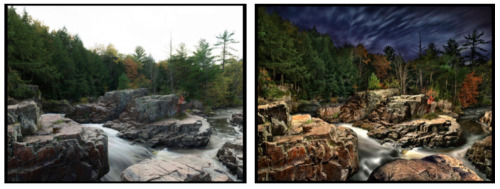
The first photo portrays a landscape scene with a long exposure. The scorched sky and contrasting trees and scales do not attract the eye. The second picture is much more dynamic, with more depth and visual impact. The photographer achieves the shot by lighting specific individual elements of the photo. I’m unsure as to how the photographer has lit the sky, however, many of the techniques may have been executed post production. Using LED light from a side angle has produced depth of contrast in the highlights and shadows. The added clarity gives the image an overall more professional look.
9 notes
·
View notes
Text
Digital noise in photography
what is digital noise?
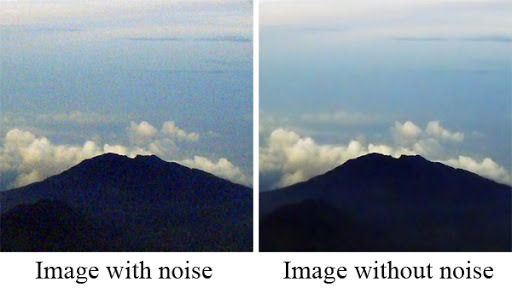
Digital noise is random pixels in a photograph that obscures detail and makes the picture have a lower quality standard. Photos can end up so noisy that they are unable to be used. When taking pictures with a digital camera an electronic sensor built from tiny pixels is used to measure the light for each of the pixel and the result becomes your photograph in the end.
what causes noise in photography?
You’ll always have some amount of noise in your photograph as its not something you can prevent but it is something that you can control the intensity of it. Digital noise is a randomness caused by your camera sensor and internal electronics. By having a much higher ISO can cause a lot more noise especially when shooting in low light and its necessary to have a higher ISO.

A long exposure time can also be the cause of more digital noise. The longer the exposer the more light is being let into the lens therefore causing more noise to appear into your photograph.
Sensitivity and shutter speed is your main challenges when it comes to digital noise. Having a slow shutter speed causes the shutter to stay open for longer and the longer it is open the more noise will be introduced to the photograph.

16 notes
·
View notes
Text
Dark Frames - reducing digital noise
Dark frame - This is a technique used for reducing digital noise. with shooting at long exposures means that you will be creating more digital noise.This involves using multiple images with the same camera settings the lens cap on. With the lens cap on your camera, you will be capturing noise without any signal. This allows you to shoot a signal to noise ratio which will produce a better image quality.
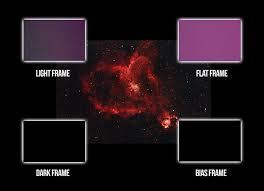
Step By Step Guide:
Shooting
1- turn off long exposure noise reduction
2- shoot long exposure On RAW file
3- shoot similar image with the lens cap on (same settings etc)
optimisation
1- Open files into photoshop, including lens cap image
2- layers- place lens image above normal image
3- blending mode - lens cap mage to subtract - 100% zoom
13 notes
·
View notes
Text
Digital Noise Removal
Blending Images Together
One type of noise removal after taking a photo is taking many images of one scene then using photoshops blending tool and joining the pictures together. This means that you’re taking shorter exposures to reduce the digital noise in the photo.
How to do it
Step 1 - Open the images you want to blend in one photoshop document.
Step 2 - Create a layer mask on the top layer.
Step 3 - Use the brush tool to blend in the lit parts into the photo, you can use the opacity of the brush to change how bright you can the area to be. White adds back the top layer whilst the black deletes the layer and makes brings in the lit parts.
13 notes
·
View notes
Text
Catch Me If You Can Final Image & Evaluation
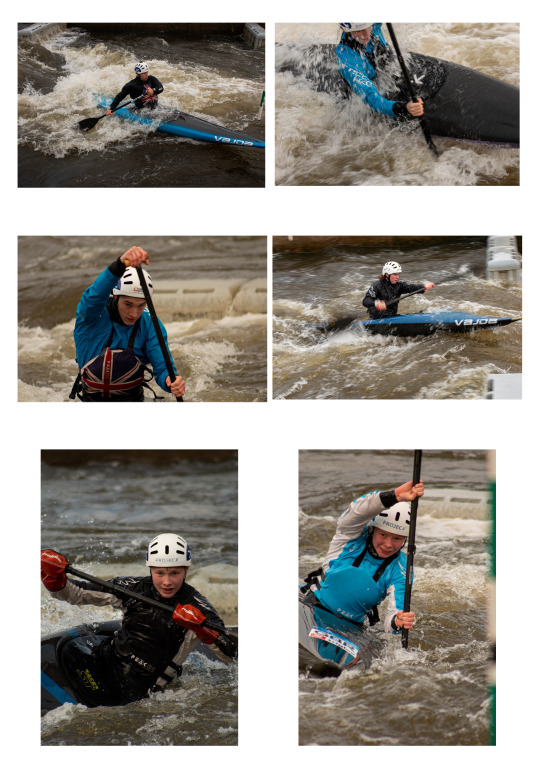
I have included a variety of different shots in my final 6 images such as, wide angle, panning, telephoto, frozen motion and blur motion. I have also tried my best to capture competitive facial expressions on the kayakers. I feel that I have done a good enough job as this was my first time shooting any type of sport. I shot all of these in complete daylight and used various equipment. I have optimised my images in post-production, however, I only fixed up a couple of things such as contrast, highlights, texture and vibrance. I feel that I have gained many new skills along with knowledge at shooting sports as well as improving on the skills I already have. I am pleased with the outcome of my work and I would love to have more opportunities to shoot sports photography in the future so that I can make use of my acquired skills and learn the things I have yet to learn.
0 notes
Text
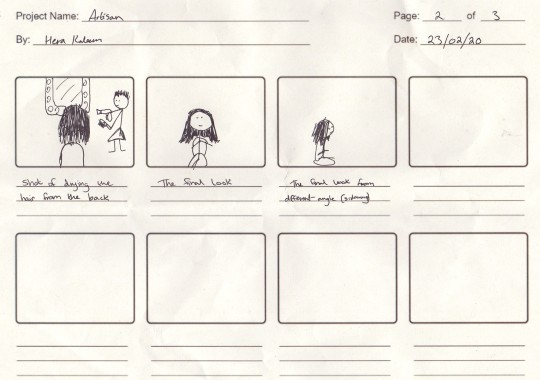
Artisan Storyboard
My completed storyboard for Artisan;
0 notes