
Statistics
We looked inside some of the posts by forsaken-nerds and here's what we found interesting.
Average Info
Notes Per Post
472K
Likes Per Post
283K
Reblog Per Post
189K
Reply Per Post
398
Time Between Posts
8 days ago
Number of Posts By Type
Text
13
Photo
2
Note
2
Last Seen Tumblr Blogs


Fun Fact
Celebrities use Tumblr as well.
Text


✨️🌿 Get this cool NEW NATURE Tutorial from my shop! Trees, plants, flowers, grass, etc. LAST DAY to get this tutorial is MARCH 5th! 👈✨️✨️✨️ Shop link below. 👇👇👇
SHOP
4K notes
·
View notes


Text


ive been wanting to make smth like this for a little while now and i finally finished it up ^_^ hopefully my tricks are helpful
10K notes
·
View notes
Text


I was asked by a friend yesterday if I could offer basic tips about comic paneling. As it turns out, I have a lot to say on the matter! I tried breaking down the art of paneling using the principles of art and design, and I hope it helps you out!
EDIT: uh uh there are a lot of people reblogging this, so i figure i may as well append this now while i can lol
This whole thing was very much cranked out in a few hours so I had a visual to talk about with a friend! If this gives you a base understanding of paneling, that's awesome! Continue to pull in studies from the comics you see and what other artists do well and don't do well! You can tell paneling is doing well when the action is flowing around in its intended reading format.
Here's the link to the globalcomix article from which I pulled the images about panel staggering! Someone sent in a reblog that it wasn't totally clear that the 7th slide mostly covers what NOT to do in regards to staggering, and that is my mistake!
I saw in a tag that someone was surprised I used MamaYuyu too, and I don't blame them lol. If I had given myself more than a couple hours maybe I would have added something else on, I just really admire MamaYuyu's paneling personally.
uh uh, final append: I am by no means a renowned master of paneling, so if you find anything off base here, by all means, counter it with your own knowledge and ways you can build upon from here! Art is always a sum knowledge of everything we find. 💪
26K notes
·
View notes


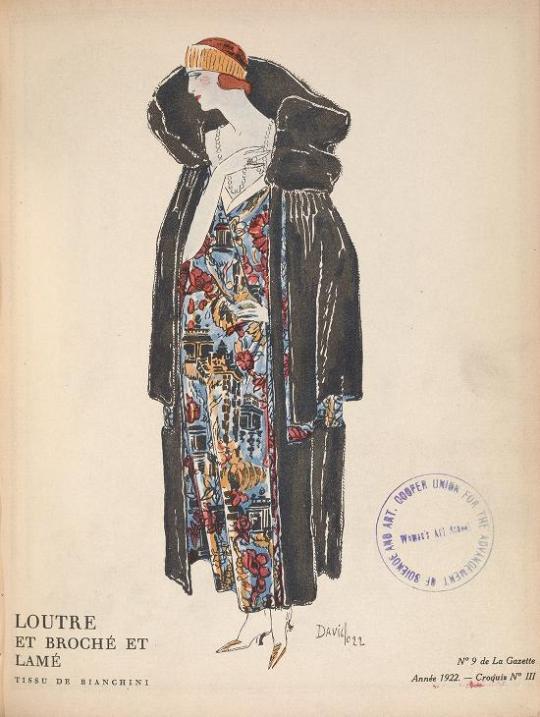
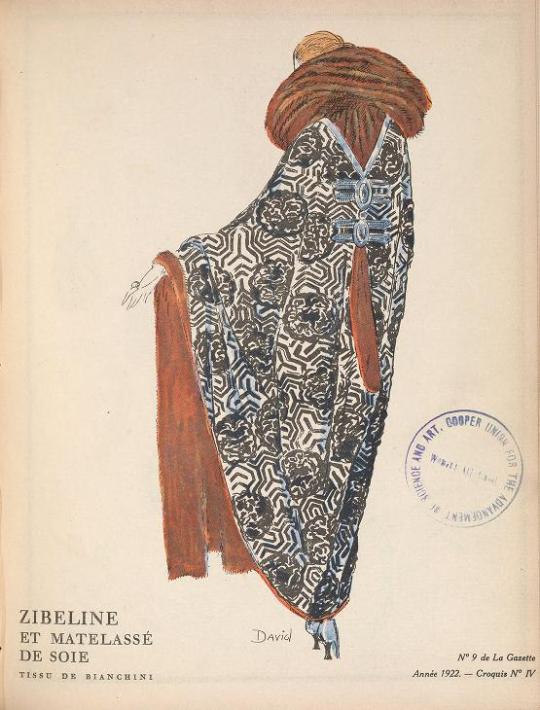
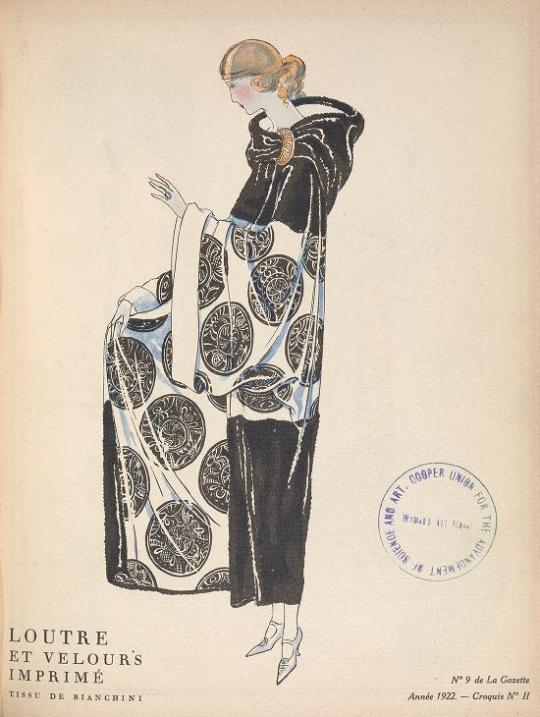
Photo
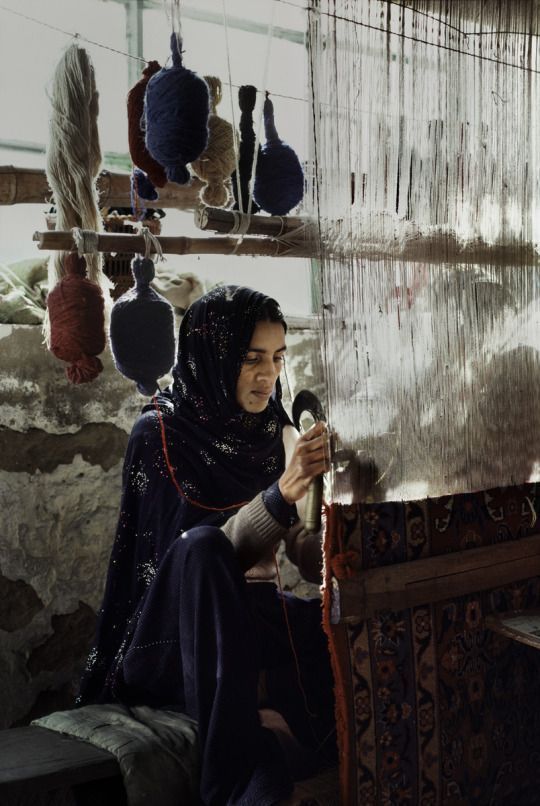
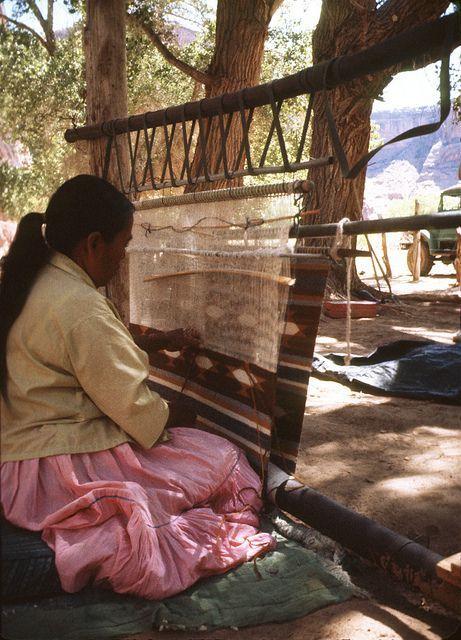

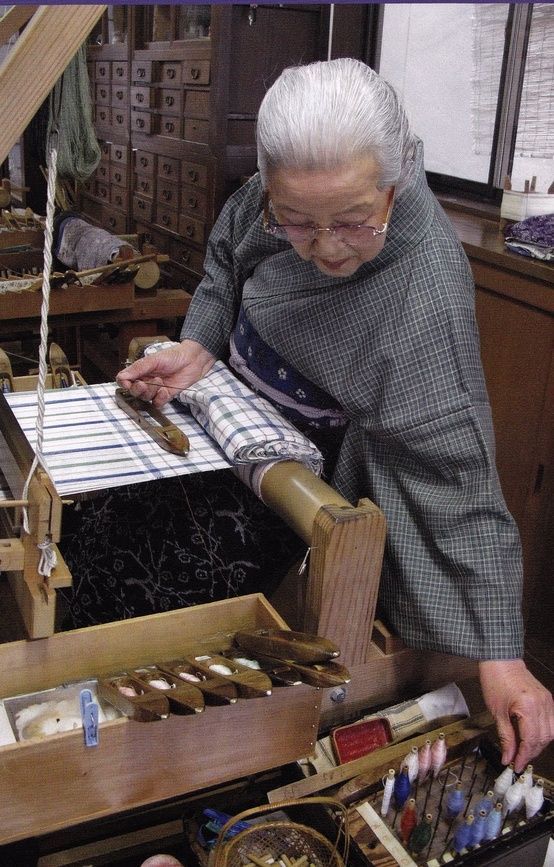


weavers and spinners
Pakistani | Navajo | Qashqai | Japanese | Romanian | Guatemalan | Benin | Kurdish
20K notes
·
View notes
Text
Resources for Mending Clothes
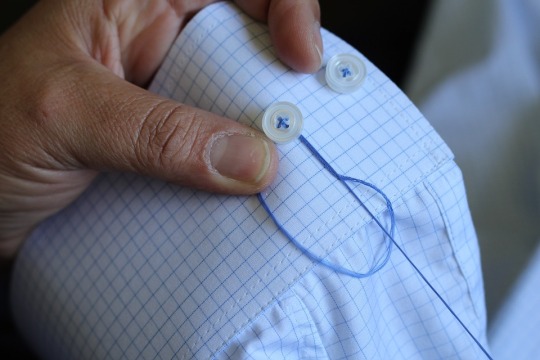
We toss out over 80 pounds of textiles each year. These textiles are often made of plastic materials (polyester, nylon), made in unethical conditions, dyed with harsh dyes that often get put into the rivers, etc. Even a single cotton shirt releases carbon emissions and uses tons of water.
So the best thing to prevent the unsustainable growth of the fashion industry is to make sure that your clothing lasts as long as possible. To do so, mending clothing is a must. So here are some resources to help you learn how to do various things, such as sewing a button, to tailoring clothes, or even upcycling old clothing into new styles.
* How to sew on three different types of button
* How to hand sew on a patch on a torn pair of jeans
* How to sew up a hole in an old shirt
* How to sew a simple T-shirt
* How to upcycle old clothing into new clothing
* More upcycle and sewing techniques
* How to repair a damaged sock
* How to do an invisible stitch
* 3 different stitches to work with for different results
* How to make a T-shirt smaller so it fits you better
* How to make repairs to your shoes
These are just a few of the things that you can do in order to make sure that your clothing lasts for a long time. Nobody wants to keep buying new clothing, as it is expensive and wasteful.
So making alterations to your clothing, or fixing small holes hen you see them can be hugely beneficial to your wallet, to garment workers, and to the environment in the long term.
106K notes
·
View notes
Note
Hello Mj do you know if there is some close ups of the body tattoos specifically the legs as i cant see them well on my tv?
hello! ◕‿◕ your best bet might be to search YouTube for videos of the DA:TV CC, like maybe someone scrolls through them all and rotates the Rook so that the details can be seen. this tweet has each body tattoo's 'thumbnail' labelled according to what faction the datamines say it is associated with. I also went into the game just now and took screenshots of each body tattoo design (the leg portions). rest of post under cut due to length.
Design 2 ('design 1' is blank/no tattoos) -

Design 3 -

Design 4 -

Design 5 -

Design 6 -

Design 7 -

Design 8 -

Design 9 -

Design 10 -

Design 11 -

Design 12 -

Design 13 -

Design 14 -

Design 15 -

Design 16 -

Design 17 -

Design 18 -

Design 19 -

Design 20 -

Design 21 -

Design 22 -

I hope this helped at least a bit. (..◜ᴗ◝..)
33 notes
·
View notes
Text

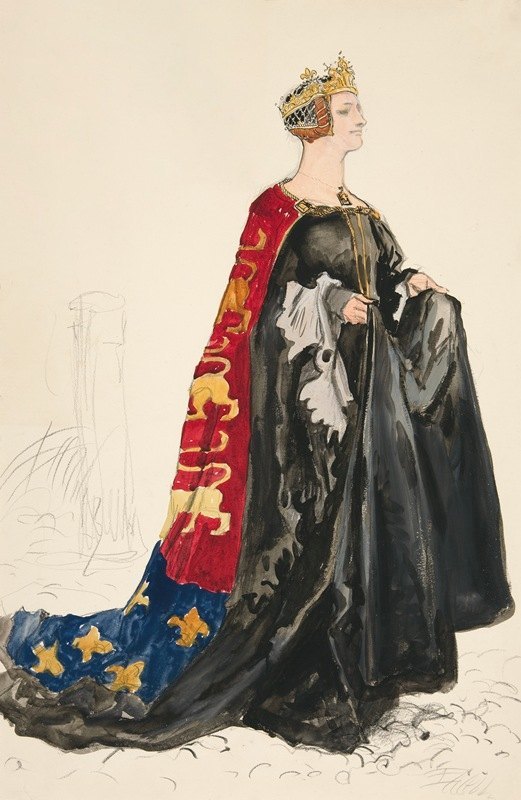


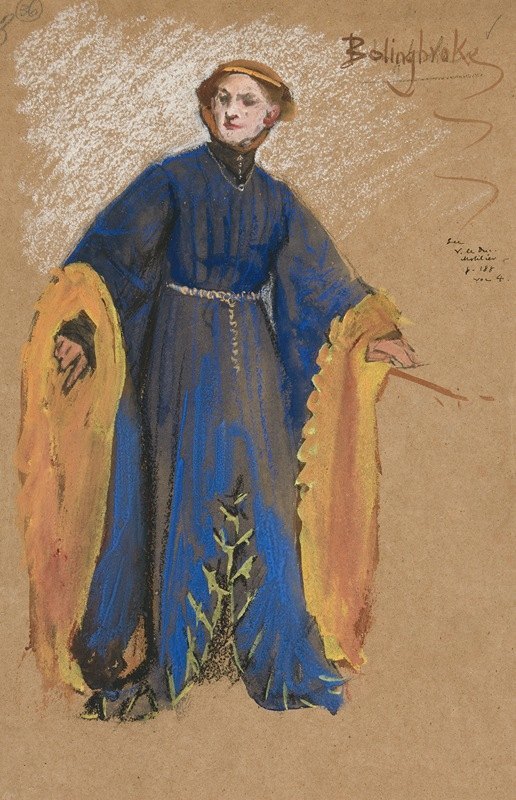
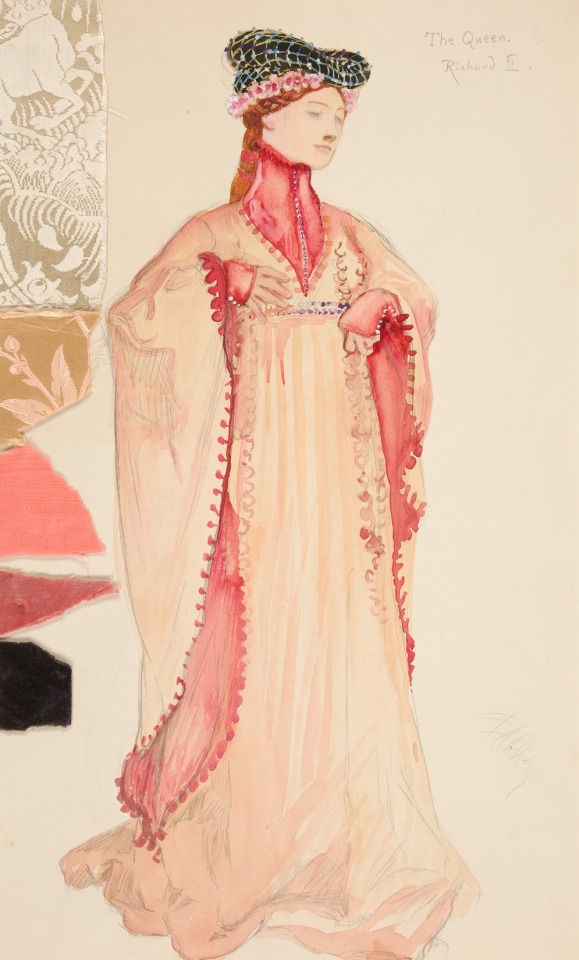
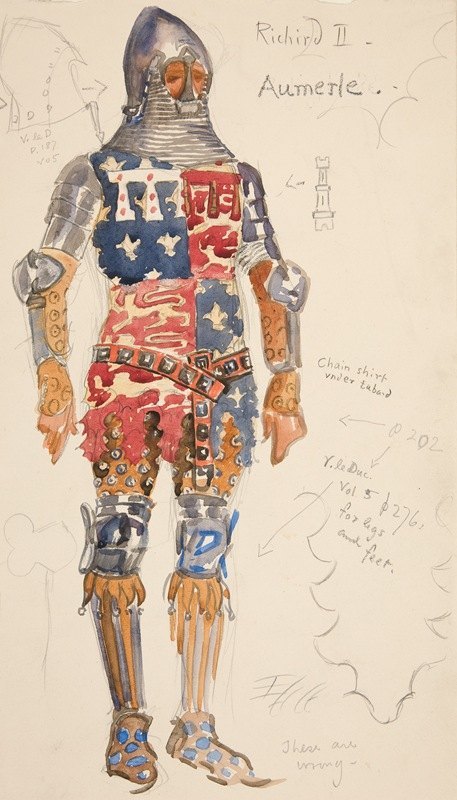
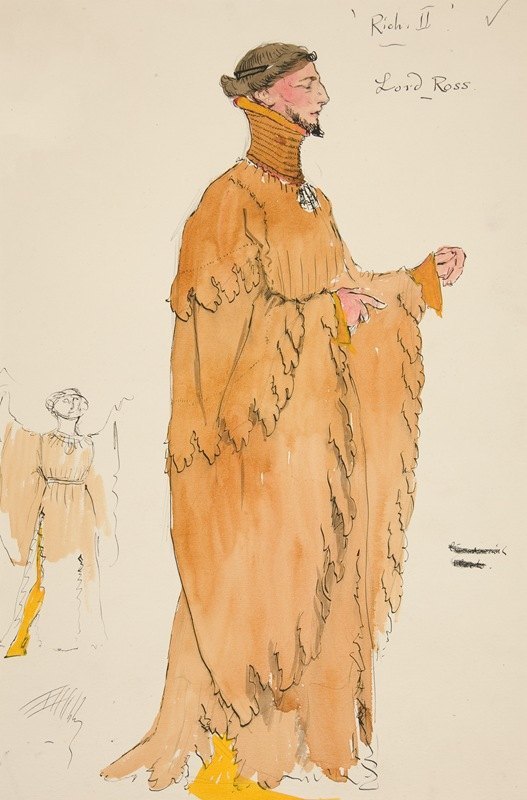


Costume designs by Edwin Austin Abbey for Henry Irving's production of Richard II, 1898
4K notes
·
View notes
Note
Hi Andy! out of curiosity would you be able to give any tips on, and this is the best way I can think to describe this 💀, rendering the elf glow ears? Like the glow of a light source where skin is thin i guess?
It's something that I've been trying to figure out how to do for ages in procreate, and is something I've always really liked in yours as well as others work when it comes to elves! If not thank you anyway, take it easy
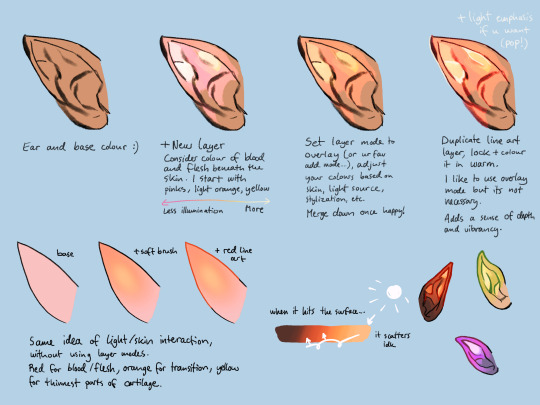
hi!! i'm so sorry this took a while to get to.... I drew up a little step by step including what layer modes i usually use, but it's not foolproof and will need some colour tweaks on a per-drawing basis until u find your stride with it.
the term for this is subsurface scattering!!! its how light penetrates translucent surfaces and bounces around inside/diffuses back out into a 'glow'.... that orange radiance is Blood and Cartilage.
some videos i've enjoyed on the topic (1) (2) (and there r many more to do with 3D rendering, if you're interested in going down the rabbit hole... i think i took off running with glowy ears after learning abt subsurface scattering in my 3D animation course back in 2018. ITS SO FUN)
i'm using my own shorthand for. everything i drew here. but i hope it makes sense for visualizing a quick workflow in procreate!!!!
i personally use a mix of layer modes, depending on the piece, usually overlay, screen, or colour dodge... It is honestly something i should devote some proper study time to (paint from observation without layer modes - its Good to be able to better understand colour interaction this way) - but this is how I've been doing it for the last few years!
transcript under the cut:
from left to right:
Ear and base colour :)
+ New layer Consider colour of blood and flesh beneath the skin. I start with pinks, light orange, yellow Less illumination <--> More
Set layer mode to overlay (or ur fav add mode...), adjust your colours based on skin, light source, stylization, etc. Merge down once happy!
Duplicate line art layer, lock + colour it in warm. + Light emphasis if u want (pop!) I like to use overlay mode but its not necessary. Adds a sense of depth and vibrancy.
base + soft brush + red line art Same idea of light/skin interaction, without using layer modes. Red for blood/flesh, orange for transition, yellow for thinnest part of cartilage.
When it (light) hits the surface... it scatters idk
168 notes
·
View notes
Text


Shoes by Philips Shoes
c. 1925-1935
The National Museum of Norway
10K notes
·
View notes
Text
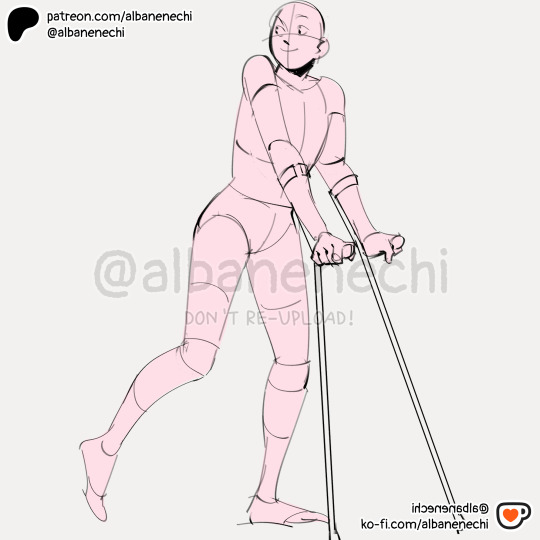
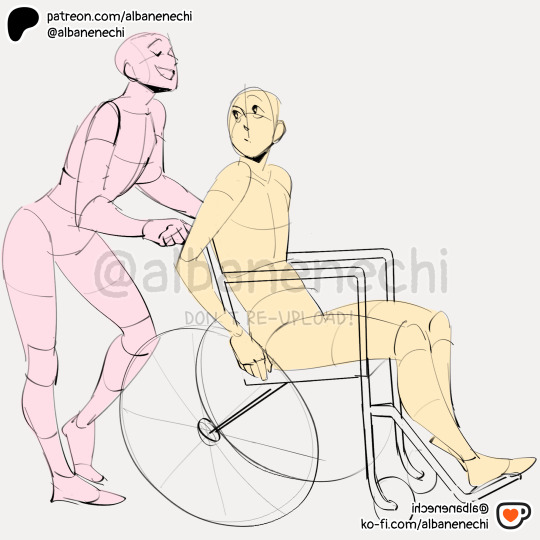
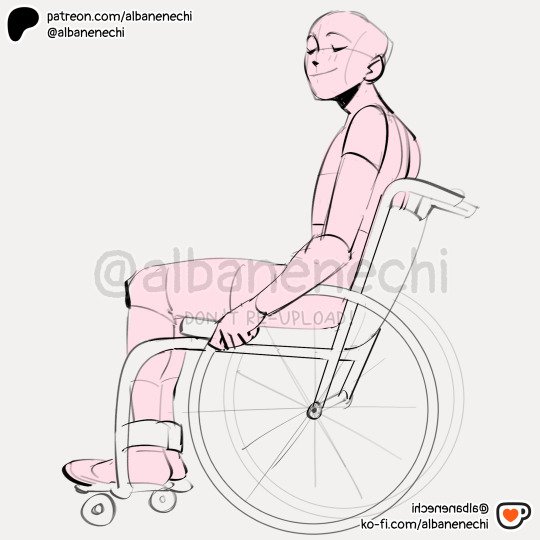
Drawing bases & pose references pt 50 ✨
3 extra 'mobility aid' poses for patrons!
5K notes
·
View notes
Text
10 Non-Lethal Injuries to Add Pain to Your Writing
If you need a simple way to make your characters feel pain, here are some ideas:
1. Sprained Ankle
A common injury that can severely limit mobility. This is useful because your characters will have to experience a mild struggle and adapt their plans to their new lack of mobiliy. Perfect to add tension to a chase scene.
2. Rib Contusion
A painful bruise on the ribs can make breathing difficult, helping you sneak in those ragged wheezes during a fight scene. Could also be used for something sport-related! It's impactful enough to leave a lingering pain but not enough to hinder their overall movement.
3. Concussions
This common brain injury can lead to confusion, dizziness, and mood swings, affecting a character’s judgment heavily. It can also cause mild amnesia.
I enjoy using concussions when you need another character to subtly take over the fight/scene, it's an easy way to switch POVs. You could also use it if you need a 'cute' recovery moment with A and B.
4. Fractured Finger
A broken finger can complicate tasks that require fine motor skills. This would be perfect for characters like artists, writers, etc. Or, a fighter who brushes it off as nothing till they try to throw a punch and are hit with pain.
5. Road Rash
Road rash is an abrasion caused by friction. Aka scraping skin. The raw, painful sting resulting from a fall can be a quick but effective way to add pain to your writing. Tip: it's great if you need a mild injury for a child.
6. Shoulder Dislocation
This injury can be excruciating and often leads to an inability to use one arm, forcing characters to confront their limitations while adding urgency to their situation. Good for torture scenes.
7. Deep Laceration
A deep laceration is a cut that requires stitches. As someone who got stitches as a kid, they really aren't that bad! A 2-3 inch wound (in length) provides just enough pain and blood to add that dramatic flair to your writing while not severely deterring your character.
This is also a great wound to look back on since it often scars. Note: the deeper and wider the cut the worse your character's condition. Don't give them a 5 inch deep gash and call that mild.
8. Burns
Whether from fire, chemicals, or hot surfaces, burns can cause intense suffering and lingering trauma. Like the previous injury, the lasting physical and emotional trauma of a burn is a great wound for characters to look back on.
If you want to explore writing burns, read here.
9. Pulled Muscle
This can create ongoing pain and restrict movement, offering a window to force your character to lean on another. Note: I personally use muscle related injuries when I want to focus more on the pain and sprains to focus on a lack of mobility.
10. Tendonitis
Inflammation of a tendon can cause chronic pain and limit a character's ability to perform tasks they usually take for granted. When exploring tendonitis make sure you research well as this can easily turn into a more severe injury.
This is a quick, brief list of ideas to provide writers inspiration. Since it is a shorter blog, I have not covered the injuries in detail. This is inspiration, not a thorough guide. Happy writing! :)
Looking For More Writing Tips And Tricks?
Check out the rest of Quillology with Haya; a blog dedicated to writing and publishing tips for authors!
Instagram Tiktok
58K notes
·
View notes


Text
Right now, I’m sifting through 50+ applications for a new entry-level position. Here’s some advice from the person who will actually be looking at your CV/resume and cover letter:
‘You must include a cover letter’ does not mean ‘write a single line about why you want this position’. If you can’t be bothered to write at least one actual paragraphs about why you want this job, I can’t be bothered to read your CV.
Don’t bother including a list of your interests if all you can think of is ‘socialising with friends’ and ‘listening to music’. Everyone likes those things. Unless you can explain why the stuff you do enriches you as a person and a candidate (e.g. playing an instrument or a sport shows dedication and discipline) then I honestly don’t care how you spend your time. I won’t be looking at your CV thinking ‘huh, they haven’t included their interests, they must have none’, I’m just looking for what you have included.
Even if you apply online, I can see the filename you used for your CV. Filenames that don’t include YOUR name are annoying. Filenames like ‘CV - media’ tell me that you’ve got several CVs you send off depending on the kind of job advertised and that you probably didn’t tailor it for this position. ‘[Full name] CV’ is best.
USE. A. PDF. All the meta information, including how long you worked on it, when you created it, times, etc, is right there in a Word doc. PDFs are far more professional looking and clean and mean that I can’t make any (unconscious or not) decisions about you based on information about the file.
I don’t care what the duties in your previous unrelated jobs were unless you can tell me why they’re useful to this job. If you worked in a shop, and you’re applying for an office job which involves talking to lots of people, don’t give me a list of stuff you did, write a sentence about how much you enjoyed working in a team to help everyone you interacted with and did your best to make them leave the shop with a smile. I want to know what makes you happy in a job, because I want you to be happy within the job I’m advertising.
Does the application pack say who you’ll be reporting to? Can you find their name on the company website? Address your application to them. It’s super easy and shows that you give enough of a shit to google something. 95% of people don’t do this.
Tell me who you are. Tell me what makes you want to get up in the morning and go to work and feel fulfilled. Tell me what you’re looking for, not just what you think I’m looking for.
I will skim your CV. If you have a bunch of bullet points, make every one of them count. Make the first one the best one. If it’s not interesting to you, it’s probably not interesting to me. I’m overworked and tired. Make my job easy.
“I work well in a team or individually” okay cool, you and everyone else. If the job means you’ll be part of a big team, talk about how much you love teamwork and how collaborating with people is the best way to solve problems. If the job requires lots of independence, talk about how you are great at taking direction and running with it, and how you have the confidence to follow your own ideas and seek out the insight of others when necessary. I am profoundly uninterested in cookie-cutter statements. I want to know how you actually work, not how a teacher once told you you should work.
For an entry-level role, tell me how you’re looking forward to growing and developing and learning as much as you can. I will hire genuine enthusiasm and drive over cherry-picked skills any day. You can teach someone to use Excel, but you can’t teach someone to give a shit. It makes a real difference.
This is my advice for small, independent orgs like charities, etc. We usually don’t go through agencies, and the person reading through the applications is usually the person who will manage you, so it helps if you can give them a real sense of who you are and how you’ll grab hold of that entry level position and give it all you’ve got. This stuff might not apply to big companies with actual HR departments - it’s up to you to figure out the culture and what they’re looking for and mirror it. Do they use buzzwords? Use the same buzzwords! Do they write in a friendly, informal way? Do the same! And remember, 95% of job hunting (beyond who you know and flat-out nepotism, ugh) is luck. If you keep getting rejected, it’s not because you suck. You might just need a different approach, or it might just take the right pair of eyes landing on your CV.
And if you get rejected, it’s worthwhile asking why. You’ve already been rejected, the worst has already happened, there’s really nothing bad that can come out of you asking them for some constructive feedback (politely, informally, “if it isn’t too much trouble”). Pretty much all of us have been hopeless jobseekers at one point or another. We know it’s shitty and hard and soul-crushing. Friendliness goes a long way. Even if it’s just one line like “your cover letter wasn’t inspiring" at least you know where to start.
And seriously, if you have any friends that do any kind of hiring or have any involvement with that side of things, ask them to look at your CV with a big red pen and brutal honesty. I do this all the time, and the most important thing I do is making it so their CV doesn’t read exactly like that of every other person who took the same ‘how-to-get-a-job’ class in school. If your CV has a paragraph that starts with something like ‘I am a highly motivated and punctual individual who–’ then oh my god I AM ALREADY ASLEEP.
200K notes
·
View notes
Photo
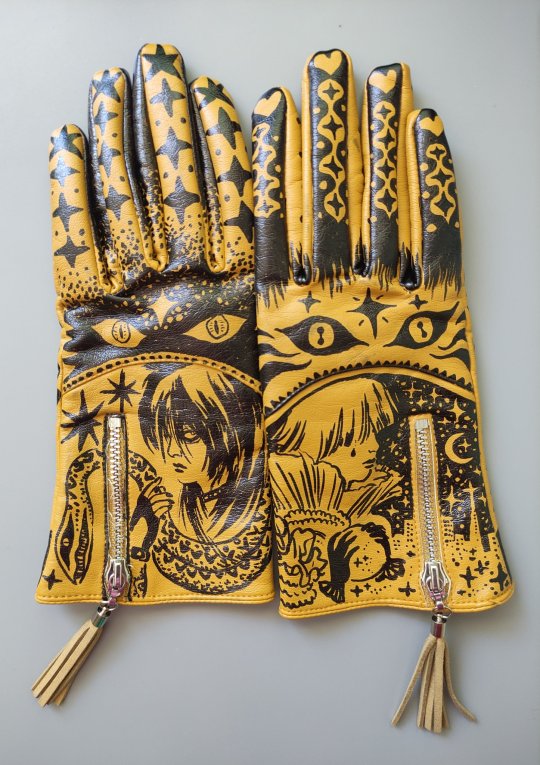
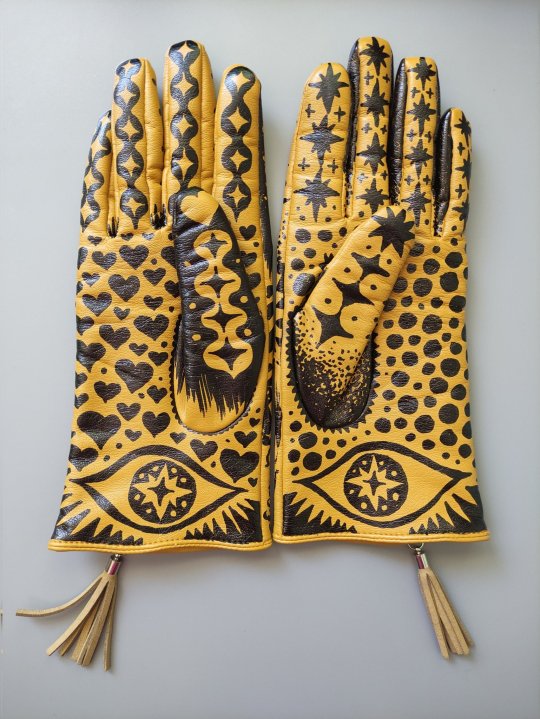
I found out that my gloves had some dark stains on them, so I decided to refresh them a bit :D It was fun! Used alcohol-based marker for drawing.
10K notes
·
View notes
Text


the eise eisinga planetarium in franeker, the netherlands, the oldest working planetarium in the world. located inside the former home of eise eisinga
18K notes
·
View notes