Don't wanna be here? Send us removal request.
Text
FINAL PHOTOSHOOT WITH TEXTILE PIECE AND CUSHION COVER
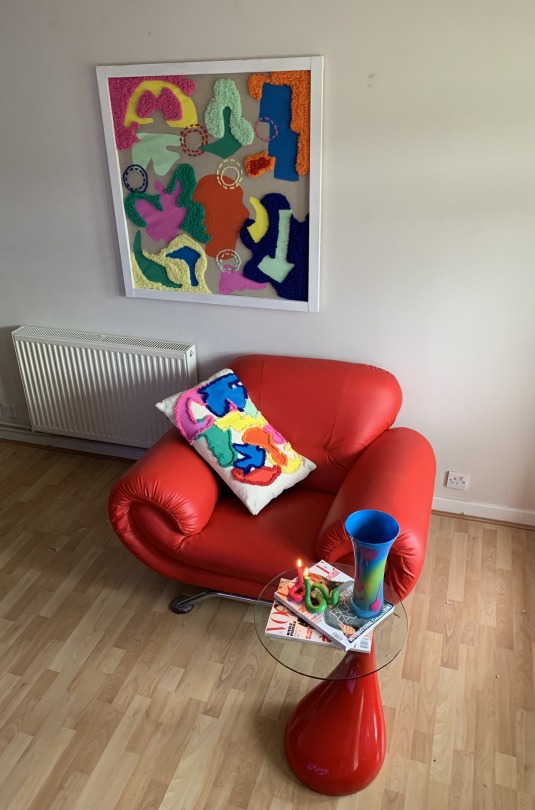
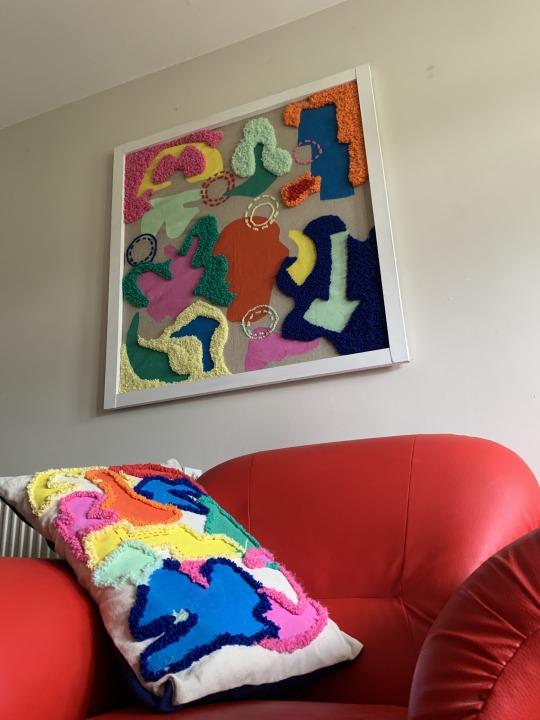
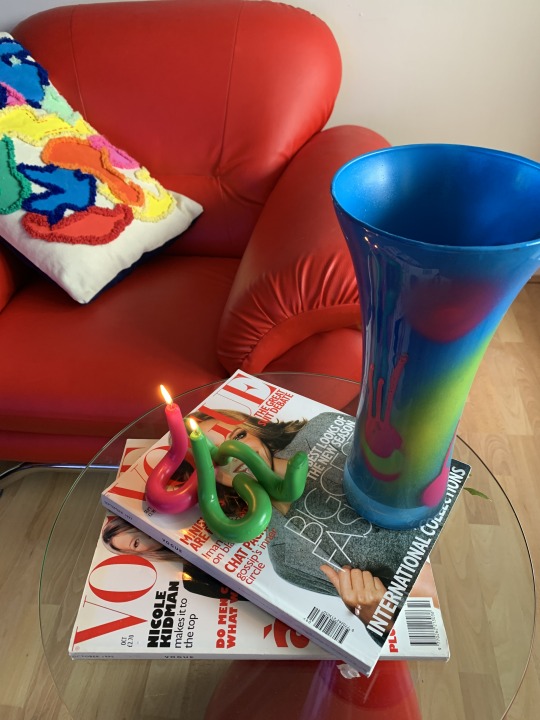
For my final photo shoot i decided to have a bright red lounge chair as my middle point, and include a glass vase that i spray painted myself, bent colour block candles, vogue magazines and a red side table. I included all these items as i wanted to complete the look of a modern living room.
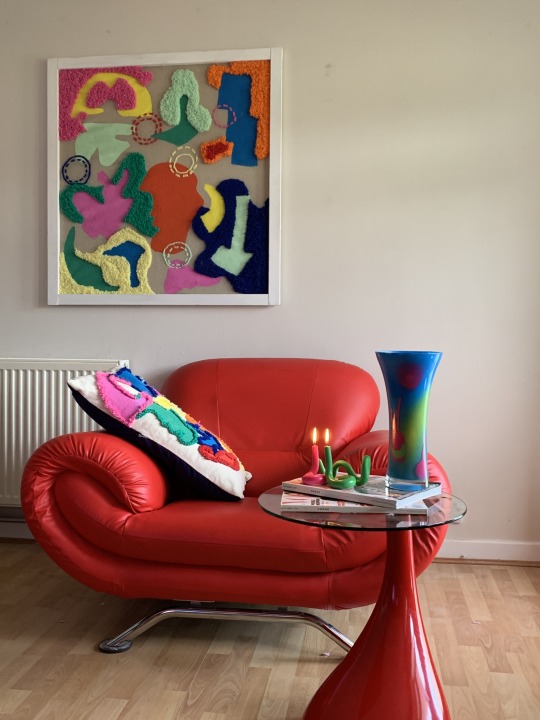
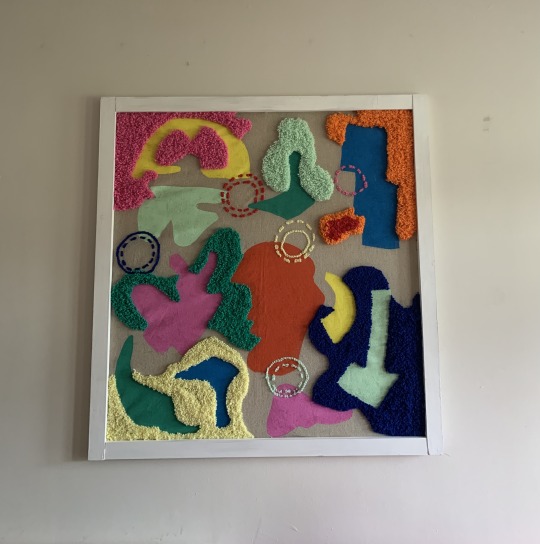
i decided to have my piece above the set scenery to resemble my inspirations from Pinterest boards,where we see multiple elegant and high interior-based areas having a similar set up. The traditional setting of a living room consists of generic pieces of furniture, facing usually towards the TV, and multiple family pictures or art canvases hanging from the walls. This juxtaposes my set up and final piece. This is because my target audience for my canvas is marketed towards younger people, usually taking on a more modern aspect of interior designs and furniture. I wanted to create a modern styled living room, with bright colours and items that have been proved to be rising in the market, such as bent colour block candles.
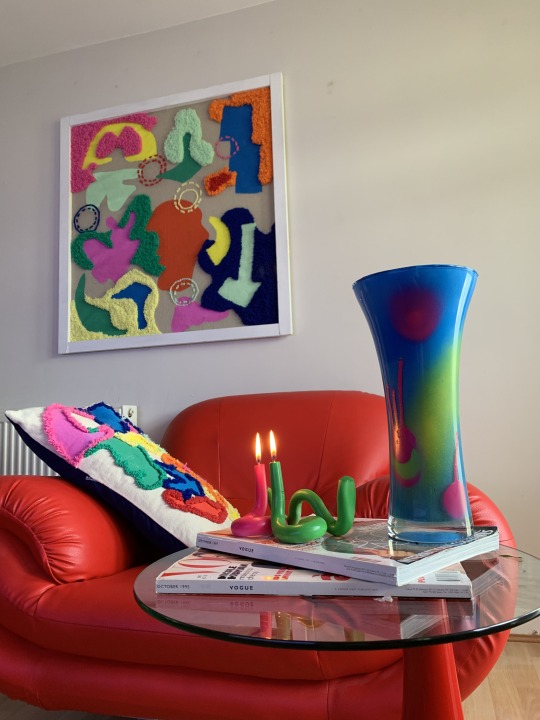
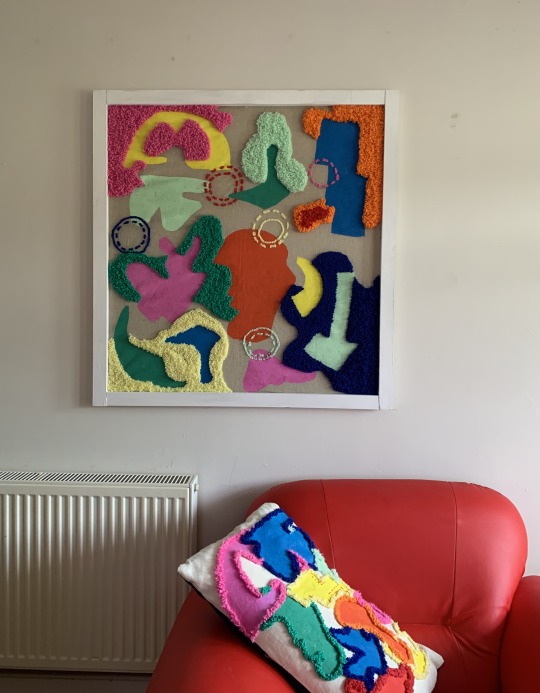
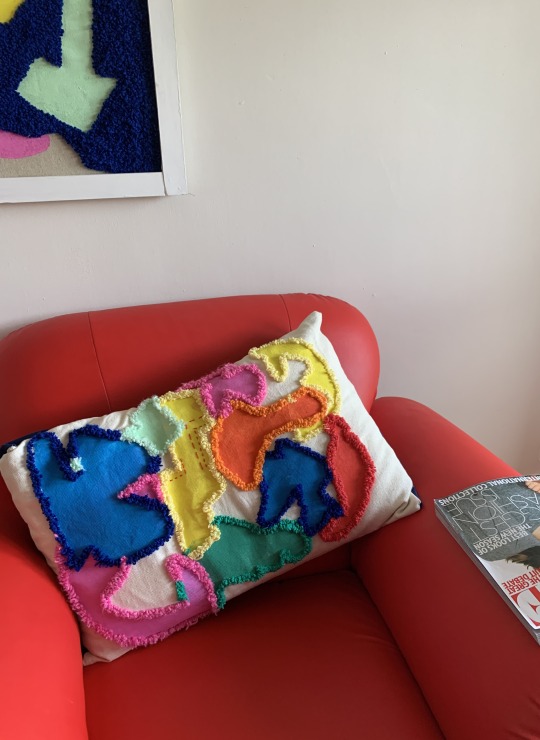
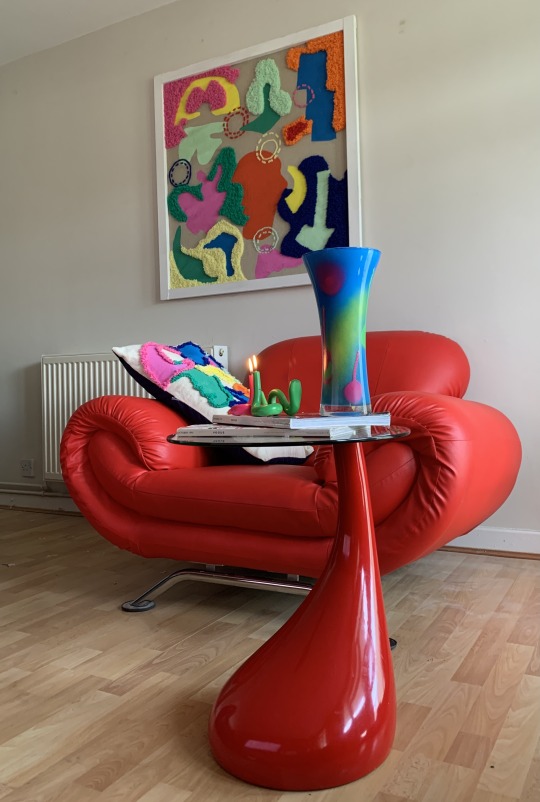
For my final photo shoot i was inspired by multiple Pinterest boards. Through my own secondary research i was able to collect multiple variations of futuristic inspired interior designs which allowed me to set the colour palette for my shoot. My colour palette inspiration consisted of pure bright block colours, mostly primary.
1 note
·
View note
Text
Spray painting candles and vase
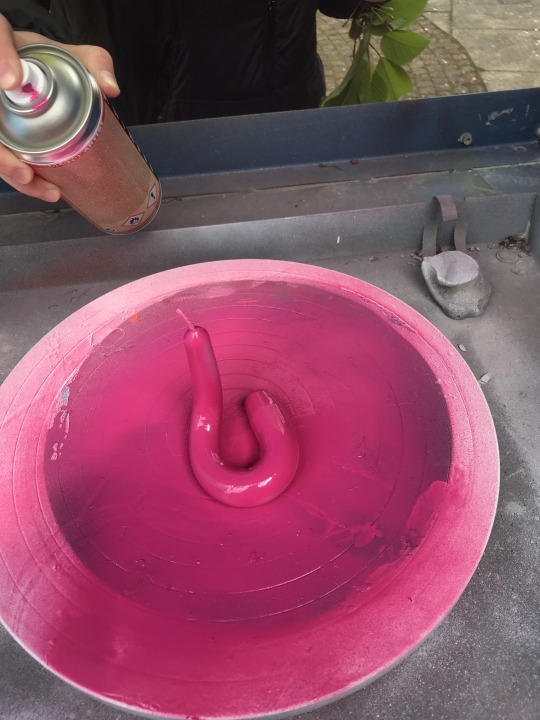
I have gone downstairs to the 3D workshop to spray paint the candle sticks and the vase. I was fortunate today as they have recently put a spray paint booth outside sop I was able to have a go at using it.
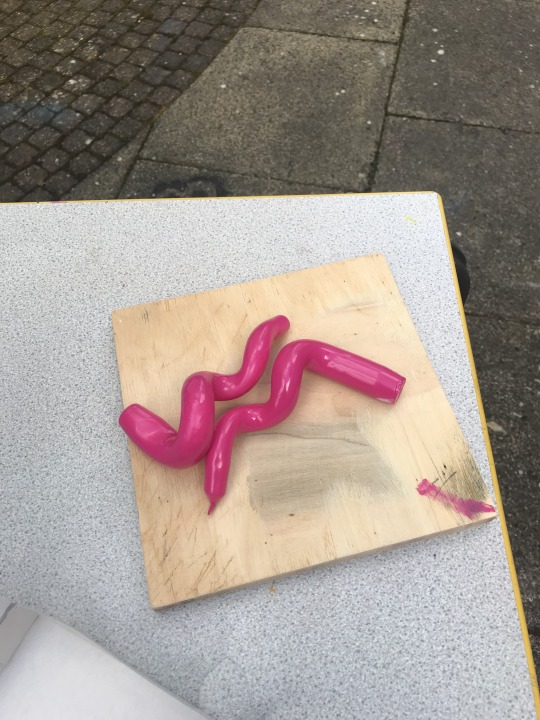
I evenly shared the candles so that some were green and the others were pink. I chose these colours as they fit with my bright aesthetic and the mood i’m trying set for my final photoshoot. I started to spray paint in pink first but found it really fiddly as every time I moved the candle to spray paint, the other side would accidentally smudge. So I ended up having to hold the wick with my fingers and sprayed around whilst moving the candle stick to completely cover it with paint.
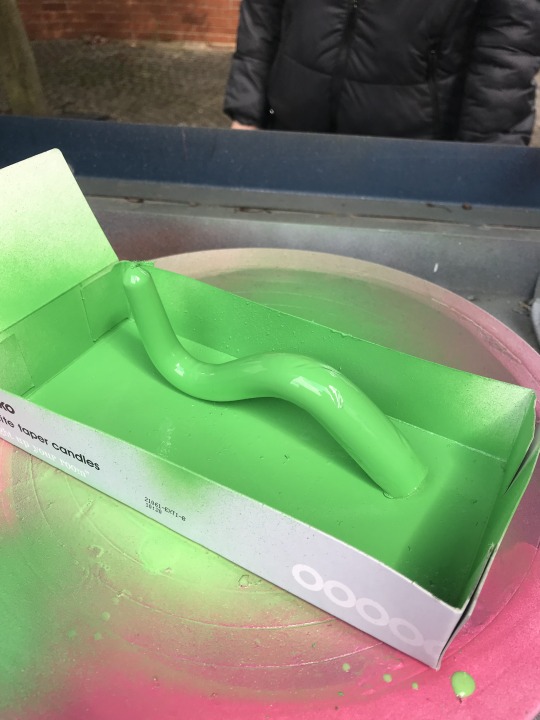
I applied the same process to the green candles then waited around an hour for all the candle sticks to completely dry.
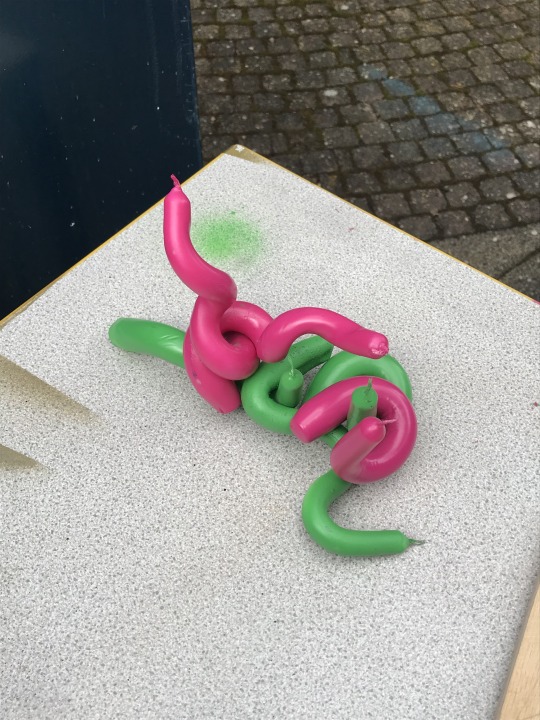
Heres a photo of when my lecture and I started playing around with the candle sticks, figuring out different ways I could display the candles. I now have two ideas how I could use the candles in the photoshoot, I could use them as actual candles and light them or use them as more of as sculpture piece like shown in the photograph above.
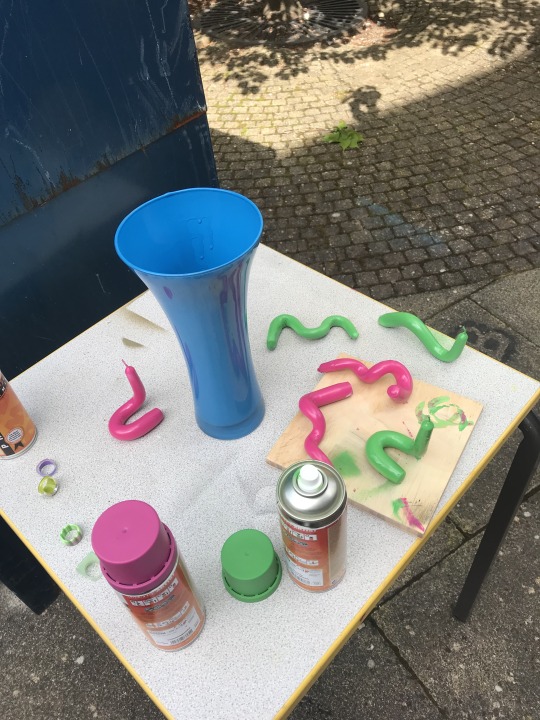
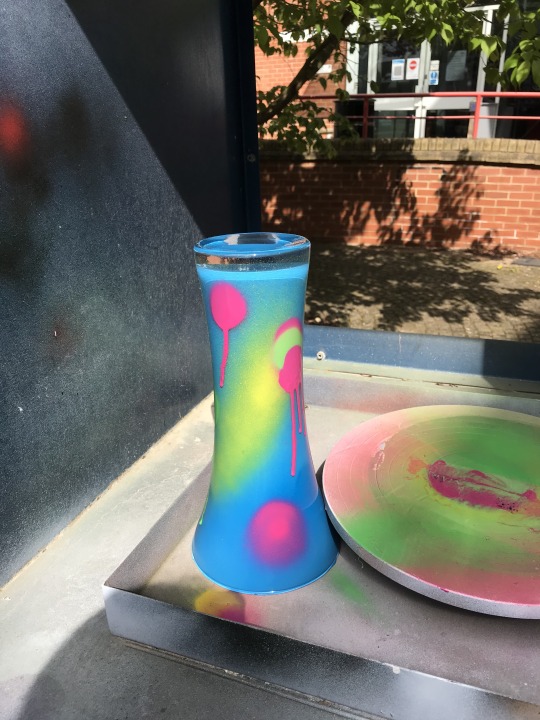
As I waited for the spray paint to dry, I went onto designing the vase. Initially I wanted to splatter/flicker acrylic paints using a pain brush onto the vase however what would of happend is the paint wouldn't set onto the glass properly and ultimately would ruin the vase. So I decided to instead paint the vase entirely with blue spray paint and
1 note
·
View note
Text
Prep for Final photshoot/making props
My plan is to set up a funky modern living room area to photoshoot my final pieces. This afternoon I have searched around town to find props to add to the image of the photoshoot. I hoped to find something to put on top of a living room table (that i’m going to use in my photoshoot) in the charity shop, in order to to shop more sustainably. When I shop at the charity shops usually I see some really cool retro home bits unfortunately there wasn't anything that striked my attention, there was some floral print vases but i was looking for something bright and colourful to fit the colours of my final outcomes as well as the chair table that I am going to use to photoshoot with.
So you know what they say... cant find it, DIY it
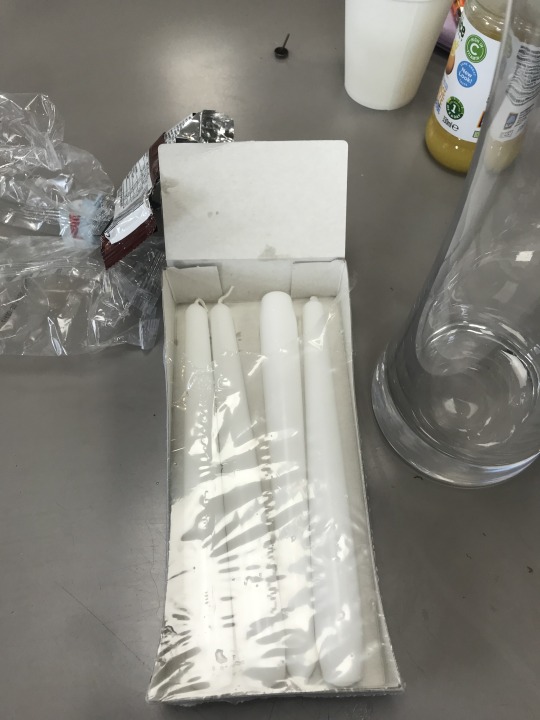
All over TIK TOK, Instagram and Pintrest I have seen these wacky candle sticks in which people have made to decorate their home. So I went to Wilko and bought 12 candle sticks for £2 and I plan to bend them so that they stand up also spray paint them as i think they'll look better in the photoshoot if they were green or pink.
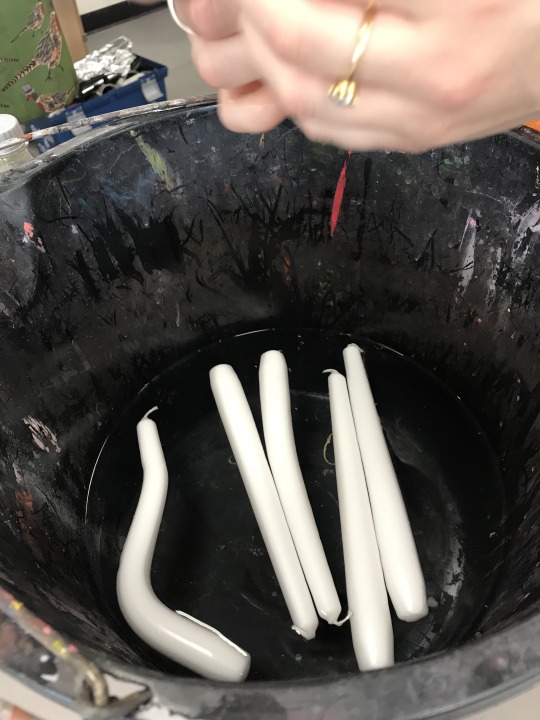
To make these I watched a youtube video and the first step was to keep them in warm water for 10 mins. So I have filled the bucket with warm water and put a timer on.
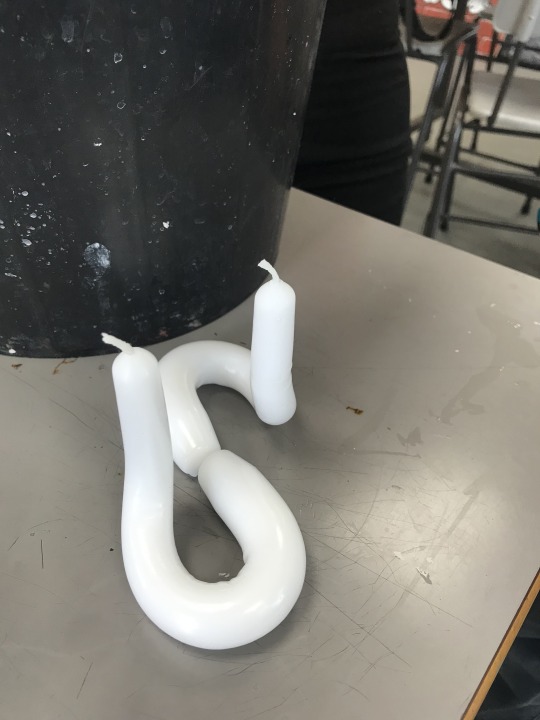
I then waited 10 mins before i got them out of the water. I started to gradually bend them into shapes that I describe as ‘Squiggly shapes’, I had to make them stand up which was difficult as they are fragile so it was easy to break them. To do this a shaved the bottom of them gently using scissors and this worked well. My initial reaction to how they looked when I shaped them was “ooo FUN!” but now that I have looked closer, the ones I have seen are much bigger. Which is okay though as I can just make more and make a collection rather than one big one.
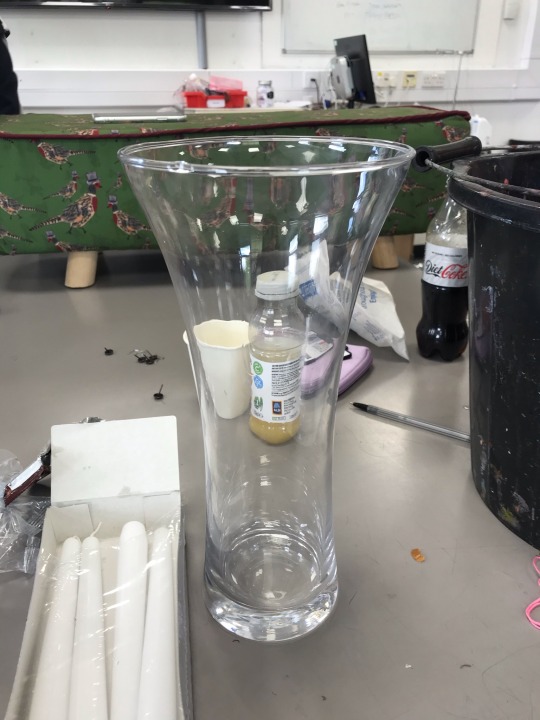
From wilko I have also bought a transparent glass vase in a funky shape for £5 to put on top of the table in the living room. I plan to spray paint this in a blue colour.
0 notes
Text


I have made a Pinterest board of the house settings to inspire my final photo shoot. I plan to create a very bight and playful mood to match the aesthetic of my work. The Pinterest board meets this criteria with it’s irregular shaped chairs, sofas, lights, mirrors and candles. I hoped to use furniture with similar characteristics as the ones in my Pintrest board, I have a red 60s inspired sofa and table that would be perfect for this photoshoot. I will also go out and buy candle sticks as well as a vase to use as props, I plan to bend the candle sticks to add to my hand craft image.
0 notes
Text
Behind the scenes of my shoot.
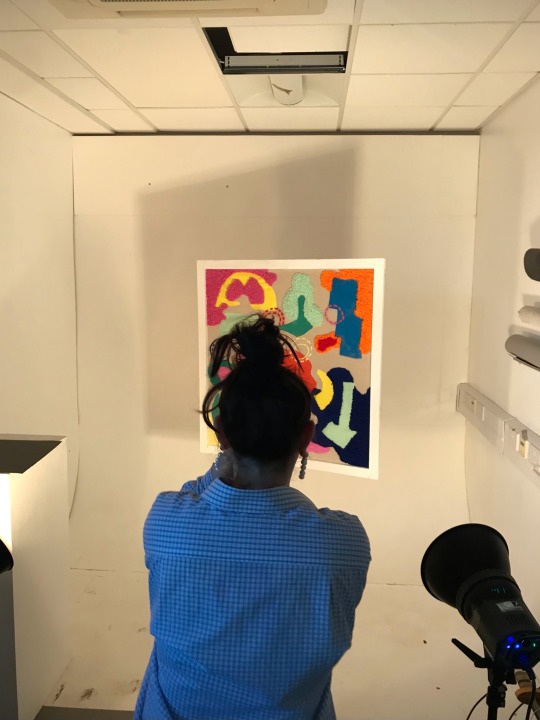
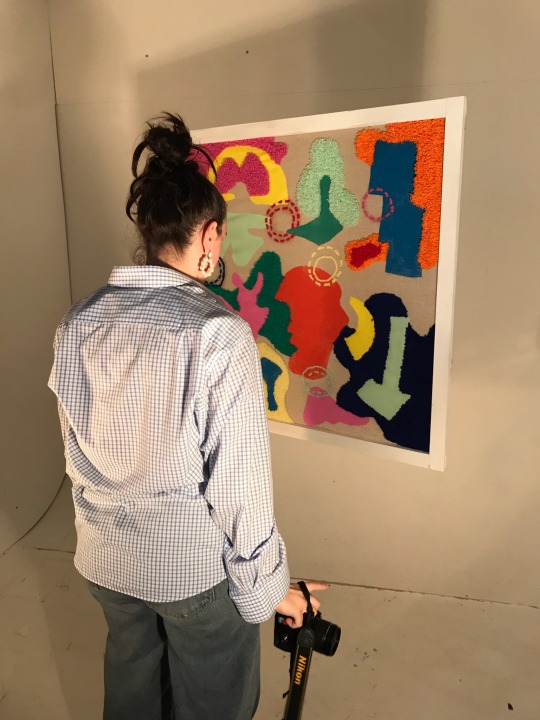
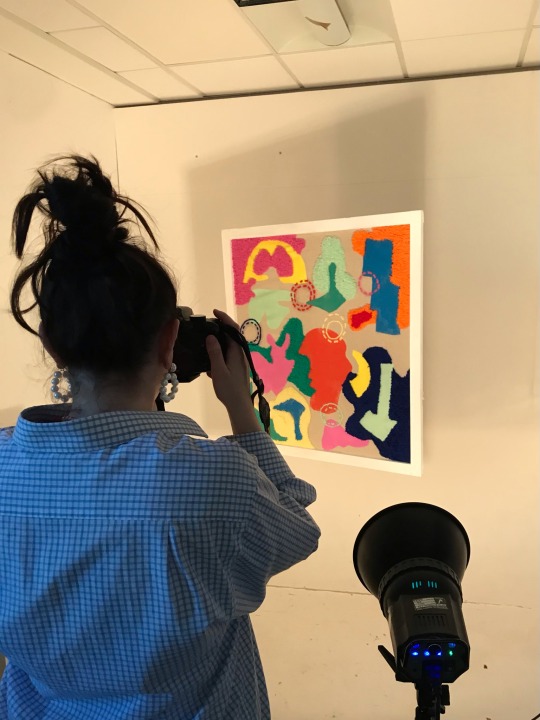
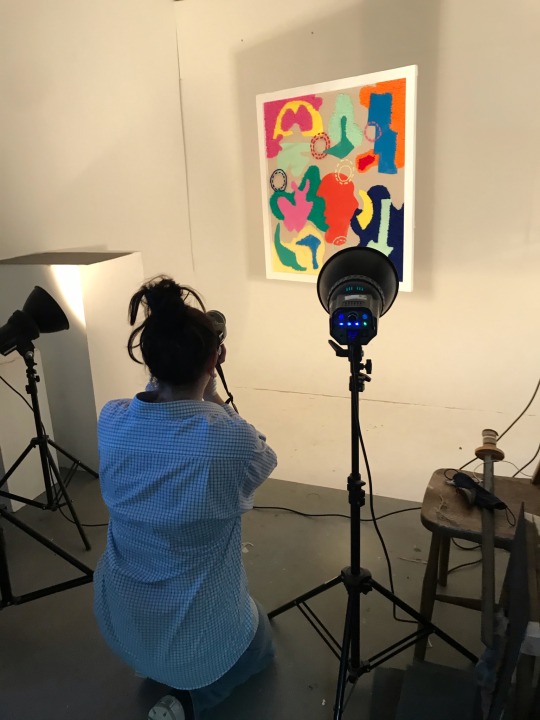
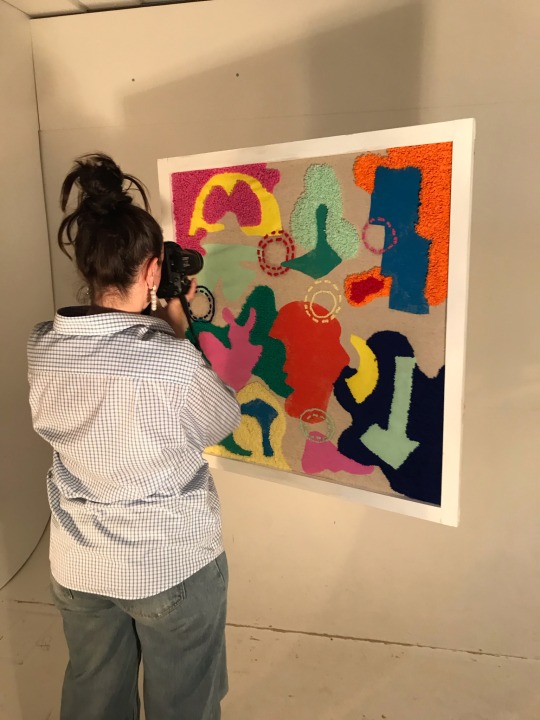
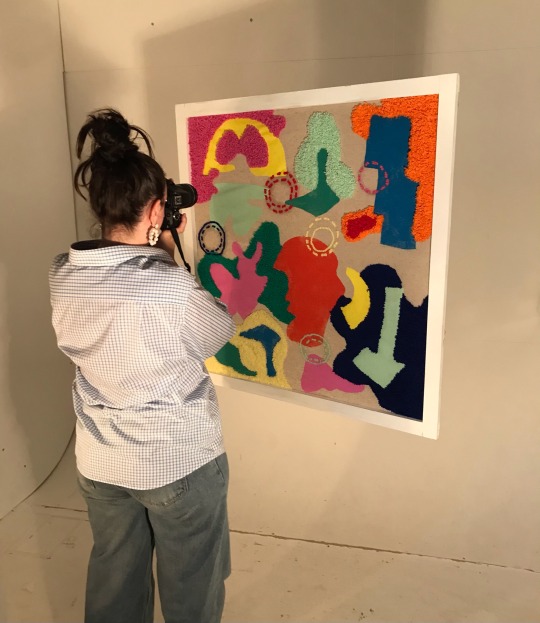
Here are behind the scenes of my Photoshoot in the photography studio as you can see i am taking pictures of my final piece using a cannon camera and i am exploring different angles and distances as well as playing around with the lighting to create a good selection of photographs for this photoshoot.
1 note
·
View note
Text
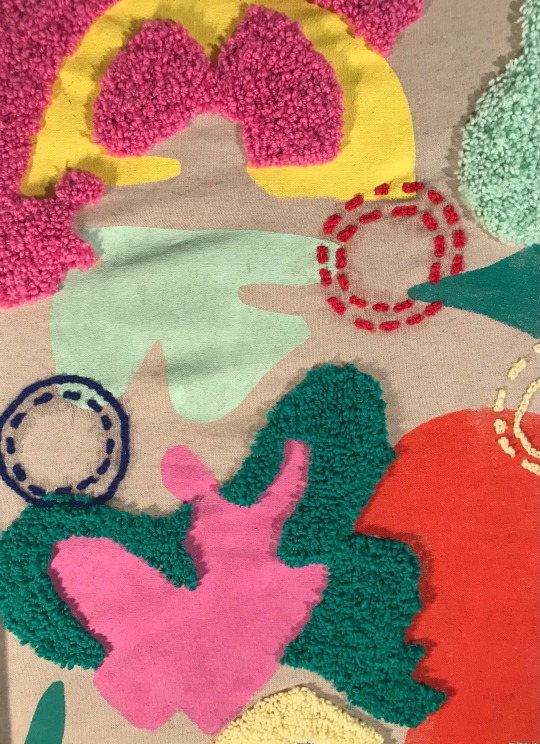
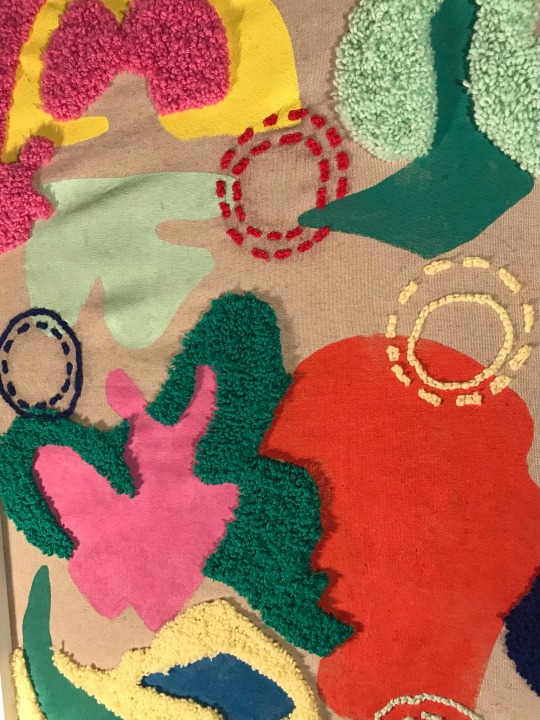
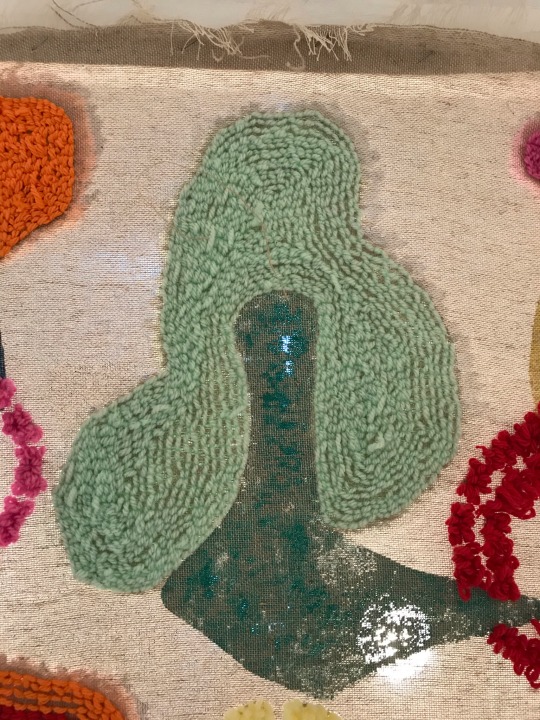
Here are some up close photographs from my photoshoot, these photos came out very clearly and I like how the focus is showcasing all of wonderful textures within my final piece. It was important for me that not only do I show the piece as a whole i also do up close photos for that reason and I will do the same when I do my final photoshoot this week.
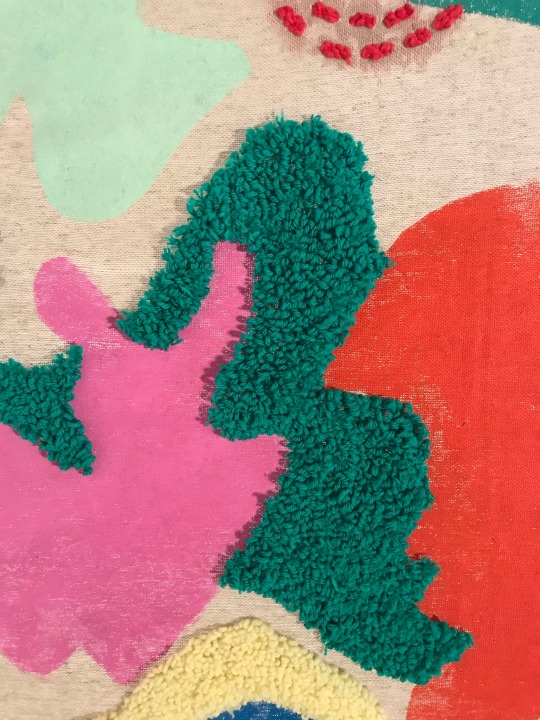
For these pictures I set the studio lights dim so that the light didn't shine through the fabric, then I took the photos per section of piece to highlight the contrast between the punch needle texture and screen print and this is clearly portrayed in these images.
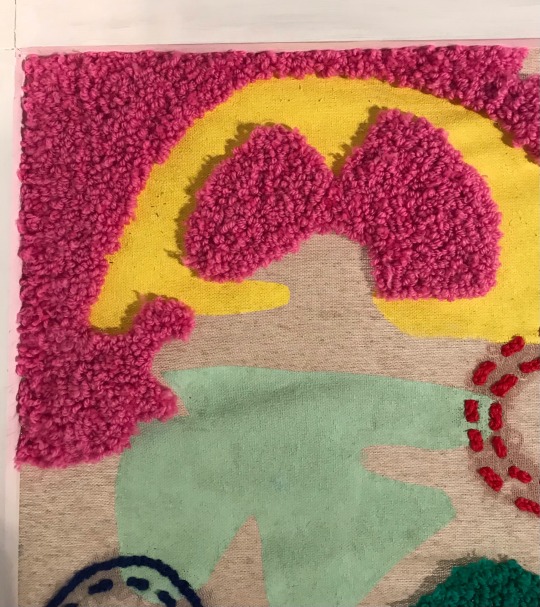
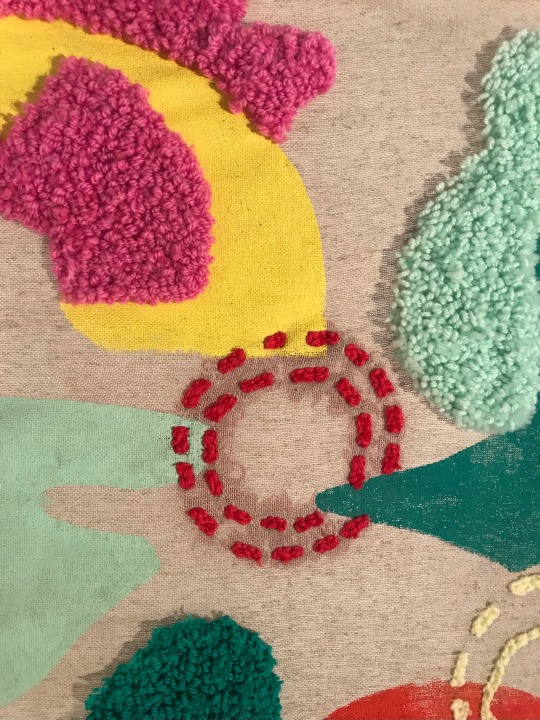
I have also taken up close photos of the back of the textile piece where you can see the dramatic contract between how the punch needle texture looks from the back of the piece (which is technically the front) in comparison to the front where its create a ragged texture. In my previous posts I have spoken about how I prefer the effect its given when you punch needle from the back however these photos do give the front justice as the stitches look very interesting.
1 note
·
View note
Text
PHOTO SHOOT 1
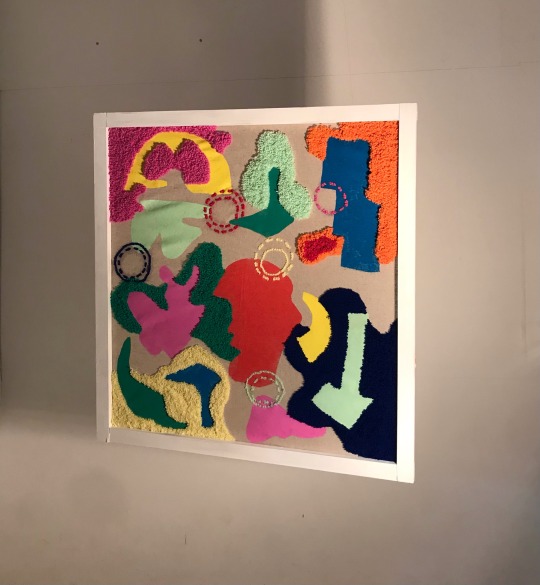
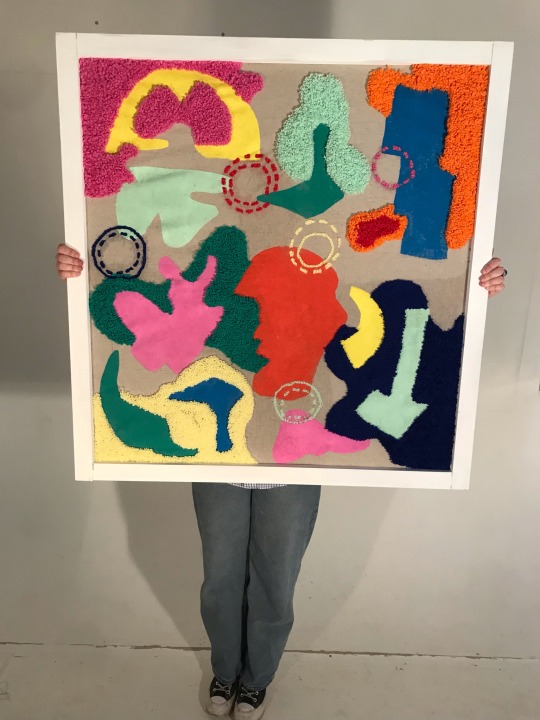
For my first photo shoot i decided to use a plain white backdrop. This was a necessary set up as i didn't want to draw any attention away from my bright colour blocked final piece. I also wanted to have my final piece hanging mid air, so in order to achieve this setting i attached string to the back boarding of my frame, and then attached it to two hooks on the ceiling. This allowed me to have my piece in the center of the studio, and have enough white spacing in the background.
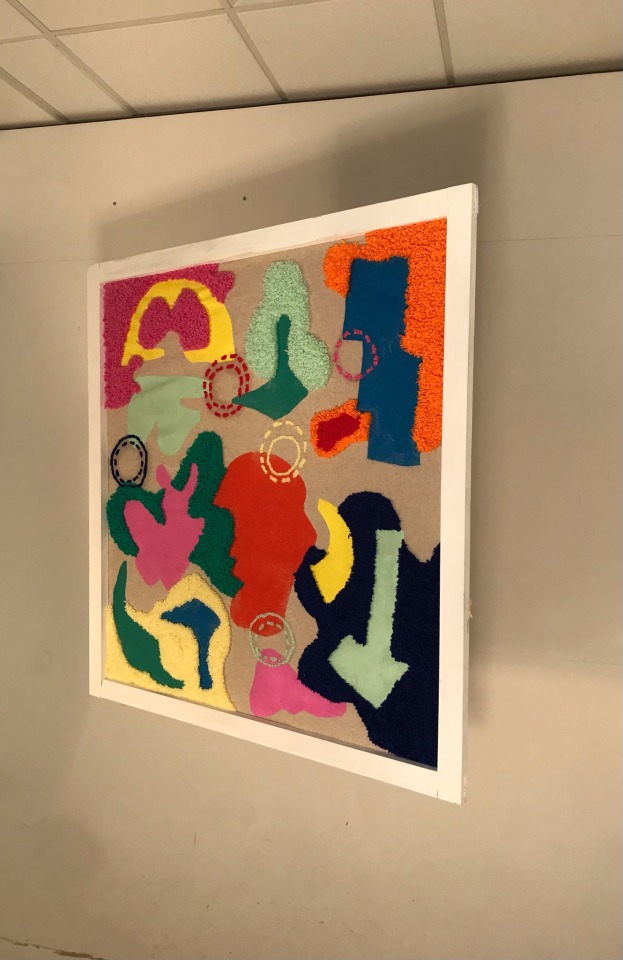
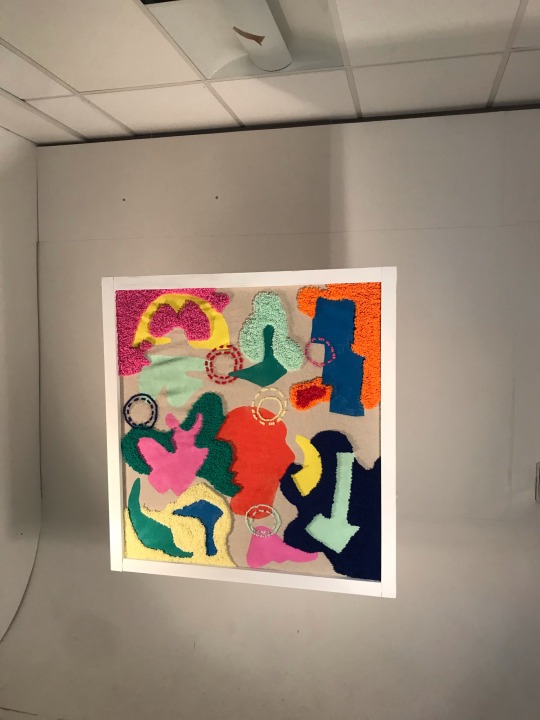
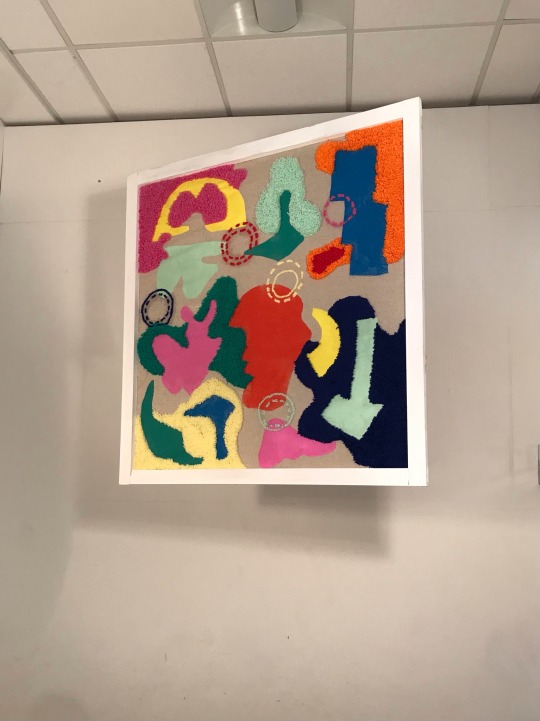
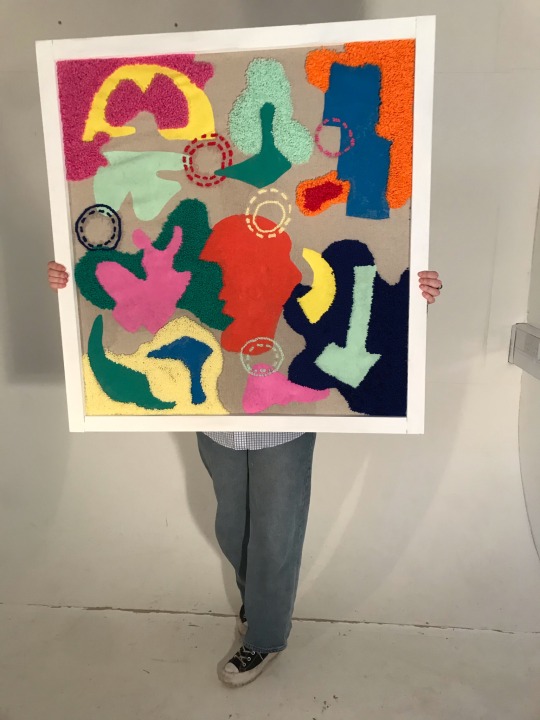
Another way i presented my final piece is by holding the pieces in front of my body. Although this may seem like an unusual way to present my work i wanted to do this as i think it creates a contrast with my small body and this huge canvas. I wanted to create the surrounding of an at home project, connecting back to my theme of arts and crafts.
1 note
·
View note
Text
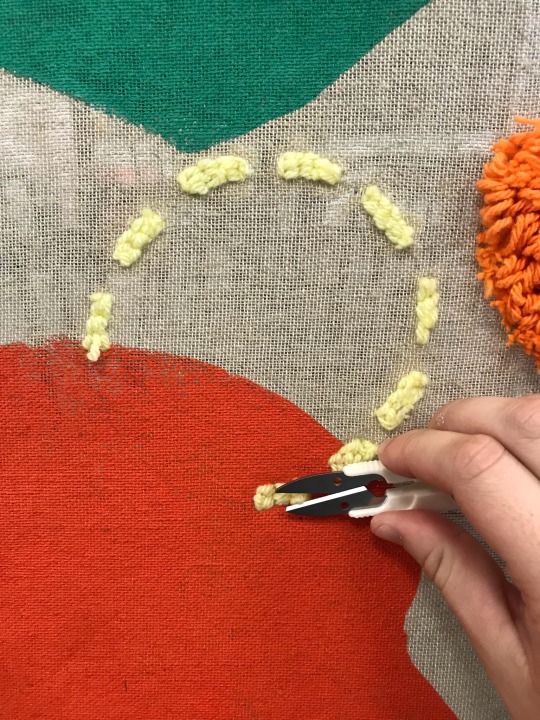
This afternoon, I am currently spending the next few hours going over areas that need to be re done or finished. The first section I need to finish is to punch needle the yellow circle in the centre on the piece. The photo shows me trimming any excess wool from the fake stitches I have made.
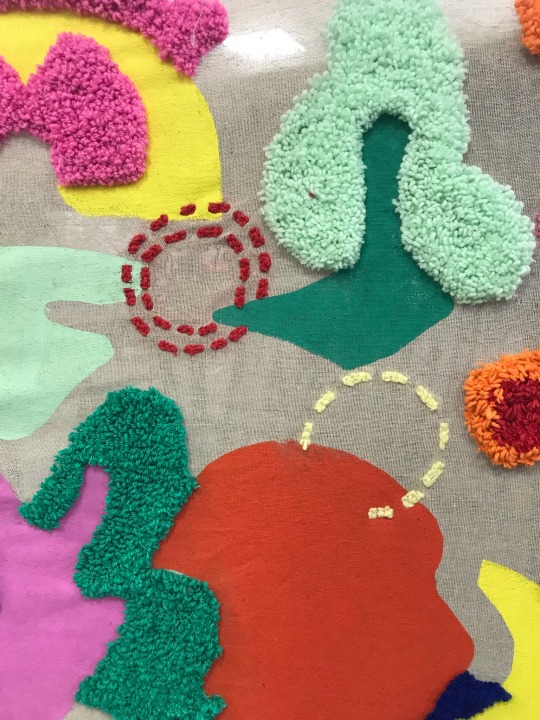
After completing the full circle of punch needle stitches I will start punch needling the inner circle using the same colour yarn but with a running stitch instead.
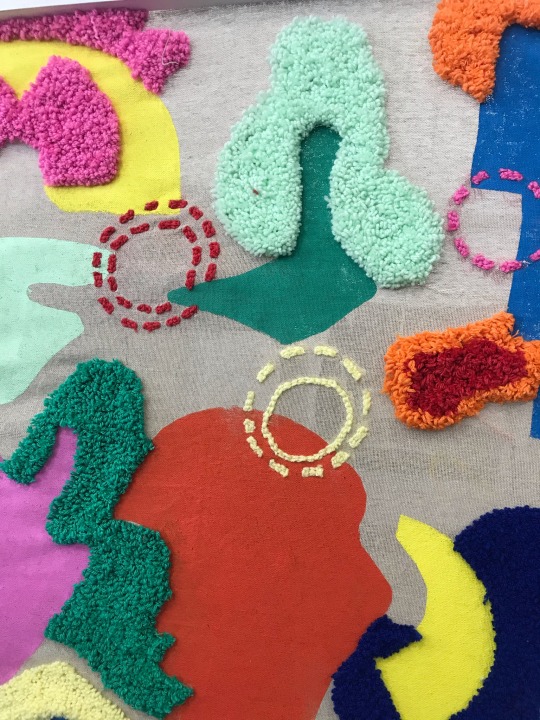
I have now finished the yellow circle inspired by Sam Owenhull. I am surprised about the final result as i hoped the circles to be symmetrical however i kind of like how they aren't like this and have wonk to them as it fits in with my homemade mood that im trying achieve across my pieces.

Lastly I went over these took punch needle areas as they looked out of place not being filled to the edge of the frame. As I have previously spoke about this issue occurred from the transitioning of the frame I used to punch needle from and now the new one. I lucky had some left over pink and blue yarn in my bag to work from. I have now punch needled over the random spaces now I can go into the photography studio to have a "Art gallery inspired photoshoot"

1 note
·
View note
Text
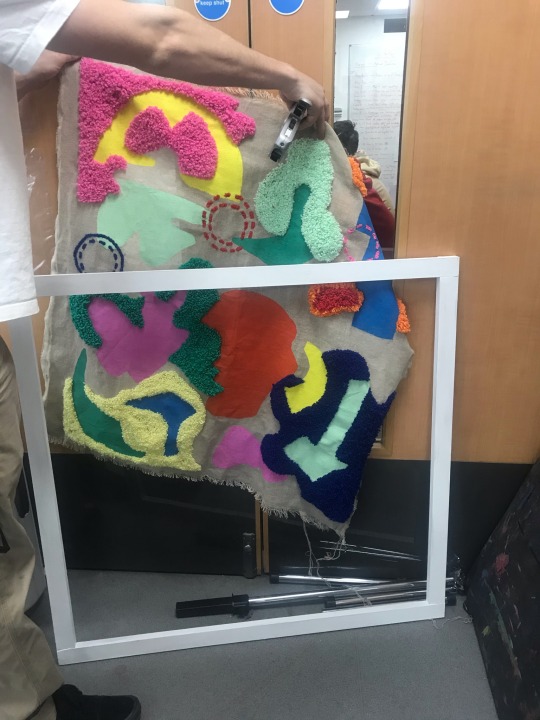
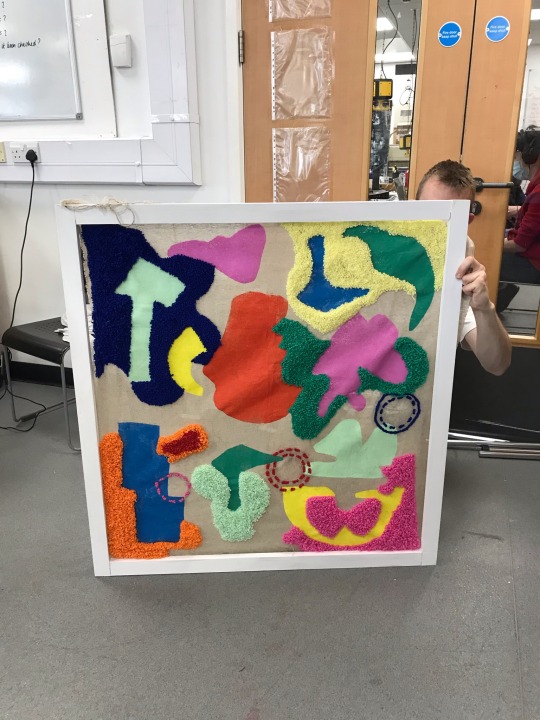
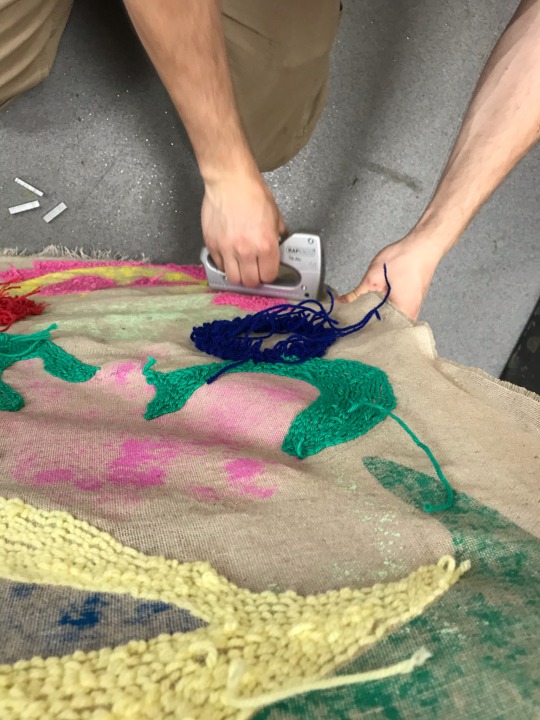
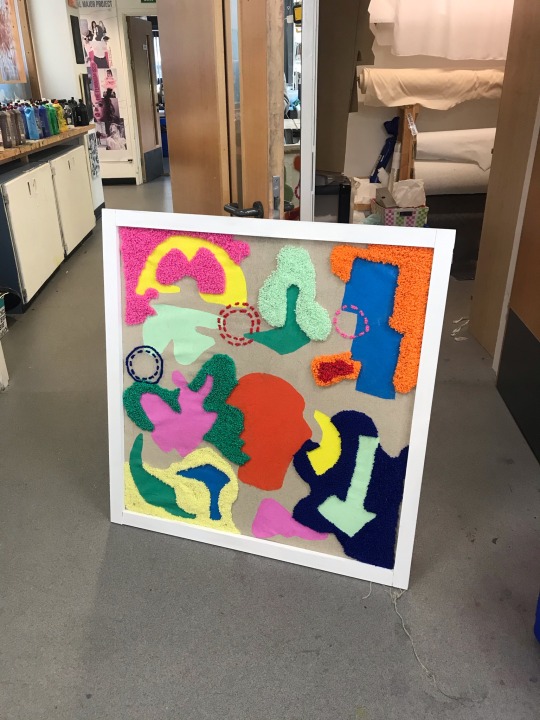
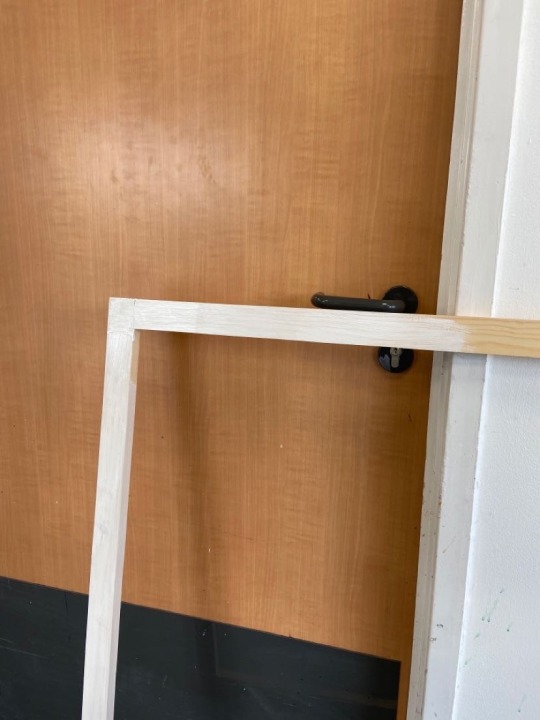
Now the paint from the frame is dry its ready to be attached to my final piece. I have asked one of the technicians this afternoon to help me out on doing this. I have been given the choice to either staple the fabric over the frame so that its like a canvas or to have so that the frame is visible, I have decided to frame it so that its stapled from behind making it look similar to the one i was inspired by in the art gallery.
After making this decision we did a quick tester by putting the fabric behind the frame and not only do I simply prefer it framed this way but I have planned to do a photoshoot where I initiate that my piece is in a gallery so this way works better for that look.
We then stapled every inch of the frame so that the fabric was tightly secured. After this I noticed that I would need to do some touch ups in some areas of punch needle. This is due to the fact that I punched needled on the other frame not this one so the fabric has changed place. I will spend the next few hours going over any areas where i need to go over again.
1 note
·
View note
Text
Inspiration for photoshoot

A few weeks ago I came across a lady I follow on instagram, she posts daily of the art work she's visited or visits and post them, this is an example of one. The actual art piece is irrelevent to me and the project however I was really inspired by how it has been laid out in the gallery specifically the idea of it being hung mid air so that people can walk around the piece show casing it from all angles to get a feel of all the different textures.
This would have been how I would of displayed my textile piece, if we held an exhibition at college however due to Covid19 we wont be able to host one this year but I still want to re create this location and setting and plan to also hang it up in the photography studio giving the impression that my work is in Textile Art gallery.
1 note
·
View note
Text
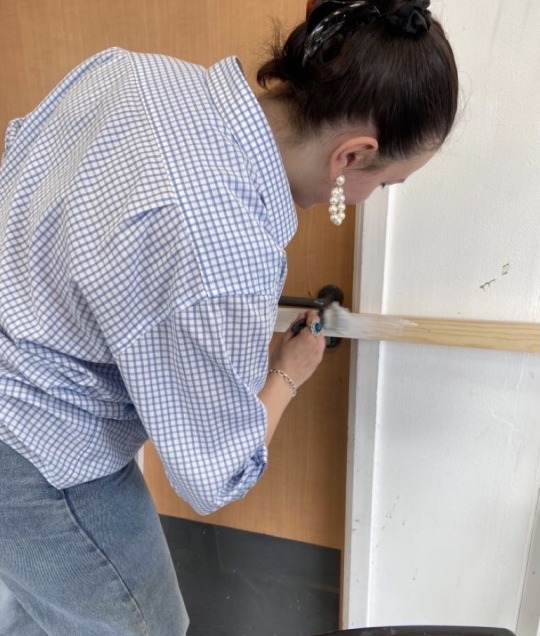
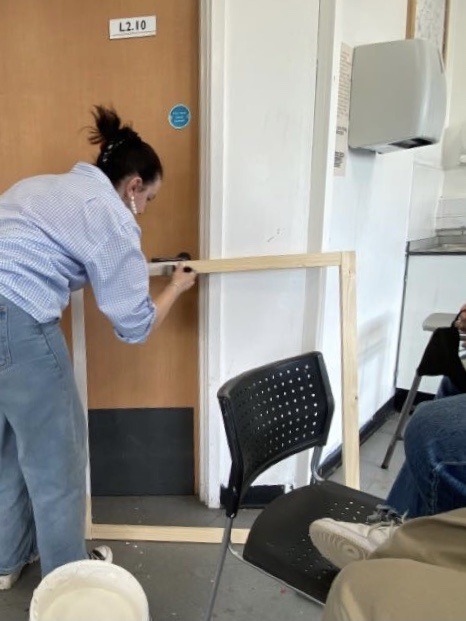
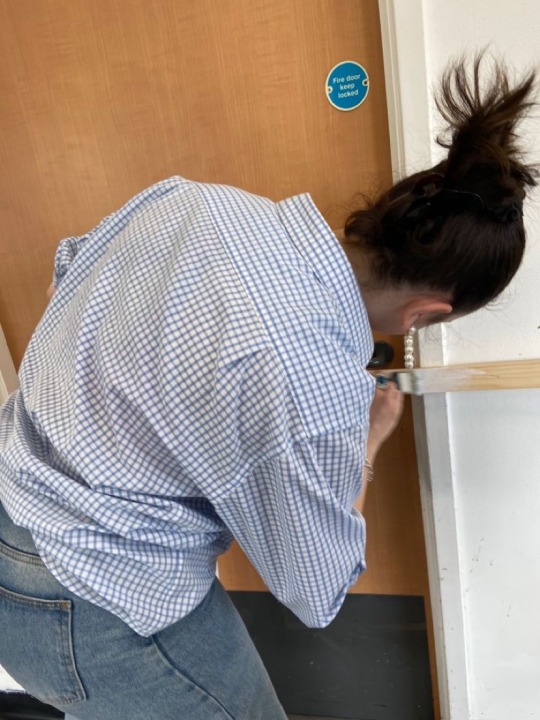
painting a frame for my textile piece ready for photoshoot
I have nearly finished my final piece, however through
1 note
·
View note
Text
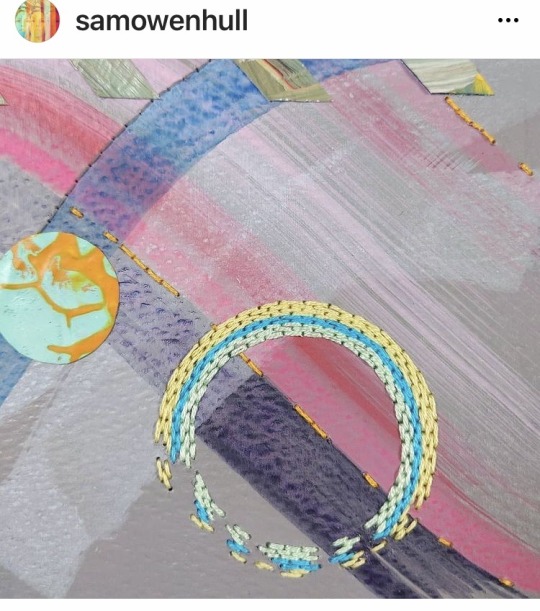
i have decided to include similar circular punch needling , inspired by Owen Hull. Through my secondary research i found that he creates hand embroidered circular shapes and other patterns , alternating shades and gaps. I felt as though my piece needed extra texture and detailing , and after a reflection with a tutor, i designed different circular patterns and punch-needled them onto the empty spaces of my canvas.
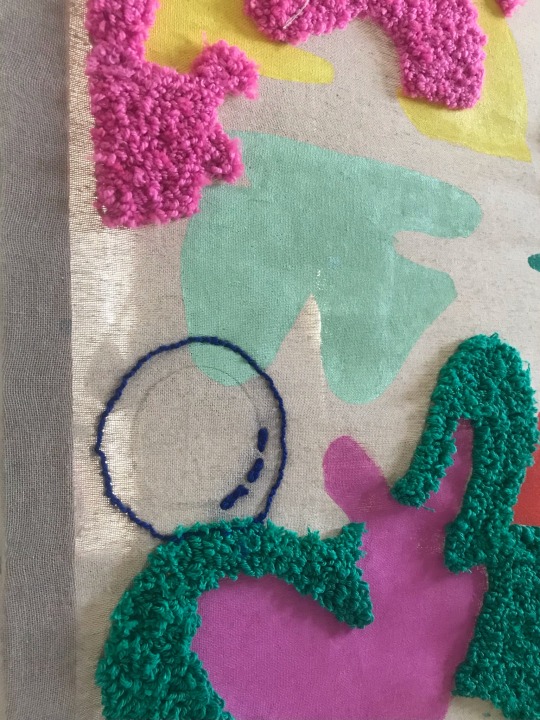
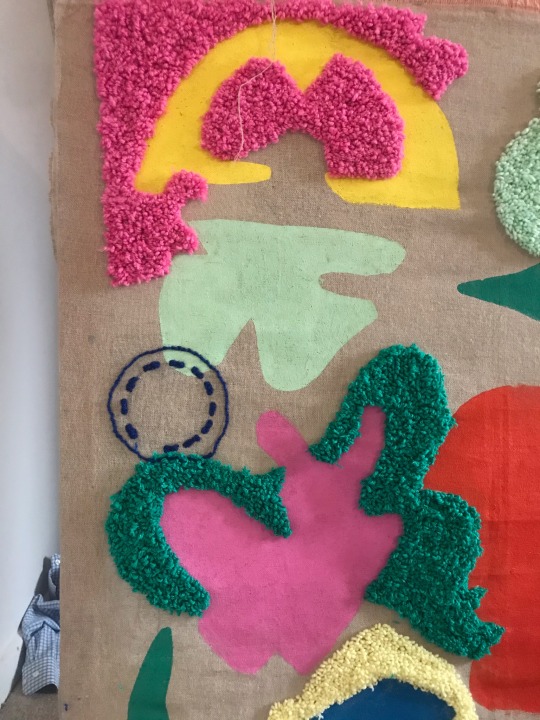
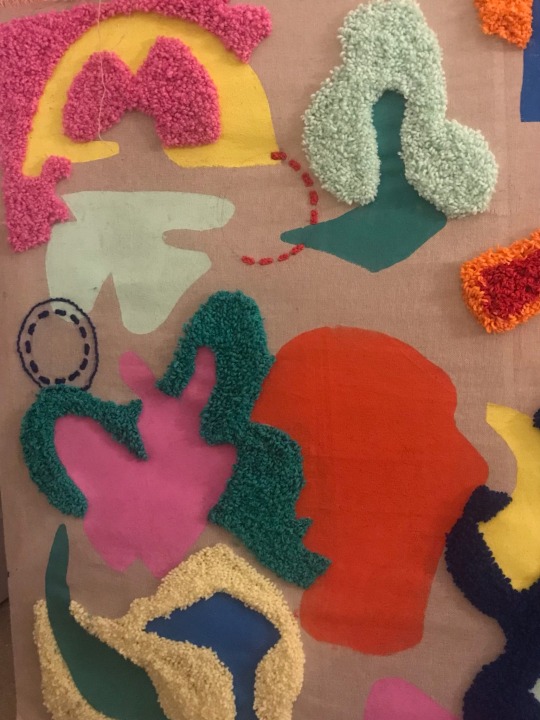
These posts are documenting the gradual process of these circular detailing. For my first circle detailing i decided to have a full dark blue circle , then having a gapped inner circle. i decided to do this as it added more texture to my piece and allowed me to fill in any empty spaces.
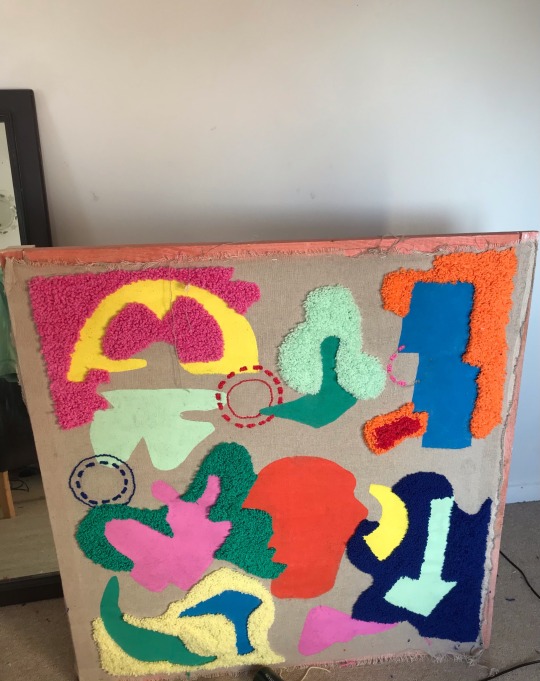
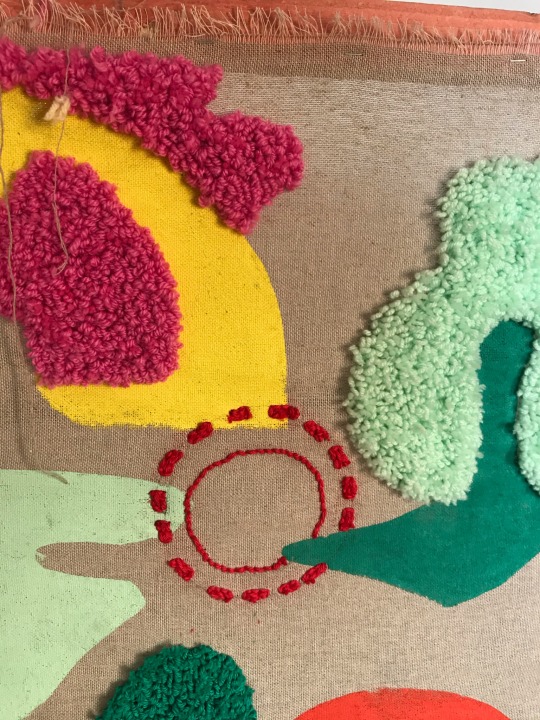
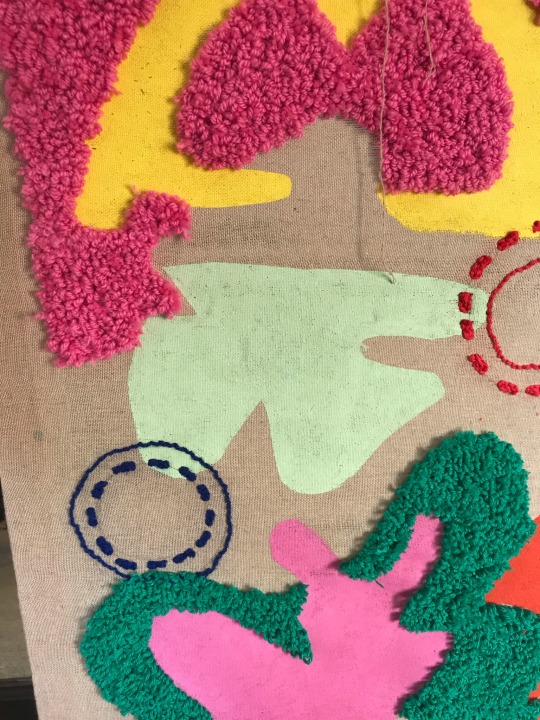
1 note
·
View note
Text
more behind the scenes
Here are some of the behind the scenes of me punch needling at home. So far the majority of the punch needle on my final piece has been at home meaning ive been able to do it in my bedroom whilst i listen to music. I have mostly sat down for this process as its a long one and after awhile youre legs can hurt from standing up too long.
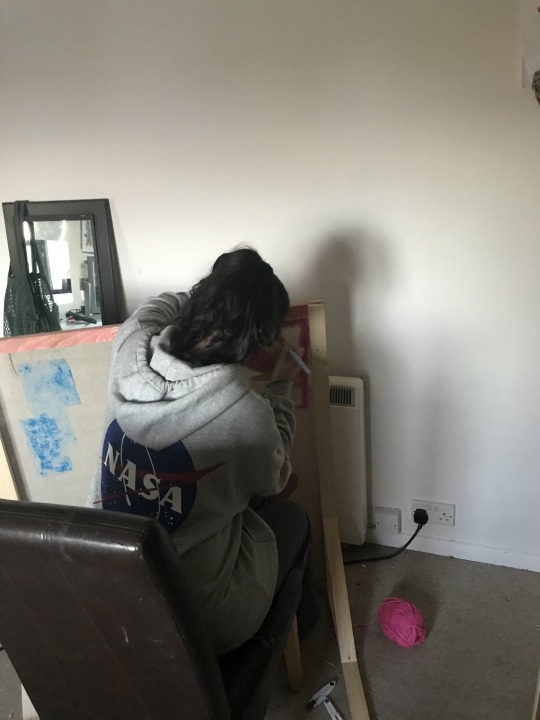
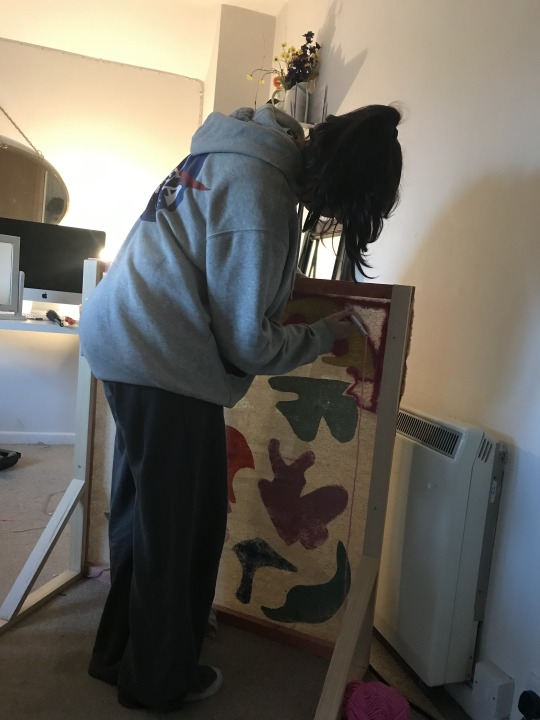
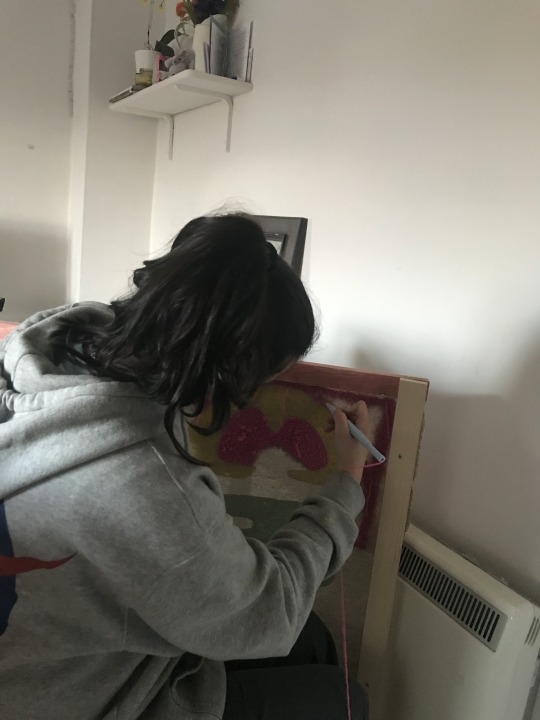
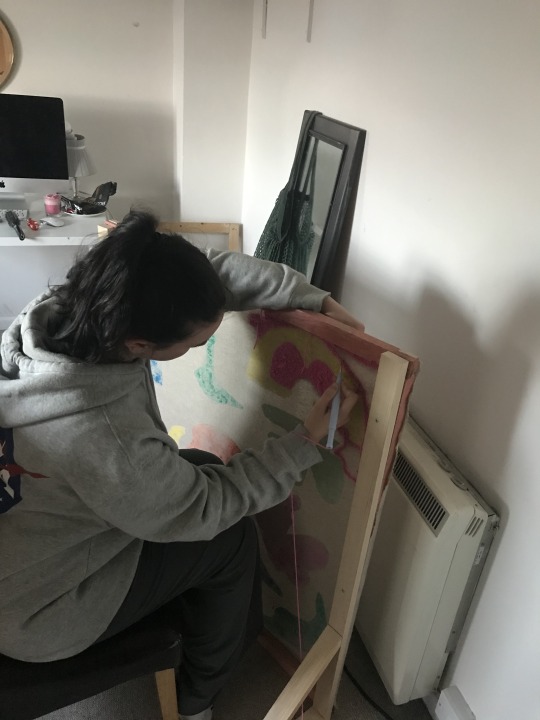
1 note
·
View note
Text
Adding a little more detail to my textile piece
After reading my targets this week, I have a little extra bits to add to my final piece over the next week. I am very happy with this outcome so far however I feel that theres a few gaps where extra detailing could be placed. I have inspired by Sam Owenhulls work to do this today because she uses embroidery in her work to add extra detailing too.
Design 1:
Just circles bringing the shapes more together

Design 2:
Circles and lines to fill ALL gaps as well as brings piece together. I would do this using punch needling. However I am not in a rush to decide right now as it depends on what the circles look like and if after I punch needle the circles , it still needs something more to fill an empty space.

1 note
·
View note
Text
final cushion cover
Here are some photos of my final cushion cover, Im very happy with the final result. It was my first time using the process punch needle therefore I was unsure how effective this piece would turn out however after seeing the final end result I'm so glad I took this risk. As I was creating it I was really pleased at how well the colours I chose complimented each other, they also looked really good and vibrant and modern against the colours I used for the screen printing.
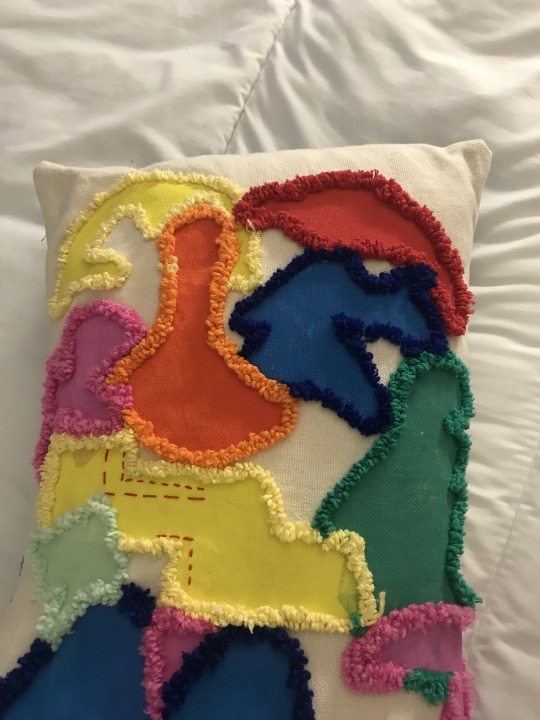
0 notes
Text
constructing my cushion cover
In todays workshop, I have made my cushion cover to add to my final pieces using the over locker and sewing machine. I chose to use the blue fabric as I felt it complimented my design the most. I have chosen to make an envelope cushion cover but I dont have any experience in making a cushion cover therefor I have asked on of my lectures for daily guidance to help me do this.
I firstly cut around my punch needle fabric with the blue one, so that I had two fabrics the same size.
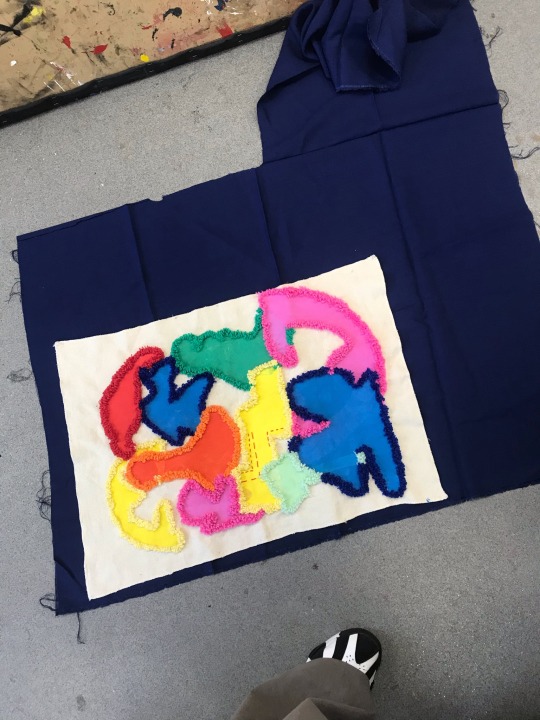
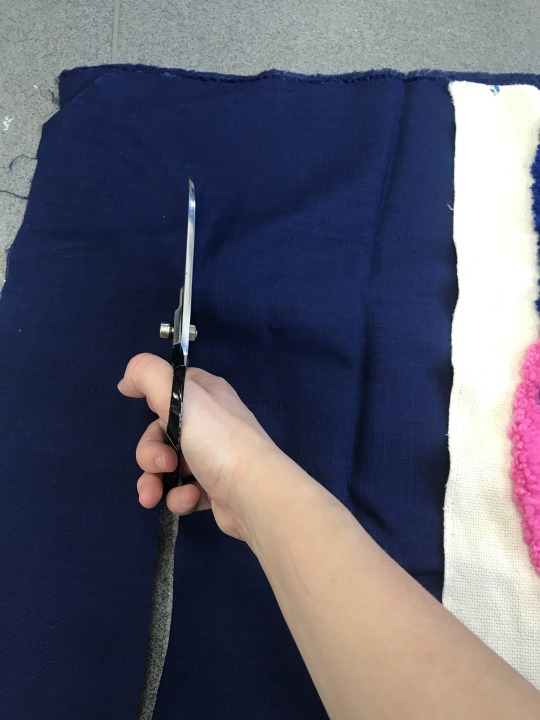
I had to ask for assistance to make sure the two fabric were the exact same size, then I cut the blue fabric into two I did this using textile scissors.
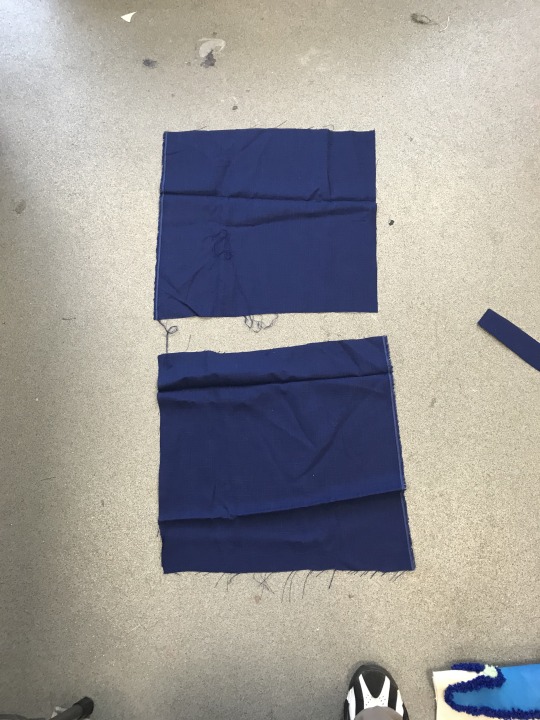
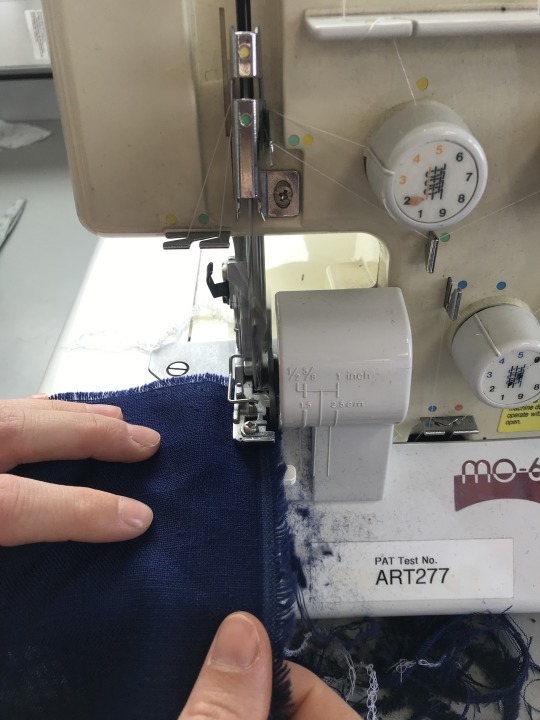
To prevent the fabric from fraying, I have used the over locker today to do a over lock stitch around the each sides of the two blue fabric.
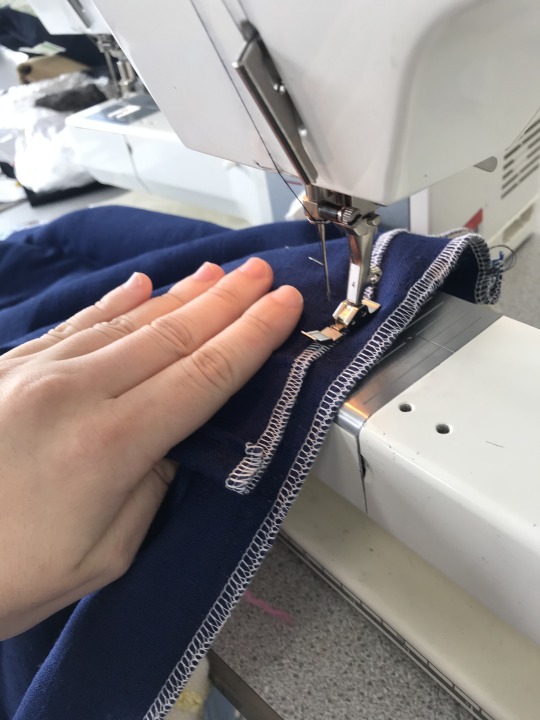
This is the precise process of overlocking the edges of my cover. This process requires attention to details as one wrong move could extract too much of my fabric, ruining the shape of the cover.
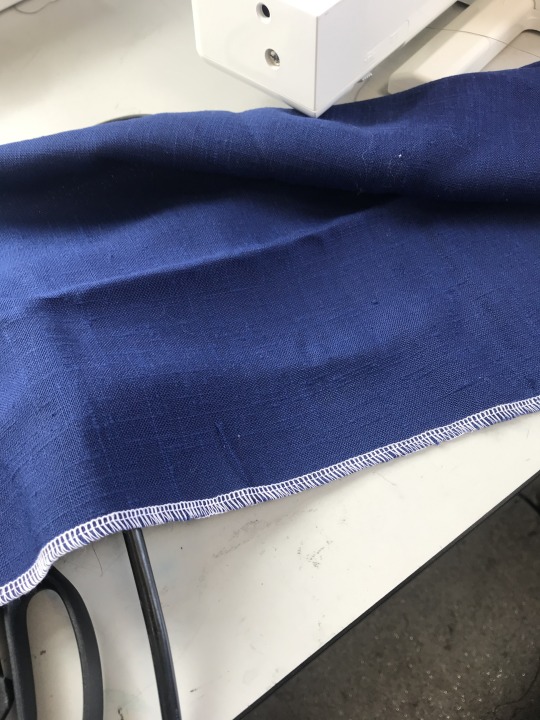
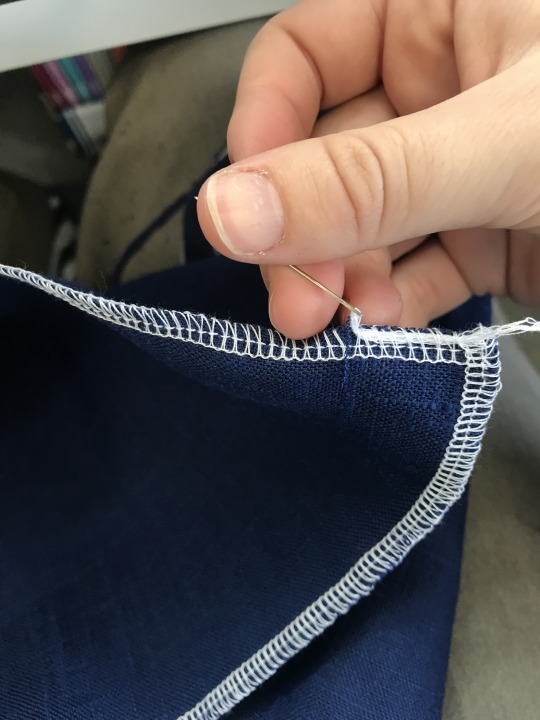
In order to remove the extra threading at the end of the overlocking, i took an embroidery needle, and threaded the excess thread through the gaps of teh overlocked edge.
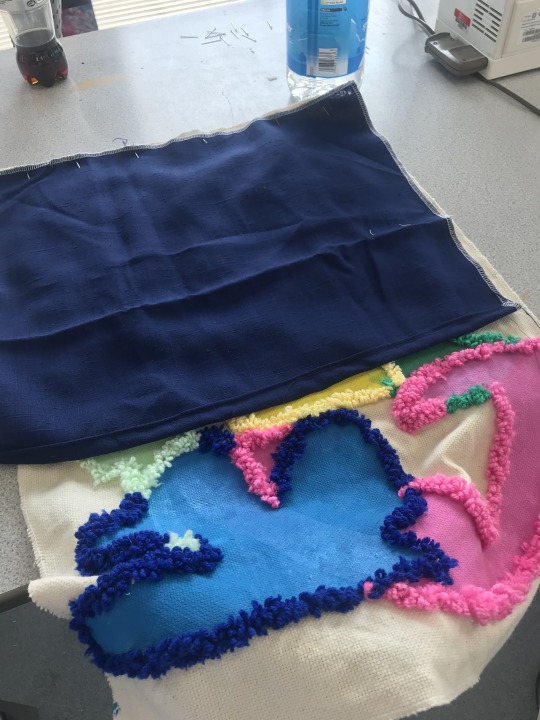
Here i have my cushion edges pinned together, ready to be sewn and stitched together , inside out.
1 note
·
View note


