
Don't wanna be here? Send us removal request.
Statistics
We looked inside some of the posts by finalmajorprojectaliciaansell and here's what we found interesting.
Average Info
Notes Per Post
1
Likes Per Post
0
Reblog Per Post
0
Reply Per Post
1
Time Between Posts
2 days ago
Number of Posts By Type
Text
17
Last Seen Tumblr Blogs


Fun Fact
12.7% of mobile users access Tumblr.
Text

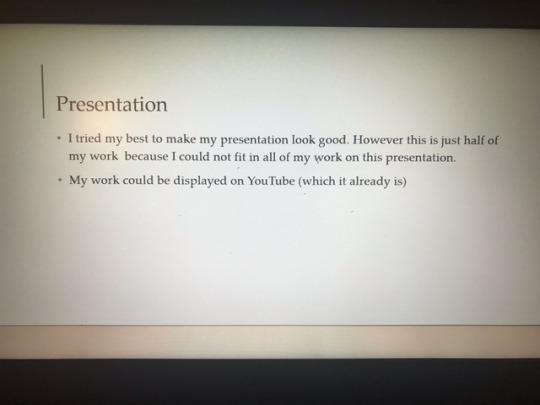
This is my final major project presentation. Overall i tried to include as much information as possible and i think i spoke loud enough and clearly. I included and talked about as much as i could in the time limit we were given.
0 notes
Text
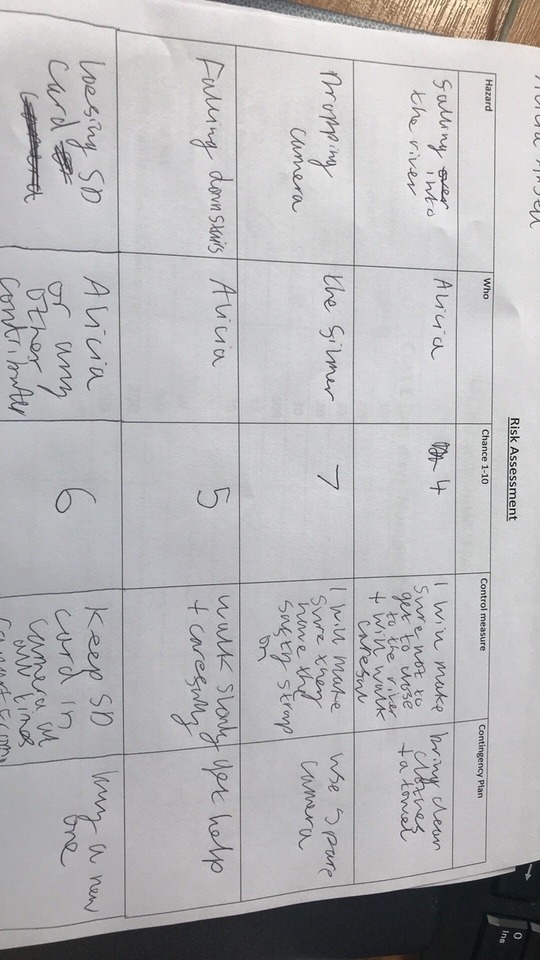
I thought I put my risk assement up but o couldn’t find it so I have uploaded it now
0 notes
Text
Reflective Journal week 6
I fished editing my video and i made a longer and shorter version due to cutting time down so it is 2 minutes long. I also added in video transitions to make it look better. I then uploaded my video on YouTube and Facebook and got 5 comments for my feedback. I also made my power point presentation that i will be showing to the class after the half term break.
0 notes
Text


My video’s feedback
From this feedback i learned what people liked about my video. I think people like the editing the most for example the transitions, outro and intro. They also like the whole idea pf the video.
0 notes
Text
Link to my FMP video
https://www.youtube.com/watch?v=gAaoXQqLPAc

0 notes
Text
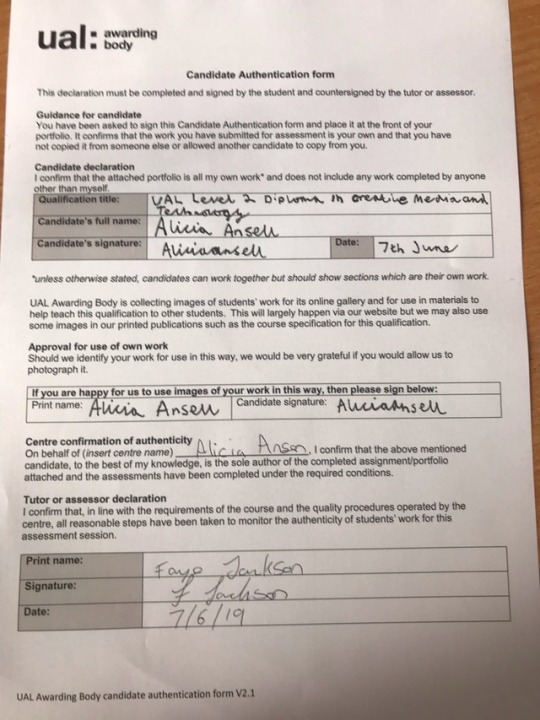
This is the sheet to say that I confirm all the work I have done is mine and created by me
0 notes
Text
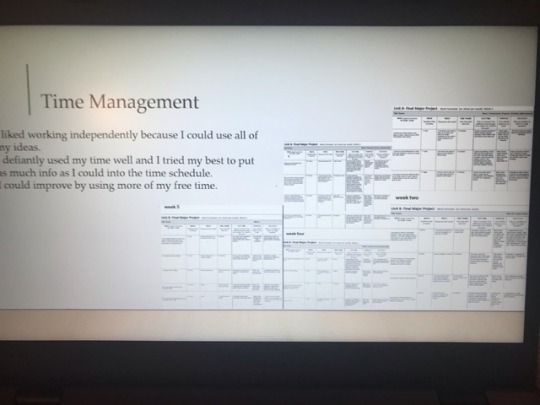
My Work Schedule week one

week two


week three


week four

week 5


1 note
·
View note
Text
Constructive feedback
River: I thought that the various use of music was very well done however I feel that you should have included transitions to make the video flow better.
Caitlin: The intro is really good and the concept of the video is a good idea. Overall, I really like the video.
Peter: The intro is fast paced and energetic and the entire video is funny and random and a good show of what you do for your channel.
0 notes
Text
Final Major Project Evaluation
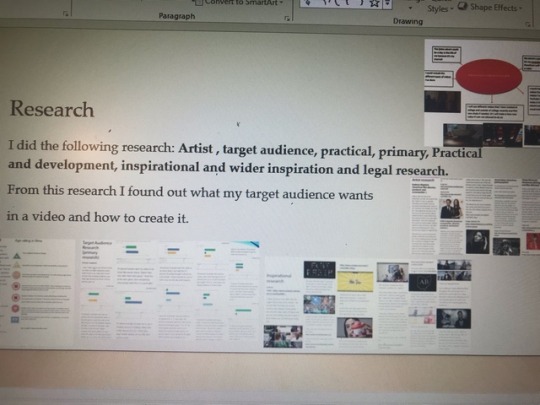
The first research I did was called initial research I made different brainstorms to show my different ideas and plans. I wrote about my main idea the most including hardware, software, style and design. I also wrote about my other ideas I had more vaguely. My other ideas were based on photography rather than video production. I thought I could make a magazine about my YouTube channel. But I did not think this would be as effective. I also thought about doing a poster for my YouTube channel or one on a completely different topic, health eating and healthy living. I also considered making a YouTube banner. Then I wrote up my proposal which was about my chosen topic and the plan. I used a schedule to help me progress with my project and keep up to date. I did 5 pages of this.
I did inspirational, artist, target audience, legal practical and development, art and wider inspiration research. I found the inspirational research useful because I could analyse videos and how they were edited etc. Which really helped me think about how I want my video to be edited and how it looks like. I think the artist research was less useful; then the inspirational research. I felt like the artist’s research is more inspirational the inspirational research. This is because I felt inspired by it but it did not help me with producing my project. However, I found target audience research useful because it helped me learn more about who would be watching my video. I think primary research helped a lot with this because my questions were relevant to my project. I really liked the developmental research because it helped me create my YouTube intro clip that is at the beginning of my video. Plus, now I know how to create one and what website I can use. The final research I did, wider inspiration, was similar to the artist research. It inspired me but did not help me with creating my video. However, it helped me think about what other videos I could do in the future.
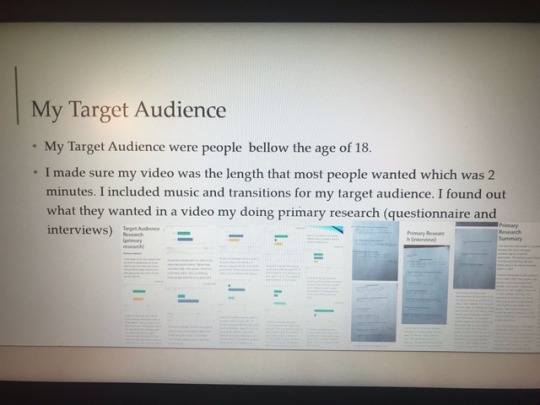
The demographic of my audience was peopled under the age of 18. The photographic of my audience is that most of them prefer funny videos over serious ones. They like video game videos the most. They like a mixture of different types of music. I found out all of this information in my primary research. I did a questionnaire and a few interviews with people in my class to help me find out this information. My YouTube intro appeals to my target audience because everyone I interviewed said they liked YouTube. This is imported because they are more likely to enjoy something that is connected to what they like.
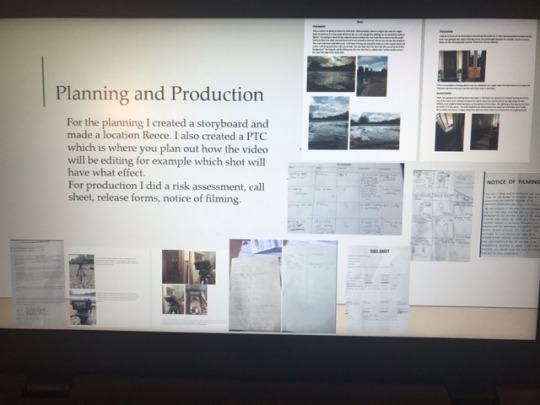
I produced my shots by using a Cannon G7x camera and a tripod. I also used my webcam for one shot. I took my shots in my house and at a river near my house. I also took test shots to make sure they were good enough and took shots at different angles to see which looked best. Before this I did some pre-production work. I made call sheets, a story bored, notice of filming. I also made sure I had performer and contributor release form and a risk assessment sheet. I then used Adobe Premier Pro CC to put my video together and edit it. I made a split screen and I made parts of the video’s speed duration faster. I also added in music and some subtitles. I made a longer version and a shorter version of my video because I had to cut some parts out to make it shorter and more effective. I used panzoid.com to create my YouTube intro for the video. Making a YouTube intro for my video made me advance in using technology. I also learned how to use more effects in Adobe Premier Pro CC.
Overall I am happy with my project and I think it is good especially considering, I have never made this kind of video before. I think most things went to plan. I can’t think of anything in particular that did not workout. However, I wish I could have included more videos but it would have been too long. If I did this project again I would try other effects in my video.. I would also add in more new footage. I found work independently good because I could film what I wanted to and use all of my ideas as well as editing it by myself. I kept up with my schedule by writing about what I was going to do just before I did it. My proposal helped me have a general idea of what I was going to and what the video might be like. I included images to help show what videos I was thinking about using. I think I used my time well and I ended up finishing my videos sooner than I thought I would. Also I ended up with a longer version and a shorter version because I cut out some parts to make the video less then 3 minutes.Maybe I could have used the spare time to improve my video but I did not want to change something incase i would ruin it. I think my video is presented well. The video starts with an introduction and starts from the past then ends closer to the present as it goes along. Then my video ends with an outro.
0 notes
Text
Reflective journal
This week i have been editing my video and talking about how i have edited it and how i have shot it. I only have one thing left to do then i am done editing. Then i will write up my proposal and put my schedule up
0 notes
Text
How i shot my video

For the river shot I had the tripod as low as it could go for a low shot because I liked the effect of not being able to see the floor. It makes the river look so close. I had the camera titled up a bit so the camera would fit all of me in.

I used the log as an advantage and decided to sit on it instead of stand on it. When I tried to stand on it did not work plus you could not really hear me. So I moved the camera closer and I wanted people to see all of me so that’s why I did a low shot that was close up.

I had the tripod as high as it could go. I had it pointing as high as possible so you could see the top of the stairs. I got the camera man to slowly change the angle and follow me walking. The camera went at an angle to avoid the boxes at the bottom of the stairs being seen.


I just had my camera on a tripod not very low not very high up.
0 notes
Text
How i edited my video

This is my first shot I properly edited (the first shot was just imported and no editing was needed) I split the shot into three separate clips so I could speed the two clips up and have the last one at normal pace so that you would be able to tell what I am saying when I get to the bottom of the stairs. I also had to re frame the first two clips on this one shot because it cut the top of my head off. This clip is in my longer version

I imported the intro I made for the practical and developmental research. For my intro because i liked it a lot so i did not want to make a new one.

I did a Skeleton edit on this shot to crop out the start and the end to give it a cleaner and more professional shot.

I also did a Skeleton edit on this shot because I filmed this one myself. Then I had to re frame the shot to make it look better I did this by dragging the corners and adjusting the size to change the placement.

I cut this video down to just the very start of it when I introduce myself (my first ever YouTube video)

I moved the two video tabs on top of each other to join them together. This is called a split screen.

I also added text by using the legacy title option.

I used the position tool to change the size and position of both videos to make them the same size and in the same placement.

Then I had to download old previous videos from my channel. I added slow creepy music in to the intro of this video to make the intro more effective. I also just thought it would be better with music. I got the music from Free music archive.

For This shot (that I shot previously) already included gym like music. I added in text by using the text tool. I used the edit controls section to change the color and font of the text. Then I used the arrow button to adjust the size.

Then the video goes black and this pops up. I did this by using the text tool like I did previously.

I already made this intro on windows movie maker. The text starts further back and moves forward. I added in some slow creepy music (the same as last time so the video does not have a crazy amount of different music.)

The I added text in the left hand corner the bottom corner to make it look cool.

I tried to use the gain audio option so u could hear me better but it just muffled everything and sounded awful so I put subtitles on what I want the viewers to hear. The music was already included in the video so I could not edit it out.

Here I talked over the camera whilst it was on the tripod and zoomed into the mini waterfall thing. This is also in the longer version.

Then I ended the video like how I started the video. Just cuted out the parts I didn’t want.

Then I ended my video with an outro I made for my practical and development research. I added in slow western like music.
0 notes
Text
Book Research-Film Making by Tom Holden (teach yourself)
I can easily move the camera in different positions using a tripod.You can have the camera really high or low by using this type of equipment.
You can make ur own sound effects for example running up the stairs. You can do this by getting a microphone and recording the sound.
Going to free locations is a good place to start when filming shots. For example other peoples houses and bathrooms. This where low budget films are usually produced.
Its also a good idea to visit your location to find out how easy it is to get there on the day of the shoot. Is there any risk factors. This is why i should do a risk assessment. I should also think about the layout of the location.
Before i go to my location to take shots i should make sure i have enough space on my camera to avoid having to keep deleting videos which would take time up. I should make sure my camera is fully charged so it will not die.
My pre production work (planing) should make editing more smooth. There are to types of editing, linear and none linear. Linear is when you put the film into chronological order. None linear is not filmed or edited in the same order.
Types of different shots and effects
close up: A shot that will make the subject fill in the screen like a face.
crash-zoom: a very rapid zoom. Zoom in and zoom out. It can be very dramatic.
cut: The instant when one shot joins another in the editing process.
Cutaway: A shot that reveals some detail
dissolve: An edit effect in which two shots are joined by means of fading out then going to the next shot
fade: a shot fades into blackness.
skeleton edit: the very first edit that cuts out unwanted parts of the shot.
Filed of vision: the visual area your camera will record and film at any one time.
Frame: the filmed shot
Frame accurate editing: Editing that allows editors to stop and start cuts exactly where they want.
Jump cut: A cut in which some of the action disappears and will cause a jolt in continuity.
Low angle shot: A shot made when the camera is placed low to the ground facing upwards. This is effective for making someone look dominating or huge.
High shot: Makes someone look small and insignificant
Pan: Moving the camera around horizontally on a tripod or shoulder for the purposes of filming someone walking or a car driving etc.
0 notes
Text
Here is some feedback from someone in my class. I will update my schedule and get it up on my blog as soon as possible i just wanted to finish it before i put it on here.
0 notes
Text
Reflective Journal-Week 5
This week i finished all my planning including my story bored,reece and call sheets etc. I also filmed all of my shots and i have started to edit my video. I am also writing about how i have edited the video so far, which includes screenshots. Next week i will continue this.
0 notes
Text
Location Recce
First location: My Room
My room is the first location here I will be sat on my chair in front of my desk. This quick shot will be filmed on my Logitech webcam to look like one of my videos on YouTube. The lighting is good but only when the shutters are closed so I will keep them closed for the shot. I will use my microphone to block background sound out. There are no hazards.

This is the direction I will be sat in front of my camera.

This is the direction the camera will be pointing at.
Second location: My staircase
Here I am going to be walking down the stairs. I will have my camera on a tripod looking up to the top of the stairs and I will get someone to slowly move the camera down as I get closer to the bottom at an angle to hide the boxes at the bottom of my stairs. The lighting is fine due to the fact its inside. It is also quite. The only hazard is me falling down the stairs so I will make sure I walk down safely and slowly. I might speed the shot up when I edit it so it looks like I’m walking faster.


Third Location: My Stairs
I will be in front of my front doors welcoming the audience in then saying goodbye to them at the end. I am going to the shot in the day so its nice and bright because its outside. Sound is not an issue, its nice and peaceful outside. There are not any hazards.

There is a problem of being able to see my reflection so I might open the back doors so it looks like they are not there and just use the two front doors in this shot.
Final location: The River
This is where I’m going to shoot my final shot. Unfortunately, there is a log in the way so I might have to stand on it. It was quite dark that day so I will change the settings on my camera to make it lighter. I am going to stand at this edge because it makes the river look like a channel at this angle however this river does not end here so it is not actually a channel. but so you can see me properly. The river looks best mid/afternoon. I will have to bring my tripod to make sure the camera does not move. I will bring someone with me to help. You can hear the river but I like this sound to be in the background. The hazards will be falling into the river but this is unlikely but I will be careful when I am near the edge to be extra safe.

0 notes

