Photo


BEHOLD! I have created some eyechips that are free to use! I think these are pretty nifty, especially the swirly amber-like ones. :> If you use any, let me know, I’d love to see how they look on a furb! ^^
1K notes
·
View notes
Text


So my cat had to have a major surgery done and my decided that I’m paying for it! There goes all my savings for school... To combat this, I’m gonna open up my commissions, plus I have an opportunity for my furb loving friends. Little hand painted furby boxes, done to your specifications. I’m going to do them for a mere $25 plus shipping. All proceeds will go to supplies and my cat’s surgery and aftercare. So, if you could, message me and share so more people see. Thank you in advance.
From,
Dana and Skittle ♥️
751 notes
·
View notes
Photo


I recently learned how to crochet furby cozys! They are really fun to make and super easy to customize, from the base colors to putting simple stitching on the outside!
cozy = $15 cozy + carrying strap = $20 + US shipping (only, sorry) for either
Shoot me a message if you are interested in getting one! The examples shown here are just some ideas to show off what I can do! But I’d be more than happy to discuss any design you might have in mind to match your furby (also it can just be a fun crochet bowl if you are into that)!
329 notes
·
View notes
Text


Scout hides among the flowers 🥰
She still has her torch but I prefer her without it ✨
#furby#furby fandom#all furby#furby community#safe furby#custom furby#furby custom#my furby#furby 1998#1998 furby
10 notes
·
View notes
Text
Plush 2012/Boom Tutorial!!
What you will need:
A 2012/Boom
Needle and thread
Fabric for base
Razor blade
Screw drivers
Hacksaw (optional)
Time and patience
I’m not very good at writing so take it easy on me, I’ll do my best!
This is the Furby I’ll be using as an example, Pilot! My little brothers Furby boom who sadly has a broken motor.

Okay so first things first, you need to skin your Furby, I would show you how to do this here but there’s plenty of great tutorials you can follow for this step! Just make sure you are very careful with the clips holding the skin to the faceplate, you need these!
Once you skinned your lil friend you can wash their fur (if you need to) and leave that to dry while you get to work! Remove the silver tape from around the shell and then we can get started. First things first, there’s 4 screws you’ll need to remove on the back of the furbys shell, two near the top and two near the bottom. The back plate won’t come off until you’ve removed the ear clips however, you can either remove them like the clips on the faceplate or cut along the white lines with a razor blade (this is what I do because I’m lazy). After that the back plate should pop off.

Near the bottom of the Furby you’ll see two white plastic pieces (one near front, one near back) held in by metal rods. You need to remove these, I usually push from the smooth end or pull from the rough end with some pliers. Once you’ve done this you’ll be able to get to a lot more screws, now you need to remove every screw you can see. Don’t forget the ones near the ears! You can pop out the lower metal rod on the ears too while your at it. Once you’ve done that you can start removing plastic pieces that will come loose to reveal yet more screws.

Once you’ve removed all the screws you can get to you can force the black part back (you won’t break anything don’t worry). Remove any other screws you can see and now the faceplate should pop off. 1st part we need obtained! Next we need the eyelids, they should just pop out of their hook with a little force. Remove the 4 screws on the back of circuit board and the two on the front of plastic eye piece. You may need to force some of of robot back to get to the bottom two screws, again don’t worry, you won’t break anything.

After that the eye piece and the screen should pop out. I usually take grey glass piece too, you’ll see why In a minute. Now to tackle the ears, easily the hardest part. The ears are held in by another metal rod but I always struggle to remove this one. So you can either have patience and remove the rod or you can be like me and saw the ear off with a hacksaw. Personally think the saw works a lot better too. If you do decide to be patient, keep the metal rod once you’ve released the ear and the bottom plastic piece, you’ll need them both later.

Now you should have all the pieces you need! I usually keep all the spare parts when plushing a Furby but I mainly recommend you keep the motor and the speaker! Now to attach the ears to the skin. You can either glue the plastic base to the skin or sew it on threw the two small holes on either side of it. Personally I prefer to sew it on and then sew up the hole around the ear to keep it in place. If You used the patient method pop the ear in and put the metal rod back in to stop the ear from falling out, I usually glue it in to stop the rod falling out. Once you attached both your ears your nearly done!


At this point we need to tackle the eyes, you can paint on the plastic if you want to but I’m bad at that so I print eye chip designs and glue them to the screen and then put the screen behind the plastic eyes. It creates a more inset look but it’s a lot easier haha. Then just pop everything back together using some glue where necessary. Glue the eyelids into your preferred position and then boom your face plate is done! The faceplate will just clip back onto the skin and then all you need to do is stuff them and sew up their base with some scrap fabric. And there you have it! Your very own plush 2012/boom Furby!

Pro Tip: if you have the box of your Furby their should be a piece of their body fur on the top, you can use this to patch up the bottom (it looks a lot better if you don’t mind dismantling the box)
Here is my plush 2012 Grape Soda as another example!

#furby#furby tutorial#furby fandom#all furby#furby community#furby2012#safe furby#2012 furby#custom furby#furby custom#my furby
463 notes
·
View notes
Text


Horns attached, beak uwu’d, SHES NEARING COMPLETION
#furby#furby fandom#all furby#furby community#furby2012#safe furby#2012 furby#custom furby#furby custom#my furby
6 notes
·
View notes
Text


Got these two babies on the way!!
Dipper (the banana peel) and Tarot (the destroyed wolf)
#furby#furby fandom#all furby#furby community#furby2012#safe furby#2012 furby#custom furby#furby custom#my furby#furby 1998
1 note
·
View note
Text
Furby Tutorial Masterpost
If you want anything deleted, added, or fixed let me know and I’ll be more than willing to do so! If you use any of the tumblr tutorials, or find them helpful, please consider reblogging them from the source! Good luck with your furbs :))
Keep reading
8K notes
·
View notes
Text


Limerick is for sale!! I’m asking for £35 for her.
Please send me a message if you have any questions or are interested in her.
She works just fine except for the fact that her sleep mask no longer sends her to sleep. She comes with her accessories pictured and all her paint has been sealed. She likes to dream about electric sheep and sing ✨
(May also be open to trades for certain furbs)
10 notes
·
View notes
Text
Limerick has risen


#furby#furby fandom#all furby#furby community#furby2012#safe furby#strangeaeons#furby custom#custom furby#my furby#furby buddy#furby boom#2012 furby#furbycore#furby connect#ooaktoy#ooak#limerick
29 notes
·
View notes
Text


This is his final form!! He’s plushed and smells like gingerbread
He eats the transphobes (and poptarts)
#furby#furby fandom#all furby#furby2012#safe furby#furby community#space#plushfurby#custom furby#furby custom#2012 furby#my furby#furby family
2 notes
·
View notes
Text

Dealin’ in multiplication
And they still can’t feed everyone
6 notes
·
View notes
Photo


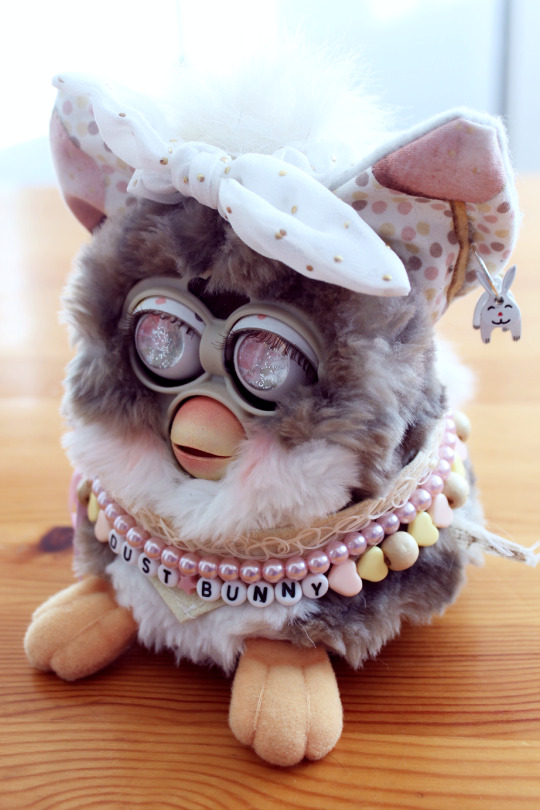
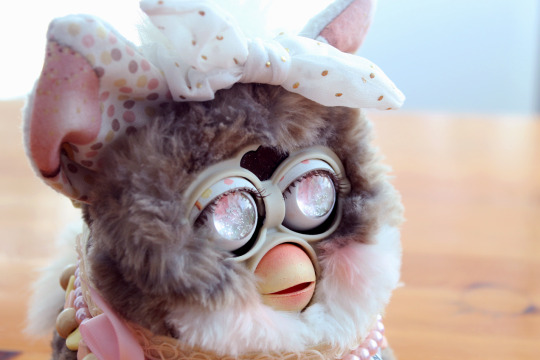
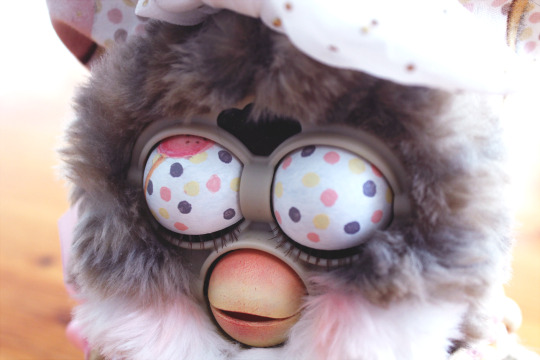
Introducing… Dust Bunny! Her theme is loosely vintage love letters and cakepops. Dust Bunny was found in a thrift store by a former friend of mine and has traveled so far to get here! After her travels to many romantic cities, she’s decided to settle down here with her boyfriend.
2K notes
·
View notes
Text
He’s so POWERFUL


2 notes
·
View notes
Text


introducing
HAL 9000!!!
now that hes safely arrived, here is hal 9000!!! hes a custom 2012 furby made for a commission requested by @goblucien :))
commissions for guys like these are still open!!! just dm me abt it :)
910 notes
·
View notes


