
Don't wanna be here? Send us removal request.
Statistics
We looked inside some of the posts by emcdowell-l3dda-projectkawaii and here's what we found interesting.
Average Info
Notes Per Post
1
Likes Per Post
0
Reblog Per Post
1
Reply Per Post
0
Time Between Posts
18 hours
Number of Posts By Type
Text
1
Video
1
Photo
15
Last Seen Tumblr Blogs


Fun Fact
Kazakhstan’s Minister of Communications and Informatics has blocked the Tumblr site because it contained 60 sites of terrorism, extremism, and pornography in 2015.
Text
Evaluation
Introduction
For this project I have been asked to create an animation on Adobe After Effects and create Kawaii style characters in a kitchen theme. I’ve also collaborated in a group which was given a task to draw kawaii characters in a sub-theme, which in this case is crockery.
Research
For this project, the main research I have collected is primary as well as secondary. For my primary research I have taken photos of crockery that we have at home to get ideas what characters I could create. For my secondary research I have researched the profiles and work done by different artists, which include Charuca Vargas, Takashi Murakami and Yoshitomo Nara. I have also researched different poster designs and written what I like about them and ideas of what elements could be used in my final poster. Other research I have collected include collecting photos online of kitchen interior styles and different appliances to collaborate in creating a kitchen backdrop.
I think that the primary research I have collected was useful as it helped me choose the design and style of the crockery when creating the crockery characters. I think the secondary research might have influenced the style of the faces and expressions of the kawaii characters I’ve created, but is still a different style to the styles of other kawaii artists. The further research was helpful as the photos of the appliances helped me to use as a reference of what style of appliance I could create for the backdrop.
Idea Generation
For idea generation, I have used a sketchbook to sketch out different facial expressions in general to come up with ideas what expressions to put onto the characters I’ve created as well as drawing many different types of crockery with facial expressions which a few of them have influenced my five final characters.
I feel like generating ideas on a sketchbook can be a lot easier than creating a brainstorm or mindmap, depending on what type of ideas I need to come up with. In this case I liked coming up with ideas of characters for the project via sketchbook.
Production in Adobe Ai and Ae
For this assingment, I have produced my final characters in Adobe Illustrator CC and created the final animation in Adobe After Effects CC. As I have just started learning how to use Adobe Illustrator and After Effects, I felt that I have struggled with creating the characters, as well as animating them. I also felt that I was more familiar with Adobe Illustrator, as it has some features which are similar and some the same as Adobe Photoshop, even though each software’s purpose is different. I felt that creating the animation was a whole new experience for me, as I have never created an animation before. Because of this I have decided to keep the final animation simple as I’ve finished it close to the deadline, as well as being new to learning the software.
Reflection Evaluation
For many of my finished pieces I have created this term, I have written how it went creating the final pieces on my blog on Tumblr. I have also been writing my weekly journals on a word document which I’ve written about what I have done, what new skills / things I’ve learned, what went well as well as what didn’t during the course of the week as well as how I felt the week went. I’ve also written what was left to do and stuff that I need to organise for the next week.
Working Collaboratively
I have also been put in a small group to collaborate in creating a backdrop for our animations. I think that working in a group for this type of project was good, as we mixed our different styles of what we can create in Illustrator. The one thing that didn’t really work was deciding who’s edit of an illustration to use, e.g. who’s backdrop edit to use for our final animation. I think that the advantages of collaborating together in a group is that many styles can be blended into one piece, which can turn out really good in many ways.
Targets
One of the targets I hope to achieve is to be able to create an improved and more detailed animation on Adobe After Effects, and I hope to learn more tools and features on Adobe Illustrator. I also hope to improve on my drawing style during the course of this year as well.
0 notes
Video
youtube
The video above shows the final animation I have created for the Kawaii Kitchen Assignment. I have created the animation in Adobe After Effects CC and managed to animate two different characters.
I have created the animation by first creating a new document and clicking on New Composition. I have then set the composition preset to PAL D1/DV Square Pixel. I have then imported the After Effects File of one of the characters into the project window, and then dragged it onto the timeline.
After this I have created another composition with the same type of preset, but this time on this composition I have inserted a portable network graphics file of the kitchen backdrop onto the project window. Before importing the image file I have imported the file as a composition and after this I have dragged the image file to the timeline. On the same composition I have dragged the composition of the animated character to the same timeline as the kitchen backdrop. I have also sped up the animated character composition on the timeline by going to the layer drop down menu, hovered the cursor over time and then clicked on time stretch. Then I have reduced the stretch factor from 30 to 20 to make the animation faster. I have then made the animation loop by duplicating the composition layer and have done the same method as reducing the stretch factor. This time I have reduced the stretch factor to -20 so the animation plays in reverse. I have then duplicated the layers to expand the animation to play for about 7 seconds.
After this I have imported a second animated character, but this time the file I’ve imported the file is an Audio Video Interleave file. I have then dragged the second character file from the project window to the timeline and then resized the character in the composition.
Overall I felt that the final animation turned out pretty good. It could have gone better by animating a few more characters, but I didn’t in the end as I finished the animation close to the deadline and I’ve just started learning Adobe After Effects.
0 notes
Photo
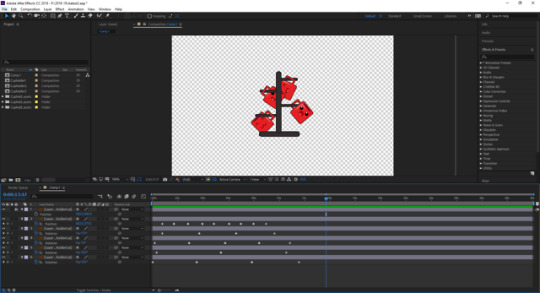
The screenshot above shows a second character that I have created being animated in Adobe After Effects CC. I have done this by inserting a new document and then clicked on New Composition. I have then set the composition preset to PAL D1/DV Square Pixel. I have toggled the transparency grid and then imported the file of my characters. When importing the file, I have imported the file as a composition. I have then dragged the layers onto the timeline window.
The next thing I have done was dragging the anchor point to the characters (which are the tea cups on the mug tree) and I have dragged the anchor point right next to the cup handles. After this I have started creating the animation by pressing ‘P’ to go to position mode and started dragging the tea cup off the mug-tree away from the tree. I have moved the cup at a short distance after moving the timeline indicator about every 1 second to create key frames to make it look like the cup is moving.
I have done a similar method to the rest of the tea cups on the mugtree, but this time I have set the mode to rotate by pressing the ‘R’ key. I have then clicked on the stopwatch on the timeline to insert a key frame. I have then moved the time indicator every few seconds and moved round the object with the axis being the anchor points. I have also moved round the key frames to make it look like each cup is swaying at different times. I have then rendered the animation by adding the composition to the render queue and put the destination of the rendered animation to my pen drive and clicked render in order to render the animation.
0 notes
Photo
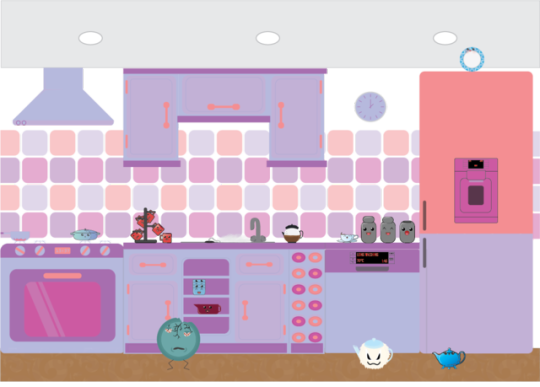
The image above shows the Kawaii Kitchen backdrop created by Matt Gavrilovas which our group will be using for Adobe After Effects CC. This backdrop also includes all most of our group’s characters in collaboration for the assignment. I have done this by opening the documents of the backdrop and the kawaii characters and the copied the characters in different parts of the canvas with the backdrop after resizing them. I have then needed to reorganise the layers in the Kawaii Kitchen backdrop by selecting the characters and moving the character layers from the backdrop layers onto new layers and then locked the layers related to the backdrop. I felt like that this backdrop with the characters went well and hopefully will be ready for animating in Adobe After Effects CC.
0 notes
Photo
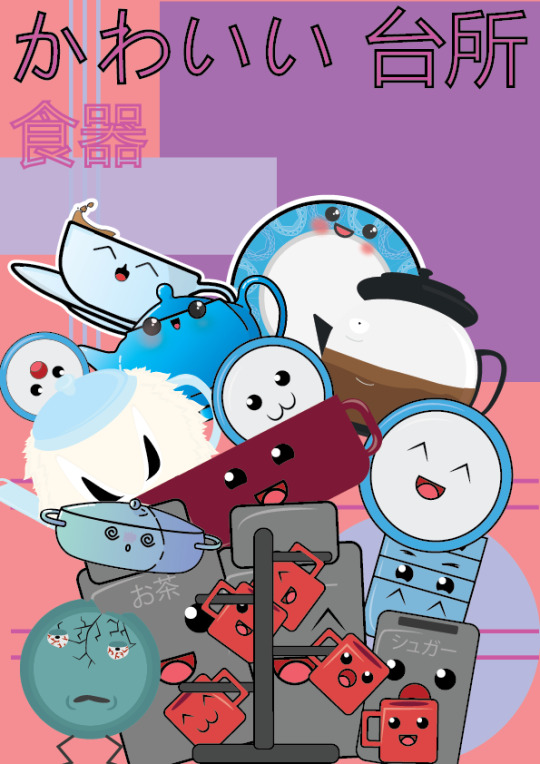
The image above shows the second final poster that I have created for the Kawaii Kitchen assignment. This poster is also a collaboration as I have included Matt Gavrilovas’ and Humphrey Harris-Burton’s characters. I have done this by opening the documents of their characters after placing the documents on my pen drive and I have then resized the characters I’ve created to create space for their characters. I have then resized and rearranged their characters after pasting them onto the canvas to make it look more neat.
0 notes
Photo
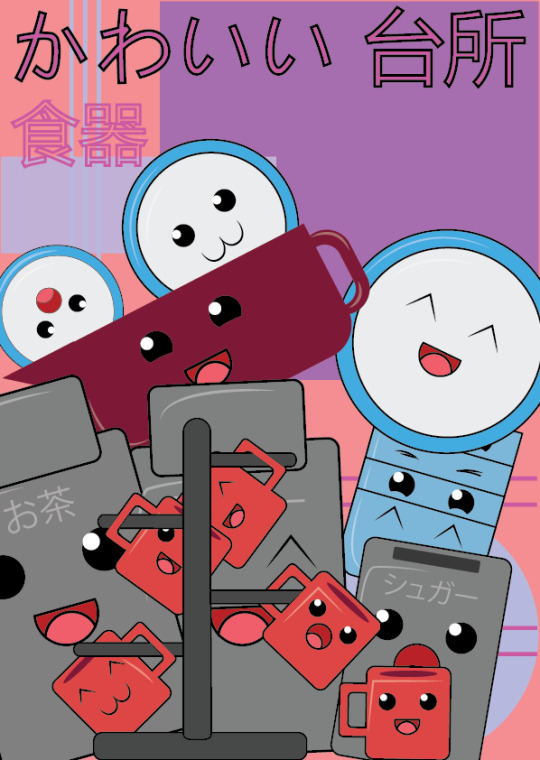
The screenshot above shows the final solo poster I have created on Adobe Illustrator CC. This one poster only includes the characters I have created on Illustrator. The first thing I have done was creating a background and I have done the same method I have done with the composition designs as I have created the poster close to the deadline. After this I have opened the document with my final characters and pasted the character layers onto the poster document. I have then adjusted the characters by resizing and rearranging the characters. I have then inserted a text box at the top of the canvas and then went onto Google Translate to get a translation of the poster title in the Japanese language. The word かわいい (Kawaī) literally means ‘cute’, ‘tiny’ and more commonly known as Kawaii. The word 台所 (Daidokoro) translates to ‘Kitchen’ and the word 食器 (Shokki) literally translates to ‘Dishes’. I have then pasted the Japanese words into the text box and changed the colour of the top line as well as putting in a black stroke and put no colour in the second line, but put in a coloured stroke related to the colour theme.
0 notes
Photo
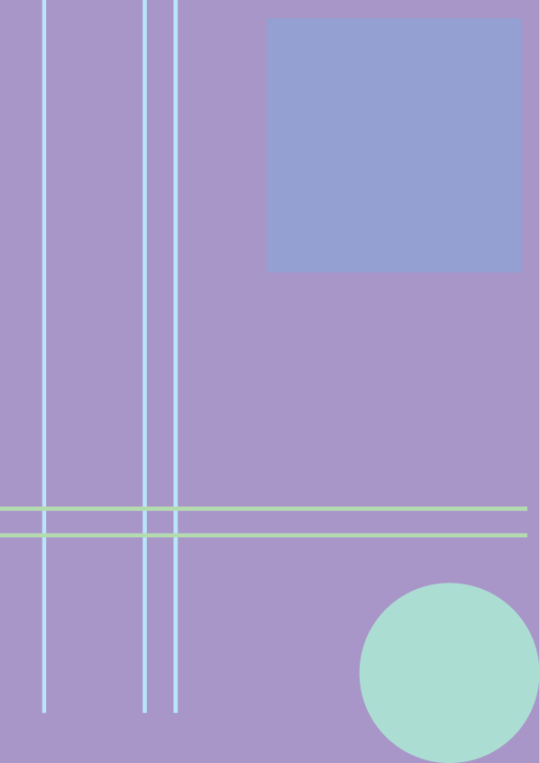
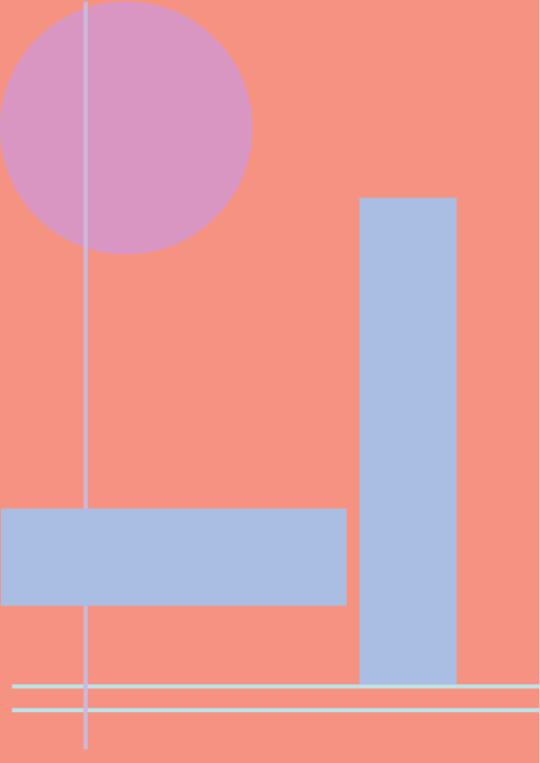
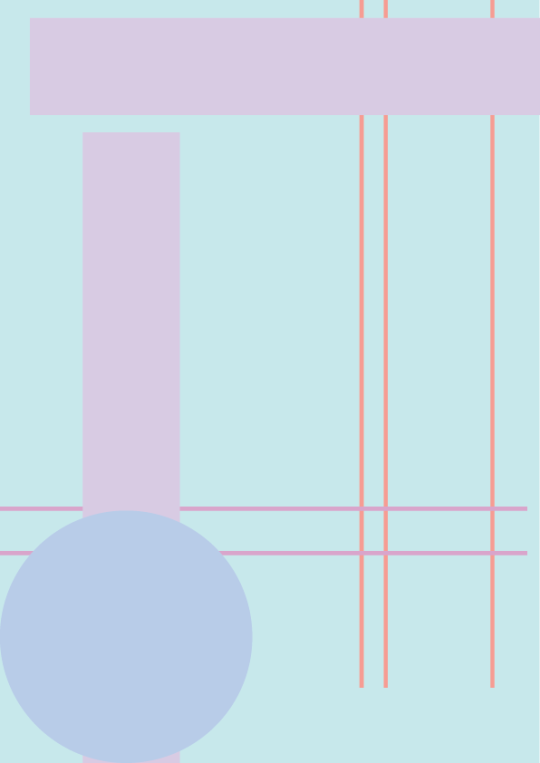
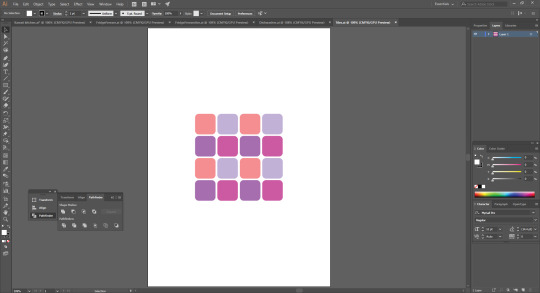
The images above show poster design templates using different compositions that I have made on Adobe Illustrator CC. I have created these designs by opening 3 new A4 size documents on Illustrator, and I have then used the rectangular grid tool to create a 2x2 rectangular grid as the compositions are based on the rule of thirds. After locking the rectangular grid layers, I have opened an Illustrator document from the college interact site which consist of different layers containing different monochromic shapes. I have then copied some of the shapes into the new documents to create a design. After creating a composition using the shapes, I went on the Adobe Colour CC website to create a colour scheme by using the colour wheel and the colours I have chosen are mainly pastel colours. After creating a colour scheme I copied the hexadecimal colour code on each colour and pasted the code in the colour picker of each shape. I have also created a solid background by using the shape tool to insert a rectangle by 210x297mm and used the colour picker to choose a colour from the scheme I’ve created.
I think that the composition designs I’ve created on Illustrator turned out good when they’re finished and found this task was easy to complete on Illustrator, as you’re using simple tools. One thing I would do differently If I was given the same task again is to maybe use more similar colours and less shapes to make it look simpler as well as more appealing.
0 notes
Photo


The photos above show different styles of kitchens from different websites. I have originally collected these photos as secondary research for the design on the kitchen for the collaborative backdrop, but focusing more on the style of ceramics on the wall as secondary research for creating the design of the tiles for the collaborative backdrop.
0 notes
Photo


The photos different appliances from the Currys website and shows a dishwasher, an American style fridge freezer and a fridge freezer with a water dispenser. I will use these photos as part of my secondary research on creating different appliances for the backdrop collaboration.
0 notes
Photo

The image above shows Matt Gavrilovas’ edit of the Kawaii Kitchen collaboration backdrop. Our group has decided that we will use Matt’s backdrop after agreeing to do the wheeldecide website and the fact that it’s a tad more detailed than mine and Humphrey’s. I will use his backdrop for animating the Kawaii characters.
0 notes
Photo

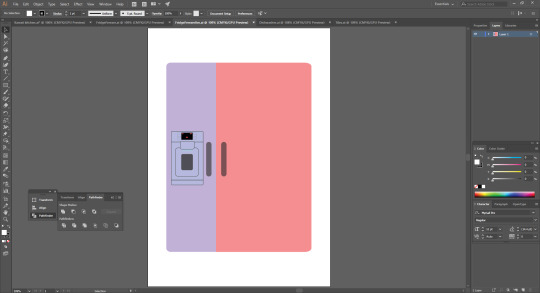
The screenshot above shows my edit of the kawaii kitchen backdrop collab that our group has done. On the backdrop above, I have created the wall ceramic tiles, the fridge freezer and the dishwasher. Humphrey has created the cupboards and drawers and Matt has created the oven, extractor fan hood and the wall clock. I have also tried to put a cream colour wall behind and above the tiles above and I have organised the kitchen appliances and cupboards myself in the kitchen backdrop above.
0 notes
Photo
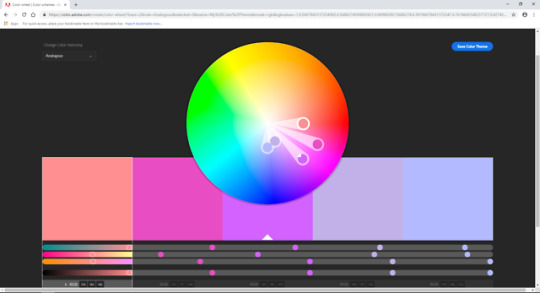
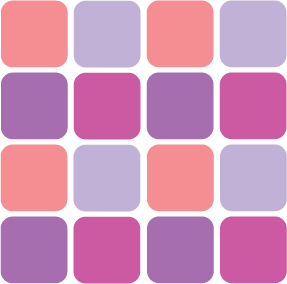
The screenshot above shows the colour scheme our group has created by using the Adobe Colour CC website which lets you create a colour scheme by using a colour wheel with different types of harmony. Our group has decided to use the analogous harmony and we have used our kawaii characters as reference to choose colours similar to the characters. We have chosen 5 different colours in our colour scheme; #ff8f91, #e84dc4, #d362ff, #c2b1e8 and #b3bbff.
0 notes
Photo
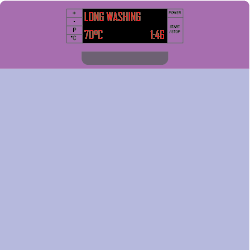
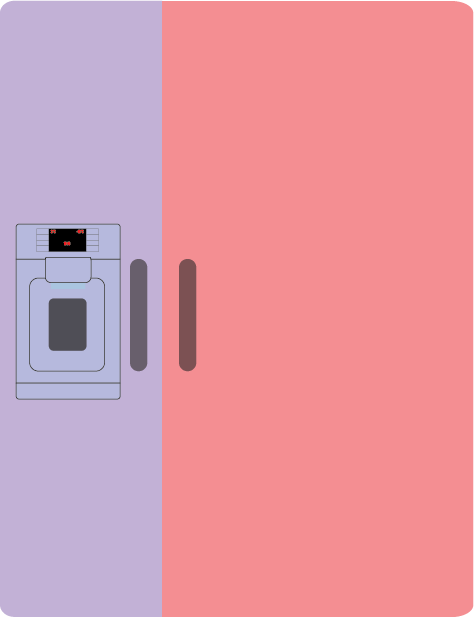
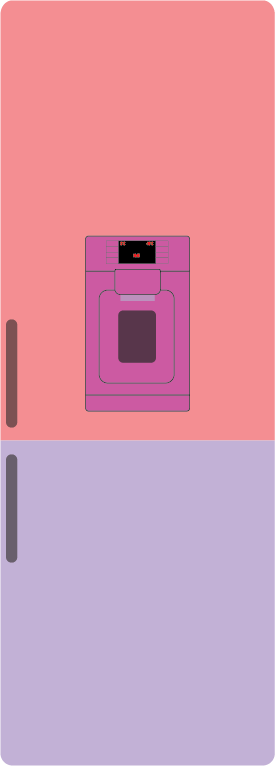
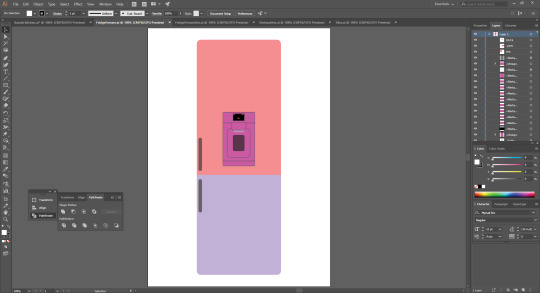

The screenshots above show some appliances and a set of tiles I have created on Illustrator that will be put into one document as a collaboration with 3 other people in our group to create a backdrop for our crockery characters. I have created the appliances by using the shape tool to create rounded rectangular shapes and used the curve adjuster to adjust the sharpness of the curve. I have also used the pathfinder tool to get rid of unwanted areas of shapes, e.g. to have a side of a rectangle with sharp points. I have also used the text tool to create an LED display on the American fridge freezer and dishwasher.
Our group has decided that I create the ceramic tiles, refrigerator and other kitchen appliances and that Humphrey creates the cupboards and faucet and Matt creates the oven and the extractor fan.
1 note
·
View note
Photo
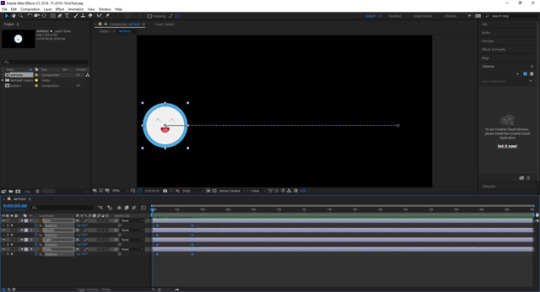
The screenshot above shows a simple 2D animation test I have done in Adobe After Effects CC 2018 using one of my Kawaii Characters I’ve created for this assignment. The first thing that I have done when starting up Adobe After Effects CC is creating a new composition. I have done this by clicking on new composition in the composition window and selected the preset to PAL D1/DV Widescreen Square Pixel. I have then imported a file to the project window by right clicking on the window and pressing file on the import drop-down menu. I have then selected the Adobe Illustrator file of my character and before importing the file, I have set the import kind to Composition and set the footage dimensions to Document Size. I have then dragged the character to the composition window and resized the character to a smaller size as well as keeping the ratio.
I have then pressed the ‘P’ key on the keyboard to go to position mode in all four layers, dragged the time indicator to 3 seconds pressed the stopwatch in the selected layers to insert key frames at 3 seconds on the timeline. I have then selected the character on the composition window and dragged the character to the other end of the composition. After this I have then selected all the layers, pressed the ‘R’ key to go to the rotation mode and inserted a key frame at 3 seconds (same as position key frame and changed the number of rotations from 0 to 1 and pressed the space bar to test out the animation. I think that this animation turned out pretty well, it could have gone better by putting more animation into it, but I have just started learning the program.
0 notes
Photo
The screenshot above shows one of the completed Kawaii Characters (which is one of the three plates by itself) in a different document in Adobe Illustrator CC. I have done this by copying the group of plate characters and inserting them into a new document and used the shift tool to select each character and separating them. As I will use one of the characters in Adobe After Effects CC, I have rearranged the layers of the character so I can experiment with the character properly in After Effects. After this I have inserted the character into a new large 1:1 document in Illustrator and made adjustments to the strokes by enlarging them 5x as they were before as you can hardly see the strokes if they were the same size before due to enlarging the character into the new document. I have then saved it as an Illustrator document file and is ready to be experimented with in After Effects.
0 notes
Photo
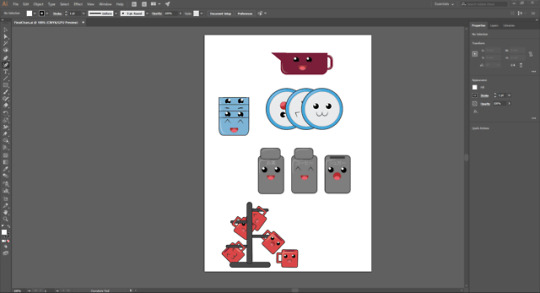
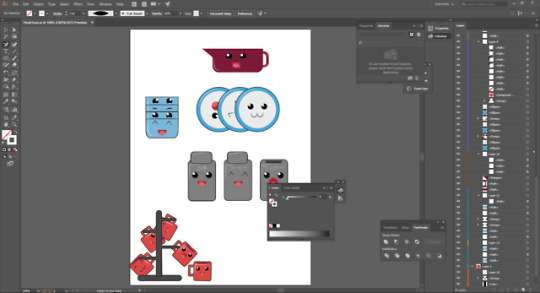
The screenshot above shows the document of the final Kawaii Characters about good enough for completion. The changes I have made from the screenshot before was fixing the mugholder hangers and the teacup handles. I have done this by using the scissors tool in the eraser tool menu and selected areas the stroke paths and removed them by selecting the selected stroke paths and pressing the backspace button and removing the unwanted strokes. I had to make some adjustments to the mugholder layer as some colour was lost when erasing the strokes.
0 notes
Photo
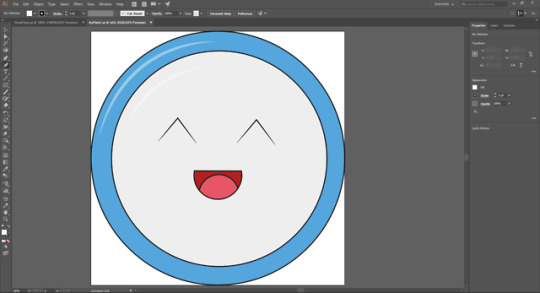
The screenshot above shows the crockery characters for the Kawaii Kitchen Project close to be good enough for completion. Here I have attempted to create Kawaii style faces with different characteristics / expressions. I have done this by using the shape tool to create an ellipse shape to create the eyes. I have then filled the ellipse shape in black and inserted another ellipse shape but changed the fill colour to white to give the eyes a reflection-like effect. I have then duplicated the two shapes to create the open-eyes. To create the happy closed eyes I have used the pen tool to create a path in the shape of a caret, approximately the same size as the open-eyes. I have then changed the uniform of the stroke and change the stroke colour to black.
To create the open-mouth I have used the ellipse tool to create two circles with similar but different fill colours and then used the divide option on the pathfinder tool get rid of unwanted parts of the shapes. To create the happy open-mouth like the gravy-jar I have done the same method with the open mouth, but inserted a rectangle shape by using the shape tool and used the pathfinder tool to remove the upper part of the divided rectangle. For other facial characteristics including (:3) and the closed eyes I have used the same method as I have done for the happy closed eyes.
0 notes