
Statistics
We looked inside some of the posts by djangofreeeman-blog and here's what we found interesting.
Average Info
Notes Per Post
1
Likes Per Post
1
Reblog Per Post
0
Reply Per Post
0
Time Between Posts
1 month
Number of Posts By Type
Text
4
Photo
1
Last Seen Tumblr Blogs


Fun Fact
Tumblr has a 66 index score for customer satisfaction in the US.
Text
Extention for dismissKeyboard
extension UIViewController {
func hideKeyboardWhenTappedAround() {
let tap: UITapGestureRecognizer = UITapGestureRecognizer(target: self, action: #selector(UIViewController.dismissKeyboard))
tap.cancelsTouchesInView = false
view.addGestureRecognizer(tap)
}
func dismissKeyboard() {
view.endEditing(true)
}
}
0 notes
Text
Appdelegate
let ad = UIApplication.shared.delegate as! AppDelegate
let context = ad.persistentContainer.viewContext
Save
let store = Store(context: context)
store.name = "Amazon"
let store1 = Store(context: context)
store1.name = "Pchome"
let store2 = Store(context: context)
store2.name = "Yahoo"
let store3 = Store(context: context)
store3.name = "Asos"
ad.saveContext()
Fetch
let fetch : NSFetchRequest<Store> = Store.fetchRequest()
do {
self.stores = try context.fetch(fetch)
self.selector.reloadAllComponents()
}catch{
//Handle error
}
-----------------------With table view
#PREPARE
UITableViewDelegate,UITableViewDataSource,NSFetchedResultsControllerDelegate
func controllerWillChangeContent(_ controller: NSFetchedResultsController<NSFetchRequestResult>) { tableView.beginUpdates()
}
func controllerDidChangeContent(_ controller: NSFetchedResultsController<NSFetchRequestResult>) { tableView.endUpdates()
}
func controller(_ controller: NSFetchedResultsController<NSFetchRequestResult>, didChange anObject: Any, at indexPath: IndexPath?, for type: NSFetchedResultsChangeType, newIndexPath: IndexPath?) {
switch type {
case .insert:
if let indexPath = newIndexPath{
tableView.insertRows(at: [indexPath], with: .fade)
}
break
case .delete :
if let indexPath = indexPath{
tableView.deleteRows(at: [indexPath], with: .fade)
}
break
case .update :
if let indexPath = indexPath{
let cell = tableView.cellForRow(at: indexPath) as! ItemCell
ConfigCell(cell: cell, indexPath: indexPath as NSIndexPath)
}
break
case .move :
if let indexPath = indexPath{
tableView.deleteRows(at: [indexPath], with: .fade)
}
if let indexPath = newIndexPath{
tableView.insertRows(at: [indexPath], with: .fade)
}
break
}
}
------FETCH
let fetchRequest : NSFetchRequest<Item> = Item.fetchRequest()
let dateSort = NSSortDescriptor(key: "created", ascending: false)
fetchRequest.sortDescriptors = [dateSort]
let controller = NSFetchedResultsController(fetchRequest: fetchRequest, managedObjectContext: context, sectionNameKeyPath: nil, cacheName: nil)
self.controller = controller
do{
try controller.performFetch()
}catch{
let error = error as! NSError
print("\(error)")
}
0 notes

Text
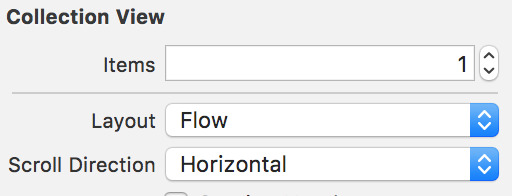
Carousel like home screen

這種特效是如何做的呢在這邊紀錄一下
基本上他是個CollectionView
只是把ScrollDirection改成Horzontal
接下來就像TableView一樣把Cell 跟custom class 做出來

Cell 圓邊的部分在這裡
override func layoutSubviews() {
super.layoutSubviews()
self.layer.cornerRadius = 15.0
self.clipsToBounds = true
}
接下來把Collection View Controller 加入 DataSource
extension HomeViewController : UICollectionViewDataSource {
func numberOfSections(in collectionView: UICollectionView) -> Int {
return 1
}
func collectionView(_ collectionView: UICollectionView, numberOfItemsInSection section: Int) -> Int {
return 2
}
func collectionView(_ collectionView: UICollectionView, cellForItemAt indexPath: IndexPath) -> UICollectionViewCell {
let cell = collectionView.dequeueReusableCell(withReuseIdentifier: "Interest Cell", for: indexPath) as! UIViewCollectionCellCollectionViewCell
cell.interest = self.interests[indexPath.item]
return cell
}
}
把上方的狀態欄改成白色

override var preferredStatusBarStyle: UIStatusBarStyle {
return .lightContent
}
加入UIScrollViewDelegate
最後為了有更好地划動體驗滑的時候會照著index 滑不會會不上不下
因為CollectionViewController 是 ScrollView 所以是UIScrollViewDelegate
extension HomeViewController : UIScrollViewDelegate {
func scrollViewWillEndDragging(_ scrollView: UIScrollView, withVelocity velocity: CGPoint, targetContentOffset: UnsafeMutablePointer<CGPoint>) {
//取得Layout
let layout = self.collectionView?.collectionViewLayout as! UICollectionViewFlowLayout
//計算Cell的寬度
let cellWidthIncludingSpacing = layout.itemSize.width + layout.minimumLineSpacing
var offset = targetContentOffset.pointee
//算出現在顯示出的Cell index
let index = (offset.x + scrollView.contentInset.left) / cellWidthIncludingSpacing
let roundIndex = round(index)
offset = CGPoint(x: roundIndex * cellWidthIncludingSpacing - scrollView.contentInset.left, y: -scrollView.contentInset.top)
targetContentOffset.pointee = offset
}
}
0 notes
Text
UIImageView extention “URL download”

從網路上下載圖片下來放入你的ImageView
使用:

extension UIImageView {
func downloadedFrom(url: URL, contentMode mode: UIViewContentMode = .scaleAspectFit) {
contentMode = mode
URLSession.shared.dataTask(with: url) { (data, response, error) in
guard let httpURLResponse = response as? HTTPURLResponse, httpURLResponse.statusCode == 200,
let mimeType = response?.mimeType, mimeType.hasPrefix("image"),
let data = data, error == nil,
let image = UIImage(data: data)
else { return }
DispatchQueue.main.async() { () -> Void in
self.image = image
}
}.resume()
}
func downloadedFrom(link: String, contentMode mode: UIViewContentMode = .scaleAspectFit) {
guard let url = URL(string: link) else { return }
downloadedFrom(url: url, contentMode: mode)
}
}
1 note
·
View note