defreitasjournalfinalproject
Album Recording Journal
A journal keeping track of the whole process of recording a short album.
46 posts
Don't wanna be here? Send us removal request.
Last Seen Blogs

themespoint
Untitled

spceman87
my favorite sexy things

1ckyposts2
used to be 1ckyposts

jesticaljesy-blog
idk what I'm doing

sentimentos-engavetados
Sentimentos Engavetados
Text
Mixing Overall
Mixed in the studios on Range of monitors in Studios, using hybrid of outboard and plug ins, mixed and referenced on: university monitors, Adam A8X (Home studio) Yamaha HS8′s, 1970′s hifi, Car speakers and headphones both mixing and standard. constantly checking is everything clear and does the mix transfer onto other systems. (Attempted to do this although did not necessarily achieve this).
Feedback on mixes from: Richard Formby, Justin Morey, George Chung, Michael Ward, Steve Parker and other students and also the artists themselves.
Mixing techniques used where found from watching mix videos of professionals, or reading about techniques in articles, and applying knoweldge learnt watching and working with professionals in the past.
research conducted on specific plug ins, and time spent experimenting to understand them and use them how to achieve something I wanted.
0 notes
Text
Credits:
Produced, Engineered, Mixed and Mastered - Chris De Freitas
Assistant Engineers: George Chung, Laurence Neale
Art Work: Chris De Freitas
Josh’s Tracks:
Songwriting - Josh Lawes
Arrangements - Chris De Freitas
Drums - Chris De Freitas
Percussion - Chris De Freitas
Bass - Dom Bowyer
Piano - Jake Mehew
Organ - Bob Birch
Synthesisers and other Keys - Chris De Freitas
Guitars - Chris De Freitas & Robbie Carruthers
Vocals - Josh Lawes
Heavy Rain Strings - Charles Cunliffe & Abi Guerrero
What Comes After Cello - Ben Winfield
Jemma’s Tracks:
Drums - Theo Goss
Bass - Chris Sellers
Keys - Jemma Freese
Guitar - Scott Jack
Vox - Jemma Freese
0 notes
Text
Mastering The EP
After listening to the mixes, the EP needed to sit on the same volume level, and also needed some attention in the frequency spectrum to even them out a bit, mainly focusing on problems in the low end, and some problems the reverb in the sides caused.
I sat with Michael Ward, and we listened to all the tracks and identified the problems that needed to be fixes, some problems were like the vocal being too low in the mix, not standing out. so because i managed to have my final mixes in the box and did not have to recall them as I did earlier on in the mixing stage I was able to make the adjustments to the mix that the master could have done, but not as well. after these changes had been made we both identified problems with the low mids, lack of presence of some of the 3-4k area, and how the tracks needed to move more.
Mastering in the mastering suite on the mastering monitors meant I was able to tackle the masters appropriately in Wavelab Mastering software, rather than just making the tracks louder and pushing up the high end.
I started with Corrective EQ on each other the tracks, using the brainworx plug in, either set to duel mono, or mid-side. removing some of the mud around 200-400hz in the sides. often adding some push at around 4k for presence most often in the vocal.
compression was used to make the track move and dance better rathwr than control transients, as the mix bus compressor I was using did that job. Compression added with a long attack time of 90ms and upwards, helped make the tracks move better and add some musicality to the track.
Limiting was done to bring the tracks to the same level as each other and then slightly above that by roughly 2 db of gain reduction, this did not set the tracks to be really loud and as loud as in pop, but preserved the jazz feeling, but also the punchiness of pop. When releasing the tracks for the artists, final changes will be made to the loudness of the tracks based on some time listening to the tracks on different systems and also considering that non musically educated people will want the track louder because thats what they know best.
The tracks where then converted from 48k 24 bit to 44.1k 16 bit with dithering to smoothen the down-sample, ready to be put onto CD and also versions as MP3′s and released onto streaming platform.
Below is a list of reading I did before mastering and also used in the mastering module in 1st semester

0 notes
Text
Mixing Heavy Rain
Mixed into Mix bus: Compression and EQ.
Drums grouped and sent to Drum bUS, api 2500 bus compressor applied to unify the microphones better, EQ use to clean bottom end and push top end sparkle.

Bass: Re-amped in plug on and then compressed with 1176 plugin for control and punch, EQ’s t remove muddiness and push to add punch around 750hz on small speakers.
Keys: EQ’d removing most of bottom end and pushing top end crisp up, then compressed with LA3A Plug in for punch, and evening levels.

Strings: Heavy tuning and processing needed due to bad recording environment.
Cellos and Violas, both with separate Cello and Viola busses, but then sent to same strings master buss afterwards.
The Cello bus had: Red 37 51 EQ, SSL G series Channel for EQ and compression and then Parametric EQ to remove low end rumble and mud, and harshness of mids, with push at top for air and space.

Viola: Red 37 51 EQ, SSL G series Channel for EQ and compression and then Parametric EQ

Vocals: Tuned, De-essed, Compressed, EQ’d for colour and driven, EQ for corrective measures.

Reverbs and Delays used to create space and also delya used as an effect on the Keys in the solo.
0 notes
Text
Mixing: Eclipse
Mixed into mix bus, SSL Comp and EQ
Drums bus: SSL Comp and Corrective EQ.

Snare Drum bus:
Kramer Pie Compressor to make it punch hard, 1176 to control the dynamics, and EQ to add bottom thump on snare, and remove gritty mids.

Bass: MM Bass re-amp EQ and Compressor, 1176 compression and EQ pulling Low mids for rounder sound.

Acoustic Guitar:
CLA Acoustic plug in - adds compression, brightness and adds nice acoustic space reverb. compressed with 1176 for punch and evening out or transients, EQ low end out and push around 5k for clarity and brightness.

Guitar Effects:
On the chorus sounding guitar it was recorded clean throuhg the JCM but then in the box vibrato pedal and chorus oedal where applied, making it sound almost like a synth.
Lead guitar needed for mid range drive and push, so I used the Aphex vintage exciter that gave the drive and presence the solo needed, before it was lacking crunch and bite.


Vocals: De-esser, compression, API EQ, corrective EQ plulling the harshness of the shhh and whistles. doubler on chorus vocals, to add bigger sounding vocal across the spectrum with chorus sounding effect.

Delays and reverbs used.
panning used on automation and levels and EQ’s.
0 notes
Text
Mixing: What Comes After
Mixed into a bus compressor: SSL G-Master Compressor (Waves) and used a parametric EQ to clean up some of the bottom end and low mids, with a push around 7k for brightness.

Drums:
Grouped, and sent to a Drum Bus, panned within the bus track, with some processing applied to master Bus: Limiter to stop things from popping out too much, and some EQ to add colour, brightness and control bottom end.

Kick and Snare microphones sent to kick bus and snare bus, then levels from mics mixed into tgem with processing applied:
Kick drum processing: Gate, Compressing with Ren AAX and EQ to clean low mids paper sound and slight boost on thump.

Snare Processing: Gate, 1176 comp (Control), API 550A, Para EQ, LA2A compression (Punch)

Overheads: DBX 160 Compression, Parametric EQ to brighten and remove low end and muddiness.

Rest of the microphones:
Close mics processsed to sound clean and punchy, room microphones compressed hard and used to bring in the room sound of the kit. Trash Microphones compressed hard and EQ’d to add colour, brought in low level to give kit characteristic rather than sound like a clean drum kit. Busses sent to reverbs.
Bass: Re-amped in plug in CLA Bass, EQ’d and Compressed with 1176 to prevent jumping out.
Percussion: Sent to bus, limited to bring together, EQ bottom end out and push at top end for brightness.
Keys: Sent to master bus, used U67 mics the most, EQ’d bottom out, low mids out and added a lot of top end for brightness to stand out, then compressed with LA2A to control levels and sit in the mix
Organ: sent to bus, all microphones mixed into the bus to get desired sound, acting as a way of EQing the sound, then EQ applied to remove some bottom end and some muddiness, with a push around 5k for clarity and a slight push at around 2k for some colour and drive. then compressed with LA2A to even out dynamics.
Guitars: sent to individual busses to treat both microphones used, then EQ applied removing bottom end, and some muddiness around 500hz and either boost around 4-5k for definition, or a cut if too harsh string sound. some guitars then slightly limited to reduce the dynamic level of the parts. Panned hard on the sides, to create space for vocal in the middle and organ and keys.
Cello: All Tuned (Melodyne), sent to a bus, EQ’d Red 37-51, Limited with LA3A, EQ’d parametric EQ and Limted again with Waves L1. needed colour and life, bottom end and muddiness that clashed with rest of track removed, top end and colour added to cut through mix, limiting to bring dynamics to a similar level. paned within the buss, but mainly hard left and right with same parts panned evenly to emulate bigger string section than just single cello.

Vocals: Tuned (Melodyne), Compressed into Warm Audio 76 outboard, then printed back into pro tools, then De-essed, EQ’d bottom end out and add some top end, compressed again with Renaissance EQ and Compressor, then treated with EQ and analog drive from Scheps 1073 plug in, pushing input harder and output lower to get more grit with some creative EQ.
Vocals then used double track, processed, duplicated, placed slightly behind other track, both panned hard left and right, created a chorus effect and bigger sounding vocal in the Chorus’.

Reverbs: All tracks either singular or bus tracks sent to Reverb Busses, Hall, Plate and Room.
FX Busses, Delays used on Vox and on some guitar parts, add depth to mix and help ring parts out move, delays mainly mono for Vox, but some stereo ping pong for movement and interest used in small amounts.
Automation used t control levels at different points in the track, with also master bus automated to be quieter in verses and building up to add movement to the track. Final EQ adjustments made to master fader and buss tracks.
0 notes
Text
Mixing Like A Fool (Jemma Freese)
originally completely mixed on the desk, only using outboard gear for compression, EQ both desk and hardware, and reverb and delay effects used in the box (Oxford reverb and Tape delay). After getting the mix as close as I wanted it I then printed all the stems of the track and took it into the box for automation changes, slight corrections on EQ and compression and final panning.
Created a master fader in the box and applied mix bus compressor: API 2500 and some small EQ to tame bottom end.

Drum Bus: compressed to bring the drums together and make them sound tighter and as one instrument, before levels of the kit where jumping out a little too much and it became distracting.

Snare drum needed some more punch: 1176 compressor and boost on EQ around 220hz


Overheads needed more presence, the room tone was not clear enough and the room mics where too dirty sounding, so pushed the compression with a DBX 160 to bring those tones out and also push the cymbals out a bit more in the mix.

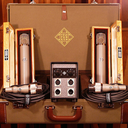
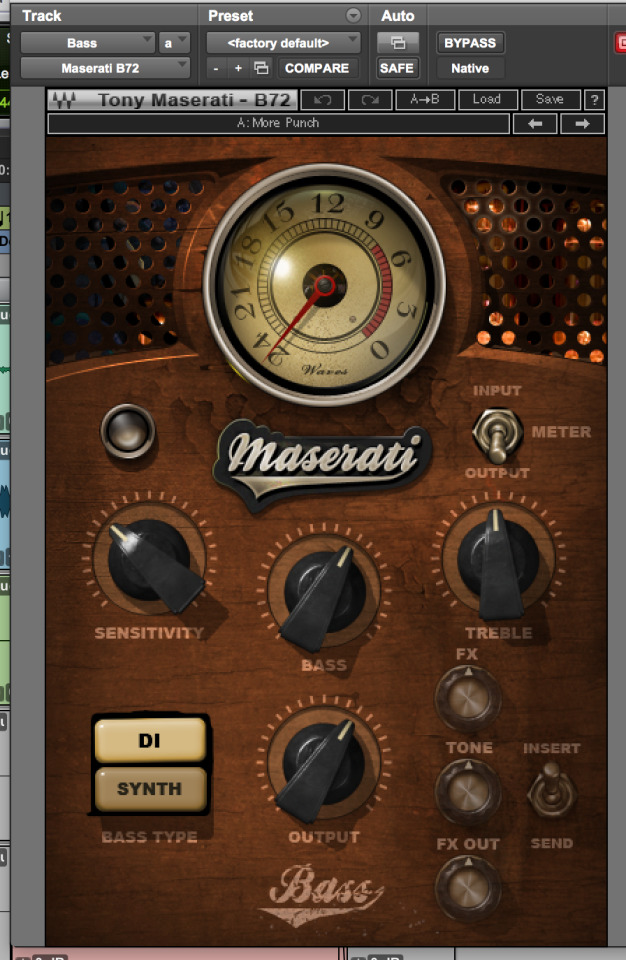
Bass: was flat sounding, bit muddy and not characterful enough, so used Maserati Plug in that gave a warm, clean sounding bass, with controlled low end and reduced low mid range that caused the clarity issue.
Reverb used on vocals to give it some separation from the rest of the mix was the Abbey Road Plates.

Gave rich, warm vocal reverb sound.
Tape delay was used and EQ’d to try emulate the likes of the space echo, this helps add some character to the vocal and also help blend everything together better.
0 notes
Text
Mixing: Go (Jemma Freese)
Originally completely mixed on the desk, only using outboard gear for compression, EQ both desk and hardware, and reverb and delay effects used in the box (Oxford reverb and Tape delay). After getting the mix as close as I wanted it I then printed all the stems of the track and took it into the box for automation changes, slight corrections on EQ and compression and final panning.
Master Fader created and Mix Bus compression (SSL) applied and slight EQ tending to bottom end, and slight boost in the high end for more energy in the higher frequencies.

Drums had been processed on the desk with outboard such as the 1167 compressor, Distressors, MXL compressors, Tube EQ and Drawmer 69 compressor. however they needed to come together better to mix buss compressor was added, just helping glue the drums together.

Keys sounded good but clashed a bit with the bass and guitar, so a pull at 234hz meant that the keys cit through better and left space for the guitar bass and voice, just giving more separation to the instruments, helping especially as the tracks gets busy near the end.

The vocals needed a bit more evening out in dynamics as certain parts jumped out a little to far, automation was used, but it needed just a little more compression to help tame the vocals more, sitting them in the mix better.

0 notes
Photo


I designed the Artwork for the EP on an online creator called Canva.
0 notes
Text
Synth and Keys Recording: Korg
I used my own Micro Korg XL Plus for the synth parts which are quite low in the mix, and also some tape recorded flute parts that are very similar to the sound of Fairchild used by the Doors in the final chorus of the track Eclipse. I also used the electric piano and Wurly sounds that are banked as well, the keys can be hears at the beginning of ‘What Comes After’ and throughout heavy Rain the Wurlitzer part. This was recording at my home studio going directly out of the Korg as a stereo signal into my Motu Soundcard.
0 notes
Link
I used this track as a reference for the guitar parts in What Comes After. I like the far panning on the track, the doubling of riffs and overall funky vibe.
0 notes
Text
Further Guitar Recording played by me
I had already recorded some Electric guitar for the tracks using a Fender Strat 1970′s reissue, into a Marshall JCM Stack, with a warm, but clean sound, this was used with different tones, and effects applied in the box played in the studio using a BNC Video tie cable allowing me to record myself easily and efficiently. I also used the Vox AC30 for some of the cleaner guitar parts.
I then needed guitar recorded for a couple of solo’s and also felt like Eclipse and What comes after needed something more added to them. I got in ex-student Robbie Carruthers, who layed some Guitar down using My 1970′s Strat, and Telecaster hum-bucker style guitar. This went into the JCM for a more driven sound. I directed what I wanted showing him reference tracks from John mayers most recent records released this year.
After this I then recorded myself some final parts in that I wanted in what comes after, the very clean sunding guitar with sliding parts, this was a Telecaster going into the Vox with some reverb on. This added to the final aesthetic I was wanting.
0 notes
Text
Percussion Recording
I had a session where I recorded all the percussion parts, from Cajon, to tambourines etc. I set Pro Tools to loop record and recorded lots of different percussive sounds, claps etc.
0 notes
Link
0 notes
Link
0 notes
Text
Acoustic Guitar Recording


I used an AA U67, 251 and Pearl Stereo Mic on a Taylor Guitar, I read in John Mayer’s recordings they liked to use a stereo mic on the guitar and then the other two were there for experimentation, I like the 67, but the 251 had a honky sound to it, around 1-2k that I was not so keen on, so I didn’t use it in the final mix.
0 notes
Text
Guitar Parts
As heard before in the Demos for Josh’s tracks I wrote all the guitar parts, based off the initial recordings sent over of just the acoustic, I then came up with all the guitar parts I wanted.
0 notes