Text
Seeing the light
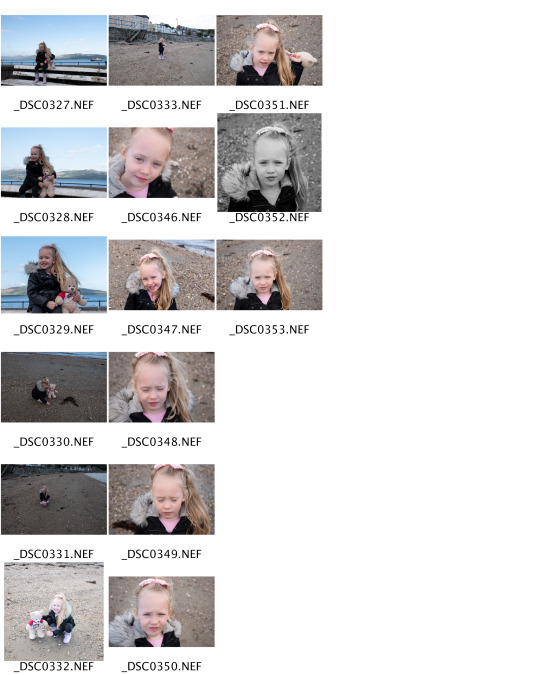
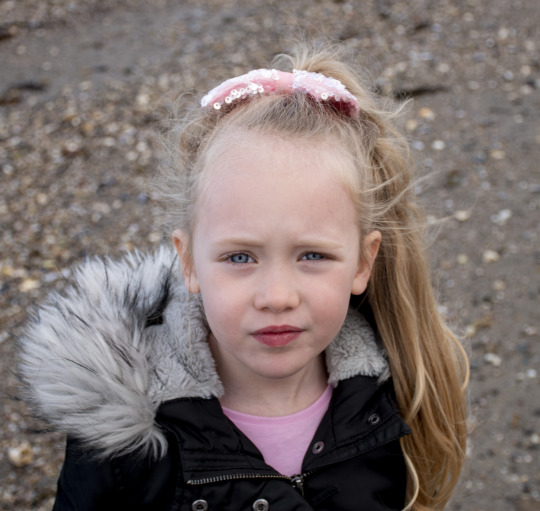
I managed to keep my original plan of shooting one of my portraits of my daughter while we were away for the weekend. Although she was quite distracted as most 4 year old’s are on the beach, I think we got a couple of good ones. I had to use a silver reflector to bounce the sunlight from behind back onto her face - but not too much as she was squinting her eyes at the glare.
I think my favourite image is the one below, but keep changing my mind!
0 notes
Photo
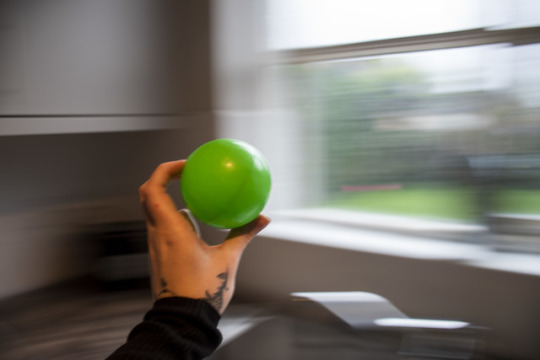
Panning shot for the spheres brief. this was took at f4, 1/125 and iso 125.
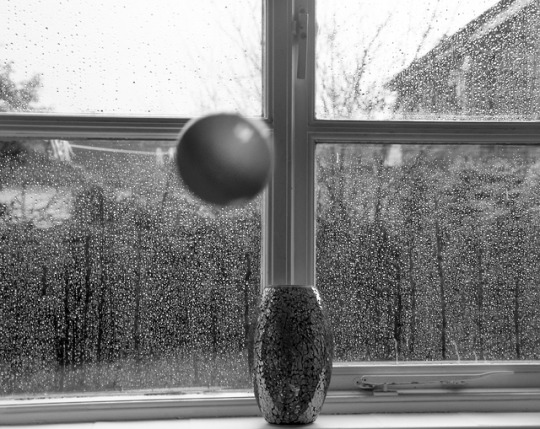
Black and white frozen movement shot was took at f4, shutter speed 1/200 and iso 200.
0 notes
Text
Exhibition.
We visited the Linda McCartney exhibition at Kelvingrove Museum. This exhibition was named Retrospective which I think is fitting.
“A retrospective, generally, is a look back at events that took place, or works that were produced, in the past. As a noun, retrospective has specific meanings in medicine, software development, popular culture and the arts.” Wikipedia
Before going to the exhibition, I knew very little of Linda McCartney as anyone other than Paul McCartney’s wife with the vegetarian food brand. I had seen a few of her photos, online and advertised on billboards for the dates at Kelvingrove, but didn’t expect them to be as interesting as I had found them on the day. There were images displayed I had seen before not knowing it was Linda who had taken them.
The photographs displayed were picked out by John and their 2 daughters Mary and Stella. There were over half a million photographs to pick from, so these images were deemed the most storytelling ones I believe.
We had the opportunity to hear a little about Linda’s life as a photographer and it helped me understand why her pictures were the way they were. The guided tour of the exhibition was a bonus as it was a bit overwhelming going in to so many images and I don’t think I would have had the understanding without it.
We were told that Linda (Eastman at the time) was a receptionist for a magazine and handled all the incoming mail in 1966. A press pass had arrived for an event for the Rolling Stones, who at the time were upcoming musicians about to make their big break. Linda was not invited herself, but after two night classes with her friend she had recently took an interest in photography - but hadn’t had any formal training. She decided to keep the pass and attend to take the photos. We think being the only young female there helped her secure the space for the “one photographer on board” and her image of Mick Jagger and Brian Jones on the Hudson River was Linda’s own big break. She had a point and shoot attitude to her images, which in this case worked, but personally I do feel there are images, particularly her early ones which could have benefited from a bit of understanding more on the technical side. This image I really like because of it’s moody tone, yet both of them look relaxed. I don’t think Linda particularly liked the posed look and a lot of her pictures seem quite candid. This print was a Black and White bromide print.
Brian Jones and Mick Jagger, 1966.

At the beginning of her career, Linda chose to mainly display her images as platinum prints of negatives. Platinum prints, also called platinotypes, are photographic prints made by a monochrome printing process involving platinum. The platinum tones range from warm black, to reddish brown, to expanded mid-tone grays that are unobtainable in silver prints.Wikipedia. She didn't crop and her images have a sense of “real life” which I think is lovely.
The Beatles, 1969. (Bromide Print)
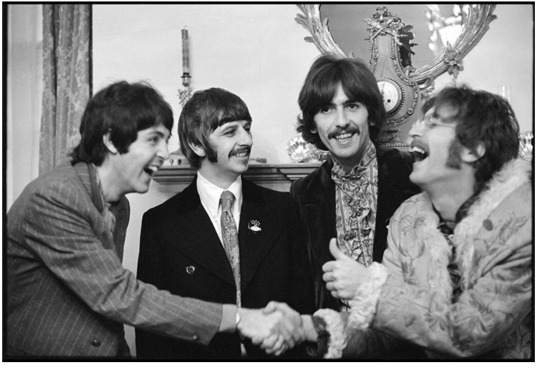
She became well known for her photographs of Rock stars and icons, including Jimi Hendrix and of course The Beatles. She met Paul McCartney photographing him and the rest of the Beatles. They married in 1969 and Linda’s career was at a high, being resident photographer at a lot of events. She was particularly interested, and lucky, to know upcoming artists - which I think helped her career massively.
In this image of John Lennon in 1969, the quick thinking of Linda can be seen , knowing that there was only a small section of backdrop that this could work on, she captured the image as he walked off set in the studio in London. I think its a nice photo, i like the excess space and the composition, the purple works well in this colour c-type print.
John Lennon, 1969. Colour C-type print.

There are a few other things to note about the exhibition. Also displayed was some Cyanotype prints. i loved these! I hadn't actually seen these before and would love to know more about this type of print. There was polaroids and negatives exhibited too, and a couple of Linda's cameras were also displayed. She mainly used her 35mm cameras or her Hasselblad medium format.
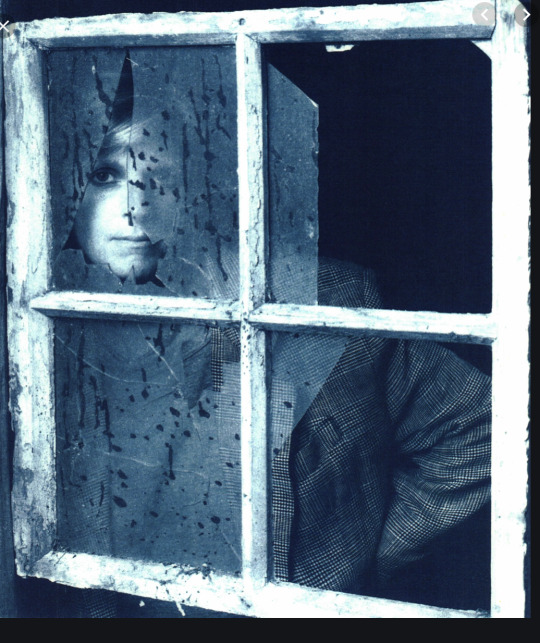
It was hard to pick some favourites as there was such a variety of photographs on display. I do really like the relaxed feel on a lot of her work, theres not much posed photography. As famous as she was, I do get the impression that family life was very important to the McCartneys and a sense of normal was shown, in amongst her top celebrity images. Personally I do feel she was lucky to have those type of people around her and perhaps her personality helped her gain her respect of the people she photographed. There might be some technical errors in some images, but as Linda herself was a fan of the "happy accidents" I don't think they outweigh the good. I enjoyed this exhibition and it definitely opened up my eyes to the exhibition environment.
0 notes
Text
Film
I’d never used a film camera before (well, I did used to waste all my parents film playing with it like a toy when I was younger!) so I was excited to use the Pentax during our studio session last week. We are using this for our clean white brief along with our DSLR’s. The one thing I noticed first off was how heavy the camera body was and I was cautious not to drop it. For some reason I felt this was more fragile than my Nikon which cost a crazy amount more!

For the film camera, we had to use a light reader to make sure our exposures were correct before shooting. In our DSLR there is a built in light reader so this was also new to me. It was quite tricky getting the correct exposure set, the studio lighting can be a bit difficult at times, choosing not to sync etc. We used FP4 film which has an ISO of 125 so we set this on the Pentax along with the shutter speed. On this instance there was a bit of mix up with the correct shutter speed and the class was advised it should be 1/125 - although we know now this should have been 1/60. It is daunting taking the picture not knowing if it’s correctly exposed, in focus or just a nice photograph - as soon as I took my first picture I automatically looked at the back of the camera, only to be realise I must do this out of habit on my Nikon! I found it quite hard to focus the lens directly on the subject, my eyesight isn't as sharp as I thought, even with contact lenses in. So I did find overall I preferred the ease of the DSLR but it is quite fun doing the film and there's much more chance of mistakes so it did make me think about my settings more. I loved the vintage feel of it all, pushing the film through the reel manually and feeling in control of it all.
I’m looking forward to use film more, I’m actually going to get my own film camera to practice with as I do really like the look that these cameras can give.
0 notes
Photo

We were asked to consider focal length for some of our sphere images, and as a general rule of thumb so I’ve been looking at some things to help. I saw this from Jak Spedding on Pinterest
0 notes
Photo
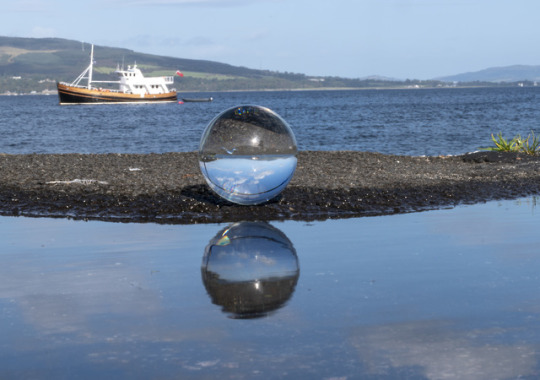
Extended Depth of Field
For this I used aperture f32 and shutter speed 1/20. Focal length is 56mm. The bigger the F number, the more in Focus the whole image is :)
0 notes
Photo
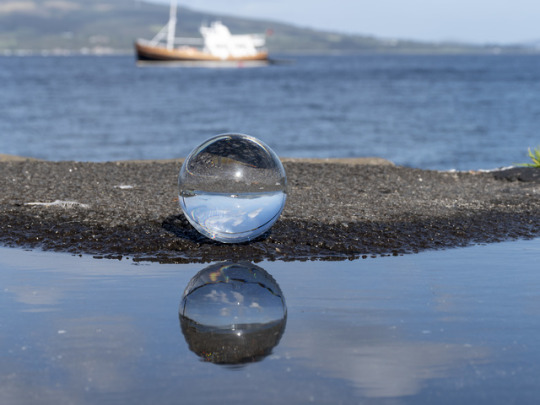
Shallow Depth of Field
I created this image using an aperture of f9 and shutter speed of 1/125. I used a puddle to give a double reflection in the lens ball and used the boat at sea behind to show the shallow depth of field.
0 notes
Photo
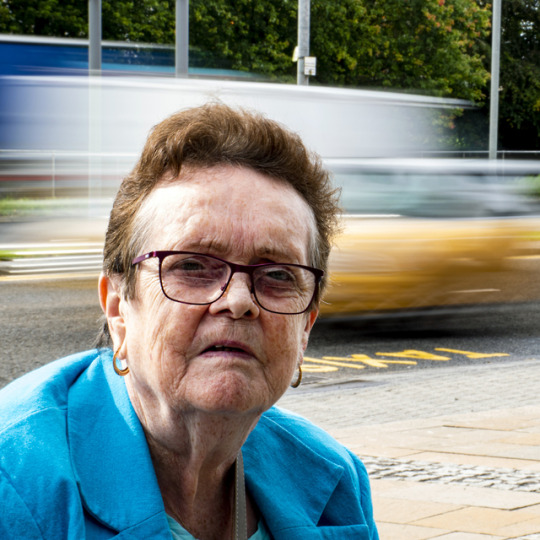
Practice shot for one of my Seeing the light portraits. I wanted to create the impression that as you age, everyone and everything seems to be so fast paced, but for elderly people it can continue at a slow pace, feeling unnoticed and out of sync with the world. The location wasn't a first choice but as I had my Gran and my equipment with me I thought it was worth at least a practice shot. I do quite like this, and love the happy accident of the yellow car at the taxi sign.. it feels quite New York like!
0 notes
Text
Research: Who are you?
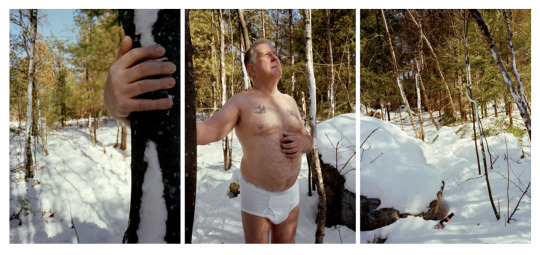
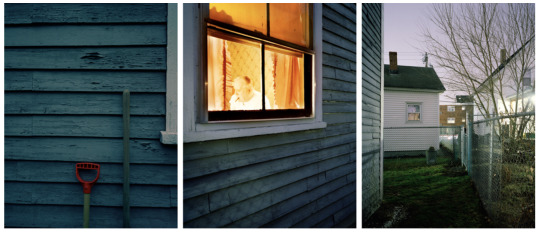
While researching for the Triptych Who are you? brief, I came across a photographer called David Hilliard. He is fantastic at putting panoramic photographs in place, in 2, 3, 4 or 5 separate images creating one overall deep image. He photographs himself in a lot of them, and as a viewer they seem genuine, emotional and creatively constructed.
He graduated from Yale in 1994 and has displayed at many American exhibitions since. A couple of his photographs that caught my eye for their triptych are “What the ice gets, the ice keeps, 1999″ and “Dad, 1998″
I really appreciate the effort of keeping the images so in sync, I’ve personally struggled getting the panoramic effect and definitely need more practice!
0 notes
Text
Seeing the light: Portraits Research
The brief for this was to produce 4 varied colour portraits, enriching the portraits character.
My ideas are to include my daughter, my Gran, a woman and a stranger - preferably one in his workwear - police, firefighter, window cleaner - it won’t matter the job but I do feel like I really want to portray whichever their job is. For my daughters image I want this to look fun and carefree - something you’d expect a 4 year old to be! My grans portrait I plan to do on a busy street, which will be challenging with a Tripod and reflector!
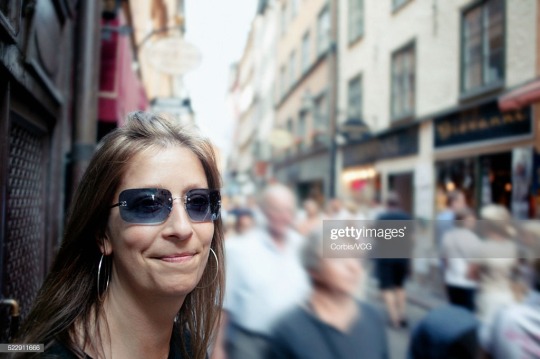
I’m really looking forward to this shooting this brief and have looked at some examples of images I like.

0 notes
Text
Decade
Decade - 1900
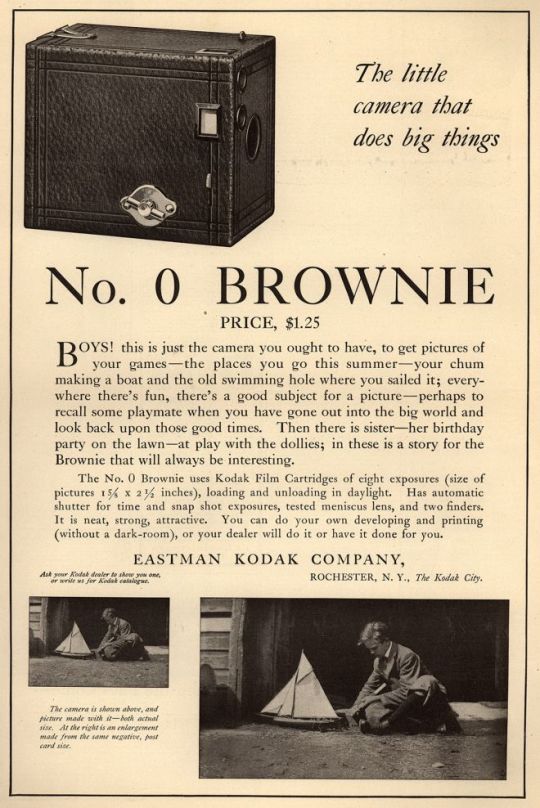
The Kodak Brownie was a very inexpensive (equivalent to about £25-£30 these days) user-reloadable point-and-shoot box camera introduced in 1900. It was a basic cardboard box camera with a simple meniscus lens that took 2 1/4-inch square pictures on 117 roll film. It was marketed predominantly at children and surpassed its marketing goal and 150,000 were shipped in their first year of production. Kodak used these cameras to popularise photography. In 1901 an improved version of the Brownie was released. The Number 2 Brownie was also a massive success. These produced larger 2-1/4 by 3-1/4 inch photos and cost about a little more. The Brownie cameras were taken to war by soldiers and many iconic shots were captured with these. Kodak introduced 120 film which is a popular film format for still photography, intended for the Brownie 2. It was originally intended for amateur photography but was later superseded in this role by 135 film.
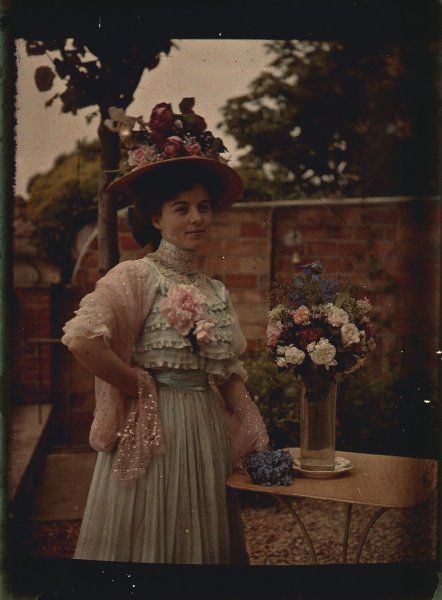
In 1903, the Lumière brothers patented a colour photography process and in 1907 the Autochrome Lumiere was marketed. Using a technique producing natural colours through superimposition, using Louis Ducos du Hauron’s separation technique, to create colour images on paper with screen plates. Autochrome was loved for it’s “ aesthetic appeal and uniqueness” Unlike ordinary black-and-white plates, the Autochrome was loaded into the camera with the bare glass side facing the lens so that the light passed through the mosaic filter layer before reaching the emulsion. The use of an additional special orange-yellow filter in the camera was required to block ultraviolet light and restrain the effects of violet and blue light, parts of the spectrum to which the emulsion was overly sensitive. This camera wasn’t ideal for taking moving subjects and a tripod had to be used due to it’s longer exposures required due to the light loss through all the filtering on the plates.
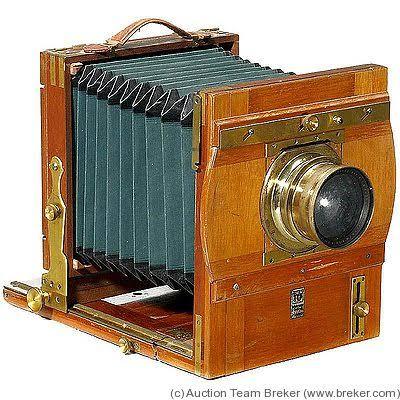
The Reise-Camera was manufactured by E. Suter of Basel, Switzerland in circa 1905. This camera is designed with a square frame construction and square bellows with leather corners. It is made with select mahogany, highly polished with polished brass fittings. The focusing screen frame is adjustable for portrait and landscape shots. The lens board is adjustable in both horizontal and vertical directions. In the year 1900, The Reise Camera changed it all. This was the world’s first truly portable camera, with its ability to be folded into a compact shape and being extremely light weight as compared to other models available on the market, this was the thing for people who were looking to travel around and shoot photos.
Kinemacolor was the first successful colour motion picture process, used commercially from 1908 to 1914. It was invented by George Albert Smith of Brighton, England in 1906. Kinemacolor was an additive process operated with alternating red and green filters that were applied to the shutter in front of the camera and in front of the projector. With at least 32 fps the frame rate was double the minimal frame rate of 16 fps. One of the main challenges in developing the process was to sensitise the orthochromatic black and white stock to the red end of the color spectrum.
In 1909, Kodak announces a 35 mm "safety" motion picture film on an acetate base as an alternative to the highly flammable nitrate base. A film base is a transparent substrate which acts as a support medium for the photosensitive emulsion that lies atop it. Despite the numerous layers and coatings associated with the emulsion layer, the base generally accounts for the vast majority of the thickness of any given film stock. The motion picture industry discontinues its use after 1911 due to technical imperfections.
What else happened in this decade?
1900. Can you believe that 25% of all cars that were sold in 1900 were electric cars?! Ahead of it’s time or are we not being told everything?!
1900. The Irish Party Formed, In Dublin, Irish delegates convened to create what they called the “Irish Party” and denounced British atrocities in the Boer War.
1900. Small Pox Epidemic, In Kentucky a small pox epidemic was raging with hundreds of people stricken. The mortality rate was 20% and health authorities demanded that every person in the state be vaccinated.
1901. Marconi sends first wireless transmission over 2000 miles across the Atlantic Ocean from Poldhu in Cornwall, England to Newfoundland, Canada. The transmission consisted of the Morse-code signal for the letter "s" which consists of three dots ( ... ).
1901. Queen Victoria dies at the age of eighty one. She had nine children, and left Edward as her heir. Her reign has been used to designate the era, and was the longest serving of any English monarch.
1903. First UK Number Plate (A1) is issued.
1904. First Crayola Crayons, Edward Binney and C. Harold Smith introduce the world to Crayola Crayons for school kids.
1908. Ford Model T, Henry Ford's Ford Motor Company introduces the Ford Model T costing $850.00, this was nearly 1/3 of the price of any other car on the market but still not cheap enough for the masses.
1909. First Men to Reach The North Pole, Explorers Robert E. Peary and Matthew A. Henson claim to became the first men to reach the North Pole.
0 notes
Photo
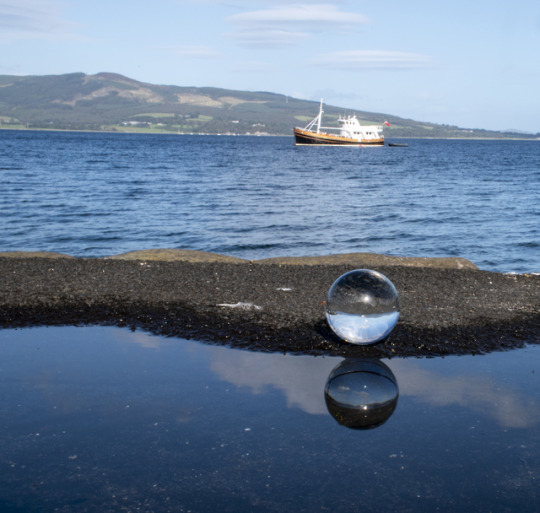
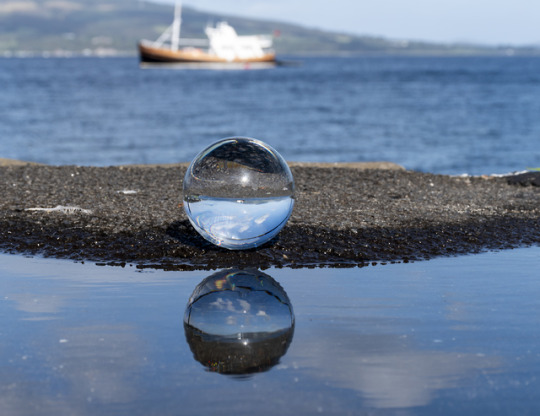
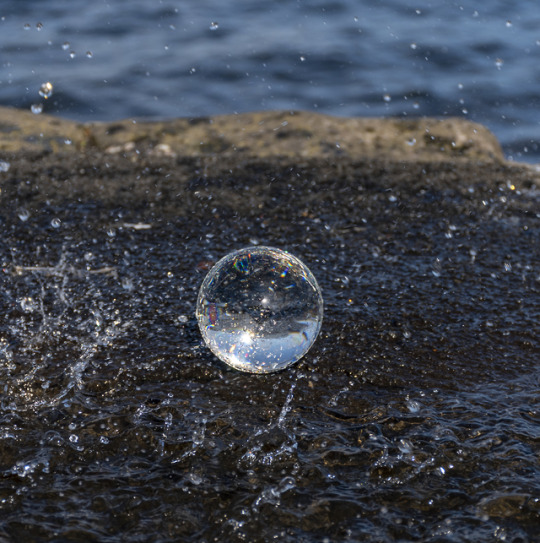
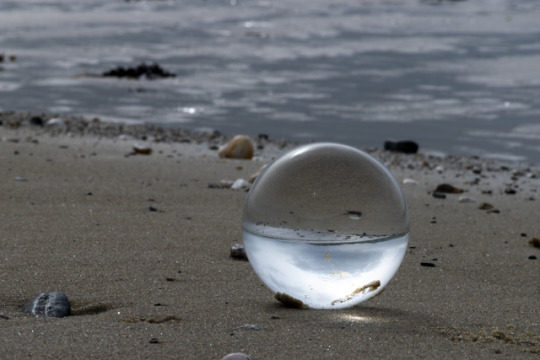
My spheres brief images.
I’ve shown extended and shallow depth of field, various focal lengths and an advanced movement image. I still have a panning and frozen movement image to include for submitting
0 notes
Text
Reflectors
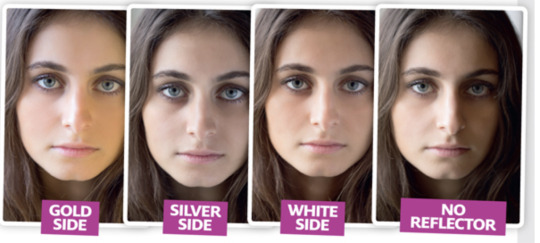
Using reflectors as a main light source, position your subject in front of the light and reflect back onto the subject. You’ll get a nice soft light on their face with a light rim on the back their head.

0 notes
Photo

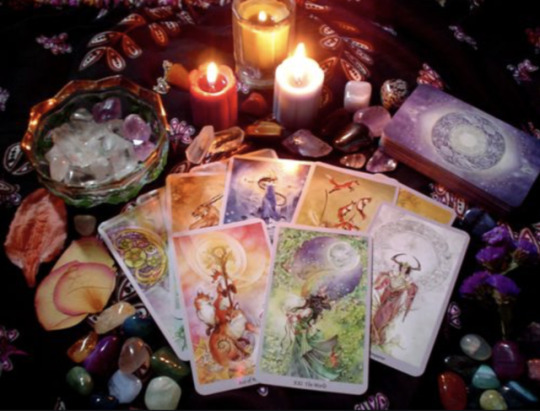

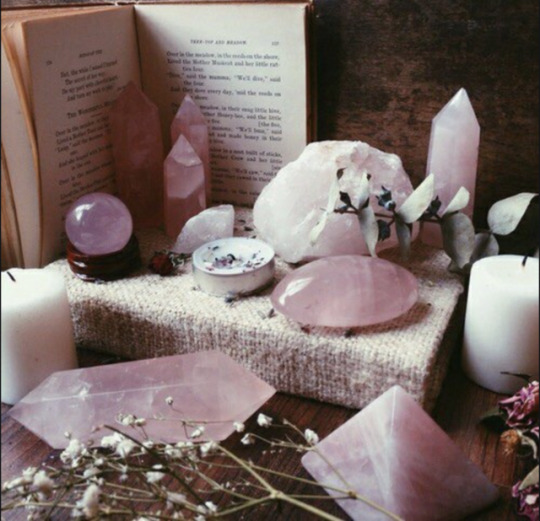
Who are you? Research. Take 2.
Above images are ideas for my triptych Who are you? brief. I plan on using items that show my interest in spiritual/witchy things. It is a topic of conversation that my mum is from a family of witches, although none of us practice any kind of magic we are interested in tarot cards, crystals and the occult.
My items will include crystals and stones, crystal ball (Lens ball), tarot cards and candles. I’d love to include my daughter somehow and adding to the look - my black cat! The location will be my mums kitchen table where we always sit together. For my self portrait part I’d love to try the glitter idea, symbolising setting intention and releasing it.
0 notes
Photo
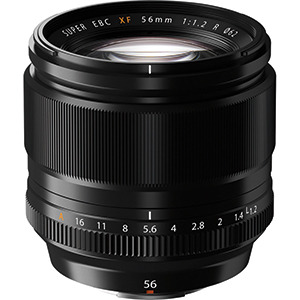
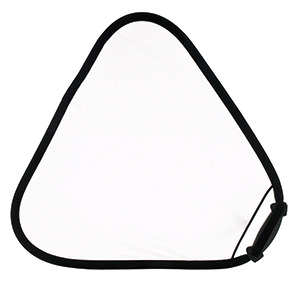
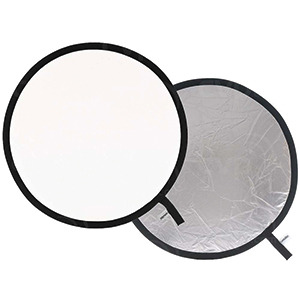
(Essential) Kit for Natural Light Photography.
Prime Lens An 85mm or equivalent lens is ideal for flattering portraits, with the fast maximum aperture of f/1.4 or f/1.8 ideal for isolating your subject, as well as offering extra versatility in low light.
If you’re shooting under clear skies and can’t find a shady spot, a diffuser will help soften the harsh light. Dedicated diffusers are available, but if you haven’t got one to hand a translucent piece of white cloth will do the job.
Various reflectors are available, but something like a white/silver or silver/gold combination will give you options to bounce light back onto your subject.
0 notes
Text
Research: Natural Light Photography
Treat natural light photography the same as studio lighting. Find quality soft light. Look for shadows to create shape and mood. Place your subject at 45 degrees to the light as a starting point. The light source is fixed, so move your subject and camera to reduce the height of the light in the eyes.
Try and avoid shooting under direct sunlight, when the sun is high in the sky, as this will create unflattering deep shadows. If shooting under the shade is not practical or available, try diffusing the sunlight with equipment or improvised options such as light-translucent sheets work well too. On the other hand, if you need to lighten the subject, reflectors work well at directing the light. There are 3 main colours of reflectors, coming in rectangular and round. Of the three, white delivers the most subtle results, with silver providing a bit more punch and gold offering a warmer look. A lot of reflectors come with different surfaces on either side, so you can have white and silver, or silver and gold, for instance. It’s a matter of personal choice and dependant on image you are trying to get.
The hour just after sunrise and just before sunset is considered the best time for photography. A good trick is to try and keep any grey skies out of the picture - unless the clouds add to the photo by being moody and textured. An overcast bright sky can actually be great for wildlife and outdoor portraits as it doesn’t cast any harsh shadows.
So we have 3 main things to think about with natural light photography
- 1. Position. Move your subject and/or camera as you can't move the light source!
-2. Time. High noon will cast more harsh shadows from above so time your shoot right. Think of the direction the shadows will form depending on the time of day.
-3. Weather. Plan your shoot around the weather situation. Think of using diffusers for strong sunlight or reflectors for low light due to clouds.
0 notes
Text
Research: Portrait Photographers (Modern)
Mark Mann was born in Glasgow. He learned photography at Manchester Polytechnic and gained his first experience while assisting fashion shooters – Miles Aldridge and Nick Knight. Three years later he moved to New York, where he pursued the career of a photographer. Soon he became one of the most popular portrait photographers specialized in shooting sports and celebrities. His portraiture was spot on the pages of such print media as Billboard, Men’s Health, Spin, Esquire, Fortune, etc. Mark's incredible works feature a number of famous artists, for instance, Rihanna, Iggy Pop, Stevie Wonder, Queen Latifah, the Black Eyed Peas and many others. Below image by Mark Mann.

Martin Schoeller managed to create a totally different perception of familiar portrait photography. He is widely known for the one-of-a-kind technique of shooting famous people extremely close. His portraiture allowed people to see worldwide prominent figures in a completely new perspective. This portrait photographer's recognizable style, identical background and lighting in all of his imagery have drastically changed the way most famous people are perceived.
Jimmy Nelson brings up the pressing subject of nations whose heritage is on the verge of extinction. As one of the top contemporary photographers, he is noted for conveying empathy for these particular nations. The aim of his portraiture is to attract attention to the problem of the disappearance of various cultures in different parts of the globe.
David Lazar takes most of his pictures while traveling. He aims to transmit real life, as well as show the unique beauty of various cultures and places. This traveling photographer visits places with rich cultural or exclusive traditions. His shots are currently used for various publications. You can find them in magazines, newspapers, books and journals.
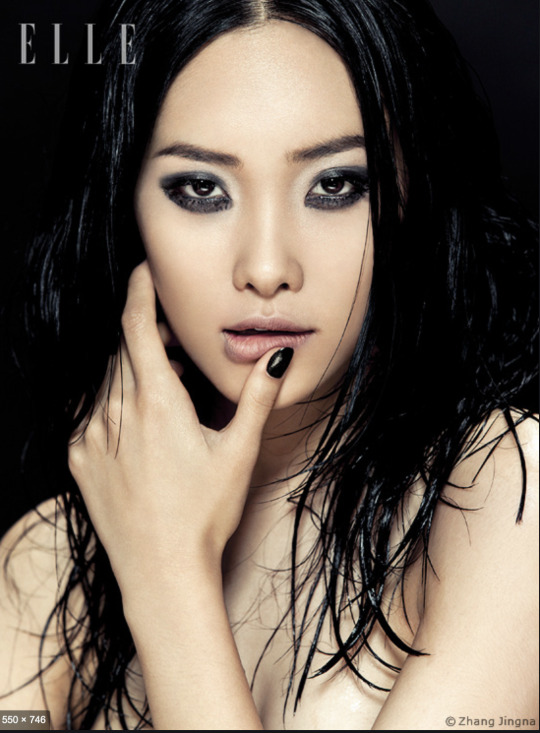
Zhang Jingna knows portrait photography techniques that are useful for taking perfect fashion and beauty images. Her works are published in the top world’s magazines. I mean Vogue, Elle, Harper’s Bazaar. Except for this, she has solo exhibitions that demonstrate the beauty of people from different cultures and nationalities, their peculiarities and specific features.
0 notes