Don't wanna be here? Send us removal request.
Photo


。・ template psd ninety four, template pack forty seven by templatepsds ゜+.*
-`. info .’-
+ here are some random floral templates I made. there are nine total, just packed into one psd.
+ the font used in the template is called ‘Phosphorus Bromide,’ which you can find here.
+ to put an image inside the center, place your image layer right above the layer titled “picture goes here”, right-click on your image layer, and select “create clipping mask.”
+ credits: flower pngs
+ not for commercial use or anything like that! just for personal use/to have fun.
+ adjust as much as you want to suit your liking.
+ please like or reblog if you download.
+ message if you have any questions/difficulties!
-`. dl .’-
+ dropbox || mediafire
874 notes
·
View notes
Photo
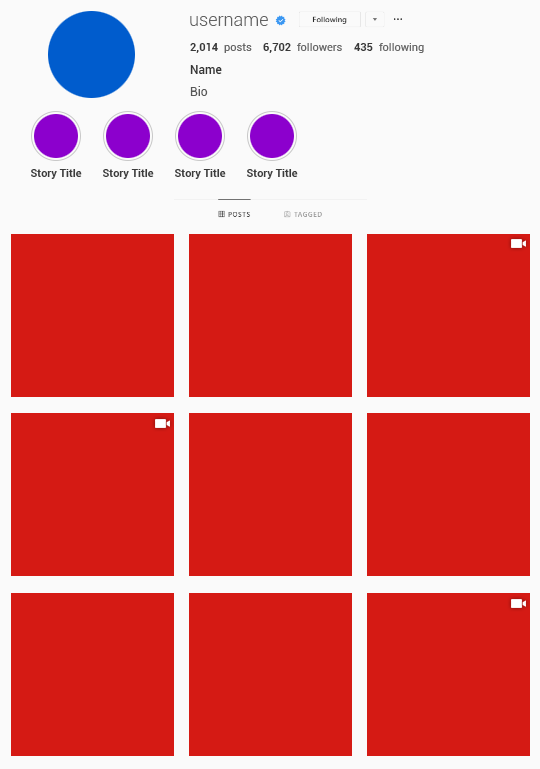

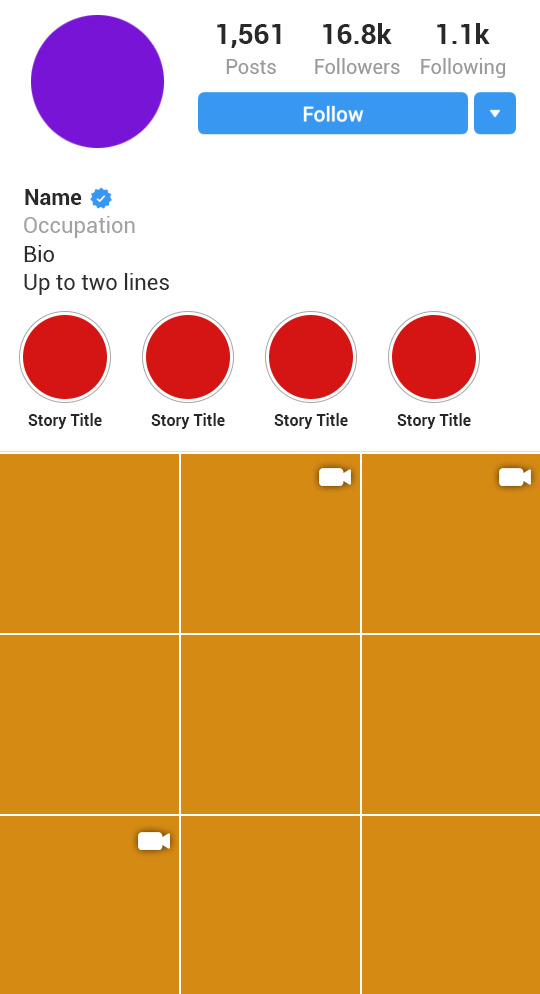
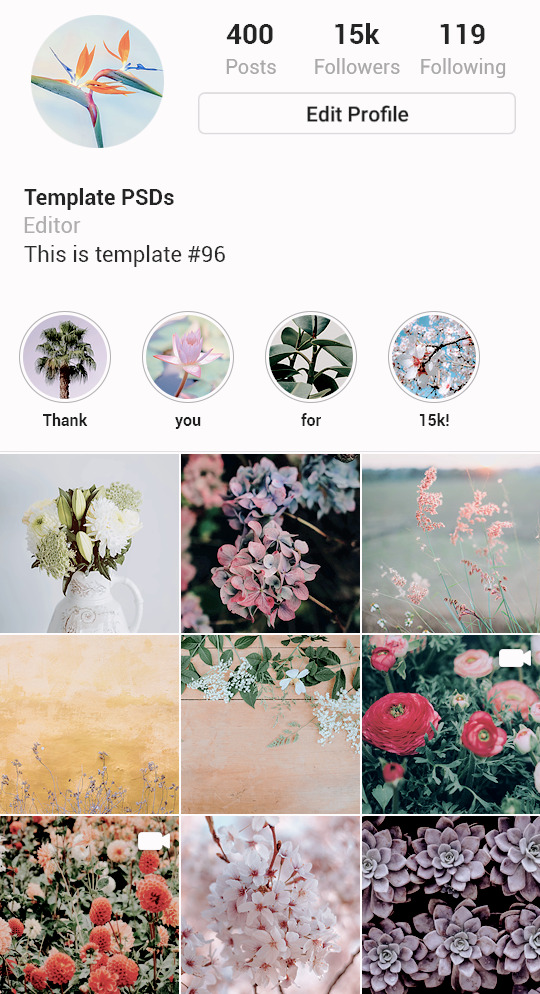
。・ template psd ninety six, template pack forty nine by templatepsds ゜+.*
-`. info .’-
+ as requested, here are a couple instagram templates with 9 posts. the first one is the desktop version, the other is the mobile version.
+ you can have up to 4 featured stories, or remove them all for a longer bio.
+ each “post” has a video option, in which you make the “if video #” layer visible. you can do a normal image to represent a thumbnail, or you can enter a gif.
+ these are rather big images, but you can resize them (Image>Image Size> enter new dimensions whilst checking the “constrain proportions” box) to make it smaller. you might need to do this if you intend on inserting gifs.
+ fonts used: Roboto in thin, light, regular, medium, and bold, all of which you can download here.
+ credits: icon used
+ not for commercial use or anything like that! just for personal use/to have fun.
+ adjust as much as you want to suit your liking.
+ please like or reblog if you download.
+ message if you have any questions/difficulties!
-`. download .’-
+ one (desktop ver): db || mf
+ two (mobile ver): db || mf
2K notes
·
View notes
Link
2 notes
·
View notes
Photo

Honeybee v.3 - Re-release
For those unaware, the Honeybee icon font suffered a major issue today, January 20th, and it was lost while adding new icons.
The font lost around 500 icons but almost 1000 icons were recovered. Unfortunately, I can’t tell which icons are gone because it’s a large amount of them and I can’t track the lost ones down.
Good news is…
Honeybee’s page has new filters! You can now sort the icons by food type, as well as outlined/filled icons, drinks, and others!
Most of the most recent requests have been attended to and there are new icons including: mistletoe, Harry Potter icons, new plants and animals, and even fantasy creatures!
Honeybee has a new icon, which is now a bit prettier than the previous one. The page has also been slightly revamped.
I’d like to thank my amazing fiancé @waltersboringshit for recovering the icons and for being so supportive all the time no matter what it is about. ♥️
Check out the font if you haven’t yet.
A few important notes:
The library remained the same, so you don’t have to reinstall the font.
Most of the icons that survived have the same names, so there’s a good chance that the icons you’re using don’t need updating.
If you’re using unicodes, you have to update them; they are all changed and they won’t be showing the correct icons now.
The icons that are missing will not be added back to avoid problems like this from happening again.
I’ve closed requests for new icons until I find out a way of adding new stuff to the font without messing it up or even losing it, like it happened this time.
579 notes
·
View notes
Photo
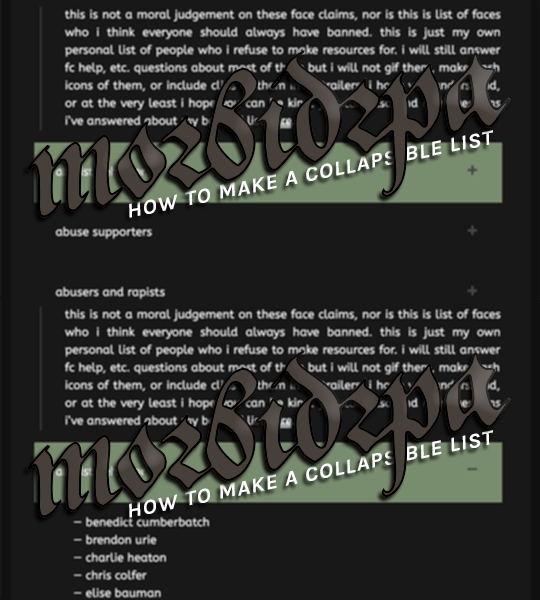
as requested by a lovely anon not too long ago, this is a user friendly tutorial on how to easily make collapsible lists on your theme using css and html! i’d say it’s beginner level, easily, so you should be able to easily utilize this code for banned fc lists – like mine! where the request came from – faqs, to do lists, “what i do” pages, or anything else you’d need a lot of information presented in the least intimidating way. so let’s get started! all you’ll need for this is a page to install it on, and codes which i’ll be providing you. and, as always, please give this a like or reblog if it’s appreciated, or consider buying me a sleepytime tea.
Keep reading
236 notes
·
View notes
Photo
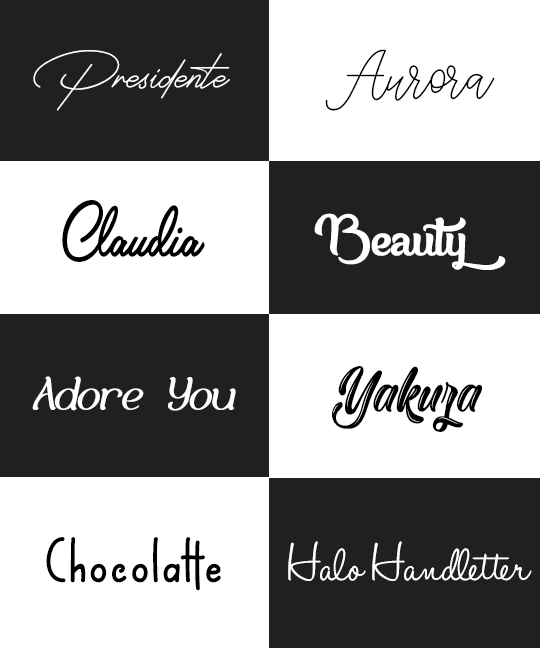
FONT PACK BY FLOIDPSDS
Presidente
Aurora
Claudia
Beauty
Adore You
Yakuza
Chocolatte
Halo Handletter
All these fonts were taken from the site © netfonts. If you have downloaded any/liked or use, please ask me to leave your liked or to like. Thanks and enjoy the content.
551 notes
·
View notes
Photo

WHITE DEMON LOVE SONG: A GIF PAGE CODE BY MORBIDRPA
just a cute little gif pack page theme! i’ve seen so many of them floating around lately and decided it might be time to clean mine up and release it just for fun. gave it a nice light, bright color scheme and a mild little 60s feel et voila! everything should be pretty simple and easy, but this is my first code release ever so feel free to hit me up with any questions!
CREDITS
original theme layout inspiration from @insomniacgifs
credit icon from @suiomi‘s honeybee icon font
font hosting by myself and google fonts
coolors.co for color palette generation
gifs featured made by myself
page title inspired by the killers and cody fern’s ahs character michael langdon
RULES
use as a base code ONLY with proper credit
do not repost and claim as your own
leave credit in tact; you may edit the way the credit module looks but it must remain visible
do not repost the gifs featured on this page for any reason; reblog my cody fern gif pack instead, which is where the gifs came from
do not use the featured font in another page or theme unless you’re matching this page to your main blog
please give this a like or reblog if you’re planning to use, or consider buying me a sleepytime tea
PREVIEW && CODE
186 notes
·
View notes
Photo


wabbajack [ Theme 106 ]
[ theme originally inspired by/made for ‘tombstonehq’ ]
PREVIEW || DOWNLOAD
Features - —
fansite style theme / rph / rpg etc.
400px posts only
up to 16 additional links on slide out navigation page
background ( set to cover - will resize to fit screen, use an HD image if possible! )
easily editable font size & theme colours
sidebar boxes can be toggled on/off as needed - includes : welcome box, more info box, affiliates/most wanted box, admin box, updates box, disclaimer box. easily editable content for boxes ( please view all options in basic editor )
main title & subtitle appear in header
click to auto scroll to posts
Any glitches, or questions, hit up my ASK. Thanks :3
DON’T REMOVE CREDIT, a like or reblog would be appreciated! *please make sure to view all available options in the basic editor!
CREDITS: tooltips original code and jquery by - MALIHU / fullscreen overlay menu - W3schools / preview background image; Tina Rataj-Berard on Unsplash
546 notes
·
View notes
Text
Are you trying to change your theme, but getting this error?:

Here’s how you can fix it! With screencaps!
Keep reading
821 notes
·
View notes
Photo


。・ template psd seventy six, template pack thirty nine by templatepsds ゜+.*
-`. info .’-
+ as requested, here is a mugshot template. there is actually two of them–one of them with just the mugshot, and one of them with a criminal history list under the mugshot that I used from a previous template of mine.
+ the mugshot board w/ the name & criminal # is optional, you don’t have to have it, especially if it takes up too much room.
+ on the left is the feet and inches, which goes by every 2 inches, but the smaller lines is the odd inch (meaning inbeteween 4′4″ and 4′6″ would be 4′5″.). it goes from 4′0″ (3′9″ if you consider the smaller lines) to 6″6″.
+ on the right is the centimeters equivalent to the odd feet and inches (meaning 5′5″ is 165.10cm and so on). these also go by every 2 inches. you don’t have to have these though, you can remove them if you want.
+ all you have to do is make a png, add it above the lines and measurements, but below the mugshot board layers.
+ in the first template, I also added a gradient layer to switch the colors around (meaning everything that is black (mugshot board, measurements, lines) will be white, and everything that is white (background and mugshot text) will be black). this is optional.
+ not for commercial use or anything like that! just for personal use/to have fun.
+ adjust as much as you want to suit your liking.
+ please like or reblog if you download.
+ message if you have any questions/difficulties!
-`. dl .’-
+ one (mugshot)
+ two (mugshot w/ criminal history)
952 notes
·
View notes
Photo


Eight Fandom Fonts
One of the fonts I always find hard to locate are ones directly from a franchise, so this is a font pack of eight fonts from two are from Marvel movies and six are from other various fandoms.
Thor: Ragnarok | Star Trek | Captain Marvel | Star Wars
Narnia | Harry Potter | Lord of the Rings | Percy Jackson
2K notes
·
View notes
Text
icon psd: gael garcia bernal

this is a vibrant, poc friendly psd. I made this from scratch for fun and thought I would share. please credit me somewhere on your blog if you are using this psd. this psd has been tested on gael, as well as a few other poc, and has not whitewashed, but as always, make sure to adjust it so you don’t whitewash your fc.
the border is also included.
download.
17 notes
·
View notes
Text
by clicking h e r e, you will find 101 gifs (250x150px) of trevante rhodes in bird box (2018). all of these gifs were made by me. do not redistribute, edit, repost, include in gif hunts, etc. reblogs are very appreciated :~)


226 notes
·
View notes
Photo

*✧・゚:* expanding menu tutorial
hey all! i made a tutorial on the menu you can find on my blog. it’s not my full code, but it covers all of the bases without the design at the end, which is totally up to you!
requested by anonymous
610 notes
·
View notes
Photo


COMPLETERESOURCES — Colored gifs
I’m using CS6 extended but it will work in all other versions
You’ll need basic knowledge of photoshop and gif making
Please Like / Reblog if you find this useful
There’s many ways to make these gifs. This tutorial is going to show you three different ways on how to achieve these super colored edits. You can use the following tutorial to make colorful gifs, “color scheme” sets, pic spams and even character aesthetics.
Keep reading
585 notes
·
View notes
Photo


COMPLETERESOURCES — PSD No. 118 → Download
Please like or reblog if you download.
Don’t redistribute or claim as your own.
Enjoy!
236 notes
·
View notes
Text
Gif colouring tips
This post is some top tips for colouring gifs that I’ve learned from colouring my own gifs over the last year or so.
It’s for people that already know how to gif and have perhaps been using other people’s PSDs or have been trying to colour themselves but haven’t quite got the hang of it yet or have been colouring themselves but don’t like the results.
For reference you can find all of my giffing tutorials here.
Don’t use PSD’s - If you learn how to colour your own gifs and then attempt to create a couple of PSDs to use across all of your gifs, you’re most likely going to have crappy results. Every gif (even if they’re from the same scene) will need different layers and settings to make it work. In the time it’ll take you to adjust your PSD’s to suit your gifs, it would be faster to just colour it from scratch. Some people like to have a “signature” look with their colourings, which I understand, but it’s tricky to pull off, particularly if you’re a beginner and you’re giffing multiple fandoms. Which brings me nicely to the next tip.
Take each gif individually - The best approach to take, in my opinion, is to colour each gif individually. Sometimes if you’re giffing just one scene it is feasible to use the same PSD on every gif, but even then the lighting can be different because the scene has actually been filmed in two or more different takes.
Make use of your drafts - Drafts serve a purpose - so we can draft things, duh! But until recently, I didn’t realise how useful they could be in making gifs. When you’re in the process of making a gifset, create a post and save it to your drafts. As you make each gif and save it, add it to the post and that way you can see what your gifset is going to look like as it unfolds. It enables you to make sure the colourings of your gifset match because you can see all of the gifs together. And it also means you can simply pop over to PS and add a little brightness or adjust colour balance to make sure the gifs all look similar.
Don’t get too overwhelmed with it - Easier said than done, I know, but I found that the biggest hindrance to me colouring was thinking it was a lot harder than it actually is. Tutorials can seem long and overwhelming, but when you break it down and put it into practice a few times, you’ll realise it’s not as tricky as you think it is. Some gifs can be a lot harder to colour than others, but 9 times out of 10 when I’m making gifs it takes about 5 minutes. A lot of the time I sharpen it, add curves and the gif already looks great, so it’s really not as hard as it seems.
Practice, practice, practice - Colouring like anything else in life is not something that you’ll be able to do overnight. I’m still learning new things and better methods all the time even after a year of doing it. Experiment, read as many tutorials as you can and just get used to it. When I switched from PS CS5 to CC there were quite a few changes to the methods of giffing and for about 3 weeks I barely giffed because I couldn’t get over the hurdle of having to learn a new process, but now I’m completely used to it. So persevere and set aside a couple of times a week to practice. You don’t even have to post what you make, just practice for yourself.
Get an eye for colours/what looks good - Like I’ve said time and time again in all of my tutorials, it’s all about judgement when it comes to colouring. Some people may look at my gifs and think I coloured them badly (hell, I do most of the time lmao) or that they would have coloured it differently but that’s the point - everyone has their preferences. Don’t try to replicate somebody else’s colouring exactly, because that’ll never happen (even if you follow every tutorial they have) create colourings that you like. Figure out whether you like pale gifs, vibrant gifs or black and white gifs. Do you like high contrast or low contrast? Bright gifs or not-so-bright gifs? Once you feel confident with the process of colouring gifs, the best thing to do is step away from tutorials and practice colouring by yourself, and eventually you’ll develop your own colouring techniques and preferences without even realising.
Learn the function of each layer - It’s easy to follow tutorials without fully understanding what the hell you’re doing or what any of it means (I did exactly the same in the beginning), but understanding what each layer does yourself will really help you to colour. The basics are that curves, levels and brightness/contrast change the brightness and colour balance and selective colours change the colour. But there’s more to it than that and each layer serves different purposes. For example, if a gif is particularly red, if you try to go to colour balance and reduce the red right down the gif is going to end up looking awful and most likely green/yellow. The best approach to take in this case would be to apply a little colour balance to reduce the redness and then go in with selective colours and increase the cyan in Reds. You’ll learn the best way to tackle these things by going back to the above tip - practice, practice, practice!
Everything in moderation - Before I started colouring my own gifs I used PSD’s and a lot of them had 20+ layers. Since I didn’t colour myself, I assumed that was normal, but personally, I rarely exceed 6 layers. It’s not necessary to colour the crap out of a gif with multiple layers of contrast, selective colours etc. Depending on your tastes you may want to do that and that’s fine, but it’s very easy to create good gifs without adding lots of layers and making lots of changes.
Hopefully some of these tips were helpful. Feel free to ask if you have anything else I can help with related to giffing or colouring and I’ll do my best.
508 notes
·
View notes