Don't wanna be here? Send us removal request.
Text
Making the Second level


Like the first level I used the end point as the starting point and even redid the floor. I didn't know what I wanted to do with this level yet as it was the last level, I sat on it a little while before deciding to make the room go up wards instead of left to right. I started working on the walls and got them to the height I wanted this first room to be at then started to work on the puzzle.


I didn't fully know what to do with the puzzle, I first started with a moving platform then I added a few normal platforms which lead to a spinning platform. The spinning platform led to three different ways one to the button for the door, one to the block and the last to the exist. the path leading to the block would only have one spinning platform. Well, the one heading to the button starts with normal platforms to three rotating platforms which would rotate into a ramp. I then had normal platforms and small platforms which had a moving platform which led to a small jump to the button. I set up the way to jump up into the next floor and added the path to get to it which started with at the spinning platform to a moving platform. I added a light blue area around the door to the next floor.

I then finished the roof but realized that the room would be extremely dark, so I added some materials which had light coming from them and had them as lights for the walls and for detail. This helped slightly but only if I was near enough to them, so I just added in invisible lights. I also moved the block to a place where the player can't get to and added a button where it was before which would them activate a moving platform which will push the block down.

I then went onto the next floor which I also struggled on what to do for it. I decided to make it into the last room where the player can just jump around on jump pads and take any path they wanted to get to the end.
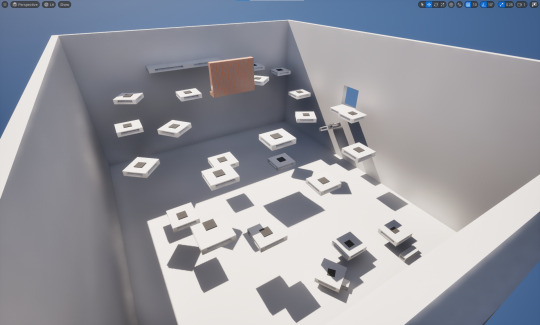
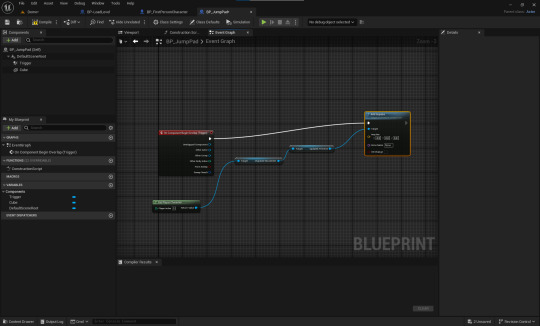
I set up the jump pads and the platforms they were going to be one and decided to add a slight obstacle to the level via a brick wall. I didn't really have that much trouble setting all the jump pads up besides making sure they wouldn't jump out of the map.
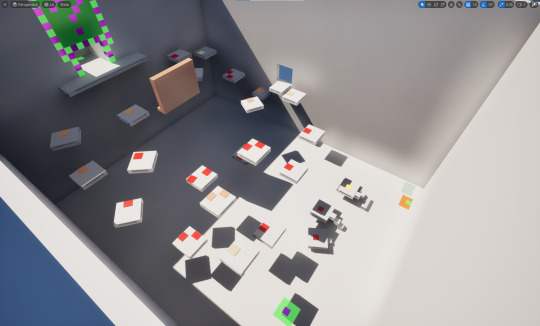
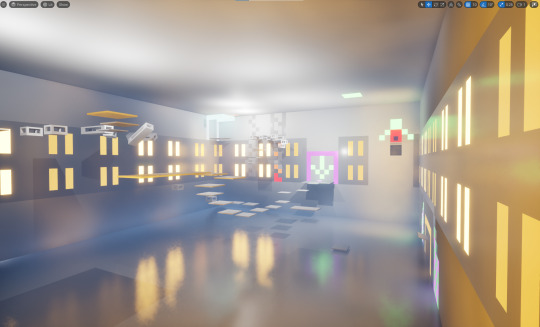
I then tested out all the jump pads to make sure they were correctly set up I did. I did need to change the height and distance of them all to get them all working I had each one color coded to tell how strong each jump pad was. I had the lecture play test the level for me and decided to move the jump pads towards the ends instead it being in the middle of the platforms. I then start to do some decoration of the room and even made it the button for the block a lot clearer by adding a big green arrow above it.
0 notes
Text
Making first level


After I felt that the tutorial level was done, I moved onto making the first level. At first was just going to use the floor that was given to me when I made the new level. I decided to add a plane and make it the size of the floor before replacing it with the plane. I decided to make the starting point to be the same thing where you entered at the end of the tutorial to make seem like it was connected. I made it floating in the void with a death plane underneath, I added the first part of the level which was just two moving planforms which would help the player cross the gap. I then made a copy of the plane and made it smaller as I realized that it was too big for the first room. I then started to build the wall for the first room.


Well, making the walls I found a glass material and decided to use it as windows next to the door. I then start to add a few jump pads and a button for the door, I would replace the windows as I realized it didn't really make any scene to have them there, so I replace them with faces. as I was completing the walls I had decided to make a new blueprint of a ladder for fun, I ended up using it for the next part of the room and because I wanted to do a tower idea for the game, I added another door to the top of the room which was the real door and the one at the bottom being a fake. I decided to start working on the next room a little I made duplicate of the ladder and made it iron which would have no collision. I then went back to the first room and adding another moving platform and two rotating platforms and two spinning platforms to get to the block.


After I had felt that the first room was done, I moved on completing the second room. I carried on making the ladder maze which did was a difficult to make as I didn't want it to be too easy or too hard for the player. I added the platform which held the block but also put some fake blocks for decoration, I put the button to open the door at the fake door. I then started working on the walls, well doing this I started to work on the last part of the map but then went back to complete the walls.

After finishing the walls, I worked a little more on the last part of the level before going back to the second room to add an invisible roof. This was a little bit of a pain as I had to make sure everything was fitted correctly and wouldn't cross over any other wall, even though it would be invisible, and nobody would be able to tell.


I went back to the last part of the level and completed but I was not done yet as I decided to add some detail to the level as it looked bland. I even changed the lighting.
0 notes
Text
Making the tutorial level.


First, I deleted the floor then I went into the place actors' shapes and spawn in a plane for my ground. I then increased it to a size I felt was a good size then I started to create the walls for the first room. I added button and door. I created a mesh shape which I though closely looked like a cursor used that as the place to put the text that explained what to do with the box then I added the box Infront of it. Because of the lack of color, I changed the material of one part of the wall to gold. I duplicated the plane for the floor and moved it to start working on the second room. At first, I didn't know what I wanted to do with the second room besides adding the box button and a checkpoint, I decided to make add in a moving platform for players needing to use the platform to put another box onto another button which would activate the door. I ended but creating a weird chair which I decide to use to hide the first box. I started working on the third room and wanted to make it interesting so I created a version of the moving platform that would rotate up or down if you stepped on a button. Well, working on this room I felt like it was too big, so I added a new wall to make what was going to be the third room into the fourth room. I carried on working on the fourth room then moved onto the next stage which the player had to go up a stair well to them get onto auto moving rotating platforms which would lead to another checkpoint at the start of the jump pad area.


Before I finished the jump pad zone, I whet back to the third room. I didn't really know what to do what to do with the third room when I decided to make it. I decided to make it into a maze and started to set up the walls I then realized that I didn't want to just have a normal maze and wanted to make it a slightly deceptive. So, I started to set up some invisible walls for players to see as ways to go but then hit the wall or for them to see a jumpable gap that would if failed would have them fall into the death plane and reset. But because of the floor being one big plane So I deleted the floor plane for that room and readded a plane as I deleted the floor for the fourth room as well. This part was difficult as I had to place each part of the floor one by one, I finished the floor and then carried on adding the walls of the maze and either deleting parts of the floor or to hide them along with the some more hidden walls. After I set up the maze, I started to work on an outer wall for fourth room, while making the walls I decided I wanted to be a little tricky and decided to make a "Secret route" which connected from the fifth room and lead the player all the way back to the start of the map.

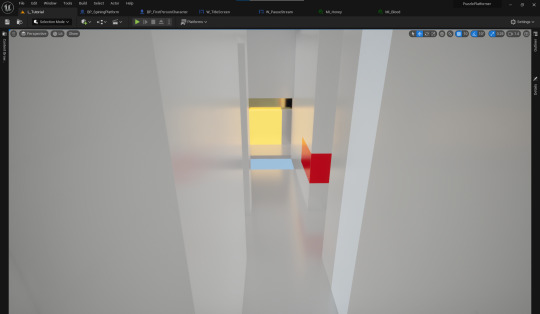
I carried on making the walls for the fourth room and did it in a pattern which made it look like you were inside a city. I then went back to working on the jump pad area. I completed the jump pad area but decided to create another type of moving platform which would be a spinning platform, the spinning platforms would be the last obstacle for the player to cross before they could open the door to the next level. I set up the end then went back to working on trick path which I use the spinning platforms on that path as well. We then had a playtest for our tutorial level's. I had been told that my maze was good but was hard to tell where you were because the walls look the same. Too try and fix this I added some color to a few of the walls that were near parts that would either guide the player, or warning of a hidden wall.
I also decreased the size of the blocks as they blocked what you could see Infront of you, I also replaced the 2nd rooms button moving platform to an auto one and the second block, as after you got the door open you could just grab the block for the platform and carry it into the next room.
I stared to work on adding roof to room one through to four as the player could just through the block into the next room trapping them into the room. Making the roofs was challenging as I came to realize that I hadn't set up the walls nicely and even had to go back a few times to redo roofs and finding places where I messed up in them. After I completed the roofs, I made the first three rooms roofs hidden as to not block out the light.
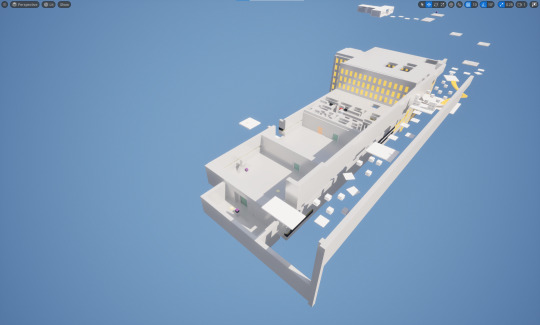

I then turned down how far the spinning platforms could spin and the rotating ones to rotate along with their speed, as they became trickery for player to know how far to rotate them or when the perfect time to jump from the spinning platforms. After I fixed the problems, I finished up the walls on the last part which led to the next level to prevent players from not needing the block for the door. I then went back to working on the trick path and even made a room behind the door you spawn Infront of at the start, I finished it off and added walls around it to make sure player couldn't just jump onto the invisible roofs of the other rooms. With the trick path complete I had finished the tutorial level and was ready to start working on the first level.
0 notes
Text
Making Load next level

We recreated the layout for we did for the checkpoint. But changed the text to say, "Load Next Level".
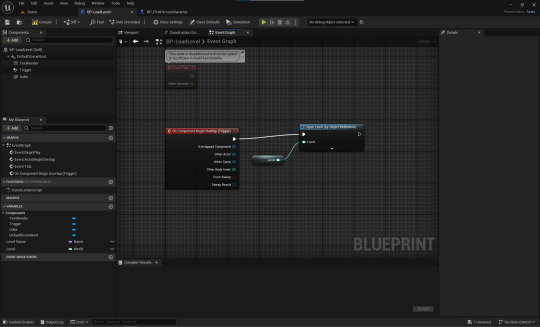
Going into the code we made an instance of the

0 notes
Text
Adding Sound effects

We moved on to adding sound effects for the game, we added sound effects to make our games feel more emissive and alive. But we had to find some free use sound effects to use. Thankfully our lecture provided us a link to a star trek sound effect that we could use for our games.


After we found the sound effects that we wanted to use we downloaded them and then opened Adobe Audition and moved them onto it. We did this so that we could edit the audio but also to change the audio from a mp3 to a wav as we couldn't add the audio as an mp3.

after we had turn it into a wav we opened our "My audio" folders and imported them into it. one it was done importuning we created
0 notes
Text
Being able to pick up the cube and let it go, and making the retical.


First, we went to the first-person folder and then into actions folder and then created a new Acton.

we
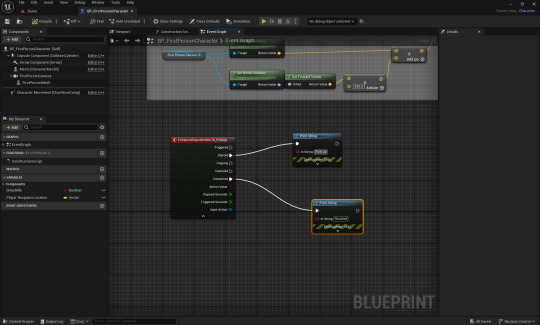
to make sure it was working we

0 notes
Text
Making the Title screen

We created a new level which was to be our title screen. After we set up the title screen how we wanted our to look like we then went into our widgets folder and created a new widget called Title screen. We even made a cutscene for the title screen.
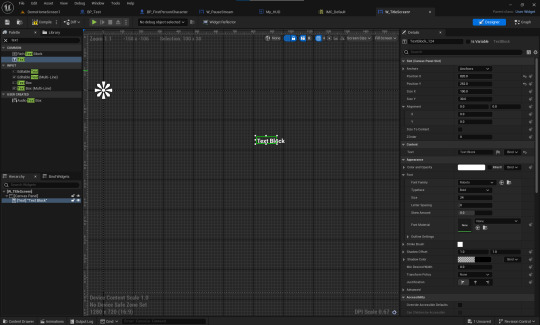

We redid the same steps as we did for the pause screen widget for the title screen widget.

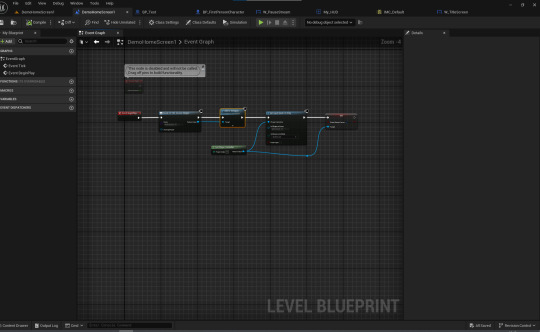
We went into the code for it and added an event begin play connected it to a "Create W Title Screen Widget" and change the class to the title screen and then connected the CWTSW to a target is user widget called add to viewpoint. To make sure the player could actually use their mouse in the title screen we added a Get player controller and added a set input mode UI Only which we connected the add viewport to the it's Exec node. We connected the Get player controller to the set input mode UI Only player controller node then added a set node and connected both the UI and the Get player to it and ticked the Show mouse cursor on.

Testing it let resulted in it working.
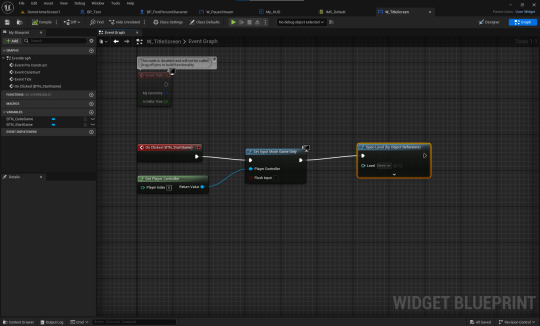
We then set up both the Start game button and quite game buttons to work when clicked. We made a on click start button statement which we connected to a "Set Input Mode Game Only" and added a "Get player controller" which we also connected. We then connected the SIMGO to an "Open level (by Reference)" state mind which we connected to our demo levels.

Well, the quite game was easy to make.
0 notes
Text
Making pause screen

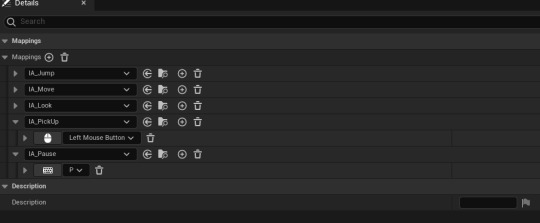
First we went into the and created a new data asset and called it IA_Paused. Then we


we went into our my Widget folder and created a new widget calling it

We then added the two buttons and then added text box's to them. We named the top one called "Resume Game" and the other "Quite Game"
0 notes
Text
Making cutscenes


First, we spawned in a cine camera actor and we changed the camera focal Legath from 35 to 12 to make the focal look the same as the player's view. We also turned off the constrain aspect Ratio as with it on it would look weird. We then right clicked one the camera and clicked to pilot camera as we would not be able to do any sequencing for the cutscenes without being in the camera.


opening my sequences folder We right clicked and went into the cinematics and choose the Level Sequence. I named it "Demo Cutscene 1" we went into it and then moved to camera from the details into the track of the sequencing to be able to make the cutscenes. We then when to the transform part of the track and opened it, we then hit the plus symbol on the transform to add the keys for the start of the cutscene. After we hit got that we clicked the button for the end of the track to let use make the end of the cutscene, we moved the camera around to another position then hit the plus symbol again to make a new key we would use this as our first part of the cutscene.

We repeated the steps from before to make a total of three sequences. We then made a new level Sequence and called it master cutscene, we then opened it and put all three of the cutscenes we made before into the track we did this to make the full cutscene. We would put them in the correct order then watch it to see if it works or not. I had to redo my shots as I had used a different camera for each shot, so it didn't work.


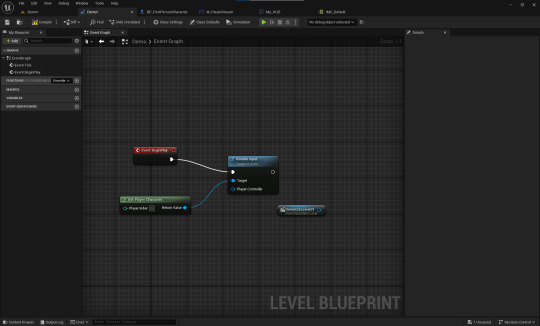

After we got the master sequence set up, we needed to make sure it would work in the game. We brough it into the map with it highlighted we then opened the world blueprint and made a reference to the cutscene. We made the reference and then went to making sure that player would not be able to move around well the cutscene was active.
0 notes
Text
Master Material Box and moveable box

We then went onto 3ds max which we used to create are master material box via making the height and size as well as the middle of the box being pushed in. After we had made our box, we saved it and exported it we moved to coloring it using Adobe Substance 3D Painter.

Before we import the material

y


After we imported it, we need to make sure it was move able
0 notes
Text
Checkpoint, Death plane and player respawn

To make the check we added a cube component and did the same made it's scaled it to x 1.0, y 1.0, z 0.1, we then added a collusion box around the check cube. We then added a Text render and change the text into to say checkpoint then put it above the collusion box.
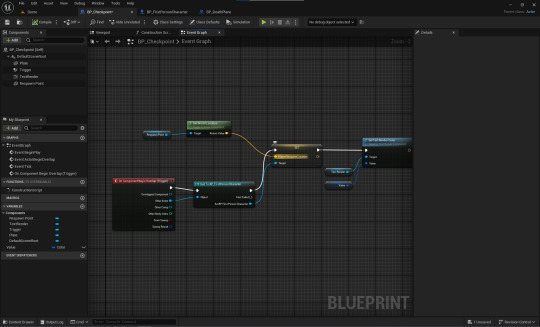

then we started to code the check point We made

After we got the check point working, we started on the death plane. To make it we made a new blueprint and called it Death plane, then we added a box collision which we named "Collision" well collision was still selected we went into the event graph to start coding the death plane.

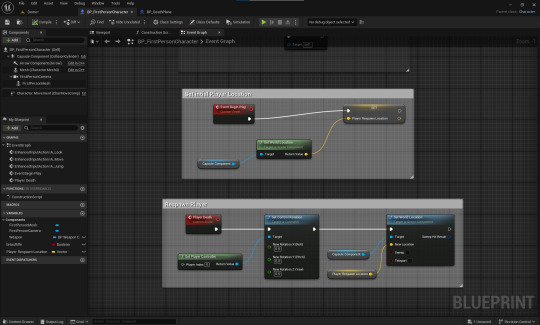
Next we went onto making the player respawn.
0 notes
Text
Creating a moving platform

We added a box actor to the and changed its length by 2, Hight by 0.1 and width by 2. then added an arrow to make sure to show which way it was going to move.


To get the platform moving we started with a custom event calling it event begins play to start the process. We connected it to a timeline and did the same thing as we did for the door, we then added in a multiplication box and connected it to the move platform track on one end and a set relative Location on the other. We promoted pin B to a variable and called it "Distance". we also made it public so that in we could set change how far we wanted it to go without needing to go into the event graph. The relative location component needed a target object for it to active the movement, we added an object reference of the platform and connected it to the target plug and hit compile.
We had the platform moving vertical, but we also wanted it to move Horizontal. We added a branch statement which came out from the update exe, we promoted the condition Boolean to a variable and called the condition "Horizontal?" which we also made public. We duplicated the Set Relative Location component as to make sure that we could change it being horizontal or vertical, We set the branch to have as if true it would be set to horizontal and if false it would be vertical.


But we wanted to be able to set the platform from auto or button. So, we then disconnected the event being play and connected it to a branch Statement, which we as then connected to a set play rate timeline component and that was then connected to the play in timeline node. then We promoted the condition of the branch sequence to a variable and called it "auto?" and made it also public. we then made a new custom even and called it "Start Moving" and had it connected to a branch as well which we then added the auto variable to this part as well. Both of these branches were put into the Exec plug of the timeline Component. The timeline component required a target object reference and float, we promoted both of them to variables and named the targe "Move platform" and the float to "Platform Speed" and made these both public.

We then went back to the button; we did this to make it so that we could have the button also be used for the platforms as well. We added a branch statement Infront of both relative location statements and adding start moving and stop moving statement which were connected to an object refence of the platform. To get it to not error out when we wanted to have it be a platform instead of a door, we promoted the branch condition to a variable and called it "Door?" as if true it would be a door but if false it would be a platform, we also made it public as well before we hit compiled and save.
0 notes
Text
Creating a button and door
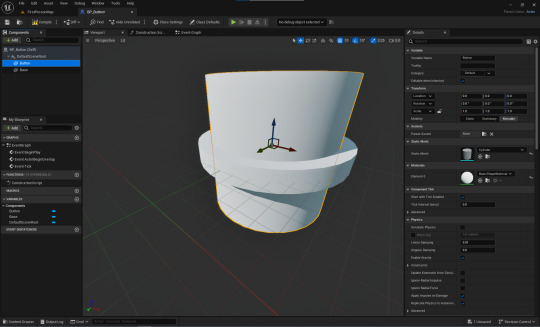

We first started with making a blueprint. Choosing a cylinder flatting it then expanding it. Then we added another cylinder and put it inside the other cylinder before we made it smaller and painted it yellow. we created a collusion box around the center cylinder and called it trigger. So that when this collusion box was hit it would activate the button.

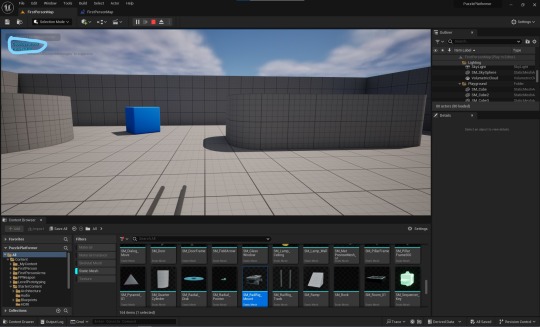
To get the button working we went into the event graph. Then clicking on the trigger, we then right clicked and opened the add event and got out the "On Actor Begin Overlap (Trigger Volume)". then we added a Pring string and changed the text to "Hello World!". we added the print string so once the button was stepped on it would print out the text so we would know it was working. We also added a delay before the print string. We also added an "On Actor End Overlap (Trigger Volume)" and connected it to a print string which had the text "Good Bye World!", We added this so that when the button was stepped on it would say "Hello World!" and when it was step off it would say "Good Bye World!". Which when tested worked.
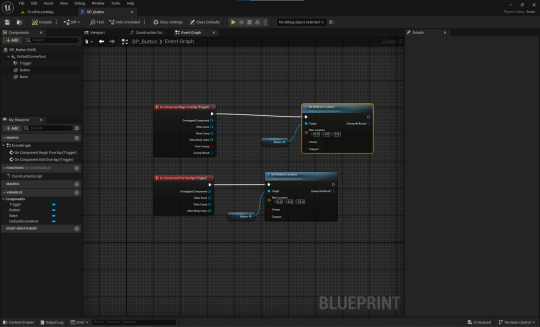
After we knew the button was working, we wanted to make so that when the button was pressed it would go down. So, we removed the trigger volume with the delay and print strings as we knew button was working now. We replaced them with an "On Component Begin Overlap (Trigger)" and an "On Component End Overlap (Trigger)", adding to each a "Set Relative Location" we made the button the target for each. We had the first SRL set to x axis 0.0, y axis 0.0, and the z axis 2.0, For the 2nd SRL we changed the z axis to 10.0. We did this so that when the button was activated it would press down then when it was stepped off it would go back to how it was before it was activated.


We then moved onto creating the door, we used cubes for the sides we scaled the y axis to 0.5, the x axis to 0.5, and the z axis to 2.5, for the top of the door the y axis was 3.0, x axis was 0.5, and the z axis was 0.5. for the main door we had it as y axis as 2.0, the x axis was 0.25, and the x axis was 2.5.


Afte the door was set up we started on making it so that the door could open and close. We did this like we did with the button but instead we started with the OCBO (Trigger) and the OCEO (Trigger). We then added a timeline and connected the OCBO to the Play and the OCEO to the Reverse, then we opened the timeline and created a new track that would be how the door moved. which went from 0 to -126, we named this track door slide. Next, we added a "Set Relative Location", we split the "Next location" pin into three as we only needed to use the Z axis and we added the door component and set it to the target, then we put the timeline update pin into top pin and the Door slide pin into the Z axis. We compiled and saved it before testing it which worked. This part was difficult as there was a lot of components and steps that need to be followed closely or else we could have messed it up. Little did I know this was for shadowing for later on.


Now we moved onto getting the door to open when the button was pressed.
We replaced the OCBO (Trigger) and the OCEO (Trigger) with two custom evens one called OpenDoor which went into the timeline play and the other CloseDoor which went into the Reverse
0 notes
