Text
Editing Essay
In the media industry, in order to create a finalised piece of work we must take on the process of manipulating and rearranging video shots, known as editing. This is one of the main parts of the post-production process. When editing, this means you have total control over how the finished piece will look. You want the finished piece to look the best that it can be; this is where colour correction comes into play. We use this to enhance the quality of the picture and to create effects relatable to the theme of your video. Adding transitions between clips can make the sequence run a lot smoother, and adding a sound track over the top of your clips will automatically allow them to become a lot more interesting. The purpose of editing is to show a story through picture. Placing clips in a certain order can create different emotions with the audience and it is important to achieve the right one, depending on the purpose of your video. All editors hope to achieve a professional looking video that they are proud of, and it is the magic of post-production that allows them to do so.
However, the very earliest filmmakers were afraid to edit film shots together as they assumed that connecting different shots of different things from different positions would confuse the audience. Although they quickly discovered that editing shots into a sequence not only contributed to the audience’s sense of tale, but also enabled them to tell more complex stories as a result. Early on the cuts were made in camera, meaning that the cameraman would simply stop filming at the exact end of a shot, and begin filming again when the next shot began.
When starting out on your edit it’s best to sort through all your footage and create some form of organisation. I do this by labelling any bad/unwanted shots a certain colour so that I know not to use them. I do not delete them just in case I change my mind or they may come in handy later on. It is common to shoot far more footage than you actually need which usually leaves you with more than one take of the same shot. When I come across this I use a different colour to label the best shot out of all the takes of that certain shot, making it a lot quicker for me to find what I’m looking for when placing it onto the timeline. Depending on how much footage I have for the project I am working on, I may or may not decide to rename all my clips. For example, if I were creating a documentary and had a lot of cut away shots and different interviews, I would rename all the interviews and place all the related cutaway shots in separate folders. However, if I were editing together a simple interview, I would most likely not need to rename all the clips as the list of shots would already be in the correct order of what it was filmed in. When working with footage on the timeline, I like to start from the very beginning and cut each clip to how I want it before moving onto the next one. I also prefer to cut to a beat as I feel this helps the video to flow a lot smoother and automatically becomes a lot more visually interesting. Effects and graphics come last for me in the editing process. I like to create a sequence that I am proud of before spending time adding colour correction and transitions to make it look pretty.
Before the process of cutting your footage together can even begin, three main procedures must take place; file management, transcoding and assigning qualitative information to your clips. When placing your clips straight from your camera onto the computer, it is important to have created a RAW folder to place them in. It is also just as important to then create a transcode folder in which you will place the files when they have been transcoded. This makes file management a lot easier when differentiating the footage that is now at the correct settings to edit with. The process of transcoding then takes place, meaning the files must be changed into the correct codec so that the footage can be edited smoothly without any mishaps. To ensure there are no problems when editing, files need to be transcoded into Apple Pro Res 422 when using Final Cut Pro. During this process, file information must also be changed in order to match that of the sequence you are going to edit on. Files must be de-interlaced, at a frame sixe of 1920x1080, with 25 fps, at 100% quality.
Once editing has begun it is down to you as the editor to create your story. The way you choose to present your story, for example the theme, genre or general vibe that you want your audience to get from your video, is all down to the creative decisions you make when piecing each clip together. It can be as easy as changing the saturation on a clip from high to low; instantly turning a bright, vibrant, cheerful scene into a gloomy one. Music choice is a great mood setter for the direction you want your video to take. A more up tempo song will suggest that it’s an upbeat light hearted video. The aid of a simple sharp cut or fade to black can cause the difference between insinuating a dramatic climax to a cliff-hanger, or just a gentle close to the scene. Having all these creative tools at your fingertips automatically makes it ten times easier to interpret your story the way you intend it to be seen.
The ‘rough cut phase’ is where editing is in full swing. Your story is coming together and the sequence of footage is all starting to make sense. It’s a good idea to get a fresh pair of eyes to look over your rough cut and give feedback on what they think may need changing. This can help the editor make vital decisions during the final cut as they will be able to feed off of the viewer’s first impressions. Throughout this phase, scenes may be added or removed in order to better the understanding of the story for the viewer. As the final cut begins, cuts may be made tighter, sound levels are corrected to the right volume and picture quality is enhanced. Completing the final cut means that you are 100% happy with the sequence of your footage and the message it portrays; before finally starting on the finishing process. This is where the editor gets to spend time playing around with all the enhance tools on offer in order to make their masterpiece as visually exciting as possible. With programmes such as Magic Bullet Looks and Adobe After Effects, there are hundreds of filters and colour correction effects to help portray the image in any way the editor wants. Not only does this play a vital part in making shots look pretty, but it also allows the editor to fix shots that would once have been deemed unusable. Perhaps the exposure was too high or the white balance wasn’t right; the use of these programmes allow the editor to fix this without wasting what could be a perfectly good shot. Once all is complete and the editor is certain that their creation is perfect, the final cut will be exported to H.264 (MP4) for internet sharing.
0 notes
Text
QUICK QUESTION!
Since friends and family are allowed to the showreel tomorrow, how are they meant to get in if we're not allowed through reception?
1 note
·
View note
Text
Single Ladies - Beyonce
Single Ladies was directed by Jake Nava and shows a simple production of Beyonce's mind blowing dance moves. This is an as live music video as the entire video consists of a continuous performance from Beyonce and her two backing dancers.


All filmed in black and white, this dance-heavy video was shot in three separate takes. Jake Nava wanted the video to feel like it was one continuous take, so on shoot day decided to split the song into three parts; deliberately letting the shots be long so viewers would connect with the human endeavour of Beyonce's awe-inspiring dance.
All changes in look and lighting were executed in camera as Nava wanted to keep the feel very organic and ungimmicky. The shifting lighting scheme is also of use to create transitions in order to cover up cuts in order to make the shot look continuous.


Throughout the whole of this video the shots are very smooth and the cuts flow easily into the next. This is until towards the end of the video when the beat of the music picks up and the pace of shots follow. Very quick cuts are made between several shots as the beat climaxes to the end of the song.
The blank back drop, simple outfits and lack of colour were all part of Nava's idea of 'less is more'. By limiting the production, the main focus is the outstanding dancing which overrules a huge cast with outrageous costumes. Sometimes the best creations are the simplest.
https://www.youtube.com/watch?v=4m1EFMoRFvY
0 notes
Text
Classic - MKTO
Classic was directed by Josh Forbes and shows the concept of going back in time and reliving the classic moments from all the different eras. This is a narrative/as live music video as it shows the two boys going into a casino, playing poker, drinking and having a good, then seeing the girl and flirting with her, taking her to a photo booth, and then a big dance off at the end. These scenes are inter cut with regular shots of the boys performing the song.

The scenes in the casino show the boys off as being very classy and old fashioned. This is also suggested straight away at the beginning just by the types of microphones they're using. Playing poker also suggests that they're quite rich, along with the cocktails surrounding them and the suits they're wearing. It's a very Rat Pack themed video.


When the girls are taken into the photo booth, a cut occurs so that when they're shown inside the booth they're now dressed in different classic outfits from different eras. This fits in with the lyrics as they sing about loving from the 40s - 80s rather than the plastic girls of today.


The beat of the song is very up tempo and is generally a feel good tune, and this is shown by the quick cutting shots, especially at the end when everyone is up dancing. The beginning scenes in the casino however, are all filmed in slow motion, but still keep with the beat. This is to show the night just starting out, building up to the big free-fall at the end.
The main colour scheme for this video is black, red and navy. These are quite rich classy colours, and also link in with the theme of poker. There are also a lot of silhouettes and lens flares which give the shot a glossy mysterious look.


https://www.youtube.com/watch?v=4Ba_qTPA4Ds
0 notes
Text
Story Of My Life - One Direction
Story Of My Life was directed by Ben Winston and follows the boys reliving moments from their childhood. This is a narrative/as live music video as it shows the boys starting out printing photos using on old fashioned photo printer, hanging them up to dry, looking through all the photos and then recreating the photos as they are today. These scenes are inter cut with regular shots of the boys performing the song.


Ben Winston wanted to create a video by recreating the photos the boys have had from when they were little in order to reveal that little but more about them and to show quite intimate moments that people haven't seen before.
It was extremely important that every single detail was correct when filming which meant that the old picture of the photo they were creating was placed over the monitor in order to line up the people on screen in the right place. Green poles were also put in place to hold peoples arms in order to keep them really still, which were then removed in the edit.


Some shots were filmed at 50 frames which involved speeding the music up and they boys having to sing along extra fast, so that in the edit the speed would be halved to give a slow motion effect.
It took five days for the set to be built and 7000 photos, all of the boys, were individually hung around it.

Basic shots make up the majority of this video. A lot of slow motion is used to fit in with the pace of the song and to also create emotion and show that it's a more serious take on one of their videos. A large circular track is also used when filming the boys performing the song.


The whole video has a neutral colour scheme; showing a more mature side to the band, and to also compliment the slow calm beat of the song.
https://www.youtube.com/watch?v=W-TE_Ys4iwM
0 notes
Text
Stalingrad Evaluation
Over the course of filming Stalingrad I was given the role of Production Manager. I did not enjoy this role and found my job very boring. I attended all rehearsals I was told to prior to filming, and attended all days of filming. Without fail, every morning, I stuck up the call sheets for the day ahead and informed the cast needed within plenty of time of needing them on set. I was also extremely apologetic to the cast, throughout the four days of filming, when schedules overran and they had to wait longer for their scene. Once all cast were on set my job became very pointless. I didn't feel very included as part of the crew as my job role involved no practical work. However, I did very much enjoy day three of filming as I was given the role of video logger due to a limited crew. I really enjoyed being able to communicate with a lot more of my fellow crew members and felt like I had achieved a lot more by the end of the day.
In future productions I hope to have a more practical role in order to make my experience a lot more enjoyable.
0 notes
Photo
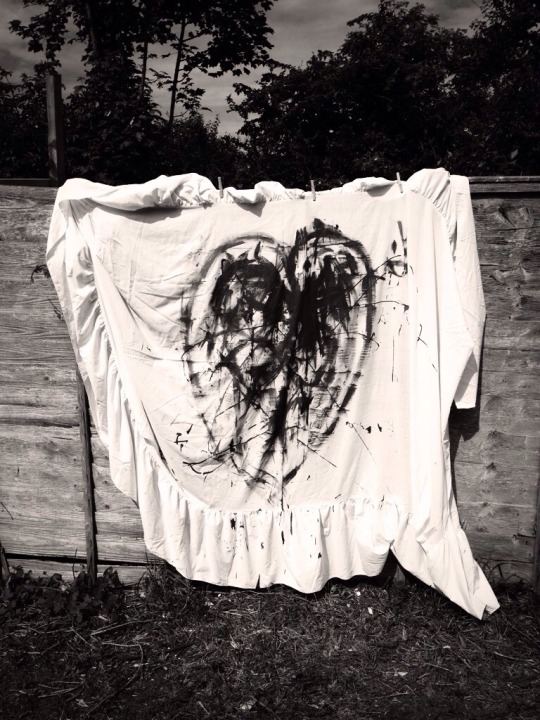
Music Video Shoot Day Three - 09/06/14 My House Gravesend Today was the last shoot for our music video. All crew (minus two members) plus our main actress attended this shoot. We only had a couple of shots to gather so it didn't take us long, especially since the only equipment we were using was a tripod and camera. It was a hot day so we were able to complete the painting scene in the garden with ease.
3 notes
·
View notes
Photo


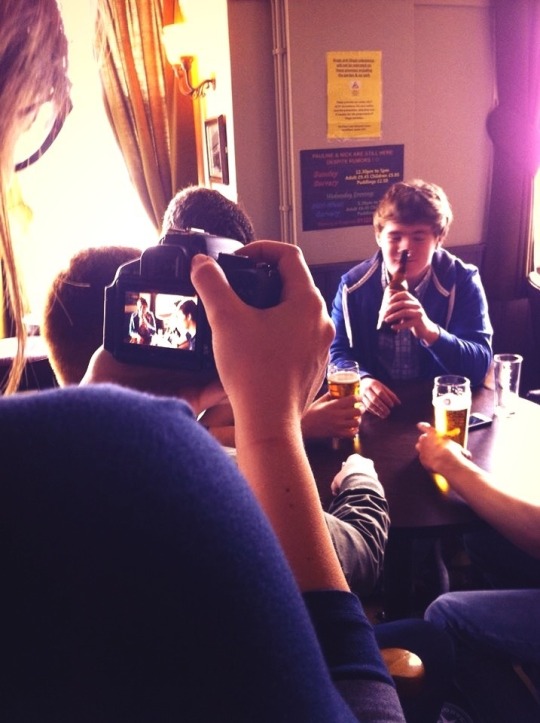
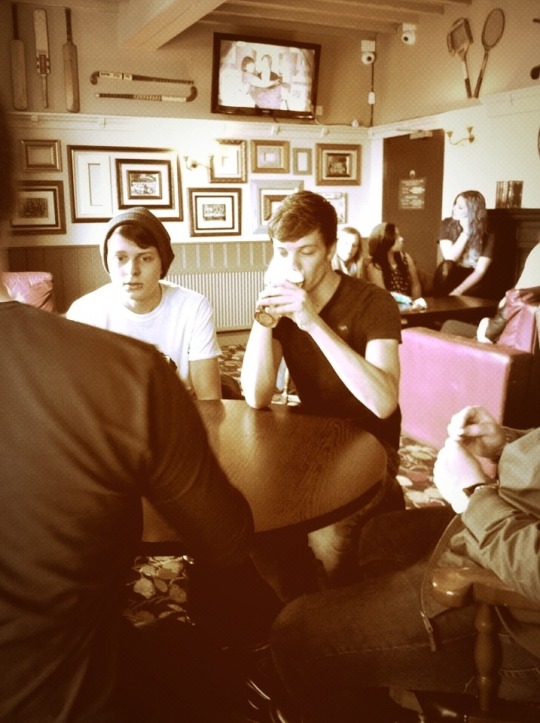
Music Video Shoot Day Two - 29/04/14 Orange Tree Pub Dartford Today my group filmed at the second venue for our music video. I did not attend this shoot as I had a lot of paperwork that needed to be completed in order to meet deadlines, and since I was not needed on either of the two cameras being used and since there was enough crew on the shoot, I decided to stay at college and continue with my work. However I was told all went well on the shoot and was provided with a collection of photos from my group.
1 note
·
View note
Photo

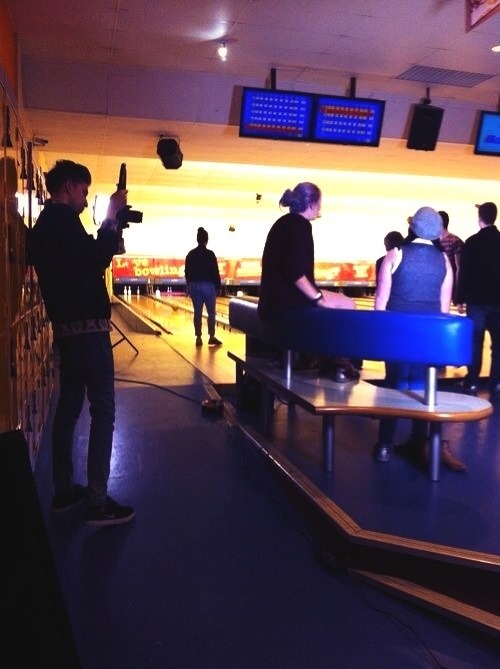
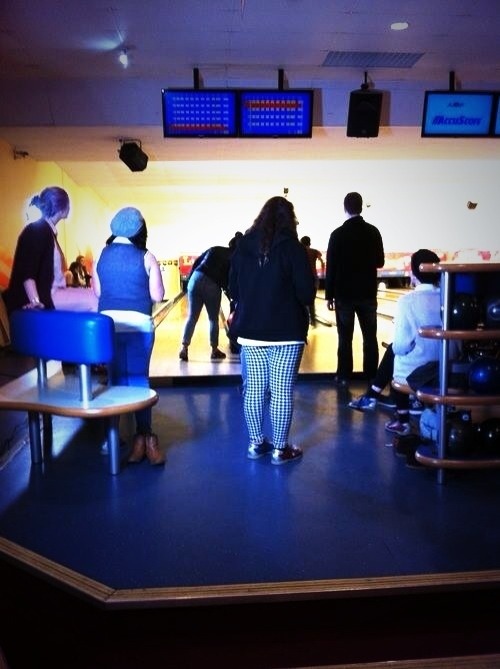
Music Video Shoot Day One - 03/04/14 AMF Bowling Gravesend
Today we kicked off the filming for our music video. All cast and crew (apart from two members), including the band, attended the venue. The bowling alley wasn’t busy and we were given the end lane which meant we had plenty of room to set up lighting and capture shots from lots of different angles without getting in the way of the public.
1 note
·
View note
Photo

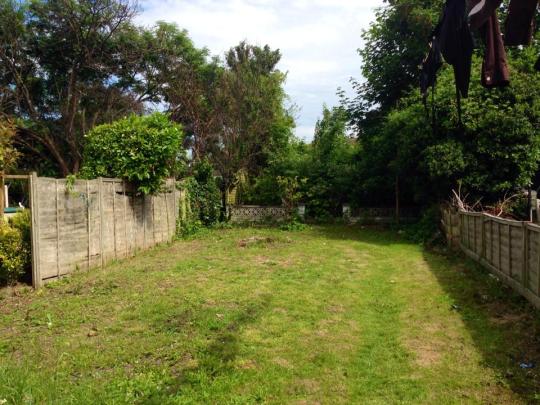
RISK ASSESMENT - Bethany's bedroom/back garden
STEP ONE - IDENTIFY THE HAZARD
There are very little hazards at this location however one scene is set upstairs so the only risk would be tripping or falling on the stairs. The other scene is set outside; the ground is flat therefore there is very little risk of tripping over, however falling over would be the only hazard. If it rains we will not film outside.
STEP TWO - WHO IS AT RISK
If a hazard was to occur the people at risk would be the crew and the actors. Neighbours may also be disturbed if a commotion occurs in the garden.
STEP THREE - EVALUATE THE RISK AND DECIDE WHETHER MORE NEEDS TO BE DONE
Tripping Hazards - Since we are not using lighting on this shoot there will be no hazards involving wires. The bedroom could become too cramped if too many people are are in there at one time which could increase the risk of equipment being knocked over and tripping over each other.
STEP FOUR - LEVEL OF RISK (1-5) 5 being the highest
Tripping Hazard - 2
STEP FIVE - RISK CONTROL AND REVIEW
Tripping Hazard - To minimise the risk of tripping or falling on the stairs, the people needed in the upstairs scene plus the cameraman will be the only people to go upstairs. People not needed in that scene will stay downstairs.
Noise - When filming in the garden we will act in a professional manner to ensure no disruption is caused to the neighbours.
No protective equipment is needed for any of the above risks.
2 notes
·
View notes
Text
Music Video - Call Sheet
ARTIST: Blur The Boundaries
SONG: Vandalise My Heart
PROD CO: Miskin Media
SHOOT DATE: Monday 9th June
LOCATION: My house - 22 Cruden Road, Gravesend, Kent, DA12 4HD
PRODUCTION MOBILES (CREW):
Courtney King - 07403220500
Matthew Thornhill - 07798888584
Bethany Caller - 07785738432
Chloe Hobbs - 07713245859
CALL TIMES:
CAMERA CREW: 11:00HRS
ACTORS: 11:00HRS
SCENES:
Girl in her bedroom receiving breakup message and moving on from him
Girl and friend in the garden messing about and having fun painting a heart on the fence
CAST:
Helen Turner
Grace Ryan
CAMERA EQUIPMENT:
x1 Cannon 600D camera
x1 Tripod
0 notes
Link
ARTIST: Blur The Boundaries
SONG: vandalise my heart
PROD CO: Miskin Media
SHOOT DATE: Tuesday 29th April
LOCATION: The Orange Tree Pub
Hawley Road
Dartford
Kent
DA1 1NR
PRODUCTION MOBILES (Crew):
Courtney King 07403 220500
Matthew thornhill 07798 888584
...
2 notes
·
View notes


