
Don't wanna be here? Send us removal request.
Statistics
We looked inside some of the posts by assimkamukaadvancedcomp and here's what we found interesting.
Average Info
Notes Per Post
0
Likes Per Post
0
Reblog Per Post
0
Reply Per Post
0
Number of Posts By Type
Text
1
Last Seen Tumblr Blogs


Fun Fact
70% of Tumblr users say the Dashboard is their favorite place to spend time online.
Text
Advanced Compositing
This is by far the most ideas I had for a project, which was kind of like a blessing and a curse. I had enough good ideas but because there was so much I was constantly thinking it over, starting and switching projects.
So these are some of the other concepts.
The first concept that I pursue and fully planned was called K.Academy which revolved around a school that trains kids on becoming lethal assassins, the ‘Academy’ gets its student by forcing the parents to sell their kids to the academy or something bad will happen to them.
I asked Kris to play the headmaster of this academy and I was planning on having him talk into the camera from an office room that I would've comped together. He would be talking to a parent and telling them what was going. While he’d be doing that I would’ve cut to some children training at target practice, using real targets.
I even started drawing up a storyboard: (StoryBoard Image here)
But after a lot of thought I decided that I don’t want to rush this concept and do it properly in the future because I am into making it into a indie series.
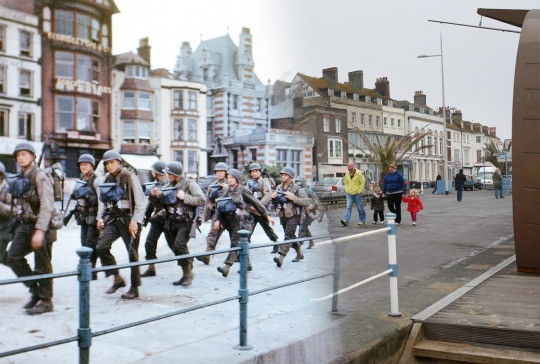
Moving on to the next concept was a World War Then vs Now, which is pretty much self explanatory, I was planning on shooting videos in Cardiff and London, and then comp them as if they were World War footage, using a layer masking cutting back and forth showing the Now vs Then concept.
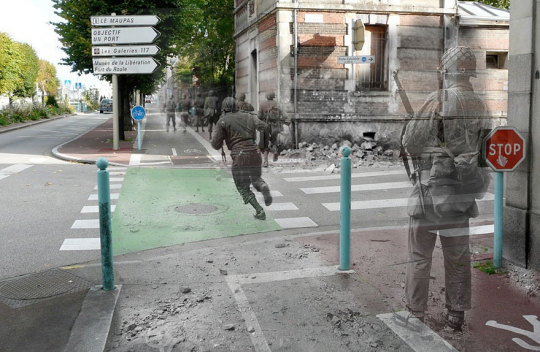

Another concept was also related to the World War 2 theme, it was going to be 3 matte paintings featuring soldier characters in each one. The first one was going to be a pilot running to his fighter plane in the airfield as he was called to action, the second one was going to be soldiers enjoying a can of baked beans on a checkpoint and the third would’ve been some sort of a bunker shot.
The final concept I experimented with was a fantasy theme where they would be two characters fighting with superpowers, but this theme wasn’t strong enough and was disregarded.

The rest of the concepts I felt I would want to to explore in the future and experiment with more time and skill.
This brings us to the final concept that I decided to follow through with which was originally called “Overtime” but was later changed to “Small Job” and I’ll get into that.
Small Job:
So the original concept for this project was to have a hit man have a call from his boss while he’s eating breakfast (cornflakes) on his day of, his boss calls him and tells him to come in and work overtime for a small job since his co-worker’s wife is giving birth. Frustrated the hitman walks to his in-house gun vault muttering and cursing while picking out the right tool for this ‘small job’.
This had a comedic value and would’ve been sort of like a short film, it created a sense of mystery since we don’t really find out he’s a hitman until he walks into his domestic gun vault.
But I had trouble recording the audio and the footage where the hitman was eating breakfast was to grainy and would’ve bought the project’s value down. So I decided to re-shape the concept and keep in the last two scenes with no audio and slightly changing up the hitman character.
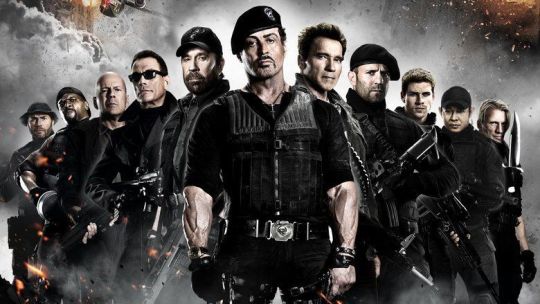
Originally the hitman was supposed to come across as a grungy and rough - gun to hire character, someone that’s from like the expendables or the A-Team to give you an idea.
Instead of having a typical tie and suit hitman.

So I was planning on having the main character be wearing his pyjamas and robe while he got his phone call, I filmed it back at my place but it came out to noise, blurry and had no audio. Also it was to late to reshoot it so I just went with a casual guy walking into his gun vault.
The vault:
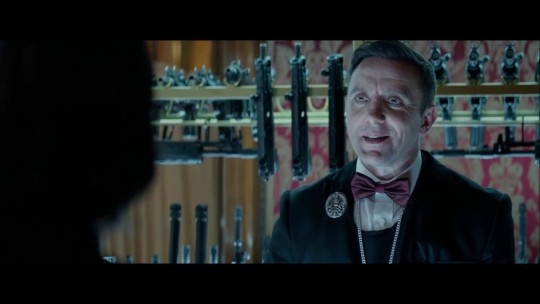
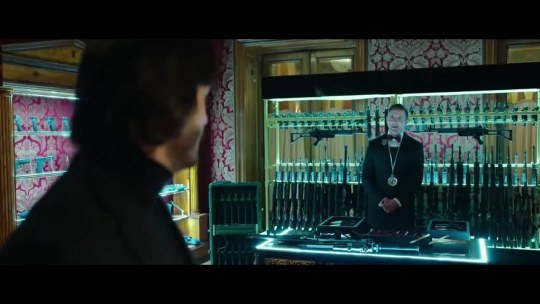
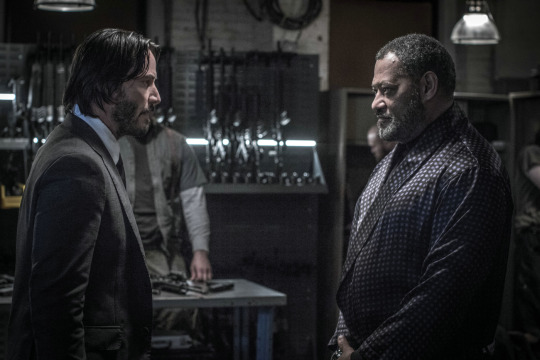
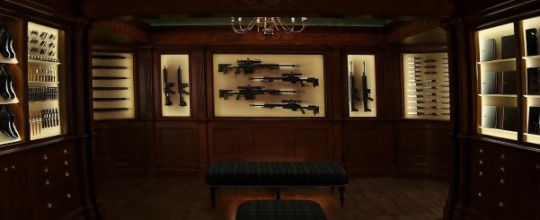
I looked at so many movies and how they shot gun vaults or gun walls. Some of the movies that I looked at where John Wick 2, we all remember the iconic scene where the handler was describing the guns so exquisitely while standing in front of a beautiful ‘exhibit’ of weaponry.
There was also a rugged looking scene with the hobo underground that caught my interest.
I love how the gold design goes well with the red pattern and the black silhouette of the guns, looks absolutely stunning.
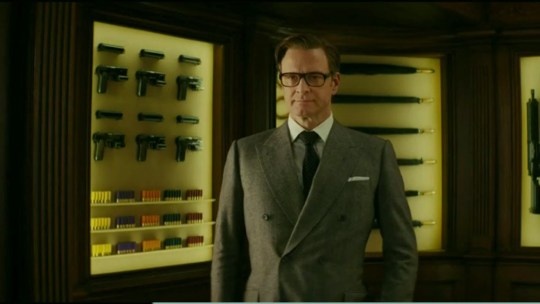
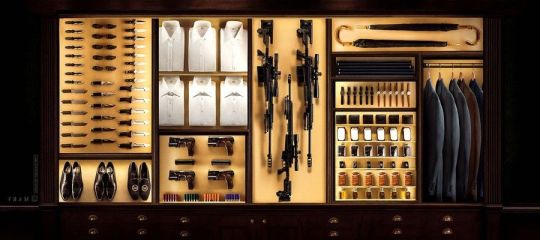
I also looked at Kingsman which was super classy, and I liked it even though it wasn’t what I was initially looking for.
Am pretty sure the following ones are fan made mock ups (or not) but they still have the same vibe.

Polar, the new Netflix movie also fuled my inspiration. (Btw AMAZING MOVIE, MACHINE GUN FINGERS!!!).


The main character for polar was also rocking an eyepatch which was something I considered adding to my character.
In addition to looking to movies for reference, I also looked at what gun enthusiasts built in their home. These are usually rough looking and fit more into my theme.
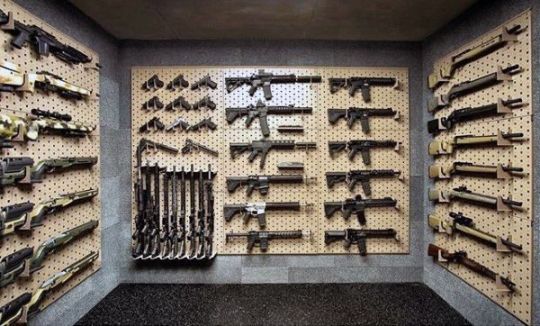
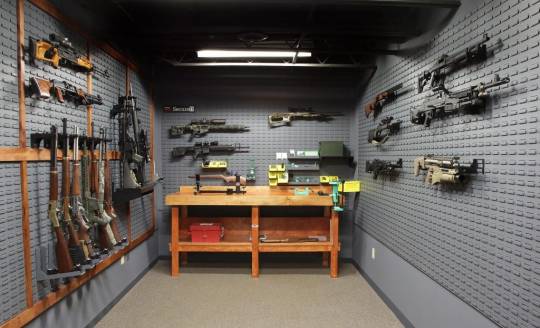
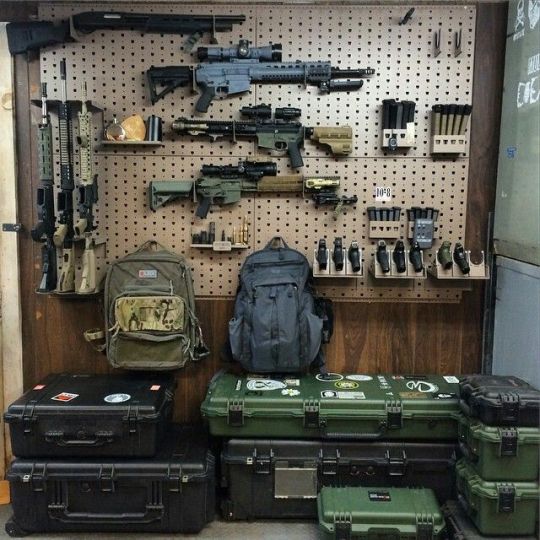
After looking at these reference images I realized that messy and rugged looking gun vaults are usually mess on the shelves and the ground, not the racks since there isn’t room to mess up there. So I started designing my gun wall.

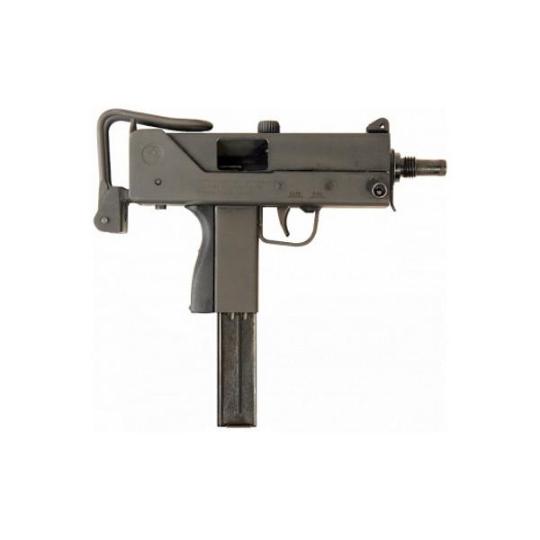
This was my first prototype, from the get go I knew I wanted artiellery shells for comedic value, since this hitman is well equipped for any job, be it small or big job. I also wanted to have the gun that I would be holding in the end which is the Mac 10.
Eventually I completed this prototype and was planning on using it for the comp.
I interpreted with different HDRI’s to get the best lighting.

Storeroom

Satara

Preller

Moonless

Lounge.
With all this planned I headed to the shooting phase.
The Shoot:
So there is this huge lift in the back of the uni that’s just way to big I feel, every time I go in it I always picture it as something, sometimes a space shuttle, or a sci-fi room that will mess you up when you inside. And I though that if the buttons were removed it would look like a gun vault. So I decided to use it as the gun vault room and planned to track gun racks on to its walls.
I was playing on having a dolly track where the camera starts of facing the door, and as soon as the character walks in and faces the wall the camera follows him, then we get a shot from that’s from the walls perspective.
But it turned out that the dolly wasn’t on my media account and Kris didn’t add in time, but I still wanted the tracking shot so I settled for a tripod tilt that turned out pretty well.
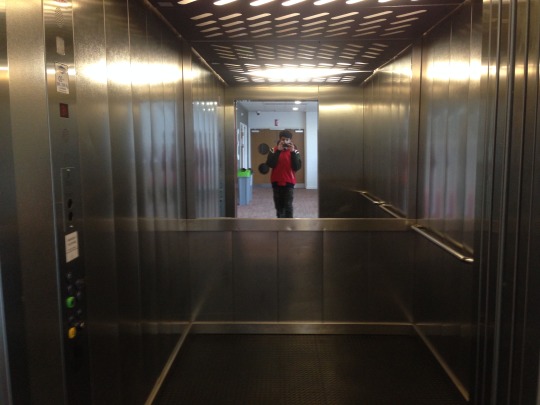
I scouted it one last time before the shoot to make sure that it would work. Then I headed there with my trusty camera man Hayden. We placed tracking markers on the wall to make sure it tracks, this is something I learnt in tracking 1, which you should always have tracking markers no matter how easy you think the track will be.
I took out the FS5 camera along side a tripod and filmed a basic panning shot.
The shoot went pretty well but as you would imagine it was kind of awkward with people walking in and out always asking “am I in your shot” like no mate am still putting up tracking markers. Also since the main character would step outside and would need to enter the lift aka the “gun vault”, the lift would get called to other floor, but nonetheless, we still got our shot.
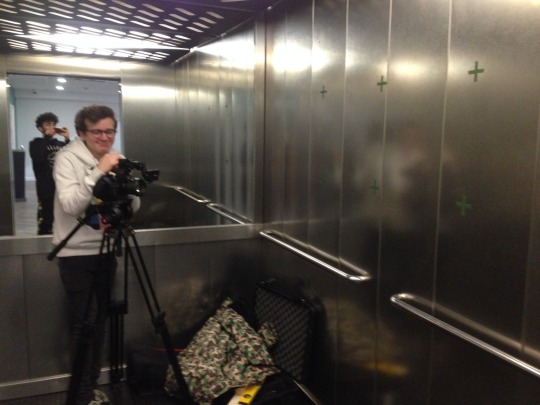
The second shot required the green screen studio since I wanted to add an element of reality to the project by actually handling a physical gun, it was an airsoft gun so put the phone down. But it did look realistic so I couldn’t be waving that thing around in the lift since so many people walk in and out. I asked the person handeling the camera to hold the gun so I could reach for it and it would look as if I was pulling the thing of the rack.
Kris helped me film in the studio but even though we still rushed it. I forgot to pull the curtains back, push the cameras back up, light the screen properly, light the character properly. Check the camera’s setting, (Kris actually handled the camera, I know sound like am blaming Kris, but, am not). All of these issues caused problems in the keying process.
Shot 1:
The first shot was the Lift shot and I immediately realized that my original model wasn’t going to work. Because the lift wasn’t symmetrical like my model and most of the model wouldn’t even fit in the shot.

The shelf on the left looked odd because the wall it’s against is smaller than the one opposite it, so I had to get rid of the shelf and shift some models around to make the wall looking packed with weapons.


Since the far right of the image was visible and the middle wasn’t, I moved the models to the right and left the model kind of empty.
Now that the model was adjusted, I moved onto comping it with the footage..
Comping and 3D Tracking:
In order to really sell this as a hitman home work space I couldn’t just leave the university hallway in, I had to remove it and replace it with a suitable hallway.
So using luma keys and key merges I managed to isolate hair detail from the background, and I rotoed the rest out.

I tried using the bear minimum of keyframes for the roto but there were gaps where the alpha masks didn’t join up that I had to adjust which caused more keyframes.

Also I had to make sure that the roto was clean and no part of the background could act like spill.


I did separate rotos for the head, one for each ear, nose, one of the right and left side of the neck, a final roto for all the hair, one for the torso, bottom, one of each arm, one for each hand, one for each side of the hood, and one for the hoodlace.
After fine tuning and refining the results were pretty good.


Then all I dead was colour grade the character plate and the gun rack plate separately so they could blend in together, then I merged them together and then did a joint grade to make them seem as if they’re part of the same shoot.
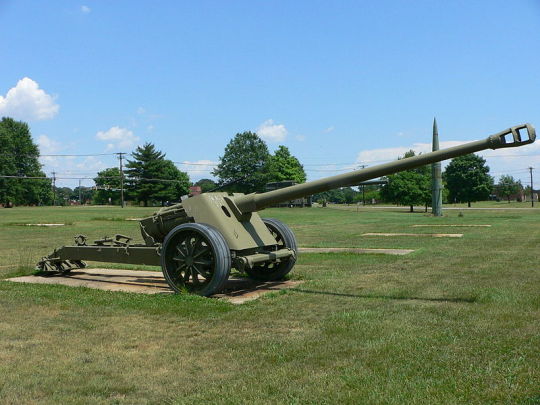
For the background I decided to make it into a sort of hallyway with art on the wall and the cannon in there as well. It looks like an exhibit. I just wanted to fit the cannon in since it was to big and awkward in the lift shot, but it actually brings the background picture together very well.

So this is it raw staright out of the render, I actually faced a small challenge with this because the 3D render messed up and speed up the frames even though I’m pretty sure I matched the frame rate. In order to fix it and get it to line up again I basically found out the frame that the camera starts to move and set my read starting point there and everything worked out.
Also am most proud of this for colour grading.
First I took bought down the contrast.

Then I reduced the saturation

Added a blur

Colour graded it once again

Then I drew a mask for the right side of the wall to grade separately, and I rotoed the cannon so it would be out the way. but I feathred it to look like as if the light is spilling onto the cannon

But I feathred it to look like as if the light is spilling onto the cannon


Same thing done to the wall at the back. I fitted it in with the roof using roto and edge blurs to give it a nice shadow.

I achieved this result with diffrenet experiments withe the roto node, playing around with the position and feather.


Then I did the gun racks that were tracked onto the walls of the lift. Colour grading them wasn’t that difficult since I found a HDRI that resemble the lift a lot. Adding a radial blur and grade nodes really made the the metalness and shininess of the lift pop.


Keying:
This was the most difficult thing to be honest, there is a small ring around the character. I tried using multiple keying techniques, first one was done through the basics, where I got a primate keyer to have a silhouette of the body, then I used multiple keylights get an alpha for the hair and then mix them all together with keymix. Unfortunately that didn’t look to great, the hair details was fine but there was so much spill and whenever I tried keying it, the inner matte will be affected.


So instead I used a keylight for the whole key and used gizmo to suppress the spill.


I used a backdrop to check the mask and I was happy with the results.

Grading the green screen shot was so difficult because I wanted it to follow the same colour schemes as the shot before, and sometimes I would be thinking it’s not cold enough.

Or it’s not warm enough.

In the end I decided to use a radial node to cast contrast and give variation to the grade instead of keeping it flat.

A huge problem with my keying is that there is a bit of white despilled on the top of the characters head, but with this grade it looks like a light reflection so it doesn’t really stick out like a sore thumb.
Clean up:
As for clean up I removed the buttons on the side of the lift by rotoing around it and using a constant and a ramp to match the gardiant to the other plates of the wall. I even animated the constant and the ramp since there is a change in lighting. I even added noise just to make it seem even more natural.


Mistakes were made:
After all the roto, grading and luma keying, I was only able to use around 40 frames from the original 8 second clip. This is because the background track was HIDEOUS. The wall on the right would slightly come out towards the left one. When I saw it I immediately knew what was the problem, when I modeled this scene in Maya there was a problem on Maya’s end where I couldn’t see my render port or the tracking image plane, so I had to place it based on the previous gun rack. However, even though I measured the distance using basic geometry I still placed the gallery hallway to far back for whatever reason. I realised how far back it was, I just ignored it. But when I saw problems in the track immediately guessed that it was at fault. I really should’ve take the posting more seriously.


Solutions: I tried moving the background plate around in Nuke in hopes in finding a new perspective, but that didn’t help. The only option was to just cut it out of the project, but I realised that the beginning and the ending are actually useful since the beginning is static and towards the end the perspective matches the track.
I considered keeping the first 100 frames where its static.

Then cutting to the second shot.

Then cut again to the first shot but it would be towards the end, so I basically cut out the walking in part.

Then back to the second shot where I’m about to grab the gun of the rack.
However this felt taccy and way to forces, I wouldn’t enjoy a piece that was this choppy, so I just decided to use 40 frames of the first shot and just move on to the second shot.
Evaluation:
This was the most stressful project ever, I really doubt that the FMP will be this stressful, but then again I did keep on switching idea back and forth so I need to be more decisive.
Overall this project has shown how powerful of a compositor nuke is and how it could go so deep into the footage grading every nook and cranny, for example the layersheet just blew my mind with what you could with it. How you could go and isolate a CG object and grade it on its own even if it was rendered with other objects.
I learnt so much and I am planning on learning even more. However, I am also truly disappointed and gutted at the end result of the first shot when I realised that the background hasn’t tracked. I’m aiming to become a tracker or a matchmover so seeing such a stupid mistake ruin the whole project that I’ve worked so hard on just broke my heart, but at the end of the day it was a stupid mistake that I made, no one else. I will defiantly learn from this and make sure everything is in line and the perspective is correct in future tracks.
0 notes