I reblog whatever I love FE:Awakening/Heroes | Bnha | Rick and Morty| other cool things
Don't wanna be here? Send us removal request.
Video
Kittens, raised with rabbits, have learned to imitate the rabbits’ behavior by hopping about.
340K notes
·
View notes
Text
Fire Emblem Edit Tutorial!
Requested by @alpez-cheesecake
In this tutorial, I��ll be explaining how I make my palette swap and galaxy hair edits of Fire Emblem crit portraits! I’m sorry if it’s a little hard to follow. This is my first time making a tutorial like this, so I’m not really that good at it :P. Anyways, without further ado, on to the first part!
Part 1: Palette Swaps! ft. Layla!Azura
The first thing you need for any edit like this is a sprite sheet. I get mine from The Spriters Resource, which has tons of sprite sheets from all kinds of different games.
Save the sheet onto the computer and open it in Photoshop so it’ll be transparent.
The next thing you need is a color reference for the other character (this doesn’t have to be transparent, because it won’t be in the final picture)

Now that we have both a sprite sheet and a reference, we can start swapping colors! Let’s start with hair.
First, we have to make Azura’s hair gray, so we can overlay on top of it later. We can do this by coloring Azura’s hair and eyebrows black (or white, it really doesn’t matter) on a different layer…

…then clicking where it says “Normal” in the red circle, and selecting “Color” and…

POOF! Instant monochrome hair!
(Having a monochrome layer isn’t always necessary, but it usually helps the end result look better.)
Then we colorpick Layla’s hair color, and paint that on another layer over Azura’s new hair like so.

Next, we go back to the BW Color layer and use the Rectangular Marquee Tool (the one circled below) to form a box around all the parts colored.

Now we click on the tool above the Rectangular Marquee (the arrow thingy). and use the arrow keys to go left once, and then right once to select the area colored.
Now that we have a selection, we can go back to the purple layer and hit Ctrl+C and Ctrl+V to copy and paste a hair-shaped purple layer. After deleting the old purple layer, Azura should look something like this:

Now all we have to do is find the type of layer that works best by switching the “Normal” to whatever looks best (in this case, Color).

And voila! Layla-haired Azura. If you want to color the clothes or eyes, just repeat these steps until you’re satisfied with the result!

Onwards, to part 2!
Part 2: Galaxy Hair! ft. Nyx
Like before, we start off by opening a sprite sheet in Photoshop.

Now we color Nyx’s hair in on one of her portraits a layer above, but NOT her eyebrows just yet. It can be any color this time, since it’s not going to be in the final picture. We’re just going to use it as a selection shape! The result should be something like this:

After that’s done, we can find a picture of a galaxy, like this one:

Next, we copy and paste the galaxy picture over Nyx.

Now that we have our galaxy pic in place, we have to select it. We use the Rectangular Marquee Tool to select all of the color over Nyx’s hair, then select the arrow-thingy above it. Now all we have to do is use the arrow keys to go left once, and right once, and we’ll have selected Nyx’s hair shape.

Then, just hit Ctrl+C and Ctrl+V and you’ll have a new layer with Nyx’s galaxy colored hair (don’t get rid of the original layer just yet, make it invisible). Paste her hair again and drag it down using the arrow-tool and arrow keys so that both Nyxs have galaxy hair over them.

To get galaxy eyebrows for the first portrait, we make the galaxy layer visible again, but at low opacity. Then we can erase everything but the where the eyebrows are. When put back at 100% opacity, it should look something like this.

Now, for the second portrait, we copy and paste the same galaxy picture into Photoshop again and put it at low opacity. Then we line it up with the hair that’s already there, like this (notice how it looks clearer in the second portrait).

Next we erase everything but the eyebrows again and put it back at full opacity, so both Nyxs have Galaxy hair and eyebrows.

Now, to make the next step easier, we’ll merge all the galaxy layers by deleting the color layer, making the Nyx layer invisible, going back to a galaxy layer, and hitting Shift+Ctrl+E. Then, we can change the new galaxy layer to whatever looks best instead of “Normal” (in this case, Vivid Light).

Have fun!
493 notes
·
View notes
Text
MIRIEL/CHERCHE GOOD THANKS FOR COMING TO MY TED TALK
21 notes
·
View notes
Photo
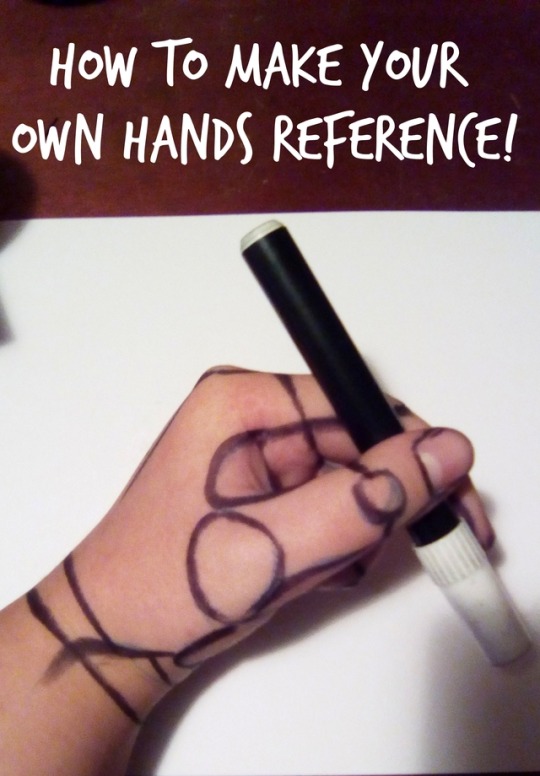
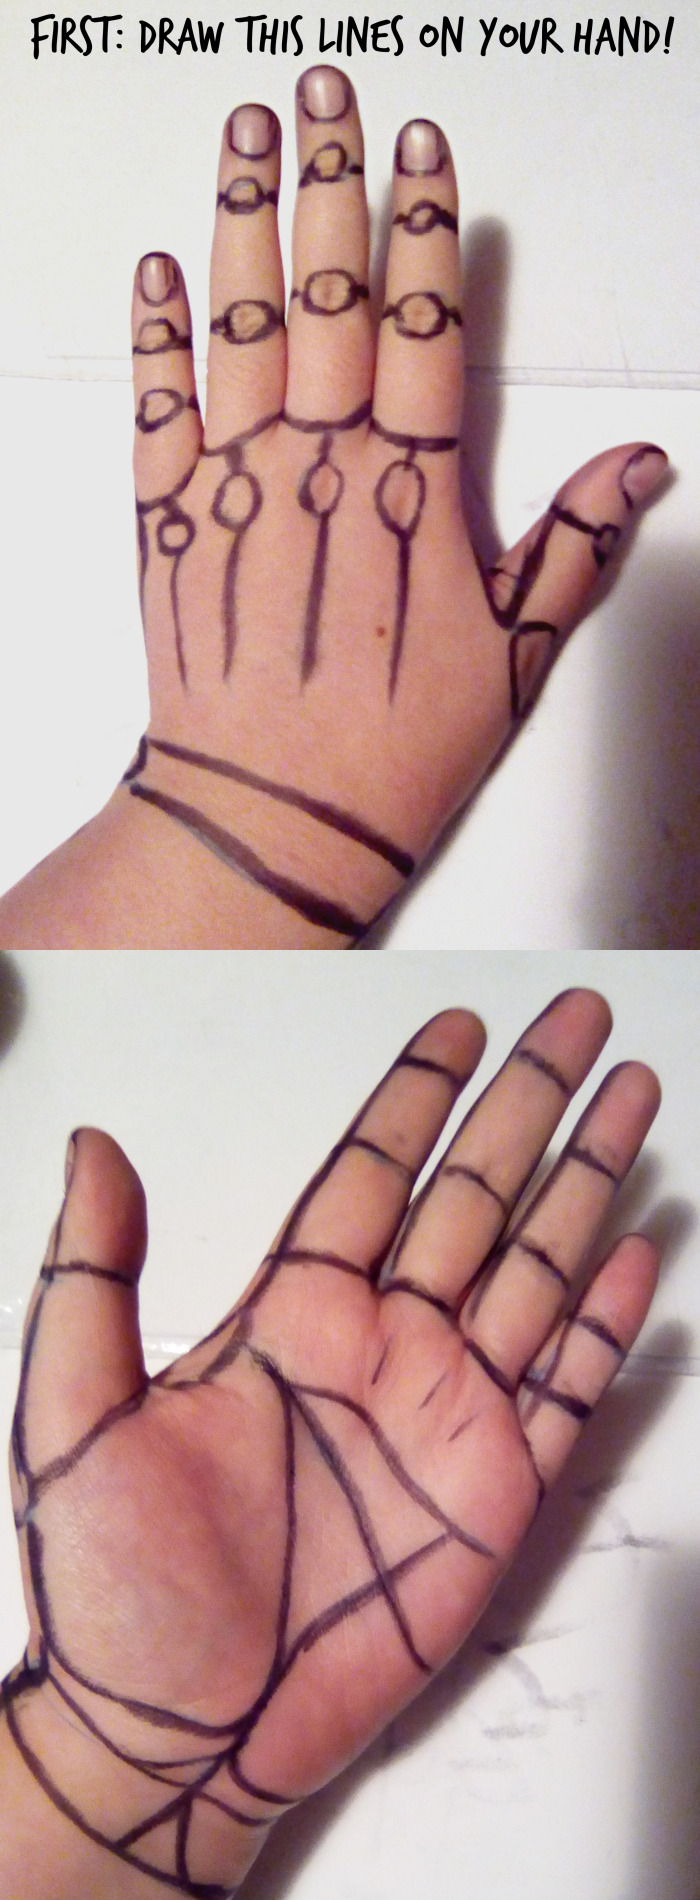
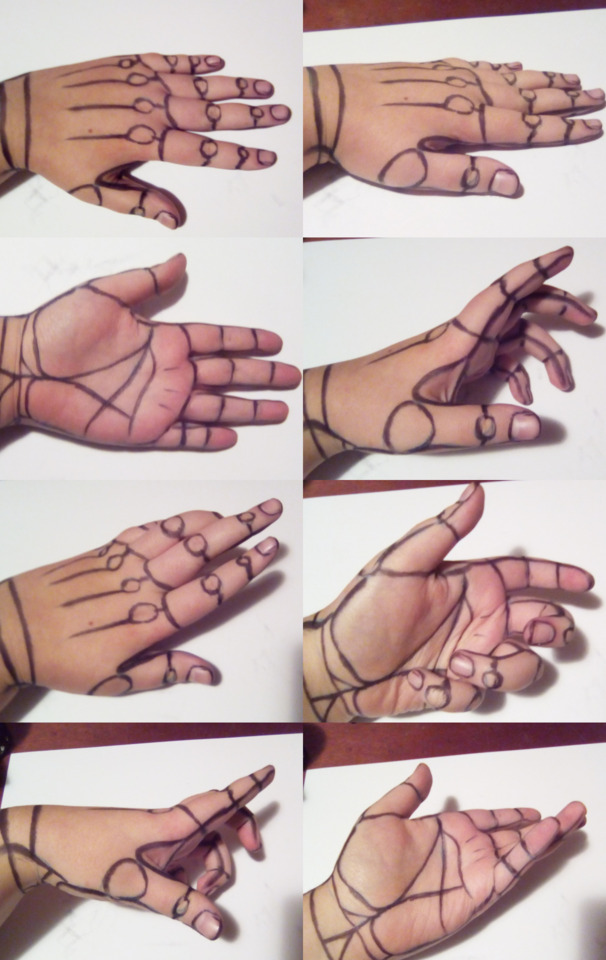
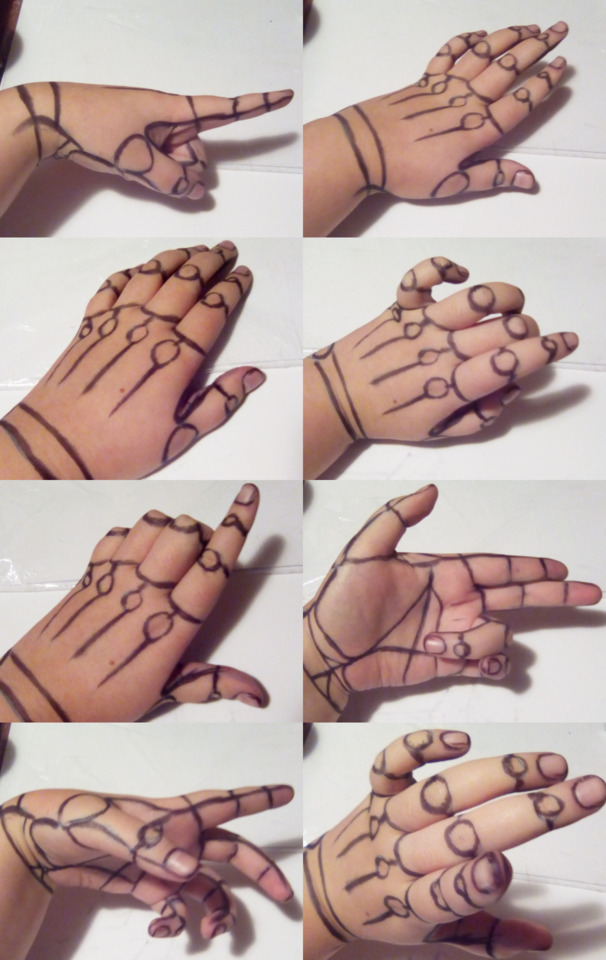
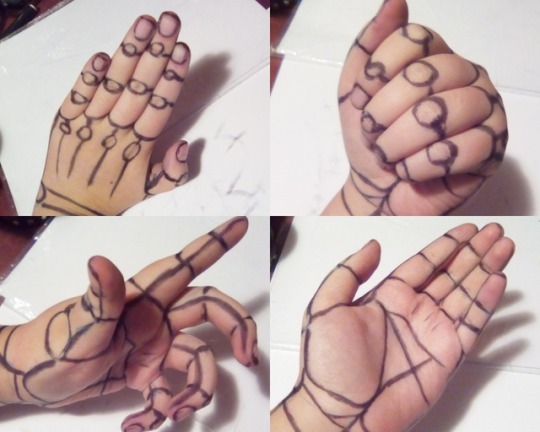
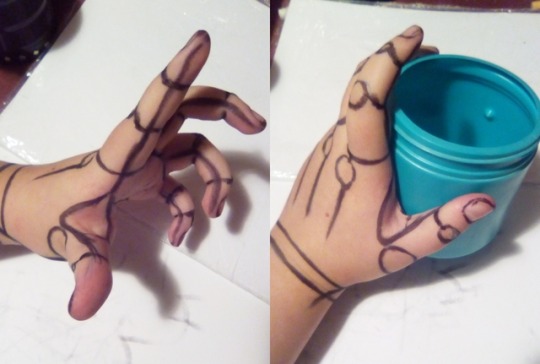
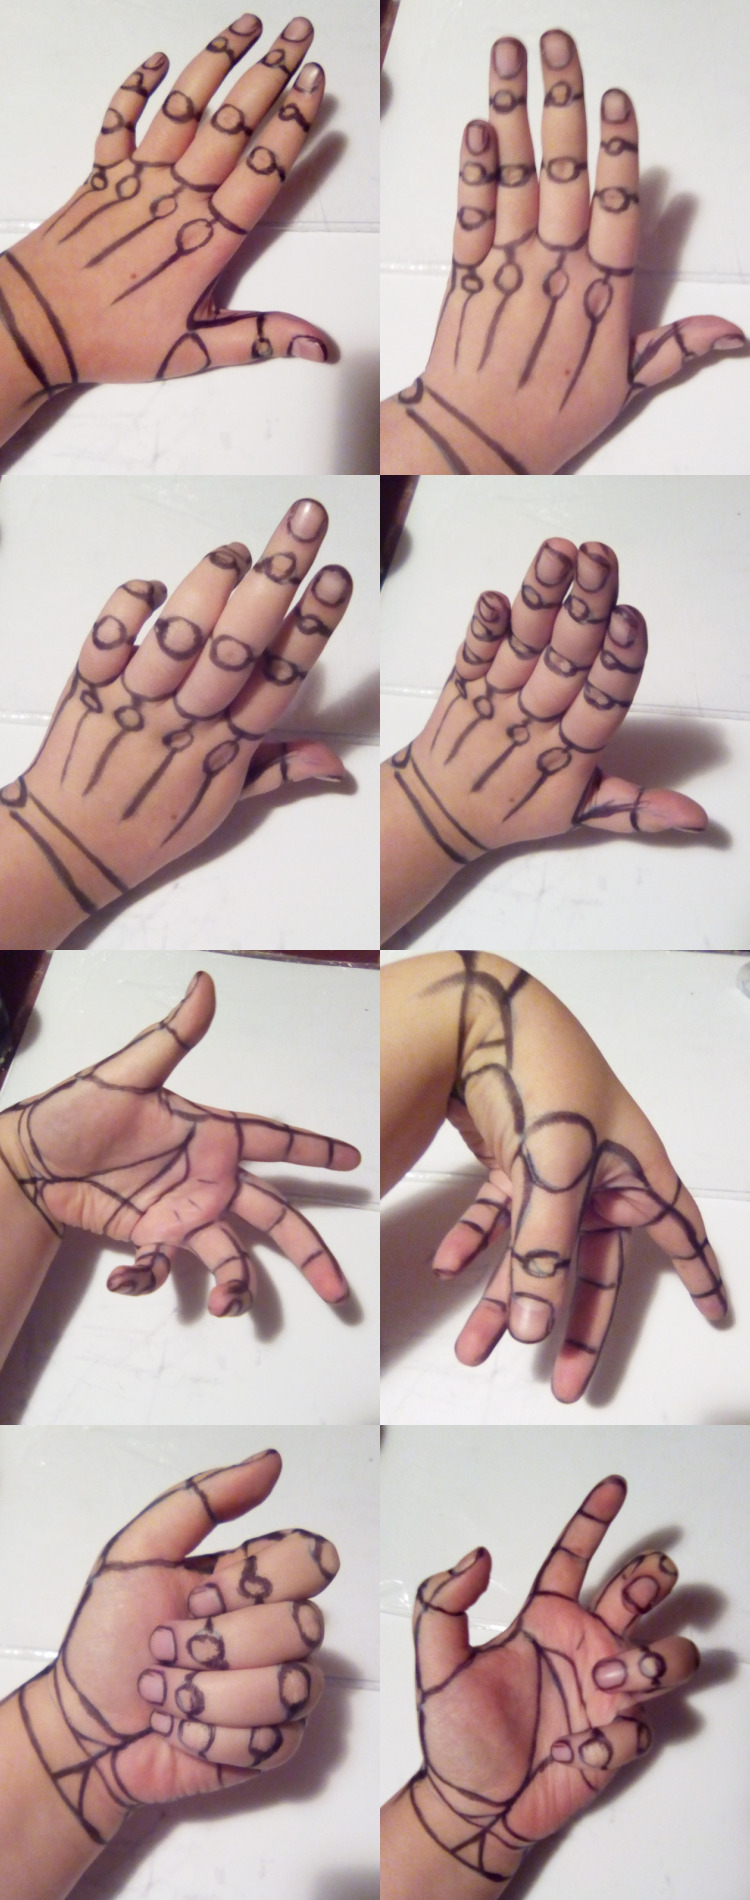
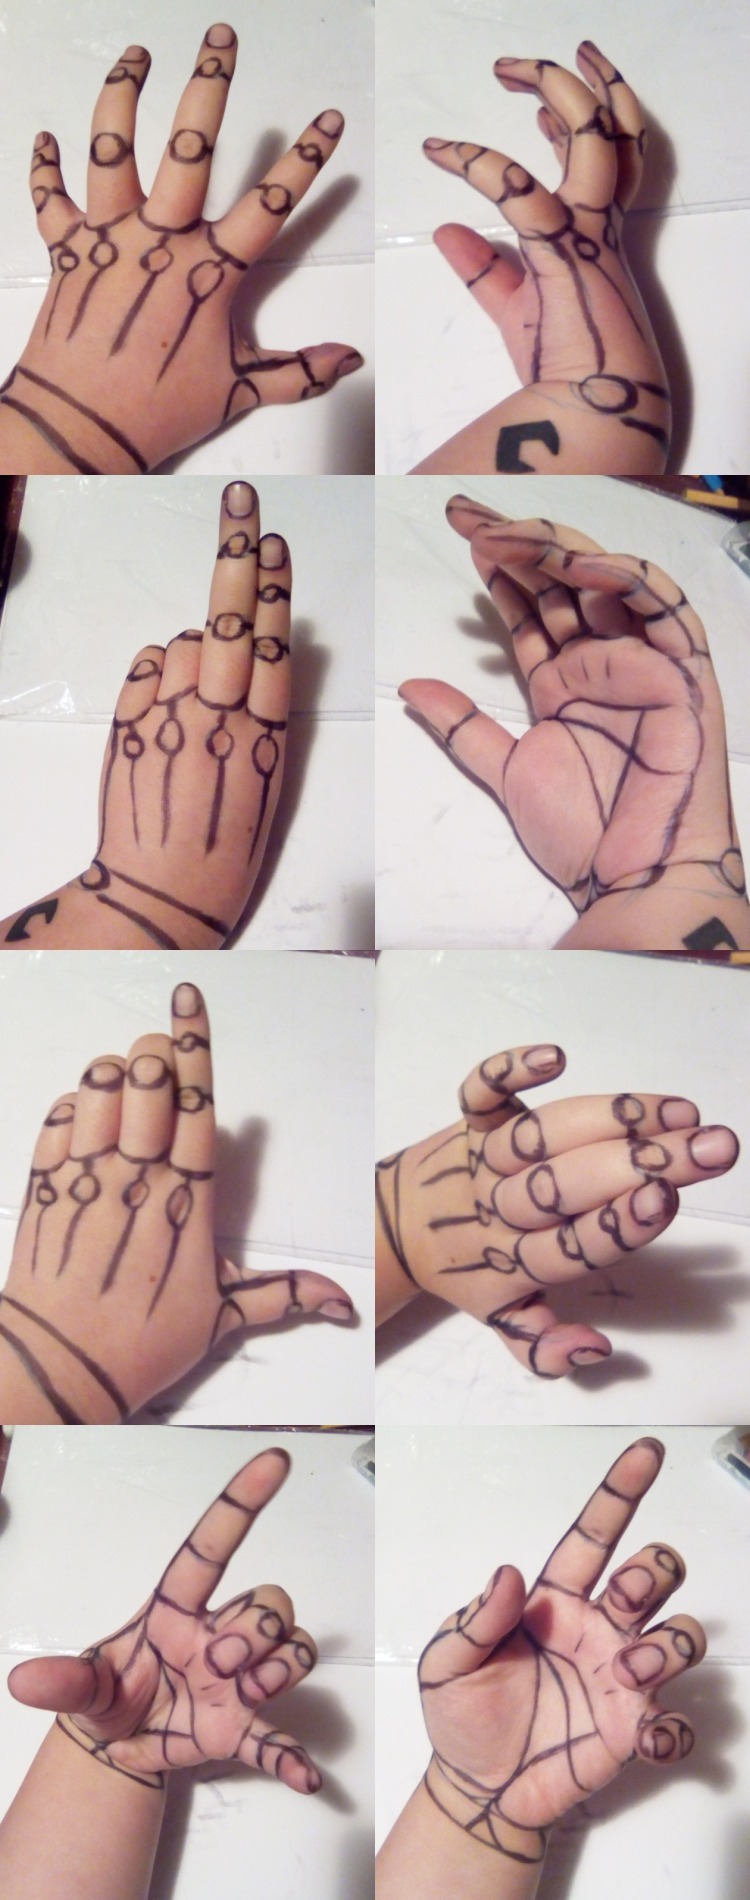
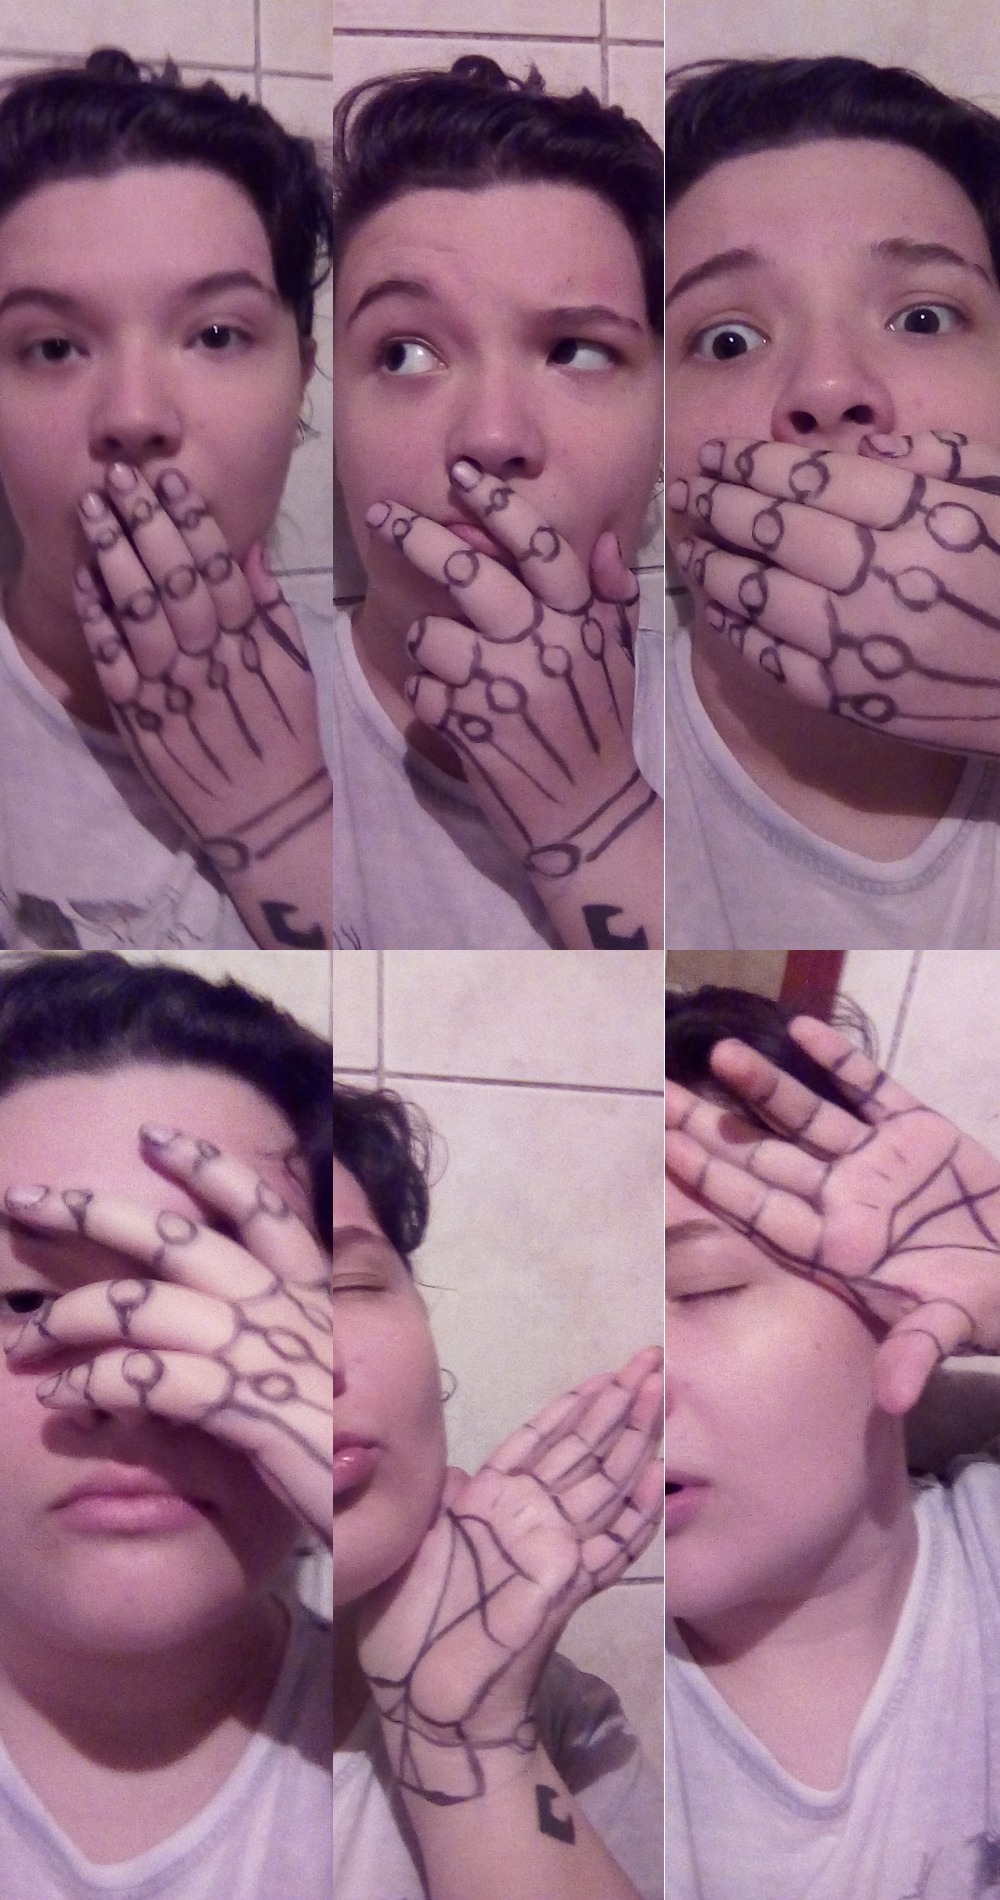
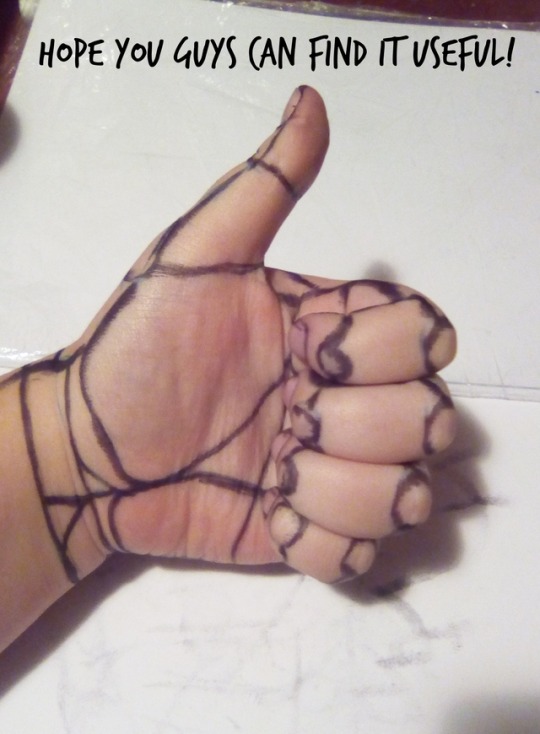
Another crap thing I do to make references, if you like it I can make more tutorials but idk if someone would find sense in my crazy stuff hahaha
39K notes
·
View notes
Photo
My beautiful babies

i drew all the 1st generation wizards. idk what to do with myself now
539 notes
·
View notes
Photo

8-18-18
I’m really happy recently w my art and happy w James body type.
Old one (8-27-17)
179 notes
·
View notes
Photo

my favourite part of awakening was when robin and miriel got married
183 notes
·
View notes
Photo

Chrom is in smash so to celebrate he gets to eat all the unpeeled oranges he wants B)
2K notes
·
View notes
Photo

this is a ship that I’ve thought about for a while and I love
985 notes
·
View notes
Text
chrom/gaius and chrom/vaike are SUPER VALID i can’t believe intsys forgot to put in their s supports ://
10 notes
·
View notes
Photo

he snatched my wig and called me a bitch!! eliwood!!!
204 notes
·
View notes


