
Don't wanna be here? Send us removal request.
Statistics
We looked inside some of the posts by almanoelscraft and here's what we found interesting.
Average Info
Notes Per Post
0
Likes Per Post
0
Reblog Per Post
0
Reply Per Post
0
Time Between Posts
2 days
Number of Posts By Type
Text
17
Last Seen Tumblr Blogs


Fun Fact
When “GIF” was named word of the year in 2012, Oxford Dictionaries U.S.A. credited Tumblr for pushing the word.
Text
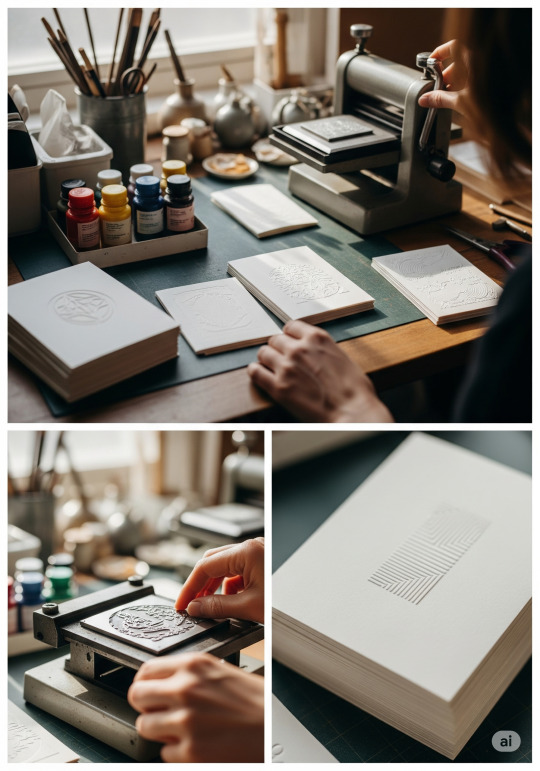
The Art of Letterpress: Crafting with Pressure and Precision”

If you thought typography and DIY crafts only danced together at the occasional sign-making soirée, think again. Today, we’re diving into one of the most visually stunning and tactilely satisfying techniques ever to grace the printed page: letterpress printing. This centuries-old method is equal parts art, engineering, and oddly therapeutic hand-pressing—perfect for crafters who want their words to literally leave a lasting impression.
What is Letterpress?
Let’s set the scene: It’s the 1400s, and Johannes Gutenberg has just revolutionized the world with movable type. Fast forward a few centuries, and his legacy is living its best life in your home craft studio.
Letterpress printing involves inking a raised surface—typically metal or wood type—and pressing it firmly into paper. Unlike modern digital prints that sit on top of the page, letterpress leaves a physical impression you can see and feel. It's essentially the artisanal sourdough of the typography world.
Why It’s Perfect for DIY Crafters
Letterpress is the ideal playground for crafty typography lovers. Whether you're designing wedding invitations, business cards, custom stationery, or just trying to elevate your journaling game, it allows for a blend of aesthetics, technique, and personalization. Plus, the crisp lines and subtle indentations make your work look ultra-professional, even if you’re wearing glitter-covered pajamas.
And yes, it’s as satisfying as popping bubble wrap—only prettier.
Essential Materials You’ll Need
Before you get elbow-deep in ink, here’s a quick checklist to prepare your letterpress toolkit:
Printing press: No need to rob a museum! You can start small with tabletop presses like the L Letterpress or a secondhand Adana.
Printing plates or movable type: These can be bought pre-designed, custom ordered, or DIY’d using photopolymer or linoleum blocks.
Ink: Letterpress ink is oil-based or rubber-based and made specifically to avoid flooding delicate lines.
Brayer or inking roller: For smooth, even ink application.
High-quality paper: Thick, cotton-based paper like Crane Lettra is ideal for getting that luxurious impression.
Cleaning supplies: Letterpress is not a tidy sport. Ink gets everywhere, so mineral spirits, rags, and gloves are your friends.
Optional (but fun):
Typography templates or stencil guides if you're creating your own typefaces.
Gold foil or embossing powders for extra razzle-dazzle.
Step-by-Step: Your First DIY Letterpress Print
Design Your Layout Start with a simple phrase or a favorite quote. Choose a classic serif font for timeless elegance, or go bold with a custom script for personal flair.
Prepare Your Type or Plate If using movable type, align the letters backward in your press (yes, backwards—it’s like mirror writing for grown-ups). If you’re using a polymer plate, secure it to a base that fits your press.
Ink It Up Apply a small amount of ink to your brayer and roll it until it's evenly coated. Then, lightly roll the ink over your raised type.
Press and Impress Place your paper in the press, align it carefully, and pull the lever or crank. Voilà! You just made art that literally leaves a mark.
Repeat, Refine, and Revel Print more, tweak the inking pressure, test new papers, and don’t forget to Instagram it (hashtag #PressPerfection, obviously).
Creative Typography Meets Craft
Here’s where things get juicy for us font-fanatics. Letterpress lets you experiment with font pairing in a tangible way. Try combining sans-serif headlines with elegant script subtext, or mix bold display fonts with minimalistic body text. It’s not just design—it’s a sensory experience.
Want to level up? Start carving your own type blocks from linoleum or rubber, introducing your unique letterforms into the mix. This hybrid of hand-lettering and relief printing gives you total creative control. Who needs Helvetica when you have Youvetica?
Unique Fact of the Day:
Did you know that early printers using letterpress would store their type in wooden drawers? Capital letters were stored in the upper drawer, while lowercase letters were in the lower one. Yep, that’s exactly where the terms “uppercase” and “lowercase” come from!
Mind. Blown. (Or should we say… inked?)
Tips for Next-Level Letterpress
Use blind impressions: Press the plate without ink for a subtle, elegant embossed look.
Play with gradients: Try a split fountain inking technique to create color fades.
Layer it up: Combine letterpress with watercolor washes or calligraphy overlays.
Letterpress printing is more than just a retro revival—it’s a tactile tribute to typography’s rich heritage. With each impression, you're not just crafting a design, you're celebrating centuries of print culture. And let’s be real: anything that lets us mash art, history, and the irresistible smell of ink into one creative afternoon? That’s peak DIY power.
Get ready to press on—literally and creatively. Tomorrow, we dive into papercutting with typographic flair, where X-Acto knives meet expressive quotes. Yes, it’s going to be sharp.
https://letterhanna.com/the-art-of-letterpress-crafting-with-pressure-and-precision/
0 notes
Text
Stamp It Yourself – Crafting Custom Stamps for DIY Typography

Move over store-bought stamps—today, we’re diving into the satisfying, slightly addictive world of DIY stamping. And not just any stamping—we’re focusing on typographic stamps that allow you to create personalized messages, repeatable motifs, and visually delicious textures in your crafts. If you love lettering and the rhythmic thrill of printmaking, this is your jam.
🧠 Why Stamping Rocks in the Craft World
Stamps are like the fonts of the physical world—modular, repeatable, and powerful. With a single stamp, you can apply the same motif again and again (and again) on paper, fabric, wood, or clay. Combine that with customizable letters and you’ve got a print party waiting to happen.
Better still? You’re in control of the typeface. Want a grungy block letter? Done. Fancy a curly script vibe? Let’s roll. It’s like font-making meets potato carving (but make it chic).
🛠 Materials You’ll Need:
Rubber carving blocks (or erasers!)
Linoleum cutter or X-Acto knife
Pencil or pen
Tracing paper
Acrylic block or wood block (for mounting)
Ink pad (pigment or dye-based)
Ruler or stencil (optional)
Washi tape or masking tape
Bonus tip: If you want to go eco or low-budget, you can even use foam sheets glued to cardboard!
✏️ Step-by-Step: How to Make Custom Typographic Stamps
Step 1: Choose Your Lettering Style
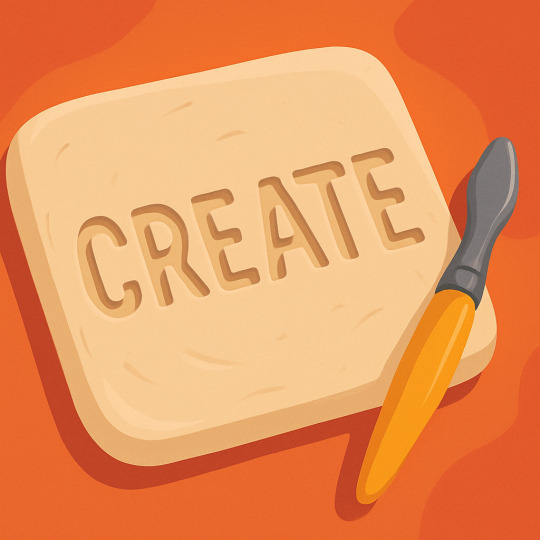
Before carving anything, sketch out what you want your stamp to say. This could be a single letter (great for creating alphabets), a word (“LOVE”, “CREATE”, “WOWZA”), or a decorative typographic symbol (like an ampersand, star, or heart).
Play with typography here—serif, sans-serif, handwritten, script. You can even download a font online, print it, and trace it.
Step 2: Mirror, Mirror on the Stamp
Text must be carved in reverse, otherwise it’ll print backward. (Unless you want “ECNALUBMA” on your tote bag. Which… could be cool, actually.)
Use tracing paper to flip your design. Draw your lettering on the tracing paper, then press it onto the rubber block and rub to transfer the design.
Step 3: Carve It Out
Now the fun (and slightly nerve-wracking) part: carving. Use a small V-gouge to carefully outline your letters. Then carve away the negative space around them so your lettering stands proud.
Go slowly—rubber is forgiving, but not invincible. And keep those fingertips safe! (Nobody wants a permanent thumbprint on their “Hello” stamp.)
Step 4: Mount It (Optional)
If you want easier stamping and cleaner prints, glue your rubber stamp to a small acrylic or wood block. Mounting helps apply even pressure and prevents smudging.
Step 5: Test and Refine
Ink your stamp and press it onto scrap paper. This is your “proof print.” See if you need to deepen cuts, trim edges, or fix any wonky lines.
Once you’re satisfied—go forth and stamp like you’re in an indie print shop in Brooklyn.
🎨 What Can You Do with Typographic Stamps?
Greeting Cards: Spell out personalized messages with a handmade touch.
Tote Bags & T-Shirts: Use fabric ink for custom fashion.
Gift Wrap: Wrap your gifts in newspaper or kraft paper, then stamp them for an artsy upgrade.
Scrapbooking: Stamp titles, dates, or phrases to make each page pop.
Wall Art: Arrange a meaningful quote with your own stamps and frame it proudly.
🧠 Typography Meets Printmaking: Why It Matters
Combining typography with stamping connects two ancient forms of communication: writing and printing. You’re not just making letters—you’re physically crafting the tools that make letters. It’s like being your own Gutenberg.
What’s more, each stamp print has its own quirks and textures. A slightly imperfect edge, a faint ink variation—that’s the magic of handmade design.
Think of it this way: in a world of digital type, stamped letters are the analog rebels with charm.
🔤 Pro Tips for Better Type Stamps
Use simple, bold fonts for your first stamps—they’re easier to carve.
Try modular alphabets (one letter per stamp), so you can spell anything.
Use different inks (metallics, pastels, or even embossing) for variety.
Want more depth? Layer different stamps on top of each other for dimension and color contrast.
📌 Fun Fact:
Before typewriters, personal letter-writing kits included rubber stamps for composing messages letter by letter. It was like analog texting—just with more ink smudges and fewer emojis.
🎉 Wrap-Up: Stamp Your Style
DIY typographic stamps aren’t just tools—they’re tiny pieces of functional art. You get to be the designer, the carver, the printer, and the message-maker. Whether you're labeling your sketchbook or decorating a gallery wall, your stamps tell your story—one press at a time.
So next time you want to express yourself with flair, don’t just write it—stamp it.
Tomorrow we take it up a notch with embossing. Think raised letters, metallic sheen, and texture you can feel. Until then, keep those ink pads juicy and your type stylish!
https://letterhanna.com/stamp-it-yourself-crafting-custom-stamps-for-diy-typography/
0 notes
Text
Crafty Quotes: Making DIY Wall Art with Typography Flair”
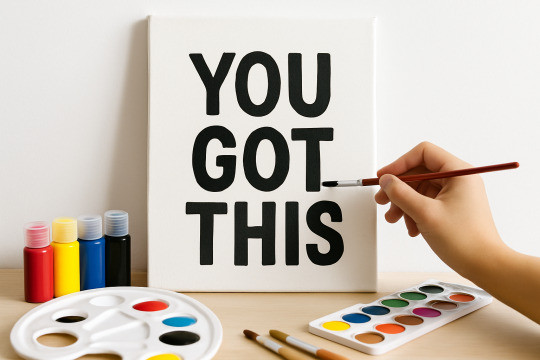
Wall art is where interior design meets self-expression. And guess what? You don’t need to be Picasso or a poet to create something striking and meaningful. Today, we dive into making your own DIY wall art with a typographic twist—yes, fonts, lettering, and layouts will take center stage. This is a fantastic project to explore your personality, your favorite quotes, or simply your aesthetic vibes.
📌 Why DIY Wall Art?
Besides the obvious cost-saving benefits, creating your own wall art lets you express your identity. Think of it as personality wallpaper—without the lifetime commitment. Want to hang a bold “Get Stuff Done” in your workspace? Or how about a gentle “Breathe” in your meditation nook? Typography-based wall art lets you convey that message your way.
✂️ Materials You’ll Need:
Blank canvas or heavy art paper
Acrylic paint or watercolor
Paintbrushes or markers (paint pens are magical here)
Pencil and eraser
Ruler and stencil (if you want clean lines)
Optional: vinyl letters, washi tape, or Mod Podge for a layered look
🧠 Design First: Words Matter
Pick a phrase or word that actually means something to you. It could be funny (“Alexa, clean the house”), motivational (“You’ve got this”), or romantic (“Love lives here”). The words will be the focal point—so think about:
Tone: bold vs. elegant vs. playful
Length: shorter phrases tend to pop
Style: all caps, script fonts, or hand lettering?
Here’s where typography kicks in. Choose a font that fits the message. A quote about relaxation? Use a soft brush script. Something inspiring and fierce? Go with a bold sans-serif in all caps. Use online tools like Canva, FontPair, or Google Fonts for typography inspo.
✍️ Layout 101
Once you’ve got your quote, sketch it lightly with pencil. Decide on your alignment: centered, justified, diagonal, circular, etc. Want to go a little rebellious? Try wrapping the text around a shape, or use a mix of font sizes to create contrast and rhythm.
Pro tip: Use a ruler and light guidelines to keep your spacing even. Nothing kills the vibe like a crooked “YOU GOT THIS.”
🎨 Time to Paint (or Ink!)
Whether you’re painting or using paint pens, start slow and steady. Trace your letters before filling them in. Don’t rush—uneven strokes are fine, but smudges? Not so fun. You can also:
Add shadows for a 3D effect
Highlight a word with a contrasting color
Use a dry-brush technique for a rustic look
Fun Fact of the Day 🧠 The first known use of a motivational poster with typography was during World War II. Ever seen that “Keep Calm and Carry On” poster? It was designed in 1939 by the British government to raise morale in case of invasion. It didn’t get popular until the 2000s—talk about a late bloomer!
🪄 Advanced Twist: Mixed Media
For a cool layered effect, try:
Adding printed paper cutouts behind or over your letters
Using washi tape to mask out sections before painting
Adding hand-drawn flourishes or illustrations around the text
And if you're digitally inclined, design it on a tablet, print it out, and mount it with a wood frame for that "designer-on-a-budget" vibe.
🖼️ Show It Off
Frame it. Hang it. Gift it. Post it. Your DIY wall art is now ready for its grand entrance. Whether you go minimal or maximal, modern or vintage, your wall now speaks your language.
https://letterhanna.com/crafty-quotes-making-diy-wall-art-with-typography-flair/
0 notes
Text
Say It in Wood: Typography Signs That Speak Volumes

Ready to take your typographic talents from paper to planks? Today’s all about crafting wooden signs that say exactly what you want—in your style, your font, your voice. Whether it’s a farmhouse-chic “Welcome” by the door or a quirky “No Wi-Fi. Pretend it’s 1993” for your living room, typography on wood brings character and charm that lasts.
This is where your words become part of the furniture—literally.
🌲 Why Wood?
Wood is durable, rustic, and timeless. It can be sanded, stained, painted, burned, or carved—making it one of the most versatile typography-friendly surfaces. You’re not just writing words, you’re building heirlooms.
🛠️ Materials You’ll Need:
Wood (pine, plywood, reclaimed wood, etc.)
Sandpaper (optional but recommended)
Acrylic paint or wood stain
Vinyl stencils OR printable design + graphite paper
Paintbrushes or paint pens
Clear sealer (like Mod Podge or polyurethane)
Optional: wood burner or Dremel for carving
🔠 Typography Tips for Wooden Signs:
Bold fonts show up better from afar. Think Bebas Neue, Impact, or League Gothic.
Script fonts like Great Vibes or Sacramento work well for names or short phrases but avoid overusing them—they can be hard to read.
Mix fonts—pairing script with sans-serif can make your signs look pro.
Adjust kerning and line spacing so your design breathes and doesn’t look cramped.
✍️ Techniques for Getting Your Typography on Wood:
1. Paint + Stencil Method (Beginner-Friendly)
Sand & Prep the Wood Smooth the surface and optionally apply a base coat or wood stain.
Apply Vinyl Stencil or Printed Transfer Use transfer paper or graphite paper to trace a printed design onto the wood.
Paint Your Letters Use acrylic paint and a small brush for precision. Remove stencils carefully.
Seal It Once dry, apply a sealer to protect it.
2. Hand Lettering with Paint Pens
Use oil-based paint pens directly on sanded wood. Great for freehand calligraphy or quick quotes!
3. Woodburned Typography (Intermediate to Advanced)
Trace your design.
Use a pyrography pen (wood burner) to slowly etch the design.
Add shading or textures for depth.
🧠 Unique Fact of the Day:
The Hollywood sign—perhaps the most iconic typography on wood (okay, technically metal now)—was originally a wooden structure advertising a real estate development in 1923. That’s one BIG wooden sign success story.
🔤 Font of the Day:
ChunkFive or Anton for bold and rustic vibes. If you want something more classic-country, go for Homemade Apple or Pacifico.
🪵 Creative Wooden Sign Ideas:
Welcome Boards: Lean against the front door or hang vertically.
Kitchen Signage: “But First, Coffee” or “Bake the World a Better Place.”
Workshop Rules: “Measure Twice, Cut Once” never looked so official.
Kids' Room Decor: Use colorful fonts and names.
Directional Arrows: Great for events or garden paths.
🧪 Advanced Idea: Mixed-Media Wood Typography
Add metal letters, rope accents, or even 3D printed pieces on wood for a modern-industrial mashup.
✨ Pro Tips:
Light-colored wood makes dark letters pop; dark stains need white or metallic lettering.
If you’re mixing fonts, contrast style AND weight—like bold sans-serif + thin script.
Always test your paint or burn depth on scrap wood before you commit.
https://letterhanna.com/say-it-in-wood-typography-signs-that-speak-volumes/
0 notes
Text
Pressed with Personality: DIY Letterpress and Embossed Cards
You’ve ironed, etched, stamped, stitched, and painted your way through this crafty jungle. But now, dear artisan, it's time to press your point—literally. Welcome to the beautifully tactile world of letterpress and embossing.
These techniques have been wooing paper lovers since the Renaissance, and they’re still the gold standard for elegance. Whether you’re crafting wedding invitations, thank-you notes, or business cards with bite—today’s projects are all about giving typography some serious texture.
🖨️ What Is Letterpress & Embossing?
Let’s define our new playthings:
Letterpress involves pressing inked, raised type into paper for a deep, crisp print.
Embossing creates a raised design (no ink necessary!) by pushing paper between two dies—one raised, one recessed.
Debossing is the reverse of embossing: it presses inward for a sunken-in effect.
For home crafters, we’re keeping it manual and DIY-friendly (read: no $20K letterpress machines today, folks).
🧰 What You’ll Need:
Blank cards or thick paper (at least 200gsm)
Embossing folder or DIY embossing stencil
Embossing tool (or blunt stylus)
Letter stamps or letterpress plates (can be 3D printed!)
Optional: Die-cutting/embossing machine (e.g. Sizzix, Cricut Cuttlebug)
Ink pad (for letterpress effect)
Washi tape, ruler, pencil, and a steady hand
🔠 Typography Tips for Pressed Crafts
Serif fonts shine here—think traditional, classy, and deeply readable.
All-caps serif gives authority to invitations and formal cards.
Avoid hyper-thin fonts—they don’t press well and may look like faint bruises on paper.
Bold script fonts can add elegance when embossed.
🧭 Step-by-Step: Handcrafted Press & Emboss Projects
✉️ Embossed Greeting Card
Sketch Your Layout Lightly draw guide lines in pencil.
Place Your Paper in Folder Or use a DIY stencil (cut from cardboard) for single words or initials.
Rub with Embossing Tool Trace the stencil edges with pressure—work slowly for smooth outlines.
Flip & Admire The reverse side should show a raised effect. Simple, clean, chic.
🖋️ Letterpress Effect (Without a Machine)
Ink Your Letters Using alphabet rubber stamps or carved wood blocks.
Align & Press Firmly Onto cardstock. Apply even pressure—use a book on top if needed.
Optional Deboss Touch While ink is still fresh, press a clean stylus around the edges of the letter to add depth.
🧠 Unique Fact of the Day:
The first movable type letterpress dates back to the 15th century, invented by Johannes Gutenberg. This single invention sparked the modern printing revolution—and yet here you are, doing it for fun, with ink-stained fingers and homemade stencils. The full-circle moment is chef’s kiss.
💌 Typography-Based Project Ideas
Thank-You Cards: Embossed initials or words like “GRATEFUL” or “YOU ROCK.”
Wedding Invitations: Classic serif fonts, letterpress-inked dates.
Quote Cards: Letterpress a motivational phrase, frame it, or slip it into a gift.
Mini Business Cards: Debossed logos + your name in clean serif = classy AF.
Gift Tags: Use small stencils to emboss monograms or festive words like “JOY” or “LOVE.”
✨ Crafting Wisdom:
For embossing: dampen paper very slightly—a light mist can help it mold better.
For letterpress: always test your ink pad and spacing on scrap paper.
Don’t be afraid to combine embossed designs with ink for mixed-media style.
🧪 Experiment Ideas:
Use metallic ink for a luxe letterpress.
Try blind embossing—no ink, just texture—for an ultra-minimalist vibe.
Pair embossed words with hand-lettered embellishments for a “hybrid typography” look.
🔤 Font Pick of the Day:
Try Playfair Display, Cormorant Garamond, or Lora for elegant serif type. For something whimsical, try Bodoni Moda or Libre Baskerville—they look amazing when pressed!
https://letterhanna.com/pressed-with-personality-diy-letterpress-and-embossed-cards/
0 notes
Text
Etched in Style: Glass and Mirror Typography Crafts

Okay, typography trailblazer—today we’re turning up the glam and dialing in precision. Welcome to glass and mirror etching, the sleek, sophisticated cousin in the DIY family. Whether it’s a monogram on a wine glass, an inspiring quote on a vanity mirror, or labeled pantry jars with a chic frosted look, etched typography is where elegance meets personalization.
And you don’t need a workshop full of lasers. Just a stencil, some cream, and a bit of boldness.
🧊 What Is Glass Etching?
Glass etching is the process of creating a frosted design on the surface of glass or mirror. It’s done using:
Etching cream (a chemical that lightly corrodes glass)
Or for the pros: sandblasting (we’ll save that for Level: Wizard)
Today’s method? Etching cream—safe for home crafters, totally typography-friendly.
🛠️ What You’ll Need:
Glass surface (jar, mirror, glass frame, tumbler, etc.)
Stencil or vinyl decal of your chosen typography
Etching cream (found in most craft stores)
Painter’s tape
Gloves and safety glasses
Craft stick or small brush
Running water (for rinsing)
🔠 Typography for Etching
Font choice is everything here, because unlike paint or pen, you can’t layer or correct. So choose wisely:
Sans-serif fonts (like Futura or Montserrat) give clean, modern looks.
All caps works great for impact and readability.
Stencil fonts avoid delicate pieces falling out of vinyl stencils.
Avoid: ultra-thin or heavily detailed fonts—they can bleed or get lost.
✂️ How-To: Etch Your Message Like a Pro
Clean the Surface A smudge-free glass is essential. Wash, dry, and wipe with rubbing alcohol.
Apply Your Stencil Use painter’s tape to hold the stencil or vinyl decal in place. Press firmly to prevent etching cream from sneaking underneath.
Glove Up and Apply Cream Using a brush or craft stick, dab a generous layer of etching cream over the open stencil areas. Avoid getting it outside the design.
Wait It Out Let it sit (typically 5–15 minutes—check your product’s label).
Rinse and Reveal Rinse under running water while wearing gloves. Remove the stencil and dry off. Voilà! Your text is now etched into the glass forever.
💡 Typographic Project Ideas
Bathroom Mirror Affirmations Add subtle frosted words like “You Got This” or “Kindness First” to your mirror.
Personalized Glassware Monograms, names, or titles (“Dad Fuel”, “CEO Juice”) on mugs and glasses.
Labeled Pantry Jars Say goodbye to sticky labels and hello to etched elegance: “Flour”, “Sugar”, “Snacks.”
Etched Glass Frame Art Use bold lettering to etch quotes onto glass sheets, then frame them for a floating text effect.
🧠 Unique Fact of the Day:
Did you know the first glass etching dates back to the 1500s? Back then, artisans used acids to create elaborate patterns—today, we’re using it to spell out "Snack Queen" on a cookie jar. Evolution, baby.
🔤 Font Tip of the Day:
Use a bold, stencil-style font when making your own vinyl stencil with a cutting machine. It ensures that all letters are connected and you won’t lose the center of your "O" mid-etch.
🧙 Crafting Wisdom:
Test on scrap glass first—like an old picture frame.
Use mirror backs for dramatic reversed etching effects.
For added flair, combine etched areas with hand-painted accents around the glass.
✍️ Today’s Creative Challenge:
Etch a short motivational word onto a mirror or frame and hang it where you'll see it daily. Or, personalize a glass and gift it to someone who deserves a little stylish shoutout.
https://letterhanna.com/etched-in-style-glass-and-mirror-typography-crafts/
0 notes
Text
Stamp It Out: DIY Stamps and Typography Tricks

Have you ever wanted to make your mark—literally? Welcome to Day 14 of our DIY Crafts series, where we dive into the art of creating your own custom stamps. But wait! This isn’t just about rubber and ink. Today we bring typography into play, teaching you how to design letter stamps, word motifs, and repeatable text patterns that scream you. This is where old-school printing meets modern creativity.
So grab your carving tools, a little courage, and let’s stamp out something memorable.
🖋️ Why Stamping?
Stamping is one of the most underrated craft techniques—seriously! It’s:
Reusable (one stamp = infinite impressions)
Versatile (cards, fabric, packaging, walls!)
Perfect for adding crisp, typographic elements to any project
Whether you're branding handmade products, decorating notebooks, or making gift tags, custom stamps let you work smart and stylish.
✂️ What You’ll Need:
Rubber stamp blocks or craft foam
Linoleum cutter or precision knife
Pencil and tracing paper
Ink pads in fun colors
Acrylic block (if making clear stamps)
Optional: laser printer & carbon paper (for image transfers)
🧠 Typography Concepts to Use
This is your chance to flex those letter-loving muscles:
Serif vs. Sans-serif: Clean fonts = easier carving
Monospaced Fonts: Great for even impressions
All Caps: Bolder and easier to cut
Handwritten Fonts: More expressive but slightly trickier
Decorative Type: Ideal for making a single word the star
Pro tip: Avoid fonts that are too thin or overly detailed—they're heartbreakingly difficult to carve and often smudge when stamped.
✍️ How to Design a Typographic Stamp
Sketch It Out Write or type your chosen word in your preferred font. Think short and sweet: “Thanks,” “Handmade,” “Yes!”—you get it.
Transfer the Design Trace your design in reverse (important!) onto tracing paper. If using a printer, flip the image in a photo editor first.
Press & Trace Place the design onto your rubber block and burnish with the back of a spoon to transfer it cleanly.
Carve Carefully Start with outlines, then carve away the negative space. You want the letters to remain raised.
Test & Adjust Ink your stamp, test it on scrap paper, and refine the edges as needed.
💌 Project Ideas
1. Custom Gift Tags Use a short word like “JOY” or “LOVE” with decorative type. Stamp onto kraft tags for an instant boutique feel.
2. Business Branding Stamp your shop name or initials on envelopes, thank-you cards, or even wrapping paper. Nothing says "artisan" like hand-stamped branding.
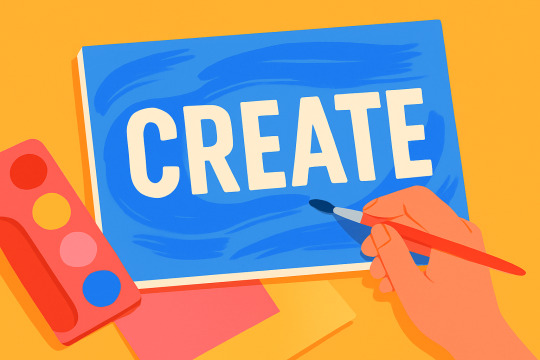
3. Wall Art Go big. Use foam stamps and bold letters to stamp inspiring words like “BREATHE” or “CREATE” on canvas or wood panels.
4. DIY Stationery Make matching letterhead and envelopes with a minimal sans-serif monogram.
🔠 Font Pairing Tip of the Day:
Try using a bold slab serif for the main stamp word and pairing it with a script font added in ink or handwriting afterward. It creates visual hierarchy and a touch of personality.
🧽 Maintenance Tips
Clean your stamps immediately after use with a damp cloth
Store flat, away from heat and direct sunlight
Don't press too hard—let the ink do the work!
🤯 Unique Fact of the Day:
The oldest known rubber stamp patent dates back to 1866—and was used for marking butter. Now you can stamp everything from love letters to linen tote bags. Progress, huh?
https://letterhanna.com/stamp-it-out-diy-stamps-and-typography-tricks/
0 notes
Text
Handmade Greeting Cards with a Typographic Twist

Greeting cards are the pocket-sized canvases of the DIY world. They’re quick to make, easy to personalize, and ridiculously satisfying to hand out. And when you sprinkle in some clever typography? Chef’s kiss. Today we’ll explore how fonts, words, and layout can become the stars of your card-making game.
✨ Unique Fact of the Day:
Hallmark sells more than 6.5 billion greeting cards per year—but the most-shared cards on social media? Handmade ones with clever, bold typography. In other words: people still love a punny card with flair.
🎯 What You’ll Learn:
How to make bold typographic designs using stencils, stamps, or hand lettering.
How to incorporate puns and playful wording for next-level cuteness or snark.
Techniques for layering paper, using embossing tools, or adding dimension.
Font pairings and layout strategies that make words pop.
Whether it’s a birthday, a breakup (yes, even that), or a “just because,” today’s lesson ensures your message lands with style.
🧰 Supplies Checklist:
Blank cardstock or folded paper (A6 or A7 sizes are great)
Fine-liner pens or brush markers
Ruler and pencil
Letter stamps or alphabet stickers
Ink pads (in fun, non-sad colors)
Watercolors or colored pencils
Washi tape and/or ribbon
Embossing powder and heat gun (optional, for fancy folk)
Craft glue or double-sided tape
Scissors or craft knife
Optional: Printables of cute phrases or font templates
💌 Project 1: Minimalist Quote Card
Why:
Clean, minimal, elegant—this one’s for the font-nerds and less-is-more fans.
How:
Fold a white card in half.
Lightly pencil in your chosen quote (“You’re the serif to my sans” is a solid pick).
Use a fine liner or brush pen to ink it with style.
Add a subtle border or tiny hearts, stars, or dots for flair.
Typography tip: Use all caps in sans-serif for bold, modern looks. Script fonts add charm. Mix both? Now you’re a pro.
🧲 Project 2: Letter Stamp Magic
Why:
This gives your cards a typewriter-style, retro feel.
How:
Use alphabet stamps to spell out a message (test on scratch paper first!).
Ink each letter carefully, stamp slowly, and line things up with a ruler.
Layer with background paper, washi tape, or embossing for dimension.
Bonus idea: Use a gold ink pad on black paper for some dramatic drama. 💅
😂 Project 3: The Typographic Pun Card
Why:
Because everyone secretly loves a groan-worthy pun with nice handwriting.
How:
Choose a punny phrase (try: “You light up my life” with a lightbulb illustration).
Sketch it out—make the text the hero, and add a small drawing if needed.
Outline with black pen, color it in, and embellish with stickers or sparkle.
Popular categories: food puns (“You're one in a melon”), animal puns (“Paws-itively amazing”), and seasonal jokes (“Have an egg-cellent Easter”).
💥 Advanced Option: Heat Embossed Typography
For that professional finish that feels store-bought but better.
How:
Use a clear ink pen or stamp to write your message.
Sprinkle embossing powder over the ink while it's still wet.
Shake off the excess, then heat it with a heat gun until it melts and shines.
Great for special occasions or just flexing your fancy supplies.
🧠 Typography Tips for Card Design:
Hierarchy wins hearts: Emphasize the most important word.
Balance is everything: Don’t crowd your card—white space is chic.
Try faux calligraphy: Draw a script font in pencil, then trace with ink, thickening downstrokes.
Use font pairings like a designer: Serif + script, sans-serif + blocky bolds—it’s a party.
🚀 Pro Move: Make a Batch!
Once you’ve designed a layout you love, make 5-10 cards with slight variations. You’ll be glad to have them on hand when inspiration (or birthdays) strike without warning.
https://letterhanna.com/handmade-greeting-cards-with-a-typographic-twist/
0 notes
Text
Typographic Wall Art: Paint, Print, and Paste Your Message Loud & Proud
Typography isn’t just for graphic designers and your cousin who insists on using Papyrus for everything. It’s a powerful visual tool that combines form and function—and in today’s DIY world, it's your secret weapon for wall-worthy inspiration.
This lesson is all about creating striking wall art that uses letters, words, and quotes to transform your space. Whether you're working with canvas, paper, or even upcycled wood, your walls are about to start speaking volumes.
🧠 Unique Fact of the Day:
Typography wall art is one of the top five most-pinned craft categories on Pinterest every year since 2017. Why? Because people love words that speak to them—especially when they’re painted in gold foil or arranged in stylish block letters above a coffee station.
✨ Techniques We’ll Explore Today:
Stencil and Spray Paint Lettering
Hand-lettered Canvas with Acrylics
Mod Podge Collage Typography
Vinyl Letter Decals (DIY Style)
Recycled Wood + Painted Script Signs
These methods range from quick and easy to time-to-rewatch-your-favorite-series-in-the-background kind of detailed. Pick your project based on how bold (or patient) you're feeling.
🛠 Supplies You’ll Likely Need
Canvas, wooden board, or thick watercolor paper
Acrylic paint or spray paint
Alphabet stencils or vinyl letters
Washi tape or painter’s tape
Pencil + ruler (measuring is caring!)
Paintbrushes or sponge brushes
Mod Podge or decoupage glue
Magazines, newspapers, or printed quotes
Craft cutting knife or scissors
Optional: Gold foil, twine, beads, sequins, etc.
🎨 Project 1: Hand-Lettered Canvas Quote
This is the Instagram classic—clean, simple, and oh-so-pinworthy.
How To:
Choose a quote that makes you feel things (funny, inspiring, or petty—you do you).
Lightly sketch your text with a pencil onto the canvas.
Use a fine brush and acrylic paint to hand-letter it in a script or block font.
Optional: Add design flourishes like florals, shadows, or a gradient background.
Typography tip: Mix fonts. Use script for emotion, serif for impact, and sans-serif for clarity. Balance them like you're designing your own billboard.
🧼 Project 2: Spray Stencil Street-Art Vibes
Fast, fun, and bold—this is typography for rebels.
How To:
Print out large block letters on cardstock and cut them out to make your own stencil.
Tape the stencil onto your surface (canvas, wood, wall, etc.).
Use spray paint (outdoors or in a ventilated area!) to apply color.
Let it dry and peel away the stencil.
Boom. Instant typographic drama.
📰 Project 3: Collaged Quote with Magazines
Channel your inner ransom note artist—but make it cute.
How To:
Cut letters from magazines, newspapers, or printed fonts.
Arrange them on canvas or thick paper to form your quote.
Glue them down with Mod Podge.
Seal with an extra layer on top for durability and shine.
This technique is particularly fun for mixing font styles and creating a retro punk vibe.
🌲 Project 4: Wooden Slab Typography
Farmhouse chic? Industrial edge? Rustic glam? Say no more.
How To:
Sand and paint or stain your wooden board.
Sketch or stencil your quote using chalk (for easy corrections).
Paint over it with acrylic or use a paint pen for precision.
Finish with sealant for longevity.
Bonus: Add hooks on the back and hang it like the masterpiece it is.
🌀 Want to Go Digital First?
Design your quote in a program like Canva, Procreate, or Photoshop first. Play with font pairings, spacing, and layout. Once you're happy, print it out as a guide or use a projector to trace it onto your chosen medium.
💡 Typography Tips for Impact
Hierarchy matters: Emphasize keywords with bigger or bolder fonts.
Spacing is magic: Don’t cram letters. Give your words room to breathe.
Contrast counts: Use light letters on dark backgrounds and vice versa.
Alignment sets the tone: Left-aligned feels clean, center feels classic, and right-aligned feels a little rebellious.
https://letterhanna.com/typographic-wall-art-paint-print-and-paste-your-message-loud-proud/
0 notes
Text
Lettering in Clay: Molding Messages That Last
Clay might just be the most patient of all crafting materials. It waits for you to mold, shape, carve, and occasionally smush it beyond recognition. Now, pair that with the expressive beauty of typography, and you’ve got a match that’ll make your inner design nerd swoon.
We're not just talking about putting your name on a pot. We're talking hand-pressed alphabets, quote plaques, custom stamps, fridge magnets, and clay jewelry that spells things out in the coolest way possible.
🧠 Fun Fact of the Day:
The oldest known writing system, cuneiform, was made by pressing wedge-shaped tools into clay tablets over 5,000 years ago. That’s right—your DIY letter tile project is basically art history in action.
🛠️ Tools and Supplies You’ll Need
Air-dry clay or polymer clay
Clay roller or a clean rolling pin
Alphabet stamps or letter cookie cutters
Craft knife or clay sculpting tools
Acrylic paints or paint pens
Gloss or matte sealer (optional)
Sandpaper (for smoothing edges)
Toothpicks, skewers, or old pens (for fine details or poking holes)
Wax paper or silicone mat for working surface
✨ Project 1: Clay Quote Plaque
Make a mini inspirational sign that looks great on desks, shelves, or as a thoughtful handmade gift.
Steps:
Roll out a slab of clay to about 1/4 inch thick.
Cut out a rectangle or shape of your choice.
Use alphabet stamps to impress a word or phrase (like “CREATE”, “BREATHE”, or “NOPE”).
Smooth the edges and add a hole at the top for hanging if desired.
Let it dry, then paint the letters in a contrasting color.
Seal for durability.
Creative spin: Try using a script font for a handwritten look or mixing upper and lower case letters for playful contrast.
🧲 Project 2: DIY Word Magnets
Perfect for leaving sassy notes on the fridge or inspiring mantras near your coffee machine.
Steps:
Roll out your clay and cut small rectangular tiles.
Stamp individual letters onto each tile.
Bake (if using polymer clay) or let air-dry.
Paint or seal if desired.
Attach self-adhesive magnets to the back.
Now go ahead and spell “YOLO” or “FEED ME TACOS” on your fridge like the classy crafter you are.
💍 Project 3: Personalized Name Pendants
Yes, you can wear your craft on your sleeve—literally.
Steps:
Roll a small ball of clay and flatten it into an oval or circular disc.
Use mini stamps or freehand carving to inscribe a name or word.
Add a hole for stringing.
Bake or air-dry, then paint and glaze.
String it onto a chain or cord for instant DIY jewelry magic.
Typography tip: Use monospaced or sans serif fonts for clean lines and legibility.
🖌 Typography Techniques in Clay
Impressed Type: Use stamps or blunt objects (e.g., the edge of a Lego brick!) to press letters into soft clay.
Raised Type: Roll small clay snakes and shape them into letters to stick onto the base surface.
Cut-Out Letters: Roll flat sheets and cut out letters using cookie cutters or by hand with a craft knife.
Handwritten Texture: Etch directly into clay with a skewer or stylus to mimic handwriting.
BONUS: Make Your Own Clay Alphabet Stamp Set
Can’t find the perfect font? DIY it!
Flatten small cubes of clay and carve one letter into each block.
Bake or dry completely.
Use these to stamp your own custom messages anytime.
Now you’re basically a type designer and a sculptor. Michelangelo, eat your heart out.
https://letterhanna.com/lettering-in-clay-molding-messages-that-last/
0 notes
Text
Pop-Up Prose: Paper Engineering Meets Typography

Paper engineering might sound like something that requires a PhD and a blueprint... but really, it's just folding paper in creative ways. And when you combine that with smart typography? You get cards, posters, and paper displays that are practically alive with movement.
Why Pop-Ups + Fonts Are a Match Made in Craft Heaven
They surprise and delight. Regular text says, “Hi.” Pop-up text screams, “HEY THERE, LOOK AT ME!”
Dimensional storytelling. Letters can tell a story not just with their meaning but with how they emerge and unfold.
Perfect for cards and keepsakes. Nothing says “I love you” like hand-crafted paper typography jumping out at your face.
Creative challenge. You’ll never look at a piece of cardstock the same way again.
🛠️ Supplies You'll Need:
Cardstock or thick paper
X-Acto knife or scissors
Cutting mat
Ruler
Pencil and eraser
Bone folder or scoring tool
Glue stick or double-sided tape
Printed typography templates
Optional: metallic pens, stamps, glitter (you know, the usual pizzazz)
📐 Project 1: Pop-Up Name Card
Perfect for personalized gifts, desk decor, or your future Etsy empire.
Steps:
Choose a bold, geometric font (like Bebas Neue, Impact, or Oswald).
Print the name or word large on a folded sheet of cardstock.
Use a craft knife to carefully cut the tops and bottoms of each letter, keeping the sides attached.
Score a fold line beneath each letter, and gently push them out from the inside.
Add contrast by backing the letters with colored or patterned paper.
Bonus flair: Add embellishments like stars, hearts, or a pop-up border.
✉️ Project 2: Typography Explosion Card
No, not a literal explosion—just the feeling of one.
Steps:
Start with a tri-fold card.
Cut and fold tabs on the interior to build platforms for words or letters.
Create cut-out letters from cardstock or print and trace your favorite fonts.
Mount letters on the pop-up tabs so that they “explode” outward when the card opens.
Add motion lines or comic-book-style accents like POW, WOW, or LOVE using hand-lettering.
Pro tip: Fonts with chunky serifs (like Rockwell) give that fun, comic vibe.
🧠 Project 3: Layered Letter Shadow Box
Let’s add some drama and depth.
How-To:
Choose a short word like “HOPE” or “WOWZA.”
Print it in a large size using a bold, clean font (Gotham Bold, anyone?).
Cut the word out of 4–5 sheets of cardstock.
Stack the layers with foam adhesive dots between each, aligning the letters.
Place the layered cut-out in a shadow box for instant 3D wow-factor.
Color tip: Try an ombré gradient for an eye-catching visual effect.
Typography Techniques to Try in Pop-Up Projects
Offset shadows: Create a layered effect with a slight color shift.
Outlined letters: Let light shine through to create paper silhouettes.
Negative space text: Cut the background instead of the letters for an elegant look.
Kinetic letters: Add pull-tabs to make letters swing or flip!
Unique Fact of the Day 🧠
The first documented pop-up book dates back to the 13th century and was used to teach astronomy—with rotating wheels and flaps! That’s right, medieval scholars were the OG paper engineers.
https://letterhanna.com/pop-up-prose-paper-engineering-meets-typography/
0 notes
Text
Textile Type: Adding Typography to Fabric Crafts

This is where your fonts get cozy. We’re turning cloth, canvas, and cotton into typographic playgrounds. Whether you want to make a personalized tote, a custom quote tee, or an embroidered affirmation to hang above your coffee bar, this is the juicy stuff.
Why Typography Loves Textiles (and Vice Versa)
Custom vibes. You can literally wear your favorite quote.
Gift goldmine. Monogrammed napkins or punny shirts? Chef’s kiss.
Typography teaches patience. Especially if you're hand-embroidering the word “Supercalifragilisticexpialidocious.”
Fonts become fashion. Ever rocked a sweatshirt that says “Hustle Hard”? Now you can make one.
🪡 Tools of the (Textile Typography) Trade
Depending on your method of attack, here’s what you might use:
For Painting:
Fabric paint or markers
Freezer paper (for stencils)
Foam brush or fine tip brushes
Iron and ironing board
Fonts printed out on paper
For Embroidery:
Embroidery hoop
Embroidery floss
Fabric (cotton or linen is easiest)
Needle
Water-soluble pen or transfer paper
Fonts printed for tracing
For Iron-On Vinyl (Cricut & Co.):
Heat transfer vinyl (HTV)
Cutting machine (like Cricut or Silhouette)
Iron or heat press
Weeding tool
Font file loaded into your design software (SVG or PNG)
🧢 Project 1: “Say It with a Tote” – Painted Typography Bag
Steps:
Choose your quote—fun, fierce, or floral. Example: “Crafting is my cardio.”
Choose a bold, easy-to-read font. (Try Bebas Neue or Montserrat.)
Print out the text, then cut it into a stencil using freezer paper.
Iron the stencil onto a canvas tote.
Dab on fabric paint with a foam brush.
Let dry, peel the stencil, strut your tote around town like it’s haute couture.
🧵 Project 2: Embroidered Quote Hoop
Low-tech, high-impact.
Steps:
Choose a short quote. “Stay cozy” or “Kindness wins.”
Select a pretty script font like Great Vibes or Pacifico.
Trace the letters onto your fabric using transfer paper or a water-soluble pen.
Stretch the fabric into your hoop.
Start stitching! Back stitch or split stitch works great for lettering.
Pro tip: Add embellishments like little flowers or stars around the words for ✨ drama ✨.
👕 Project 3: Custom T-Shirts with Iron-On Vinyl
Say goodbye to boring graphic tees. Hello, typographic flair.
Steps:
Choose your font. (Keep it bold and legible.)
Design the layout in your cutting software. Remember to mirror the text!
Cut it from heat transfer vinyl.
Weed the excess vinyl.
Position on your shirt and press with heat.
Peel and admire. You're now a walking billboard of your own taste.
Typography Tips for Fabric Crafters
Avoid thin fonts for painting. Bleed city!
Stick to sans-serifs for iron-ons. Cleaner cuts, better readability.
Embrace script for embroidery. It's like cursive with flair.
Prewash your fabric. Shrinkage is the enemy of perfect alignment.
Mix fonts carefully. Limit yourself to two per project—max.
Unique Fact of the Day 🧠
The first commercially successful T-shirt with printed typography was a political campaign tee from the 1948 U.S. presidential election. That's right—fonts on fabric have been spreading messages for over 75 years!
https://letterhanna.com/textile-type-adding-typography-to-fabric-crafts/
0 notes
Text
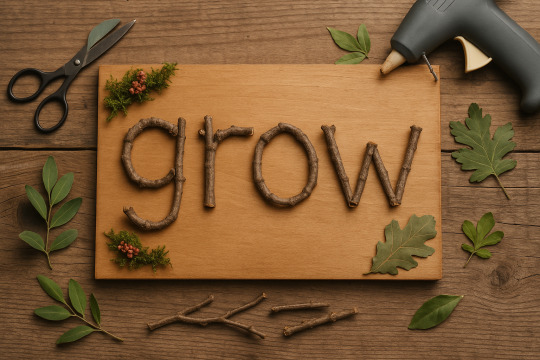
Naturally Lettered: Crafting with Nature & Typography
Ever looked at a tree branch and thought, “You could be an ‘S’”? No? Well, today’s your moment of enlightenment. We’re diving into nature-inspired crafting, where we mix organic materials like wood, leaves, stones, and flowers with beautiful text and creative font applications.
It’s earthy. It’s artsy. It smells like eucalyptus and ambition.
Why Nature + Typography = A Crafting Power Couple
Texture! Letters made of bark, moss, or leaves add rustic charm.
Eco-friendly. Less plastic, more fantastic.
Peaceful process. It’s hard to stress when you're gluing acorns onto a word plaque.
Typography contrast. Mixing crisp digital fonts with irregular organic elements? Chef’s kiss.
Your Supplies for This Wild Letter Adventure
Fallen branches or twigs (dry and clean)
Dried or fresh leaves (flat ones work best)
River rocks or small pebbles
Bark, acorns, flowers, moss, pinecones
Hot glue gun
Scissors, craft knife
Cardboard or wooden base
Paint pens or brush pens
Optional: Mod Podge or clear sealant
And yes, you guessed it—printouts of your favorite fonts or hand-drawn letter templates!
Project 1: Twig Typography Wall Hanging
Rustic. Reclaimed. Ready for Pinterest.
Steps:
Choose a short word like “Grow,” “Home,” or “Wild.”
Print it in a chunky sans-serif font (like Anton or Impact).
Use the printout as a template to cut and arrange twigs into each letter.
Hot glue twigs onto a sturdy cardboard or wooden base.
Add embellishments: moss accents, flower corners, or bark edges.
Pro tip: If twigs snap mid-project, just call it wabi-sabi typography—it’s all about embracing imperfection!
Project 2: Nature Rubbing Letter Art
A classic throwback with a typographic twist.
Steps:
Collect leaves with prominent veins, bark pieces, or textured rocks.
Place them under a piece of paper.
Lay letter stencils or hand-lettered outlines on top.
Use crayons or pastels to rub over the surface.
The texture of the natural elements shows through the letter shapes—voilà! Nature typography.
Fonts that work well: Stick to chunky, all-caps fonts so the textures really pop.
Project 3: Rock Quote Garden Display
Let your garden whisper sweet nothings to visitors.
How-To:
Gather smooth, flat stones.
Clean thoroughly.
Write or paint one letter per stone, spelling out a short quote or mantra.
Arrange the stones in a pot, along a path, or inside a shadow box frame.
Font vibes: Use script for elegance (Dancing Script) or uppercase for clarity (Futura Bold).
Typography Twist Ideas
Even when nature’s the star, you can still sneak in fonts creatively:
Leaf cutout banners: Cut letters out of real leaves and string them up.
Pressed flower monograms: Use pressed petals to "fill in" stenciled letters.
Clay letter stamps with wildflowers: Press natural elements into clay tiles alongside alphabet stamps for texture and text.
Crafting Mindset: Let Nature Guide You
Don’t worry about symmetry—organic shapes are part of the charm.
Mix natural chaos with font order—it’s balance, baby.
If a leaf tears or a twig crumbles, just compost it and keep going.
Keep font printouts nearby for tracing inspiration, especially if your handwriting looks like chicken tracks (no judgment).
Unique Fact of the Day:
The earliest known use of typographic “nature” was by monks who hand-lettered manuscripts using natural inks made from berries, bark, and soot. Calligraphy meets foraging—who knew?
https://letterhanna.com/naturally-lettered-crafting-with-nature-typography/
0 notes
Text
Word Play: Crafts That Come Alive with Fonts & Lettering
Today’s lesson is a love letter to letters. Whether you're printing out bold block text for a home sign or hand-lettering a dreamy quote on a canvas, fonts aren't just visual tools—they’re personality with punctuation.
Fonts make crafts speak—literally. So, let's explore fun, beginner-friendly projects where choosing the right typeface is part of the magic.
Why Fonts Are a Crafty Game-Changer
Instant emotion. Serif says classy, sans-serif says modern, script says “I own scented candles.”
Customizable text. Names, quotes, phrases—you’re in charge.
Perfect for gifts. Nothing says “I care” like your friend’s name in glitter vinyl.
Lettering is meditative. Seriously, ask any calligrapher—they vibe hard.
Your Typo-Toolbox (aka Crafting with Fonts Starter Kit)
Whether digital or analog, you’ll want:
Printable letter stencils or font templates
Transfer paper or carbon paper (for tracing)
Paint pens, brush markers, acrylic paint + fine brushes
Cricut or Silhouette (if you're fancy)
X-Acto knife (for DIY stencils)
Ruler, pencil, and eraser
Your favorite fonts downloaded and ready to roll!
And of course—a surface to letter on! Think canvas, wood, paper, jars, fabric banners, even plant pots. (Yes, your ficus wants a name tag.)
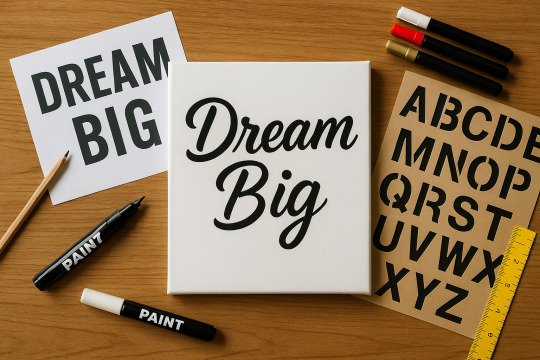
Project 1: Custom Canvas Quote Art
Perfect for wall décor or gifts, this is modern-day embroidery for your brain.
What You’ll Need:
Blank canvas or thick paper
Chosen quote or word
Printer + font (or hand-lettering skills)
Transfer paper or lightbox
Paint pen or brush
Steps:
Choose your favorite short quote.
Select a font (script + serif combos are trendy).
Print it out, place it over your canvas with transfer paper underneath.
Trace lightly with pencil.
Go over it with a paint pen or brush.
Add background color, doodles, or washi tape flair.
Font suggestion:
Bold & Friendly? Try Fredoka One
Elegant Script? Try Great Vibes
Rustic Modern? Go Playfair Display + Raleway combo
Project 2: Personalized Wooden Name Signs
These are great for doors, desks, weddings, or bedroom walls. Level-up points if you’re making them as gifts!
Materials:
Wooden board or plaque
Chosen name or word
Cricut (or print-and-trace method)
Acrylic paint or vinyl
Sandpaper (for prep)
Optional: embellishments like flowers, rope borders, mini lights
How-To:
Sand the board for a smooth base.
Either cut the word out with a Cricut or print and trace it using transfer paper.
Paint the letters or apply vinyl.
Add decorations to match your theme.
Font Mood Tip: Want something whimsical? Try Pacifico. Want sleek modern? Use Montserrat Extra Bold.
Project 3: Hand-Lettered Glass Jar Labels
Cute and functional? Now you’re talking.
You’ll Need:
Empty glass jars (mason jars work great)
Paint pens (oil-based for glass)
Rubbing alcohol (clean the surface first!)
Printed font or handwritten labels
Steps:
Clean jar surface thoroughly.
Use printed font as a guide (trace on paper and tape inside the jar for guidance).
Letter your labels on the outside.
Let dry fully and cure if needed.
Now your pantry screams “organized adult” instead of “where’s the sugar?”
Crafting Mindset: Fonts Are Feelings
Don’t overthink your font choice—but do consider the vibe.
Balance readability with personality.
If you make a typo, well… now it’s an abstract art piece.
Mixing fonts = spice of life, just don’t use 5 at once unless you’re going full chaos goblin (in which case, I respect it).
Unique Fact of the Day:
Comic Sans was designed to mimic comic book lettering— but get this: it was originally meant for a Microsoft dog assistant program in the '90s. So the next time you see it in a serious memo, just remember—it was never supposed to be serious in the first place.
https://letterhanna.com/word-play-crafts-that-come-alive-with-fonts-lettering/
0 notes
Text
Fabric Fun: Easy No-Sew Projects for Cozy Creativity

Fabric crafts are perfect for when you want to add a little softness to your DIY game. Whether it's leftover scraps from an old shirt or a mysterious bundle of fabric you found in your grandma’s sewing box, today’s projects will help you transform textiles into treasures.
And don’t worry—if the last time you touched fabric was while folding laundry (a dark time, I know), you’re still absolutely qualified to dive in here.
Why Fabric Crafts Are Worth It
Textiles add texture. (Say that five times fast.)
They’re comforting to work with. Like arts and crafts and therapy had a baby.
No sewing machine needed. Scissors, glue, and knots will get you far.
Scrap-friendly. Even the tiniest fabric bits can find a purpose.
Fabric Crafting Essentials
Let’s build your squishy toolkit:
Fabric scraps (cotton, denim, felt, jersey knit)
Fabric scissors (they do make a difference)
Hot glue gun or fabric glue
Safety pins or binder clips
Ribbons, buttons, beads, lace
Iron-on patches (optional)
Old T-shirts, pillowcases, or sheets (for upcycling)
Fabric glue dries quickly and holds strong—almost like it’s clinging to its dreams. Much like us, right?
Project 1: No-Sew Fabric Flowers
These little blooms are great for gift toppers, hair accessories, or that boring lampshade you’ve been meaning to upgrade since 2017.
Materials:
Fabric circles or strips
Hot glue or fabric glue
Button or bead (for center)
Steps:
Cut fabric into circles (around 3–4 inches wide).
Fold each in half, then in half again to make little fabric petals.
Glue petals in a circular arrangement.
Glue a button or bead in the center.
Boom. Blooms.
Pro tip: Use felt for a cleaner, more structured flower. Use silk or chiffon for a wispy, romantic look. Use dinosaur-print cotton for maximum chaos energy.
Project 2: Braided T-Shirt Bracelets
You know all those T-shirts with the weird underarm holes that you won’t wear but also can’t throw away? Let’s give them a second life—as fashionable arm candy.
You’ll Need:
T-shirt strips (approx. 1 inch wide, 12 inches long)
Tape or safety pin
Scissors
Steps:
Stretch the strips so they curl inward.
Tape or pin one end down, then braid three strips together.
Tie ends into a loop or knot.
Add a bead or charm if you’re feeling ✨extra✨.
These make great friendship bracelets, especially if you dramatically present them with a backstory like, “I made this from the shirt I wore to my first concert... in my living room... on YouTube.”
Project 3: Fabric Wall Hanging (Mini Patchwork Style)
Let’s make some wall art so cozy your walls will need a nap.
Supplies:
Small fabric squares (different colors/textures)
Sturdy base (felt sheet or cardboard)
Glue
Stick or dowel + string (for hanging)
Instructions:
Arrange fabric squares in a pattern or random mosaic.
Glue them to your backing base.
Glue a stick along the top, attach string, and hang.
The result? A boho-style textile masterpiece. Bonus points if you name it something dramatic like “Emotional Quilt #3.”
Crafting Mindset: Cut, Don’t Stress
Look, your fabric flower might not win a prize at a county fair. But did it make you smile? Did it distract you from doomscrolling? Did you accidentally glue your fingers together? All signs of a great craft session.
Beginners’ pep talk:
Fabric frays? Fringe it and call it “shabby chic.”
Glue blob? Add a button on top.
Pattern mix-up? It’s “eclectic.”
There are no mistakes here—just “creative pivots.”
Unique Fact of the Day:
The oldest known textile dates back over 34,000 years. Archaeologists found flax fibers in a cave in the Republic of Georgia—proof that fabric crafting is practically in our DNA. So if your fingers have a sudden urge to braid, wrap, or embellish, blame your ancient ancestors. They started it.
https://letterhanna.com/fabric-fun-easy-no-sew-projects-for-cozy-creativity/
0 notes
Text
Trash to Treasure: Fun & Easy Upcycled Crafts

Have you ever stared at an empty cereal box and thought, “You could be something… greater”? No? Just me? Well, after today, you’ll never look at “junk” the same way again.
Upcycling is the art of taking discarded items and giving them new life, function, or flair. Think of it as DIY with a heart of gold (and a dash of eco-hero energy). Not only does it save money and reduce waste, but it gives your crafts a cool backstory. Imagine saying, “Oh, this organizer? It used to be a spaghetti box.”
Mic drop.
Why Upcycling Rocks
Eco-friendly: Less trash, more style.
Budget-friendly: Your supplies are literally free.
Endlessly creative: Constraints breed innovation. (MacGyver would be proud.)
Conversation starters: “Oh this vase? It used to be a shampoo bottle.”
Materials to Start Collecting
Time to raid your recycling bin! Here’s your new favorite supply list:
Cardboard boxes (cereal, tissue, shipping)
Glass jars and tin cans
Old t-shirts or jeans
Toilet paper rolls
Plastic containers or bottles
Magazines, newspapers
Bottle caps, buttons, and random bits
Yarn, string, or ribbon scraps
Pair these with your basic tools (scissors, glue gun, tape, paint) and you’ve got a recipe for upcycling magic.
Project 1: Cereal Box Drawer Organizer
Because your junk drawer deserves better.
What You’ll Need:
Empty cereal boxes (at least 2–3)
Scissors or craft knife
Ruler and pencil
Decorative paper or fabric (optional)
Glue or tape
Instructions:
Cut boxes to size. Decide how tall your organizers should be and trim them accordingly.
Create compartments. Mix and match different heights and shapes to fit snugly in your drawer.
Decorate (optional but encouraged). Wrap them in pretty paper, fabric, or even comic strips.
Arrange in drawer. Place them inside and revel in your new, aesthetically-pleasing organization system.
Now your paper clips and rogue batteries have a fashionable new home.
Project 2: Tin Can Lanterns
Turn your old soup cans into glowing works of art. They’re perfect for patios, cozy corners, or even romantic evenings with your cat.
What You’ll Need:
Empty, cleaned tin cans
Hammer and nail or metal punch
Tea light candle (or LED for safety)
Paint (optional)
Steps:
Fill can with water and freeze. This keeps it from bending while you punch holes.
Mark a simple design. Hearts, stars, or polka dots are great starting points.
Punch holes along the design. Use a nail and hammer (carefully!) to create your pattern.
Let ice melt and dry can.
Paint or decorate. Give it your personal flair.
Place candle inside and enjoy the glow.
Warning: You may become irrationally proud of your glowing tin can. This is normal.
Project 3: T-Shirt Tote Bag (No Sew!)
Yep, you read that right—no sewing required. Just scissors, knots, and a rebellious attitude.
Materials:
Old t-shirt (preferably one you’ve emotionally outgrown)
Scissors
Instructions:
Cut off the sleeves and neckline. Boom—instant handles.
Turn inside out. Tie a row of small knots along the bottom hem to close it up.
Flip right-side out. Done!
Now you’ve got a reusable, washable tote for groceries, books, or more craft supplies (because the addiction is real).
Mindset Check: Channel Your Inner Trash Whisperer
Upcycling is about vision. It’s seeing what could be, not what is. That coffee can? It’s not just a can—it’s a planter. That milk jug? Bird feeder. That single sock without a partner? Hello, sock puppet stage debut.
And remember, there's no such thing as “too weird” in the upcycle world. The quirkier, the better.
Unique Fact of the Day:
The term “upcycling” was coined in 1994, by Reiner Pilz, a German engineer who was fed up with the waste of recycling. He said instead of “downcycling,” which degrades materials, we should be “upcycling”—adding value to used items.
So when someone says your tin can lantern is just “trash,” you can confidently say, “It’s engineered art, actually.”
https://letterhanna.com/trash-to-treasure-fun-easy-upcycled-crafts/
0 notes
Text
Paper Power: Beginner Paper Crafts to Get You Hooked

You know what they say—give a crafter a piece of paper, and they’ll make a masterpiece (or at least a really charming mess). Today’s all about mastering paper crafts, one crease at a time. From the ancient elegance of origami to the heartfelt simplicity of handmade cards, this day is your paper playground.
Why Start with Paper Crafts?
Let’s be real: crafting can get pricey. But paper? Paper is the people's medium. You likely already have some lying around—printer paper, old magazines, maybe even last year’s birthday cards (we’re recycling them now; it’s fine). Plus, paper crafts require minimal tools and zero experience. If you can fold and cut, you can conquer.
And hey, folding paper is cheaper than therapy.
Essential Materials
Here’s your no-stress starter kit for today:
Paper (colored, plain, old scraps—it’s all game)
Scissors or craft knife
Glue stick or double-sided tape
Ruler and pencil
Markers, pens, or crayons for flair
Optional: bone folder (fancy tool for smooth creases)
If origami’s on the table (and it is!), square paper is your best friend. Don’t have any? Just trim that A4 down into a square—it’s like giving it a glow-up.
Project 1: Classic Origami Crane
Yes, it’s the one you’ve seen in movies and restaurants and on sushi menus. The origami crane is the poster child of paper folding.
Why a crane?
In Japanese culture, cranes symbolize peace and hope. Legend says folding 1,000 of them grants a wish. We’re starting with one. Baby steps.
Instructions:
Start with a square piece of paper, color side up.
Fold in half diagonally both ways to form an “X.” Unfold.
Flip it over and fold in half vertically and horizontally. Unfold.
Collapse into a square base (like a diamond).
Fold the edges in to form a kite shape. Repeat on both sides.
Pull and fold the “legs” up to form the wings and tail.
Finish by folding the wings down and gently pulling the neck and tail to puff it out.
It takes a couple of tries, but once you nail it, you’ll want to fold a hundred just because it’s so oddly satisfying.
Project 2: Handmade Greeting Card (The “Pop” Edition)
We’re going 3D, baby.
Materials:
A blank piece of cardstock
Decorative paper or old book pages
Scissors and glue
Your wit (for the inside message)
Steps:
Fold your cardstock in half (landscape style).
Cut two small slits on the fold—about 1 inch apart.
Push that little tab inward to create a “pop” stand.
On another piece of paper, draw something fun—like a heart, star, or cartoon animal.
Cut it out and glue it to the pop tab inside the card.
Decorate the front however you want: stickers, washi tape, doodles, or literal glitter explosions.
Bonus tip: Write a cheesy pun inside. "You're the 'highlight' of my day" with a paper highlighter glued in? Iconic.
Crafting Mindset: Embrace Your Inner Kid
Here’s your permission slip to just play. Tear, fold, draw, crumple, start again. Paper crafts are low risk and high reward. You’re not building a rocket ship. You’re making joy. (Although if you do make a paper rocket... please show me.)
Beginner’s Paper Confidence Boosters:
If it rips, it’s now “distressed.”
If it folds wrong, it’s “abstract.”
If it looks weird, it’s “modern art.”
See? Everything’s art with the right attitude.
Unique Fact of the Day:
The world’s smallest origami crane was folded using a microscope. Yes, in 2001, a Japanese scientist folded a crane from a piece of paper only 0.1 x 0.1 mm using tweezers under a microscope. It was smaller than a grain of sand. The dedication? Unmatched.
https://letterhanna.com/paper-power-beginner-paper-crafts-to-get-you-hooked/
0 notes