
An alternate sewing channel for @AddrianaStarflower! Find me on YouTube at the same username!
Don't wanna be here? Send us removal request.
Statistics
We looked inside some of the posts by addri-sews and here's what we found interesting.
Average Info
Notes Per Post
931K
Likes Per Post
499K
Reblog Per Post
432K
Reply Per Post
166
Time Between Posts
19 days ago
Number of Posts By Type
Text
12
Note
2
Video
1
Photo
2
Last Seen Tumblr Blogs


Fun Fact
Premium Tumblr themes are available from anywhere between $9 to $49.
Text
sometimes love is a woman and her industrial size spool of thread
9 notes
·
View notes
Text
MAKING A LONG FURBY CARRIER BACKPACK
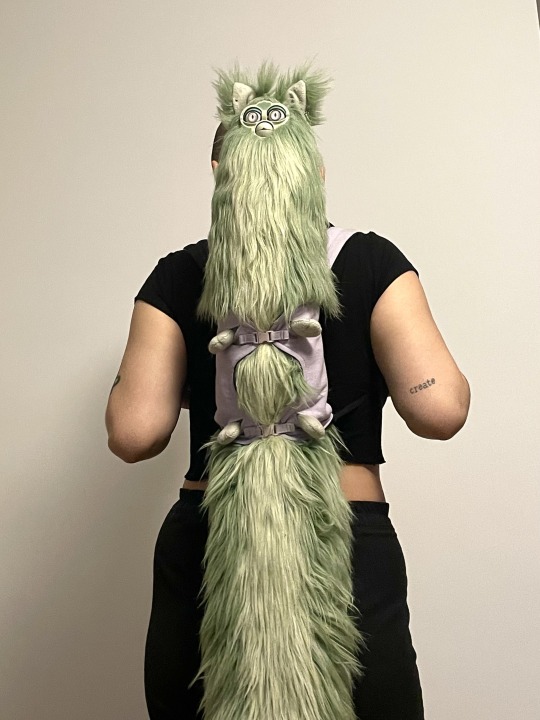
The most universal problem we all share is the utter length of our furbies. Tho beautiful, gracious and completely other worldly, it is not very portable.
Furbies are meant to explore the world and cause chaos among simple mortals. Now we can help them with also having both hands free!
Perfect for festival season or simple everyday activities like going to court, your beloved friend can accompany you everywhere!
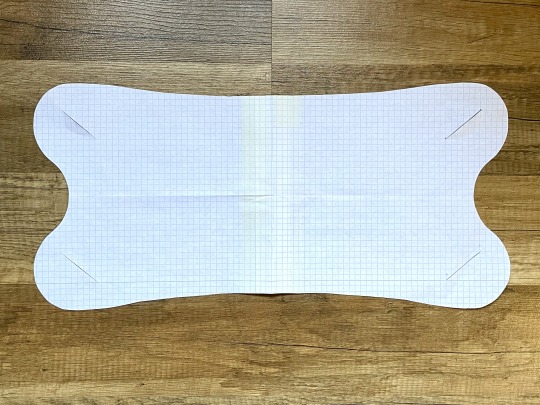
I started with creating pattern that uses my boy’s anatomy to its advantage. Arm holes hold onto him and it will fasten with two buckles.
The mock-up fits him perfectly!
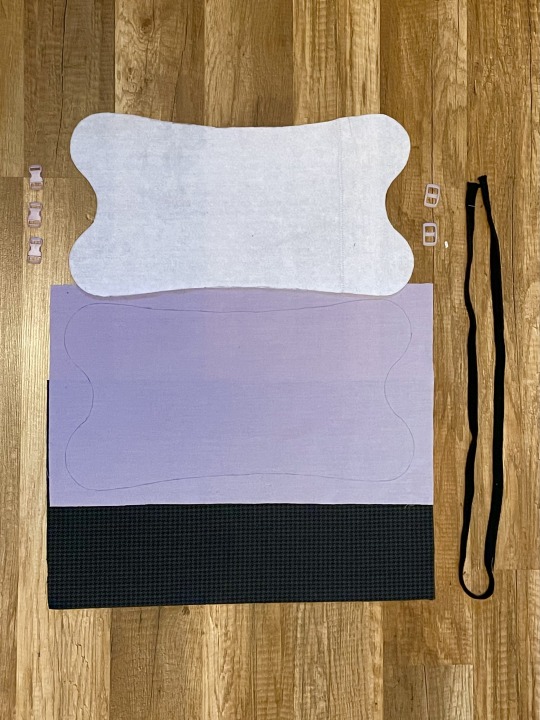
Those are materials I used:
beautiful purple cotton fabric that complements Topson’s fur
thick polyester for lining
white felt for the layer in between
black strap + plastic thingy that I don’t know the name of to make adjustable backpack straps
buckles

Firstly I sewn cotton fabric with inner lining fabric and turned it right side out.

Felt goes inside and the thing is closed with stitch all around.
Then I drew the arm holes and sewn around them similar to how you make button holes.
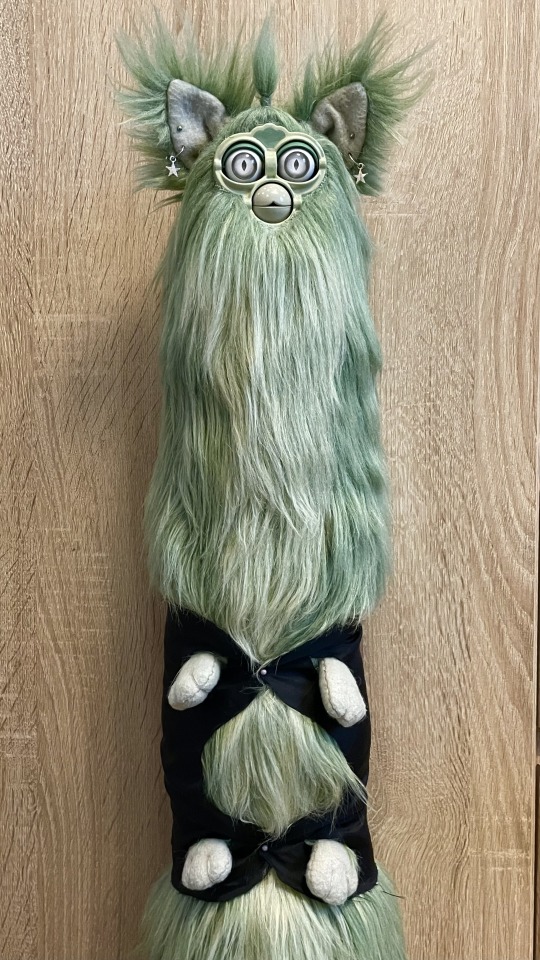
Next goes the buckles.

Topson tried it on and it fits perfectly!

It’s time for backpack straps. I sewn two layers together, flipped it and stuffed it with poly stuffing.

Then I added the adjustable mechanism.
The straps go on the harness and it is done!

I’m so excited to share it with you all! This project was on my mind for so long and I finally managed to finish it. Stay tuned for second part where I will be decorating the carrier and of course for some new content with Topson terrorizing the civilians and attempting malicious acts.
Peace, stay long 💚
1K notes
·
View notes
Text
Button Gauge

Do you have a project that you have no button guidelines? Or perhaps you need to change the number of buttons or their placement? Are you bad at math? The button gauge is the tool for you!

All the button points are equidistant from each other, and when you open it the points REMAIN equidistant. It's like magic. I already have the top and bottom my button placements marked beneath the button gauge with pins.
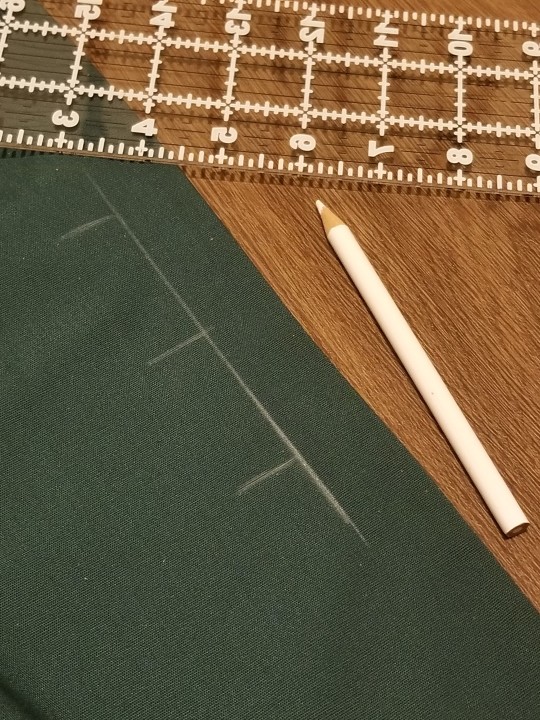
My gauge has little gaps for you to draw your buttonhole guides with a chalk pencil. I went back and drew a 1 in. guide from the edge of my garment to ensure everything would be lined up.

Then I just installed the buttonholes with the buttonhole foot that came with my machine. It's a nifty little tool that makes the task of button placement super easy! You do need to be gentle with it. Mine is cheap and flimsy, so it gets "out of sorts" if I open it too quickly and the top and bottom most points become unaligned. This is easy to fix by just closing and reopening the gauge.
1K notes
·
View notes
Text
apparently this is not common knowledge among punk diy sewists but if you’re sewing patches / doing any sewing that requires pushing a needle through multiple layers of fabric, use a needle grip. they’re little rubber things that have excellent grip on the metal needle so you don’t have to pinch the needle as hard. you will save your fingers soooo much unnecessary pain.
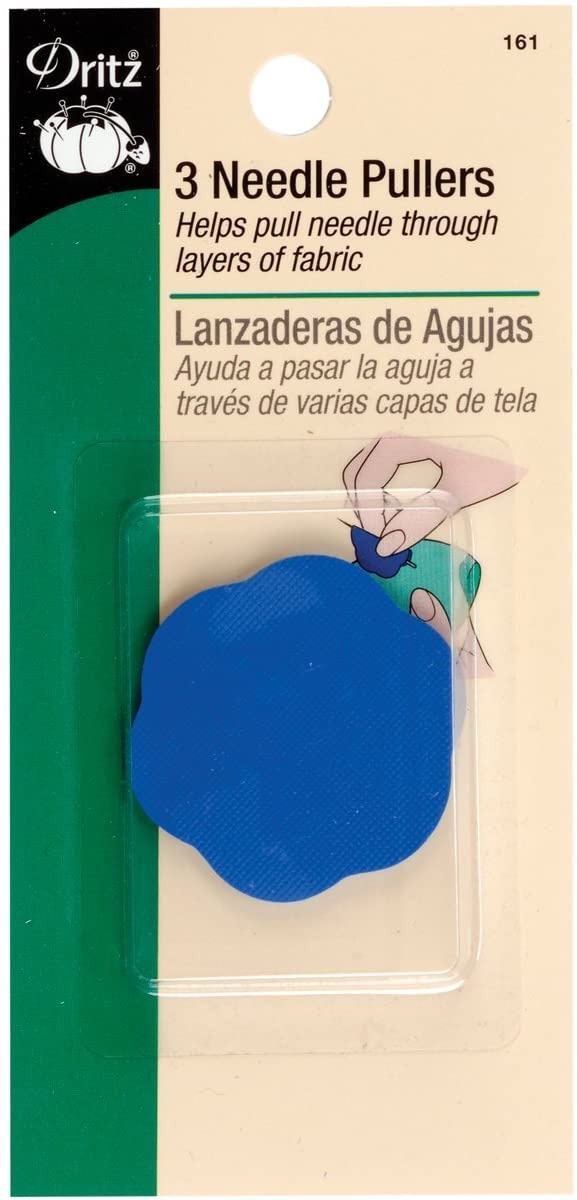
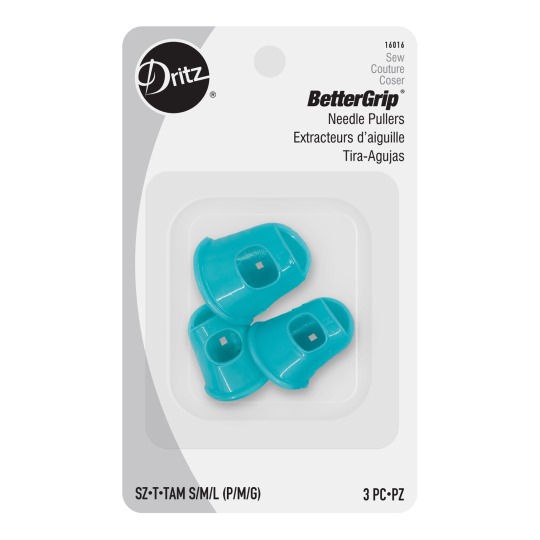
there’s two main types. the basic type is just a little circle of rubber that you fold around your needle, and the fancier type is a little rubber cap for your fingertips. they’re very cheap, under five bucks for the fancier kind and less for the basic, and they last forever. you can buy nice ones from your local craft store or steal them from the quilting section walmart idc. if you’re in a pinch (pun intended) and can’t go out, if you have a non-slip mat under a rug, cut off a little corner and that will work decently. please treat your fingers kindly <3
25K notes
·
View notes
Text
It’s always “stop starting new hobbies, don’t keep buying more supplies, weren’t you working on a project already don’t start a new one” and never “nice enrichment I love your enrichment”
8K notes
·
View notes
Note
but what is the sewing bird for?
For holding the fabric, it's like a third hand to help you while you hand sew. It clamps to the table and the bird's body and head are a big spring loaded clip that holds things. I've never used one, but it would be neat to try.
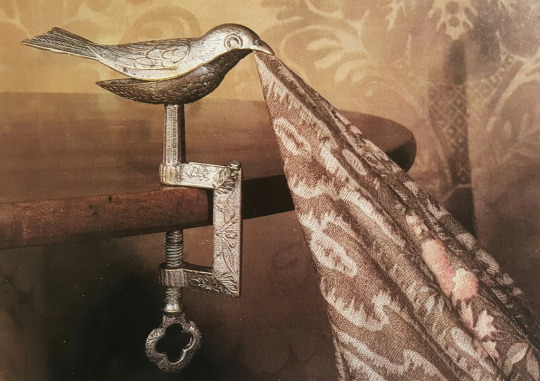
(image source)
A lot of them also have pincushions.

(image source)
14K notes
·
View notes
Note
would you recommend using a basting stitch for an invisible zipper on a mockup of a dress so that i can easily rip it out and reuse it when i make the actual dress? for context i'm making CUT/SEW 015 (the jsk) for a lolita-inspired witchy ren faire outfit. i'm only making a mockup of the skirt thus far but the one thing holding me back is that the instructions have you finish the skirt, zipper and all, before attaching the ruffles at the bottom, and i didn't want to buy two zippers when I could just reuse one. thank you <3
If you've had problems sewing in invisible zippers before, and you want some practice, then I'd put one in your mockup. I'll probably make stitch length about 3.5 (assuming 2.5 is normal and 5 is max) so that it's sturdy, but easy to remove.
When I'm doing mockups that really need a closure for me to be able to tell the fit, I use snap tape:

It's easy to sew into the space where the zipper would go. It's easy to remove and use again.
Most of the time, though, I just safety-pin the closure shut when I'm doing the fitting.
Fun fact, if you're sewing pants for someone else, sew the front of the crotch shut, and leave the back open. This is good for two things: 1) the back of the trousers usually needs more adjusting than the front, so it's faster, and 2) then you don't need to stick safety pins in anyone's crotch. Just a quick tip if you do this: tell your model that the pants WILL open up in the front, or else they spend the whole time worrying about ass-zippers.
I wish you the best of luck with cut/sew, and may your dress turn out better than mine.
25 notes
·
View notes
Video
Look! I’m a magical Gohda chef!
54 notes
·
View notes
Text

I’m making a vtuber model….
Debut date and sneak peeks to slowly come
2 notes
·
View notes
Photo
55K notes
·
View notes
Text
A bit about me!
Hi guys, I’m Addri and this is my cosplay/VTubing tumblr.
I use she/her pronouns!
My Tags
#Madame Starflower Speaks — Anything directly related to VTUBING/my persona
#Addri Rambles — My regular brand of madness
#Sewing Pizzazz — sewing tips
#Videos — my videos as they come out
#Live -- streaming notifications/stream funny stuff
More to come as needed, check back if you see a new tag in use
Other blogs:
Main: @addrianastarflower
Events (focused on Father-figures): @daddecember
Twitch:
My discord server:
Cosplay/VTubing Youtube:
My ao3:
Fandoms your will see content in here for:
Voltron
Jujutsu Kaisen
Fablehaven
Harry Potter
Steven Universe
Gravity Falls
My Hero Academia
Merlin
Marvel
The Dragon Prince
Spy X Family
0 notes
Text
Shouto Todoroki Cosplay Belt!
6 notes
·
View notes
Photo
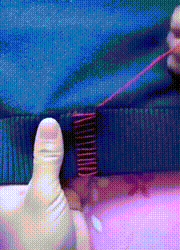


#10/10#this has got to be my favorite stitch for sewing#It doesn't matter how far they are apart#as long as you can't pry open the seam and potentially break it#It's wonderful.#I used this in my most recent video for the underarms and back#Sewing Pizzazz
818K notes
·
View notes
Text
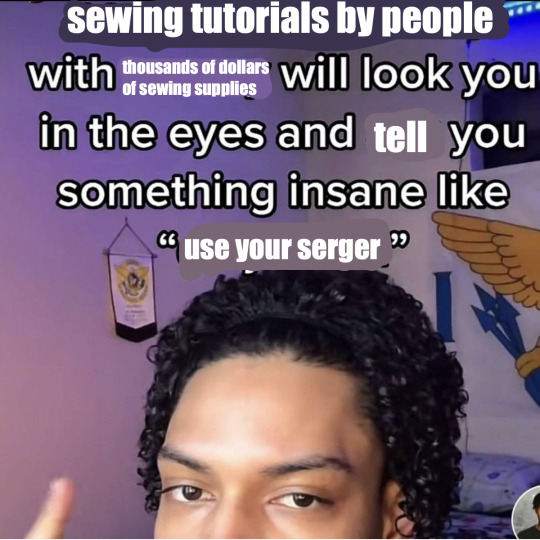
Please enjoy this shitty meme I made to sum up my last couple of days
8K notes
·
View notes
Text
New Video to come in the next few days!!!
Next time I’m making Shouto’s Second Hero Costume Belt

2 notes
·
View notes
Text
New Video Out Now! Watch me make a Pride Vest!
youtube
3 notes
·
View notes
Text
Hi guys! This is Addri (yes the very same as the fanfic author) and this is my sewing only Tumblr! If you want to talk fandom, head to my main at @addrianastarflower
More to come with our first video!
2 notes
·
View notes