#like i have the option selected and i can go into the menu to change it
Text
we need to start handing out fliers or something telling people that ffxiii's auto-battle is an optional mechanic, it's been 10 years and the situation is still dire
#my post#and it's not like the option's difficult to find. you literally select the next button down on the battle menu#and if that's too much effort then you go to the settings options menu and change which tab you default to in battle#like. i will not take your criticisms of the game being too easy seriously unless you've actually given the harder setting a shot#i can respect the people who found auto-battle too easy but manual too hard. but i can't stand the people who are like#''but the fast gameplay means it's not optimal to play it that way so there's no point'' first off: the auto's ai is not always optimal#second: it's literally a difficulty option. funny how when you choose the option to make the game harder it makes the game harder#and autobattle functions are like. a pretty common option in turnbased rpgs. and have been for a long time.#anyways. i've beaten the game without auto-battle so if you want my tips on how to play without it i will happily share them :)#ffxiii
9 notes
·
View notes
Text
bruh what the fuck tumblr mobile has just Completely Removed my ability to have dark mode
#i just updated it and dark mode is just Not Working At All#like i have the option selected and i can go into the menu to change it#and my settings menus work fine with whatever colour scheme i pick like dark mode works fine there#and it's normal on desktop#but on mobile my dash and blogs are all in regular light mode#which means i literally cannot use the app until i can fix that#because white screens give me really bad migraines
6 notes
·
View notes
Text
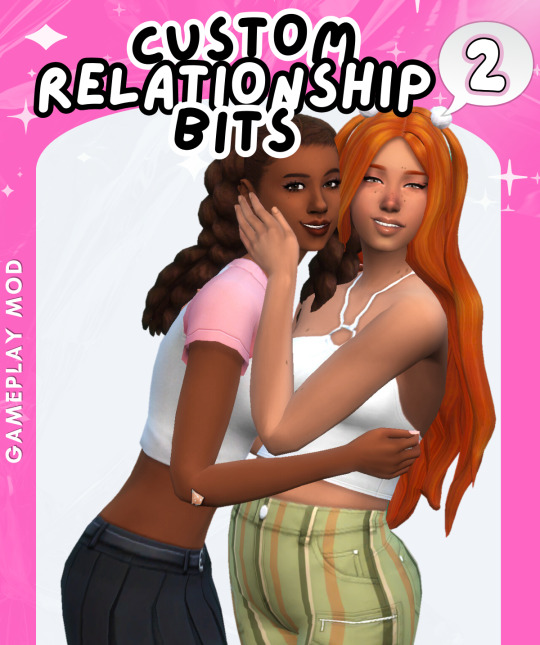
Expanded Storytelling Relationship Bits Mod: 2
Ok..more storytelling and relationship options for your sims!
(Really tried my best to push this out before the end of Jan) 😮💨
If you want more info about the mod check this page out: Expanded Storytelling Relationship Bits Mod
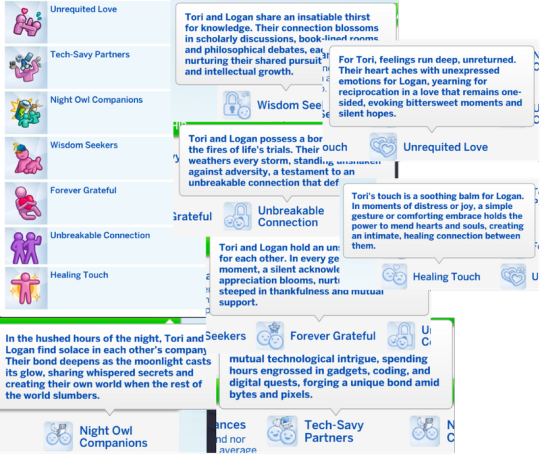
This time around created more relationship bits. Here they are
I wanted to try something new this time, which is why it took me so much time. I'll get into it later.
But there are a few new things I have added and changed from the previous one. First off, there are more interactions available: social interactions, phone interactions, and rabbit hole interactions.
Each one of these interactions corresponds to a specific relationship bit.
Healing Touch: 'Plan Relaxing Activities Together,' 'Offer Comfort through Hugs and Physical Touch.'
Wisdom Seekers: 'Ask Questions about the Universe.'
Unbreakable Connection: 'Celebrate Anniversary of Enduring Connection,' 'Promise Everlasting Friendship' (Only available pre-promise).
I do need to note that, just like the other mod, many of these are cosmetic and don't have a full effect yet. (Emphasis on 'yet,' as I will slowly but surely make these more functional.)

If your Sims have the Wisdom Seeker, Tech-Savvy Partners, or Night Owl Companions relationship bits, some interactions will unlock on the phone:
Wisdom Seeker: Study Together at the Library
Tech-Savvy Partners: Send Tech News
Night Owl Companions: Night Time Activities Menu
(Regarding nighttime activities, I haven't found a workaround for this issue yet. However, here's a temporary solution: When selecting an activity for the two Sims who have the rabbit, choose the Sim you want to go with first, and then select yourself again using the same option. I'm not sure why this happens, but it can be a bit inconvenient. I'll work on making the process more streamlined in the future, but for now, this is how you can get them to go to the same activity.)

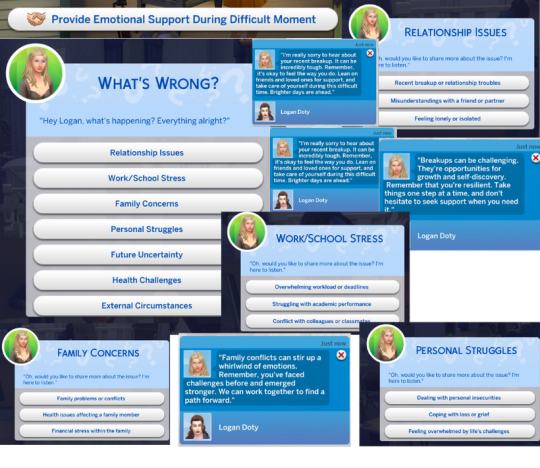
The new feature I've been working on, which I'm quite excited about, involves social interactions. I've always felt that many social interactions lacked depth and context. So, what I'm currently working on is creating social interactions to fill that gap
One of these interactions is 'Provide Emotional Support,' which is available for Sims with the 'Healing Touch' relationship.
In this interaction, your Sim will be presented with several options when they are feeling sad. Your Sim can choose from these options to express why they are feeling sad. Once they make a selection, the other Sim will ask for more context, leading to the exchange of contextual advice and reassurance.
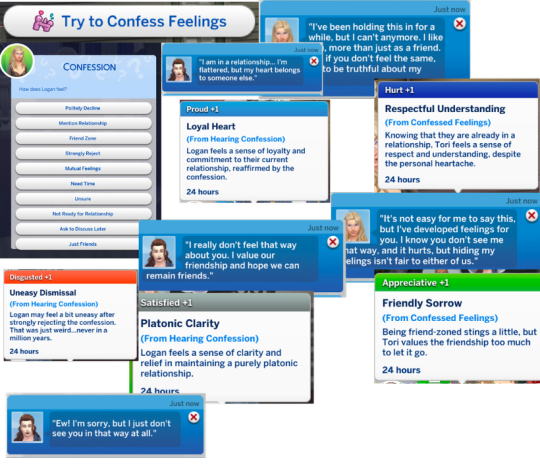
I've also developed another social interaction, 'Try to Confess Feelings,' which is available for Sims experiencing 'Unrequited Love.
Attempting to confess your feelings will lead to various outcomes depending on the option you choose. In this interaction, the Sim who hears the confession will have several response options available.
The choice made by the listening Sim will have an impact on their relationship, both romantically and platonically. Some response options may harm the relationship more than others.
The way the Sim responds through the animation doesn't affect the outcome. I've designed it this way to leave the choice entirely in the player's hands. However, unless both Sims are in a flirty mood and have a high friendship level, the Sim who hears the confession will always use the rejection animation. Nevertheless, this animation choice doesn't alter the outcome.
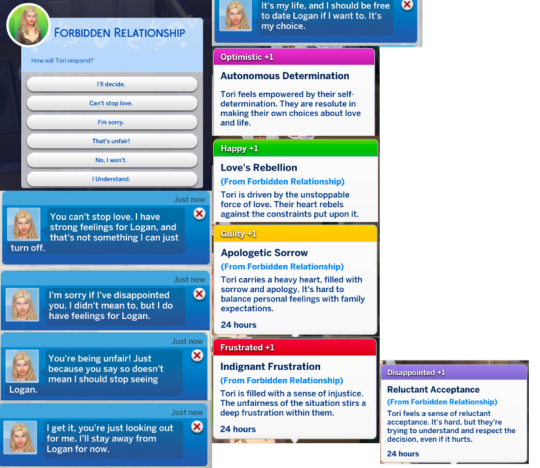
The social interaction 'Forbid Relationship With' can be used either before or after designating two Sims as star-crossed lovers. Some of the options will even add the 'star-crossed lovers' relationship bit to the two Sims (if they didn't have it), while others will remove it (if they did have it).
The interaction can be found under the Mean -- Arguments Pie Menu Category. Only a parent, grandparent, uncle, or caregiver can trigger the interaction.
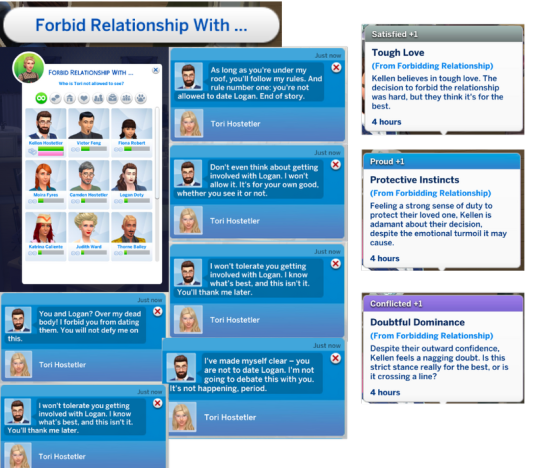
Depending on the chosen options, the relationship can either suffer a negative or experience a positive impact. While all of the options will influence the relationship, certain responses will have a significantly greater effect on it than others.
These are all the main points! I hope you all enjoy this new feature because I'm eager to create more! There will be additional interactions and other things I'll be adding to this mod. I'm constantly learning new things, and it's truly enjoyable to implement them!
Download Here
Public Feb 24
#the sims 4#thesims4#sims 4 mods#the sims cc#ts4#sims 4 edit#ts4cc#sims 4 cc#ts4 mod#ts4 mods#mycc#ts4 download#sims 4 romance
1K notes
·
View notes
Text
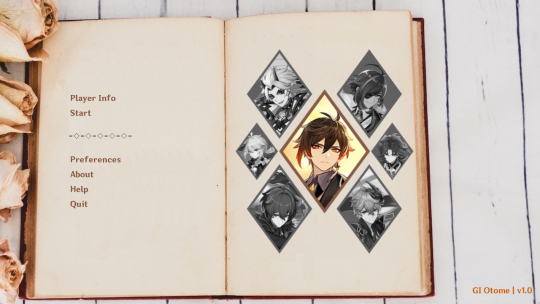
— a short and casual genshin impact otome game.
⟣ 𝕕𝕠𝕨𝕟𝕝𝕠𝕒𝕕 𝕙𝕖𝕣𝕖 ⟢
┊ (Windows 🪟, Linux 🐧, or Mac 🍎 only!)

◇ 𝐰𝐡𝐚𝐭'𝐬 𝐭𝐡𝐢𝐬? ◇
Just a simple something I had in mind for a Genshin otome game... I have 0 attention span, 0 time, and 0 knowledge to write and build a full-fledged 3D game with intricate stories, plot, and mechanics. This is just a simple visual novel with a streamlined plot and partial voices. You should be able to complete everything in like... 30 minutes long in total. Might be less, even.
◇ 𝐜𝐨𝐧𝐭𝐞𝐧𝐭 𝐭𝐚𝐠𝐬 ◇
The game will contain the following: established relationship, FLUFF, comfort, lots of pet names, suggestive themes, lots of kissy sounds on some routes, implications of violence (not towards player), a sprinkle of protective behavior
◇ 𝐥𝐨𝐯𝐞 𝐢𝐧𝐭𝐞𝐫𝐞𝐬𝐭𝐬 ◇
Zhongli, Xiao, Childe, Diluc, Kaeya, Itto, Kazuha
(Zhongli is selected by default because who doesn’t love geo daddy???)
◇ 𝐰𝐡𝐨'𝐬 𝐭𝐡𝐢𝐬 𝐟𝐨𝐫? ◇
This is a very self-indulgent project, hence the dialogues were written with fem!player in mind. It will contain suggestive themes, so please be aware of that before downloading / playing!
◇ 𝐢𝐬 𝐭𝐡𝐢𝐬 𝐟𝐫𝐞𝐞 𝐭𝐨 𝐩𝐥𝐚𝐲? ◇
Yes, it's totally free - in fact, I do not accept payment.
◇ 𝐡𝐨𝐰 𝐭𝐨 𝐩𝐥𝐚𝐲? ◇
Click the link to download the appropriate file based on your OS. Only Windows, Linux, and Mac are supported. No, I won't release it on other platforms.
Open the game, and you’ll find that it’s pretty straightforward. Customize your profile, select your love interest, then start the game.
There are no wrong answers and the love interest can be changed anytime (just go back to main menu and select the character’s picture on the right side).
◇ 𝐜𝐚𝐧 𝐢 𝐬𝐡𝐚𝐫𝐞 𝐭𝐡𝐢𝐬? ◇
You can personally send links to this post / the game’s itch.io page to your friends via DMs, but outside of that (reposting), NO. For example, posting about this on Reddit is prohibited.
◇ 𝐚𝐧𝐲𝐭𝐡𝐢𝐧𝐠 𝐞𝐥𝐬𝐞 𝐭𝐨 𝐧𝐨𝐭𝐞? ◇
This is a super casual project.
Scripts are not proofread. Probably lots of grammar mistakes.
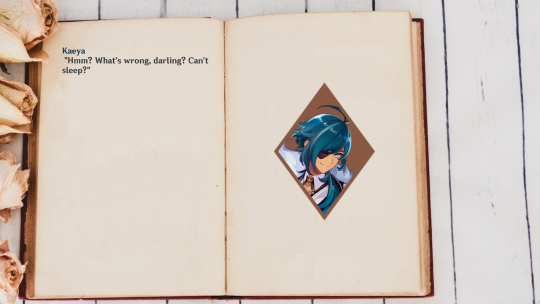
Novel format without narration (full dialogs).
There are no actual sprites, just official art and something akin to a speech bubble to cater to the characters’ changes in ‘expression’.
There are voices, but only partial - mostly just grunts, chuckles, kisses, and stuff. I’m using JP voices EXCEPT for Itto because Max Mittelman is a gem. No, I will not add other languages' voice versions.
Sound cues and voices are quite important for this game so I recommend using headphones.
Depending on when you open the game (morning, afternoon, nighttime, midnight), your currently selected love interest might greet you differently.
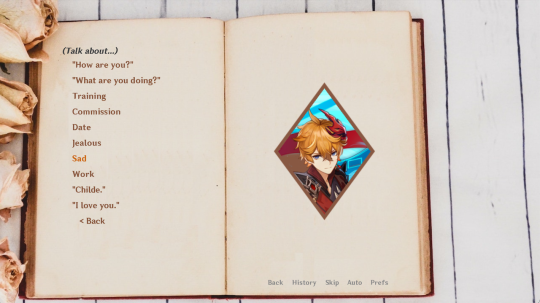
To reiterate, there are no wrong answers.
Selecting all talk/act options for a character will unlock a small event where they'll give you unique gifts.
I lowkey have so many ideas on how to expand on this in terms of gameplay and options but let’s be real here it probably won’t happen lol why can’t my brain be this creative when it comes to work
◇ 𝐢𝐬 𝐭𝐡𝐢𝐬 𝐚 𝐯𝐢𝐫𝐮𝐬??? ◇
No... That said, anyone can literally say that. Please be responsible for your own actions.
I have also released other games on the same itch.io profile, so this isn't my first rodeo. Feel free to check the reviews on those before making your decision if you're wary about downloading!
◇ 𝐥𝐚𝐬𝐭 𝐰𝐨𝐫𝐝𝐬 ◇
hyv please don't sue me i gain 0 dollars for this and i just wanna simp in peace

⟐ 𝚌𝚛𝚎𝚍𝚒𝚝𝚜 🄸 𝚒𝚝𝚌𝚑.𝚒𝚘 𝚙𝚛𝚘𝚏𝚒𝚕𝚎 🄸 𝚒𝚗𝚜𝚝𝚊𝚕𝚕 𝚒𝚗𝚜𝚝𝚛𝚞𝚌𝚝𝚒𝚘𝚗𝚜 ⟐

© zhongrin | 2022 ◆ do not repost or share without permission. reblogs much appreciated. feel free to reach out to submit suggestions, feedback, comments, or if you just want to talk!
#genshin impact#genshin x reader#genshin impact x reader#genshin otome#genshin fangame#zhongli#xiao#childe#diluc#kaeya#itto#kazuha#zhongli x reader#xiao x reader#childe x reader#diluc x reader#kaeya x reader#itto x reader#kazuha x reader#rin uses her programming skill to have fun#rin writes
17K notes
·
View notes
Text
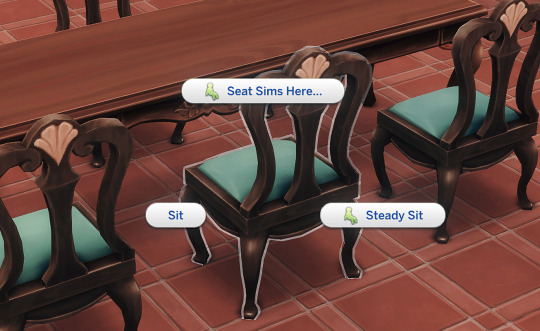

[MOD] Steady Sit & Seat Any Sim
This was a mod I created before for private use. Some friends said they urgently needed this, so I reconstructed it and here it is.
I've been bothered by how Sims would hastily get up from chairs as soon as I told them to sit. That's why I made this mod as an attempt to alleviate the issue and provide a relatively more "steady" sitting experience.
This mod adds the following new interaction options:
"Steady Sit" option for chairs (and pool edges). It allows Sims to sit down while restricting most of the common autonomous interactions that might prompt them to stand up. This will help Sims stay put in their seats longer instead of hastily standing up or frequently changing seats. They are still able to initiate interactions that they can do while sitting.
"Seat Sims Here" option for chairs (and pool edges), allowing you to select one or multiple Sims and have them sit on the clicked or nearby chairs. Each picked Sim will enter Steady Sit state.
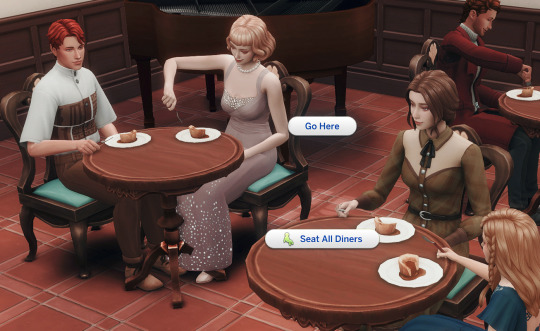
"Seat All Diners" option to the floor in restaurants. This lets you instruct all diners to sit. Sims with claimed tables will return to their seats and continue their dining process, while unassigned sims will sit at random seats in non-dining areas. All diners (of that moment) who sit or are already sitting will enter Steady Sit state.
"Leave Seat" option for all Sims in the Steady Sitting state, allowing them to immediately end sitting and stand up. (You can also simply initiate any interaction from pie menu like "Go Here""Call Over".)


Theoretically, Sims will stay seated for up to 240 Sim minutes. But it's not overly forceful and Sims can still get up for various reasons, such as low motives, player direct interactions that require standing, or any higher-priority autonomous interactions that hasn't been restricted. Steady Sit state will end as soon as Sims' bottom leave the seat.
This mod was created based on my usual playstyle and environment and it helped my Sims remain seated for the longest possible time without problems. However it's not a one-size-fits-all solution (I do wish I knew one), and its effectiveness may vary depending on situations and other mods installed that introduce new autonomous actions. You may find it works well or not so well in your environment. Unfortunately I haven't tested it at special events like weddings as I've never played that part of game. Feedback is appreciated if you'd like to give it a try.
Please see the full requirement and compatibily info on the download page.
Download: CurseForge / Patreon - free
#the sims 4#ts4 mod#ts4mod#sims 4 mod#the sims 4 mod#ts4 mods#s4 mod#ts4 download#sims 4#ts4#amellce mod
1K notes
·
View notes
Text
Benchmark Tech Notes
Running the Benchmark
If your Benchmark isn't opening, it's an issue with the executable file, and something not completing properly on either download, or extracting the Zip file. The Benchmark is designed to run and give you scores for your potato computer, I promise.
I actually saved my Benchmark to my external drive, and it still pulls and saves data and runs as it should. Make sure you allowed the download to complete before extracting the zip.
Resolution
Check your Settings; in Display, it may be defaulting your monitor Resolution to something than you might otherwise use if you aren't on standard 1920x1080.
To check your monitor Resolution, minimize everything on your screen and right click anywhere on your Desktop. Go to Display Settings and scroll down to find Resolution and what it's set at.

You can set the Graphic Settings 1 tab to Maximum, or to Import your game settings. Display Settings tab is where you set it to be Windowed, Bordered, or Full Screen, as well as select Resolution to match your monitor in the dropdown (or customize it if needed). I speak on Resolution as some folks in my FC noted it changed how their characters looked.
The Other tab in Settings is where you can change the text output, or even check a box to disable the logo and score; I do this on subsequent plays, once I have my scores at various settings, to get the clean screenshots.
@calico-heart has a post about fixing graphics settings, with screenshots of the settings tab. Basically, change graphics upscaling from AMD to NVIDIA, and/or uncheck Enable Dynamic Resolution. Also check the Framerate Threshold dropdown.
Screenshots
The benchmark auto-saves 5 screens each playthrough. In the Benchmark folder there is a Screenshots folder to find the auto-images taken of your characters.
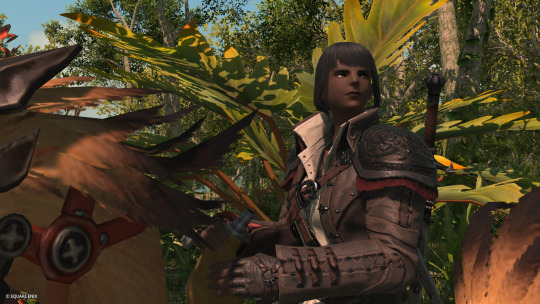

Character Appearance
If you want to get your current in game appearance, including non-standard hairstyles, make sure to load up the live game, right click and "Save Character Settings."
Then go to Documents/My Games/Final Fantasy XIV: A Realm Reborn (this is the default in Windows 10 so mileage varies). The file will have the date you last updated their settings and be named FFXIV_CHARA_01.dat (or however many saves you have/made).
Grab those newly updated DAT files for your character(s) and copy them, then in the same base folder, go to Final Fantasy XIV: A Realm Reborn (Benchmark).
Paste the copied DAT files in there, and rename to FFXIV_CHARA_BENCH01.dat (the number doesn't matter, and you may have more).
When running Benchmark Character Creation, use the dropdown menu.
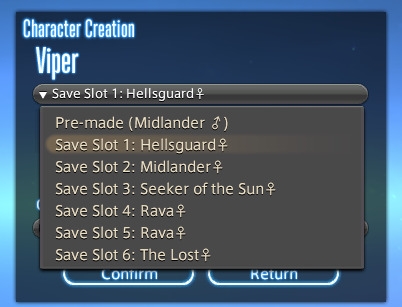
If you do Create a Custom Character and Load Appearance Data, it will give you default hairstyles again. Meteor's Dawntrail hairstyle is a new default.
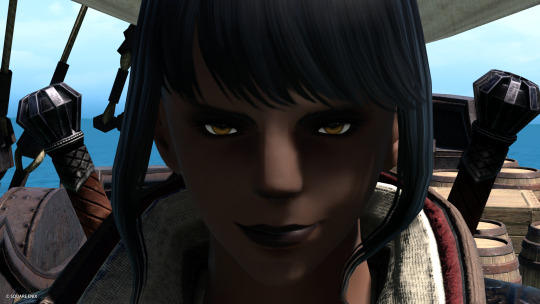
In Char Gen I am finding that a very pale hrothgal reflects the green scenery around her, giving her white skin/fur a green tinge. The other zones do not have this problem, or at least not to the same degree.
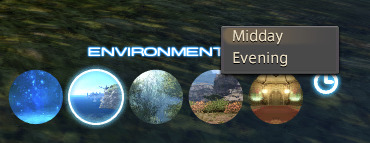
They added a Midday vs Evening setting in outdoor areas as well to test lighting. The lighting in the Gridanian innroom is better; not as bright as outdoors, to be expected, but not completely useless.
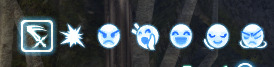
New voice type icons to clarifying the sounds you make.
Remember we're getting a free fantasia with the expansion, so some tweaking may be needed; Iyna I felt like I needed to adjust her jaw. Other colors--skin, hair, eyes, tattoos, etc--are showing differently in the various kinds of lighting.
Uncertain if the limit on hairstyles for the Hrothgals so far is just a Benchmark thing; they do have set styles for different head options. Everyone gets Meteor's hair though, so it may be a temporary/Benchmark limit. But which clan and face you choose drastically alters what hair and facial feature options you have access to.
Check your settings, tweak them a bit, play around with chargen, and remember this is still a Benchmark; they always strike me as a little less polished than the finished game, but so far I'm actually pretty pleased with having defined fingers and toes, the irises in the eyes, scars looking cut into the skin, and other improvements.
172 notes
·
View notes
Text
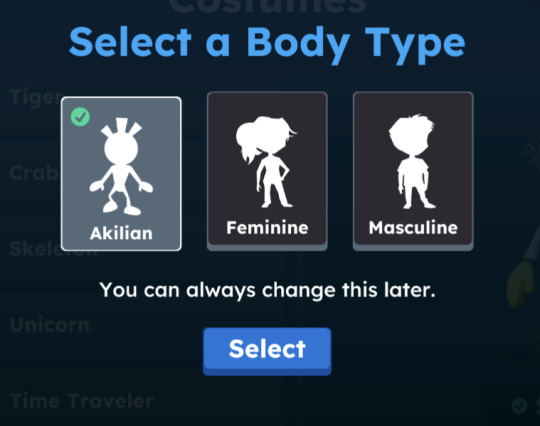
My ADHD video game, Endeavor OTC, used to offer only one player character body type, which is understood to be a form of alien or possibly robot, the graphics are small and it's difficult to tell. I liked having an "Akilian" body because you also got numerous skins to dress them in, everything from "dinosaur costume" to "butterfly-themed superhero". My favorite was the dapper victorian cat followed by the 70s-themed skin with the disco ball head. It was mainly irrelevant anyway since you don't really see the avatar during gameplay.
They've just introduced new body types, and points for saying "Feminine" and "Masculine" rather than "Female" and "Male", not to mention setting it up so you can change avatar easily and frequently. That said, offering me the option to keep my Akilian body or go to a gendered body just makes it seem like they have some real weird ideas about nonbinary people.
Wake up babe, new gender identity dropped.
I suspect they're doing this because they just got bought by a bigger company that wanted "normal" gendered avatars, which is a huge bummer, but we'll see. The Akilian body type still gets the vast majority of the cool outfits, at least. I'm sticking with Akilian unless they really up their game for the gendered avatars' clothing.
[ID: A screengrab of the avatar-selection menu from Endeavor OTC; it shows three body type options, "Akilian", "Feminine", and "Masculine". While the Akilian body does look more cartoonish, the main difference is the hair, although the Akilian and feminine body types are also thinner than the boxy masculine body.]
141 notes
·
View notes
Text
ARG notes: ZampanioSim
Okay, a work this metafictional and also that (I think) responds to audience interaction is going to need a high-caliber gimmick. Hang on.
...
Alright. Hey guys, catfishAnabasis (Light) here, taking a moment out of my surprisingly busy day tell you about a weird thing on the internet.
ZampanioSim is an intricate and brainbending ARG. It takes direct inspiration from Homestuck, The Magnus Archives, and House of Leaves, as well as the creator (JR, jadedResearcher/justifiedRecursion)'s previous canon of Homestuck fan-work and games. A major theme is "unreality".
HERE IS YOUR TRAILHEAD.
Feel free to ignore the rest of the writeup and check it out now.
I know very little about JR's other work, right now. However, among my many INTERESTS, I am something of a TMA ENJOYER and an AMATEUR INTERNET INVESTIGATOR, and if I were in a HOUSE I like to think I could LEAVE it pretty easily.
So, yeah. I figured I'd just describe my experience of this rabbithole and maybe you'll want to check it out too. I'm sure this will only scratch the surface.
ZampanioSim is structured as a nested labyrinth. In the same way that:
Homestuck is a webcomic framed as an interactive adventure game about an account of kids playing a video game (Sgrub) that doesn't exist, and
House of Leaves is a novel framed as a found scholarly discussion about a documentary (The Navidson Record) that doesn't exist about a house that doesn't exist,
ZampanioSim is a game-based ARG framed as an attempt to simulate a game (Zampanio) that doesn't exist based on a found FAQ of the game (that only sort of exists).
More concretely, ZampanioSim features a lot of nested browser games, as well as audio, narrative, an actual audience-interactive narrative game (the way Homestuck was originally), external websites, and more.
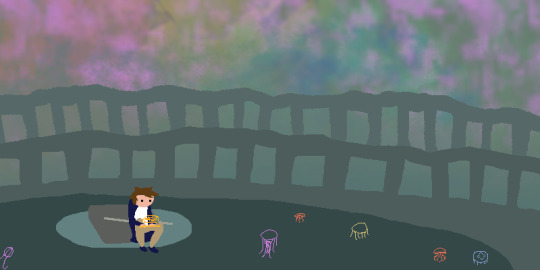
The starting point is, of course, the House:
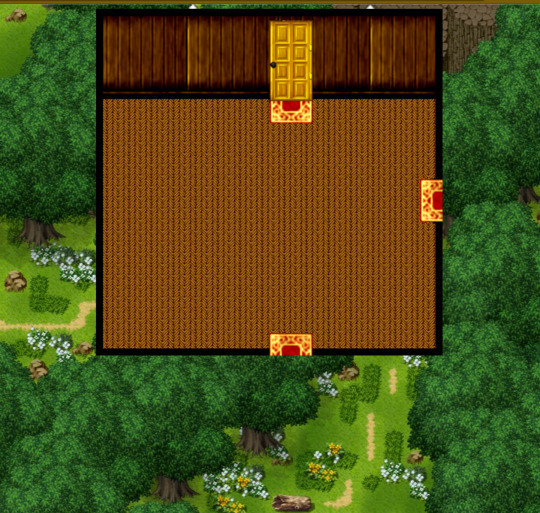
ZampanioSim takes full advantage of the browser as medium. There is content accessible via the address bar, developer tools, cookies (I think), the developer console, and probably more that I haven't realized.
Like, to give you a sense of the kind of rabbithole we're dealing with: Here's a map I made of the House outset page today:

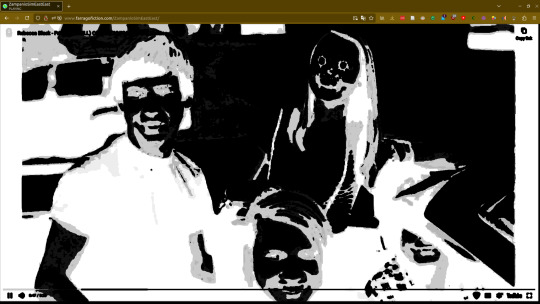
...And I say today because the House does change over time. Today (a friday) when I clicked on the EastEast route, for instance, I was greeted by this grotesquely distorted version of Rebecca Black's "Friday":
Okay, let's talk about what we have going on in the House map, starting from the doors and working out. (I've given some of these my own names for clarity.)
North
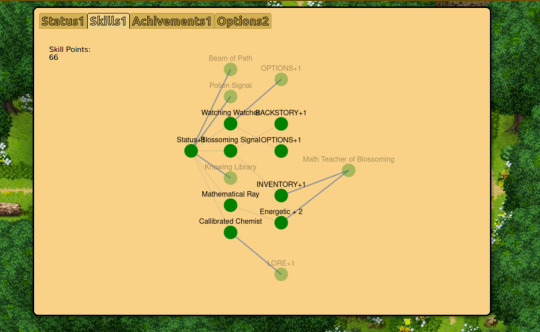
The Classpect Menu Game:
This, I think, is the main titular "ZampanioSim". It's the part that's intended to recreate the experience of a supposed old computer game, but by and large, you only experience the menu screen, not the rest of the gameplay. You can select attributes (based on Homestuck's Classpecting system + the Magnus Archives fears) gain points and select skills and (depending on your seed) eventually "beat the game". It's glitchy, it's a hellscape, there's an entity or two in the menu system that are trying to talk to you. It's great fun. Contains links to a rabbithole (which you can plug passwords into for more secrets) and + some secrets to you in the credits.
(While mostly the aspects seem to add flavor to the menu options, there's a special class called "Waste". This appears in neither TMA nor Homestuck, but comes from a fan or meta-joke that Andrew Hussie and Toby Fox, the writer and a major composer for Homestuck, are classpected* as the "Waste of Space" and "Waste of Time". By telling it you're a "Waste"you're more likely to get weird glitches and new options in your Classpect Menu game run - there's a fun recurring element in some of these games about the game changing depending on who you tell it is playing. I learned about the Waste trick from JR's youtube channel. Also, setting your birthday as Halloween might also do something.)
I have no idea if the different iterations of games here are substantially different. I haven't checked. There's a lot going on. "There's a lot going on" is a good summary of ZampanioSim overall.
*( Uh, classpecting is this in-Homestuck personality system where game players are a [Role] of [Element].)
Eyedlr: Eyedol Games is the company that supposedly made the original game Zampanio. Eyedlr is their spambot-filled tumblr clone, which also has secrets in it. (Actually, just assume everything has secrets out.)
East
The House Exploration game: It has the same setup screen as the Classpect Menu game, but this one drops you into a game with visuals: An infinite(?) procedural house you navigate with imagery derived from your choices.
Peewee's exploration game: When it's not blasting Rebecca Black's Friday But Weird into your ears, the EastEast route is another procedural infinite(?) maze, except that you type directions to Peewee, a snake guy with goggles who also moves around on his own. This one also introduces named characters we learn more about elsewhere.
Bathroom text: Procredural bathroom maze, unless it's just some text telling you to take a break. ZampanioSim really likes telling you to take breaks and hydrate, so that you can better appreciate and spread Zampanio.

Absolutely not. Also, I'm a busy woman. I have to finish this writing summary first.
South
The Train Game: a game - notably not a maze - where JR walks down a series of train corridors and monologues to you about the game and the "reality" behind it.
The mazecrawler game: You tell a little guy how to navigate an infinite(?) maze - and if you choose right and open up your browser's Console menu, you can learn a great deal more about
West
The only West route is AdventureSimWest, which is an actual text narrative game where readers submit commands that the author incorporates into updates - just like early Homestuck. It's still going. The logs are extensive but it's mostly about the antics of a new employee at Eyedol Games, which is stuck in a time loop.
Other
Then there's some other scattered clickable text -
The truth about alt: An exchange between two shapeshifters.
A transcript: A dialogue between two people who apparently work for Eyedol Games.
The lower left leads you to an apparently rotating selection of other Zampanio-related games. I particularly liked NagaGirlfriend.
None of this is even the stuff you can reach this page exclusively through the Console menu.
And much more
And there's a lot of stuff that's NOT branching directly off of the house. There's other things you find buried in links or by searching - a discord and a wiki that both straddle the line between in-character and -out, Archive of Our Own content, a youtube channel, the Eyedol website...
Is there a "story" to ZampanioSim?
Yes.
Like I said, there's a lot I haven't seen yet. But what's going on is something like this:
JR is attempting to recreate this game, Zampanio, of course, and tap into its fanbase. The game Zampanio is an infectious meme. Eyedol Games is a transdimensional company that is perhaps both trying to spread the meme and contain it, by removing its spores, e.g. the Zampanio FAQ - the thing that inspired JR to make ZampanioSim - from the internet.
Various parts of the game recognize that they are fictional and may identify you the reader/player as "Observers".
There are a few recurring characters who have gotten swept up into the meme, either working for Eyedol or trapped in ZampanioSim or both, and have followed it from variant to transdimensional variant.
(this is an image from homestuck. it's a reference.)
Japes aside, this is a brain-bending, very cool, and completely ludicrous unfiction project which I believe is made mostly by one person with an unparalleled hand for web sorcery, whimsy, and vibes. The vibes are so good.
The host website, Farrago Fiction (which AFAICT is a multi-person project), hosts a number of often-homestuck-inspired weird games and simulators.
I know ZampanioSim is now a few years old and is still actively updating. Consider checking it out.
2024-08-24 edit: Part 2!
#zampaniosim#creepy shit#light's arg notes#arg#unfiction#light writes#homestuck#house of leaves#light listens to the magnus archives#zampanio
140 notes
·
View notes
Photo


twitter | theme by sage
get the code: static preview / live preview (temporary)
inspired by twitter - free through dec 31st as part of my holiday sale ♡
features (more info below the cut):
optional: music player, featured posts, blogs, updates, tags on click, glow effect
customizable: description, colors, body & title fonts, font size, & blog title
search bar, day/night, tumblr controls, & scroll to top buttons
sticky top post info with a drop down menu
responsive design, 3 border radius (corners) options, uploadable profile & header images
this theme uses tabler icons
nothing needs to be changed in the code, everything can be changed in the customize panel!
terms:
reblog if using
do not touch the credit
view all terms
credits listed in the code / credits page
please consider supporting me ♡
make sure you read through this post before asking questions!!
header
header image is 600px x 250px, it will crop to fit and is adjusted depending on screen size
if there’s no uploaded header image it will be a solid gradient background
the profile image is 100px x 100px & will default to your icon if no image is uploaded
the home/ask/follow buttons will become fixed to the header at the top of the page as you scroll
up to 3 header stats each with an icon and text
includes links to home, askbox, archive, and my credit
i recommend keeping your custom title pretty short!!
sidebars
the right sidebar can be toggled completely off if you don’t want it at all, otherwise the featured posts, blogs, & updates sections can be individually toggled
responsiveness:
the right sidebar will disappear and a sidebar button will appear to toggle it on/off
the left sidebar links will convert to icons only
the music player will become toggleable with the right sidebar
for very small screens, the top buttons on the left will become a footer
left sidebar links: up to 7 sidebar links
featured posts: 4 featured posts each with an image & url
blogs: up to 3 blogs each with a link to the blog & a follow button
updates:
up to 4 updates each with a title & text
i recommend keeping your update text to only one line
uploading your song:
i recommend using google drive to host your mp3 files - below is a brief explanation for how to do this but you can also see the resources provided here by glenthemes and more links on my credits page
to start you need an mp3 audio file, once you have the one you want go to google drive and click: + New ➞ File upload
select your mp3 audio file and click open
open your newly uploaded audio file in google drive and click the three dots on the top right, then click Share and under General Access change it to Anyone with the link can view
copy the sharing link provided, it will look something like this: https://drive.google.com/file/d/1pBA6KdlLEzoEZPQ6hmaSr9LGLeCQGPxz/view?usp=sharing
go to the following site and paste your sharing url in the first box provided: https://www.joelgrayson.com/drive-download-link-generator
your final product should look something like this: https://docs.google.com/uc?export=download&id=1pBA6KdlLEzoEZPQ6hmaSr9LGLeCQGPxz
make sure the music player is toggled on in the theme, paste your audio link in the Song URL field
#twitter#themehunter#theme hunter#twitter theme#codehunters#phantom code#phantom theme#tumblr themes#tumblr codes#allresources#completeresources#tumblr resources#userbru#userdre#usernik#useraashna#tuserlucie#tumblr theme#music player#responsive
2K notes
·
View notes
Text
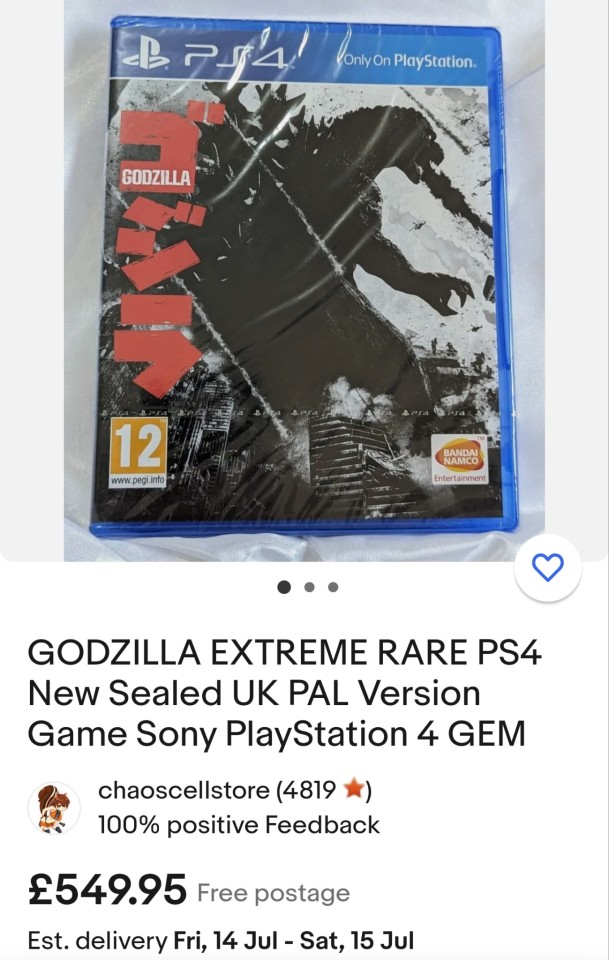
Something I really lament is the move towards digital media. Slowly we start to never own the things we like. Even if we "buy" a digital game, or movie or show. It's locked behind a certain platform or service. Once it shuts down we lose it forever.
(me when big booby anime girl explosion Is taken off of Netflix)
I also feel like there's a certain charm to owning physical media, like things you can hold and the satisfaction from pressing a clicky button or putting a disc or cassette in and seeing it work.
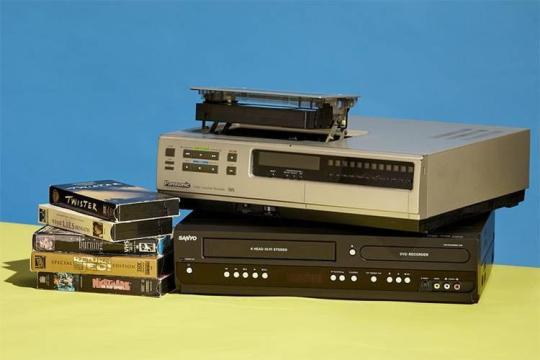
(oooh so classy so retro so.. expensive in the modern day)
More people should try to make copies of what they own digitally, or try to buy physical media before it's lost from streaming services and digital storefronts forever. Like the case with certain games like Godzilla 2014 and Transformers War for Cybertron. They don't exist digitally anymore. Only hard copies exist outside of emulation and at insane resell prices like... INSANE ones for a mediocre Godzilla game
So yea. Buy some more CDs of those albums you have on replay! Buy a DVD of that niche obscure anime you like! And most importantly PLEASE PLEASE START MAKING HARD BACKUPS OF SHOWS YOU LIKE THAT YOU PIRATE!!! media preservation is important!
(me downloading every episode of Daredevil onto my hard drive to burn to a DVD later so I can give it to all my friends)
This is now going to be a Comprehensive guide on how to rip a CD
POLL TIME!
Burning and Ripping Disc's❤️❤️💕💕🏳️⚧️🏳️⚧️
STEP ONE:
BUY A CHEAP BLU-RAY/DVD DRIVE FOR YOUR WINDOWS COMPUTER
here are some I recommend!!!
i personally use this pioneer one :)))
DVD drives in general are relatively cheap from 30-20 smackeroos, but Blu-ray drives are around 80-100 bucks depending on the manufacturer but offer better support for copying HD video such as on a Blu-ray.
STEP TWO:
FIND A PIECE OF MEDIA YOU ENJOY.
in this case its gonna be a CD!!
i really enjoy Vespertine by Bjork, but i wanna have it on my computer just in case anything happens to my CD. SO. ill open Windows Media Player
(she hasn't changed since 2011 <3333 be urself girl)
NEXT
ill insert the disc into the player. and it'll start playing!
Pause the disc and go into Rip settings
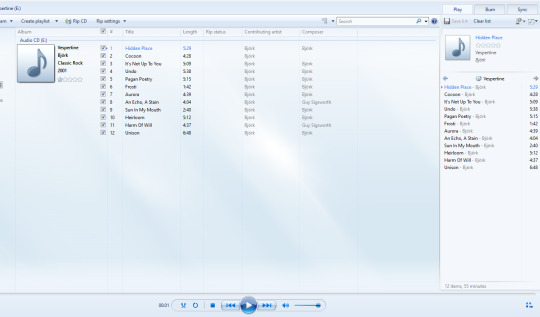

NEXT!! select the format!
if you want to conserve space and don't mind sacrificing audio quality select MP3! if you want to hear the same level of audio quality as preserved on the CD, select a format labelled LOSSLESS. I recommend .WAV files as they'll work with most devices including an android phone or iTunes on PC (more on that later ;3 )
NEXT!
create a folder on whatever u wanna save ur music to! (u can call it whatever u want the world is your oyster bestie)
THEN!!! FINALLY
go into more options on the Rip Settings menu!
select ur folder and press Rip CD!!!!
the fun thing of this now, is that you can pull these files on your computer and put it onto your Android device so you can listen to your hearts content without lugging around your CD in a player at high quality without any subscription service with free reign of who you can give your download to!
But Magenta! what if i have an iPhone?
ohohoo fear not bestie because iTunes on PC has an even EASIER way to do it
because simply putting in a disc with iTunes downloaded prompts THIS

(oooo so new age)
and if you have apple music on your iPhone this will sync to your phone if you logged into iTunes on PC!!
thank you for coming to my TED talk

#vhs#media preservation#piracy#no like for real. please just download the stuff u pirate just in case it gets taken down#ateez#atz#x files#godzilla#Björk
510 notes
·
View notes
Note
Hello! I was wondering if u wouldn’t mind sharing a tutorial on how u making ur gif boarders? post/714133310754979840
hiii, yeah of course!

there are multiple ways to do it i'm sure, i'll share the two methods that i use the most. first tho, you need to create your selection for that border. (rest of tutorial under the cut, i use photoshop cs5 for reference)
in that example gif, the border is 10px away from all sides, and my gif dimension is 540px wide (width) and 440px tall (height). if i want a border that's 10px away from all edges, i need to remove that number from the dimension numbers.
540 - (10 + 10) = 520px for the width
440 - (10 + 10) = 420px form the height.
once you have your numbers for your gif, select the rectangular marquee tool. under style choose "fixed size" and enter the width and height in pixels (don't forget to add the letters "px" if they're not there).

once you have the numbers, click wherever in the canvas. this will create a selection with the right dimension. you can then move the selection around (with the mouse or arrow keys) until it's centered.
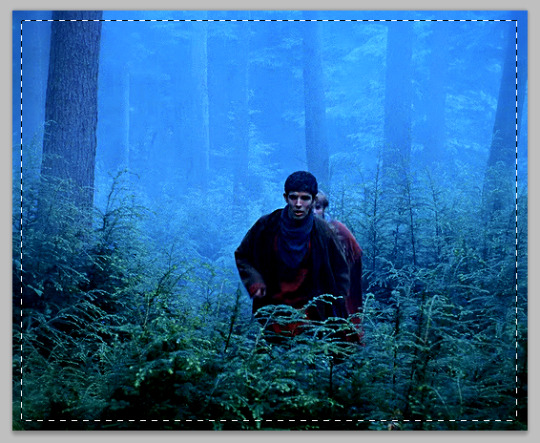
you can definitely draw the shape by hand without bothering with numbers if you want, but i like knowing that the border is the same ratio as the gif.
(if your gif is quared, you don't have to bother with numbers, you can just select "fixed ratio" in the style and enter 1 in both width and height, for a perfect square ratio. and then you can draw a box with the marquee tool until you reach the desired size.)
FIRST METHOD: LAYER STROKE
with that selection still on, create a new empty layer. this is where the stroke will go.

then go to the top menu: Edit > Stroke...
a stroke settings window will pop out, where you can choose the thickness in pixels, as well as the color and blending mode (i usually leave it at normal and edit the layer's blending mode if i want, instead). you can't edit these settings later, so be sure of what you want (which is why i usually prefer the second way).

this is what a white 1px stroke border looks like:

SECOND METHOD: LAYER STYLES
i prefer this way, because you can later edit the color and thickness of the border if you want.
so, still with that selection activated from earlier, go to Layer > New Fill Layer > Color Fill. pick whatever color, this doesn't matter at all, we won't actually use that color fill. put the Fill of that new color fill layer at 0% opacity.

now that this layer is basically transparent at the moment, double click on it to enter the layer style options.
click on the Stroke option at the bottom and enter your desired values for size and color. you can change this later if you wish.
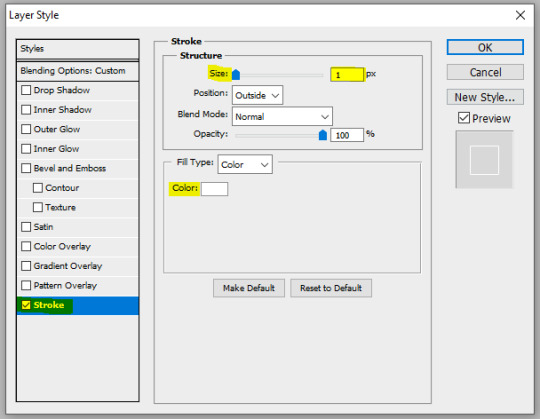
and this is what a white 1px stroke looks like with this method (looks basically the same yeah lol, but this method gives more flexibility)

CENTERING THE BORDER + FINAL TOUCHES
to make the border more interesting than just a white 1px stroke, you can change the layer's blending mode, as well as giving it more styles, such as: outer glow, inner glow, gradient overlay, color overlay. and don't hesitate to play with the blending modes for each of these layer styles too!
here's an example of settings with outer glow, inner glow, and a gradient 2px stroke:


to make sure the border is centered, here's a quick tip: select the stroke layer and the move tool. then with the keyboard, do Ctrl + A, it will make a selection of the canvas. then, click on these symbols at the top. it will center your layer horizontally and vertically.

and that's it :)
#alie replies#Anonymous#*ps help#tutorial#photoshop#resource#allresources#completeresources#usersmia#userabs#usercats#resources#resourcemarket
180 notes
·
View notes
Text
useful information: How to get a USB Blu-Ray player to work on your computer
Not a post about vintage technology, just an explanation of what you think might be simple to do but isn't: There are Blu-Ray players that plug into your computer by USB, and you discover that just plugging it in doesn't make it work* in the same manner that CD-RWs or DVD-RWs are automatically recognised and function. You will see "BR Drive" in My Computer and the name of whatever movie you have inserted, but that's as far as you're able to go.
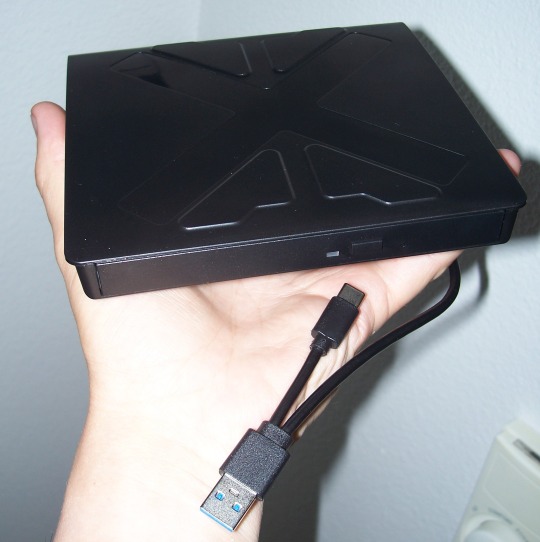
*There is software you can buy to make a Blu-Ray (internal or external) function, sure, and if an internal came with your computer it's likely already installed -- but if you're like me you don't have that software, you're cheap and won't pay for software, and you want to use what you have installed already or find free solutions.
Looking in the Blu-Ray drive's package, there's not a lot of info about what you're supposed to do. The above no-name Blu-Ray player cost $40 from a popular website; name-brand ones can set you back $120 or so. Looking around online for those instructions, I never saw the whole set of directions in one place, I had to cobble them together from 2 or 3 sites. And so here I share that list. To keep out of trouble, I'm not linking any files -- Google will help you.
Get VLC, the free video player available for pretty much any operating system. Thing is, it doesn't come with the internals to make it work with Blu-Ray even if when you go to the Play Media menu there is a radio button for selecting Blu-Ray.
Get MakeMKV, a decoder for reading Blu-Ray disks. This had been totally free during the beta testing period but it's come out and has a month or two trial period you can work in.
Get Java if you don't already have it. Reason for this is, the menu systems on Blu-Ray disks uses this... technically it's not required, however it does mean you don't have options such as special features, language and sound changes, or scene selection if you don't have Java installed; insert a disk, it can only play the movie.
Get the file libaacs.dll online so you have AACS decoding. I am told it hasn't been updated in awhile so there may be disks produced after 2013 that won't work right, but you won't know until you try.
There's a set of keys you will also want to have so that the player knows how to work with specific disks, and so do a search online for the "FindVUK Online Database". There will be a regularly-updated keydb.cfg archive file on that page to pick up.
Got those three programs installed and the other two files obtained? Okay, here are your instructions for assembly...
In VLC: go to Tools, Prefs, click "show all"… under the Input/Codecs heading is Access Modules then Blu-Ray: Select your region, A through C. You can change this if you need to for foreign disks. Next related action: go to My Computer and C:, click into Program Files and VLC, and this is where you copy the libaacs.dll file to.
In MakeMKV: click View, then Preferences, and under Integration - add VLC.
Confirm that Java is set up to work with VLC by going to the computer's Control Panel, going to System Properties, and into Environment Variables. Click System Variables, and click New to create this key if it doesn't already exist:
… Name: Java
… Value: [the location of the Java 'jre#.##' folder... use Browse to find it in C:\Program Files\Java]
Let's go back into My Computer and C:, this time go to Program Data, and then do a right-click in the window and select New and Folder. Rename this folder "aacs" (without the quotes), and then you click into it and copy the keydb.cfg file here.
REBOOT.
And now you should be able to recognise Blu-Ray disks in your player and play them. Three troubleshooting notes to offer in VLC:
"Disk corrupt" -- this means MakeMKV has not decoded and parsed the disk yet, or that you don't have the libaacs.dll in place so that it can decode the disk.
...After checking the VLC folder for the DLL to make sure, launch MakeMKV, then go to File, Play Disk, and select the Blu-Ray drive. Now it will grind a bit and figure out the disk's contents.
A note appears when a movie starts saying there will be no menus, but the movie plays fine -- Java isn't running.
...Invoke Java by going to the Java Settings in Start: Programs. You don't have to change anything here, so Exit, then eject the disk and put it back in to see if the movie's menu now appears.
Buffering between chapters, making the movie pause for a few seconds? There is a setting for this but I need to find that info page again for where that is. (If you find it, tell me where it is!)
I don't claim to know a lot but if you have any questions I might have some answers or suggestions. So far I've watched "Office Space" and Disney's "Coco" without any issues beside occasional buffering.
82 notes
·
View notes
Note
Hi I read your post about vertex persona chart and the part you said to save it and check the astroclick travel map to see where we are meant to travel and why or where can we feel at home
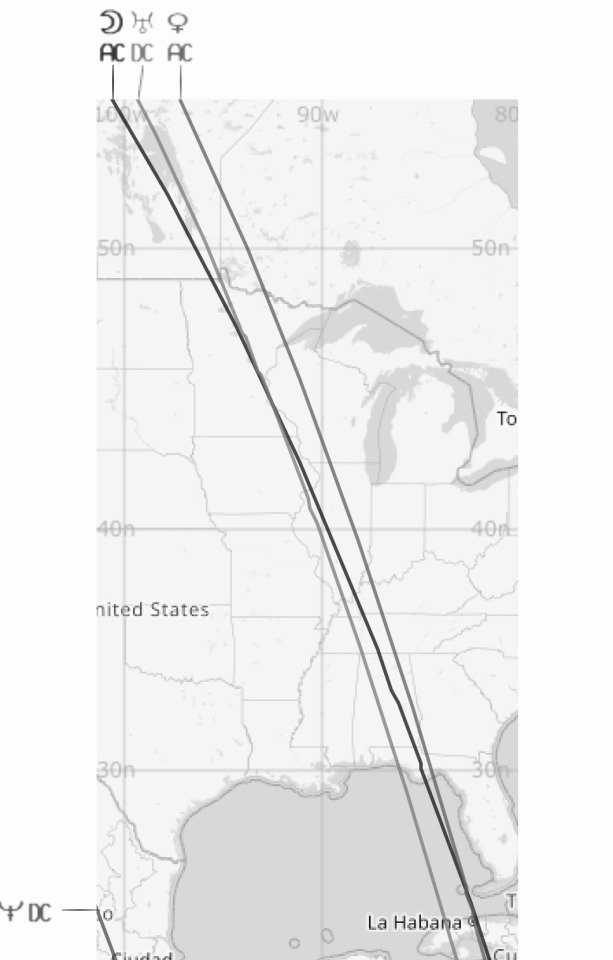
So I'd like to ask how can we do that? Can you make a post of how to read the lines please? Thanks
how to convert your vertex persona to an astromap and some observations for when you read this astromap
first get the persona chart
on astro.com go to the "extended chart selection" page, for "chart type" use the "persona chart" option, click the big green "show the chart" button, the vertex is already preloaded in the options so use the drop down to select "vertex", finally click the "go!" button next to your name.
now convert the chart into a map
click the "save" button, two options will appear - click "add to 'my astro'", a pop-up message will say it is added to your collection - use the "click here" hyperlink to bring you the vertex persona's "extended chart selection" page, click on the plus button in the "horoscope for" box, two options will appear - click the "edit" button, select any gender aside from the preselected "event/other" so the astromap can be formed (because it requires a gender to become a map), click the green "continue" button, click on the three lines in the upper right corner for the side menu to appear, click the "locational astrology" section, two options will appear - click "astroclick travel", and you are there!!
on to the observations!
☆ sun/dc line can make you feel like you where bound to meet people who give you genuine attention
☆ sun/mc line can show you where you feel the most yourself and/or will help you realize who you are / who you want to be
☆ moon/ac line will show you where you want to settle down and make a house a home
☆ moon/ic line can show where you reconnect with your mother and/or make you feel vulnerable like a child
☆ moon/mc and/or the vertex persona's 4h ruler / mc line will show you where you are meant feel right at home - you are likely to adjust well to the change of scenery too
☆ when you visit a mercury line you feel like it is fate that brought you there - things might weirdly line up, you might have important conversations, and/or meet important people
☆ mars/ic lines are where you tend to make a lot of impulsive decisions that lead you towards your fate
☆ mars/mc is where you can really get to work on a passion project of yours
☆ mars zenith is where your passions can become your career - your ambition will serve you well
☆ jupiter lines tend to make you feel happy, fulfilled, and lucky
☆ uranus/asc and/or uranus/mc lines are where your fan base is majorly from and/or where you can amass a lot of followers
☆ uranus/ic lines are where you can be your most free and authentic self
☆ uranus/dc lines are where unexpected huge life changes occur
☆ neptune/dc is where your dreams can come true
☆ neptune/mc is where you will transcend this lifetime
☆ pluto/dc lines are where a lot of people are obsessed with you
like what you read? leave a tip and state what post it is for! please use my "suggest a post topic" button if you want to see a specific post or mythical asteroid next!
click here for the masterlist
click here for more related to planetary & object persona chart information
want a personal reading? click here to check out my reading options and prices!
© a-d-nox 2024 all rights reserved
#astrology#astro community#astro placements#astro chart#asteroid astrology#natal chart#persona chart#astrology tumblr#astrology chart#natal astrology#astrology readings#astrology blog#astrocartography#astro notes#astro observations#astroblr#vertex persona chart#vertex
127 notes
·
View notes
Text
how to transfer your old pokemon to pokemon home before it's too late!!!
the wi-fi services for the nintendo 3DS and WiiU are shutting down in early april 2024, and while it specifically lists pokemon bank and poke transporter as being available post-shutdown, there is no guarantee of how long that may be for. there will likely come a time when these services shut down, and it could be in the relatively near future.
it is also pretty much impossible now to transfer pokemon to the switch's Home service with alternative methods such as PKHeX (popular pokemon save editor for the uninformed) due to the implementation of server-side Home IDs tracking pokemon at all times - the details of that aren't super important for this post, but point is, whenever bank shuts down, unless nintendo makes an offline way to transfer to home, it will be impossible to move pokemon from the old gens to the new, even with alternative/hack-y methods.
i write this guide with the intention of making this process easier for people since transferring pokemon has changed so much over the past two decades that it's a bit of a mess, and in a timely manner to give people time to finish the process. i'll be organizing by generation so feel free to skip to any part of the guide you need. (keep in mind that transferring is permanent, your pokemon cannot go back afterwards!!)
(by the way it would mean a lot to me if you weren't overwhelmingly negative of pokemon in the tags/reblogs. i get that pokemon transferring being an online service sucks but reading that stuff in my notifications constantly is really tiring </3 make ur own post to talk about that)
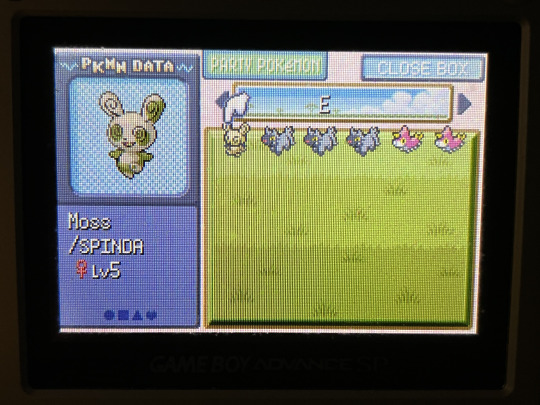
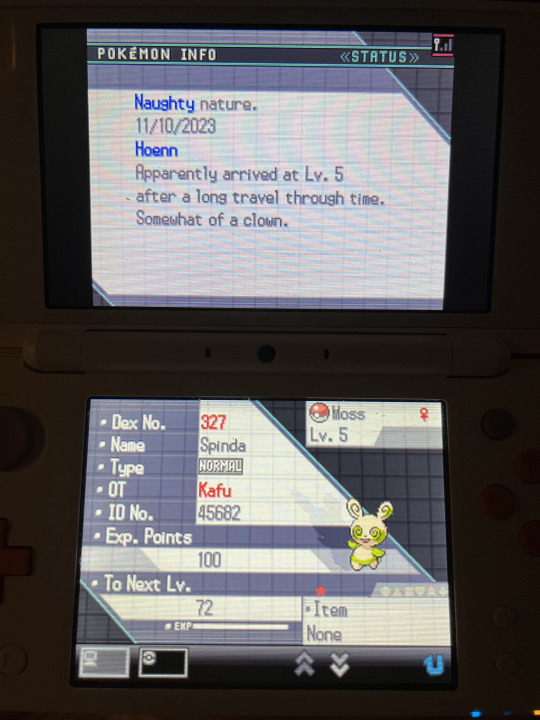
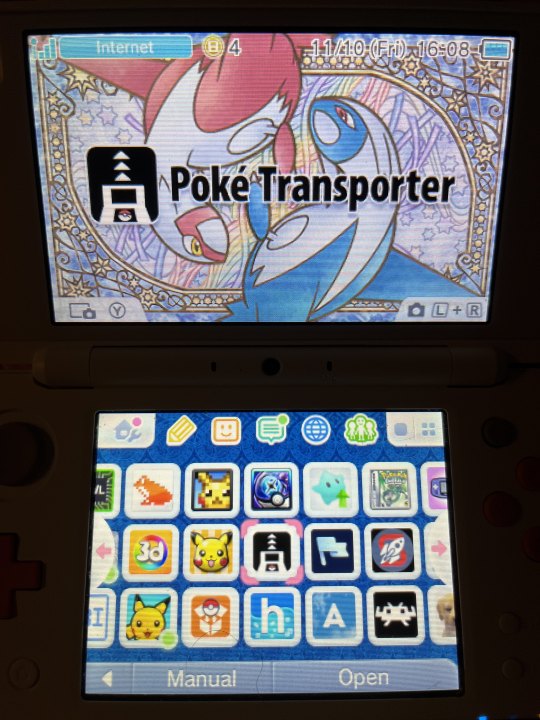
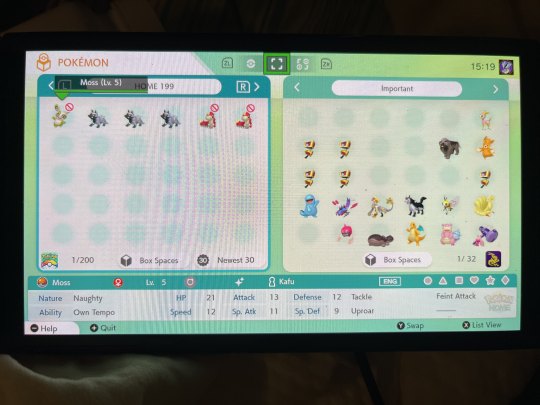
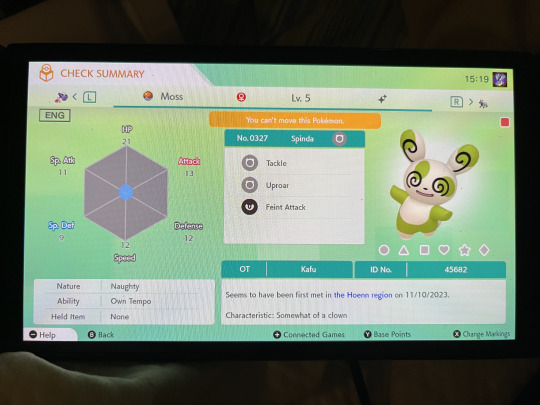
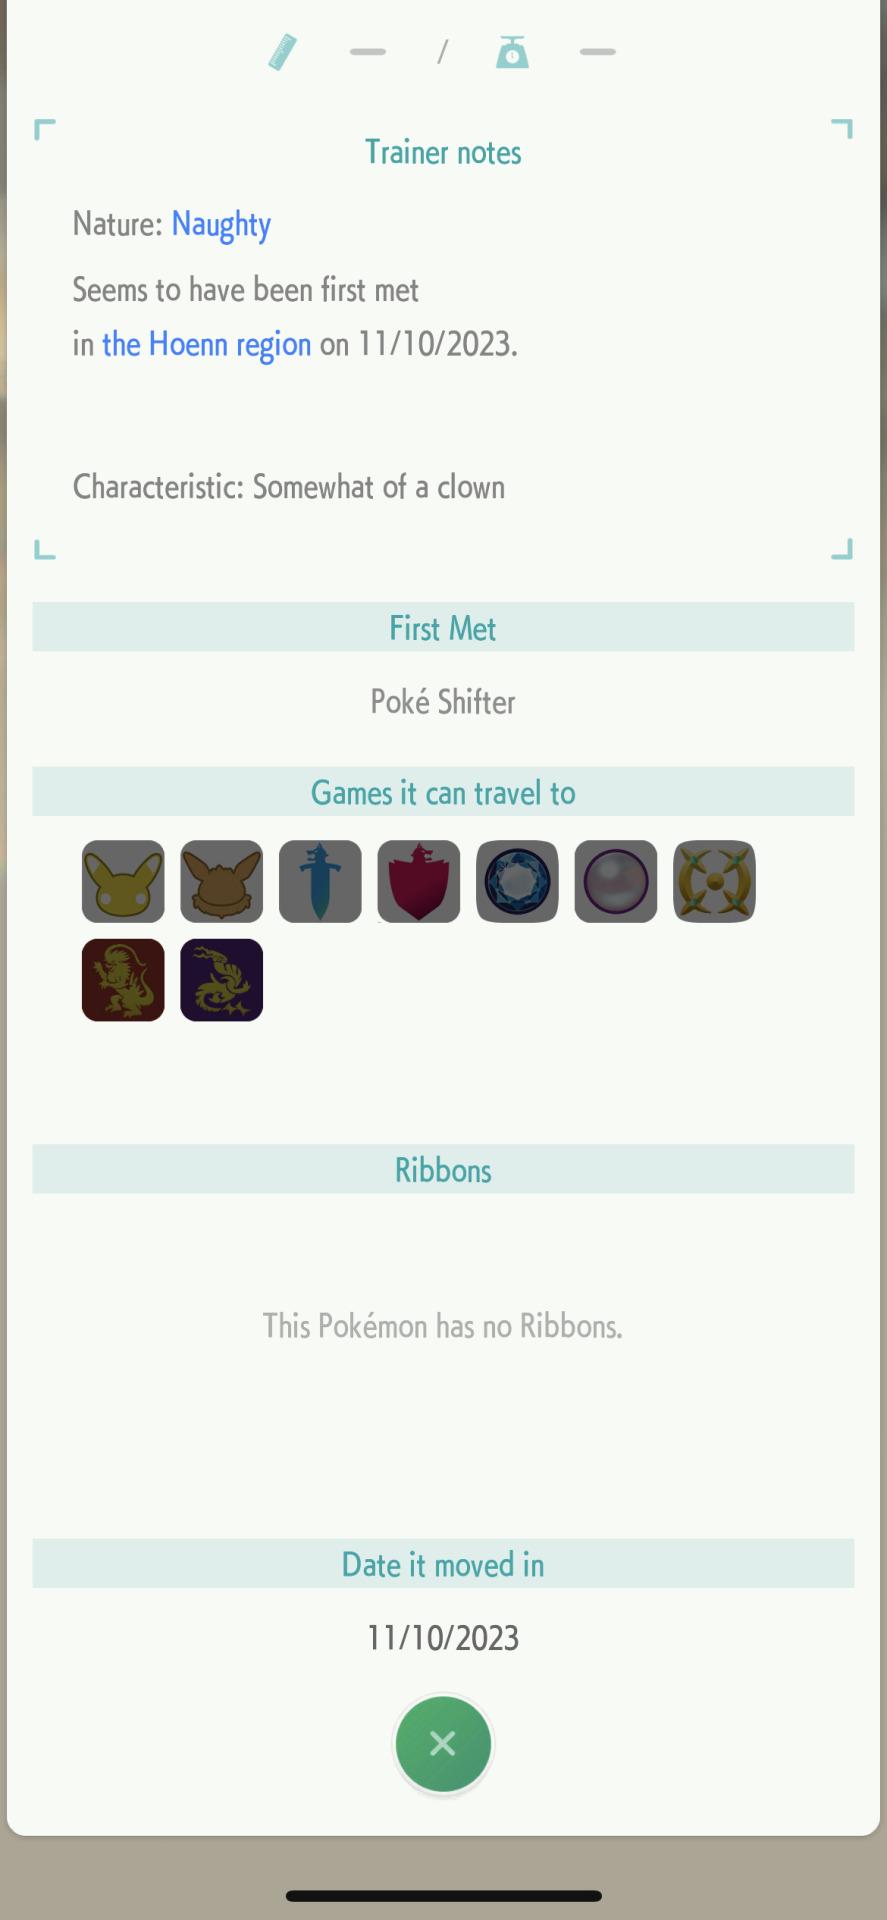
to walk you through, i'll be transferring this random shiny spinda i hatched in emerald version all the way up to pokemon home. her name is Moss :]
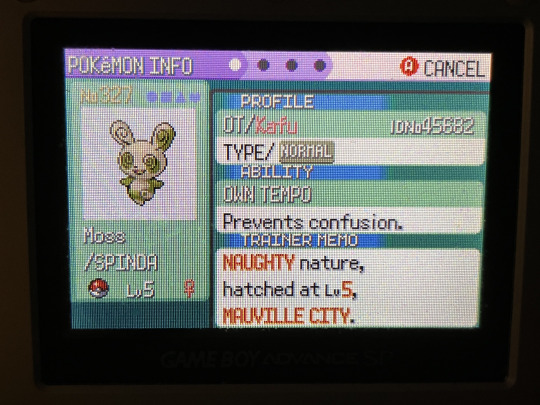
below the cut since this is long as fuck sorry LOL
GEN 1/2 -> 3 (aka RBY/GSC -> RSE/FRLG)
this is impossible! as for the Virtual Console releases of the gen 1/2 games on 3DS, more on that later in the gen 5 -> 6/7 section.
GEN 3 -> 4 (aka RSE/FRLG -> DPPT/HGSS)
what you need:
a copy of RSE or FRLG
a copy of DPPT or HGSS in the same language as the RSE/FRLG copy that has beaten the champion and has access to post-game areas, preferably HGSS because it lets you transfer unlimited times as opposed to DPPT's once-per-24-hours limit (unless you happen to have korean DPPT/HGSS, which is not language locked in terms of transferring)
either an original DS or a DS lite, the old ones with the GBA slot at the bottom
the steps:
#1. you can only transfer 6 pokemon at a time, so get whatever 6 pokemon you want to transfer up together in gen 3. if you're intending to transfer less than 6 pokemon, you'll need to catch some extras since you have to transfer the full 6 every time (i usually just catch a bunch of extra mons on the first route, which is what i've done here with the poochyenas/wurmples)
#2. put the gen 3 game into the GBA slot of the DS, and the gen 4 game into the DS slot. both games should appear on the home menu after turning on the DS.
#3. load the DS game and spam A past the title screen. before loading your save, scroll down. you should see a "MIGRATE FROM (GAME NAME HERE)" option. if you don't, either the GBA game isn't reading properly, or you have not visited Pal Park in your gen 4 game of choice. in HGSS, the Pal Park is located in Fuchsia City, and in DPPT, the Pal Park is located at the end of Route 221 below Sandgem Town.

#4. select the aforementioned migration option and pick the pokemon you want to transfer.
#5. navigate to the Pal Park and complete the Catching Show, where you re-catch your transferred pokemon in the wild. this does not overwrite what pokeballs they were originally caught in! you will need to bring a pokemon with Surf if you have any Pokemon that spawn in the water areas. you can check what location the pokemon you transferred will be in on bulbapedia.

#6. say yes to storing the caught pokemon in your PC boxes and they'll be there!
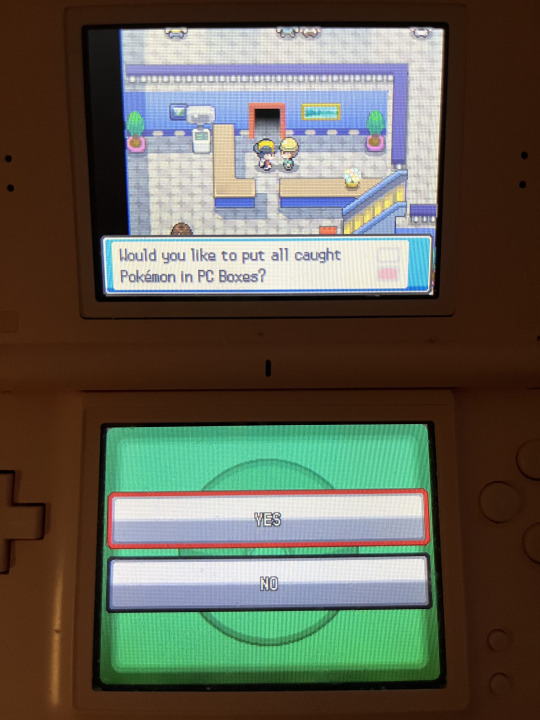

important things to note:
pokemon with HM moves will be blocked from transfer, so make sure to use the Move Deleter to remove HM moves from any pokemon you're transferring in gen 3 before trying to transfer. in RSE, the Move Deleter is in Lilycove City, and in FRLG they are in Fuchsia City.
gen 3 -> 4 is the only step in the transfer process where held items transfer up as well, meaning that if you attach a valuable item such as a rare candy, master ball, or TM to a transferred pokemon, you can take it off that pokemon and put it in your bag in the gen 4 game.
an aside about colosseum/XD gale of darkness on gamecube:
you can transfer pokemon from colo/XD as well! unfortunately you'll need to have beaten colo/XD, and then you will also need to beat the gen 3 game... in FRLG, you even have to complete the postgame ruby/sapphire quest on the sevii islands to unlock trading with the gamecube games. once you do all that though, you can navigate to the pokemon center basement in Phenac City to trade with your gen 3 GBA title. to do this, you'll need a gamecube or wii with gamecube compatibility, a GBA (or GBA SP), and a GCN -> GBA link cable to connect the two consoles.
GEN 4 -> 5 (aka DPPT/HGSS -> BW/BW2)
what you need:
a copy of DPPT/HGSS
a copy of BW or BW2 in the same language as DPPT/HGSS copy that has beaten the champion (or N in the original BW) and has access to post-game areas.
two DS consoles of any kind (3DS is also fine!)
the steps:
#1. get the pokemon you want to transfer together in your gen 4 game's PC boxes. you can only transfer 6 pokemon at a time. if you have less than 6, catch some extra pokemon, since you need to transfer the full 6 every time. save it and turn off the DS with the gen 4 game.
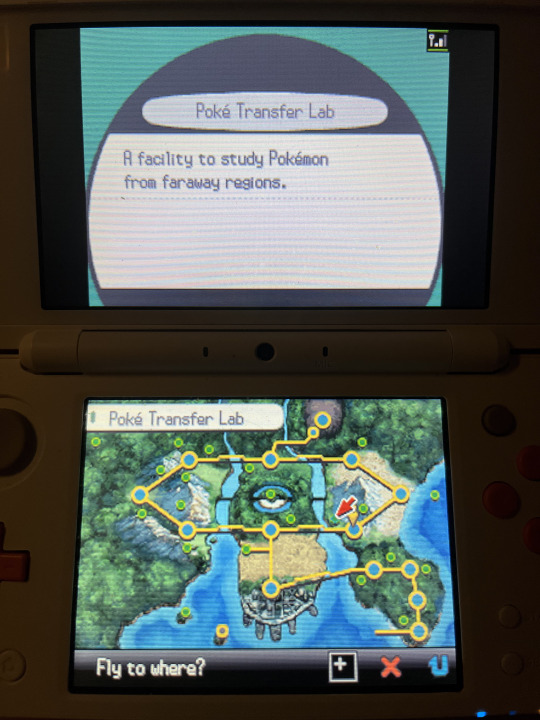
#2. turn on your gen 5 game and navigate to the Poke Transfer Lab. personally i just fly to Black City/White Forest and head west.
#3. talk to the NPC in the lab to start the transfer process. you will be prompted to turn on your other DS again and open DS Download Play with your gen 4 game inserted. do that and download the Poke Transfer app that comes up.


#4. select the 6 Pokemon you want to transfer when prompted.
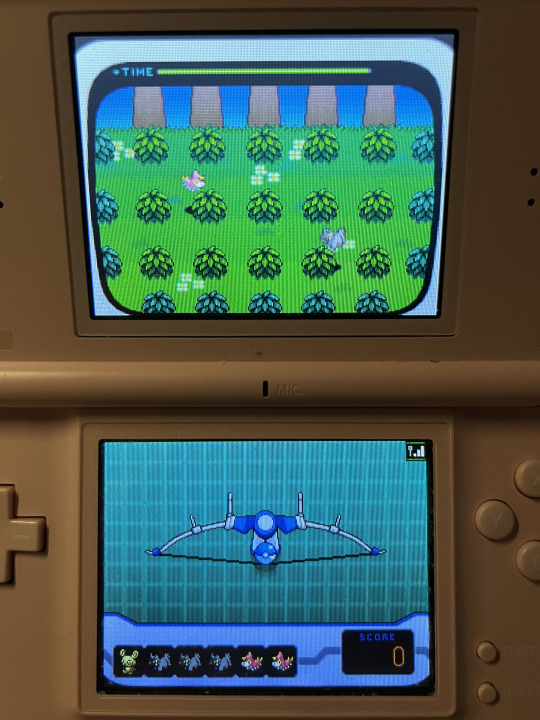
#5. play the transfer minigame! just drag the... bow? (lol) on the bottom screen to aim your pokeballs. there's technically a time limit, but it's very generous, and your final score doesn't matter.
#6. say yes to transferring the pokemon once you're done and they'll be placed in your PC boxes!
important things to note:
pokemon with HM moves will be blocked from transfer, so make sure to use the Move Deleter to remove HM moves from any pokemon you're transferring in gen 4 before trying to transfer. in DPPT they're in Canalave City, and in HGSS they're in Blackthorn City.
the level the pokemon was obtained at and the date it was obtained is changed upon transfer to gen 5 - it will have the met date of your DS clock and the met level of the level it was at the time of transfer. if you'd like to preserve a pokemon's met date, make sure to change the DS clock to the proper date.
GEN 5 -> 6/7 (aka BW/BW2 -> 3DS TITLES/BANK)
what you need:
a copy of BW/BW2
a copy of any 3DS pokemon game (XY/ORAS/SUMO/USUM)
a 3DS (or 2DS, i'll just be referring to them all as 3DSes here) with the poke transporter and pokemon bank apps installed. these were free apps that were once downloadable from the 3DS eShop, but the 3DS eShop is no longer available, so if you don't already have them installed you will need to explore alternate methods, AKA hacking your 3DS and injecting them in. that's outside the scope of this guide but you can find more information here on 3ds.hacks.guide. (do not attempt to follow any 3DS hacking guide not on this website, they could be outdated and harm your 3DS!)
a nintendo network ID that your 3DS is logged into (also outside the scope of this guide but if you don't already have one, it will prompt you during the process to make one)
internet connection
the steps:
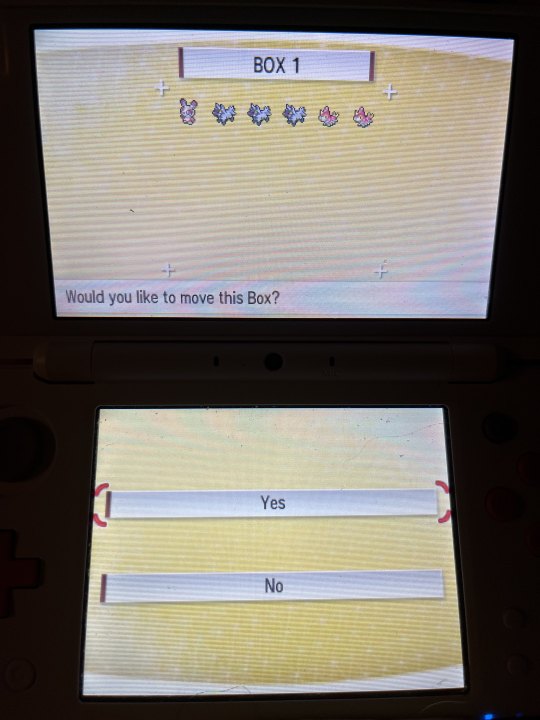
#1. poke transporter defaults to trying to transfer every pokemon located in Box 1 of your PC, so go into your gen 5 game and put every pokemon you want to transfer into Box 1, and take anything you don't want to transfer out. if you want to transfer more pokemon than you can fit in one box, you'll have to transfer multiple times.

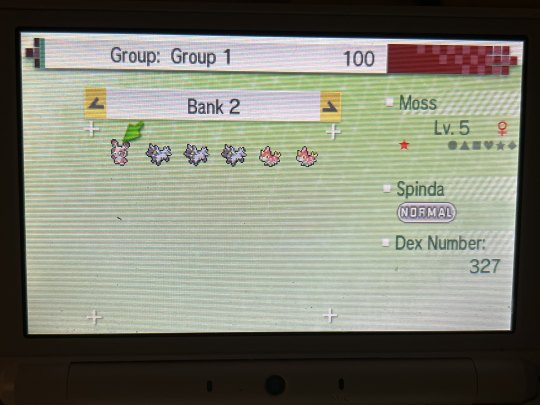
#2. open poke transporter with your gen 5 game inserted into the 3DS' cartridge slot. after pressing A through some menus and selecting the gen 5 game when prompted, it should ask if you want to transfer the pokemon in Box 1, with a preview of the pokemon inside. confirm and let it do its thing. after poke transporter is finished, the pokemon you transferred will be in the special Transport Box in bank.
#3. make sure you either have a 3DS pokemon title downloaded onto your 3DS, or swap out your gen 5 cart for one, it doesn't matter which.
#4. close out of poke transporter and navigate to pokemon bank. at the time of writing this guide, bank is still online and is free for everyone without a subscription - the main menu has an infinite "free trial" period number.
#5. select "use pokemon bank" and pick a 3DS game to connect with when prompted. it doesn't matter which one, but if you're looking to see your pokemon in a gen 6/7 game right now, pick the one you want to move it into. viewing a pokemon in a gen 6/7 game isn't required to move to home later, though!
#6. the Transport Box is located one box to the left of Box 1 - navigate to it and drag your pokemon out into a normal bank box. now you can move them to any gen 6/7 pokemon game you want, or home later!


important things to note:
even though bank connects with both gen 6 and gen 7 games, once you place a pokemon into a gen 7 game (SUMO/USUM), you cannot transfer that pokemon back to a gen 6 game (XY/ORAS), so be careful!
an aside about the VC releases of RBY/GSC:
poke transporter can also be used to transfer pokemon out of the VC releases of RBY/GSC. these pokemon are changed pretty heavily, converting all their old gen data into pokemon's modern data structure. you can find more information about all the changes/conversions made on bulbapedia. these pokemon are considered gen 7 pokemon afterwards, and cannot be moved into XY/ORAS. pokemon with held items also cannot be transferred from VC titles and will fail to transfer.
if you want to transfer pokemon from cartridge RBY/GSC and have a save dumping device, it is possible to inject the cartridge's save file into the VC versions with Checkpoint on a hacked 3DS and then transfer that way. for GSC specifically, you'll need to edit your save slightly to make it compatible with VC GSC's save format. i personally made a converter for that here that you're free to use in-browser.
GEN 6/7 -> GEN 8+ (aka BANK -> HOME)
what you need:
a 3DS (or 2DS, i'll just be referring to them all as 3DSes here) with the pokemon bank app installed. this was a free app that was once downloadable from the 3DS eShop, but the 3DS eShop is no longer available, so if you don't already have it installed you will need to explore alternate methods, AKA hacking your 3DS and injecting it in. that's outside the scope of this guide but you can find more information here on 3ds.hacks.guide. (do not attempt to follow any 3DS hacking guide not on this website, they could be outdated and harm your 3DS!)
a nintendo network ID that your 3DS is logged into (also outside the scope of this guide but if you don't already have one, it will prompt you during the process to make one)
a switch with Pokemon Home installed, which can be downloaded for free from the switch's eShop. a nintendo switch online subscription is not required.
unfortunately, you WILL need a subscription to home's premium plan to do bank -> home transfers.
internet connection
the steps:
#1. open pokemon bank and make sure all the pokemon you want to transfer are in their own boxes, and any you don't want to transfer are not in the same boxes as the to-be-transferred pokemon.
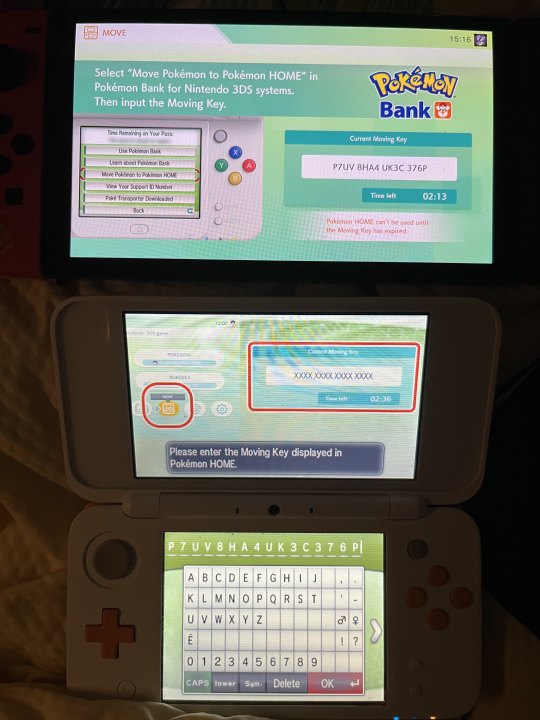
#2. go back to the bank home menu and select the "move pokemon to pokemon home" option. when you get the notice about the transfer being one-way, you'll need to scroll down to hit "Begin".

#3. you will be prompted to select what boxes of pokemon you'd like to transfer, so pick all the applicable ones.

#4. you will then be prompted to put in the moving key from home, so turn on your switch, open pokemon home, and select the icon that looks like a 3DS on the main menu. when prompted, choose "Ready!" to get the moving key.
#5. input the moving key on the 3DS, submit it, and wait for both apps to do their thing. once bank goes back to its title screen, you can turn off the 3DS.
#6. home will go back to its title screen as well, and depending on how many pokemon you moved, you may have to wait a few minutes to get back into the app. once it's done, the next time you open home, it'll prompt you to choose how to organize your transferred pokemon into home. pick whatever you see fit.
#7. congratulations, your pokemon are safe in home!!

important things to note:
unlike all pokemon games before the switch, pokemon can actually go backwards in generation on switch, so don't worry about transferring a pokemon into scarlet/violet locking you out of moving it to sword/shield, for example. (the exception to this is LGPE - nothing can be moved into LGPE and once a pokemon is moved out of LGPE, it can't go back.)
pokemon home actually has decent hack checks, so be careful when transferring hacked/glitched/otherwise illegitimate pokemon around.
pokemon from a gen 3/4 game will have their met location set to "Poke Shifter" - this is an alternative translation of the japanese name for the Poke Transporter.
pokemon on switch can only transfer into games that contain that pokemon in its dex, so not everything transferred can go into scarlet/violet, for example.
and that's it!!
there's a lot of other quirks to the pokemon transferring process at pretty much all steps, so if you run into an unusual issue or have specific questions about how pokemon data is changed in minute ways across the franchise, i would encourage you to do your own research, all of this stuff is pretty heavily documented by the fanbase. this is just meant to be a guide for casual users, and a quick reference.
this guide of course does not cover options for transferring in alternative ways, but it's worth mentioning that if you have a hacked 3DS and the ability to back up save files at any point from gens 3 -> 5, you can use PKHeX to transfer pokemon into the 3DS titles, then move them to bank and transfer to home normally from there. that's outside the scope of this guide and i'd also encourage you to do your own research for that.
happy transferring!
#pokemon#pokemon bank#pokemon home#long post#nintendo#of course it really sucks that we have to do this at all#ive been opposed to bank/home being online services since p much day one#but that's just how the cookie crumbles i guess#Sighhhh i have so much stuff to transfer myself lol#kiki was here#kiki.txt
210 notes
·
View notes
Note
Anon here!! How did you make the heart graphic for the power rentry?

hi!! i’ll put it under the cut since there’s quite a few steps. lmk if you need a more specific tutorial or images for any of the steps!!

1) finding the base
find the shaping mask you wanna use. you can look up “shaping mask png” or “mask png” on pinterest to find some. this is the one i used:

2) removing the background
to remove the background, use the selection layer in ibis paint x. to find this layer, go to the layers panel and it should be the one all the way at the top. it is titled “selection layer.” to remove the white background, select the bucket tool and select the white background. it should turn blue. then switch from the selection layer to the layer you’re removing the background from. look at the top middle of the screen. there should be a square composed of dotted lines that looks like this:
click on it and select “cut.” this will remove the white background. click on it again and select “remove selection area.” now you’re ready to continue!
3) creating a cleaner base layer
you might want to do this if you plan to add a stroke, as once the background is removed from the mask, it tends to leave some remnants behind. this makes the stroke look choppy and pixelated. to do this, take the paint bucket tool on a new, blank layer, and fill in the black part of the base with black. then, delete the base layer underneath the new layer. the hearts will become transparent (to see this better, change the canvas from white to transparent in the layer menu) and the base will hold its shape. you can also remove the hearts in the previous step, but this tackles two birds with one stone and (in my opinion) looks cleaner.
4) filtering manga panels
to make the manga panels pink, i looked up “pink manga polarr code.” pretty much any one will do, but this is the one i used:
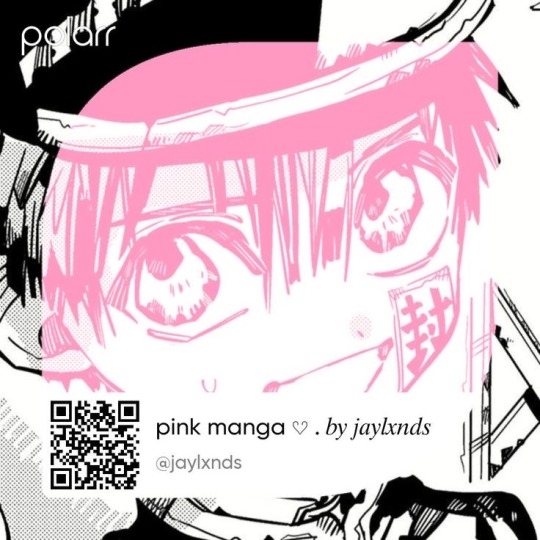
for the rest of this step, you’ll need the app polarr. once you get the app, go to the edit section of the menu on the bottom. click “open photos” and insert the manga panels you wish to change the colors of. then, click “filters” and “import filter.” from there, click “import qr code” and click on the filter in your gallery. the filter will go into polarr, and you can just click instant export or you can save it and then export it. it’s up to you.
5) masking the panels
import the images you just filtered into your canvas. now we’ll use a clipping layer to have them take the shape of the base. click on the image layer you want to do this with, and then hit the clipping option in the layer menu. this will have it take the shape of the base.
6) coloring the hearts
now we’ll add a new blank layer atop the clipping layers. i color picked the pink color from the image, and then used the bucket tool to fill in each of the hearts.
7) adding the extra pngs
for this step i used the sticker option in picsart and a transparent canvas to collect the pngs. i believe i looked up “pink png” in the search bar, but i’m not sure. then i imported them into the ibis paint x project and positioned them where i wanted them to go. download transparent pngs of the project (one of each image you added). toggle the eyes on and off so that you can save the different versions (not individual layers. i just mean if you added two manga panels, make sure you get one with one manga panel and one with the other).
8) creating the gif
search up ezgif animated gif maker. it should be the first option that comes up. for this, i typically switch to “manually ordered upload” opposed to “alphabetically ordered opload” (the default) so i have more control over the order of the images in the gif. once you upload them into the site and you get to the editing menu, set the delay time to 100 and click the box that says crossfade frames.
andddd you’re done!!! i hope this was somewhat comprehensible and i didn’t miss any steps xD
177 notes
·
View notes
Text
Old mod page, abandoned 3/2/24; New mod page @ Godsibb
Finally, after 2 years of work, it is complete. -But still being updated.
There's a Japanese version of the mod now!
今は日本語版のMODがある!
This is a mod for Xenogears using Retroarch's Beetle PSX HW core real-time texture replacement feature. (It requires the Vulkan driver, so make sure your graphics card supports that.) (Duckstation doesn't have a similar option, unfortunately.)
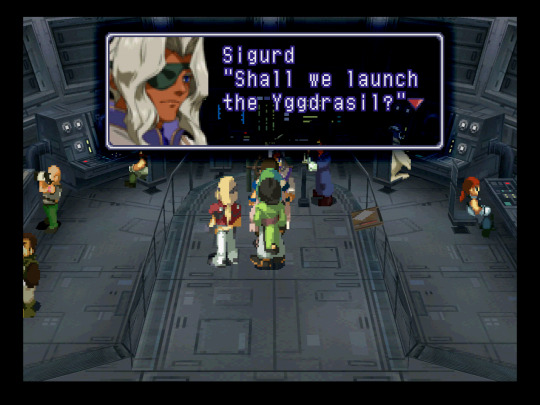
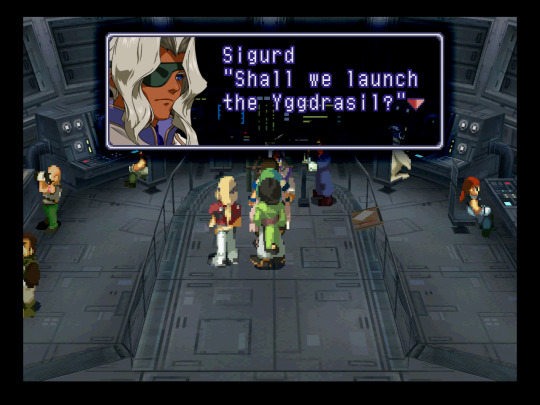
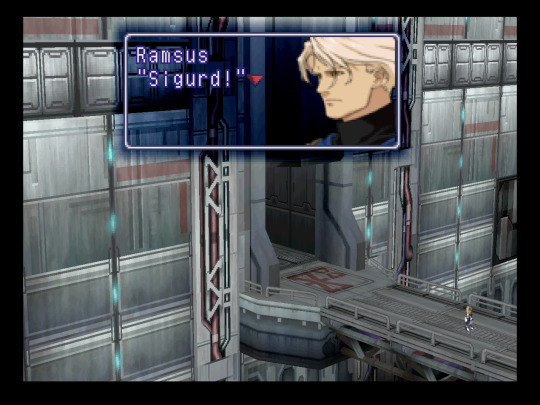
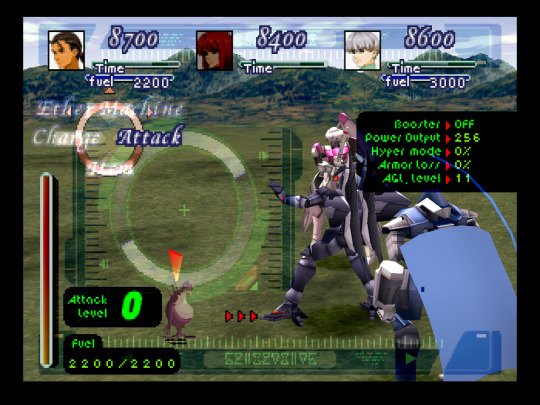
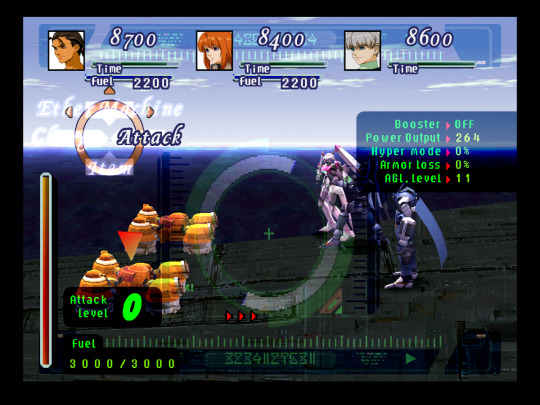
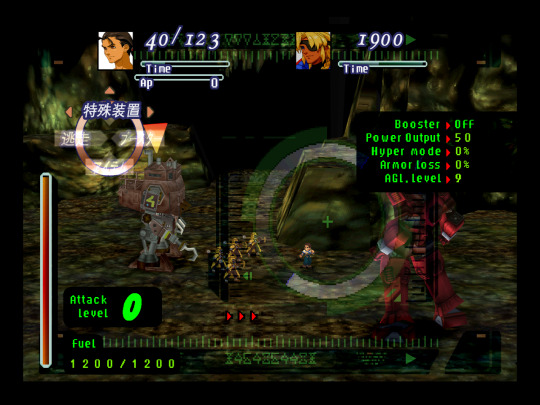
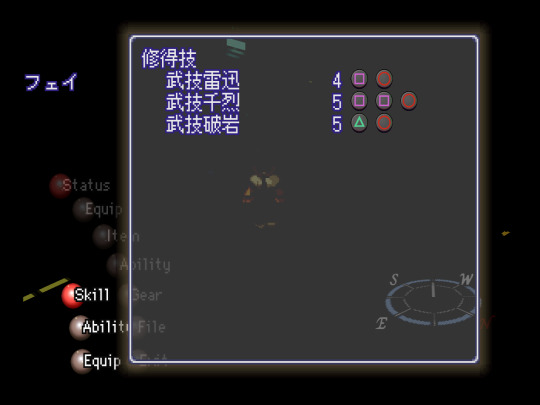
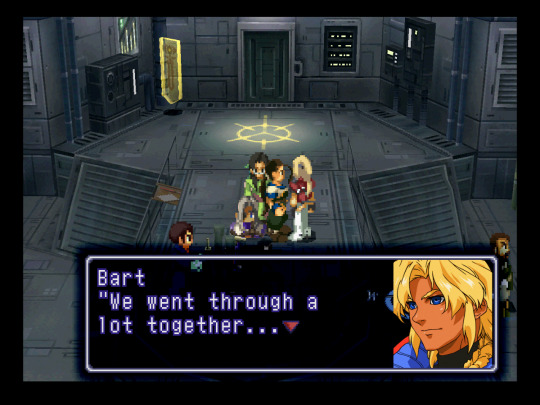
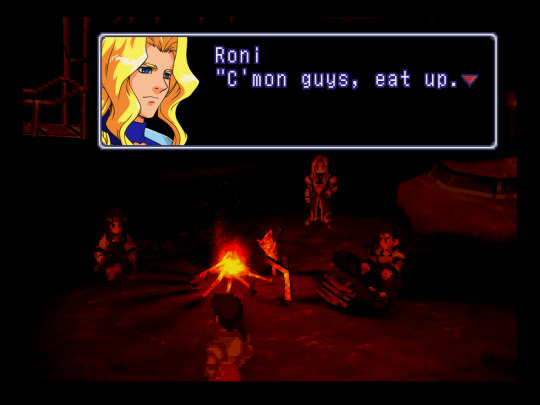
It replaces every single character dialogue portrait, menu portrait, & (almost every) battle portrait (looking at you, Yggdra officer Gear pilots) with high quality, cleaned up artwork, as well as recreated high quality UI while keeping it as close to the original game as possible.
And best thing about it is, if there's anything you don't like about it, like certain aspects of the UI, you can locate and delete that file from the folder. Everything is optional. (if you have any questions as to what's what, drop them into my dms)
Current version: 1.4
現在の日本語版: 1.4
(More screenshots below download info and UI changes.)
Being a real-time texture replacer, it should work with any English version of XG, both base-game and modded/patched. Any fan-translated patch using the US version as a base should display correctly.
There's a separate version for the Japanese version of the game. May need some editing still with other characters' UI ("Ether"/"Spells"/"Arcane"/etc) but for the most part its good to go in terms of battle UI. Let me know if you find any errors.
(I've been using it with the Perfect Works Build mod. Highly recommended!)
(Note!!: If you use PWB mod, don't use its "readjusted portraits" patch when patching your rom, as that patch interferes with this mod's portraits texture replacing.)
(It works on Steam Deck... but don't ask me for details in setting that up in particular, I don't own one 😅)
~~~
Download/ダウンロード
I recommend reading the instructions txt files I included in the DL.
This includes information such as how to set up .cue and .m3u files, swapping discs, renaming the texture folder, Retroarch settings and Beetle PSX HW Core settings to get the mod working, settings suggestions for making a cleaner looking and faster playing XG (YMMV), and settings to fix certain emulation issues Ive come across (freezing on fast-forward, crackling audio during 3D/effects-heavy cutscenes/gameplay, blank screen during Rico flashback, etc).
~~~~~~~~~~
-Changes made to the UI include:
Menu UI:
selection triangle, Walk/Gear icons
menu portraits
▲ ■ ● ✖ button DeathBlow menu icons
ABXY button DeathBlow menu icon- alternate textures
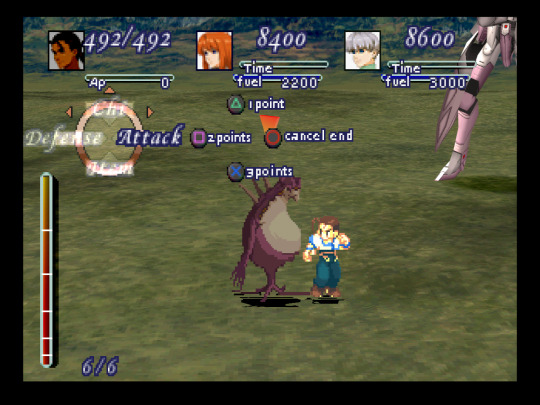
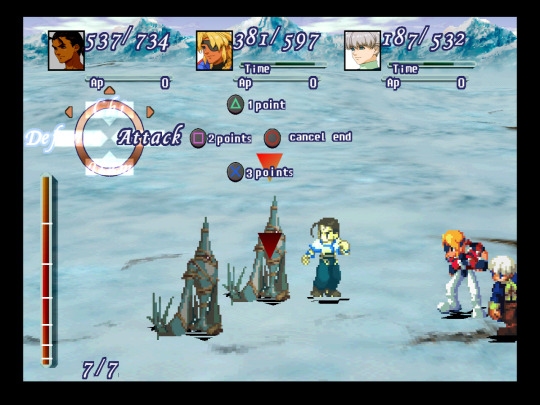
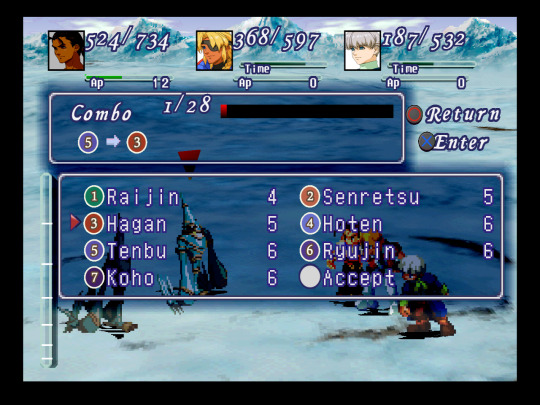
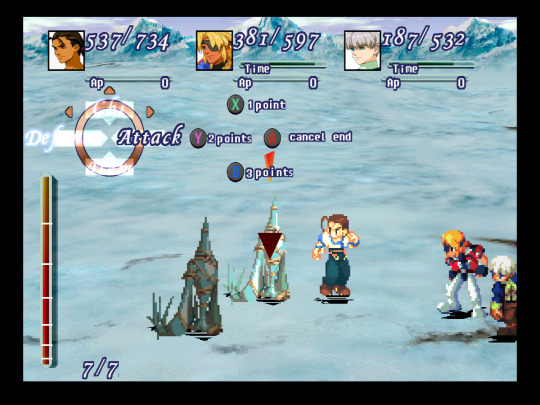
Battle UI and on-foot specific battle UI:
Circular battle palette and tags behind text
Battle palette text, "Combo", "Return", "Enter", "Miss", "EP", & HP/DMG/heal/AP numbers
HP/AP bars
"Time", "fuel", "total damage", AP numbers, "1/2/3 point(s)", "cancel end"
battle portraits
▲ ■ ● ✖ button DeathBlow icons
ABXY button Deathblow icons- alternate textures
Bottom screen mid-DeathBlow ▲ ■ ✖ icons (unfortunately, there's no way to change the other mid-DB quadruple-button icons)
Combo 1-7 and Accept icons
In-Gear specific battle UI:
"fuel" and fuel numbers
"Fuel" (when using boost)
fuel bars (top and left)
All Gear status menus' green text/numbers
Attack level numbers and ∞
Gear menu backgrounds
Gear "power shut down", "camera damaged", "out of fuel", etc, statuses
background UI elements, runes, triple red triangles, Gear lock-on UI (unfortunately, there's no way to change the circular part of this UI)
Misc UI changes:
Red/grey spheres (in the menu and loading screen)
All instances of selection diamonds, both horizontal and vertical
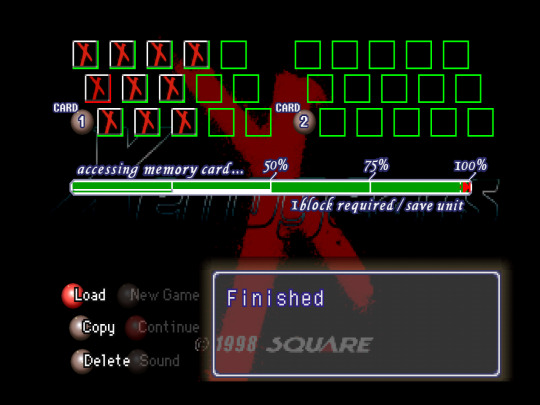
Load/save screen "CARD 1"/"2" text, memory card icon, load/save bar/text
Disc 1 and 2 maps (with alternate color versions; makes the enterable area indicators harder to see though)
NESW compass letters (unfortunately, there's no way to change the circular compass texture)
~~~~~
-Screenshots (before & after and alts):


And Japanese version's (日本語版) UI:
⬇!!Spoilers in images further down!!⬇
--
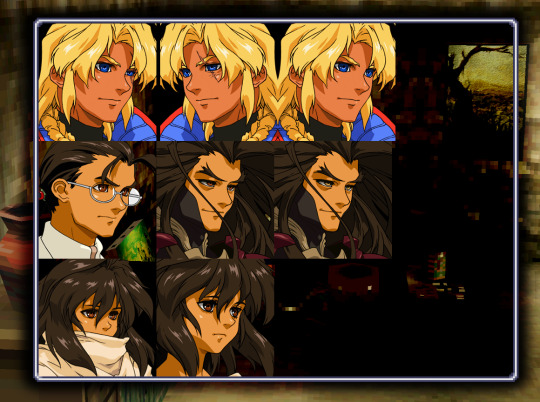
I won't be showing all portraits here; only the ones worth mentioning.
Portraits created for the mod that have no artwork equivalent:
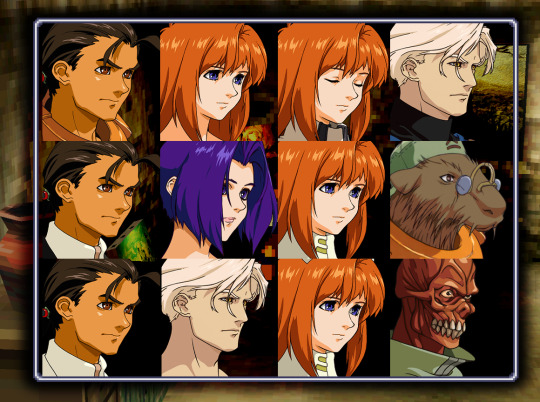
Portraits to match their sprites vs official unedited artwork:
(default on left, alt on right)
Roni/Medena/Erich edited sprite equivalent vs their official PW art
Citan edited unsmiling (dialogue-only) sprite equivalent vs official smiling art)
Krelian(s) edited sprite equivalent vs official art
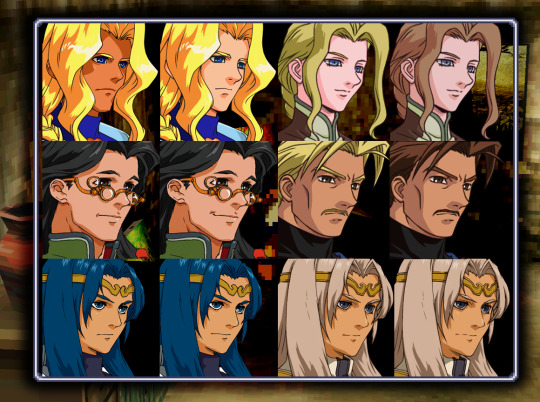
Portrait alts created for fun:
Both sides of scar-eyed Bart
Two-eyed Bart
Kim lab coat with glasses
Fei-colored Id
Fei-colored Id with Id's yellow eyes
Fei-colored young & older Emeralda
(might add to this list later. have any suggestions? fun ideas? lmk. It doesn't have to be canon-compliant.)
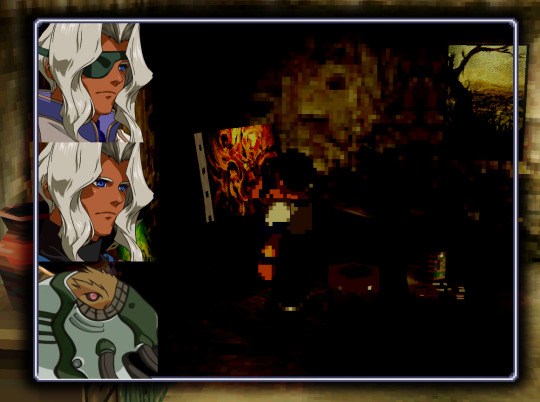
Screenshots of alt portraits in-use:
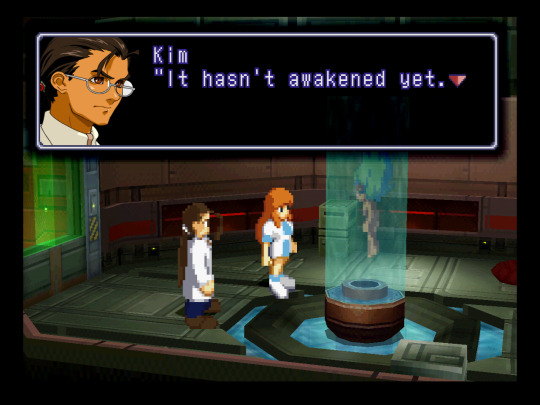
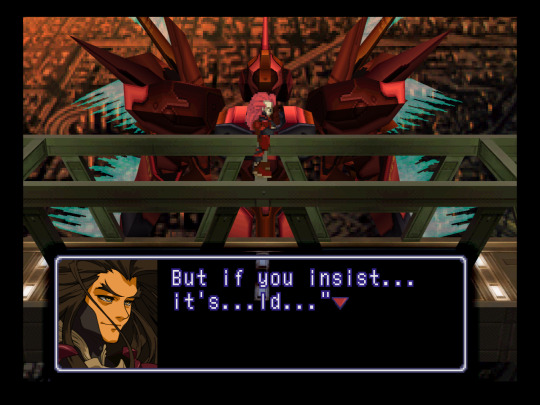
I'll continue to update this and subsequently reblog it as new versions are released.
With any new updates, just DL and replace/overwrite the old folder.
In-progress tumblr post of the past as a bit of a time capsule for myself 😄

#Xenogears#Xenogears modding#Playstation modding#modding#texture pack#Playstation classic#my mods#Xenogears texture pack; PAW#long post#image heavy#Last edited: Feb-19-24
167 notes
·
View notes
Last Seen Blogs