#which is actually all assembled and just needs all the hems and finishings. but that'll probably take me most of this next week I think
Explore tagged Tumblr posts
Text
It's been almost two weeks since my last sewing update, but I have been making progress on a couple different projects, thankfully. I mentioned in my last post that I was hesitant to cut into a king-sized 100% linen bedsheet that I've been hoarding for 10+ years. I knew I wanted to make an apron, but I also knew that it wouldn't take up anywhere near the whole sheet, and I had the thought that I might be able to get two projects out of this one sheet (and the remnants of the matching fitted sheet) if I was careful about how I cut out all my pieces. Possibly a gathered tiered skirt/petticoat, along with the apron.
I measured the two long sides of the flat sheet that had identical ~1.25" deep hems, and I found that each side was 112" or just over 3 yards long, not counting the top and bottom hems. That meant if I did side seams, I could get a 6 yard wide bottom tier for the skirt and not have to do a hem at all, just use what was already there. Not the widest hemline on this kind of skirt (I have a purchased skirt with a 25 yard hem, and years ago I made a 26 yard tiered skirt out of muslin), but with this heavy weight linen it felt like 6 yards at the hem would be plenty.
Gathered tiered skirts are really just rectangles and a bit of simple math. Since the sheet's side hem determined the size of the lowest tier at 224", I figured I would do 2-to-1 gathers and make the next tier up 112" wide, and the third tier up 56" wide. A fourth tier at that 2-to-1 gathering ratio would have been only 27" wide, which wouldn't have fit over my hips, so the skirt would have 3 tiers.
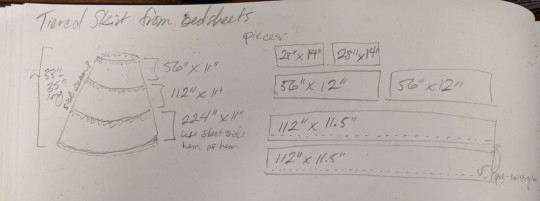
I'm a short girl at not quite 5'2" and I like to wear my skirts pretty low on my hips for spoonie comfort issues, so after measuring a purchased skirt whose length I like, I decided that between 30" and 33" inches in total length would be ideal. With three tiers that length could easily be divided into tiers that are each 10"-11" tall. I added a half inch for seam allowance (but no hem allowance on the lowest tier, since I was re-using the existing hem) to get the exact measurements for each of the pieces I needed for the skirt.
I was able to tear most of my pieces, since the linen bedsheet was nicely on the grain and tore relatively cleanly, thus saving my hands from cutting all those long pieces. I had meant to cut the top tier at 14" tall so that I'd have room to turn under a nice thick waistband too -- and then I totally forgot and cut it at 12" just like the middle tier, lol. I was able to get one of the middle tier pieces and both of the top tier pieces out of the remains of the matching fitted sheet, so I only needed one middle and two bottom tiers from the flat sheet. That left me with plenty of flat sheet left over for the apron, but I'll talk more about that in my next sewing post.
With my pieces all cut out, it was time to start the most annoying part of making a gathered tiered skirt: gathering all those tiers. I'm trying to sew with cotton thread more often these days, but for the gathers I switched back to polyester thread just for the strength. For the two bottom tier and two middle tier pieces I ran two lines of gathering stitches along the top edge, placed pins to divide each panel into quarters, and got to gathering and pinning.
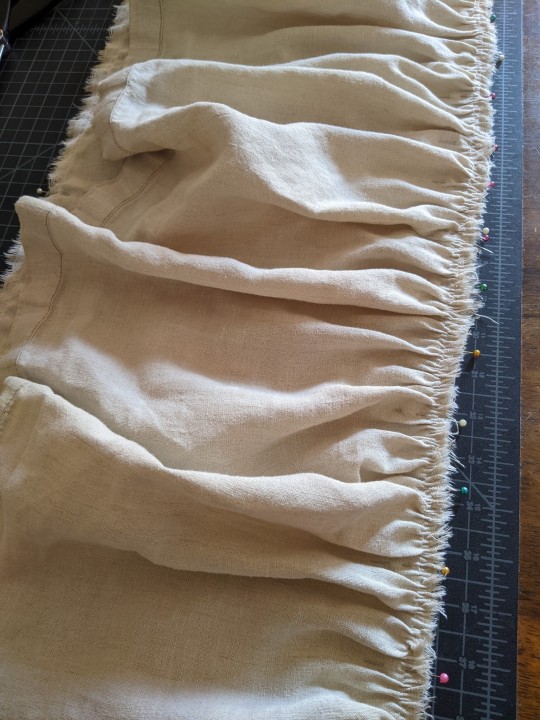
With tiered skirts I really prefer to work from the bottom up, so that I'm always attaching a gathered piece to a completely flat piece of fabric, and save side seams for last. So the bottom tier pieces got gathered up and attached to the middle tier pieces, then the middle tier got gathered up sewn to the top tier.
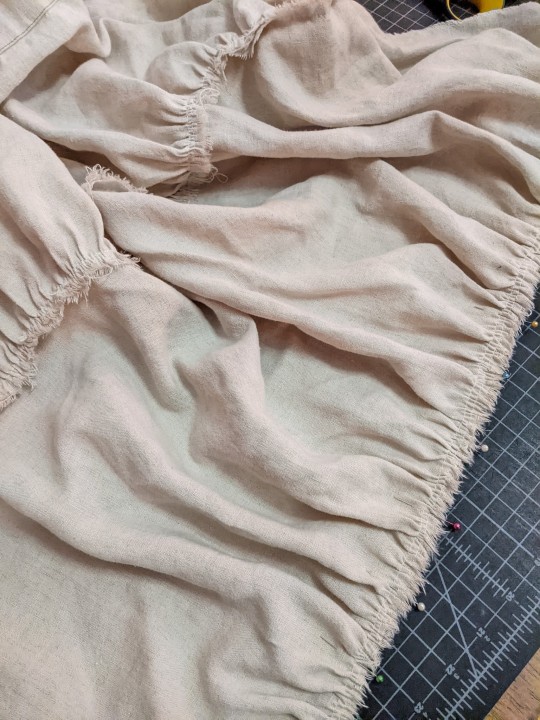
Since I accidentally cut my top tier pieces shorter than I'd meant to, I did play around with adding a separate waistband for the top tier to be gathered onto. But I couldn't do a full 2-to-1 gather if I wanted the waistband to pull on over my hips, and the waistband made the proportions look weird, like the top tier was too long. So I ended up cutting the waistband off after I sewed it and actually shortening the top tier even a little bit more. After turning under the top edge to enclose the raw ripped edge and then turning under 3cm (~1.2") for a waistband casing, that top tier ended up being about 9" tall, and the proportions of that look much better for some reason.
Before I sewed the side seams, I decided that this skirt needs to have pockets, of course. I knew I was planning to do French seams to protect the raw edges against unraveling, so I put the pockets in with a French seam as well.
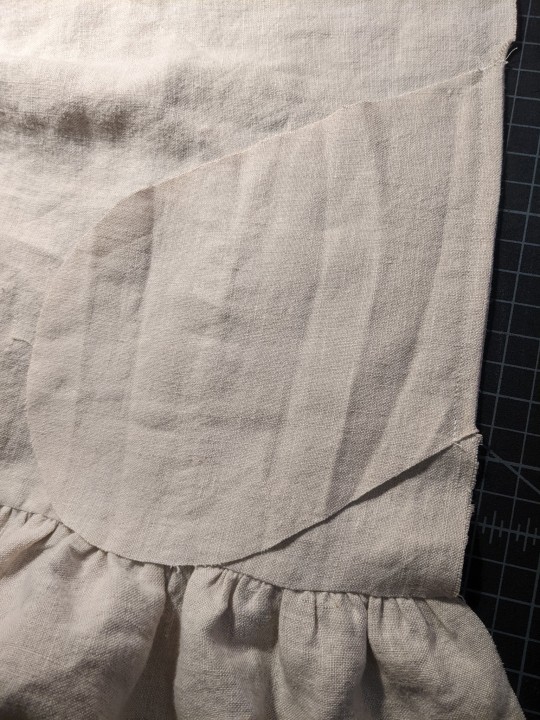
With the pockets in place, the next step was to do the side seams (including the pocket bags), being careful to match up the height of the hem and each of the tiers so everything was nice and clean and square. Then I was able to turn under that waistband casing and sew it in place -- my original plan had been put in three separate channels for narrow elastic that would result in a bit of a faux-cartridge pleating look, but actually getting the elastic strung through there turned out to be more of a pain than it was worth, so I ended up picking that out and just using a single 1" wide elastic band in the waistband casing instead.
And with that, the skirt was technically wearable, and with some fabrics I might have been happy to leave it there. But the raw ripped edges at the seams between each of the tiers worried me. I've had well-loved sewing projects just shred after many wears and washes because I left the seams unfinished, figuring I would be the only one to see the inside. Ideally I want this skirt to be in my rotation for years and years, so I decided to make the effort to finish those seams too.
My original plan had been to cover the raw edges inside with 3/4" herringbone twill tape. For some reason I was convinced that I had a bunch of it left over from a Wasteland Weekend project from 2018, only to discover that I actually only had ~3 yards left. So rather than ordering more and waiting for it to arrive (and then inevitably having some of that left over too), I decided to just make some 3/4" tape from the linen sheet itself. Since this whole skirt is rectangles on-grain and the tape wouldn't have to go around any curves, I made the tape from on-grain rectangles too, rather than bothering with proper bias tape.
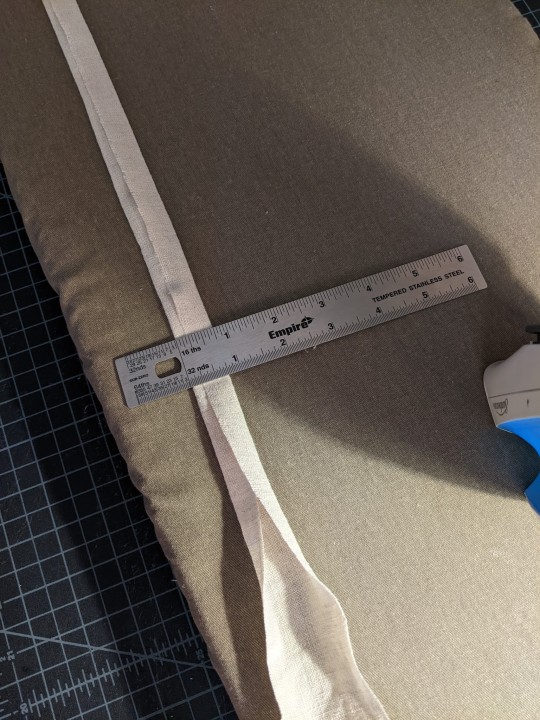
With the hem and the waistband already cleanly finished, I just needed tape to cover the ~3 yard seam between the bottom and middle tier and the ~1.5 yard seam between the middle and top tier. I tore nice straight strips, trimmed off the frayed edges, and ironed the raw edges under to give me that 3/4" width. It's three layers thick in the middle but only 2 layers thick on the sides, since it isn't a proper double-fold tape.
Then it was just an issue of pinning it over the raw edges inside the skirt -- first from the inside in roughly the right place and then from the outside to make sure it lined up with the seam well.
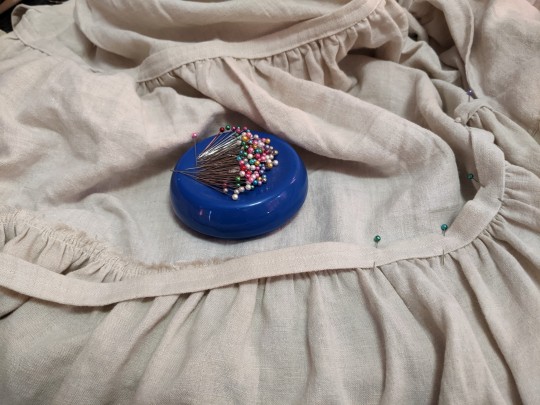
I stitched-in-the-ditch from the outside right where the gathers met the next tier up, and then went back and did another line of stitching just slightly up from that, using the width of my machine foot (~1cm) as a guide. That covered all the raw edges inside and reinforced the seam, and gave it a nice neat appearance from the outside.
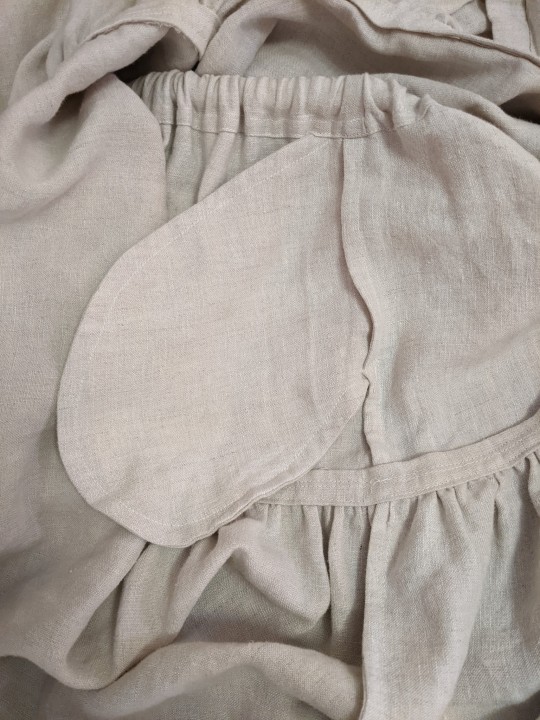
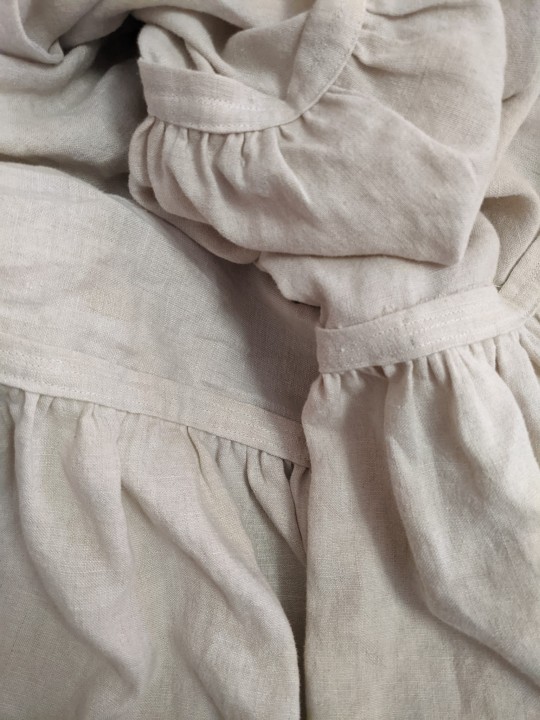
It also had the added benefit of behaving almost like cording on a corded petticoat -- the gathered seems have a lot more body and stiffness now than they did before, which gives the finished skirt a really lovely lofty structure.
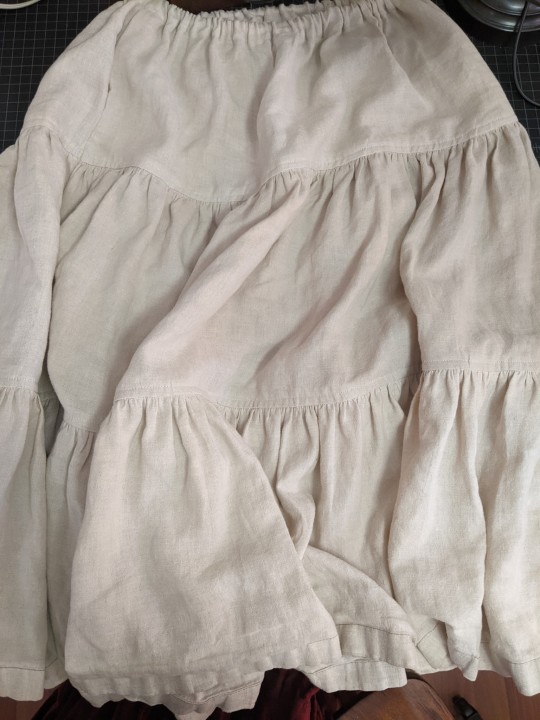
The whole skirt ended up being about 31" long, right in that 30"-33" length I had originally aimed for, and when I wear it low on my hips where it's most comfortable, it just brushes the tops of my feet.
My plan is to wear this mostly under other long skirts and dresses, more as a petticoat than a skirt on its own (tho it is heavy enough and neat enough to be worn on its own, if I want). That lofty structure from the seam finishes adds a lot of floof to my other long skirts, just barely peeking out the bottom of the purchased green skirt I originally measured to figure out the length for this one, and hiding completely under my purchased 25 yard burgundy skirt but giving it enough extra volume that it doesn't drag on the ground quite so badly.
As the colder weather sets in I'm sure this will get a lot of wear under skirts and dresses (including the several dresses I'm still planning to sew in the next couple months!), but even now in the last heat of summer it's quite comfortable to wear, since it's linen. Jack commented that it seemed like a lot of work for a skirt that won't be seen (and it did manage to remind me how much I dislike gathering long lengths of fabric), but as long as it's functional and gets used often, I feel like all the effort was worth it.
While I was putting this together, I also cut out and started assembling the apron project from the same bedsheet. Even with all those pieces cut out, I still have enough linen left over for at least one more, maybe two more projects. Next up I'm going to get to all the finishings on the apron (which will be getting its own post once it's done) and keep trucking along on the handsewn eyelets for the Lengberg Castle Bra-thing. And once those two are done, I think I just might be ready to finally start on all the dresses I want to make with my new fabric.
#sewing#tiered gathered skirt#peasant skirt#bellydance skirt#if you can sew a straight line on a sewing machine you can make this skirt#I wouldn't recommend trying to sew it by hand but it's a good beginner sewist project#the math is really easy and you can work upwards from the hem like I did or downwards from your waist measurement if you want#gathering in a 2-to-1 ratio (so the final piece is half its original width) is pretty standard but you can also do 3-to-1#bedsheets and quilting cotton are excellent options for this kind of skirt#and if you're careful with re-using hems like I did or using the finished selvedge edge of the fabric you can avoid hemming it entirely#long post#my sewing#2024 mood#linen petticoat project#linen apron project#which is actually all assembled and just needs all the hems and finishings. but that'll probably take me most of this next week I think#post on that coming eventually#and then: DRESSES
9 notes
·
View notes