#what details can be obtained from aadhar card
Explore tagged Tumblr posts
Visit Tumblr Blog
Explore Tumblr blogs with no restrictions, modern design and the best experience.
Last Seen Tumblr Blogs


Fun Fact
70% of Tumblr users say the Dashboard is their favorite place to spend time online.
Text
How to get Single Status or Unmarried Certificate In India?
Do you know that a single Status certificate, a Bachelorhood certificate, or an unmarried certificate is a frequently asked query for a Visa and majorly for marriage-related processes?
So, you're dreaming about marrying someone from another country? That's amazing! But before you dive into wedding plans, there's this thing you need to know about called a Single Status Certificate. It's kinda like your relationship passport, especially if you're planning to get hitched in places that follow Hague rules.
Getting a single status certificate apostille is super important, seriously! It's like making sure all your info is spot-on and true. This certificate tells if someone is married, single, divorced, or a widow. So, getting this affidavit of single status is necessary.
What are the necessary documents for Indians to obtain a Singlehood or Single Status certificate or Unmarried Certificate?
Below is a list of the required documents for obtaining a single status certificate or bachelorhood certificate:
Affidavit: Confirming you're single.
Address Proof: Aadhar Card or Passport.
Birth Proof: Birth Certificate or Schooling Certificate.
Parental Confirmation: Letter from parents with their Aadhar Cards.
Previous Marriage: Divorce Certificate (if applicable).
Widowhood: Death Certificate (if applicable).
Once you've got these papers, you need to get the affidavit stamped and signed by the right authorities so you can use it properly.
How to Get a Single Status Certificate/ Unmarried Certificate Apostille in India
Below is the 4-step simple process for getting a single status / unmarried certificate apostille in India.
Step 1: Prepare Your Affidavit
Make an affidavit declaring your single status with the help of a notary.
Step 2: Get Attestation
Choose either the State Home Department or Sub Divisional Magistrate (SDM) for attestation.
Your affidavit needs to be stamped by one of these authorities to make it official.
Step 3: Apostille by Ministry of External Affairs (MEA)
Once attested, your affidavit moves to the Ministry of External Affairs for Apostille.
Apostille is a special stamp that validates your Single Status Certificate internationally.
Step 4: Additional Embassy Attestation (if required)
If the country of your partner isn't on the Hague Nation List, you'll need Embassy Attestation along with Apostille.
This ensures your document is recognized in countries not covered by the Hague Convention.
If you need a single status certificate Apostille, think about reaching out to a reliable agency that focuses on attestation and apostille. Their team knows how to handle documents well, so you won't have to worry about mistakes. They'll make sure everything gets done right, saving you a bunch of time and money. So why not give them a shout?
What's a Single Status Affidavit In India And How Do People Use It?
let's talk about something called a single status affidavit. It's basically a paper where you write down some important stuff about yourself, like when you were born and details from your passport.
Now, the person who writes this paper is called the deponent. They're the one who swears that everything written down is true, to the best of their knowledge. And usually, there's someone else called a witness who confirms that what's written is true too.
Now, why would you need one of these affidavits? Well, they can be used as evidence in court cases or other legal situations. It's like having a piece of paper that says, "Yep, everything this person said is legit!"
Where can I get a single status affidavit?
If you need to obtain a single status affidavit, there are several places you can look into:
Government Offices: Check with your local registrar's office, civil registry, or vital statistics office.
Embassy or Consulate: If you're abroad, inquire at your country's embassy or consulate for assistance.
Notary Public: Many notaries offer affidavit services, including single-status affidavits.
Legal Service Providers: Law firms and legal service providers can help prepare affidavits.
Online Services: Look for reputable online platforms offering affidavit templates and assistance.
Why is needed for an unmarried Certificate?
You know, some countries don't just take a simple piece of paper saying whether someone is married or not. They want extra assurance to prevent any trickery. That's where the apostille comes in.
It's like a stamp that makes the document legit for foreign countries.
Having an apostille means you don't have to spend time calling or emailing back and forth to verify things. It's like a shortcut that saves everyone's time and speeds up the whole process. So, if you're planning to tie the knot in another country, having that apostille on your unmarried certificate is super important.
What is the Format of a Single Status Certificate?
First off, what's an affidavit? It's like a formal way of saying something to prove it's true. When it comes to getting a single status certificate, there's no set way to write this affidavit. But there are some things you should include to make sure it's all good for the Indian embassy.
So, when you're writing your single status affidavit, just remember to keep it simple, truthful, and to the point. That way, you'll have no trouble getting that certificate from the Indian embassy.
Sample of Affidavit of Single Status Certificate.
There are a few things you've got to include:
Affiant says they are single
Parents confirm if the affiant is married
Applicant's birthdate and passport number
Where the affiant currently lives
Someone confirms affiant isn't married
Authority checks if documents are real
Affiant signs and dates form

Validity of Single status Certificate Apostille
So, you've got your Single Status Certificate apostilled, right? Cool, but there's something you need to know about how long it's good for.
Usually, an apostille document is only valid for 6 months. But hey, don't stress too much! Some countries might still accept it even if it's older, like a year old.
But here's the deal: it really depends on which country you're planning to show it in. Different places have different rules about this stuff.
The best way to find out for sure is to ask the people who handled your apostille. They'll know what's up and can give you the lowdown on whether your document is still good to go.
Cost of the apostille for unmarried or bachelorhood certificate
When you want to get your single status document apostilled, you'll have to pay a few different fees. These fees can vary depending on where you're applying from, and they cover things like charges from different authorities, fees for the apostille service itself, how many documents you need to get apostilled, what type of document it is, and some other fees that might pop up along the way.
Honestly, it can be a bit tricky to figure out exactly how much it's going to cost you because it's different for everyone and depends on where you're applying from. Your best bet is to reach out to an apostille service provider. They can take a look at your situation, the documents you have, and where you're applying from, and then give you a clearer idea of all the charges you might face.
Time Required to complete the unmarried certificate Apostille
Getting an unmarried certificate apostilled takes some time because there are several authorities (DM or SDM) involved.
It usually takes around 10 to 12 days, but it can vary depending on where you got the certificate from.
If you want to speed things up, it's important to pick a good apostille service agency��that you trust. They can help make the process faster.
0 notes
Text
Mutual Divorce & Expert Legal Support: Hire the Best Divorce Lawyer in Delhi

Marriage is a lifelong commitment, but when things don’t work out despite every effort, ending the relationship respectfully and legally becomes necessary. In such cases, seeking legal support from an experienced mutual divorce lawyer in Delhi is the smartest step forward.
At Court Marriage Advocate Kaushal, we provide reliable, compassionate, and legally sound support to couples going through divorce. Whether you're seeking a mutual consent divorce or dealing with complex legal issues, our team is led by the best divorce lawyer in Delhi—offering clarity, speed, and confidentiality throughout the process.
What is Mutual Divorce?
A mutual divorce is when both spouses agree to end the marriage amicably. It is the most peaceful, fastest, and cost-effective way to obtain a divorce in India. Governed by Section 13B of the Hindu Marriage Act, 1955, this process requires both parties to mutually agree that the marriage is beyond repair.
Why Choose a Mutual Divorce Lawyer in Delhi?
Delhi has a well-structured family court system that handles thousands of divorce cases every year. However, navigating the legal process can be stressful without proper guidance. A skilled mutual divorce lawyer in Delhi will help you:
Draft the joint petition accurately
Ensure all financial and custody terms are clearly mentioned
Represent you in court hearings
Avoid unnecessary legal delays
At Court Marriage Advocate Kaushal, we provide full legal support for couples choosing mutual divorce. Our aim is to protect your rights while making the process as painless as possible.
Mutual Divorce Process in Delhi: Step-by-Step
Here’s a simplified overview of the process when you work with our legal team:
1. Filing the Joint Petition
Both spouses file a joint petition in the family court expressing mutual consent for divorce.
2. First Motion Hearing
Both parties appear in court to record their statements. The court reviews the petition and allows a six-month cooling-off period (can be waived in some cases).
3. Second Motion Hearing
After the cooling-off period, the couple appears again for final consent. If the court is satisfied, a divorce decree is granted.
4. Divorce Finalized
The court issues the official divorce decree, legally dissolving the marriage.
Why We’re Known as the Best Divorce Lawyer in Delhi
Not all cases are simple. If your divorce involves child custody, alimony, or property disputes, you need expert legal advice. Advocate Kaushal is considered one of the best divorce lawyer in Delhi due to:
15+ years of family law experience
In-depth understanding of both mutual and contested divorce cases
Confidential and personalized legal support
Expertise in fast-track divorce, NRI divorce, and settlement agreements
Transparent fees with no hidden charges
Our approach is empathetic, professional, and fully compliant with Indian legal standards.
Documents Required for Mutual Divorce
To proceed with a mutual divorce in Delhi, the following documents are essential:
Marriage certificate
Identity proofs (Aadhar card, PAN card, etc.)
Address proofs of both parties
Passport-size photographs
Income proofs (salary slips, ITRs)
Details of jointly owned property (if any)
Children’s birth certificates (if applicable)
Our office assists in compiling and preparing all documents for timely submission in court.
Final Words
Ending a marriage is never easy, but it doesn’t have to be ugly or prolonged. With the right legal partner, you can handle it with dignity and efficiency. If you're looking for a mutual divorce lawyer in Delhi, or simply need advice from the best divorce lawyer in Delhi, trust Court Marriage Advocate Kaushal to guide you.
We prioritize your emotional well-being while ensuring complete legal compliance and protection of your rights.
0 notes
Text
LLP Registration in India: A Smart Start for Partnership-Driven Businesses

Considering starting a business with a partner—or perhaps a team of partners? If you're looking for flexibility, combined with protection from legal liability, a Limited Liability Partnership (LLP) Registration may just be the right structure for you.
Why choose an LLP?
Starting a business means choosing a new structure. There are many, including Sole Proprietorship, Private Limited Company, and LLP, to name just a few. It can all get a little overwhelming. Let's break it down in simple English.
An LLP gives you the best of both worlds by combining all of the benefits of a partnership structure and a company structure. Benefits include ease of management, tax benefits, and most importantly, limited liability. It's great in that you won't lose your sets if the business takes a turn for the worse.
What is an LLP, anyway?
It might be easiest to think of an LLP as a "smart partnership". It gives you:
Easy management (no board meetings, no paperwork),
Separate legal entity (like a company),
Limited liability (your home, assets, and savings are not at risk due to your partner's fault).
In partnerships, if one partner makes an unfortunate decision, they are all financially in the same boat! With an LLP, you have the protection of limited liability for the personal liability that arises from other partners.
Why choose LLP versus the other options?
Assume you and a friend wanted to start a consulting agency. You need to put in place a legal structure that looks professional, avoids heavy compliance, and minimizes personal risk. LLP is the perfect fit.
Here is why:
✔️ Limited personal liability
✔️ Less paperwork than Private Limited Companies
✔️ No minimum capital
✔️ Separate legal entity
✔️ No dividend distribution tax
This is a key reason LLPs have always been favorable to chartered accountants, lawyers, architects, IT consultants, small scale services vendors etc.
Who can have an LLP?
Almost anyone! You must have a minimum of two designated partners and:
At least one designated partner must be a resident of India.
Both designated partners must have a Digital Signature Certificate (DSC).
Both designated partners must have a Director Identification Number (DIN).
A company (such as a Private Limited Company) can also be a partner of an LLP.
What documentation is required?
For Partners:
PAN number
Aadhar card/passport/voter ID/driving license
Proof of address (e.g., recent utility bill or bank statement)
Passport-size photograph
A valid email ID and mobile phone number
DSC and DIN (if received)
For LLP:
Proposed name of the LLP.
Proof of registered office (e.g., rent agreement + NOC from landlord)
LLP agreement (which provides details about how the LLP will operate).
A Step-By-Step Guide on Registering Your LLP in India
1. Obtain a DSC (Digital Signature Certificate)
All partners will need a DSC to sign documents electronically. You can apply through any of the authorized vendors; this process usually takes 1-2 days.
2. Apply for DIN (Director Identification Number)
Apply on the MCA (Ministry of Corporate Affairs) portal. DIN is a unique ID for designated partners, and it is compulsory.
3. Reserve Your LLP Name
The RUN-LLP form is used to check name availability, and to reserve your name. Make sure your name ends with "LLP", e.g. PixelEdge Consulting LLP.
4. Incorporation Form (FiLLiP)
The form will ask for partner details, business address, capital contributions, and supporting documentation. Once the application is approved, you will be issued a Certificate of Incorporation.
5. Draft and File your LLP Agreement
The LLP Agreement outlines how the business operates, partners' roles and responsibilities, profit shares, dispute resolution procedures, exit clauses, etc. The LLP agreement must be filed within 30 days of incorporation to avoid penalties.
Ongoing LLP Compliance
Just because you're running an LLP doesn't mean you have no obligations. You still need to comply with annual compliance requirements:
Form 8 - Statement of Account & Solvency (the accountant will assist you with this)
Form 11 - Annual Return (with the partner details)
Income Tax Return (ITR) - Even if there is no profit, this needs to be filed.
Good news! These filings are much easier than those of Private Limited Companies.
Is an LLP the Right Fit for You?
If you're a small business owner, a professional consultant, or just starting with a partner, an LLP is the right choice for you. Often, an LLP requires little money, no legal team, and no CFO. All you need is the right partners and the proper structure.
An LLP gives you:
✅ Personal Liability Protection
✅ Simpler setup and management
✅ Long-term flexibility
Need Help Registering Your LLP?
Don't want to fill out, file, and follow-up with the forms yourself? Kanakkupillai offers full online LLP registration services including name reservation, agreement filing, and all the support you need.
Be the smart one to start your business. Register your LLP today on strong and stress less!
0 notes
Text
IEC Registration – Import Export Code Registration in India
In today's globalized economy, businesses are expanding their reach beyond national boundaries. Whether you're planning to import goods from other countries or export Indian products to international markets, obtaining an Import Export Code (IEC) is a crucial first step. Issued by the Directorate General of Foreign Trade (DGFT), IEC is a 10-digit identification number that is mandatory for any individual or business dealing in import and export activities in India.
What is IEC (Import Export Code)?
The Import Export Code is a unique 10-digit code required for anyone starting an import or export business in India. It serves as a license that enables companies or individuals to engage in international trade. Without an IEC, it is not possible to clear customs, send shipments, or receive money from abroad.
Who Needs IEC?
IEC is required by:
Businesses or individuals who import goods into India.
Exporters who send goods or services outside India.
E-commerce operators dealing in international trade.
Startups or SMEs planning to expand globally.
Note: IEC is not required for imports or exports done for personal use, not connected with trade, manufacturing, or agriculture.
Benefits of IEC Registration
Global Market Access – Helps businesses expand beyond domestic markets.
No Return Filing – Unlike other tax registrations, no monthly or annual returns are needed.
Lifetime Validity – IEC is issued for a lifetime and doesn’t require renewal.
Simplified Process – The application is entirely online and hassle-free.
Supports Business Growth – Encourages foreign transactions and global trade partnerships.
Documents Required for IEC Registration
PAN Card of the individual or business
Address proof of the business (electricity bill, rent agreement, or property papers)
Cancelled cheque or bank certificate
Digital photograph of the applicant
Aadhar Card or any other identity proof of the applicant
How to Apply for IEC Registration in India?
You can apply for an IEC online through the DGFT website. Here are the steps:
Step 1: Visit the DGFT Portal
Go to https://dgft.gov.in and create a login account.
Step 2: Fill in the Application Form
Navigate to “Apply for IEC” under the “Services” section and fill in all necessary details.
Step 3: Upload Documents
Upload the scanned copies of the required documents as mentioned above.
Step 4: Pay Fees
Pay the government fee for IEC registration, currently ₹500.
Step 5: Submit the Application
Once submitted, the application will be processed, and the IEC will usually be issued within 1-2 working days.
When is IEC Not Required?
When goods/services are imported or exported for personal use.
For traders registered under GST and using GSTIN in place of IEC for export/import (as per CBIC guidelines for certain transactions).
Conclusion
IEC Registration is your gateway to international trade. It is simple to obtain, has no renewal requirement, and opens up a world of opportunities for Indian businesses in global markets. Whether you are a startup or an established enterprise, getting your IEC is the first and most crucial step toward becoming an international trader.
0 notes
Text
Understanding Udyog Aadhar: A Complete Guide for MSMEs
In an effort to promote and support Micro, Small, and Medium Enterprises (MSMEs) in India, the government introduced a simplified registration process known as Udyog Aadhar. This initiative helps small business owners obtain official recognition and access to various benefits offered under government schemes.
Whether you’re just starting out or already running a small enterprise, understanding Udyog Aadhar registration is crucial for unlocking numerous opportunities for growth and development.
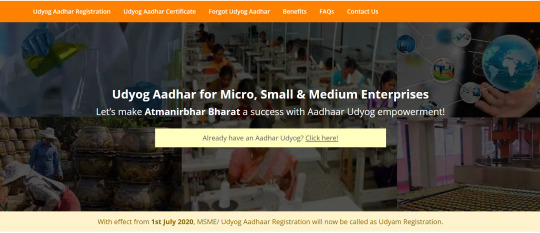
What is Udyog Aadhar?
Udyog Aadhar, now known as Udyam Registration, was introduced by the Ministry of Micro, Small and Medium Enterprises to simplify the registration process for businesses. It replaced the earlier complex procedures that required multiple documents and certifications.
Essentially, Udyog Aadhar is a unique identification number provided to MSMEs to help them avail benefits such as subsidies, easy bank loans, tax exemptions, and more. The primary objective is to bring more small businesses into the formal economy and offer them a level playing field.
Why is Udyog Aadhar Important?
Registering under Udyog Aadhar offers several advantages:
Access to Government Schemes: Registered MSMEs can access schemes like Credit Guarantee Fund Scheme, Subsidy on Patent Registration, and Industrial Promotion Subsidies.
Easier Bank Loans: With a valid Udyog Aadhar certificate, getting loans at lower interest rates becomes easier.
Priority in Government Tenders: Government tenders and contracts often prioritize registered MSMEs.
Tax and Compliance Benefits: MSMEs can benefit from various direct and indirect tax exemptions and minimal compliance requirements.
How to Register for Udyog Aadhar?
The process to Udyog Aadhar register your business is simple and user-friendly. Here’s how you can do it:
Visit the Official Portal: Go to the official Udyog Aadhar website.
Aadhar Number: Enter your 12-digit Aadhar number and validate it using an OTP sent to your registered mobile number.
Business Details: Provide essential business information such as name, type of enterprise, address, and bank account details.
Submit the Application: Once all the information is filled in correctly, submit the application.
Receive Udyog Aadhar Certificate: After verification, your Udyog Aadhar certificate will be generated and sent to your registered email ID.
Who Can Apply for Udyog Aadhar?
The following types of enterprises can apply for Aadhar Udyog registration:
Proprietorships
Partnership Firms
Limited Liability Partnerships (LLPs)
Private Limited Companies
Self-help groups
Co-operative societies
The enterprise must be engaged in the manufacturing or service sector and meet the investment and turnover limits defined under the MSME category.
Documents Required for Udyog Aadhar Registration
One of the main benefits of this system is the minimal documentation needed. Typically, you will need:
Aadhar card of the business owner
PAN card
Bank account details
Business address proof
NIC code for the type of business activity
Benefits of Udyog Aadhar Certificate
Obtaining a Udyog Aadhar certificate offers long-term benefits for small business owners:
Eligibility for collateral-free loans under government schemes
50% subsidy on trademark and patent filing fees
Concessions on electricity bills and other utilities
ISO certification reimbursement
Support in foreign trade and export promotion
Difference Between Udyog Aadhar and Udyam Registration
While Udyog Aadhar was a significant step forward, it has now been replaced by Udyam Registration for new applicants. However, existing Udyog Aadhar holders can still operate and are encouraged to migrate to the new system to continue receiving benefits.
Why Use a Trusted Portal for Registration?
Although the registration is free on the official government site, many business owners prefer professional assistance to avoid errors and ensure timely processing. Platforms like Udyog Aadhar offer expert support for document verification, application submission, and obtaining your Udyog Aadhar certificate with ease.
Final Thoughts
Whether you are a budding entrepreneur or an established business owner, obtaining Udyog Aadhar registration is a smart move. It not only helps in gaining legal recognition but also opens up a world of financial and administrative benefits. By registering through a reliable service, you can ensure a smooth and hassle-free experience.
Don’t miss out on the advantages the government offers to small businesses. Aadhar Udyog registration is your gateway to a stronger, more supported business journey.
#udyog aadhar#aadhar udyog#udyog aadhar registration#udyog aadhar certificate#udyog aadhaar#udyog aadhar register
0 notes
Text
Everything You Need to Know About Udyam Registration and Udyam Aadhar
In India, small and medium-sized businesses form the backbone of the economy. To support and empower these businesses, the Government of India introduced the Udyam Registration process under the Ministry of Micro, Small & Medium Enterprises (MSME). If you are a small business owner, understanding terms like Udyam Aadhar, Udham Aadhar, or obtaining your Udyam Registration Certificate is essential for growth and compliance.
To begin your registration, you can visit the official platform here: Udyam Registration Portal
🔍 What is Udyam Registration?
Udyam Registration is a simplified government registration process for MSMEs in India. It replaced the older system known as Udyog Aadhar. Businesses that register under this scheme receive a unique Udyam Certificate, which serves as official recognition from the government.
📜 Benefits of Udyam Registration
Easy Access to Government Schemes Registered MSMEs can easily avail benefits like subsidies, tax exemptions, and priority lending.
Bank Loan Approvals Banks give preference to businesses with a valid Udyam Registration Certificate during loan processing.
ISO Certification Charges Reimbursement Registered companies can apply for reimbursement of ISO certification expenses.
Protection Against Delayed Payments MSMEs get legal protection and interest on delayed payments from buyers.
🧾 Documents Required for Udyam Aadhar Registration
To complete your Udyam Aadhar or Udhyam Aadhar registration, you’ll need:
Aadhaar Number of the business owner
PAN Card
Business Address
Bank Account details
NIC Code for business activity
🛠️ How to Apply for Udyam Registration Online
Visit the official Udyam Registration portal: https://www.udyam-registration.com
Enter your Aadhar number and validate it.
Provide business details like name, type, address, and bank info.
Submit and download your Udyam Registration Certificate.
The process is entirely digital and takes just a few minutes.
📩 Why Every Small Business Should Get a Udyam Certificate
If you want to gain recognition, secure government tenders, or access financial support, getting your Udyam Certificate is essential. It improves your business credibility and opens up new growth opportunities.
📌 Final Thoughts
Whether you call it Udyam Aadhar, Udham Aadhar, or Udyam Registration, the goal is the same — empowering Indian MSMEs. Don’t wait to register your business. A simple step today can lead to greater benefits tomorrow.
👉 Start your registration now at the official site: www.udyam-registration.com
#udyam registration#udham aadhar#udyam aadhar#udhyam adhar#udhyam aadhar#udyam certificate#udyam registration certificate
0 notes
Text
What You Need to Know About BDA Khata Transfer in Bangalore with Khata Broker
Legal paperwork for properties in Bangalore's expanding real estate scene is importantly supported by the BDA Khata transfer process. Knowing how BDA Khata Transfer works is vital if you are purchasing or selling real estate in the city. Although the work might sound daunting, professional guidance from trustworthy companies such Khata Broker makes the process easier and more ordered.
BDA Khata transfer in Bangalore will be examined in this post together with how Khata Broker can help you to negotiate this important process.
What is BDA Khata?
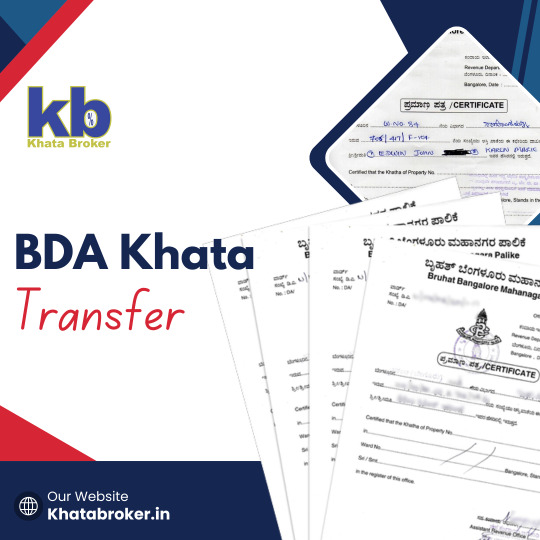
Understanding first what BDA Khata really is will help you to move into the particulars of BDA Khata transfer. Property owners in Bangalore will be given a legal document known as the Bangalore Development Authority (BDA) Khata. It is required for property registration, borrowing, and property taxes; it offers evidence of the existence of the property.
In Kannada, the word 'Khata' basically means 'account.' The registration includes information like the location of the property, its size, ownership details, and tax paid status. Owning property in Bangalore depends on a must have paper known as the BDA Khata.
Why is BDA Khata Transfer Important?
If a property changes hands, a BDA Khata transfer is required. A seamless Khata transfer is needed to keep the title documents current whether you are selling your house or getting it.
The new proprietor could be unable even to apply for loans without a good BDA Khata Transfer, as well as property registration, water and electricity connections, or other required services. Furthermore, the tax records of the property could persist under the previous owner's name.
How to Transfer BDA Khata in Bangalore?
When you know every stage, the BDA Khata transfer procedure is more clearcut. The BDA Khata transfer process is basically like this:
1. Eligibility Check: BDA Khata transfer should legally work. This implies that the property need the requisite authorization and should not be litigated.
2. To start the BDA Khata transfer: you must accumulate the demanded documents. Among the crucial papers are: first.HandleFunc
Sale deed or deed of gift (evidence of ownership)
title deed or other evidence of ownership, Cheers.
n NOC (No Objection Certificate) from the builder or developer (if available)
o Revenues from property taxes
a Aadhar card, voter ID, or any governmentissued ID.
3. Khata Transfer Application: A BDA office application for Khata transfer can be submitted after all documentation been obtained. Either the buyer or seller can perform this.
4. Verification by BDA: BDA personnel will review the papers and property particulars after the application is turned in. They will also check to see if the property tax is current.
5. Fees payment: You will have to pay the transfer fees after successful verification; usually a small sum is based based on the value of the house.
Once the payment is made, the BDA will update the records and issue the new Khata in the name of the new owner.
Challenges in BDA Khata Transfer in Bangalore
Although BDA Khara transfer is a simple process, it might occasionally be difficult, especially for fresh real estate owners. Common problems comprises:
Legal arguments can cause the Khata transfer process to be postponed or stopped totally.
•Not Finished Documentation: Complications can result from lost or unfinished materials. Before applying, it is vital to see that every document is in order.
• Khata transfer cannot happen until outstanding debts—including those left by the prior owner—have been settled.
Working with professionals familiar with the legal requirements and paperwork is advised to avoid these difficulties; one such professional is Khata Broker.
How Can Khata Broker Help You with BDA Khata Transfer?
Khata Broker is a wellknown BDA Khata Transfer in Bangalore, thanks to years of experience and a team of expert staff members. Their packages were created to make the whole process stressfree for buyers and sellers of real estate.
Here’s how Khata Broker can assist you in your BDA Khata transfer:
1. EndtoEnd Service: Beginning from the start, Khata Broker takes charge of the whole BDA Khata Transfer process. Whether it's filing, fee payments, or paperwork, they make sure everything is done exactly and promptly.
2. Expert direction from: Khata Broker comes from their thorough understanding of BDA laws and local real estate rules, therefore helping you to sidestep mistakes and guarantee a seamless transition.
3. Document Verification: By checking and organizing the needed documents, they confirm none is missing or mistaken.
4. Timely followup: Khata Broker manages all of the BDA official followup activities so that your Khata transfer is finished promptly.
5. Legal Aid: Should there be any legal concerns regarding the property, Khata Broker teams with legal advisors to solve the issue and complete the transfer.
6. Transparency: Khata Broker's traits is their openness regarding services and charges. You will always be informed of what to expect during the process and there are no extra costs.
Why Choose Khata Broker for BDA Khata Transfer in Bangalore?

Khata Broker's recognition among BDA Khata transfer services in Bangalore varies for several reasons:
• Reliability: They have proven themselves successful in handling BDA Khata transfers for many customers.
Efficiency: Khata Broker guarantees a fast and seamless process to save you time and energy.
Their pricing is aggressive and they deliver excellent value, therefore.
• Customer Support: Khata Broker offers outstanding customer service and is always eager to help with any queries or worries you might have.
Conclusion
Although the BDA Khata transfer process in Bangalore can appear difficult, with proper direction and expert assistance, it becomes much more manageable. For those in need of BDA Khata transfer help, Khata Broker provides a straightforward and dependable solution. Their offerings will assist you in negotiating the documentation and legal issues with ease, whether you are an experienced real estate investor or a firsttime buyer. Khata Broker is your best bet if you want a reputable assistant to help you with the BDA Khata transfer in Bangalore. Their experienced staff will guarantee that your real property transfer runs smoothly, letting you focus on what is most important.
0 notes
Text
Best Personal Loans in India up to 50 lakhs

Whether for a medical condition, a renovation in your home, education or even your own project, getting quick and convenient finance is vital. A fast approval personal loan can prove to be the answer, and applying online makes it even easier. If you're in search of ease, speed, and convenience, this page will walk you through how to apply for a personal loan online and obtain approval promptly, with loan amounts up to ₹50 lakhs.
What is a Fast Approval Personal Loan?
A fast approval personal loan is a financial instrument that is meant to give you instant access to money with less paperwork. In contrast to conventional loans that take weeks to process, fast approval personal loans provide instant approval within a few hours, giving you the financial assistance you require in a time-sensitive manner.
Benefits of Fast Approval Personal Loans
Quick Processing and Immediate Funds
The greatest advantage of obtaining a fast personal loan online is speed. Most lenders in present times provide an online personal loan application process that guarantees fast approval and fast disbursal of funds. What this implies is that you can take care of immediate financial needs, for instance, medical expenses or urgent expenditures, virtually right away.
Easy and Straightforward Process
Getting a personal loan online is an easy task. You can apply and furnish documents from home, without having to make frequent visits to the bank.
Higher Loan Amount
Based on your credit score, you could be eligible for a loan up to ₹50 lakhs. These loans are suitable for large-ticket purchases such as home makeover, consolidating debts, or financing your venture.
How to Apply Online for a Personal Loan?
Online application for a personal loan has never been more convenient. Proceed with the steps below to apply for your speedy personal loan:
Step 1: Verify Eligibility
It is important that you satisfy the eligibility requirements before applying for the loan. Commonly, the lenders seek conditions such as:
A regular income source
Sound credit history
Age between 21-60 years
Address and identity proofs
Most lenders provide an eligibility calculator on their website to assist you in checking if you are eligible for a quick approval personal loan.
Step 2: Compare Various Lenders
All online personal loans are not created equal. Compare interest rates, loan terms, processing charges, and other fees across various lenders. The right lender will get you the best deal.
Step 3: Fill Out the Online Application
Once you've found the right lender, visit their website and fill out the personal loan application form online. Be honest while providing your details such as your income, employment status, and financial history. Incorrect information can delay the approval process.
Step 4: Submit Required Documents
For quick processing, you’ll need to upload your documents online. Typically, you’ll need to provide:
Proof of identity (e.g., Aadhar card, passport)
Proof of income (e.g., salary slips, bank statements)
Proof of address (e.g., utility bills, rental agreements)
The quality of your documents, the quicker your loan will be approved.
Step 5: Wait for Approval and Loan Disbursement
After submitting your documents and application, the lender will confirm your information and approve the loan in just a few hours. Once approved, the loan amount can be transferred directly into your bank account within a short time.
Quick Personal Loans: What You Need to Know
In an age when time is everything, obtaining a personal loan in an instant is a revolution. Whether you are requesting a minimal sum or seeking up to ₹50 lakhs, personal loans online enable you to manage your finances instantly.
Instant Approval for Emergency Needs
The main benefit of rapid approval personal loans is that they enable you to fix immediate needs instantly. Traditionally, obtaining a loan may involve days or even weeks, but with online personal loans, you have the chance to get approved within hours and funds to be released in minutes. Whether for unplanned medical expenses or to meet an unexpected expense, these loans bring you the reassurance you require.
Flexible Repayment Terms at Your Convenience
One of the advantages of fast approval personal loans is their flexibility. Based on the lender, you can select a repayment tenure that aligns with your repayment ability. Whether you wish to opt for short repayment tenures for early closure or longer tenures for reduced EMI outgo, quick personal loans offer you the choice to pick what is most convenient for you financially.
Points to Keep in Mind While Applying
Interest Rates
Always compare the interest rates before applying for a personal loan. Even a small variation in interest rates can make a big difference in your total repayment amount.
Loan Tenure
Select a loan tenure that is comfortable for your repayment ability. Longer tenures lower the EMI burden but can lead to higher total interest paid over a period of time.
Processing Fees and Other Charges
Make sure you know any processing charges or concealed fees that can be charged on your loan. Honest lenders will make all the charges explicit.
Conclusion
With the fast-paced world we live in today, money needs can pop up at any time. A quick approval personal loan online is the perfect answer to meeting sudden expenses, large or small. With an online personal loan, not only do you save time but also have the advantage of quick approval and release. With amounts ranging up to ₹50 lakhs, these loans are flexible enough to meet any financial requirement.
#fast approval personal loan#apply personal loan online#online personal loan#quick approval personal loan#quick personal loan
0 notes
Text
School Admission form 2025-26 in Soyla
School Admission Form 2025-26 in Soyla – Dundlod Public School
Are you searching for the top school for your child's admission in Soyla? Well, you're on the right page! Dundlod Public School, Soyla, is inviting applications for the 2025-26 academic year, and this is your opportunity to give your little one a bright future. If you are curious about the admission procedure, eligibility, and everything else, we have you covered in the simplest manner. So, let's begin!
Why Dundlod Public School, Soyla?
Before we discuss the nitty-gritty of the admission procedure, let us consider why Dundlod Public School, Soyla is a perfect destination for your ward.
Quality Education: There is a meticulously crafted curriculum with rigorous academic sessions ensuring academic and overall development.
Experienced Teachers: Highly educated and well-experienced staff devoted to creating brilliant minds.
Safe and Supportive Environment: The institution ensures a secure and supportive environment for children to learn and develop.
Extracurricular Activities: Whether sports or cultural and artistic activities, students are given ample opportunity to exhibit their talent.
Modern Facilities: There are well-equipped classrooms, a library, science lab, and a playground for the best possible learning experience.
Who Can Apply?
Dundlod Public School, Soyla, is open to students of Nursery through Kindergarten to Class 12. Parents wishing for schools that give emphasis both to education and personality development should keep this as a high priority option. The age requirements for admissions are as follows:
Nursery: The child should be at least 3 years old by March 2025.
Kindergarten: The child should be at least 4 years old by March 2025.
Primary & Secondary Classes: Admission for all classes is open, but students might be required to come for an entrance test (for senior classes).
How to Get the Admission Form?
Obtaining the Dundlod Public School Admission Form 2025-26 is as easy as a pie! Here's how you can obtain it:
Visit the School: You can get the admission form directly from the office of the school.
Download from the Website: If there is an online facility available with the school, you can go to their official website and download the form.
Request via Email or Phone: Some parents are fond of convenience, so you can inquire if the school facilitates sending forms via email.
Steps for Admission
Now that you have the admission form, here are the easy steps to follow:
Fill Up the Form: Ensure all the information such as name, age, parents' details, and previous school information (if applicable) are properly filled in.
Attach Documents Required: You have to provide some documents along with the form, including:
Birth certificate (for proof of age)
Passport-sized photographs
Address proof (such as Aadhar card or electricity bill)
Previous school report card (for upper classes)
Transfer certificate (for students transferring from other schools)
Submit the Form: Leave the form with the school office within the deadline.
Attend the Interview/Test: If your kid is applying for a higher class, they will have to undergo a small test or an interaction session.
Pay the Fees: After selection, parents will be notified about the fee structure and payment procedure.
Confirmation of Admission: Once the payment of fees has been made, you will have an official confirmation from the school.
Important Dates to Remember
It is always wise to follow important dates so that you will not miss any:
Admission Form Availability: From March 2025
Last Date to Submit Form: Expected in April-May 2025
Entrance Test & Interview (wherever applicable): Approximately May-June 2025
Final Admission List Declaration: By June-July 2025
Session Begins: Probably by July 2025
What Parents Need to Know
Early Admission is Advisable: Apply as early as you can so that you get a seat, particularly for Nursery and Kindergarten.
Tour the School: If not already done, visit the school to feel the atmosphere.
Speak with the Teachers: Meeting with the teachers can make you learn about the method of teaching and school environment.
Verify the Fee Structure: Always inquire about the complete fee structure, including admission charges, tuition charges, and other fees.
Stay Informed: Monitor the school's website or notice board for any information regarding admission.
Final Thoughts
Selecting the perfect school is the most crucial choice for your child's future. Dundlod Public School, Soyla, is an excellent mix of academics, co-curricular activities, and personality development that makes it a great option. If you would like to put your child through for the 2025-26 session, don't procrastinate – admissions get filled rapidly!
We hope this handbook has simplified the admission process for you. Should you have further questions, you are welcome to contact Dundlod Public School, Soyla, directly. Wishing you and your child every success in this new journey of learning ahead!
0 notes
Text
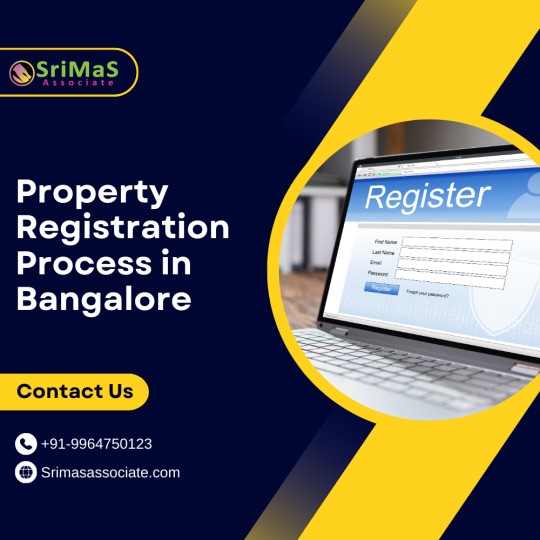
What Is the Process for Getting a BBMP Trade License and Property Registration in Bangalore
Bangalore, often referred to as the Silicon Valley of India, is a bustling hub for businesses and real estate. Whether you’re starting a new venture or investing in property, understanding the regulatory processes is crucial. Two significant aspects you need to be aware of are obtaining a BBMP trade license certificate and navigating the property registration process in Bangalore. This guide will walk you through both processes, highlighting how Srimas Associate can assist you every step of the way.
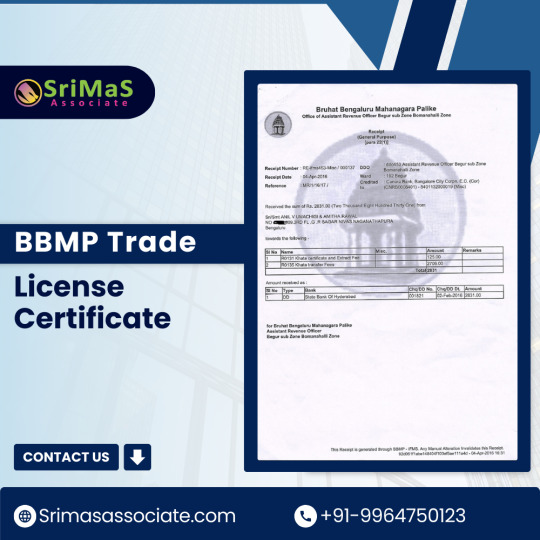
Understanding the BBMP Trade License
A BBMP (Bruhat Bengaluru Mahanagara Palike) trade license is a mandatory requirement for businesses operating in Bangalore. This license ensures that your business complies with local laws and regulations. The BBMP issues trade licenses for various categories, including retail, manufacturing, and service-based industries.
Importance of a Trade License
Legal Compliance: Operating without a trade license can result in fines and legal issues.
Building Credibility: A trade license enhances your business's credibility in the eyes of customers and partners.
Access to Financial Services: Many banks and financial institutions require a trade license for loan applications.
Steps to Obtain a BBMP Trade License Certificate
Step 1: Determine the Type of License Required
Before applying, identify the type of trade license you need based on your business activities. The BBMP categorizes licenses based on the nature of the business, such as food services, retail, or manufacturing.
Step 2: Prepare Required Documents
Gather the necessary documents for the application. Commonly required documents include:
Proof of Identity: Aadhar card, passport, or voter ID.
Proof of Address: Utility bills or rental agreements.
Business Registration Certificate: If applicable, such as a partnership deed or company registration certificate.
NOC from the Landlord: If you’re renting the premises.
Site Plan: A layout of your business premises.
Step 3: Fill Out the Application Form
Visit the official BBMP website to download the application form for the trade license. Fill it out accurately with all required details.
Step 4: Submit the Application
Submit the completed application form along with the required documents to the BBMP office in your jurisdiction. Ensure that you keep a copy for your records.
Step 5: Pay the Fees
You’ll need to pay a fee for the trade license application. The fee varies depending on the type of business and your location within Bangalore. Payment can usually be made online through the BBMP portal or at designated banks.
Step 6: Inspection by BBMP Officials
Once your application is submitted, BBMP officials may conduct an inspection of your business premises to ensure compliance with safety and regulatory standards. Be prepared for this visit and ensure that all safety measures are in place.
Step 7: Receive Your Trade License
After successful verification and inspection, the BBMP will issue your trade license. You will receive a BBMP trade license certificate that you must display prominently at your business location.
Step 8: Renewal of the License
Trade licenses are typically valid for one year and need to be renewed annually. Keep track of the renewal date and submit your application on time to avoid penalties.
Importance of Property Registration
Legal Protection: Registered property provides legal evidence of ownership.
Financial Security: It is essential for obtaining loans and mortgages.
Transferability: Registered properties can be easily transferred or sold in the future.
Steps for the Property Registration Process in Bangalore
Step 1: Verify Property Documents
Before initiating the registration process, ensure that all property documents are in order. Key documents include:
Sale deed
Encumbrance certificate (EC)
Khata certificate
Tax payment receipts
Step 2: Pay Stamp Duty
Stamp duty is a tax imposed on property transactions and varies based on the property’s value and location. Calculate the stamp duty using the guidelines provided by the Karnataka government and pay it through designated banks or online.
Step 3: Prepare the Sale Deed
The sale deed is a legal document that transfers property ownership from the seller to the buyer. It should include details such as:
Names and addresses of both parties
Description of the property
Sale amount
Date of transaction
Step 4: Schedule Registration Appointment
Visit the local sub-registrar office to schedule an appointment for registration. You may also check if online appointments are available through the official website.
Step 5: Attend the Registration Appointment
On the scheduled date, both the buyer and seller must be present at the sub-registrar office. Bring the original documents, along with copies, to submit for verification.
Step 6: Sign the Sale Deed
Both parties will need to sign the sale deed in the presence of the sub-registrar. It’s essential to read the document carefully before signing to ensure all details are correct.
Step 7: Obtain Registration Certificate
After successful registration, you will receive a registration certificate. This document serves as proof of ownership and must be kept safe.
Step 8: Update the Land Records
Once the property is registered, ensure that the land records are updated to reflect the new ownership. This is crucial for future transactions and for obtaining a Khata.
How Srimas Associate Can Help You
Navigating the processes of obtaining a BBMP trade license certificate and completing the property registration process in Bangalore can be complex. This is where Srimas Associate comes in. Here’s how they can assist:
1. Expert Consultation
Srimas Associate offers professional consultation services to help you understand the requirements and steps for both trade licensing and property registration. Their team is well-versed in local regulations and can provide tailored advice.
2. Documentation Support
One of the most challenging aspects of licensing and registration is gathering and preparing the necessary documents. Srimas Associate can help ensure that all your paperwork is complete and correctly filled out, reducing the risk of delays.
3. Application Handling
The application process can be time-consuming. Srimas Associate can handle the submission of your trade license and property registration applications, ensuring that they are filed correctly and on time.
4. Compliance Assistance
Staying compliant with local laws is crucial for business operations. Srimas Associate provides ongoing support to ensure that you remain compliant with all regulations, including renewal of licenses and updating property records.
5. Post-Registration Services
After obtaining your trade license or registering your property, Srimas Associate continues to offer support in areas such as tax planning, legal advice, and financial services, ensuring that your business or investment remains secure.
Conclusion
Starting a business or investing in property in Bangalore involves understanding and navigating various regulatory processes. Obtaining a BBMP trade license certificate is essential for legal compliance, while the property registration process in Bangalore secures your ownership rights.
By following the steps outlined in this guide and seeking professional assistance from Srimas Associate, you can ensure a smooth and efficient process. With the right support, you can focus on growing your business or enjoying your new property, knowing that all legalities are handled properly. Embrace the opportunities that Bangalore has to offer, and take the first steps toward your entrepreneurial or real estate journey today!
0 notes
Text
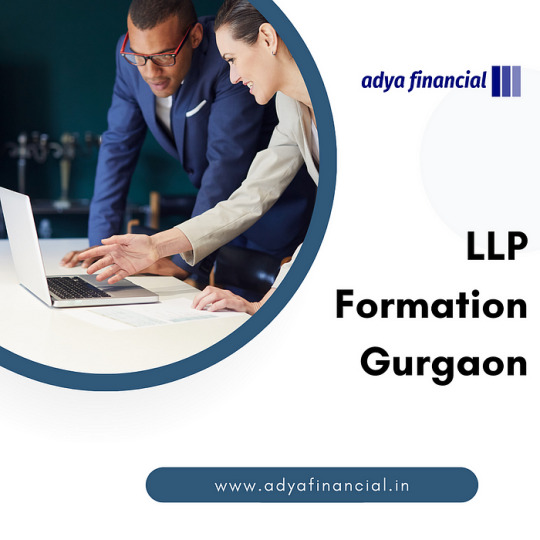
What Are the Steps for LLP Formation and Company Registration in Gurgaon
Understanding LLP and Its Benefits
Before diving into the steps, it’s essential to understand what an LLP is and why it might be the right choice for you. An LLP is a partnership in which some or all partners have limited liabilities. This means that, unlike traditional partnerships, the personal assets of the partners are protected in case of financial troubles. Furthermore, LLPs enjoy the following benefits:
Limited Liability: Partners are not personally liable for the debts of the LLP.
Flexibility: LLPs offer flexible management structures and can be adapted to suit the needs of the partners.
Tax Benefits: LLPs are taxed as partnerships, which may provide tax advantages compared to other corporate structures.
Perpetual Succession: An LLP continues to exist even if one of the partners leaves or passes away.
Steps for LLP Formation in Gurgaon
Step 1: Choose a Unique Name for Your LLP
The first step in LLP formation in Gurgaon is to select a unique name for your partnership. The name must be:
Distinct and not similar to existing companies or trademarks.
Compliant with the LLP Naming Guidelines set by the Ministry of Corporate Affairs (MCA).
Step 2: Obtain Digital Signature Certificate (DSC)
A Digital Signature Certificate is required for the e-filing of documents. A DSC can be obtained from authorized agencies and is essential for signing all electronic documents during the registration process.
Step 3: Obtain Director Identification Number (DIN)
Every designated partner in the LLP must obtain a Director Identification Number (DIN). This can be applied for online through the Ministry of Corporate Affairs’ website. The application requires submitting identification proof and address proof.
Step 4: Draft the LLP Agreement
The LLP agreement outlines the rights, duties, and responsibilities of the partners. It should cover:
Profit-sharing ratios.
Management structure.
Roles and responsibilities of each partner.
While it’s possible to draft this agreement independently, seeking professional assistance from Adya Financial can ensure that all necessary clauses are included and compliant with regulations.
Step 5: File Incorporation Documents
Once the name is approved and the necessary certificates are obtained, the next step is to file the incorporation documents with the MCA. The documents include:
Form 2: This form contains details of the LLP and its partners.
LLP Agreement: This needs to be executed and filed along with Form 2.
Identity and Address Proof of Partners: Aadhar card, passport, or voter ID.
Proof of Registered Office: Utility bills or lease agreements.
Step 6: Obtain Certificate of Incorporation
Upon successful submission of the documents, the Registrar of Companies (RoC) will review the application. If everything is in order, you will receive a Certificate of Incorporation. This document officially marks the registration of your LLP.
Step 7: Apply for PAN and TAN
After receiving the Certificate of Incorporation, you need to apply for a Permanent Account Number (PAN) and Tax Deduction and Collection Account Number (TAN). These are crucial for tax purposes and can be obtained online through the Income Tax Department’s website.
Step 8: Open a Bank Account
Once you have your PAN, you can open a bank account in the name of your LLP. Most banks will require the Certificate of Incorporation and the LLP Agreement to open the account.
Step 9: Comply with Regulatory Requirements
After the formation of your LLP, it’s essential to comply with various regulatory requirements, such as:
Filing annual returns.
Maintaining proper books of accounts.
Conducting regular audits if required.
Steps for Company Registration in Gurgaon
If you are considering a different business structure, such as a private limited company, the steps for company registration in Gurgaon are somewhat similar but have distinct requirements.
Step 1: Choose a Suitable Business Structure
Decide on the type of company you wish to register — Private Limited, Public Limited, or One Person Company (OPC). Each structure has its own legal implications and benefits.
Step 2: Select a Unique Company Name
Just like with LLP formation, the company name must be unique and comply with the naming guidelines. Ensure it reflects the business activities and is not already in use.
Step 3: Obtain DSC and DIN

Step 4: Prepare the Memorandum and Articles of Association
The Memorandum of Association (MoA) and Articles of Association (AoA) define the company’s objectives and the rules governing its operations. These documents need to be drafted carefully to avoid future legal issues.
Step 5: File Incorporation Documents
Submit the incorporation documents, which include:
Form SPICe: This is the application form for company registration.
MoA and AoA: These must be signed by all directors.
Identity and Address Proof of Directors: Similar to LLP requirements.
Proof of Registered Office: As mentioned earlier.
Step 6: Obtain Certificate of Incorporation
Once the documents are filed and approved, you will receive a Certificate of Incorporation, which officially recognizes your company.
Step 7: Apply for PAN and TAN
Similar to LLPs, you will need to obtain a PAN and TAN for your company for tax purposes.
Step 8: Open a Bank Account
With the PAN in hand, you can open a corporate bank account for your company.
Step 9: Regulatory Compliance
Keep in mind that companies face more stringent regulatory requirements than LLPs. Make sure to:
Hold annual general meetings (AGMs).
Maintain statutory registers.
File annual returns and financial statements with the RoC.
How Adya Financial Can Assist You
Navigating the process of LLP formation in Gurgaon or company registration in Gurgaon can be daunting, especially for first-time entrepreneurs. This is where Adya Financial comes into play. Here’s how they can help:
1. Expert Guidance
Adya Financial offers expert guidance on choosing the right business structure based on your specific needs and goals. Their team of professionals is well-versed in both LLP and company registration processes.
2. Documentation Support
The paperwork involved in business registration can be overwhelming. Adya Financial can assist you in preparing and filing all necessary documents, ensuring that everything is compliant with legal requirements.
3. Legal and Financial Advisory
In addition to registration services, Adya Financial provides legal and financial advice, helping you understand your obligations and rights as a business owner.
4. Post-Registration Services
Once your business is registered, Adya Financial continues to offer support in areas such as tax planning, compliance management, and financial reporting, ensuring your business remains compliant and financially healthy.
5. Time and Cost Efficiency
With Adya Financial handling the registration process, you can focus on your core business activities. Their expertise also helps in avoiding costly mistakes that can arise from improper documentation or compliance.
Conclusion
Starting a business through LLP formation in Gurgaon or company registration in Gurgaon can be a straightforward process if you are well-informed and prepared. Understanding the steps involved, from choosing a unique name to ensuring compliance with regulatory requirements, is crucial for success. With the assistance of Adya Financial, you can navigate this journey more smoothly, allowing you to focus on growing your business. Whether you opt for an LLP or a company structure, taking the first step towards registration is a significant milestone in your entrepreneurial journey.
0 notes
Text
IEC Registration – Import Export Code Registration in India
In today's globalized economy, businesses are expanding their reach beyond national boundaries. Whether you're planning to import goods from other countries or export Indian products to international markets, obtaining an Import Export Code (IEC) is a crucial first step. Issued by the Directorate General of Foreign Trade (DGFT), IEC is a 10-digit identification number that is mandatory for any individual or business dealing in import and export activities in India.
What is IEC (Import Export Code)?
The Import Export Code is a unique 10-digit code required for anyone starting an import or export business in India. It serves as a license that enables companies or individuals to engage in international trade. Without an IEC, it is not possible to clear customs, send shipments, or receive money from abroad.
Who Needs IEC?
IEC is required by:
Businesses or individuals who import goods into India.
Exporters who send goods or services outside India.
E-commerce operators dealing in international trade.
Startups or SMEs planning to expand globally.
Note: IEC is not required for imports or exports done for personal use, not connected with trade, manufacturing, or agriculture.
Benefits of IEC Registration
Global Market Access – Helps businesses expand beyond domestic markets.
No Return Filing – Unlike other tax registrations, no monthly or annual returns are needed.
Lifetime Validity – IEC is issued for a lifetime and doesn’t require renewal.
Simplified Process – The application is entirely online and hassle-free.
Supports Business Growth – Encourages foreign transactions and global trade partnerships.
Documents Required for IEC Registration
PAN Card of the individual or business
Address proof of the business (electricity bill, rent agreement, or property papers)
Cancelled cheque or bank certificate
Digital photograph of the applicant
Aadhar Card or any other identity proof of the applicant
How to Apply for IEC Registration in India?
You can apply for an IEC online through the DGFT website. Here are the steps:
Step 1: Visit the DGFT Portal
Go to https://dgft.gov.in and create a login account.
Step 2: Fill in the Application Form
Navigate to “Apply for IEC” under the “Services” section and fill in all necessary details.
Step 3: Upload Documents
Upload the scanned copies of the required documents as mentioned above.
Step 4: Pay Fees
Pay the government fee for IEC registration, currently ₹500.
Step 5: Submit the Application
Once submitted, the application will be processed, and the IEC will usually be issued within 1-2 working days.
When is IEC Not Required?
When goods/services are imported or exported for personal use.
For traders registered under GST and using GSTIN in place of IEC for export/import (as per CBIC guidelines for certain transactions).
Conclusion
IEC Registration is your gateway to international trade. It is simple to obtain, has no renewal requirement, and opens up a world of opportunities for Indian businesses in global markets. Whether you are a startup or an established enterprise, getting your IEC is the first and most crucial step toward becoming an international trader.
0 notes
Text
The Step-by-Step Process of Converting a Sole Proprietorship to a Private Limited Company
Introduction
Converting a sole proprietorship to a private limited company is a significant step for entrepreneurs aiming to expand their business while enjoying the benefits of a corporate structure. This blog post will guide you through the entire process, highlighting essential steps, legal requirements, and the advantages of making this transition.
What is a Sole Proprietorship?
A sole proprietorship is the simplest form of business ownership. In this structure, a single individual owns and operates the business. This structure offers ease of setup and management but exposes the owner to unlimited liability, meaning personal assets can be at risk if the company incurs debts.
What is a Private Limited Company?
A private limited company is a separate legal entity that limits the liability of its shareholders. This structure provides several advantages, including:
Limited liability: Shareholders are not personally liable for the company’s debts.
Enhanced credibility: A private limited company often enjoys greater trust from clients and financial institutions.
Access to capital: It is easy to raise funds through equity or loans.
Why Convert from a Sole Proprietorship to a Private Limited Company?
Converting from a sole proprietorship to a private limited company can offer numerous benefits:
Limited Liability Protection: Protects personal assets from business liabilities.
Improved Access to Funding: It is easier to secure loans and attract investors.
Tax Benefits: Potential for lower tax rates on retained earnings.
Credibility and Trust: Enhances reputation with clients and suppliers.
Step-by-Step Process of Conversion
Step 1: Assess Eligibility for Conversion
Before initiating the conversion process, ensure that your business meets the following criteria:
The sole proprietorship must be operational and compliant with all regulatory requirements.
The owner should be ready to transfer assets and liabilities to the new entity.
Step 2: Prepare Required Documentation
The following documents are essential for converting a sole proprietorship to a private limited company:
Identity Proof: Voter ID, Aadhar card, or passport.
Business Registration Documents: Any existing licenses or registrations.
Financial Statements: Recent balance sheets and profit & loss accounts.
Memorandum of Association (MoA): Should include objectives related to the takeover of the sole proprietorship.
Step 3: Obtain a Digital Signature Certificate (DSC) and Director Identification Number (DIN)
To proceed with incorporation, all directors must obtain:
Digital Signature Certificate (DSC): Required for signing electronic documents.
Director Identification Number (DIN): A unique identification number for directors.
Step 4: Name Reservation
Before incorporating, you must reserve your company's name through the Ministry of Corporate Affairs MCA portal. Ensure that the name complies with naming guidelines and reflects your business's nature.
Step 5: Draft Incorporation Documents
Prepare the following documents for submission:
Memorandum of Association (MoA): Outlines the company's objectives.
Articles of Association (AoA): Defines internal management rules.
Step 6: File the Application with the Registrar of Companies (ROC)
Submit your application along with the prepared documents through the MCA portal. The application includes:
Name reservation approval.
MoA and AoA.
Identity proof and other necessary documents.
Step 7: Obtain a Certificate of Incorporation
Upon successful review by the ROC, you will receive a Certificate of Incorporation, marking your business's official transformation into a private limited company. This certificate serves as legal proof of existence.
Step 8: Transfer Assets and Liabilities
Execute a sale or takeover agreement between the sole proprietorship and the newly formed private limited company. This agreement should detail:
The transfer of all assets (e.g., equipment, inventory).
Transfer of liabilities (e.g., debts, obligations).
Step 9: Post-Incorporation Compliance
After incorporation, complete these compliance tasks:
Open a New Bank Account: Establish a bank account in the company's name.
Update GST Registration: Ensure GST registration reflects the new company details.
Reissue Licenses and Permits: Obtain necessary licenses under the new entity name.
Costs Involved in Conversion
The costs associated with converting a sole proprietorship to a private limited company can vary based on several factors:
Government fees are based on authorised capital.
Professional fees for drafting documents.
Stamp duty varies by state.
Additional costs are associated with obtaining a new PAN and GST registration.
On average, these costs can range from ₹20,000 to ₹50,000.
Common Challenges in Conversion
While converting from a sole proprietorship to a private limited company offers many advantages, it can also present challenges:
Complexity in Documentation: Preparing accurate legal documents can be time-consuming.
Compliance Requirements: Adhering to post-incorporation compliance can be demanding.
Cost Implications: Initial costs may deter some entrepreneurs from proceeding with conversion.
Conclusion
Transitioning from a sole proprietorship to a private limited company is an essential step for entrepreneurs who want to expand their operations while enjoying legal protections and enhanced credibility. This comprehensive guide will help you navigate the conversion process smoothly and position your business for future growth.
In summary, understanding each step involved in this transition will empower you as an entrepreneur to make informed decisions that align with your long-term business goals. Whether you're seeking limited liability protection or improved access to funding, converting your business structure is an investment in its future success.
0 notes
Text
DSC Registration for GST Filing: A Quick Overview
A Comprehensive Guide to DSC Registration: Everything You Need to Know
Digital Signature Certificates (DSCs) play a crucial role in the digital landscape by providing authentication and security to electronic documents and transactions. Whether filing income tax returns, incorporating a company, or signing online documents, DSC registration has become integral to various digital processes. If you're navigating the world of digital signatures and must register for a DSC, this guide will walk you through everything you need to know.
What is a Digital Signature Certificate (DSC)?
A Digital Signature Certificate (DSC) is the digital equivalent of a physical signature in electronic format. It offers authenticity, integrity, and non-repudiation of signed electronic documents. DSCs are issued by Certifying Authorities (CAs) licensed to issue digital certificates.
Types of Digital Signature Certificates Registration:
1. Class 1 DSC: These are issued for verification of email IDs and are typically used in online applications where the risk of data compromise is minimal.
2. Class 2 DSC: This class is used for filing income tax returns, GST returns, and company incorporation. It verifies the applicant's identity against a pre-verified database.
3. Class 3 DSC: Offering the highest level of security, Class 3 DSCs are used in e-tendering, e-procurement, and online auctions. They involve the highest level of identity verification.
Steps for DSC Registration:
1. Choose a Certifying Authority (CA): Select a licensed Certifying Authority authorised by the Controller of Certifying Authorities (CCA) to issue DSCs.
2. DSC Application Form: Obtain the DSC application form from the selected CA. This form requires personal details such as name, address, email ID, and contact information.
3. Identity Verification: Depending on the class of DSC, you'll need to provide identity proof documents such as a PAN card, Aadhar card, passport, or driver's license. For Class 3 DSC, the verification process may include physical verification by a designated authority.
4. Submit Application and Documents: Fill out the application form accurately and submit it along with the required documents to the CA. Make sure to double-check all the information provided.
5. Payment: Pay the applicable fee for DSC issuance. The cost may vary depending on the class of DSC and the chosen Certifying Authority.
6. DSC Issuance: After verifying your application and documents, the certifying authority will issue the digital signature certificate.
7. Downloading DSC: Once issued, you can download your DSC and the cryptographic keys from the CA's website. Ensure that you securely store the DSC file and keys.
Validity and Renewal:
DSCs have a validity period, typically one to three years, depending on the class chosen. Before the certificate expires, you must renew it to continue using it for digital transactions. The renewal process involves steps similar to those of the initial registration process.
Conclusion:
Digital Signature Certificates are essential for secure and legally recognised digital transactions. Whether you're an individual filing tax returns or a business engaging in e-commerce, having a DSC Registration streamlines and secures your online activities. Following the steps outlined in this guide, you can successfully register for a DSC and leverage its benefits in the digital world. Remember to choose a reputable Certifying Authority and secure your DSC to ensure its integrity and effectiveness.
0 notes
Text
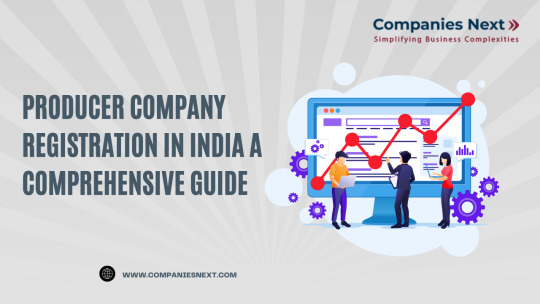
Step-by-Step Guide to Registering a Producer Company in India
India’s agricultural sector holds immense potential, and registering a Producer Company provides small producers and farmers the opportunity to form a collective, enhancing their economic and operational efficiency. A Producer Company is a specialized legal entity under the Companies Act, 2013, specifically designed for individuals involved in activities related to farming, production, procurement, and trading of primary agricultural products.
This article provides a detailed step-by-step guide to registering a Producer Company in India, offering insights into the documentation, legal requirements, and compliance obligations.
What is a Producer Company?
A Producer Company combines the features of both a cooperative society and a private limited company. It allows agricultural producers to pool their resources and collectively engage in activities such as production, procurement, harvesting, marketing, and trading of primary products. Producer Companies are instrumental in empowering small farmers, promoting sustainable agricultural practices, and enhancing the economic strength of rural producers.
Key Features of a Producer Company:
Members must be Producers: Individuals involved in production, including farming, forestry, horticulture, animal husbandry, etc., can form a Producer Company.
Separate Legal Entity: The company has a separate legal identity from its members, ensuring limited liability for the shareholders.
Limited to Producers: A Producer Company deals only with its members and cannot engage in transactions with the general public.
Step-by-Step Process to Register a Producer Company in India
Step 1: Prepare the Essential Documents
Before starting the registration process, gather all the required documents. These include personal details of the directors and shareholders, identity proofs, address proofs, and other legal documents. Here's a checklist:
Identity Proof: PAN card of each director and shareholder.
Address Proof: Aadhar card, voter ID, passport, or driving license.
Registered Office Address: Proof of the registered office address (utility bill or rent agreement).
Photographs: Passport-sized photographs of all directors and shareholders.
Digital Signature Certificate (DSC): A DSC is necessary for filing electronic forms with the Ministry of Corporate Affairs (MCA).
Additionally, the company should have documents proving the status of its members as producers, such as land ownership records, Khasra-Khatauni documents, or letters from a local authority confirming producer status.
Step 2: Obtain the Digital Signature Certificate (DSC)
Since the registration process is entirely online, each proposed director of the Producer Company must have a Digital Signature Certificate (DSC). The DSC is used to electronically sign the registration forms. You can obtain the DSC through certified agencies approved by the government.
Step 3: Apply for Director Identification Number (DIN)
The next step is to apply for a Director Identification Number (DIN) for all the proposed directors of the Producer Company. The DIN is a unique number issued by the MCA to identify directors of companies in India. You can apply for the DIN through the SPICe+ (Simplified Proforma for Incorporating Company Electronically Plus) form at the time of incorporation.
Step 4: Choose a Unique Name for Your Producer Company
Choosing the right name is critical, as it must comply with the guidelines laid out by the Ministry of Corporate Affairs (MCA). The name of a Producer Company should end with "Producer Limited Company" and should not already be registered by another company. It must also adhere to the naming conventions set under the Companies Act, 2013 and Company (Incorporation) Rules.
To reserve the name, file an application using SPICe+ Part A on the MCA portal. Two names can be proposed in this form, and the MCA will approve the one that is available and acceptable.
Step 5: Draft the Memorandum of Association (MOA) and Articles of Association (AOA)
Once the name is approved, the next step is to draft the Memorandum of Association (MOA) and Articles of Association (AOA). These are the core documents for any company, laying down its objectives, rules, and regulations.
Memorandum of Association (MOA): This document outlines the purpose and objectives of the Producer Company, including production, marketing, and trading activities.
Articles of Association (AOA): This document contains the rules and regulations governing the internal management of the company.
The MOA and AOA should be carefully drafted to ensure they reflect the company's intended activities and comply with the legal framework.
Step 6: File the Incorporation Forms with the ROC
Once the MOA and AOA are drafted, the next step is to file the incorporation application. This involves completing SPICe+ Part B and uploading all required documents to the Registrar of Companies (ROC). Along with the incorporation application, the following forms must be submitted:
AGILE-PRO-S (INC-35): This form is used for various registrations, including Goods and Services Tax Identification Number (GSTIN), Employees’ Provident Fund Organization (EPFO), Employees' State Insurance Corporation (ESIC), and bank account opening.
INC-9: A declaration by the directors confirming compliance with the requirements of the Companies Act.
INC-33 and INC-34: E-MOA and E-AOA for the incorporation of the Producer Company.
Step 7: Payment of Fees and Stamp Duty
Once all the forms are completed and documents uploaded, the next step is to pay the registration fees and applicable stamp duty online. The fees are calculated based on the authorized capital of the Producer Company. Stamp duty varies depending on the state where the company’s registered office is located.
Step 8: Verification by Registrar of Companies (ROC)
The Registrar of Companies (ROC) will verify all the documents and details submitted. This process usually takes a few days. If the ROC finds everything in order, the company will be officially registered, and the Certificate of Incorporation (COI) will be issued.
Step 9: Issuance of Certificate of Incorporation
Once the registration is complete, the ROC will issue the Certificate of Incorporation (COI). This document serves as legal proof of the existence of the Producer Company. The COI also includes the company's Corporate Identification Number (CIN), which is its unique identity in the eyes of the law.
Step 10: Post-Incorporation Compliances
After receiving the Certificate of Incorporation, the Producer Company must comply with several post-incorporation requirements:
PAN and TAN: The company will receive its Permanent Account Number (PAN) and Tax Deduction and Collection Account Number (TAN) during the incorporation process.
Opening a Bank Account: Open a corporate bank account in the name of the Producer Company to handle business transactions.
Issue Share Certificates: Share certificates must be issued to all the members within two months of incorporation.
Appointment of Auditor: The Producer Company must appoint an auditor within 30 days of incorporation.
Conduct the First Board Meeting: The first board meeting must be held within 30 days of incorporation to appoint the company’s officials, including the CEO and other key executives.
Conclusion
Registering a Producer Company in India offers a structured and efficient way for small producers and farmers to collaborate and benefit from collective efforts. The registration process, while systematic and straightforward, involves several legal steps, including document preparation, compliance with MCA norms, and filing multiple forms. It’s advisable to seek professional assistance to ensure a smooth and hassle-free registration process.
By forming a Producer Company, producers can unlock numerous opportunities for growth, access better markets, and increase their income through collective bargaining and resource management.
0 notes
Text
Pan Card Apply in Pitam Pura - JDMR
Pan Card Apply in Pitam Pura: Your Guide to Seamless PAN Card Services
Are you in need of applying for a PAN card in the Pitam Pura area? Look no further than JDMR for all your PAN card services. Whether you need to apply for a new PAN card, correct any errors, update your information, or get a duplicate card, we have got you covered. Our experienced team is here to make the process as simple and stress-free as possible for you.
Why Choose JDMR for Your PAN Card Needs?
When it comes to something as important as your PAN card, you want to ensure that you are working with a trusted and reliable service provider. JDMR has been in the business for years, helping countless individuals in Pitam Pura and beyond with their PAN card requirements. Our expertise in the field sets us apart, making us the preferred choice for many.
What documents do I need to apply for a PAN card?
To Pan Card Apply in Pitam Pura, you will typically need to provide proof of identity, proof of address, and proof of date of birth. This can include documents such as your Aadhar card, passport, driving license, or voter ID card. Make sure to have these documents handy when you visit our office for a seamless application process.
How long does it take to get a PAN card?
Once you have submitted your application and all the necessary documents, you can expect to receive your PAN card within a few weeks. However, with JDMR, we strive to expedite the process and ensure that you get your PAN card in the shortest possible time frame.
Can I apply for a PAN card online?
Yes, you can apply for a PAN card online through the official NSDL or UTIITSL website. However, if you prefer a more personalized service and guidance throughout the application process, JDMR is here to assist you every step of the way.
PAN Card Correction, Update, and Duplicate Services in Pitam Pura
In addition to applying for a new PAN card, JDMR also offers services for correcting errors, updating information, and obtaining a duplicate card. If you have recently changed your name, address, or any other details on your PAN card, we can help you make the necessary corrections.
If your PAN card has been lost, stolen, or damaged, don't worry. JDMR can assist you in getting a duplicate card issued quickly and efficiently. Our team will guide you through the process and ensure that you have a replacement card in no time.
How much does it cost to apply for a PAN card?
The fees for applying for a PAN card may vary depending on the type of service you require. At JDMR, we offer competitive pricing for all our PAN card services, ensuring that you get value for your money without any hidden costs or surprises.
Are there any additional services provided by JDMR?
In addition to PAN card services, JDMR also offers a range of other document-related services to meet your needs. From passport applications to Aadhar card updates, we are your one-stop solution for all your documentation requirements.
Don't let the hassle of paperwork and bureaucracy overwhelm you. Let JDMR handle all your PAN card needs in Pitam Pura with professionalism and efficiency. Contact us today to get started on your PAN card application or any other related services.
0 notes