#the extant gown also does this because it's from around 1810
Explore tagged Tumblr posts
Text
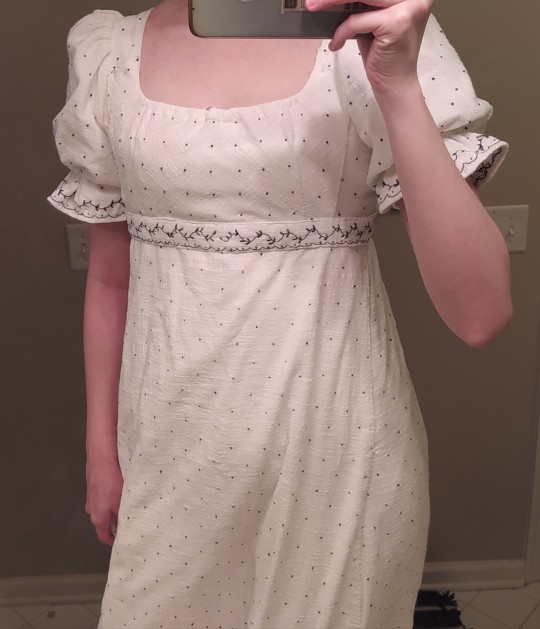
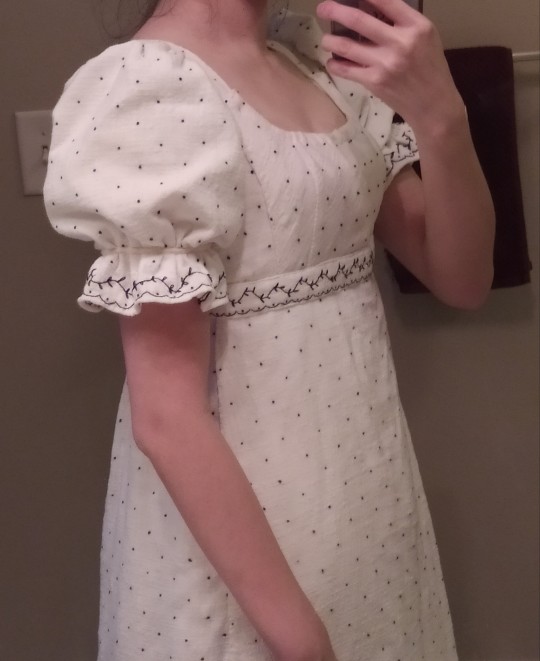
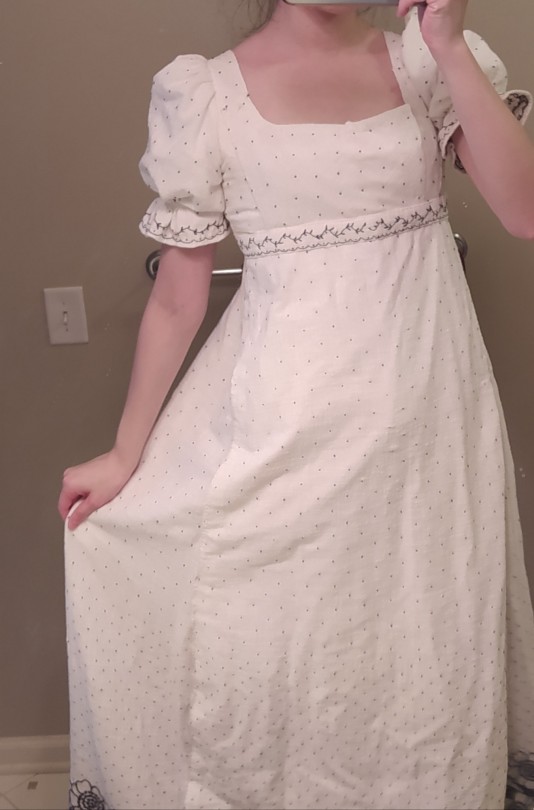
Making a regency gown: Finished
Here, have some dogshit-quality photos of the finished dress because my phone is a worthless overpriced potato masquerading as a camera


I swear it looks better in person.
I'm actually pretty pleased with the final gown even though I used 100% the wrong fabric and the skirt could use a whole entire panel more width. The floral embroidery on the hem (4th pic) came pre-embroidered with the fabric, but the dots and vines were hand-embroidered by me.
I finished the embroidery 3 weeks ago but didn't post pics because I was still holding out hope that aforementioned dogshit camera would cooperate. And well, I finally said fuck it, I'm tired of trying to get decent photos while standing on a chair in front of my bathroom mirror while 19/20 of the pics I try to take come out blurry. These 4 photos are just the least terrible of the bunch 🤬
#sewing#hand sewing#historical costuming#regency fashion#tricia sews (kind of)#you may have noticed that the waistline hits a few inches below my underbust#that's on purpose#the extant gown also does this because it's from around 1810#the waistlines move higher as the decade progesses but i like the slightly lower waistline#at some point I'm going to make a reticule and bonnet and pelisse and maybe some detachable daywear sleeves#but I'm going to take a break for now and focus on some historybounding daily wear things
85 notes
·
View notes
Text
Regency gown project: Part I-lost-count
As what is probably going to be the last thing I sew in 2022, I finally finished the bodice of the gown. Kind of. Mostly.

I’m pinning it in the front and will probably just go with pins for closures for the final dress. I tried button closures for the bodiced petticoat made from the same pattern, and I’ve decided that more buttons on the gown bodice would just be too bulky.
I only made 2 mockups when drafting the sleeve pattern, so I’m happy the process was relatively painless. I have no idea what the correct process for sleeve drafting is, but I just kind of vaguely cut out a shape that I thought would work, sewed it onto the bodice, refitted it until I was happy with it, took a pen to trace out the stitch lines, and then unpicked and cut out the final sleeve shape to trace onto a paper pattern.
As stated in the last progress update, it’s made from a lining of plain modern utility muslin and an outer fashion layer of cotton gauze. The gauze fabric has a floral pre-embroidered border that’s going to go around the bottom of the skirt. The rest of the embroidery on the dress will be done by hand.
There are 440 separate little dots on this bodice, not including the ones that go along the scalloped pattern on the ruffles of the sleeves. I know because I counted how many colonial knots I had to do instead of actually just sucking it up and doing them. The vine on the ruffles is also based on the extant gown, except I don’t think I got the proportion quite right because the leaves look like they’re spaced more closely together on the original gown. Oh well, I guess I’ll just do the vines right when I embroider the waistband.
On the extant dress, the dots and vine work are actually thousands of tiny metal staples, not embroidery. And they were originally silver, not black, but have tarnished over the last 210 years. But I actually really like the look of the darker dots, and the only pre-embroidered fabric I could find that would remotely work for this was the cotton gauze with a navy floral border that definitely isn’t historically accurate, so I’m sticking with navy blue thread embroidery for my dress. Attempting strict HA and making my dress as exact to the original is kind of moot since I’m already taking the liberty of giving this 1810s ballgown an apron-front closure for ease of getting in and out of it, instead of the back buttoned closure that would have been more popular by this decade and that I know for 100% certain the original gown has. Maybe someday I’ll try to make a more accurate replica, if I can source period-accurate cotton muslin and if I’m dedicated enough to attempt to do the entire skirt border embroidery by hand too. (If that ever happens, I might even go for back closures, except I would have to make them hooks and eyes instead of buttons because I 100% cannot reach back there with my right arm. And I’d need to contact the museum and ask if they have more photos of the back of the dress.) For now I’ll settle for doing a bazillion colonial knots and apron front closures and conjectured side-back seam placements.
Here’s a view from the side to compare to the original museum piece:

You can’t tell from the front view, but I have to use my hand as a censor bar for the side view today. Mostly because my stays are doing exactly what they’re supposed to. I can’t show you what the stays look like (aside from the tiny sliver you can see through the gap in the petticoat) because they are under bust and my shift is translucent, and that would be even more indecent than me not covering my neckline in the above photo. I’m really happy with my decision to remake the stays. I know I was upset because they’re really wrinkly, but it literally does not matter because you can’t see them anyway. I can’t say I really recommend the Bernhardt stays considering how much of a fuss they were to make and fit and remake and refit. I think I made 4 mockups before I was satisfied, and that’s just really psychologically painful when you sew everything by hand. My final pattern required so much tweaking that the shape doesn’t really resemble the original Bernhardt pattern anymore. That said, it was a good starting point and the finished product definitely does the job.
What was not doing its job today was my shift. The neckline kept bunching up in the back and making lumps through the gown bodice, so I tried to redistribute the gathers. That helped, but then it made my front neckline too low. But if I tried to tighten the drawstrings of the shift, then the shift would feel tight in the bust and flatten out the silhouette. So I had to settle for the lower front neckline, which means I just constantly look like I’m spilling out of my stays. (It’ll be fine. It will all get covered up once I make the front bib that will complete the bodice.)
The skirt also still needs to be embroidered with probably 3000 (not hyperbole) more tiny colonial knots before I can assemble the whole dress together, so this feels like a good stopping place to close out 2022.
Until next time then.
#sewing#hand sewing#historical costuming#regency fashion#tricia sews (kind of)#idk why my sewing posts are always so rambly
4 notes
·
View notes