#save as png to maintain transparency
Explore tagged Tumblr posts
Visit Tumblr Blog
Explore Tumblr blogs with no restrictions, modern design and the best experience.
Last Seen Tumblr Blogs


Fun Fact
Tumblr was the first site to host the blog for President Barack Obama in 2011.
Note
Do you sell versions of your embroidery designs? I'm obsessed with your Solas patterns and would love to try them!
Hello!
So, short answer is yes, while the first digital mockups I made were designed just for my own reference and as color guides for transferring the designs painstakingly by hand, I ended up going back to them and turning them all into digital vectors. This means they can be printed onto transfer paper or directly onto stabilized fabric for stitching, which is MUCH easier than drawing by hand. Lots of people asked me if I could sell the designs so I figured this part out and was able to test it myself--the tower embroidery was an example of printing the vector directly onto the fabric and worked out great!
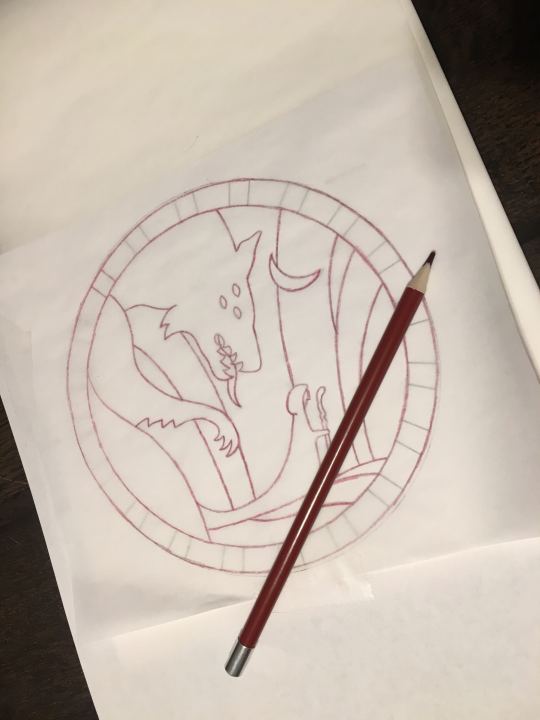
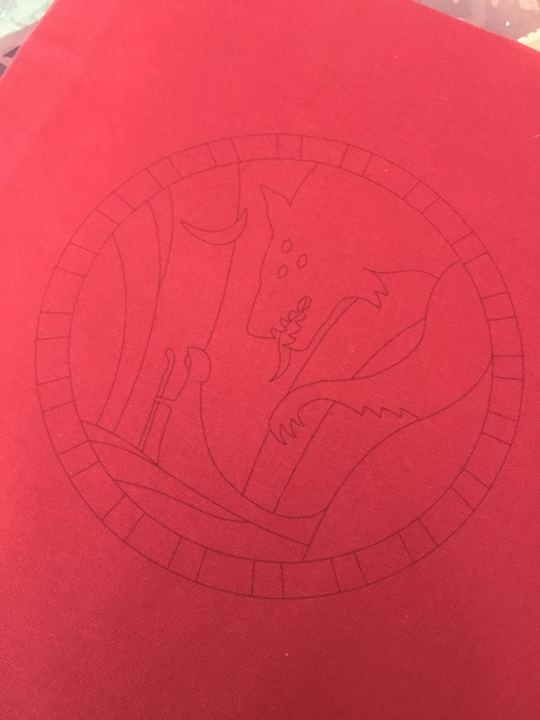
(above: tedious hand-drawing process for the Hierophant design, vs my failed attempt at transfer pencils that did not work at all for the Tower, vs printing directly onto fabric which did work in the end)
Long answer is after I did that, I uh, never figured out how or where to list them for sale online. Or what all to include with them--like what level of written instruction to include, should i also make notes on the thread colors I picked, should I include my colored-in-versions as color guides or just let everyone free-for-all it, in the case of the Tower embroidery i also hand-dyed a lot of grey thread that was crucial for it coming out how i wanted it to look--is it deceptive to sell a pattern when other people can't necessarily recreate it the same way because of that? Should I list in general the dye instructions if they wanna recreate it, or for people who want some of my extra thread or for people who don't have an inkjet printer so can't print the design onto the fabric themselves, should i think about selling full "embroidery kits" that include the printed pattern sized for a display hoop and the thread needed? etc etc etc
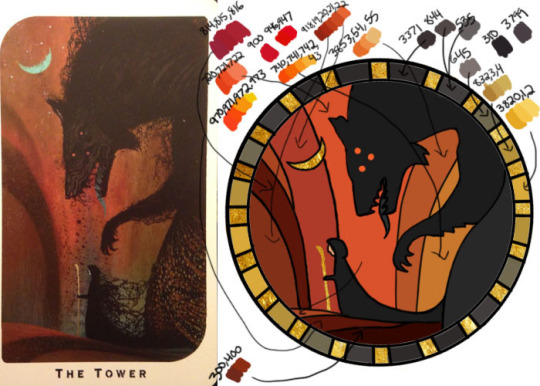
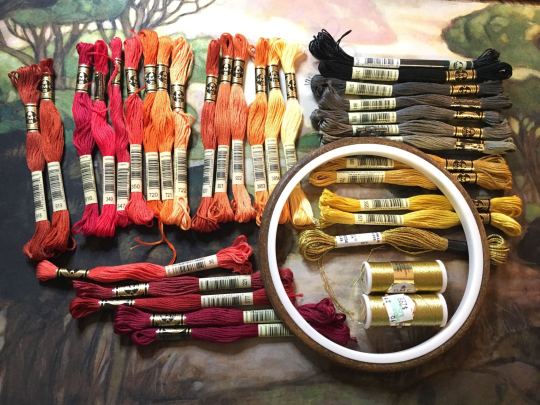
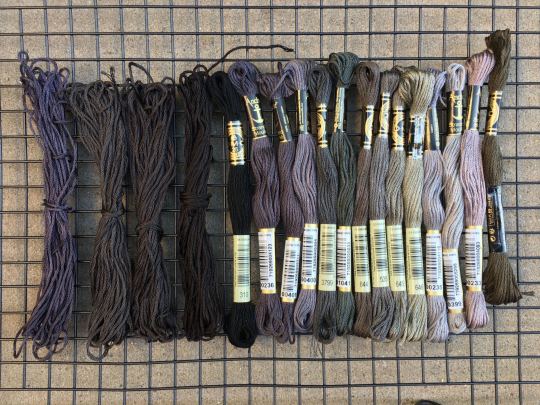
(above: photo of the color guide I made myself with tentative thread color selections (warning NOT the ones I actually ended up using), photo of my pile of threads I picked from, and photo of some of the threads I ended up dying myself to get closer to the design I wanted)
Anyway that was all a lot of thinking and work to do, so i put it off!!! and uh here we are 2 years later and I have still not posted them anywhere. I really gotta get around to all that still...
But in the meanwhile, if anyone reading would like a pattern, just let me know directly what you're looking for and I can save the versions of the files as needed for your plans and send them over. like for a digital only version (so no threads or me printing for you) i would probably make a zip file with a transparent png of the design (so you can put it in a word doc to print at whatever size you desire), as well as a pdf with a few copies of it already pre-sized for a display hoop for ease of printing or transfer, the colored-in version i used based on the tarot cards, photos of my finished versions, etc (note to self i must remember to include the design both normal for direct printing and horizontally flipped for anyone who plans to use transfer paper for it since those are mirrored...). Oh and a quick explanation of how i managed to get my fabric through a standard printer if you wanna try that.
But yeah i'm happy to work out something with kofi or paypal or venmo and sell the digital ones for like $20 each or something for now, if you don't mind not having written step-by-step instructions accompanying the patterns and example photos. Or if anyone has suggestions on where to host them for sale, for someone not interested in maintaining a dedicated storefront like etsy or storenvy long term. Maybe Gumroad? If i stuck to digital-only sales something like that might work. I'm open to input for sure. If you want something more than digital like a pre-printed fabric (since it's kind of weird to do yourself), I'm still open to trying, it just would be a little more $ to account for the fabric/stabilizer and cost of shipping, and probably take me a few more days to do.
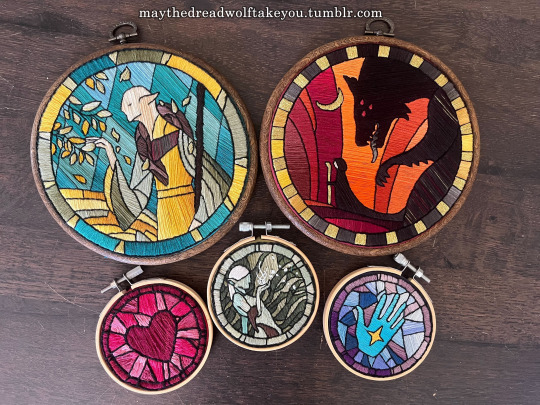
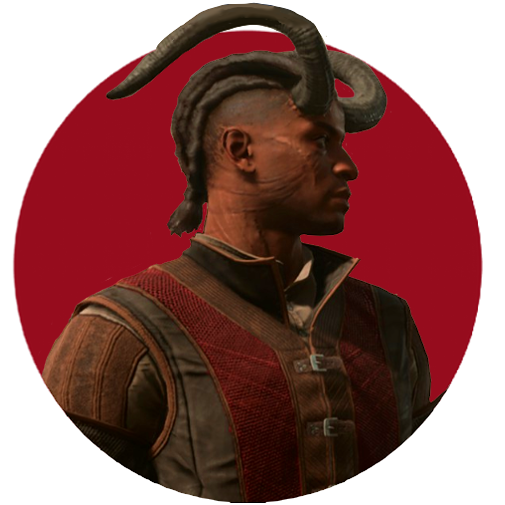
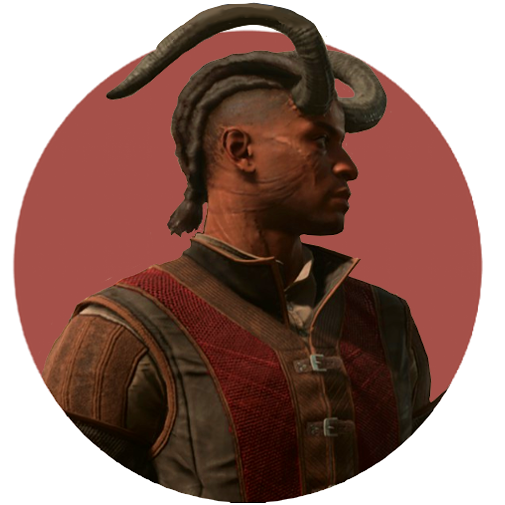
(above: example of finished DA themed embroideries)
But regardless, thank you for your interest at all!! I'm so glad people have enjoyed my embroidery series :) While I'd love to make lots of copies to sell to whoever wants one, I simply don't have the time, and they are SO labor intensive to make it really is like 80-90% of the cost is manhours. I spend anywhere from 5-15 hours making the patterns and vectors, but the stitching and rest of it itself is easily the bulk at 40-100 hours depending on complexity and number of threads used. So WAY more feasible to sell the patterns than make more to sell myself, and then anyone willing to put in the time can have one too :)
#ramblings#my stuff#my embroidery#dragon age embroidery#dragon age#replies#sparrowposting#dear tumblr PLEASE do not eat this one as i post it 🙏
26 notes
·
View notes
Text
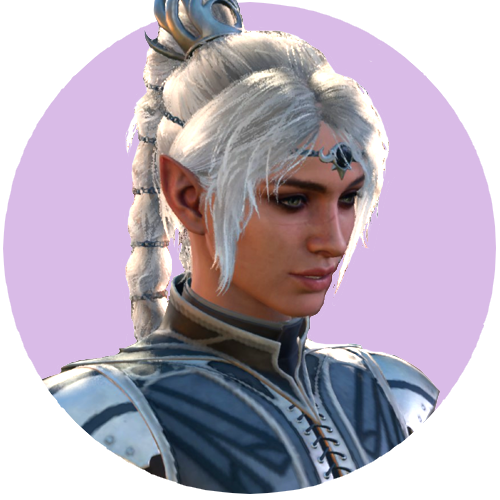
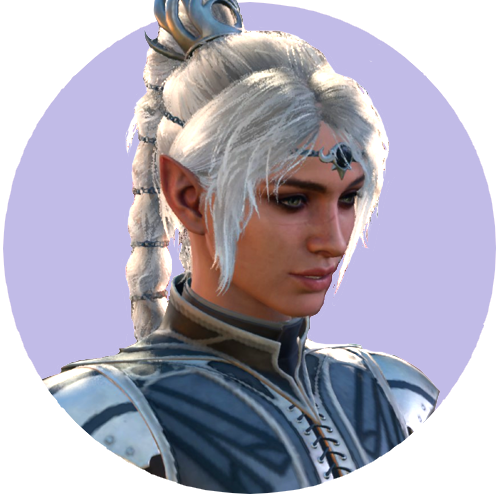
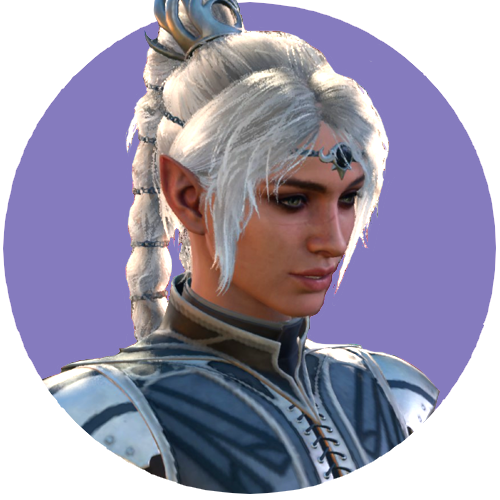
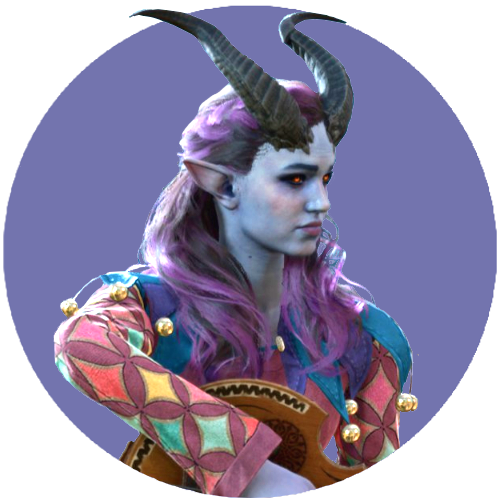
Some (spoiler appearance) Wyll and Shadowheart icons, like/reblog if using, save as a png to maintain transparency ✨
#i /need/ to take better screenshots#wyll ravengard#shadowheart#bg3edit#gameedit#icons#bg3 icons#bg3#bg3 spoilers#and if you want to change background colours please go ahead
136 notes
·
View notes
Text

This is the Tiny Dancer. It is and isn't an AI generated image. I was about to explain how exactly in a longer post about the general state and usability of AI image generators, but it went to shit thanks to Dumblr's less than perfect response to Ctrl+Z.
But, here it is. What you need to know is, you can hardly force an AI image generator to parse two colors in a prompt properly. For example, ask it to draw a character wearing white tanktop and beige sweatpants, and there's a chance it'll understand it as a beige tanktop and/or white sweatpants, and that assuming it doesn't go off the rails even more. Ask it to draw a character with blue hair wearing a yellow raincoat... I knew the fucker would wipe out on that one, so I got smart. We'll get to that one later because the actual workflow had an extra step before that.
If you want a character with cybernetic implants and/or entire prosthetic body parts, you're shit outta luck as well. It's hard to wring it out of a prompt, particularly if you want the prosthetics to look a certain way because, as described above, AI generators tend to go absolutely fucking mental over descriptors of color and material. Which is why I had to use something called inpainting. Basically, you need an image editor that handles PNG transparency, use the eraser or selection tool to remove the part that you want redrawn, save it as PNG with the removed part as a transparent hole, then feed it to the AI generator... with a text prompt describing the entire character as a cyborg built from the material you want. So, for example "female cyborg with white plastic body". To make sure the legs were in the same pose as in the original image, I used a plugin called a ControlNet to read the pose off the original and point the generator to draw the new legs in the same pose. Barely any online generators do it as they're low-effort scams, mostly. So, after some kludging and kleaning in Photoshop, I had a Tiny Dancer on plastic legs. Right. Back to the amazing technicolor dreamcoat.
The coat was drawn using the exact same technique: I erased a big coat-shaped transparent hole on the image with the legs, used a ControlNet to maintain a consistent pose, then it was more kludging and kleaning. And since the original prompt involved a street background, the Kitten Effect kicked in - you can spot four more or less wack copies of the character in the background, and my attempt at replacing them with someone different failed so laughably hard I canned all generated images from that series and decided to leave it as it is.
And finally, I edited the signs a bit Just Because I Could. I mean, any ape (or even a monkey) can write a prompt or copy it from a song. But if you know Photoshop enough to clean up some of the jank and salvage an almost good picture, you might as well show off.
#ai generated images#ai art#AI image#cyberpunk#StableDiffusion#ai image generation#ai art generation
14 notes
·
View notes
Text
photo editing
Photo editing has become an essential part of modern photography. In today's digital age, editing has allowed photographers to take their images to the next level by enhancing their visual appeal and aesthetic. With the advancement of technology, photo editing has become more accessible and user-friendly than ever before, with a wide range of software and tools available to help you achieve your desired result.
In this blog, we will discuss the basics of photo editing and provide some tips and tricks to help you improve your editing skills.
Firstly, it's important to understand that photo editing is not about altering the reality of the image but enhancing the visual appeal. The goal is to make the image look better, more captivating, and aesthetically pleasing while still maintaining the authenticity of the original photograph. This means that you should avoid over-editing your images, as it can make them look unnatural and unappealing.
The first step in photo editing is selecting the right software or tool. Some popular options include Adobe Photoshop, Lightroom, GIMP, and Canva. These programs offer a wide range of features, from basic adjustments such as brightness and contrast to advanced techniques like color grading and retouching. It's important to choose a tool that suits your needs and experience level.
Once you have selected your editing software, the next step is to import your images and make basic adjustments. These include adjusting the brightness, contrast, and saturation levels, which can dramatically improve the overall look of your image. You can also crop your images to remove any unwanted elements or to emphasize the main subject.
Another useful tool in photo editing is the use of filters. Filters can add a unique look to your images and can help you achieve a specific mood or tone. However, it's important to use filters sparingly and avoid using them as a crutch. Overusing filters can make your images look generic and unoriginal.
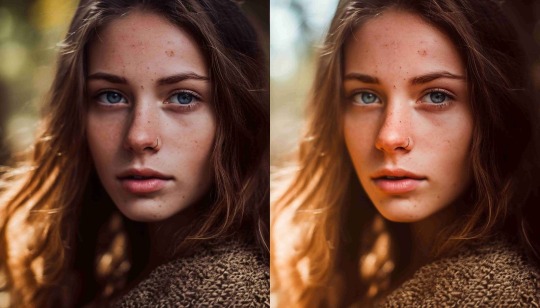
One of the most popular advanced techniques in photo editing is retouching. This involves removing blemishes, smoothing out skin, and correcting any imperfections in the image. However, it's important to be subtle when retouching, as overdoing it can make the image look unnatural and fake.
Color grading is another advanced technique that can make your images stand out. Color grading involves adjusting the color and tone of your image to achieve a specific look or mood. This can be done by adjusting the hue, saturation, and brightness levels of specific colors in the image.
Finally, it's important to save your edited images in the right format. JPEG is the most common format used for web and social media images, while PNG is better suited for images with transparent backgrounds. TIFF is the preferred format for print images, as it preserves the highest quality and resolution.
In conclusion, photo editing is a powerful tool that can enhance the visual appeal of your images and help you achieve your desired result. Whether you're a professional photographer or a hobbyist, learning the basics of photo editing can help take your images to the next level. Remember to keep it simple, avoid over-editing, and be subtle with your techniques. With practice and patience, you'll be able to create stunning images that will capture the attention of your audience.
Do you want edit any type of photo contact me : https://www.fiverr.com/share/V80BKB
2 notes
·
View notes
Text
The Importance of Image Downloading in the Digital Age
In today's digital world, images have become a crucial part of communication, marketing, and entertainment. From social media platforms to online stores, the need to download and use images is a common task for internet users. Whether it's for personal use or professional purposes, understanding the best practices for downloading images is essential.
Types of Image Downloadingimage downloader
Personal Use: Many users download images for personal projects such as wallpapers, social media posts, or simply saving a favorite image they come across online. This is usually done from websites, image galleries, or search engines.
Commercial Use: Businesses and marketers often download images for creating advertisements, blogs, websites, or product listings. These images are typically licensed for commercial use, and it's crucial to ensure proper usage rights to avoid legal issues.
Creative Projects: Photographers, designers, and content creators frequently download images for their creative works. High-quality images are essential in industries like graphic design, publishing, and content creation.
Legal and Ethical Considerations
When downloading images, it's important to be aware of copyright laws and the ethical implications of using someone else's work. Many images on the internet are protected by copyright, and downloading or using them without permission can result in legal consequences.
Stock Images: One way to avoid copyright issues is by using stock image websites, where users can purchase or use royalty-free images for a fee. Websites like Shutterstock, Getty Images, and Unsplash offer a variety of images for different uses.
Creative Commons: Some images are licensed under Creative Commons, which allows users to download and use them under certain conditions. It's important to check the license to ensure proper attribution or restrictions on commercial use.
Tips for Downloading High-Quality Images
Resolution Matters: Always choose high-resolution images to ensure they look clear and sharp, especially when used for print or professional presentations.
File Formats: Understand the different file formats such as JPEG, PNG, and TIFF. Each has its own advantages depending on your intended use—JPEGs are great for web use, while PNGs are preferred for images with transparency.
Image Size: When downloading images, consider the file size. Larger images take up more storage space and can slow down website loading times if used incorrectly. For web usage, optimizing image sizes is crucial.
Image Compression: To save storage space without losing quality, use image compression tools that reduce file sizes while maintaining visual clarity.
Conclusion
Image downloading is an everyday task that plays a significant role in personal, professional, and creative endeavors. However, it's important to download images responsibly, ensuring that you respect copyright laws and choose the right type of image for your needs. By following the best practices and staying informed about licensing options, users can enhance their digital experience while avoiding legal pitfalls.
0 notes
Text
Dark Mode Design: Why It’s Popular and How to Do It Right
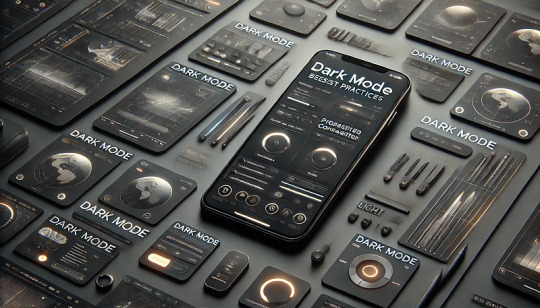
Why Is Dark Mode So Popular?
Dark mode has become a widely adopted UI trend due to its aesthetic appeal, reduced eye strain, and energy efficiency. Major platforms like Apple, Google, and Microsoft have embraced dark mode as a standard feature.
Key Benefits of Dark Mode:
✅ Reduces Eye Strain: Ideal for low-light environments, making text easier to read. ✅ Battery Efficiency: OLED and AMOLED screens consume less power in dark mode. ✅ Modern & Stylish Aesthetic: Gives apps and websites a sleek, futuristic look. ✅ Improves Focus: Reduces screen glare, making content stand out.
How to Design Dark Mode Correctly
1. Choose the Right Dark Color Palette 🎨
Avoid pure black (#000000), as it creates high contrast and strain.
Use dark grays (e.g., #121212, #1E1E1E) for a softer, comfortable UI.
Accent colors should be muted to prevent harsh brightness.
👉 Example: Google’s Material Design suggests #121212 as a dark mode base.
2. Maintain Proper Contrast for Readability 🔤
Text should be light but not too bright (e.g., #E0E0E0 instead of pure white #FFFFFF).
Aim for a contrast ratio of at least 4.5:1 for accessibility.
Avoid using bright neon colors on dark backgrounds, as they can cause eye strain.
3. Use Soft Shadows and Elevation 🏔️
Add subtle shadows to distinguish elements instead of bright borders.
Use translucent overlays instead of solid background colors.
Ensure hover and focus states remain visible in dark mode.
👉 Example: Apple’s macOS Big Sur UI uses soft highlights and depth effects.
4. Allow Users to Toggle Between Light & Dark Mode 🔄
Provide a theme switcher so users can choose their preference.
Detect system-wide dark mode settings and adjust UI automatically.
👉 Example: Many websites use prefers-color-scheme in CSS to detect dark mode:css@media (prefers-color-scheme: dark) { body { background-color: #121212; color: #E0E0E0; } }
5. Optimize Images and Icons for Dark Mode 🖼️
Transparent PNGs or SVGs should adapt to both light and dark themes.
Use lighter versions of images and logos for better contrast.
👉 Example: Google Chrome’s dark mode version of the logo has lighter edges for visibility.
6. Ensure Accessibility and User Comfort ♿
Follow WCAG (Web Content Accessibility Guidelines) to ensure readability.
Allow users to adjust brightness and contrast in settings.
Use color-blind-friendly palettes for a more inclusive design.
Conclusion
Dark mode is not just a trend — it’s a UX necessity that improves readability, enhances aesthetics, and saves battery life. However, designing it properly requires careful color choices, contrast management, and accessibility considerations.
WEBSITE: https://www.ficusoft.in/web-designing-training-in-chennai/
0 notes
Text
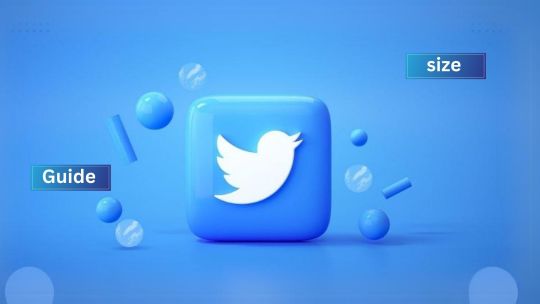
Ultimate Guide to Creating the Perfect Twitter Banner
Your Twitter banner is like a great big billboard on your profile. This is the first thing people are usually going to see when they come to your page. Whichever kind of business is being marketed, the more personal you are as an individual wanting to advertise your brand, your cover photo on Twitter becomes one of those things that help define how you project about yourself. For one's profile to appear sleek and professional on this online social network, a specific kind of customized banner on Twitter is required- not just of the right dimensions but also following good principles for the same design. You can use PhotoCut’s Image Enlarger when creating a Twitter banner. The guide here offers advice on size, design tips, and how best to make use of the banner maker on Twitter.
Why Do Twitter Banners Matter?
Your Twitter banner is one of the vital visual elements of your profile and is a chance to let everyone know about your brand, personality, or business. It's great real estate that can give your social media profiles a cohesiveness.
Here are why Twitter banners are important:
Free Branding Space: Your Twitter banner is prime space for free advertising. Whether you are an influencer, a business, or just any user, it can immediately send out a message about what you do or what your page is for.
Consistency Across Multiple Channels: It makes recognition by other people easier through consistency on all your profiles on social media. Giving a professional look to the page as well.
Show off your personality: Whether it is a favorite quote, business slogan, or even an event promotion, the banner allows you to highlight important details that reflect who you are.
Through careful design of your banner, you immediately catch the attention of visitors and pass a clear message regarding what you have in store.
What is the Best Twitter Banner Size?
The recommended dimensions for a Twitter banner are 1500x500 pixels, but you can go larger if you prefer. A larger image maintains better quality when Twitter compresses it, showing more detail and preventing blurriness. It's important to use an image in a 3:1 ratio to ensure it looks great across all devices.
When choosing the format, save your image as:
JPEG: A common file format that works well for most images. PhotoCut can convert your photos to JPEG.
GIF: Works for animated banners.
PNG: Best for images that require transparency or high-quality detail.
Keep the file size under 2MB to avoid issues with uploading. If you’re unsure about the right file size or format, consider using a free Twitter banner maker like PhotoCut, which ensures the correct dimensions and file types every time.
Why is Having the Right Twitter Header Size Important?
Uploading a perfectly sized Twitter header ensures that your image looks clear on all devices, whether it’s on desktop or mobile. Having the correct size also helps keep your key information in focus and visible to visitors. For banners whose dimensions are too large or too small, Twitter automatically crops an important part of your images.
Here are the good things about the right image sizes:
Image Clarity: The picture is clear and sharp while being compressed by Twitter doesn't distort.
Avoid Cropping: Using the correct sizes makes it less likely to see the most important part of the image, which in this case would include things like text or logos cut out, especially on mobile viewings.
How to Upload a Twitter Header Image?
To upload or switch out your Twitter header image here's how you can easily do it:
Visit your profile: Go to your profile page on Twitter by pressing the Edit Profile button.
Click the camera icon: Under the header image section, you will see a camera icon. Click on the camera icon to upload your new banner.
Select your image: Choose the image you wish to upload from your saved files.
Adjust your image: Twitter will give you the option to reposition your banner to ensure it looks perfect in your profile. Use the slider or drag to adjust the image’s position if needed.
If you’re using a banner template from PhotoCut, your image should fit perfectly without any cropping. Double-check to ensure all important information, such as text or logos, remains visible. You can also rotate your images before uploading.
Tips to Get the Most Out of Your Twitter Header
Creating a Twitter banner isn’t just about picking a random image — it’s about designing a visual experience that complements your profile. To get the best results, keep these tips in mind:
Design with Your Profile Photo in Mind
Your profile photo will be displayed on top of your banner. Make sure your design doesn’t clash with it. For instance, avoid placing text or important details directly in the middle where the profile picture will cover them. You can also create your profile photo using PhotoCut’s AI Portrait Generator.
Add Important Information
Your banner is a perfect place to add important details about yourself or your business. Here are some things you could include:
A slogan or tagline that defines what you do.
Event dates for special promotions or upcoming appearances.
Product highlights if you're promoting a specific product or service.
Links or calls to action like “Follow for updates” or “Check out our latest collection.”
Keep it Simple
Avoid overcrowding your banner with too many details. Simple, clean designs often look more professional. Additionally, minimalist designs are less likely to experience quality loss during compression by Twitter. Stick to solid colors, simple fonts, and a few key design elements for a sharp look.
Twitter Banner Design Tips
Keep it Centered
When designing your banner, always remember that Twitter crops the top and bottom of the image on mobile devices. This means that important elements like logos, text, or visuals should be placed in the center of the banner to ensure they aren’t cut off.
Use Minimalist Design
Minimalist designs look sharp and clean. Avoid using too many graphic elements, and keep text to a minimum. Overly complex designs can appear blurry once Twitter compresses them.
Keep it Consistent
If creating a banner for a business or brand, ensure the banner on Twitter has colors, fonts, and logos in a way that is consistent throughout your social media accounts; that's how your followers know your brand.
How to Create a Stunning Twitter Banner Without Design Skills
Even if you have never used graphic design, designing a professional-looking Twitter banner is easy using a tool called a Twitter banner maker like PhotoCut. It offers a simple and intuitive platform where anyone can make stunning Twitter banners without the need for any design knowledge.
Here’s how you can create your custom banner:
Step 1: Choose a Template
To start with, choose a premade template by clicking on the Template tab found in PhotoCut. Every one of these templates can be adjusted for your taste or even customised to your style and brand. Alternatively, PhotoCut allows you to have a custom design when starting from scratch.
Step 2: Choose Your Background
Choose a background from the Background tab. You can pick any color, gradient, or pattern. If you wish to apply your picture as background, select Photo and upload your background picture.
Step 3: Add Text
Now navigate to the Text tab. Under it, type in the text you wish to enter for your message or slogan. You can select premade text designs, and customize your font, size, color, and style.
Step 4: Add Text Effects
Click on the Text Effects icon to apply instant effects like shadows, outlines, or 3D effects. This can make your text stand out and grab attention.
Step 5: Add Graphics and Logo
Next, use the Elements tab to add any final graphics or images. You can import your logo, adjust the positioning, and tweak colors to match your design.
Step 6: Export and Upload
When you feel you are satisfied with your banner, click on the Export tab, and your Twitter banner is ready for uploading. You go straight to your Twitter profile where you upload the image as a professional, custom-designed banner.
Conclusion
A Twitter banner is a significant visual tool that can help you get noticed and make a more memorable impression. Using the proper size and design, combined with the ability to utilize a simple tool called PhotoCut, you are all set to make that perfect header image for Twitter that captures what your brand or personality may be. Whether promoting business or making your profile better looking, these tips along with the use of the Twitter banner maker will ensure you a professional look and polished result. Give PhotoCut a go today and design the ultimate Twitter banner!
FAQs
Q1. What is the ideal size for a Twitter banner? Ans. The size of the recommended Twitter banner should be 1500 x 500 pixels. This way, the image will appear sharp and clear on any device used and avoid cropping issues.
Q2. Can I use an animated image as my Twitter banner? Ans. Yes! Twitter is fine with GIFs so feel free to make a motion graphic banner. Just remember, do not have a file size greater than 2MB.
Q3. Which format should a Twitter banner use?
Ans. The best formats that a Twitter banner should have are JPEG, GIF, or PNG. For high-quality images or when transparency is necessary, PNG is preferred.
Q4. How can I prevent my banner from getting cropped? Ans. To prevent cropping, make sure all your crucial content is inside the 1500 x 500 pixel area. Do keep in mind that Twitter will crop your banner's top and bottom edges on mobile.
Q5. Can I use a Twitter banner maker without design skills? Ans. Yes! Using a Twitter banner maker like PhotoCut makes it easy to create a custom banner without design skills. You can use templates, adjust text, and add graphics with just a few clicks.
0 notes
Text
Mastering Transparent Backgrounds: A Comprehensive Guide to Elevating Your Visual Content
Introduction
In today’s visually driven digital world, the transparent background has become a cornerstone of professional content creation. Its ability to seamlessly blend elements into any design makes it indispensable for eCommerce, branding, and digital marketing.
A transparent background enhances visual clarity and ensures adaptability across platforms. Whether you’re designing product images or creative campaigns, understanding its potential is crucial. In this article, we’ll explore its significance, benefits, and applications.
By leveraging transparent backgrounds effectively, businesses can create impactful designs that resonate with audiences. Let’s dive into the details and learn how to master this essential visual tool.
What is a Transparent Background?
A transparent background refers to an image with no solid background color, allowing other visual elements to show through. This unique property makes it versatile for a variety of uses, from eCommerce to marketing.
Transparent backgrounds enable images to adapt to any design, maintaining a professional and polished appearance. Whether it’s a product shot or a company logo, this flexibility ensures seamless integration into diverse projects.
In industries like eCommerce, transparent backgrounds enhance product visibility, offering a clean and distraction-free presentation. Their use in branding ensures logos remain consistent across platforms, reinforcing brand identity.
Applications of Transparent Backgrounds
Transparent backgrounds are essential in modern content creation, particularly in:
ECommerce Product Images: Transparent backgrounds highlight products, eliminating distractions and enhancing focus. This clean presentation can boost conversion rates and customer trust.
Logos and Branding: Transparent logos offer consistency, whether on a website, packaging, or promotional materials. This adaptability reinforces professional branding.
Creative Projects: From social media graphics to advertisements, transparent backgrounds provide the flexibility to blend designs effortlessly with various styles and themes.
For example, an eCommerce brand using transparent product images on their storefront ensures a cohesive and appealing layout. Similarly, a transparent logo can elevate brand recall across platforms. Using a reliable product photography app can simplify the process of creating and optimizing such images.
Benefits of Using Transparent Backgrounds
The advantages of incorporating transparent backgrounds into your designs are numerous. Here are some key benefits:
Versatility: Transparent images integrate effortlessly into any project, saving time and effort during design adjustments.
Professional Appeal: Transparent backgrounds create polished visuals that resonate with audiences, fostering trust and engagement.
Efficiency: Editing and repurposing images with transparent backgrounds is faster, streamlining workflows for designers and marketers.
For instance, a clothing brand can use transparent backgrounds to showcase their products on different colored backdrops, catering to varied customer preferences. Utilizing a product photography app can further enhance the efficiency of this process, enabling quick and accurate adjustments.
How to Create a Transparent Background
Creating a transparent background might seem daunting, but it’s a straightforward process when broken down:
Select the Right Image: Choose high-resolution images to ensure clarity.
Remove the Background: Use masking or erasing techniques to isolate the subject from its background.
Save in the Correct Format: Save the file in formats like PNG, which support transparency.
By following these steps, even beginners can create transparent backgrounds suitable for various applications. For professionals, advanced techniques such as layering and blending can further refine the results.
Transparent Backgrounds in eCommerce
In eCommerce, transparent backgrounds play a pivotal role in presenting products professionally. Clean, distraction-free images can significantly impact customer decision-making by highlighting product features without unnecessary clutter.
Studies indicate that professional product images can increase conversion rates by up to 60%. Transparent backgrounds ensure a consistent and appealing visual experience, boosting brand credibility. For instance, showcasing jewelry or tech gadgets against a transparent backdrop helps focus attention on intricate details, driving customer interest.
Using a product photography app can simplify the process, enabling eCommerce sellers to create transparent backgrounds efficiently. Such tools ensure high-quality output while reducing time and effort.
Common Mistakes to Avoid with Transparent Backgrounds
While using transparent backgrounds is beneficial, common mistakes can diminish their impact:
Poor Resolution: Low-quality images with visible pixelation can harm the overall visual appeal.
Wrong File Format: Using formats that don’t support transparency, like JPEG, can result in unintended backgrounds.
Lack of Contrast: Ensure the subject contrasts well with the design to avoid blending issues.
By addressing these pitfalls, designers can maximize the effectiveness of transparent backgrounds in their projects.
Future Trends in Transparent Background Usage
As design technologies evolve, transparent backgrounds are poised to become even more integral to content creation:
AI-Powered Tools: Emerging tools are making background removal faster and more precise.
AR/VR Integration: Transparent images will play a role in creating immersive experiences for augmented and virtual reality applications.
Personalized Design: Transparent backgrounds will enhance customization, allowing brands to cater to diverse audience preferences seamlessly.
Staying ahead of these trends will enable businesses to remain competitive in the digital landscape.
Conclusion
Transparent backgrounds are more than a design choice—they’re a strategic tool for enhancing visual communication. From improving product presentation to enabling versatile branding, their applications are vast and impactful.
By avoiding common mistakes and leveraging tools like a product photography app, businesses can unlock the full potential of transparent backgrounds. Embracing this technique will not only elevate your visual content but also strengthen your brand’s digital presence.
Start exploring transparent backgrounds today to create designs that captivate and convert.
0 notes
Text
The Free Online Image Resizing Tool by Plattru allows you to resize your images effortlessly while preserving their quality.
Key Features:
Free Tool: No cost involved; resize images without any charges.
Supports All Image Types: Compatible with various image formats, including PNG, JPG, GIF, and WebP.
Preserves Transparency: Maintains transparency in images that have transparent backgrounds.
Maintains Aspect Ratio: Ensures the original aspect ratio is preserved to prevent image distortion.
How to Use:
Upload Images: Select the images you wish to resize and upload them to the tool.
Set Dimensions: Specify the desired width and height; the tool will apply these settings to all uploaded images while maintaining their aspect ratios.
Execute Resizing: Click 'Execute' to resize the images.
Download Images: Once the resizing process is complete, download the newly resized images.
Benefits of Resizing Images:
Reduce File Sizes: Smaller images save storage space and improve webpage loading speeds.
Optimize for Social Media: Adjust images to meet specific dimension requirements of various social media platforms.
Prepare for Printing: Ensure images are appropriately sized for high-quality prints.
Enhance Presentations and Emails: Use correctly sized images for better viewing experiences in presentations or emails.
This tool is ideal for preparing images for social media, creating thumbnails for websites, and editing images for personal use.
Try it here: Free Online Image Resizing Tool
0 notes
Text
Mastering 4K Quality Designs in Canva: A Step-by-Step Guide
Image editing using canvas:Expert Q&A Guide
1.How do I get 4K quality on Canva?
To achieve 4K quality on Canva, start by creating your design with dimensions of at least 3840 x 2160 pixels. Use high-resolution images and graphics to maintain quality. When you're ready to download, click on the “Share” button, select “Download,” choose the file type (PNG or JPG for images, MP4 for videos), and ensure you select the highest quality settings available. For video projects, opt for MP4 format and select the appropriate quality settings. Note that some features may require a Canva Pro subscription for full access to high-resolution downloads.
2. How to use Canva like Photoshop?
To use Canva like Photoshop, leverage its advanced features for graphic design. Utilize layers by stacking elements, apply transparent backgrounds, and use masks to create unique shapes. Experiment with custom dimensions for precise layouts and use grids to align objects. Employ filters and adjustments for photos, like Photoshop’s editing tools. While Canva lacks some Photoshop functionalities, you can create stunning visuals by combining text, images, and shapes creatively. Explore Canva’s extensive template library for inspiration and use the drag-and-drop interface for intuitive design. Remember to save your work in high-quality formats for professional results.
3. Is Canva as good as Adobe Illustrator?
Canva and Adobe Illustrator serve different purposes and audiences. Canva is user-friendly, ideal for beginners and quick design projects, offering templates for social media, presentations, and marketing materials. Adobe Illustrator, however, is a professional vector graphics software, providing advanced tools for detailed graphic design and illustration. While Canva excels in ease of use and accessibility, Illustrator offers greater control and precision for complex designs. Ultimately, the choice depends on your specific needs and skill level. For simple tasks, Canva is sufficient, but for professional-grade work, Illustrator is superior.
4. Does Canva have high quality images?
Yes, Canva offers a wide range of high-quality images. Users can access a vast library of stock photos, illustrations, and graphics, including both free and premium options. Canva's images are curated to ensure they meet quality standards, making them suitable for various design projects. Additionally, users can upload their own images to enhance their designs further. Overall, Canva provides ample resources for creating visually appealing content.
5. Is Canva as powerful as Photoshop?
Canva and Photoshop serve different purposes and user bases. Canva is user-friendly, geared towards non-designers for creating graphics quickly with templates and drag-and-drop features. It's great for social media posts, presentations, and simple designs. Photoshop, however, is a professional-grade tool offering advanced editing capabilities, enabling detailed image manipulation, graphic design, and comprehensive control over elements. While Canva is powerful for quick, accessible design, Photoshop excels in depth and complexity for professional and intricate projects. Ultimately, the choice depends on the user's needs and experience level.

Visit: VS Website See: VS Portfolio
0 notes
Text
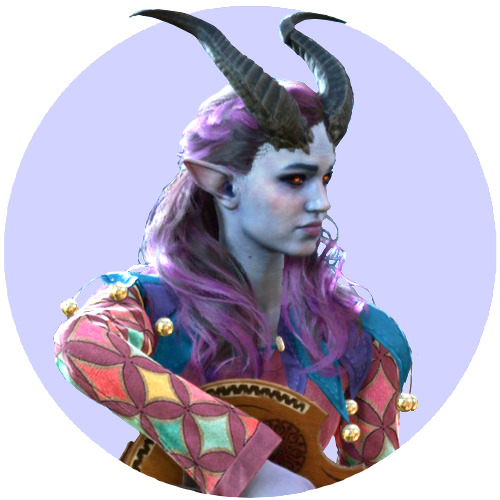

Quick Alfira icon, like/reblog if using, save as a png to maintain transparency ✨
#think i prefer this one to the one i'm using but i'm gonna stick#Alfira#baldur's gate#bg3#bg3edit#icons#anyway i love her <3#might make some shadowheart icons next stay tuned
57 notes
·
View notes
Text
Website Loading Woes: Speed Optimization for Musicians
In today’s fast-paced digital world, your website is often the first impression you make on potential fans, collaborators, and industry professionals. A slow-loading site can turn visitors away before they even get a chance to hear your music or learn about your upcoming shows. Speed optimization for musicians isn’t just a technical concern; it’s a crucial part of building and maintaining an effective online presence. In this post, we’ll explore practical tips to optimize your website’s loading times and ensure a smooth, fast experience for your visitors.
1. **Choose the Right Hosting Provider**
Your website’s performance starts with your hosting provider. A reliable and fast web host is essential for quick loading times.
- **Shared vs. Dedicated Hosting:** While shared hosting is cheaper, it often results in slower load times due to the number of sites sharing the same server. If you can afford it, consider upgrading to a dedicated hosting plan or a Virtual Private Server (VPS) for better performance.
- **Content Delivery Network (CDN):** A CDN stores copies of your site’s content on servers around the world, delivering it to users from the nearest server. This reduces the distance data has to travel and speeds up loading times for your global audience.
2. **Optimize Your Images**
Images are often the largest files on a website, and unoptimized images can significantly slow down your site.
- **Use the Right File Format:** JPEGs are great for photographs, while PNGs are better for images that require transparency. Avoid using BMPs or TIFFs, as they are not web-friendly.
- **Compress Images:** Use image compression tools like TinyPNG, JPEGmini, or Photoshop’s “Save for Web” option to reduce file sizes without sacrificing quality. This can drastically reduce load times.
- **Lazy Loading:** Implement lazy loading, a technique where images load only when they’re about to enter the user’s view. This reduces the initial load time and improves the user experience.
3. **Minimize HTTP Requests**
Every element on your web page—images, scripts, stylesheets—requires an HTTP request. The more requests, the slower your site.
- **Combine Files:** Combine multiple CSS files into one and do the same for JavaScript files. This reduces the number of requests and speeds up load times.
- **Use CSS Sprites:** CSS sprites allow you to combine multiple images into a single file. The browser then loads the single file and displays the correct image portion. This is especially useful for icons and buttons.
- **Reduce Plugins:** If you’re using a platform like WordPress, minimize the number of plugins. Each plugin adds to the number of HTTP requests, so only use the ones that are essential.
4. **Enable Browser Caching**
Browser caching allows your site to store files on a visitor’s device, so they don’t have to be downloaded every time the user visits your site.
- **Set Expiry Dates:** By setting expiry dates on cached content, you can control how long files are stored on the user’s device. Use tools like YSlow or Google PageSpeed Insights to identify which files should be cached.
- **Leverage .htaccess:** If you have access to your site’s .htaccess file, you can manually enable caching and set expiry dates for different types of content.
5. **Minify CSS, JavaScript, and HTML**
Minification is the process of removing unnecessary characters (like spaces and line breaks) from your code, making it smaller and faster to load.
- **Use Online Tools:** Tools like UglifyJS for JavaScript, CSSNano for CSS, and HTMLMinifier for HTML can help you minify your files.
- **Automate the Process:** If you’re using a build tool like Gulp or Webpack, you can automate minification during your site’s build process, ensuring your files are always optimized.
6. **Optimize Your Music Player**
If your site features a music player, it’s important to ensure it doesn’t slow down your site.
- **Use Streaming Services:** Instead of hosting large audio files on your server, embed music from streaming platforms like SoundCloud, Spotify, or Bandcamp. These platforms are optimized for fast loading and offer high-quality streaming.
- **Optimize Embedded Players:** If you’re embedding a music player, make sure it loads asynchronously, meaning it won’t hold up the rest of your site’s content from loading.
7. **Enable Gzip Compression**
Gzip compression reduces the size of your files before they are sent to the browser, which can significantly decrease loading times.
- **Activate Gzip:** Most web servers, including Apache and Nginx, support Gzip compression. You can enable it through your site’s .htaccess file or via your server’s configuration settings.
- **Check Compression:** Use online tools like Gtmetrix or Google PageSpeed Insights to check if Gzip compression is enabled on your site and see the difference in file sizes.
8. **Use a Lightweight Theme**
If you’re using a content management system (CMS) like WordPress, the theme you choose can greatly impact your site’s speed.
- **Choose a Fast Theme:** Opt for themes that are built with performance in mind. Avoid overly complex themes with excessive animations, sliders, and widgets that can slow down your site.
- **Custom vs. Premade Themes:** If you have the budget, consider a custom-built theme that’s optimized for your specific needs. Otherwise, choose a well-coded, lightweight premade theme and customize it to suit your style.
9. **Monitor Your Website’s Performance**
Regularly monitoring your website’s performance helps you identify issues and make necessary adjustments.
- **Use Speed Testing Tools:** Tools like Google PageSpeed Insights, Pingdom, and Gtmetrix provide detailed reports on your site’s speed and offer suggestions for improvement.
- **Analyze Traffic Spikes:** If you experience slowdowns during traffic spikes, consider using a service like Cloudflare to manage the increased load or upgrading your hosting plan to handle more visitors.
10. **Keep Your Site Updated**
Keeping your site’s software up-to-date is crucial for both security and performance.
- **Update CMS and Plugins:** Regularly update your CMS, plugins, and themes to ensure they’re optimized and free from vulnerabilities that could slow down your site.
- **Remove Unused Plugins and Themes:** Deactivate and delete any plugins or themes you’re not using. Even inactive plugins can slow down your site, so keep your installation clean.
Conclusion
Optimizing your website’s loading times is essential for keeping your audience engaged and improving your overall online presence. With the right strategies, you can ensure that your site is fast, efficient, and provides a great user experience, even if you’re working with limited resources. By choosing the right hosting, optimizing your images, minimizing HTTP requests, and staying on top of updates, you can create a site that not only looks great but also performs at its best. Remember, in the digital age, speed is not just a luxury—it’s a necessity.
#MusicianTips#MusicMarketing#FastLoading#FanEngagement#WebsiteOptimization#SpeedMatters#DigitalPresence#WebPerformance#OnlineMusic#TechForMusicians
0 notes
Text
10 Tips For PicsArt Photo Editor That can Help You Use it Like a Pro
PicsArt has emerged as one of the most versatile and user-friendly mobile apps for photography and digital image editing. Whether you’re a content creator, aspiring photographer, or someone who enjoys editing photos for fun, PicsArt offers a vast array of tools to turn ordinary images into extraordinary works of art. With over 500 million downloads globally, its intuitive interface is packed with professional-grade features, making photo editing on your phone seamless and enjoyable.
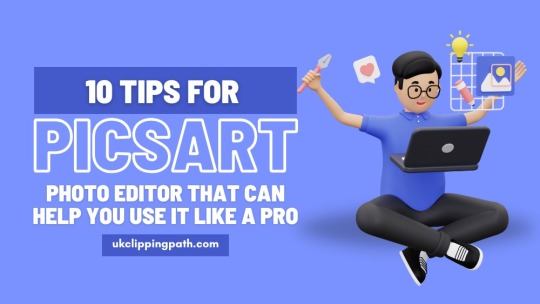
This guide will walk you through 10 pro tips for mastering PicsArt, showcasing features like image masking, background removal, color correction, and advanced photo editing techniques, to elevate your creative projects.
1. Master the Layering Tool
Layering is one of PicsArt’s most robust features, akin to professional desktop software like Photoshop. With layers, you can stack images, adjust opacity, and apply effects to individual layers, enabling non-destructive editing and image masking for professional results.
Pro Tip: Use the “Add Photo” function to layer images. Adjust opacity or blending modes to merge elements harmoniously.
How to Use Layers:
Tap on “Add Photo” in the menu.
Select the image to layer.
Resize, reposition, and apply effects to each layer independently.
Layering gives you the flexibility to create complex, polished designs, perfect for e-commerce photo editing services and collages.
2. Simplify Background Removal
PicsArt’s Background Remover tool allows you to isolate objects or subjects in an image effortlessly. Whether you’re creating product mockups, removing distractions, or enhancing e-commerce photos, this tool is a game-changer.
Pro Tip: For intricate backgrounds, combine auto-detect with manual touch-ups for precision.
Steps to Remove Backgrounds:
Open your image and go to “Tools” > “Remove Background.”
Use the auto-detect function or manually refine areas with the eraser tool.
Save the cutout as a PNG to maintain transparency.
Effective background removal is crucial for creating professional-quality visuals, especially in product photography for e-commerce.
3. Enhance Images with Color Correction
PicsArt’s Adjust tool allows you to fine-tune your image’s brightness, contrast, saturation, shadows, and highlights, breathing life into dull photos. Proper color correction ensures your visuals look sharp, vibrant, and consistent.
Pro Tip: Adjust individual photos manually rather than applying a universal filter. This ensures a unique and tailored aesthetic.
Steps to Correct Colors:
Open your photo and navigate to “Tools” > “Adjust.”
Use the sliders to tweak brightness, contrast, saturation, sharpness, and tone.
Experiment with small adjustments to achieve professional results.
For ecommerce photo editing, this technique helps showcase products in their true colors, building customer trust.
4. Perfect Edits with the Clone Tool
The Clone Tool in PicsArt is ideal for removing unwanted objects, filling gaps, or duplicating design elements seamlessly. It works by copying pixels from one part of the image and “painting” them over another area.
Pro Tip: Always zoom in for precision and use a smaller brush size for intricate details. Work on a duplicate layer to preserve the original image.
Steps to Use the Clone Tool:
Select the image and go to “Tools” > “Clone.”
Choose a source area, then brush over the section to edit.
From retouching blemishes to creating symmetry, the Clone Tool enhances the quality and professionalism of your photos.
5. Use Magic Effects for Instant Artistry
PicsArt’s Magic Effects can transform your photos into digital paintings, neon art, or glowing masterpieces with just a tap. These effects are perfect for adding a creative touch without diving deep into manual edits.
Pro Tip: Use Magic Effects sparingly in conjunction with manual edits to maintain control over the final look.
How to Use Magic Effects:
Select your photo, tap “Effects,” and choose “Magic.”
Adjust the intensity with the slider for a subtle or dramatic transformation.
6. Create Stunning Collages
Collages are an excellent way to tell a story with your photos. PicsArt’s Collage Tool offers various templates and freeform options, enabling you to combine multiple images creatively.
Pro Tip: Use freeform collages to create asymmetrical designs, adding shadows and frames for a dynamic look.
How to Make a Collage:
Select “Collage” from the home menu.
Choose a grid or freeform layout.
Arrange, resize, and embellish your images for a cohesive design.
7. Add Text and Customize Fonts
PicsArt’s Text Tool allows you to add captions, titles, or creative typography to your images. With a variety of fonts, colors, and effects, you can easily personalize your visuals.
Pro Tip: Blend text into your design by lowering opacity or using blend modes. Add shadows, outlines, or 3D effects for depth.
How to Add Text:
Select the image and tap “Text.”
Customize font, size, and color, then apply effects to match your style.
For e-commerce photos, text overlays can highlight key features or promotional details.
8. Unleash Creativity with the Drawing Tool
PicsArt’s Drawing Tool lets you sketch, doodle, or decorate your photos directly. Whether you’re creating illustrations or adding playful elements, this tool gives you complete creative control.
Pro Tip: Use layers when drawing to experiment without altering the original image.
How to Draw:
Tap on the “Brush” icon.
Choose brush type, size, and opacity.
Start drawing over your image or on a blank canvas.
9. Elevate Photos with Filters and Overlays
PicsArt offers a wide range of filters and overlays to enhance your images. Use them in combination with blending modes and opacity adjustments to achieve unique, artistic effects.
Pro Tip: Don’t rely on a single filter. Experiment with overlays and blend modes to create custom aesthetics that align with your style.
How to Apply Filters and Overlays:
Open your image and tap “Effects.”
Select a filter, then add overlays like textures or patterns.
Adjust blending modes and opacity as needed.
Filters and overlays can establish a mood or add visual interest, especially in promotional or creative projects.
10. Connect with the PicsArt Community
PicsArt’s built-in community is a treasure trove of inspiration and learning. Explore user-created content, save your favorite designs, and discover tutorials to refine your skills.
Pro Tip: Engage with the community by sharing your work, following creators, and participating in challenges for fresh ideas.
How to Explore the Community:
Click on the “Discover” icon to browse user creations and tutorials.
The community is a fantastic resource for staying motivated and improving your editing skills.
Conclusion
PicsArt combines the power of professional-grade photo editing tools with the convenience of a mobile app. From background removal to color correction and image masking, PicsArt helps create visuals suitable for personal use, e-commerce, or marketing.
However, for advanced edits requiring meticulous attention—like ecommerce image editing services or complex retouching—professional services like UKClippingPath can deliver flawless results. Let experts handle the editing, so you can focus on creativity and growth.
0 notes
Text
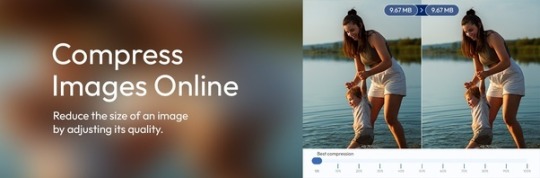
Optimize Your Visuals: How to Compress PNG Image Without Losing Quality
In today’s digital age, visuals dominate communication. From websites to social media and email campaigns, images play a crucial role in engaging audiences. However, large image files can slow down website loading times, consume excessive storage, and even reduce user experience. This is where tools that let you Compress PNG Image and other formats come in handy.
In this blog, we’ll explore how to effectively Compress Images Without Losing Quality, why using an Image Compressor PNG is vital for online applications, and how platforms like Lule Tools can help you achieve professional-grade results effortlessly.
Why Is Image Compression Important?
Image compression is the process of reducing file size without compromising visual quality. By using tools to Compress PNG Image, you can make your visuals more manageable while maintaining their aesthetic appeal.
Benefits of Image Compression:
Faster Loading Times: Smaller files mean faster loading speeds, which improve user experience and SEO rankings.
Storage Efficiency: Reduced file sizes take up less space, ideal for cloud storage or local drives.
Enhanced Performance: Websites with optimized images perform better across devices.
Cost Savings: Smaller files save bandwidth, which is especially important for hosting platforms.
How to Compress Images Without Losing Quality
One of the biggest concerns when compressing images is quality loss. A poorly compressed image can appear pixelated or blurry, which defeats its purpose. However, with the right tools, you can reduce file size without sacrificing visual integrity.
Steps to Compress Images Effectively:
Choose the Right Tool: Opt for reliable platforms like Lule Tools.
Upload Your Image: Drag and drop or select the file you want to compress.
Set Compression Parameters: Adjust compression levels to balance size and quality.
Preview the Output: Ensure the compressed image looks as good as the original.
Download the Compressed Image: Save the optimized file to your device.
Lule Tools offers a seamless process to Compress Images Without Losing Quality, ensuring your visuals remain sharp and vibrant.
Why Use an Image Compressor PNG?
PNG is a popular image format known for its high quality and transparency features. However, PNG files can be significantly larger than other formats like JPG. This is where an Image Compressor PNG becomes indispensable.
Advantages of Compressing PNG Files:
Preserve Transparency: Ideal for logos, graphics, and icons that require transparent backgrounds.
High-Quality Output: Maintain sharpness and detail even after compression.
Web Optimization: Perfect for websites that need lightweight yet visually appealing graphics.
By utilizing tools like Lule Tools, you can compress PNG files effortlessly while retaining their essential properties.
The Role of JPG Image Compress Online Tools
While PNG files are great for certain applications, JPG is another widely used format, especially for photographs. Tools that enable JPG Image Compress Online make it easy to reduce file sizes for digital use.
Why Compress JPG Images?
Save Storage: Smaller files mean more space for other assets.
Improve Website Speed: Faster loading times translate to better user engagement.
Maintain Versatility: Compressed JPG files are compatible across platforms.
Features of a Quality JPG Compressor:
Batch Compression: Compress multiple images simultaneously.
Custom Settings: Adjust quality levels to suit your needs.
Fast Processing: Get results in seconds.
Whether you’re compressing PNG or JPG files, the ability to optimize images is crucial for anyone managing digital assets.
How Lule Tools Simplifies Image Compression
Lule Tools is a leading platform designed to help users Compress PNG Image and JPG files efficiently. With its intuitive interface and powerful algorithms, the tool ensures you can reduce file sizes without compromising quality.
Key Features of Lule Tools:
User-Friendly Design: No technical expertise is required.
High-Speed Processing: Compress images in a matter of seconds.
Quality Preservation: Advanced compression techniques ensure minimal quality loss.
Multi-Format Support: Handle PNG, JPG, and other popular formats with ease.
Lule Tools stands out as a go-to solution for anyone looking to optimize their visuals quickly and effectively.
Best Practices for Image Compression
To get the most out of your image compression efforts, follow these best practices:
Choose the Right Format: Use PNG for graphics and transparency; JPG for photos and large visuals.
Set Appropriate Compression Levels: Strike a balance between size and quality.
Preview Results: Always check the output before downloading.
Compress for Specific Use Cases: Optimize images based on their intended platform (e.g., web, print, or social media).
With tools like Lule Tools, these practices are easy to implement, ensuring your visuals remain impactful and efficient.
Conclusion
Image compression is an essential aspect of managing digital visuals in today’s fast-paced online world. Whether you need to Compress PNG Image, reduce the size of a JPG file, or optimize your graphics for a website, the right tools make all the difference.
By using platforms like Lule Tools, you can Compress Images Without Losing Quality and ensure your visuals look professional across all applications. Whether it’s an Image Compressor PNG for preserving transparency or a tool to handle JPG Image Compress Online, Lule Tools offers a reliable and user-friendly solution.
Embrace the power of image compression today and watch your visuals shine while staying lightweight and efficient!
0 notes
Text
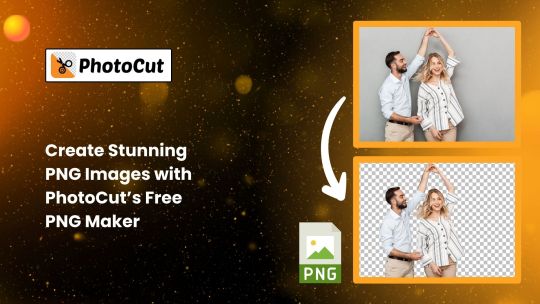
Create Stunning PNG Images with PhotoCut’s Free PNG Maker
Do you want to make your pictures more distinguished with a transparent background? A free PNG maker from PhotoCut turns your photos into professional-quality PNG images within minutes. You can easily convert JPG to PNG, add custom backgrounds, and improve your image quality with PhotoCut all for free. Let's examine a few of the features up close, which will help you make better graphics and photos with PhotoCut.
Convert JPG to PNG in a Snap
PhotoCut online PNG converter helps you to convert any JPG images into PNG with a transparent background in a snap. In this process, the background is automatically eliminated. Hence, you save time and hassle. Uploading your JPG image will have PhotoCut automatically remove the background in a matter of seconds, leaving you with a transparent canvas of your subject.
Unlike photo editing software like Photoshop, you don't trace the subject and remove background pixel by pixel. Advanced AI technology will do all this work for you so that you can just use the result as a transparent PNG image in whatever design or project you wish.
Further, if you require any cropping adjustments, PhotoCut will allow you to crop your image manually. You can fine-tune the areas that you want to keep and adjust the selection so you get the perfect result each time.
Transparent PNGs Without Losing Quality
Indeed, among the most attractive features of PhotoCut's PNG maker is that your image will be perfectly preserved. From a portrait to a product shot, an intricate logo, or even a detailed subject like hair or fur, the tool will give the PNG output without any deterioration in quality.
Even though the background is removed, PhotoCut keeps all the details intact. This allows you to work with high-resolution images that look as good as the original, hence you can be sure of professional quality output. Unblur blurred images with PhotoCut and convert them into PNGs.
Batch Convert Images to PNG
If you have many images that you need to convert, PhotoCut has a batch conversion for you. You can upload several images and convert them into PNGs with a transparent background in one go. This means it's perfect for an e-commerce business, social media managers, or anyone working with large quantities of images quickly.
Instead of processing each image individually, PhotoCut allows you to streamline your workflow and save valuable time. Whether you’re handling logos, animal images, or portraits, you can process them in bulk and get the results you need in minutes.
Enhance Your PNG Image for High Quality
Sometimes, you may find images too blurry or pixelated. The built-in AI image enhancer feature in PhotoCut helps rescue these poor images. With the AI enhancement feature, you can automatically enhance your low-resolution images to get high resolution and clarity with no manual effort.
AI technology makes images more precise, allows great details to show through, and amplifies general quality. These would mean a much polished PNG by working on transparency to have more professional polish to images to print them on your web or your social media account, these result in very fine qualities.
Customizing Transparent PNG Backgrounds for Free
PhotoCut doesn't only help you create transparent PNGs, but it also gives you the tools to customize the background of your images. After you have removed the original background, you can add new ones according to your requirements. You can choose a preset background or upload an image of your own. You can even use AI-generated backgrounds.
You can also apply blur effects to the background to maintain focus on the subject and reduce distractions. This is particularly handy when you wish to blur the privacy or add a touch of beauty to the image. From diffused, subtly blurred backgrounds to bold contrasting colors, PhotoCut offers you an endless array of PNG-making customization options for your images. You can also create headshots with a transparent background with PhotoCut.
More Than Just a PNG Maker: A Full Photo Editor
PhotoCut is a PNG image creator tool and also a full-featured photo editor. Once you have your background removed and your picture converted to PNG, you will be able to use the suite of editing tools to make it look its best. PhotoCut allows you to crop, resize, rotate, and even adjust lighting and colors for your photos.
You can also put your text, overlay more images, or add filters to change the look and feel of your picture to make it more lively, exciting, or something for social media, marketing material, or personal projects. Whether you design your eye-catching banner, personalized logo, or social media posts, PhotoCut has the flexibility to bring to life your creative ideas.
Design Impactful PNGs with Ready-Made Assets
If you're looking to create more than just a simple transparent PNG, PhotoCut offers various design templates to help you craft beautiful graphics. You have templates like LinkedIn banners, Facebook covers, mobile wallpapers, and presentations. Making eye-catching graphics for any event has never been simpler thanks to these pre-made templates. You can turn your photos into cartoons and use them for your designs in PNG format.
You may add a vast collection of shapes, lines, icons, and other graphic components to your PNG pictures with the tool. Whether it's for personal projects or professional marketing materials, you can quickly incorporate your photos into pre-made patterns to produce something original.
What Can You Do with PhotoCut’s PNG Maker?
PhotoCut's PNG maker is pretty versatile and allows you to make PNG images for many purposes. Some of the things that you can do with the tool include the following:
Car PNGs: Change your car pictures into sharp, professional-looking PNG images. This comes in very handy for auto-related websites, advertisements, or even online shops selling automobile items.
People PNGs: Turn individual portraits or group photos easily into transparent PNG images. Profile pictures, avatars, and promotional materials are always easy to make with PhotoCut.
Logo PNGs: Creating transparent logos for branding becomes easy. Transparent logos are in high demand for website design, product packaging, and digital marketing.
Sticker PNGs: Create fun and eye-catching sticker designs with transparent backgrounds. These are perfect for social media, web design, and promotional materials.
Signature PNGs: Design your digital signature and turn it into a high-quality PNG. This is especially useful for signing documents electronically or creating custom branding.
Text PNGs: Convert text into PNG images for use in graphics, social media posts, or marketing campaigns. PhotoCut’s text-to-PNG tool helps you create professional text-based designs in seconds.
Make Image Transparent for Any Purpose
The PNG maker by PhotoCut can produce an image with a transparent background for any purpose. Here are the benefits you can gain from a transparent PNG:
Boost Sales with Clean Product Images: Clean product images are critical for product photos on e-commerce sites like Amazon, eBay, and Shopify. Adding transparent PNGs to your product photos gives them a polished, businesslike appearance, which increases conversions.
Enhance Social Media Marketing: Transparent background images on social media seem to add an extra dimension of versatility and display appeal. You can position your PNG images on any background without worrying about jarring edges or unwanted borders.
Create Personalized Avatars and Profile Pictures: BG remover using PhotoCut will make avatars, profile pictures, or personal images with clean and transparent backgrounds. For social media, gaming profiles, or digital portfolios, stand out with PhotoCut.
How to Make a PNG Online for Free
Free and quite easy. The PNG maker by PhotoCut works that way. Here's how:
Upload Your Image: Simply, click on the "Make PNG Now" button and upload the image you wish to convert to PNG.
Automatic Background Removal: PhotoCut removes the background of your image in seconds using its AI-powered background remover. Your photos will be turned transparent in a matter of a few seconds.
Customize Your PNG: Once the background is removed, you can customize your PNG image. Change the backdrop, add text, overlay images, or apply filters to enhance your design.
Download Your PNG: Once you're happy with how it looks, you can download your free high-quality PNG image.
Why PhotoCut is the Best Transparent Background Maker
There are many reasons why PhotoCut’s PNG maker is the go-to choice for creating transparent images. Here’s why PhotoCut stands out:
Fast Processing: Upload your image and get your PNG in seconds—no complicated steps or layouts.
Automatic AI Technology: The AI-powered background remover makes the process quick, easy, and highly accurate.
Free Exports: You can download your images for free and edit them further without paying anything.
Online Access: PhotoCut works online, so you don’t need to download any software. Access it from any device at any time.
Editing Tools: Enhance your PNG images with editing tools like resizing, cropping, adding text, and more.
FAQs
Q1. What is a PNG file?
Ans. PNG stands for Portable Graphics Network. It's a type of image format that keeps all the details without losing any quality.
Q2. What is PNG good for?
Ans. PNG is perfect for storing images without losing any quality. It supports true color images and transparent backgrounds, making it a popular choice for web graphics.
Q3. How to remove a white background from a PNG?
Ans. Removing a white background from a PNG is easy with PhotoCut. Just upload your image, click 'Remove background,' and let PhotoCut do the work for you.
Q4. What image format is transparent?
Ans. File formats like PNG, GIF, BMP, and TIFF can all have transparent backgrounds. Give PhotoCut's transparent image maker a try to create your own.
0 notes
Text
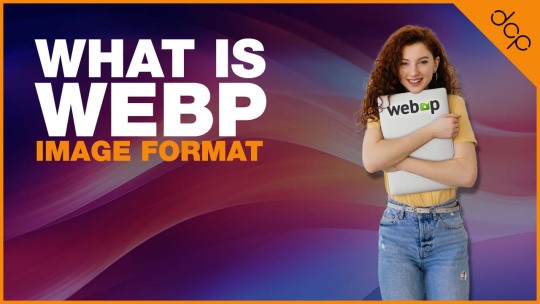
What is WebP Image Format?
WebP, developed by Google, is a modern image format designed to improve online image quality while significantly reducing file sizes compared to traditional formats like JPEG and PNG.
Using both lossy and lossless compression techniques, WebP enables faster load times, enhancing website performance, user experience, and even SEO rankings, as page load speeds are a key ranking factor.
Advantages of Using WebP Format
Reduced File Size: WebP images are typically 25–35% smaller than JPEGs and PNGs of similar quality, offering considerable savings on bandwidth.
Improved Load Times: Smaller file sizes contribute to faster load times, which is particularly beneficial for mobile users and anyone with limited internet bandwidth.
Lossless and Lossy Compression: WebP supports both types of compression, providing flexibility to choose between quality and file size.
Transparency and Animation: WebP supports transparent images (similar to PNG) and animated images (similar to GIFs), making it a versatile format for various website needs.
SEO Benefits: Faster page loads lead to better user engagement, lower bounce rates, and, ultimately, improved SEO rankings.
Browsers that Support WebP Format
WebP has strong support across most major browsers, though compatibility can vary.
Here’s a breakdown of the primary browsers that support WebP:


3 WordPress Plugins to Compress Images into WebP Format
These WordPress plugins simplify the process of converting images to WebP and compress them for optimal load speed:
Imagify - https://imagify.io/wordpress/
Offers WebP conversion and allows users to retain a backup of the original image.
Compresses images in a way that maintains quality while reducing size.
Integrated directly into the WordPress media library, allowing easy bulk optimisation.
ShortPixel Image Optimizer - https://shortpixel.com/
Known for its comprehensive compression options, ShortPixel includes WebP conversion in its feature set.
Supports automatic image resizing and optimises images as they’re uploaded.
Can serve WebP images without changing URLs, which is especially useful for websites with a large image library.
Smush - https://wpmudev.com/project/wp-smush-pro/
A popular choice for image optimisation, Smush Pro includes WebP compression.
Also offers lazy loading, which further optimises image load times.
Easy-to-use interface within WordPress, ideal for users who want minimal setup
Read More About WebP Image Compression: https://shorturl.at/wbnLZ
0 notes