#manual glass cutter
Explore tagged Tumblr posts
Text
Home Nursing Advice Column #6: Home Nursing Kit
You have probably heard of a first aid kit, and you may already have one. First aid kits are pretty much for minor injuries and illnesses, and to get you through the first few minutes of more severe injuries.
This post is not about those. This post is about a home nursing kit. Things you need or would at least want to have while taking care of someone at home long term.
Note that you probably wouldn't need all of this for a home nursing kit if you have one particular patient in mind. But it's good to own some of these things just because you're probably going to take care of someone at some point- be it a child, chronically ill person, or elderly person.
Assessment/Data Gathering Tools:
Stethoscope (and ideally know how to differentiate normal and abnormal lung sounds)
Blood pressure cuff (manual and know how to use it, or automatic- upper arm cuffs are more reliable than wrist ones, but the wrist ones are cheaper)
Fingertip pulse oximeter
Nitrite dip sticks for UTI detection
Thermometer (ear or oral- the glass kind never need batteries jsyk)
Glucometer and test strips
Personal Care Tools:
Nitrile gloves
Urinal (female or male depending on your patient)
Bath basins
A lot of washcloths
Electric kettle for warming up water (mix boiling water with tap water to desired temp in bath basin)
Rinse-free soaps
Leave-in conditioner or de-tangling spray
Bed pads or diapers for incontinence (they both come in both disposable and reusable- even for adults)
Bed pads or draw sheets for positioning
Evaporative cooling towel
Hot water bottle
Ice packs
Pillows for pressure reduction
Nail care kit
Medications:
Person's prescription medications
Acetaminophen
Some kind of NSAID
Aspirin
Some kind of antihistamine
Pill organizer
Pill cutter
Petroleum Jelly
OTC antifungal (like the cream kind for vaginal yeast infections, especially if the person has a vagina or skin folds and takes antibiotics)
Laxatives and stool softeners
Wound Care Tools:
Adhesive bandages
ACE wraps of different sizes
Irrigation syringe or the ability to improvise one
Cloth or paper tape
Gauze pads. Like way more of these than you could possibly think that you could use if you're dealing with literally any wound. Alternatively strips of soft cotton cloth that are boiled in between uses.
Food Items:
Instant chicken stock
Electrolyte powder
Drink mix powders to make water more palatable
Some good milkshake recipes
Some good soup recipes
Overbed tray
#whump reference#writing reference#reference#adulting#home nursing#nursing kit#first aid kit#resource
80 notes
·
View notes
Text
Cortador de azulejos súper preciso, para realizar esos trabajos de bricolaje en casa.
Si lo deseas, puedes adquirirlo en este enlace (afiliado):
3 notes
·
View notes
Text
Essential Tools for Professional Builders
In construction projects, professional builders rely on high-quality tools to ensure precision, efficiency, and durability. The right tools make a significant difference in completing tasks safely and efficiently.

Measuring and Layout Tools
Every great build starts with accuracy. Without precise measurements and layouts, nothing fits together properly. These tools help ensure everything is aligned and measured correctly.
Laser Levels – These are essential for ensuring walls, floors, and foundations are perfectly leveled and aligned. They project a straight beam, making it easy to set reference points over long distances.

Tape Measures – A builder's best friend, tape measures help with quick and accurate measurements for framing, cutting materials, and layout planning.

Chalk Lines – These are used to create straight, visible lines on different surfaces. Chalk lines help guide cuts and installations, especially for flooring and drywall projects.

Cutting and Shaping Tools
From wood to metal, builders need sharp, powerful tools to cut materials precisely.
Circular Saws – These powerful saws are essential for cutting wood, plywood, and framing materials quickly and efficiently. Different blades allow for cutting various materials like plastic or metal.
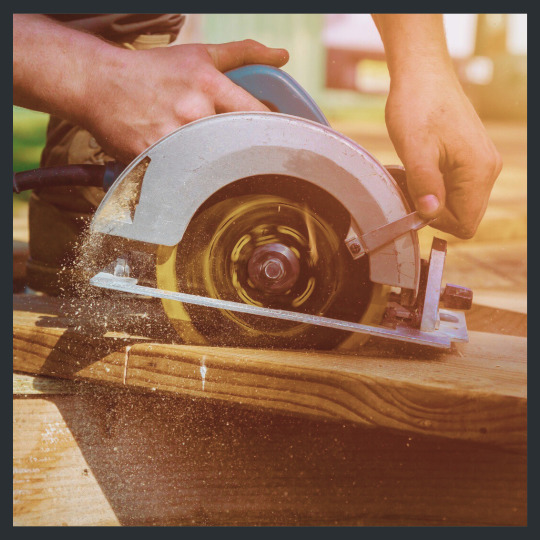
Table Saws – With a stable base and a powerful motor, table saws allow builders to make precise straight cuts, making them essential for carpentry and cabinetry work.

Reciprocating Saws – Also known as “Sawzalls,” these saws are ideal for demolition work, quickly cutting through wood, drywall, and even metal pipes.
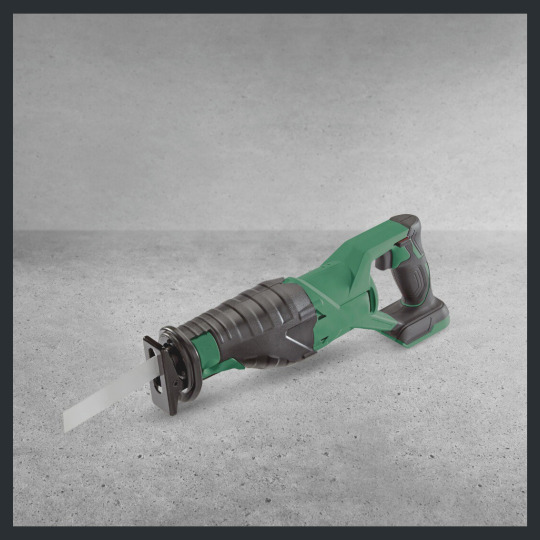
Chisels and Planes – Used for shaping and smoothing wood, chisels help with detailed carpentry work, while planes are excellent for refining rough surfaces and achieving a polished finish.

Fastening and Assembly Tools
For a structure to last, strong and secure connections are essential. These tools allow builders to efficiently join materials.
Nail Guns – Instead of hammering each nail manually, builders use nail guns to speed up framing, roofing, and trim work. These tools ensure strong, secure attachments in a fraction of the time.
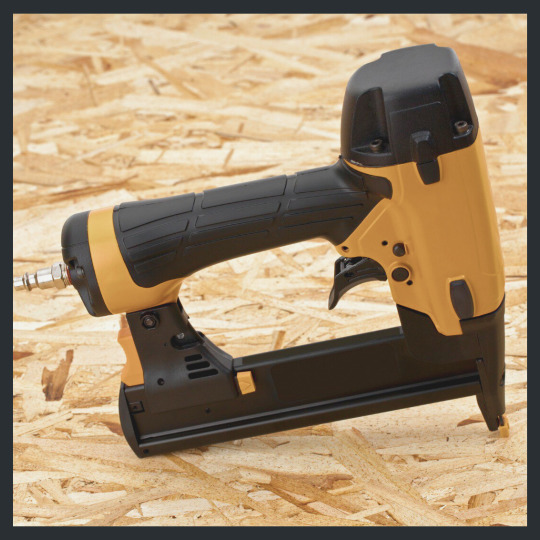
Impact Drivers & Drills – Essential for driving screws and bolts, these power tools make assembling structures easier and more efficient, especially for working with dense materials like hardwood or concrete.
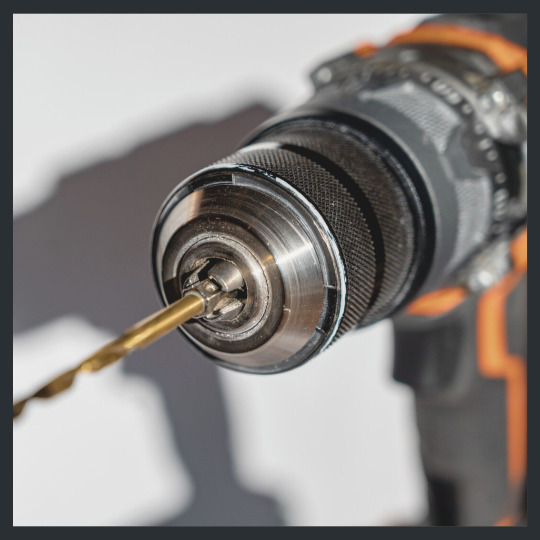
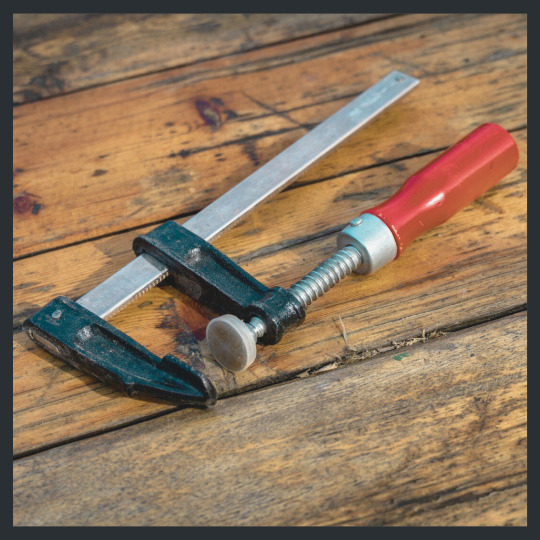
Clamps – Holding materials in place during construction is critical, and clamps help secure pieces together while glue sets or screws are installed, preventing movement and ensuring precision.
Masonry and Concrete Tools
Concrete and masonry work require specialized tools to ensure strength, stability, and a smooth finish. These tools help builders work efficiently with cement, stone, and bricks.
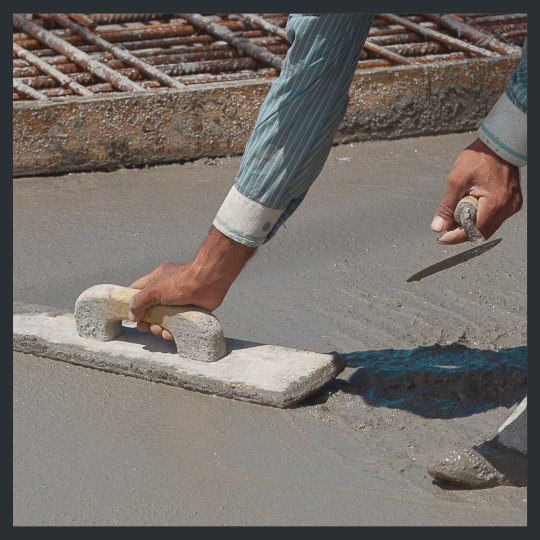
Trowels and Floats – Used to spread and smooth out concrete, trowels ensure a polished, professional finish, while floats help compact and level wet concrete.
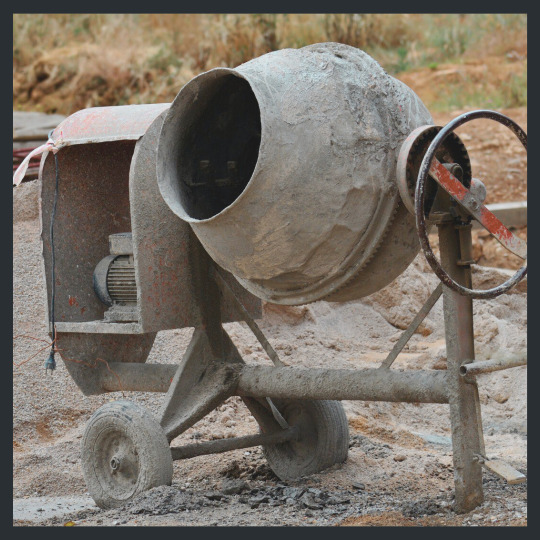
Concrete Mixers – Manually mixing concrete can be labor-intensive, so mixers automate the process, ensuring the right consistency for pouring slabs, foundations, and sidewalks.
Rebar Cutters and Benders – Concrete needs reinforcement, and these tools allow builders to cut and shape steel reinforcement bars to fit structural designs accurately.
Safety and Protection Gear
Safety is a top priority on any construction site. Proper protective gear ensures that builders can work confidently while minimizing risks and accidents.
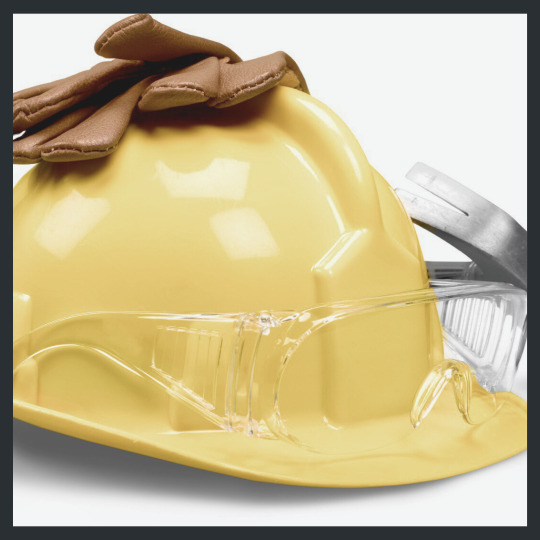
Hard Hats & Safety Glasses – Protecting against falling debris and impact hazards, these are mandatory on any construction site to prevent head and eye injuries.
Hearing Protection – Power tools and machinery generate loud noises that can damage hearing over time. Earplugs or earmuffs help reduce exposure to dangerous noise levels.

High-Visibility Clothing – Construction sites can be busy and hazardous, so wearing reflective vests and bright-colored clothing ensures that workers are easily seen, improving overall site safety.

Using the right tools not only makes construction projects more efficient but also ensures that structures are built to last. Professional builders in Bruce Peninsula depend on these essential tools to create high-quality homes and buildings suited to the local environment.
Contact And-Rod Construction Today!
For expert craftsmanship and top-tier professional building in Bruce Peninsula, trust And-Rod Construction. With years of experience, our dedicated team, and the latest tools and techniques, we handle projects with precision and care. Whether you're planning a custom home, a renovation, or a residential build, we ensure durability, functionality, and a flawless finish. Contact And-Rod Construction today to bring your vision to life with trusted expertise and superior workmanship.
#AndRodConstruction#BrucePeninsula#ConstructionEssentials#CuttingAndShapingTools#FasteningAndAssemblyTools#MasonryAndConcreteTools#MeasuringAndLayoutTools#ProfessionalBuilders#SafetyAndProtectionGears#construction tools#canada#tobermory#bruce peninsula#bruce county#construction#construction company
2 notes
·
View notes
Text
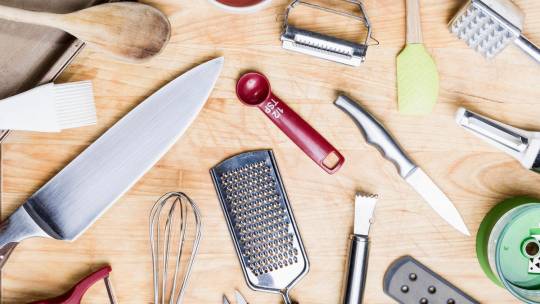
Too Late: Are These 20 Kitchen Tools Worthless? | CNET

Chef Morimoto encourages beefing up your knife skills to make thin and uniform vegetable slices. Milk Street
Why: "While it brings good slices, mastering proper knife skills gives you more control, precision and safety in the long run. Mandolins can be bulky, hard to clean and risky if you're not extremely careful. Relying too much on a mandolin, or tools like a two-in-one apple cutter or a tomato corer can hold you back from developing real technique. Taking the time to learn how to handle a sharp chef's knife or Japanese blade will help you in almost every recipe."
What to try instead: Mac 8-inch Japanese chef knife.

2.] Onion holders
Why: "These look like a weapon for Wolverine wannabes; it's meant to help you hold a whole onion and "chop" it. Instead, cut the onion in half to create a flat surface so it won't roll away. If you're trying to cut rings, save the $14 and stick a fork in the root and hold the fork."
What to try instead: Learn to properly slice an onion the old-fashioned way.

3.] Onion Googles (noting a trend here)
Why: "A waste of money, as they don't form a great seal around the eyes to prevent the sulfur compounds from getting to your eyes and making you cry. Keep your knife sharp and open a window or turn on a fan instead."
What to try instead: CNET's Peter Butler shares tips for cutting onions without crying.

4.] Metal, glass, stone and acrylic cutting boards
Why: "Cutting on hard surfaces is bad for your knives; instead, go for wood or poly."
What to try instead: Our list of the best cutting boards features plenty of knife-safe options.
5.] Chicken shredder
Why: "I can't think of anyone needing a tool devoted to shredding chicken outside a restaurant and even restaurants don't use it. This item only has one purpose so I'd skip it."
What to try instead: Two forks.
6.] Herb stripper
Why: "I love thyme but hate stripping it. When I was young I got suckered into believing this tool would help me … It's been sitting in my cupboard, laughing at me for almost a decade now."
What to try instead: For heartier herbs like rosemary and thyme, just use your fingers to slide down the stem, opposite to how the leaves grow.
7.] Bluetooth wireless probe thermometer
Why: "These are a great tool but can be very expensive. I can see myself losing, breaking, dropping, accidentally throwing away or dropping it in the coals."
What to try instead: ThermoPro's Lightning Instant Read Thermometer
Peter Som, Cookbook author and lifestyle expert. Cookbook author Peter Som didn't hold back when asked about his least favorite kitchen tools. Peter Som

8.] Electric can opener
A manual can opener is cheaper, works great and is less likely to break. Nelson Aguilar/CNET. This reminds me of the advice I got from asking for advice from a total stranger which he would buy A/B & that was his rationale! The more electronic & fancy, the more likely it is to break, which is funny bc suddenly seeing a lot more ads for electronic bed/matress/masks..
Why: "Most of us grew up with an electric can opener permanently stationed on the kitchen counter, like it was a vital appliance. But truthfully, they're more nostalgia than necessity. They take up space, can be a hassle to clean and often struggle with irregularly sized cans. A good manual opener is compact, reliable and gets the job done without needing an outlet or a user manual."
What to try instead: Oxo's soft-handled can opener.
Richard Ingraham
Personal chef to Dwyane Wade and Gabrielle Union and author of Love: My Love Expressed Through Food
9. Avocado slicer
Why: "A knife and spoon do the job just as easily and the specialized tool rarely fits all avocado sizes properly. It's a one-trick pony that clutters drawers."
What to try instead: A good paring knife like this $35 Wusthof.
10. Egg separator

Separating an egg by hand isn't so difficult that it requires hardware. Yipengge/Getty
Why: "A tool just for separating yolks is unnecessary for most home cooks." The only exception may be this one, and even that is just for yolks. Err, I mean yucks.
What to try instead: Cracking an egg and using the shell halves or your fingers works just as well.
11. Garlic peeler tube
Why: "Rolling garlic cloves in a silicone tube may work but requires storing a single-purpose gadget."
What to try instead: Smashing garlic cloves with a chef knife is quicker and more reliable.
12. Pizza scissors

Chef Ingraham says skip the scissors on pizza night. Zoranm/Getty
Why: "A pizza cutter or knife works better and faster. These scissors are gimmicky, awkward to clean and take up more space than they're worth."
What to try instead: KitchenAid's stainless-steel pizza wheel.
Best Pizza Ovens for 2025
13. Herb scissors
Why: "They're hard to clean and don't offer a huge advantage over a sharp chef's knife. Plus, they tend to crush delicate herbs more than slice them."
What to try instead: Made In's 8-inch Chef Knife.
14. Electric egg cooker
Why: "Boiling eggs in a pot is straightforward and flexible. The electric version just adds clutter unless you boil eggs constantly and hate using a stove."
What to try instead: This 1-minute hack for making poached eggs in the microwave.
15. Butter cutter and dispenser

A good butter knife works just as well and requires less space and maintenance. Williams Sonoma
Why: "It slices sticks of butter into pats… but why? A knife works instantly, and you don't have to load and clean a plastic gadget for it."
What to try instead: Williams Sonoma breakfast butter blade.
16. Pasta measurer
Why: "It's a plastic disc with holes to tell you how much spaghetti to cook. Just eyeball it or learn the rough weight by experience. It's not worth the drawer space."
What to try instead: A kitchen scale for precise measurements.
17. Oil mister
Why: "Often clogs, sprays unevenly and requires constant cleaning. A small spoon or brush does the job with less frustration."
What to try instead: World Market's olive oil cruet.
18. Electric potato peeler

A sharp vegetable peeler is all you need to skin a batch of potatoes. Capelle.r/Getty
Why: "Takes up a surprising amount of space and peels slower than a regular peeler. Plus, it's overkill unless you're peeling dozens of potatoes at once."
What to try instead: Oxo's Swivel peeler.
19. Bagel guillotine
Why: "Sold as a safer way to slice bagels but takes up a ton of space and is awkward to clean. A serrated knife does the job just fine."
What to try instead: Opinel's 8-inch bread knife.
Jackie Carnesi

Jackie Carnesi StarChefs
20. Oven mitts

There's a reason pro chefs don't use oven mitts. Webstaurant
Why: "Oven mitts are the most useless item in a home kitchen! A sturdy kitchen towel does the same job, and odds are, it's more likely to be washed regularly. I don't know many people who wash their oven mitts frequently enough ... it seems many have deemed it an item that doesn't warrant regular cleaning. It does."
What to try instead: Stock a plethora of kitchen towels.
[This is me, I use the kitchen towels all the time!!]
0 notes
Text
Essential Tools and Machinery for Efficient Service Delivery by BellevueNebraska

In today’s fast-paced world, having the right tools and machinery can be the difference between an average job and exceptional service. At BellevueNebraska, we understand the importance of equipping our team with industry-grade tools that not only ensure precision but also boost efficiency, safety, and customer satisfaction.
Whether we’re handling a complex service request or a routine job, having the proper tools on hand helps us get the job done right the first time. From diagnostics to repairs, installations, or maintenance, our toolbox is built to tackle both challenges and surprises with professionalism and ease.
In this blog, we’ll walk you through the key tools and machinery we rely on, why they matter, and how they contribute to our trusted service delivery. Plus, we’ve included five of the most frequently asked questions about our equipment and methods — giving you an inside look at how BellevueNebraska stays a step ahead.
Our Core Tool Categories
1. Diagnostic Tools
Before any service begins, it’s important to assess the situation correctly. Diagnostic tools help us pinpoint issues accurately.
Multimeters – Essential for testing electrical systems.
Thermal Imaging Cameras – Detect overheating components or hidden leaks.
Moisture Meters – Help identify water damage in walls, floors, and ceilings.
Inspection Cameras – Perfect for looking inside pipes or wall cavities without invasive demolition.
2. Power Tools
Speed and precision matter. Power tools allow our technicians to execute tasks faster while maintaining control.
Cordless Drills and Drivers – Great for quick assembly and installation.
Angle Grinders – Used in surface prep and metal cutting.
Reciprocating and Circular Saws – Make cutting through various materials efficient.
Impact Wrenches – Ideal for high-torque applications such as loosening rusted bolts.
3. Lifting and Access Equipment
Safety and accessibility are crucial, especially for services involving elevated or tight spaces.
Extension Ladders and Step Ladders – Provide reach without compromising stability.
Portable Scaffolding Systems – Used when working on multi-level structures.
Hoists and Winches – Ensure safe lifting of heavy machinery or parts.
4. Plumbing and HVAC Tools
For plumbing or climate control services, having dedicated tools is non-negotiable.
Pipe Cutters and Threaders – Provide custom fitting solutions on-site.
Drain Augers and Jetters – Used for clearing clogs and blockages efficiently.
Manifold Gauge Sets – Essential for HVAC diagnostics and refrigerant charging.
Vacuum Pumps – Used for evacuating air and moisture from HVAC systems.
5. Safety and Personal Protective Equipment (PPE)
Our tools would be meaningless without safety. We prioritize the well-being of both our technicians and clients.
Hard Hats, Safety Glasses, Gloves – Basic PPE for every site.
Respirators and Dust Masks – Critical when dealing with contaminants or dust.
Fall Arrest Systems – Used when working at height.
Why Tools Matter to Our Customers
Using the right tools doesn’t just make life easier for our team — it directly benefits our customers. Here’s how:
Faster turnaround – Jobs that might take hours with manual tools can be completed in half the time.
Higher accuracy – Precision tools mean fewer mistakes and more dependable results.
Reduced property disruption – Advanced diagnostics and minimally invasive methods help us protect your space.
Long-term savings – Quality service reduces the need for repeat work or future repairs.
Our Machinery at a Glance
In addition to portable tools, BellevueNebraska uses several heavy-duty machines for large-scale or specialized projects:
Mini Excavators – Used for outdoor digging, trenching, or grading tasks.
Concrete Cutters and Mixers – Allow for quick surface modifications or patch jobs.
Mobile Air Compressors – Power pneumatic tools on remote sites.
Generators – Ensure uninterrupted power supply during off-grid jobs.
These investments ensure that we stay self-sufficient, reliable, and ready for any situation that comes our way.
5 Frequently Asked Questions (FAQs)
1. What types of services require heavy machinery?
Heavy machinery like mini excavators and concrete mixers are typically used for outdoor installations, foundation repair, utility line access, and large-scale remodeling. These machines help speed up work while ensuring a high-quality finish.
2. Do you bring all the necessary tools to every service call?
Yes. Our technicians arrive fully equipped for the job. We assess the scope during the booking process and ensure the van is stocked with everything needed — from basic hand tools to specialized equipment.
3. Is your equipment regularly maintained?
Absolutely. We have strict internal policies that require regular calibration, inspection, and maintenance of all our tools and machinery. Well-maintained tools reduce risks and ensure efficiency.
4. How do you ensure safety when using large machinery?
Every operator at BellevueNebraska is trained and certified. We also perform site assessments before beginning any task, use PPE, and follow industry-standard safety protocols to protect both our team and your property.
5. Can I request specific tools or methods for my project?
Definitely! If you have a preference — such as non-invasive diagnostics or eco-friendly tools — let us know when booking. We’re happy to tailor our approach to meet your expectations.
Final Thoughts
At BellevueNebraska, we believe in doing things right. That starts with showing up prepared, equipped, and ready to solve problems efficiently. Our wide range of tools and machinery ensures we’re ready for just about anything — from small fixes to major overhauls.
Choosing a service provider isn’t just about cost — it’s about confidence. With our top-tier equipment, experienced technicians, and a commitment to excellence, you can rest easy knowing your project is in capable hands.
#BellevueNebraska#ProfessionalTools#MachineryMatters#ServiceEfficiency#HomeRepairs#DiagnosticTools#PowerTools#HVACandPlumbing#SafetyFirst#QualityService
0 notes
Text
"Laser Cutting Machine Price in Pune: What You Need to Know Before Investing"

Pune, a growing industrial hub in India, is witnessing a surge in demand for laser cutting technology. From manufacturing to signage, automotive to fabrication, industries in Pune are increasingly relying on laser cutting machines for precision, efficiency, and cost-effectiveness. Whether you're searching for the best laser cutting machine in Pune, comparing laser cutting machine prices in Pune, or looking for a trusted laser cutting machine manufacturer in Pune, this guide will help you make an informed decision.
Why Choose a Laser Cutting Machine in Pune?
Laser cutting machines have revolutionized metal, plastic, and wood processing industries by providing:
High Precision – Laser technology ensures accurate cuts with minimal material wastage.
Speed and Efficiency – Faster cutting speeds boost productivity and reduce turnaround time.
Versatility – Suitable for cutting metals, acrylic, wood, plastics, and even glass.
Automation & Ease of Use – Modern CNC laser cutting machines require minimal manual intervention.
Cost Savings – Reduces labor costs and material wastage, leading to long-term profitability.
Best Laser Cutting Machine in Pune: How to Choose the Right One
When selecting a laser cutting machine in Pune, several factors come into play:
1. Material and Application
Different laser cutting machines are designed for specific materials. Common types include:
Fiber Laser Cutting Machines – Ideal for cutting metals like stainless steel, aluminum, and copper.
CO2 Laser Cutting Machines – Suitable for non-metallic materials like wood, acrylic, and plastic.
Hybrid Laser Machines – Can cut both metals and non-metals.
Understanding the material type and industry-specific applications will help businesses choose the right laser cutter. For example, manufacturers in the automobile industry need fiber lasers for cutting metal sheets, while the signage industry often uses CO2 lasers for acrylic cutting.
2. Power and Performance
Low-Power Lasers (Up to 500W) – Suitable for engraving and light cutting tasks.
Mid-Power Lasers (500W – 2kW) – Used for industrial applications with moderate thickness.
High-Power Lasers (Above 2kW) – Best for heavy-duty industrial applications with thick materials.
Higher power lasers offer better cutting capabilities, but they also come at a higher cost. It’s crucial to analyze business needs before investing in a machine.
3. Cutting Speed and Efficiency
The best laser cutting machines optimize cutting speed without compromising precision. High-speed machines with automatic feeding and smart software integration are preferred for high-volume production. Companies in Pune’s manufacturing sector benefit from fast processing speeds, leading to increased efficiency and production rates.
4. Maintenance and Durability
A good laser cutting machine manufacturer in Pune provides robust machines with minimal maintenance needs. Key factors to consider:
Build Quality – Machines made from high-quality components last longer.
Cooling System – Essential for preventing overheating.
Software & Automation – Advanced software ensures smooth operations.
Local Support – Availability of service centers in Pune helps in easy maintenance.
5. Budget and Cost Considerations
The laser cutting machine price in Pune varies depending on power, size, and features. It's crucial to balance budget with quality and long-term ROI. Businesses must factor in not only the machine’s upfront cost but also:
Operating Costs – Electricity and consumables like laser tubes and lenses.
Maintenance Costs – Regular servicing and spare parts.
Software & Upgrades – Compatibility with future upgrades.
Laser Cutting Machine Price in Pune: Factors Affecting Cost
The cost of a laser cutting machine in Pune can range from INR 5 lakh for entry-level models to INR 50 lakh or more for high-end industrial machines. Several factors influence the price:
Machine Type – Fiber lasers are generally more expensive than CO2 lasers.
Power and Features – Higher wattage and advanced features increase the cost.
Brand and Manufacturer – Established brands like SLTL Group offer premium machines with exceptional after-sales support.
Automation and Software – CNC integration and smart software functionalities add to the price.
Customization Options – Custom-built machines tailored for specific applications tend to be more expensive.
Many businesses in Pune seek financing options or leasing plans to make purchasing a laser cutter more affordable.
Top Laser Cutting Machine Manufacturers in Pune
Choosing a reputed laser cutting machine manufacturer in Pune ensures quality, durability, and excellent after-sales support. Some of the top manufacturers include:
1. SLTL Group – A Pioneer in Laser Cutting Solutions
SLTL Group is a global leader in laser technology, offering cutting-edge solutions for industrial applications. Their fiber laser cutting machines are known for precision, efficiency, and reliability. SLTL Group provides:
State-of-the-art fiber laser cutting machines
Customizable solutions for various industries
Excellent customer support and after-sales service
Competitive pricing and financing options
Smart software for automation
2. Other Notable Manufacturers
Apart from SLTL Group, other manufacturers in Pune offer laser cutting solutions. However, when considering aspects like quality, durability, and service, SLTL Group remains a preferred choice.
Industries Using Laser Cutting Machines in Pune
Laser cutting machines have become indispensable across various industries in Pune:
Automobile Industry – For precise metal cutting in vehicle components.
Aerospace Industry – Ensures high accuracy in aircraft parts manufacturing.
Signage & Advertising – Used to create intricate designs on acrylic and plastic.
Jewelry & Fashion – Laser technology helps craft delicate metal jewelry pieces.
Sheet Metal Fabrication – Used in large-scale metal processing and manufacturing.
Electronics Industry – Laser cutting is widely used in circuit board manufacturing.
Construction Sector – Architects and interior designers use laser cutting for decorative panels and intricate designs.
Why Choose SLTL Group for Laser Cutting Machines in Pune?
If you’re looking for the best laser cutting machine in Pune, SLTL Group is the go-to brand. Here’s why:
Innovative Technology – SLTL is at the forefront of laser innovation, offering high-speed and precise cutting solutions.
Custom Solutions – Machines tailored to specific business needs.
Affordable Pricing – Competitive rates with financing options.
Excellent Customer Support – Nationwide service network ensures smooth operations.
Proven Industry Expertise – Trusted by businesses across multiple sectors.
Energy-Efficient Designs – Machines designed to minimize power consumption.
User-Friendly Interface – Easy-to-operate systems requiring minimal training.
Conclusion
Investing in a laser cutting machine in Pune can significantly enhance productivity and quality across various industries. Whether you’re evaluating laser cutting machine price in Pune or looking for a trusted laser cutting machine manufacturer in Pune, it’s essential to choose a reliable provider like SLTL Group. With cutting-edge technology, excellent support, and a proven track record, SLTL Group offers the best laser cutting machine in Pune to meet all your industrial needs.
For more information, visit SLTL Group and explore their advanced laser cutting solutions tailored for your business!
0 notes
Text
Commercial Kitchen Equipment: A Essential Manual for a Successful Kitchen Organization
The primary component of any successful restaurant, hotel, or catering service is a comfortable kitchen. It is necessary to invest in excellent commercial kitchen equipment in order to ensure effective service and food safety. Commercial kitchen equipment, compared to domestic kitchen supplies, is made to manage massive food preparation, reducing time and effort while maintaining equality.
The rapid growth of the food industry in India is leading to a boost in the need for commercial kitchen equipment. depending on the size of your business—a cloud kitchen, a massive restaurant, or a little café—making the right equipment decisions will greatly improve both revenue and output.
Why is it important to have commercial kitchen equipment?
A lack of appropriate commercial kitchen equipment may end up in insufficient efficiency, food wastage, and hygienic difficulties while managing a restaurant business. These tools are required for some specific reasons:
✔ Increased Efficiency: Reduces the time necessary for cooking and preparation, providing faster service.. ✔ Maintains Hygiene: In accordance with food- safety regulations and keeps surrounding neat.
✔ Encourages Bulk Cooking: Maintains multiple food items without losing quality.
✔ Savings Price: To Cut down on the use of energy and waste of food. ✔ Promotes Kitchen Organization: Maintains organization for an additional productive process.
Spending money on the right commercial kitchen equipment increases the quality of food, speeds up assistance, and builds customer satisfaction.
Types of Equipment of Commercial Kitchens
A fully functioning kitchen requires plenty of commercial kitchen equipment to manage processes which includes cooking, preparing food, cleaning, and storage. These are the most important categories.
1. Cooking Equipment
The key component of any food business is cooking. These commercial kitchen equipments enhance faster and successful meal set up:
They boil, water, and cook food with gas stoves and ranges.
Meats and vegetables also require ovens and grills for baking, roasting, and grilling.
Indian restaurants also use tandoors and steamers to make momos, tandoori chicken and naan.
You can prepare a variety of fast food and fried snacks in deep fryers and griddles.
2. Refrigeration & Storage Equipment
Now, why is that? Because to keep them fresh and spoil free, the food needs the right storage. These commercial kitchen equipments provide an assured temperature and hygiene:
Commercial Refrigerators – Stores veggies, dairy, and perishable items.
Deep Freezers – Preserves ice cream, seafood, meats, and similar items.
Cold Storage Units – Used by large-scale restaurants and catering business
3. Food Preparation Equipment
It takes time to get ready ingredients, however the proper commercial kitchen equipment may speed up the process:
Vegetable Cutters & Choppers: Quickly chop and cut vegetables
Meat Grinders and Mixers: These kitchen appliances are used for grinding meat and combine ingredients.
Blenders and dough kneaders are required for bakeries and restaurants that make bread and chapati.
4. Dishwashing & Cleaning Equipment
In any business kitchen, hygiene needs to be managed. The following Chennai-based manufacturers of kitchen equipment suppliers in Chennai provide the tools needed to maintain a neat kitchen:
✔ Commercial dishwashers: These quickly clean dishes, glasses, and knives.✔ Three-sink washing stations are used for washing your hands, dishwashing, and disinfection.✔ Grease traps and exhaust hoods: They keep the kitchen hygienic and smoke-and garbage-free.
5. Serving & Storage Equipment
For quick service, the kitchen should be kept neat and organized. These are necessary components of commercial catering equipment:
✔ Shelves and racks made out of stainless steel are used to store groceries and tools.✔ Serving counters & trolleys: useful for an efficient serving the food. ✔ Food is maintained warm and available to visitors at the Hot Bain Marie and Display Counters.
How to Choose the Right Commercial Kitchen Equipments?
Choosing the right commercial kitchen equipments can be tough. Here are some things to think about before you buy:
Great quality and Durable: Pick stainless steel and heavy-duty items for periodical use.
Energy Efficiency: Use energy-saving appliances to lower power costs.
Make sure the appliance will fit nicely in your kitchen layout.
Economical: Dont buy the equipments without a comparison of their prices, get the best commercial kitchen equipments that lie within your budget.
Easy maintenance: Select equipments that are easy to clean and maintain.
You might boost productivity in the kitchen and improve business operations by selecting the right commercial kitchen equipment.
Tips for Maintaining Commercial Kitchen Equipments
Commercial kitchen equipment functions successfully and remains functional better when it receives routine maintenance. Use these pointers to guarantee proper maintenance:
Cleaning every day: Clean surfaces, get rid of oil, and clean places used for cooking.
Frequent Inspections: Replace any damaged parts and look for signs of wear.
Observe the manufacturer's instructions: Read guidelines and operate the equipment carefully.
Schedule for Professional Servicing: Unwanted problems are avoided with regular servicing.
Maintaining everything in the commercial kitchen equipments helps extend its lifetime and guarantees that it works successfully.
Why Choose High-Quality Commercial Kitchen Equipments?
Low-quality commercial kitchen equipment is commonly purchased by enterprises in an attempt to save money, however this frequently results in repairs and replacements. Here are some reasons why investing in high-quality equipment is preferable:
Improved Performance: Reliable outcomes are produced by top-quality equipment.
Long-Term Savings: Long-lasting equipment saves money on replacement and maintenance.
Better Food Quality: Guarantees consistent cooking and improves flavour.
Safety Standards Compliance: Adheres to hygienic and health standards.
Purchasing high-end commercial kitchen equipment facilitates the operation of a successful and effective food business.
Conclusion
Every Indian food business must have the proper commercial kitchen equipment. These appliances improve the efficiency, cleanliness, and profitability of kitchen operations, from cooking and refrigeration to dishwashing and food preparation.Businesses can lower operating expenses, increase customer happiness, and improve food quality by selecting long-lasting, high-quality commercial kitchen equipment. Purchasing the greatest commercial kitchen equipment is a wise move for long-term success, regardless of whether you are renovating your current kitchen or starting a new restaurant.
0 notes
Text
Tools and Techniques for E-Waste Management

Tools and Techniques for E-Waste Management: A Path to Sustainability
As technology continues to evolve at a rapid pace, the volume of electronic waste (e-waste) generated globally is growing at an alarming rate. E-waste refers to discarded electrical or electronic devices, such as smartphones, computers, televisions, and refrigerators. With the rapid obsolescence of gadgets and the increasing use of electronics in daily life, the environmental and health challenges posed by improper disposal of e-waste are becoming more severe. E-waste contains hazardous substances like lead, mercury, and cadmium, which can contaminate soil and water, posing significant risks to human health and the ecosystem.
Effective e-waste management is crucial to mitigate these risks, conserve valuable resources, and reduce the environmental impact for which different awareness programs and activities are conducted at Poddar International College, which is one of the best colleges in Jaipur. Various tools and techniques are available to address the issue of e-waste, ranging from collection and sorting methods to recycling and sustainable disposal practices. This article explores these tools and techniques, shedding light on how they contribute to a more sustainable future.
1. E-Waste Collection Systems
The first step in effective e-waste management is the collection of discarded electronics. Several tools and systems are being employed worldwide to facilitate the collection process:
Drop-off Centers and Collection Bins: Many countries and cities have established designated e-waste drop-off centers and collection bins in public spaces like shopping malls, electronics stores, and recycling depots. These bins are specifically for consumers to dispose of unwanted or broken electronics safely. Collection programs often include incentives like discounts on new products or rewards to encourage participation.
Take-back Programs and Buyback Schemes: Manufacturers, retailers, and service providers can offer take-back programs where consumers return old devices when purchasing new ones. Buyback schemes are also popular in which consumers can sell their old electronics for a reasonable price, ensuring that these devices do not end up in landfills.
E-Waste Recycling Events: In many regions, communities organize e-waste collection drives or special recycling events where individuals can drop off their old electronics for proper disposal. These events are typically held periodically and help raise awareness about the importance of responsible e-waste disposal.
2. Sorting and Dismantling Techniques
Once e-waste is collected, it must be sorted and dismantled before it can be recycled or safely disposed of. Sorting involves separating materials based on their composition, such as metals, plastics, glass, and circuit boards. Several tools and techniques are employed in this phase:
Manual Dismantling: Workers use tools like screwdrivers, pliers, and cutters to manually remove parts such as batteries, circuit boards, and cables from electronic devices. While labor-intensive, this method is effective for handling devices that contain valuable materials like gold, silver, and copper.
Automated Dismantling Machines: In large-scale e-waste recycling centers, automated machines are employed to speed up the dismantling process. These machines can use mechanical arms or conveyor belts to separate components like circuit boards, batteries, plastics, and metals. Automated dismantling is more efficient and reduces the risk of human exposure to hazardous materials.
Magnetic and Eddy Current Separation: In some cases, magnets are used to separate ferrous metals (e.g., iron and steel) from non-ferrous metals. Eddy current separators are used to separate non-ferrous metals such as aluminum and copper from other materials in the waste stream by creating a magnetic field that causes these metals to move in a specific direction.
3. Recycling and Recovery Techniques
Recycling is the cornerstone of e-waste management. It involves recovering valuable materials from discarded electronics while reducing the need for new resources. Several tools and techniques are utilized to recycle e-waste efficiently:
Mechanical Shredding: In this method, electronic devices are shredded into smaller pieces using powerful machines. The shredded materials are then passed through various screens and separators to sort and recover metals, plastics, and glass. Mechanical shredding helps reduce the size of e-waste and makes it easier to extract valuable components.
Hydrometallurgical and Pyrometallurgical Techniques: Both hydrometallurgy (using water and chemicals) and pyrometallurgy (using heat) are used to extract precious metals like gold, silver, and copper from e-waste. Hydrometallurgical techniques involve dissolving metals from electronic components using chemicals and then recovering the metals from the solution. Pyrometallurgical techniques use high temperatures to melt metals and separate them from other materials.
Physical Separation Techniques: After shredding, physical separation techniques like air classification, gravity separation, and flotation are used to separate materials based on differences in weight, size, and density. This method allows for the separation of metals from nonmetals, as well as the recovery of valuable materials like copper and aluminum.
Closed-Loop Recycling: This innovative recycling technique involves the recovery of materials from e-waste to produce new electronic devices. Closed-loop recycling ensures that materials such as plastics, metals, and glass are reused repeatedly, reducing the need for new raw materials. For example, metals recovered from e-waste can be used in the production of new electronic components.
4. Safe Disposal and Landfill Alternatives
While recycling is the most sustainable option for e-waste, not all devices are suitable for recycling. Some components, especially those with hazardous substances like lead or mercury, require special disposal methods to avoid environmental contamination.
Certified E-Waste Disposal Facilities: Proper disposal of e-waste is essential for avoiding environmental harm. Certified e-waste disposal facilities use safe techniques to handle hazardous materials. These facilities are equipped with specialized tools like air filtration systems and chemical neutralizers to prevent the release of toxins into the environment.
Landfill Mining: In some cases, waste that has already been disposed of in landfills can be excavated and recycled through a process called landfill mining. This technique helps recover valuable metals and electronics that were previously buried, reducing the need for new mining operations and decreasing the environmental impact of e-waste.
5. Innovative Technologies for E-Waste Management
Advancements in technology are transforming the way e-waste is handled. Emerging innovations include:
AI and Machine Learning: Artificial intelligence (AI) and machine learning algorithms are being used to improve the efficiency of e-waste sorting and recycling. AI can help identify different types of materials in e-waste, allowing automated systems to better separate and recycle them.
Robotics in E-Waste Sorting: Robots equipped with advanced vision systems can perform precise sorting tasks, reducing the need for human labor and improving the speed and accuracy of recycling processes. These robots can recognize specific components and materials, making them ideal for disassembling electronic devices.
Blockchain for E-Waste Traceability: Blockchain technology in which a certification course is provided by Poddar International College, Jaipur is being explored to track e-waste from its source to its final disposal. This technology provides a transparent and tamper-proof system that can ensure that e-waste is being properly recycled and not sent to illegal dumping grounds.
Conclusion
E-waste management is an essential aspect of modern environmental sustainability. As technology continues to advance, the tools and techniques used for managing e-waste must also evolve. From collection and sorting to recycling and safe disposal, various methods help mitigate the environmental impact of e-waste. By integrating innovative technologies, efficient recycling systems, and sustainable practices, we can reduce the harm caused by e-waste and promote a circular economy that conserves resources, protects the environment, and minimizes health risks. Proper e-waste management not only helps us manage our growing reliance on electronics but also ensures a cleaner, greener future for generations to come.
0 notes
Text
Effective tips for a seamless and enjoyable off-roading experience on 4x4
Mahindra Thar Roxx is one of the most promising and affordable 4x4s in the market that can offer an incredible off-roading experience. Whether it’s performance, handling, comfort, or safety, the vehicle ticks almost every box with a bang. And with the help of premium Mahindra Thar Roxx accessories, one can amplify the overall driving experience even more. But when it comes to off-roading, it’s not an easy task. It’s full of adventure, thrill, and unexpected climatic conditions. To have a seamless off-roading experience, one has to follow the basics of off-roading to let your 4x4 nail it like a pro.
So, here are important tips to have an incredible off-roading experience without getting into any trouble.
· Know your vehicle
Every off-roading SUV comes with different features and systems. Before taking the plunge, it’s better to know your vehicle's capabilities, such as:
- Traction control
Almost every 4x4 comes with some traction control, depending upon specific conditions. However, the system could be complex or simple. Traction control mostly happens through the brakes or the off-road mechanicals to restrict wheel slip. Hence, there are many traction control systems, and every off-road vehicle has its own. So, it’s better to understand yours by reading the manual or settings.
- 4WD High or 4WD Low
Both refer to the type of driving case. The 4WD High is meant for day-to-day driving, offering top speed but minimum torque to the tires when stopped. On the contrary, the 4WD means more torque with lower speed. So it entirely depends on your requirements. But from the off-roading perspective, the 4WD Low mode is the best option to pick, as it gives more torque as well as traction at low speeds on trails.
Install the special equipment and accessories.
To amplify the off-roading experience on your 4x4, you need to install some special equipment and accessories. When it comes to Thar Roxx, you can find multiple accessories and equipment in the aftermarket. Some of the prominent ones are:
- Thar Roxx floor mats
The special 9D custom-fit premium Thar Roxx mats protect the interiors during off-road trips from dirt, mud, fluids, and dust. The mats also offer enhanced comfort and grip to feet while driving.
- Thar Roxx seat cover
To protect the seats during off-roading from excessive sweating, sun exposure, dust, and other things, you can install special leatherette seat covers with an extra layer of protection and comfort.
- Tires
Install a good set of tires for enhanced traction and grip for extreme terrains and surfaces. You can also go for mud tires for improved traction and safety on tough surfaces.
- Bumpers
For a hassle-free off-road trip, it’s advisable to install front and back bumpers. Front ones protect your vehicle from animal strikes, brushes, trees, etc. Whereas, the rear bumper shields your vehicle from the rear drivers and obstacles.
- Winch
Your off-roading can be really cumbersome without a winch. In fact, it’s the first thing you should keep with you. When your SUV is stuck in mud or terrain, a winch can be of great help to pull out your vehicle from a difficult situation.
Prepare yourself for the worst cases.
Off-roading is full of challenges. To prepare yourself for such scenarios, it’s important to keep some important things with you, such as:
- First aid box
A basic first aid box can help you stop blood loss, and clean, and heal wounds.
- Glass and seat belt cutter
You may get stuck in the worst situation due to a fall or accident; hence, keeping a glass and seatbelt cutter can save your and others’ lives.
- Fire extinguisher
To prevent any fire damage in your car, keep a fire extinguisher.
- Water and food
Off-road destinations don’t have much food and water supplies. Hence, it is better to keep enough food and water supply with you.
Final Thoughts
Last but not least, off-roading is not everyone’s cup of tea. One has to witness multiple hurdles, challenges, and difficulties. But with the above-mentioned guide, you can minimize the discomfort and amplify the off-roading experience to a great extent.
0 notes
Text
Price: [price_with_discount] (as of [price_update_date] - Details) [ad_1] Meat Grinders Electric Food Processor, Multipurpose Smart Kitchen Food Chopper Vegetable Fruit Cutter Onion Slicer Dicer, Blender and Mincer, Glass Bowl Powerful 300 watts motor, cord length 120cm, inbuilt thermal auto cutoff motor safety. Rated voltage - 230v ac, 50 hz. manufacturer warranty provided on the product and warranty card is already provided in the instruction manual last page. Push button operation, low noise motor, sharp edged stainless steel blades, single as well as dual blades for fine chopping, chopping done in seconds Portable and easy to use of the product. Twin blade technology with auto cutoff option for motor safety Package: chopper motor with blades and 600ml usable chopping bowl, 1 instruction manual. Packaging dimension - l -13cm x w - 13cm x h - 25cm The chopper is made for chopping the food material, we can chop them from large size to finer particles but it can not grinder like chutney. The chutney can not be prepared from the choppers. It crush dry fruits but make sure seeds are removed properly so that the blade will not be damage. Pure is not possible as the chopper does not grinds finely, it is designed to chop the material into smaller pieces [ad_2]
0 notes
Text
Tile Removal: Everything You Need to Know
Whether you’re looking to renovate your bathroom, kitchen, or flooring, tile removal is one of the first and most crucial steps in transforming your space. While it may seem straightforward, removing tiles can be a time-consuming and complex task that requires the right tools and techniques. In this blog post, we’ll walk you through everything you need to know about tile removal, including the steps involved, why you should hire professionals, and what to expect during the process.

1. Why Tile Removal is Necessary
1.1 Outdated or Damaged Tiles
Tiles can quickly become damaged over time, especially in high-traffic areas or spaces that experience a lot of moisture, such as bathrooms and kitchens. Cracked or chipped tiles not only ruin the aesthetic of the space but can also lead to further issues like water damage, mould, and mildew. In such cases, tile removal becomes essential to ensure the area remains safe and functional.
1.2 Changing the Design
Sometimes, a change in your design vision or a desire to update the style of your space is the main reason for removing tiles. If you're looking to switch from a traditional to a modern style, or change the colour or texture of your tiles, removing the old tiles is the first step in the renovation process.
1.3 Floor-Leveling or Subfloor Repair
In some instances, tile removal may be necessary if you plan to install new flooring, such as hardwood, vinyl, or carpet. Removing the old tiles ensures that your subfloor is even and prepared for the new material, as uneven surfaces can lead to complications during installation.
2. Tools and Equipment Required for Tile Removal
2.1 Manual Tools
Pry Bar: This is the most basic tool for lifting tiles. A pry bar allows you to get under the tile and gently lift it from the surface.
Hammer: Used in conjunction with the pry bar, a hammer helps loosen the tiles from the floor or wall.
Putty Knife: A putty knife can help remove any remaining adhesive on the surface after the tiles have been lifted.
2.2 Power Tools
Hammer Drill: A hammer drill is often used for tile removal as it can break through tough adhesive and grout.
Tile Cutter or Wet Saw: These tools are designed to cut tiles for more precise removal when needed.
Angle Grinder: For more challenging tile surfaces, an angle grinder can help cut through stubborn tiles.
2.3 Safety Gear
Safety Glasses: Protect your eyes from debris and dust that may fly up during the removal process.
Gloves: Protect your hands from sharp edges on broken tiles.
Dust Mask: Prevent inhaling dust and particles that can be released when tiles are removed.
3. How the Tile Removal Process Works
3.1 Preparation
The first step in tile removal is to prepare the area. Remove all furniture, appliances, or any items that may be in the way. Cover the surrounding areas with plastic sheets or drop cloths to protect them from dust and debris. Turn off the water supply if you are working in a bathroom or kitchen.
3.2 Loosening the Tiles
Start by loosening the grout around the tiles with a grout saw or utility knife. Then, using your pry bar and hammer, gently lift each tile from the surface. Be careful not to damage the underlying surface, especially if you plan to re-tile or install new flooring over it.
3.3 Removing Adhesive and Grout
Once the tiles are removed, you will need to clean the surface and remove any adhesive or grout left behind. This can be done with a putty knife, scraper, or power tools like a hammer drill. Depending on the surface material, you may need to use a chemical adhesive remover for more stubborn materials.
3.4 Disposal
Once the tiles are removed and the area is cleaned, the next step is to dispose of the old tiles. You can take them to a recycling centre, or contact a local disposal service to ensure proper disposal.
4. Hiring Professionals for Tile Removal
4.1 Why Choose Professionals?
While DIY tile removal is possible, it can be a time-consuming, exhausting task that requires careful handling of tools and materials. Hiring professionals ensures the job is done efficiently and safely. They have the right equipment, experience, and techniques to remove tiles without damaging your walls or floors, saving you both time and effort.
4.2 When to Hire a Professional
It’s best to hire professionals for tile removal if you’re dealing with large areas, stubborn materials, or if you’re not familiar with the necessary tools and techniques. They can also assist with safely disposing of the debris, preventing health hazards from dust or broken tiles.
5. Tile Removal and Renovation: What’s Next?
After tile removal, the next step is often preparing the space for new tiles or other flooring materials. This might involve smoothing the surface, making any necessary repairs, or installing a fresh layer of adhesive. Once the surface is ready, you can proceed with your renovation project.
Conclusion
Whether you're renovating your kitchen, bathroom, or flooring, tile removal is an essential part of the process. While it can be a challenging task, understanding the necessary tools, steps, and safety precautions will help ensure your renovation goes smoothly. If you’re not ready to tackle the job yourself, hiring professionals will guarantee that your project is completed efficiently, safely, and without unnecessary stress.
#tile removal#commercial strip out sydney#bathroom demolition sydney#kitchen demolition services#office strip-outs sydney#strip out services#kitchen strip-outs#office defit sydney#office strip outs sydney#strip out demolition sydney
0 notes
Text
Best Wrap Cutter Tools: Make Quick Work of Packaging
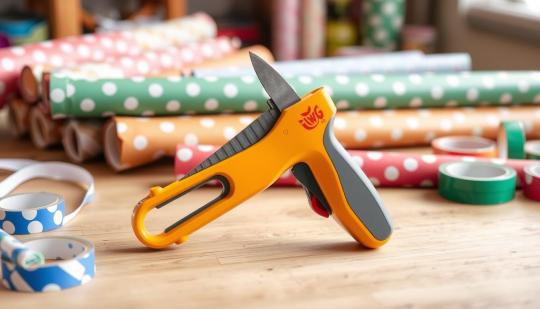
At any point battled to wrap a gift conveniently due to a dull shaper? The right wrap shaper can make a huge difference. It makes bundling simple and makes your gifts look perfect. In any case, with such countless decisions, finding all that one can be extreme.
In this aid, we'll take a gander at the top wrap cutters for 2024. We'll discuss what makes them incredible and which brands stick out. Whether you work in retail, food administration, or simply love to wrap gifts, this article will assist you with tracking down the ideal device.
Grasping Various Sorts of Wrap Cutters
Having the right devices for bundling is urgent. Wrap cutters are key for slicing through materials like therapist wrap and plastic film. They come in different structures to meet different bundling needs. We should investigate the primary kinds of wrap cutters.
Manual Wrap Cutters
Manual wrap cutters are perfect for limited scope bundling or home use. They have ergonomic plans and secret sharp edges for safe cutting. Normal sorts incorporate art leisure activity blades and 9mm snap-off utility blades with 30° edges.
These cutters are adaptable and reasonable. They're ideal for the overwhelming majority bundling undertakings.
Modern Grade Cutters
Modern grade wrap cutters are for large bundling position. They're worked for quick, enormous scope bundling. The 9030T sharp edge is a top decision for accurate cutting in the illustrations business.
The 30-degree snap-off cutting edge, similar to the 9030T, is sharp for quite a while. Extraordinary for organizations need to cut a great deal. The Sollex 9030T edge is extra sturdy in light of its titanium covering.
Specialty Film Cutters
There are additionally specialty film cutters for explicit materials. These apparatuses are made for remarkable movies like psychological wrap. The Air pocket Wrap® Shaper, for instance, cuts Air pocket Wrap sheets quick and productively.
These cutters frequently have highlights like programmed drives for improved efficiency. They likewise have sturdy, replaceable sharp edges for enduring execution.
Each wrap shaper type has its own advantages. They take special care of both bundling experts and specialists. Whether you want a manual device or a substantial shaper, there's an answer for you.
Fundamental Highlights to Search for in a Quality Wrap Shaper
While searching for a decent package opener or cardboard blade , there are key highlights to remember. You want sharp, tough edges for clean cuts on various materials like cardboard and plastic film. A 30-degree cutting point is best for nitty gritty work, particularly on bended surfaces. This helps make with smoothing, exact cuts with less exertion.
An ergonomic plan is significant for solace and efficiency. Whether you use it frequently or just some of the time, search for a model with a delicate hold handle. This makes it more straightforward to use without getting worn out. A few cutters even have exceptional highlights like felt-edge wipers for bended surfaces or adaptable wipers for sharp corners.
Security is no joke matter while picking a wrap shaper. Search for models with stowed away edges and other security highlights . Continuously wear cut-safe gloves and wellness glasses while working with vinyl or different materials. Keeping your shaper clean and supplanting dull cutting edges consistently is likewise key for its exhibition and life expectancy.
In the event that you need a container opener that can accomplish more, a few models can twist strips. This makes them extraordinary for various bundling and opening up undertakings. It's likewise vital to consider that it is so natural to supplant the sharp edges while picking a wrap shaper.
Whether you work in the business designs or appreciate Do-It-Yourself projects, a decent wrap shaper is a major assistance. Search for sharp edges, an ergonomic plan, and wellbeing highlights. Along these lines , you'll track down the best apparatus to make opening up more straightforward
First class Enclose Shaper Brands by 2024
Searching for the best pressing tape shaper or kitchen frill? In 2024, top brands offer a large number of choices. You can track down professional grade, spending plan well disposed, and premium instruments to address your issues. These brands are known for their dependability, development, and consumer loyalty.
Proficient Grade Choices
For substantial assignments, professional grade wrap cutters are the most ideal decision. They are strong, exact, and flexible. These instruments are ideally suited for retailers, distribution centers, and assembly offices.
Financial plan Agreeable Decisions
Searching for something reasonable? Top brands have financial plan well presented choices. These instruments are reliable and superior grade, making them incredible for ordinary use.
🎁✨ Prepare Your Gifts Like a Pro Now! ✂️
0 notes
Text
BD Building Tools - Tiles and Building Solution
Tiles and equipment are essential elements in various construction, renovation, and interior design projects. They serve both functional and aesthetic purposes, enhancing the durability, appearance, and efficiency of spaces. Below is a comprehensive description of tiles and the equipment involved in their selection, installation, and maintenance.
Tiles: Types, Uses, and Materials
Tiles are flat, thin pieces of material used to cover surfaces such as floors, walls, and countertops. They come in a variety of materials, shapes, sizes, and finishes, making them suitable for different environments and purposes. The primary types of tiles include ceramic, porcelain, stone, glass, and cement tiles, each offering distinct advantages and applications.
Ceramic Tiles: Made from clay and other natural materials, ceramic tiles are one of the most commonly used tiles. They are available in glazed and unglazed forms, with glazed tiles offering a glossy finish and improved water resistance. Ceramic tiles are versatile and ideal for areas with moderate traffic, such as kitchens and bathrooms.
Porcelain Tiles: A type of ceramic tile but made from more refined clay and fired at higher temperatures, porcelain tiles are denser, harder, and more water-resistant. They are suitable for both indoor and outdoor spaces, including high-traffic areas, as they offer greater durability and stain resistance.
Stone Tiles: Natural stones like marble, granite, travertine, and slate are used to create high-end, durable tiles. These tiles bring a natural aesthetic to a space and are often used for luxury applications such as high-end bathrooms, living rooms, and even outdoor patios.
Glass Tiles: These tiles are typically used for decorative purposes or in areas where the tile surface needs to reflect light or provide a sense of openness. Glass tiles are commonly seen in backsplash designs in kitchens or bathrooms, as they are easy to clean and highly resistant to stains.
Cement Tiles: Popular for their unique, often intricate patterns, cement tiles are handcrafted and suitable for both contemporary and traditional designs. They are typically used for flooring in living rooms, entryways, or as accents in bathrooms.
Tile Equipment: Tools for Installation and Maintenance
The installation and maintenance of tiles require specialized tools and equipment to ensure proper alignment, precision, and long-term durability. Below are key tools used during the tile installation process:
Tile Cutter: A tile cutter is a fundamental tool used to cut tiles to the desired size and shape. There are manual tile cutters, which are suitable for smaller projects, and electric tile cutters, which provide more efficiency and precision for larger projects.
Tile Saw: For more intricate cuts or thicker tiles, a tile saw equipped with a diamond blade is used. It provides more power and precision than a manual cutter, making it ideal for cutting stone or porcelain tiles.
Tile Spacers: Tile spacers are small plastic pieces placed between tiles to ensure even spacing during installation. These spacers help create uniform grout lines and contribute to the overall aesthetic of the installation.
Trowel: A trowel, typically used for spreading thin-set mortar or adhesive, is an essential tool for ensuring that tiles adhere properly to surfaces. Notched trowels are most commonly used to create grooves in the adhesive for better bonding.
Level: A level is crucial for ensuring that tiles are installed in a straight line and are properly aligned. This helps avoid uneven surfaces that can affect both the visual appeal and functionality of the installation.
Rubber Mallet: A rubber mallet is used to gently tap tiles into place, ensuring they are securely set into the adhesive without causing damage to the tile surface.
Grout Float: After the tiles are set, grout is applied between the tiles to fill the gaps. A grout float is a tool that helps evenly spread the grout across the surface, ensuring that it fills the spaces evenly and without air bubbles.
Tile Nippers: For curved cuts or small adjustments, tile nippers are used. These hand tools are ideal for making detailed cuts, especially when working with ceramic or glass tiles.
Tile Sealer: For certain types of tiles, such as natural stone, applying a sealer can enhance durability and prevent staining. Tile sealers protect the surface from moisture and dirt while maintaining the tile’s appearance over time.
Grout Cleaning Tools: Once grout has set, grout cleaning tools, such as sponges, scrub brushes, and grout haze removers, are necessary to clean excess grout and keep the tile surface looking pristine.
Conclusion
Tiles and their related equipment are indispensable in the world of construction and interior design. Whether for functional purposes such as durability and water resistance, or aesthetic purposes like adding color and texture to a room, tiles serve as a versatile and long-lasting solution. With the right tools and materials, tiles can transform any space, making them an essential component in modern building practices.
0 notes
Text
The Art and Science of Glass Cutting in Cape Town
Glass cutting in Cape Town has evolved into a specialised craft that combines artistry and precision engineering. As the city expands, the demand for high-quality glass products in architecture, interior design, and art rises. This article looks at the techniques, tools, and benefits of glass cutting, as well as how it is used in various industries in Cape Town. Understanding Glass Cutting Glass cutting is the process of scoring and breaking glass into specific shapes and sizes. This technique is essential for various applications, including custom windows and doors, decorative pieces, and functional items such as mirrors and tabletops. Glass cutting requires technical knowledge and an artistic eye to produce aesthetically pleasing results. Techniques Used in Glass Cutting There are several techniques employed in glass cutting, each suited to diverse types of projects: Manual Cutting Glass cutting in Cape Town typically begins with manual techniques, which are ideal for beginners and smaller projects. This involves scoring the glass's surface with a handheld cutter, then applying pressure to break it along the scored line. Manual glass cutting in Cape Town is particularly effective for thin glass sheets and enables precise handling in custom projects. Automated Cutting Automated glass cutting in Cape Town is ideal for large projects with intricate designs. These machines use advanced CNC (computer numerical control) technology to cut glass precisely and efficiently. This method produces complex shapes with minimal waste, making it ideal for projects requiring precision and custom design. Waterjet Cutting Another advanced technique for cutting through glass is waterjet cutting, which employs high-pressure water mixed with abrasives. This method works especially well for thicker glass or intricate designs that require an elevated level of detail while avoiding stress fractures. Essential Tools for Glass Cutting Achieving precision in glass cutting in Cape Town requires specific tools: • Glass Cutter: A sharp wheel cutter is required for scoring the glass effectively. There are several types, including manual and oil-fed cutters. • Straight Edge: A straight edge guides the cutter along the desired line, resulting in a clean, straight score. • Safety Equipment: Protective eyewear and gloves are essential for handling glass to avoid injuries from sharp edges or accidental breaks. • Lubricants: Using oil or a specific glass-cutting lubricant can help you get smoother cuts by reducing friction during scoring. Applications of Glass Cutting in Cape Town The applications of glass cutting in Cape Town are vast and varied: Architecture and Construction Glass cutting in Cape Town is essential in architecture, allowing for custom glass windows, doors, and facades that improve both the aesthetics and functionality of buildings. Well-cut glass panels add elegance and allow for more creative architectural designs, creating visually appealing spaces while meeting structural requirements. Interior Design Glass cutting in Cape Town facilitates the creation of customised pieces such as mirrors, shelves, and decorative panels. These custom glass items blend seamlessly into individual spaces, adding style and complementing the overall decor. Conclusion To summarise, glass cutting in Cape Town is more than just a technical skill; it is an art form that blends creativity and precision. Whether for architectural, interior design, or artistic purposes, skilled craftsmen play a key role in shaping how we interact with this versatile material. As demand for custom glass solutions grows across industries, mastering the art of glass cutting becomes increasingly important. Using a combination of traditional techniques and modern technology, those providing glass cutting in Cape Town will continue to push the envelope and create stunning works that reflect both functionality and beauty in everyday life.
0 notes
Text
The Future of Manufacturing: How CNC Laser Cutting Machines Are Revolutionizing Industries

Precision and efficiency are key to success in today's fast-paced manufacturing industry. CNC laser cutting machines have emerged as game-changers, offering unmatched accuracy, speed, and versatility across various sectors. Whether you are in metal fabrication, automotive, aerospace, or signage production, CNC laser cutting machines provide the perfect solution for intricate and high-quality cutting needs.
What is a CNC Laser Cutting Machine?
A CNC (Computer Numerical Control) laser-cutting machine is an advanced tool that uses a high-powered laser beam to cut, engrave, or mark materials with extreme precision. These machines operate with the help of pre-programmed computer software, ensuring consistent and accurate results with minimal manual intervention. They are widely used in industrial applications due to their efficiency and ability to work with various materials.
How CNC Laser Cutting Machines Work
CNC laser cutters utilize a focused laser beam to melt, burn, or vaporize materials, leaving smooth and precise edges. The process is controlled by a computer, which follows the design specifications provided in CAD (Computer-Aided Design) software. The three primary types of lasers used in CNC laser cutting machines include:
CO2 Laser Cutting Machines – Ideal for cutting non-metal materials such as wood, acrylic, glass, and plastics. These machines are commonly used in industries like signage, furniture, and packaging.
Fiber Laser Cutting Machines – Best suited for metal cutting, including steel, aluminum, brass, and copper. They offer superior speed and energy efficiency compared to CO2 lasers.
Nd**: YAG**** (Neodymium-Doped Yttrium Aluminum Garnet) Lasers** – Used for applications requiring high-power density, such as deep engraving and welding. These lasers are particularly useful in the aerospace and medical industries.
Benefits of CNC Laser Cutting Machines
1. High Precision and Accuracy
CNC laser cutting technology offers superior precision compared to traditional cutting methods. The laser beam is highly focused, ensuring clean cuts with minimal material wastage. This accuracy is essential for industries requiring detailed designs and intricate patterns.
2. Enhanced Efficiency and Speed
CNC laser cutters operate at high speeds, significantly reducing production time. Unlike mechanical cutting tools, they do not require tool changes, making them ideal for high-volume production. Their ability to process multiple sheets of material simultaneously enhances productivity.
3. Versatility in Material Processing
These machines can cut a wide range of materials, including metals, plastics, composites, and ceramics. The ability to handle different materials makes CNC laser cutters suitable for various industries, from automotive to jewelry manufacturing.
4. Reduced Material Wastage
The precision of CNC laser cutting minimizes material wastage, leading to cost savings. This is particularly important for industries dealing with expensive raw materials, such as aerospace and medical device manufacturing.
5. Minimal Maintenance and Operating Costs
CNC laser cutters have fewer moving parts, reducing the need for frequent maintenance. Additionally, they consume less energy compared to traditional cutting tools, making them cost-effective in the long run. Businesses benefit from reduced downtime and lower operational expenses.
6. Non-Contact Process
Since the laser beam does not physically touch the material, there is minimal risk of contamination, distortion, or tool wear, ensuring consistent cutting quality over time. This feature is particularly beneficial for delicate or heat-sensitive materials.
7. Customization and Flexibility
CNC laser cutters allow manufacturers to create customized designs quickly. The software-driven process enables rapid prototyping and easy design modifications without the need for expensive tooling changes. This flexibility is essential for industries requiring frequent design updates.
Advanced Features of CNC Laser Cutting Machines
1. Automation and Smart Controls
Modern CNC laser cutting machines come equipped with automation features such as AI-driven optimizations, real-time monitoring, and remote control capabilities. These smart features enhance efficiency, reduce human error, and improve overall productivity.
2. Multi-Axis Cutting Capabilities
Advanced CNC laser cutters can perform multi-axis cutting, allowing for the creation of complex geometries and intricate designs that would be challenging with traditional cutting methods.
3. Adaptive Optics and Beam Delivery Systems
Some high-end CNC laser cutters feature adaptive optics and adjustable beam delivery systems, ensuring consistent beam quality and optimized cutting performance for different materials.
4. Integrated Cooling Systems
To enhance longevity and efficiency, many CNC laser cutting machines incorporate cooling systems that maintain optimal operating temperatures, reducing wear and tear on components.
5. Real-Time Quality Control and Monitoring
Advanced sensors and software enable real-time quality control, ensuring precise cutting and detecting deviations instantly to maintain high production standards.
6. Hybrid Cutting Technology
Some CNC laser cutting machines combine multiple cutting technologies, such as plasma or waterjet cutting, to enhance versatility and meet diverse material processing needs.
Applications of CNC Laser Cutting Machines
1. Metal Fabrication
CNC laser cutting is widely used in metal fabrication for creating precise components, brackets, enclosures, and custom metal parts.
2. Automotive Industry
Laser-cutting technology plays a crucial role in the automotive sector, enabling manufacturers to produce intricate car parts with high precision and consistency.
3. Aerospace Industry
The aerospace industry relies on CNC laser cutters for crafting lightweight yet durable components, ensuring safety and efficiency in aircraft manufacturing.
4. Signage and Advertising
Businesses use laser cutting machines to create custom signs, logos, and promotional materials, enhancing brand visibility and aesthetics.
5. Jewelry Making
Jewelry manufacturers use CNC laser cutting machines to design intricate patterns and engravings on precious metals, enhancing the craftsmanship of their products.
6. Medical Equipment Manufacturing
CNC laser cutting technology is used to manufacture precision components for medical devices, ensuring high-quality and reliable parts for healthcare applications.
Why Choose SLTL Group for CNC Laser Cutting Machines?
SLTL Group is a leading manufacturer of high-quality CNC laser cutting machines designed to meet diverse industrial needs. Their extensive range of laser machines includes:
Fiber Laser Cutting Machines – Designed for precision metal cutting.
CO2 Laser Cutting Machines – Ideal for non-metal applications.
Customized Laser Solutions – Tailored to specific industrial requirements.
Advanced Automation Features – Enhancing productivity and reducing manual labor.
Eco-Friendly and Energy-Efficient Designs – Reducing environmental impact while maximizing performance.
SLTL Group also provides laser marking and engraving solutions, ensuring businesses have access to an all-in-one laser processing system for their production needs. Their machines integrate seamlessly into industrial setups, enhancing productivity and ensuring top-tier quality.
Conclusion
CNC laser cutting machines have revolutionized modern manufacturing, providing unparalleled precision, efficiency, and versatility. Whether you are a small business or a large-scale manufacturer, investing in a high-quality CNC laser cutter can elevate your production capabilities. With SLTL Group's advanced laser-cutting solutions, businesses can stay ahead in the competitive market while ensuring top-notch product quality.
For more information on CNC laser cutting machines, visit SLTL Group and explore the best solutions for your industry needs.
0 notes