#but just. completely different stitch gauges instead of making the pattern repeat more times for the largest loop of the scarf
Explore tagged Tumblr posts
Text
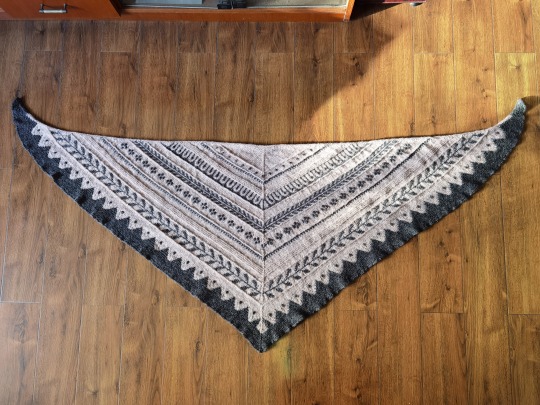
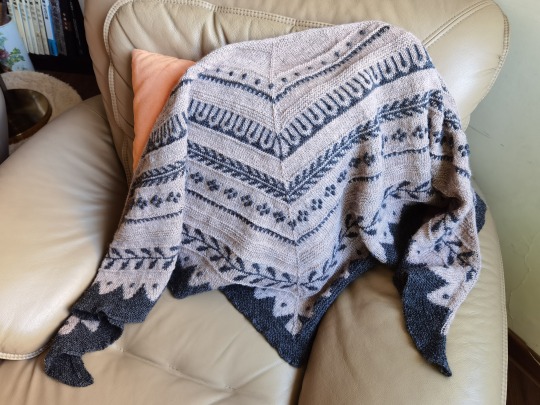
La Façade Shawl | December, 2020
The word ‘façade’ came to me because of the pattern of Chart B, which resembles the dentil ornament on a Greek temple, which then leads to the complete image of a classic temple façade. It’s beautifully symmetrical and rhythmic…
Given that the interior of a Greek temple is just as refined, I cannot help but ponder the opposite functions of a façade: a representation of the inside, or a cover-up?
I’ve been doing a fun free-writing exercise that is prompted by a collection of scents. I may or may not be looking for a new scent, but for each I ask myself to inhale solely and feel properly, and then write down whatever descriptive phrases I find suitable and the image of a lady which I am to construct based on the scent. Some perfumes are more suitable for my pillow, others I could connect with the people I know, and I have not yet found one that would fit me. And I have been wondering. How my perception of myself differs from another person’s, and which one is truer?
When I look at myself, it is all hazy. Secrets, too many of them. I am so full of them sometimes all I can do is to stare out and hope that my words would squeeze through everything else on their own and throw themselves at others; but at the same time life is not fun without secrets, layers upon layers upon layers…Ah, that sweet struggle.
In the beginning of this year I was gifted a perfume with strong notes of rose and oud, which I returned because of many personal reasons, but the choice surprised me. I’m not sure if I am allowed to wear it yet. Most of the time I still feel like a fledgling, shivering and eyes wide open, terrified of what is to come from the world. Sometimes I do feel so old, but instead of the wisdom and self-assurance I aspire to have, I am really just filled with exhaustion. What sort of a grown-up lady gets all teary at a comment from her mother? I don’t deserve rose and oud.
But what exactly is expected of me?
Who is doing all that expecting?
This shawl is made to honour me and no one else. My mind, my hands, my heart, my life—the physical and the mental.

Pattern
Woodlark Shawl by Lærke at Fiber Tales. I modified it somewhat heavily, but I can vouch that the pattern itself is really clearly written and filled with all the necessary details. I loved all the tiny traces to consideration she put into her work.
Yarn
Wool Local by Erika Knight. 100% wool, 450m/100g. It appears to be 2-plied.
The dusty pink colour is #802 Rosedale. Two skeins, with 53g left=approx. 147g used (including a swatch).
The deep grey colour is #806 Cathy. One skein, with 18g left=approx. 82g used.
The yarn is made from British wool and is obviously rougher than, for example, merino. However, it is much softer than Tukuwool. It feels sturdy yet just soft enough for a shawl that will likely come into contact with my arms and my neck. It drapes well, especially with my loose gauge. I have attempted several projects with this yarn and am very glad that it has found its place.
The only con is that this yarn was very splitty. If I were knitting a lace or a stockinette garment, that would not be a problem. But this shawl involved some purl rows and bobbles with the back-stitching method, and it was much more likely for me to split the yarn.
Of course, I appreciate the idea of reducing carbon emission by producing a yarn with local wool, but since the yarn had to travel half-way across the world to reach me, I do feel really guilty. I hate to be constantly having to choose between an eco-friendly yarn from another continent and a locally-produced one that is a pure disaster for the environment.

Finished Size
Wingspan: 180cm
Length: 65cm
Please see modifications below.
Modifications
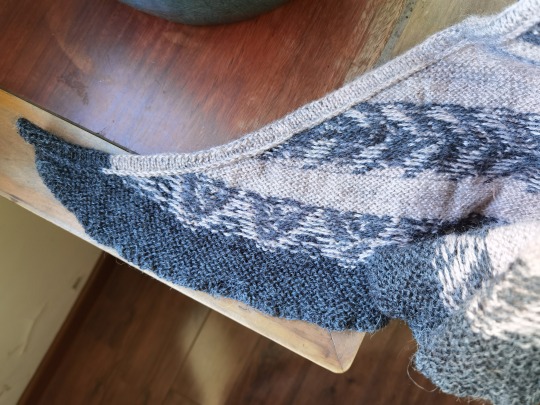
I knitted extra rows at each stockinette section to increase the size of the shawl. Sometimes that was enough for me to add a complete pattern repeat in the next colourwork section, but if not, then I improvise a pattern to make the centre of the shawl look coherent. You can see from the picture!
I also did a little surgery because in my first attempt of the bobble section I ended up with eight bobbles on the left and seven on the right. It wasn’t obvious, but I couldn’t fall asleep knowing that there was such a fault. I discovered the mistake only after a significant portion of the shawl was done, so I repaired it by cutting open and frogging the three rows involved (the two bobble rows and the row after them) and reknitting the section, before I seamed the new section back with a kitchener stitch. (Please see my Instagram post for the step-by-step pictures!)
In the first bobble section, I added a bobble in the centre of the shawl as that seemed most appropriate for me. I did this by embroidery after I finished the entire shawl: I used a tapestry needle to do a duplicate stitch as the first row, and when knitted the second row of the bobble, after doing the back-knitting I pulled the length of yarn all the way out instead of letting it form a loop on the left needle and kept those three loops on the right needle, and then used the tapestry needle to loop it around the foot of the corresponding stitch on the shawl from right to left, and finally lead the yarn back through the three loops on the right needle. After that, I just tuck the yarn to the back side and hid the ends as usual.
I don’t know how others deal with long floats when doing purl stitches in a garter pattern, but I sort of improvised a method: I didn’t catch the float when doing the purl row, letting that length of yarn float loosely behind the stitches. Then on the next row, which is a knit row, I used my left needle to pick up the floating yarn by doing under it from front to back, and knitted the next stitch together with the floating yarn. The actual stitch is now in front of the floating yarn and cover it up, so you would not see it especially if you pull the floating yarn at the back of the work. I did this every three stitches to make sure the floating yarn is secured.

(This is a backside of which I am not ashamed.)
Further considerations
Not really, except that I would love to try a different colour combination. I intended to pair the dusty pink with a deep grassy green, but the effect wasn’t good as I was going for a pair of high-contrast colours.
I would maybe pair a dusty pink with a yellow, or orange with forest green.

(Pictured are the pink yarn and a green one that I originally intended to pair it with.)
7 notes
·
View notes
Text
Flurries Hat: An Easy Beanie Knitting Pattern
When I decided to write an easy beanie knitting pattern, I wanted to make it with the stranded colorwork technique, and use two yarns to make a snowflake motif on a dark background color.
I love colorwork knitting, but I must admit, I’m a bit of a cheater. My favorite kind of colorwork design is working with a solid yarn as the main color and a variegated or self-striping yarn as the contrasting color. This combo is magical; as you work the motif, the colors change as the contrasting color is knitted. For flurries, I’ve knit the snowflake motif in a self-striping yarn that changes from blue to purple repeatedly. I think this a gorgeous combo for snowflakes, don’t you?
For this design, I chose easy-care, affordable Berroco Vintage. This worsted-weight yarn is wonderful to knit with, and it washes up well (machine wash inside-out in cold water). There are lots of color choices, too.
Our best sheep advice revealed...
Even old pros say they got dozens of tips for their flocks by reading this guide. YES! I want this Free Report »
This flurries hat is the perfect project for people just learning how to knit colorwork. The result is so gratifying, and there are only two colors to deal with. The snowflake chart for this hat is easy to follow, too, with two alternating columns of the main and contrasting color separating each snowflake motif.
This hat is sized for an adult, but a toddler size is provided at the end.
Flurries Hat Pattern
Finished Size: 20″ / 51 cm circumference and 9″ / 23 cm tall Needles: US 6 (4 mm) and US 7 (4.5 mm) 16″ / 40 cm circular needles, US 7 double-pointed needles Yarn: 2 skeins Berroco Vintage (52% acrylic, 40% wool, 8% nylon; 217 yds [198 m], 100 g); #5219 Charcoal (MC) and #5189 Purple Haze (CC) Notions: Stitch markers, tapestry needle Gauge: 22 stitches and 28 rounds = 4″ / 10 cm in stockinette stitch on larger needles
Note: If you want to make this a woman’s beanie-style hat, work just two rows of stockinette after the ribbing, and then start the colorwork. This will make the hat a little shorter.
Abbreviations CC: contrasting color CO: cast on k: knit k2tog: knit 2 sts together MC: main color p: purl rem: remaining st(s): stitch(es)
HAT
With MC and smaller needles, CO 112 stitches. Place marker and join to knit in the round. Work in k1, p1 ribbing for 1″ / 2.5 cm. Change to larger needle and work in stockinette for 1″ / 2.5 cm. Next Round: Work Snowflake Chart for 15 rounds, then work in stockinette for 1″ / 2.5 cm. Shape Crown: Round 1: [K2tog, k12] 8 times—104 sts rem. Round 2: Knit. Round 3: [K2tog, k11] 8 times—96 sts rem. Round 4: Knit. Round 5: [K2tog, k10] 8 times—88 sts rem. Round 6: Knit. Round 7: [K2tog, k9] 8 times—80 sts rem. Round 8: Knit. Round 9: [K2tog, k8] 8 times—72 sts rem. Round 10: Knit. Round 11: [K2tog, k7] 8 times—64 sts rem. Round 12: Knit. Round 13: [K2tog, k6] 8 times—56 sts rem. Round 14: Knit. Round 15: [K2tog, k5] 8 times—48 sts rem. Round 16: Knit. Round 17: [K2tog, k4] 8 times—40 sts rem. Round 18: Knit. Round 19: [K2tog, k3] 8 times—32 sts rem. Round 20: Knit. Round 21: [K2tog, k2] 8 times—24 sts rem. Round 22: Knit. Round 23: [K2tog, k1] 8 times—16 sts rem. Round 24: [K2tog] 8 times—8 sts rem. Break yarn, thread tail through rem sts twice.
Finishing Weave in ends and block.
Snowflake Chart
Toddler Flurries
Follow the same directions as for the adult hat, omitting the inch of stockinette after the ribbing (knit one round of stockinette after the ribbing section, then start the Snowflake Chart. And, here’s the most important part, use fingering-weight yarn (also known as sock yarn) instead of worsted-weight yarn. How easy is that?
(Flurries Hat pattern © Kathleen Cubley, 2017)
Tips for Stranded Knitting
Use markers between repeats. You’ll find it easier to follow the chart when you know that one repeat is between each marker. Use different type or color of marker to denote the beginning of the round.
Hold your yarn loosely to prevent puckering. Before switching colors, I spread out the stitches of the current color (on the right-hand needle) a bit. This adds a little more length for the float across the back (the new color) so it doesn’t pull too hard against the old color, causing the stitches to pucker. I did a quick video to show you how I knit colorwork with two hands and how to avoid puckering, too.
youtube
Hold your yarn in two hands for easy colorwork! I learned to throw when I was a new knitter and switched to picking several years in. Now I pick almost exclusively, but when I’m knitting colorwork, it’s all about the throw-pick combo!
About Blocking
I blocked my hat by getting it damp and laying it out on a table to dry completely. (Vintage is washable, so I could do this without the hat shrinking. The yarn has a beautiful bloom, which means that it gets a little bit of a halo when wet and dried, making it look (and feel) very soft.
If the hat is snug on you, just get it really wet, roll it in a towel to get out some of the moisture, and lay it out on a flat surface. Measure your head, and pin out the hat to half of that measurement (since you’re blocking a round object). DO NOT stretch the ribbing out to your head measurement. You need it to be snug so that the hat won’t droop over your eyes. When the hat is dry, it’ll be ready to wear.
If the hat, fresh off the needles, fits you perfectly, I still recommend a light blocking just to even out the stitches (especially the colorwork portion). Use a spray bottle to dampen the hat, and smooth it with your hands until the colorwork portion is to your liking. Pin in place, without stretching, and let dry.
I’ve provided a PDF download of the flurries hat if you prefer. I hope you’ll try this easy, free beanie knitting pattern!
Cheers,
P.S. Interested in more free knitting patterns? Make a knitted dishcloth pattern, try some new knitting stitches, or learn how to knit socks!
Flurries Hat: An Easy Beanie Knitting Pattern was originally posted by All About Chickens
0 notes