#Zacuto EVF
Text
RED Firmware Update Allows for Hasselblad Viewfinder
RED Firmware Update Allows for Hasselblad Viewfinder
With a bracket and a new “Prism Mode,” users can make use of a wire-free viewfinder with a retro touch.
If I’m honest, the EVF market isn’t too hot right now. There aren’t that many options. Zacuto most likely owns most of the market, but it still irks me that their flagship products don’t have an on/off switch. Instead, they’ll sell you a $150 cable to fix this.
So, it’s nice to see some sense…

View On WordPress
0 notes
Text
BMPCC4K for travel documentary

Having got my hands on one of the first Blackmagic Design Pocket Cinema 4K cameras (BMPCC4K) in the UK, I was excited to use it on a project where I'd be travelling all over Europe solo, producing content for the Danubius-RI, a pan-European initiative supporting interdisciplinary research on large River-Sea Systems. I was crying out for a small form factor version of my Ursa Mini 4.6K, something that had great highlight roll off in a small light, but pro-featured package.
But what is highlight roll off? Essentially it refers to the way the gradient from dark to light is handled by the camera, until the sensor effectively “clips” to white. All digital sensors will eventually clip to white, but what is key is how smooth that transition is. The smoother the transition, the better the “roll off’ is considered to be and the more the footage will look like traditional film, in theory. Great roll off alongside 13 stops of dynamic range does wonders for skin especially but also high contrast outdoor scenes. Much more like cinema, less like video. Here is an example extract from a trip to Venice:
.embed-container { position: relative; padding-bottom: 56.25%; height: 0; overflow: hidden; max-width: 100%; } .embed-container iframe, .embed-container object, .embed-container embed { position: absolute; top: 0; left: 0; width: 100%; height: 100%; }
vimeo
The Danubius infrastructure will be the first of its kind, pulling together the best scientific, social and economic minds across Europe, as a way of making river-sea systems work under the growing pressures of climate change and pollution. The films look at issues and solutions to managing the complexities of river systems and the millions of people, businesses and areas they serve. I visited 4 Supersites of scientific importance to the project: The Tay Catchment (here in Scotland, yay!), Venice (North Adriatic), Hamburg (Elbe River) and the Danube Delta in Romania.

Because I was travelling to multiple locations on each trip (we crammed each site into a couple of days filming), I needed to have a system that could be ready to shoot out the bag, with no rig assembly or reassembly required. So far I have settled on this setup with a Zacuto Gratical EVF (essential IMO for shooting outdoors and also helps with stabilizing handheld footage). Audio is run through a JuicedLink RM222 with Rode Wireless Go kit and Deity D3 pro as an on camera mic. Here is a section about the Wadden Sea from the Germany trip:
.embed-container { position: relative; padding-bottom: 56.25%; height: 0; overflow: hidden; max-width: 100%; } .embed-container iframe, .embed-container object, .embed-container embed { position: absolute; top: 0; left: 0; width: 100%; height: 100%; }
vimeo
For batteries I’m running with RavPower LPE6s and i’m barely going through 4/5 in a day. Continually they will last 50 mins at a time. I have an expensive Hawkwoods NP-F battery solution but the extra weight and rigging doesn’t suit my needs for this project. And before folk start hyperventilating, all I’ll say is If you power down in between shots and avoid external media SSDs etc, you can make LPE6s last a very long time.

I’m travelling light with just the Olympus 12-100 F4 and Sigma 18-35 F/1.8 with Metabones Speedbooster for anything in low light, but most of it has been the Oly. The image stabilisation is the best I’ve used on any camera, you can literally handhold shots and they look like they are on a tripod, while moving pans are free of any jerkiness. Whatever the algorithms are, they’re darn good! Push AF is also very fast. So far I’m delighted with the camera, its giving me that high end ‘film look’ in a very small footprint, ideal for one man doco projects.
0 notes
Text
Zacuto FX6 Shoulder Rigs - Newsshooter
Zacuto FX6 Shoulder Rigs – Newsshooter
Zacuto has a range of Sony FX6 solutions if you want to shoulder mount your camera. Shoulder mounting small-sized digital cinema cameras that don’t have an EVF can be a tricky proposition and more often than not you can end up with a frankenrig.
The Zacuto solutions are designed to allow you to go from tripod straight to shoulder mount shooting very quickly.
Zacuto has the following shoulder…

View On WordPress
0 notes
Photo


2019 NAB Show
The NAB Show (2019) is home to the world’s largest collection of vendors driving the future of media and entertainment. After visiting this years show we’ve made an personal list for the top twenty most innovative and important introductions and announcements. Aside from this list, we also made an extensive alphabetical list of interesting product announcements and created a YouTube playlist with NAB Show related video’s.
Top 20
Bolt 4K HDR Wireless Video System by Teradek
IS-mini 4K Video Color Processor (LUT box) by TVlogic
DaVinci Resolve 16 by Blackmagic Design
Digital Media Hub by Veritone
F6 Recorder Mixer (32-bit float mode, RAW Audio Recording) by ZOOM
Creative Cloud Pro Video release 2019 by Adobe Systems
ProArt PQ22UC 22” 4K HDR OLED Professional-grade Monitor by ASUS
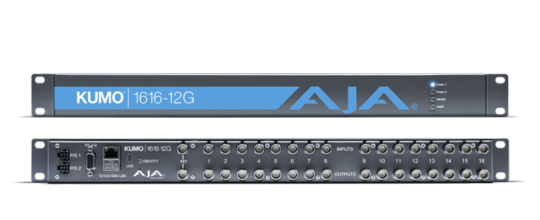
KUMO 1616-12G Compact with LiveGrade Pro & WonderLookPro Support by AJA
SpectraCal CalMAN 2019 by Portrait Display
RX0 II 4K Camera by Sony
ProArt PA32UCX 32” 4K HDR Mini LED Professional-grade Monitor by ASUS
Media Composer 2019 by Avid Technology
4K Quad by BirdDog
V-600UHD Multiformat Video Switcher by Roland
E2-F6 / E2-F8 Full Frame 6K/8K Camera by Z CAM
Teranex Mini SDI to HDMI 8K HDR by Blackmagic Design
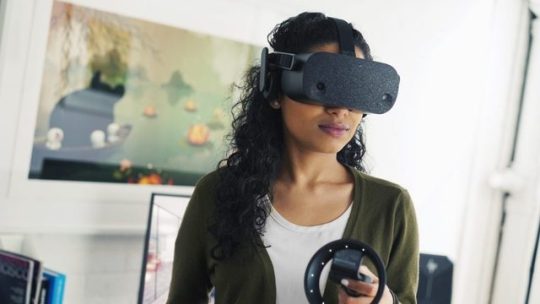
Reverb VR Headset Pro Edition by HP
Shogun 7" HDR Pro/Cinema Monitor-Recorder-Switcher by Atomos
GNARBOX 2.0 SSD by MyGnar
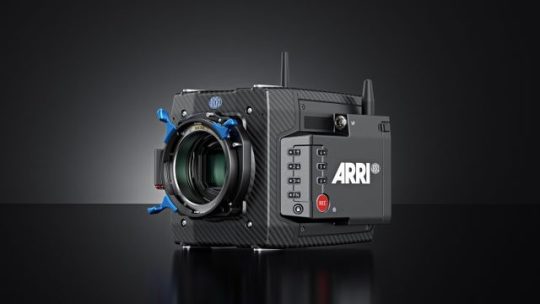
ALEXA Mini LF by ARRI
What also caught my eye (alphabetical order)
Accsoon CineEye HDMI
Aputure AL-RC A9 LED Lightbulb
Aputure Amaran AL-MC (Pocket-sized RGB FX LED Light)
Aputure Module Link Bridge
Aputure Sidus Link app and Bluetooth mesh network
(up to 64,000 devices at a time)
ARRAIY DeepTrack (Realtime tracking powered by AI)
Astera Titan Tube LED Light (FX Lighting, battery powered)
ASUS E900 G4 Tower Workstation
ASUS ESC700 G4 Tower Workstation
ASUS ProArt PA27UCX 27” 4K HDR Professional-grade Monitor
(Mini LED, IPS, 1000Nits, 576 Zones, 10-bit, HDR10, HLG)
ASUS ProArt PA90 Workstation
Atomos AtomX SDI Module for Ninja V
Beachtek DXA-RED (Dual XLR Adapter for RED DSMC2 cameras)
Blackmagic ATEM 8K
Blackmagic Design Davinci Resolve Editor Keyboard
Blackmagic Ursa Mini Pro G2
BOXX APEXX Enigma S3 Tower Workstation
Chronos 2.1-HD FHD 1
Core SWX HELIX Battery Series
Core SWX NPF Flat Pack for SmallHD Focus monitors
(60wh L-series type lithium ion battery pack)
Decimator 12G-Cross
Deity Pencil Mic
Deity S-Mic 2S
Deity Studio Mic
Deity W.LAv Pro Professional Lavalier
Dell Precision 7000 Series Tower and Rack Workstations
Falcon Eyes 4x4 LED Light Mat
FeiyuTech QING Gimbal
FilmConvert Cinematch
FilmConvert Nitrate
FiLMic Pro Audio (Audio Field Recorder App)
FiLMic Pro Freefly Movi Support
Glyph Technologies Thunderbolt 3 Dock with 2TB NVMe M.2 SSD
Grass Valley Creative Grading (GVCG) solution
Hive Lighting Bumble Bee 25-C (Portable Light with App control
HP Z6 Tower Workstation
HP Z8 Tower Workstation [link]
Iconic Engine HOLOMETRIC (4D Cinema)
Immersive Digital Experiences Alliance (IDEA) - Immersive Technology Media Format (ITMF) [link]
Insta360 EVO
intoPIX TICO-RAW
iXsystems FreeNAS Mini & Mini XL
JL Cooper Surround Sound mixing panel
LaCie Rugged RAID Shuttle (8TB
Leader LV5900 8K Waveform Monitor
LumaTouch LumaFusion 2.0
LYNX Technik AG HDR Evie
Magewell NDI Firmware update
Moza AirCross 2 Gimbal
Moza SlyPod (Slider/Monopod Hybrid)
NewTek Spark Plus 4K HDMI-to-NDI
Pisofttech PilotEra 8K 360 Camera (in-camera stitching)
Portkeys EVF OEYE-3G 1080p OLED Viewfinder
Portkeys LH5 HDR 5” On-Camera Monitor (1500Nits)
Pronology NASm3
RØDE Wireless Go Compact Wireless Microphone System
Rycote PCS-Boom Connector
Saramonic Umic9 Wireless Systems
Sharp 8K MFT Camera (Prototype)
Shure Twin:Plex Subminiature Omnidirectional Microphones
Sienna NDIntercom for Apple iOS
SmallHD Cine 7 On-Camera Monitor
Sonnet SF3 Series Pro Card Reader for RED Mini-Mag
Sonnet Twin10G dual-port 10GbE Thunderbolt adapter
Sound Devices Scorpio (32 channel, 36 track, 16 mic/line preamplifier premium portable mixer-recorder with Dante)
Spiffy Gear Lumee LED Lights
SymplyWORKSPACE (industry’s first StorNext 6 powered, 8 client, 4K capable desk-side Thunderbolt 3 shared storage solution)
TASCAM Dante Converter Series
Teradek RT ecosystem (CTRL.3, CTRL.1, MDR.X, and MOTR.X.)
TVlogic ….. HDR Professional Monitor (Prototype)
Vaxi Storm Channel Scanner
Wooden Camera Shoulder Rig v3
Zacuto Kameleon EVF
Next to interesting product announcements, there are a lot of interesting educational programs presented by industry leaders. A lot of these great sessions has been posted online.
LumaForge “Faster, Together”
Adobe at NAB Show
Maxon ‘C4D Live’
Panasonic ‘Presentation Stage’
#NAB Show 2019#National Association of Broadcasters#NAB Show#NAB#Las Vegas#Nevada#US#Technology#Innovation#Exhibition#Conference#AV#Broadcasting#Production#Post Production#Displays#Immersive#VR#Virtual Realty#AR#Mixed Reality#Audio#Video#Robotics#Projection#Software#Hardware#Camera#Light#Gear
0 notes
Text
Tweeted
Zacuto Kameleon Micro-OLED EVF – NAB Hands-On https://t.co/RCs8DxAiO5 (https://t.co/twyC38BAA3)
— exaforo.com (@exatienda_com) April 20, 2019
0 notes
Photo

New Post has been published on https://www.updatedc.com/2018/12/07/blackmagic-design-pocket-cinema-camera-4k-review/
Blackmagic Design Pocket Cinema Camera 4K Review
The Blackmagic Design Pocket Cinema Camera 4K took NAB 2018 by storm. It really was the talk of the show and everyone prior to it was hoping for an update and they got it. The camera is now shipping but it’s not available in large quantities yet. Demand is high and production doesn’t look to be matching it. While this seems to be an issue with Blackmagic I thought they solved this with the release of the URSA Mini Pro but the Pocket 4K seems to be business as usual when it comes to delivery.
Blackmagic Design sent us the Pocket Cinema Camera 4K for a limited time to do a review. The only stipulation is that we don’t do a head to head or compare the camera with other cameras on the market. Blackmagic Design is a sponsor of Newsshooter.com. this review is independent and is not being reviewed or approved by Blackmagic Design in any way prior to release.
Okay! Now that we have that out of the way lets get this review started!
Everything that’s Included
Blackmagic Pocket Cinema Camera 4K
Lens turret dust cap.
30W power supply with locking connector and international adapters.
LP‑E6 Battery
SD card with software and manual.
Welcome card.
DaVinci Resolve Studio with an activation key.
The Pocket Cinema Camera 4K is no “pocket” camera
While Blackmagic Design is calling this the new Pocket 4K I feel it’s more like a new version of the original Blackmagic Cinema Camera. The Pocket 4K is closer in size as well as not having an EVF and only a big screen.
This was the original disruptor camera from Blackmagic and the Pocket 4K is poised to do the same.
I first got my hands on the Pocket Cinema Camera 4K at the BMD NAB press conference. As many have said before it’s no “pocket camera”. It’s a totally new camera and to be honest it should have had a different name with such a radically different design. This isn’t a hyper-portable camera but as a cinema camera, it’s about as compact as I think it can be with the capability of shooting RAW and ProRes HQ in 4K DCI 60P without catching on fire. Heat dispersion is an issue that plagues all cameras and BMD clearly didn’t want overheating issues with the Pocket Cinema Camera 4K
The camera is much larger than the original pocket by huge margins. In fact, it’s larger than most DSLR cameras. What makes it large is how wide it is but don’t let that fool you it’s actually very light in weight and feels chunky in the hand.
The grip on the side is big. I have average sized hands and can hold it fine but it does feel larger than a mirrorless or DSLR camera. You would think with such a large grip the camera could have a larger higher capacity battery but it uses the Canon LP-E6. More on the battery coming up.
Overall the body feels kind of plasticky. I suppose this has a lot to do with the weight and the new carbon fiber composite material the body is made out of, however, it just feels sort of cheap. One thing I noticed is the battery compartment door seems a little loose. The door for the media compartment snaps open and closes firmly.
The covers for the inputs on the side are those pliable plastic type that pop off and are held on with a tab. I’m not a fan of these but we see them on a lot of cameras. On my C300 MKII, I pulled them off as they started driving me crazy. If this was my camera I would do the same.
I like the shortcuts on the body a lot. You have three on top that can be programmed and three that are set for ISO, Shutter and White Balance. A stills frame can be taken with the stills button and the iris wheel has a push function for zoom in focus assist. As for the stills? I wasn’t impressed.
On the back are an Iris, Focus, HFR, Zoom, Menu, and Playback button. The coolest of them all is the ability to push the HFR button and go into 60 frames per second. That is really convenient and fast without having to enter the menu to change frame rates. With the camera set to shutter angle, it will change as well when you enter 60p mode.
MFT Sensor
The original Pocket Camera had a smaller Super 16mm Sized Image Sensor while the new Pocket 4K jumps up to Micro Four Thirds 18.96 x 10.00 mm sensor with Dual Native ISO. A first in the Blackmagic camera lineup to have. Will we see this in an updated URSA Mini Pro? The sensor does yield some nice images. More on that later.
Micro Four Thirds mount and Lenses
The Micro Four Thirds mount is very adaptable. Practically any lens can be used with the proper adapter. I have a few Canon EF lenses I use on Sony E mount cameras as well as the URSA Mini Pro 4.6K. The Canon 24-105 F4, Canon 70-200 F4 and a Duclos modded Tokina 11-16mm.
I also have the very nice Lumix 12-35mm. I keep it around just in case I need it and I sure did with the Pocket 4K. The Lumix 12-35 works perfectly with the camera. Autofocus works pretty well. No Dual Pixel AF here and it does hunt a little but it’s better than not having any AF and could be improved over time. I wish I had the 35-100mm lens to pair with it.
To shoot with my Canon EF lenses I have a Metabones EF Lens to Micro Four Thirds T Speed Booster ULTRA 0.71x. With the latest V3.0 firmware the Pocket 4K autofocus didn’t work at all. I tried both the 24-105 and 70-200. Image Stabilization works as does f-stop changes and it also shows the Speed Boost increase in the aperture on the LCD screen. I’m sure Metabones will update the firmware on the Speed Booster to get AF working as this will be a very popular setup. The Speed Booster XL would be a great option for full frame lenses. I like the ULTRA since I can also use APS-C lenses like the Sigma 18-35 and 50-100.
Inputs
The inputs and outputs are all on left side of the camera.
From top to bottom you have:
3.5mm Mic Inputs
Headphone
Full-Size HDMI
12v Power input
USB-C for SSD drive
Mini XLR with Phantom Power
On the top and bottom are airvents to keep the camera cool. There is a fan inside but I found noise not to be an issue.
Menu System
With so many cameras having a messy hard to use menu system I find it refreshing that the Pocket 4K inherited the simple URSA Mini Pro menu. The camera is so easy to get set up plus being a video camera, not a hybrid no photography settings needed. The menu navigates with the touchscreen and the setting options are nice and large making them easy to see and tap to select.
Where is the Viewfinder?
Being true to the original Pocket Cinema Camera an EVF isn’t present on it’s 4K big brother. For the first couple of hours using the Pocket Cinema Camera 4K I instinctively wanted to lift it to my eye. It’s a very strange feeling knowing you can’t because the camera doesn’t have an EVF and this does cause some problems. It does have a nice full HD 5″ touchscreen. The image looks sharp and color representation also looks to be accurate but in bright sun the LCD screen is useless. It’s not a daylight monitor. In the shade, it performs fine but I struggled with it when the sun was behind me. The screen has good off-axis viewing angle which is nice since you can’t rotate or tilt the screen either. With Lumix lenses, the touch focus is pretty good. I wouldn’t say it’s a usable rack focus but it does lock in fairly quickly and nails it most of the time.
A cage and a Zacuto Gratical HD will be a lifesaver for the Pocket 4K. Unfortunately, I don’t have a cage for the loaner camera to attach my Gratical HD EVF to. I tried, but with limited hardware, it wasn’t doable plus I wanted to get the experience of using the camera as is.
Codecs, Resolutions and Frame Rates
Here is where the Pocket Cinema Camera 4K shines. Having ProRes as the main codec makes editing a breeze and the codec is very solid. Yes, it will take up more space on media cards but I’ll take that over computer intensive formats that require transcoding and rendering. Editing Long Gop and ALL-I codecs natively on a better than basic NLE can be a real struggle. We end up converting the footage or editing in proxy and all those options take up even more hard drive space and time.
Codecs
CinemaDNG RAW, CinemaDNG RAW
3:1, CinemaDNG RAW 4:1, ProRes 422
HQ QuickTime, ProRes 422
QuickTime, ProRes 422 LT QuickTime,
ProRes 422 Proxy QuickTime.
With the release of the Pocket Cinema Camera 4K, Blackmagic RAW isn’t included in the firmware but they have announced it will be available at a later date for no extra charge. The only issues are as of now DaVinci Resolve is the only NLE that can utilize the new RAW format. Hopefully others like Avid, FCPX and Premiere Pro to name a few of the popular NLE’s will support it but I think it’s going to take some time. For now, if you like RAW, you have CinemaDNG.
Resolutions and Frame Rates
HD Video Standards
1080p23.98, 1080p24, 1080p25,
1080p29.97, 1080p30, 1080p50,
1080p59.94, 1080p60.
Ultra HD Video Standards
2160p23.98, 2160p24, 2160p25,
2160p29.97, 2160p30, 2160p50,
2160p59.94, 2160p60.
4K DCI Standards
4KDCIp23.98, 4KDCIp24, 4KDCIp25,
4KDCIp29.97, 4KDCIp30, 4KDCIp50,
4KDCIp59.94, 4KDCIp60
Frame Rates
You won’t get all the frame rates in all the resolutions however you do get a very good selection for a camera in its price range and overall size and that is impressive. To shoot at 120 fps it is in HD windowed mode and it looks really good.
youtube
I shot this video at 120 FPS HD Windowed mode at 4000 ISO using ProRes 422. I really think ProRes acquisition for HFR is such a big deal as many cameras limit the Mb/s so low the image just falls apart.
In post, I only cleaned it up with Red Giant Denoiser III. Yes, it’s noisy but the image has nice detail with very low in-camera noise reduction. Other cameras I’ve used get aggressive with the noise reduction at higher iso values. This smooths and softens the image and it doesn’t look very good. I feel the Pocket 4K detail is really good at 120 FPS.
Powering the Pocket
I have several of the Canon OEM batteries and an assortment of 3rd party versions. Blackmagic Design states 60 minutes of runtime. I haven’t been able to get this performance with the included battery or an OEM Canon battery recording to CFast media. Usable runtime with the Pocket 4K is closer to 30-40 minutes. You need to power the camera down when not recording to save battery.
The Pocket Cinema Camera 4K uses the Canon LP-E6 type battery. It comes with one. No charger is included however a 2-pin locking AC power cable is included and charges the battery inside the Pocket Cinema Camera 4K so essentially the camera is the charger. The camera can be powered with an external battery without using a regulated dummy LP-E6 since the input can take 12 to 20 volts or a D-tap to 2-pin cable.
This is a first. I have one LP-E6 battery that would get stuck inside the camera. I have heard from other users that experienced this as well. I wasn’t sure how to get it out but decided to try a strip of gaffers tape and press it on to cover the entire end of the battery. Hold the release button and pull it out. After a few attempts, it worked and the battery was removed.
No damage was done and I can’t figure out what is causing it. I think it’s the two slots that are used to charge the battery in the camera that is holding it in. Maybe the spring isn’t strong enough to push it out? I’m not really sure. The battery that is supplied with the Pocket 4K doesn’t have issues with getting stuck inside the body however it doesn’t work with the battery status on the camera. The fuel gauge shows “0”. No issues with OEM Canon LP-E6N and LP-E6 batteries.
Blackmagic Design 25.5″ DC Cable Pack for Blackmagic Pocket Cinema Camera
Blackmagic Design has a DC cable pack that includes a D-tap to 2-pin, 2.5mm barrel to 2-pin and an extra 2-pin non-terminated cable for creating your own custom cable. All cables are 650mm long and retail for $55.00 US. With the proper 2-pin locking connector cable to D-Tap and a V-lock or Gold Mount battery, you’re good to go for several hours.
It shuts off without warning
A major flaw with the Pocket 4K is it will shut off while recording even when the battery indicator is showing 30% or 40%. The camera isn’t correctly estimating the actual amount of power left. When I put a full battery in the indicator will quickly show the battery depleting even before I start recording. This needs to be addressed in a firmware update stat! It might not be a camera software issue but more of a camera power consumption issue.
While I have had the camera shut down while recording several times the clips didn’t become corrupt or was deleted. This is some good news but like I said. It’s scary and I can’t imagine that clips eventually wouldn’t get corrupted with such abrupt shutdowns. Blackmagic Design said they will look into this issue further but stated the clips close every 10 frames, therefore, you could lose approximately 10 frames off the end of a clip.
I tested several batteries and I’m finding a big discrepancy with them and when the camera will shut down. With Canon OEM LP-E6N I was getting much better performance. The camera would drop to around 9% and then shut off. For now, I highly recommend the Canon OEM batteries and change them around 15% warning. I still got around 40-45 minutes with Canon OEM.
Battery Solutions
I recently reviewed the Core SWX PowerBase Edge and it is a really great way to power the camera for a long time. While it looks bulky it doesn’t feel too bad to hold since the camera itself is very light. On a tripod, it’s a no-brainer and very simple to use plus it can power your accessories as well.
The Pocket Cinema Camera 4K for serious use will probably end up in a cage or rig. If you need an EVF, and I think you will for certain situations like shooting outside in the sun or just don’t want to swap out batteries every 30 minutes and opt to record on an SSD drive, which is a pretty cool option to have. Some type of larger rig is going to be needed.
With a Canon OEM LP-E6 I got 41 minutes of continuous recording then the camera shut off without warning. When I put the battery back on the charger it showed 20% was left. The clip wasn’t deleted or corrupted.
Built-in audio and inputs
Analog Audio Inputs
Onboard microphones on cameras are generally not that great. I would say the Pocket 4K is better than most but none are as good as adding an external mic like a RØDE VideoMic Pro. It’s fine for scratch audio or simple ambient sound.
One thing that could be an issue is the microphone on the right side is placed right by the grip and if you have long fingers you could tap it and make unwanted noise. Now you wouldn’t really need to worry since you are of course going to use proper audio right? 🙂
One feature that is usually lacking in hybrid cameras is audio inputs. That 3.5mm jack can go only so far. I tested the input with a RØDE Lavalier microphone. To get a proper level I had to set the level at maximum. This generally isn’t a good thing as it could also bring up the noise floor pushing the preamps so high.
I had an issue with the 3.5mm input. After several days of shooting and using the 3.5mm input to record my audio, the input broke. I pushed the connector in and something came loose. The connection is now intermittent with the input and the connection feels like it’s not holding the microphones 3.5 tip very well. Not good.
The 3.5mm Stereo Input can also be used for Timecode input.
The Pocket Cinema Camera 4K has one mini-XLR analog switchable input that also supplies phantom power and supports line level (up to +14dBu). This is very cool for a camera in its price range. You probably won’t see this feature on a hybrid anytime soon.
These cables are a little hard to find and are more expensive than the average XLR variety. I searched around and ended up buying a Blackmagic Design Blackmagic Design Mini XLR Cable for Video Assist 4K. It retails for $29.00 US and includes two 19.5″ cables.
youtube
On my last day with the Pocket Cinema Camera 4K I used it for an easy studio shoot. All the audio was captured with a Sanken COS-11D into the mini XLR. I have to say it’s nice to just plug in a microphone into such a small camera that has phantom power. I used the Lumix 12-35 and focused with the touchscreen, setting exposure with zebra stripes and false color. I do wish the zebras would go lower than 75% as I like to use 60%-65% value for skin tone. The image is nice and detailed and the audio recorded nice and clean. I’m a fan of recording audio into the camera and I know it’s not the best quality you can get but it works for me on these type of shoots. It’s always good to have options and the mini XLR input is a good one.
Lots of recording media options
The Pocket 4K has three different media options to record too.
1 x CFast slot
1 x SD UHS-II card slot.
USB-C input for SSD Drive
That’s a lot of options for a camera in this price range plus it can record RAW Lossless, 3:1 and 4:1. Blackmagic RAW is also coming and that will make the Pocket 4K a beast of a camera when it comes to onboard codecs and RAW capabilities. Did I mention I love the ProRes option? 🙂
For a full list of compatible media check out this post. I always recommend getting the best quality you can afford. I know media can be expensive but verified compatible models will ensure the safest and best results.
Compatible USB‐C SSD Drives
Don’t stray here. I tried a noncompatible drive and it didn’t work. Shocking right? I then tested the Samsung T5 1TB and yes it does work and records without issue as well as the new Anglebird SSD2GO PKT 512GB and 2TB. While I didn’t test all the resolutions and codecs I found All the ProRes options worked without issue.
Shooting direct to an SSD drive is really great. Seeing that huge storage available kind of makes me giddy. I have a little setup that might not look so fancy but it works a treat! With no cage, I had to be creative. I added a cold shoe to the top mount and the cold shoe extender. This really worked well plus it didn’t cost me anything since I already had it. Win-win!
Below is the recommended media for recording
Dual Native ISO
Unlike the GH5s the Dual Native ISO doesn’t need to be changed to enter it. The Dual Native ISO is 400 and 3200. This can be a little confusing or maybe it’s just me. Here is how it’s explained by Blackmagic Design.
I can highly recommend using 1250 ISO over 1000. The image curve does change with the blacks and highlights being more stretched out for a less flat look but it’s much cleaner. MFT sensors have been problematic when it comes to noise at even modest ISO levels and the GH5s and now the Pocket Cinema Camera 4K are showing how far engineering has come.
At 32oo the noise is very similar to 500 ISO but is there any noise reduction going on as well? Noise reduction will smooth out the detail of an image. It’s not very pleasing. Especially on the skin. It makes things look like plastic. From the looks of the test footage, I’m not seeing any aggressive in-camera noise reduction in the image. That’s impressive. This makes cleaning it up with noise reduction software even better and it does clean up fairly easily.
Usability
Here is where the Pocket Cinema Camera 4K has issues. Usability is different for everyone. I personally do not like to fight a camera while using it. I just want to be able to get the camera out of my way and create with it. This isn’t the case with the Pocket 4K. As I mentioned earlier the camera eats through batteries and shuts down abruptly when the battery is starting to die. That alone is a big problem. I always feel like it’s going to shut down on me in the middle of a take. I really don’t need this type of stress while I’m shooting.
Not having an EVF is a problem. The touchscreen while very good isn’t enough for me to rely on in all situations. I struggled in daylight to focus manually. I went to La Jolla to shoot some ocean scenics and it was very difficult to manually focus. The screen is really hard to see on a sunny day. I was also having autofocus issues with the Canon 24-105 and 70-200 F4 lenses with the SpeedBooster ULTRA. It doesn’t work with current firmware. Peaking and zoom helped but it’s not enough for me to feel confident. The screen doesn’t tilt either so you really have to be pretty much at eye level with the camera to operate it. The Pocket 4K likes being in the shade.
In my studio set test, I was trying to follow the action more so basically not a controlled situation. I was still having focus issues. Maybe it’s just me. I really missed not having an EVF. The shooting pace is much slower and deliberate for me with the pocket after seeing how many lost takes I had due to missed focus. This might not be an issue for some but it really worries me that I could miss a great moment because I couldn’t focus correctly on time.
The Pocket 4K needs an EVF like the Zacuto Graticle HD for sunny days to get critical focus and overall usability. Add in the battery life issue and the need to use external power makes the camera a candidate for a cage or rig so kit can be attached to make it usable. While this for many won’t be an issue I think it’s important to know that you will need it and an investment that equals the cameras cost or more is inevitable.
I personally don’t mind a cage on a dedicated video camera. With a hybrid, I don’t need all the extras for photography so I would take the cage off when stills are the primary use. A cage with a video camera is almost a necessary item. Stick it in one. Add an EVF, SSD mount and power solution and I think it would be a really good setup. I’m sure a lot of cages will be coming just in time for Christmass.
Scopes
Why Blackmagic Design only uses a Histogram on a cinema camera is a mystery to me. In fact the URSA cameras also only have Histograms. I really don’t like them. For video production, I much prefer a Waveform Monitor. Even a small one like you see on other cinema cameras is very handy for nailing skin tone. The Pocket 4K does have Zebra Stripes but their lowest setting is 75%. Again no love for the skin tone that I like to have around 55-65% depending on the skins shade. I like to turn it on. Set the exposure and turn it off. As is the Zebras are for highlight protection.
False color can be a handy tool for exposure and I don’t use it very often but I did with the pocket since it’s really the only tool I could use to assist in getting proper exposure. I don’t like it as much as a waveform monitor though.
For focusing, the Pocket 4K has a Focus Assist feature. This puts a red border around the subject when it’s in focus. You have three strength settings available. I found “High” to be too forgiving and “Low” to be somewhat useless. “Medium” is the safest bet however it doesn’t work if the contrast is low.
The Zoom feature is good and probably the better option for focusing but if things are moving fast you will miss the shot.
I find focusing a big issue for me with the Pocket 4K. Shooting off the back of the camera is not my preferred method and I did get a lot of out of focus shots. Much more than I expected in good shooting conditions indoors.
Image quality
Here is where it all comes down too. Is the image any good? Well yes, it is. In fact, I’m impressed with how good it is and that’s not to take into account the actual price. For only $1,295 it’s a real bargain. Plus it includes the full version of DaVinci Resolve Studio that retails for $299 effectively putting the Pocket Cinema Camera 4K at $1,004. Crazy.
The 120 fps footage is very good also. Most cameras really fall apart at 120 fps. The Pocket does an excellent job. While it can go to 25,000 ISO that doesn’t mean you should. 1250 looks great and even 4000 is very usable. I don’t have a high tolerance for noise and don’t enjoy denoising in post so I tend to keep the ISO levels as low as possible and use lights. For many, I think the ISO noise won’t be an issue.
Is it the best, perfect all you ever wanted 4K camera? Of course not, however, I wouldn’t mind having one just for the fact it is so inexpensive and shoots a high-quality codec. I do worry a little about the overall build quality but time will tell if it’s going to last out in the field.
Things I like
The price. At $1,295 USD it’s the least expensive ProRes 4K capable camera on the market.
The image quality is very good
ProRes is a fantastic codec to shoot in
One button push away from 60p shooting
High speed even 120 fps looks very good
The camera comes with a Davinci Resolve Studio licenses. $300 value
Things I don’t Like
Battery dies and shuts off the camera without warning while recording.
On/off switch is really old school
The battery door and compartment is a hot mess. I had a 3rd party battery get stuck inside and had to use a piece of gaffers tape to pull it out
Battery life is bad
The screen isn’t usable in the sun
No EVF
No Waveform
Well, my time has come to an end with the Pocket 4K. Time to send it back to Blackmagic Design. It was a fun ride with some turbulence but all in all, a very interesting camera just as long as you can work around some of the quirks I think Blackmagic Design really did something special with the Pocket Cinema Camera 4K. I like the innovation a lot and I think they will sell a crapload of these cameras due to the price alone and the ability to shoot such high-quality images with professional codecs. For $1,299 it’s practically disposable! I bet it will become Hollywoods most popular crash cam. Now if only I had a pocket the camera would fit in.
#camera#Canon#dslr#hardware#innovation#lens#mirrorless#news#om#production#sensor#Sigma#software#Sony#Tokina
0 notes
Text
Review: Panasonic AU-EVA1 4K Cine Camera
Panasonic’s $7,345 AU-EVA1 is a Super35mm single-sensor camcorder with a 5.7K Bayer-mask sensor, an EF lens mount, variable frame rates, and 14+ stops of dynamic range, recording on SDXC cards using log, HLG, and standard gamma renderings. Its compact, boxy body with removable rotating side grip is like that of the Sony FS5, but its images, menus, and touchscreen monitor make it feel more like a junior VariCam LT, with maybe a pinch of DVX200 added into the mix.
Two Things
Before we dive into the details, I should mention a couple of controversial aspects of the EVA1: there’s no EVF, and the camera uses an EF mount, not MFT or PL.
The EVA1 lacks the rear-mounted flip-up EVF commonly found on similar cameras and its 3.5” touchscreen monitor is equipped only with a sunshade.
EVA1 LCD with sunshade
Many buyers will want to add a loupe to the monitor or use a separate EVF.
EVA1’s use of a Super35mm sensor and Canon EF mount instead of a 4/3” sensor and MFT mount—Micro Four Thirds, as on Panasonic’s AF-100 and GH-series cameras—may seem like a break with previous Panasonic affordable-camera tradition, but it’s consistent with the VariCam line: the LT ships with an EF mount.
While existing MFT lenses can’t be used (or swapped between an EVA1 and a GH5), the larger S35mm sensor offers focal-length compatibility with standard cinema lenses (and format compatibility with standard cinematographer’s brains) and at least a one stop improvement in noise performance compared to the smaller sensor.
The EF mount opens the camera to the large and growing world of EF-mount lenses in both cine and still-camera flavors. If EF isn’t your cup of tea you can swap the mount for a Wooden Camera PL mount (Wooden offers the mount with an installation service in case you don’t have a collimator handy to calibrate flange focal depth).
Design
EVA1 body, unadorned
The EVA1’s body is reasonably compact for a S35mm camera with built-in recording at 5-5/16” × 5-1/4” × 6-11/16” (135mm × 133mm × 170 mm). The body alone is 2.6 lbs or 1.2kg; add side grip, top handle, monitor with hood, mic holder and battery for a 4.5 lb / 2.05 kg weight.
EVA1 with top handle, LCD, and Canon 24-70mm f/2.8
The operator’s side has a record start/stop button on the top bevel, up/down buttons for the three built-in ND filters (ND 0.6, 1.2, and 1.8), a broad and well-textured iris control wheel, and a three-position flip switch at the bottom. The switch determines what the smaller control wheel behind it adjusts: white balance, gain, or a user-selectable function such as monitor volume, shutter speed, or frame rate. Three big round user buttons, easily found by touch, echo those on the side of the VariCam LT (but lack that camera’s backlighting, sadly). Four smaller oblong buttons are arrayed behind them; they’re a bit more finicky to find sight unseen. Similar small buttons activate the MENU and let you EXIT the current menu level.
ND and IR filters in the EVA1, partially retracted. This is how the camera arrived; once power was applied they snapped into proper alignment.
Both control wheels let you push them in: the IRIS wheel switches between manual and auto iris, while the small wheel’s click selects the current menu item.
A LOCK switch lets you lock out your selection of side-panel buttons to prevent fumble-fingered activation. Two audio gain pots poke through a flip-open cover and can be twiddled with a fingertip while the cover is closed. Opening the cover lets you grab the knobs between two fingers, and exposes separate AUTO/MANUAL switches for each channel. A recessed flip switch at the bottom, just below a red power-on LED, switches the camera on and off.
EVA1 rear, port covers closed
The rear of the camera has two SDXC slots behind a flip-open cover. Each slot has a status LED: green for “OK to yank the card”, yellow for “this is the active card”, flashing yellow for “recording to this card; hands off!” Another assignable button sits below the slots, a red tally LED sits below it.
EVA1 rear, port covers open
There’s a full-size HDMI port behind a flip-open rubber cover. Another cover opens to reveal a USB port for the AJ-WM50P Wi-Fi dongle and one for “service”. Similar covers protect a 3.5mm stereo headphone jack, BNCs for SDI out and timecode in/out, and a 12 volt coax power input for the supplied AC adapter.
Dual XLR inputs for mic or line-level feeds sit unprotected to the right.
Batteries dock in the center. The stock 7.3 volt, 5900 mAh battery nestles entirely inside the camera while larger-capacity batteries (8850 and 11800 mAh) protrude slightly. The camera’s cooling system vents through a grille just above the battery; a warm and gentle breeze wafts from the back of the camera, driven by a fan so quiet I had to struggle to hear it.
EVA1 right side without grip
The right side has the mount for the rotating side grip, and sockets for the LCD monitor cable and the grip’s control cable. There’s also a focus hook at the top.
The grip itself attaches with a bayonet mount and rotates through a bit over 90º when a thumb release is pressed.
EVA1 grip rotated fully back
EVA1 grip in upright position
EVA1 grip rotated fully forwards.
The contoured grip has MENU and record start/stop for the thumb, another control wheel and a user-assignable button for the index finder, and a final assignable button on the inside where the middle or ring finger can just reach it. The grip is made of textured, hard plastic and has a padded adjustable strap.
EVA1 grip, top view
EVA1 grip, front view. User Button 9 is just visible on the inside, in front of the cable.
The front of the camera has the EF-mount release button and another user-assignable button (there are nine total, scattered across the camera and grip) which triggers AWB by default. Dual built-in mics, a tally LED, and an ambient light sensor for auto-tracking white balance occupy a shiny panel at the top. A grille below the lens mount admits air for the cooling system.
Front view of EVA1
The EF mount is the standard bayonet-mount style used on still cameras, not the far superior positive-locking breech mount found on the Canon C500 and the VariCam LT. Bayonet mounts use spring pressure to keep the lens aligned properly, and heavy lenses or the force of a follow-focus or focus motor can move a lens in a bayonet mount, wobbling the image and possibly throwing off focus.
Fortunately the springs in the EVA1’s mount are the stiffest I’ve encountered. I hung a relatively heavy (3.67 lb / 1.66 kg) 70-200mm f/2.8 zoom off the mount with no support rods, and it showed no tendency to flex or wobble.
The top panel of the camera is well equipped with 1/4” sockets for accessories, and for the top handle, which mounts using uses captive knurled knobs.
EVA1 top panel
The top handle has two passive shoe mounts, 1/4” and 3/8” sockets, a mounting point on the right for a microphone holder, and three mounting points—front left, rear right and left—for the LCD monitor arm. A supplied shoulder strap threads through two lugs on the top handle if you want to rock it ENG-style.
EVA1 top handle
The LCD mount is simply a stubby rod, clamped in any of eight positions by its own knurled knob. The LCD holds onto that rod using a friction clamp with its own knob; the clamp allows the monitor to pivot on two axes, with click-stops at 90º angles.
You can orient the joints so that the monitor won’t pivot if pressure is applied to it, say, by the force of an eyepiece loupe pressed to one’s eye. However there’s enough flex in the plastic assembly that I’m leery of recommending such a thing, for fear of overstressing the assembly and breaking it off. Apparently I’m not the only one; Zacuto’s EVA1 Z-Finder loupe includes a metal exoskeleton to rigidify the rig and make it robust enough for the harsh handling viewfinders are subject to (the EVA1 Z-Finder is covered in part 3 of this review).
The LCD mount’s attachment screw is a standard 1/4”x20, and the monitor’s clamp fits any 15mm rod, so you can dig into your box of camera-support Tinkertoys and mount the display anywhere its 15” / 23 cm cable will reach.
LCD monitor mounted atop Zacuto EVF
The monitor is a 3.5” 16×9 resistive touchscreen like the one used on the DVX200. Like most resistive touchscreens takes a fair bit of pressure to activate, but it’s unaffected by moisture and it can be used while wearing gloves. A slide switch next to the permanently-attached cable lets you flip or mirror the image as needed for any orientation.
The baseplate of the camera has both 1/4” and 3/8” tripod sockets.
EVA1 baseplate
There’s more in part 2 and part 3…
The post Review: Panasonic AU-EVA1 4K Cine Camera appeared first on ProVideo Coalition.
First Found At: Review: Panasonic AU-EVA1 4K Cine Camera
0 notes
Photo

Zacuto EVF Flip Finder http://rover.ebay.com/rover/1/711-53200-19255-0/1?ff3=2&toolid=10044&campid=5337410609&customid=&lgeo=1&vectorid=229466&item=263245682553
0 notes
Photo

Zacuto Z Finder EVF http://rover.ebay.com/rover/1/711-53200-19255-0/1?ff3=2&toolid=10044&campid=5337410323&customid=&lgeo=1&vectorid=229466&item=182617222054
0 notes
Photo

Zacuto Z Finder EVF http://rover.ebay.com/rover/1/711-53200-19255-0/1?ff3=2&toolid=10044&campid=5337410323&customid=&lgeo=1&vectorid=229466&item=182617222054
0 notes
Text
Tweeted
Zacuto Kameleon EVF Announced – 1080p Resolution, HDMI & SDI, Lemo Power Out https://t.co/OpwVXueIP3 (https://t.co/twyC38BAA3)
— exaforo.com (@exatienda_com) March 13, 2019
0 notes
Video
A bit of #anamorphic goodness at #PIR shot through a @zacuto EVF.
0 notes
Text
Review: Panasonic AU-EVA1 4K Cine Camera, part 2
This is part 2 of a three-part review; there’s more in part 1 and part 3
Display
The LCD monitor is a 16×9 panel in which a 17×9 DCI image is shown letterboxed, and a 16×9 image is shown with the same vertical letterbox and similar spaces on either side. This slight inset allows camera data to display outside the picture, so you’re free to compose and frame using a clean image.
EVA1 monitor display. Yes, reflections can be an issue.
A unique artificial horizon for camera leveling appears in the lateral margins, using colored indicators for both pitch and roll. Like the marginal telemetry, these unobtrusive markers give you useful information without stomping on your image.
(Moiré onscreen is a photographic artifact only.)
(Moiré onscreen is a photographic artifact only.)
The monitor only resolves about 500 TVl/ph but the EVA1 offers a good selection of focusing aids: three levels of digital peaking in a variety of colors, Panasonic’s unusual but highly functional “focus squares”, and one of the best image-mag (FOCUS EXPAND) modes around. At the press of a button you can punch in for a 2x, 3x, or 4x blow-up, and a spin of either menu wheel—on the body or on the grip—cycles the magnified area though every part of the screen. Best of all, the expanded mode is available while recording.
I soon became accustomed to (or spoiled by, more like it) punching in while rolling, flicking the grip’s wheel until my area of interest was centered, focusing, and bopping back out to the full image, in less time that it takes to read this sentence.
The targeted area is remembered for the next time you punch in, though it re-centers when the camera is power cycled.
You can turn on a small WFM and/or vectorscope in the corner of the image. The ‘scopes show what the signal is doing, not what the display is showing, so if you’re recording V-Log you’ll see V-Log levels on the WFM even if you’re monitoring in V-709. There’s also a spot meter function, displaying the signal level of a spot in the center of the screen. Dual zebras round out the exposure-monitoring tools.
EVA1 display with waveform monitor (horizontal lines on screen are a photographic artifact, not visible to the eye).
Focus Squares, focused near…
…and far.
The default peak white on the monitor is about 200 nits but can be dimmed to 100 nits or brightened to 300 nits. You can assign POWER LCD to a button and boost brightness to about 440 nits, but doing so may drain the battery in five minutes flat, sear your eyeballs beyond repair, and cause the LCD to melt like ice cream on a hot, hot summer day (note: Panasonic denies that any of those things will actually happen. Probably). By comparison, iPhones typically top out at 500–650 nits. The touchscreen overlay adds some reflective glare, so the monitor can be difficult to use in bright conditions. The supplied sunshade helps to a certain extent but outdoor shooters will want to supplement it, even if it’s just by wearing a long-billed baseball cap to shade the screen.
Outputs
Both SDI and HDMI are provided and both can be active at the same time. Both feeds can output 1080i and 1080p and true 4K; SDI also allows true 2K. The SDI feed tops out at 4K/30p while HDMI will output 4K/60p. Each output can convey timecode and recording triggers. If you’re shooting V-Log, you can enable a V-709 LUT for either or both output as well as for the camera’s own LCD. Both HDMI and SDI carry embedded audio.
Each output can be set to display camera data, markers, and/or menus. The SDI output (but not the HDMI feed) can be configured to echo the LCD monitor with all its added conveniences—‘scopes, peaking, focus squares, zebras, FOCUS EXPAND, and the artificial horizon—making an SDI EVF the way to go if you’re planning on adding a viewfinder.
There’s a TC IN/OUT BNC for timecode, and a 3.5mm headphone jack, but there’s no genlock capability.
While there’s a pair of USB ports at the back of the camera, the HOST port is (at least as of today) solely for the use of the Wi-Fi dongle and the SERVICE port is for factory service uses only. There’s no way to hook the EVA1 up to a Mac, PC, or external disk for media transfer.
Menus and Controls
EVA1 has a straightforward and rational menu system, with reasonably intuitive groupings of items. I found that, after an initial familiarization period, I rarely wound up hunting randomly for any particular setting. Your mileage may vary, but I found these menus to be more logical and less frustrating than on most other cameras of similar complexity.
If there’s any “gotcha”, it’s that changes to one parameter may affect another in unexpected ways. For example, when I change SYSTEM SETTINGS > SYSTEM MODE > MAIN PIXEL from 3840×2160 to 1920×1080, OUTPUT SETTINGS > HDMI OUT also gets bumped down to 1920×1080, as is right and proper. But if I then set MAIN PIXEL back to 3840×2160, HDMI OUT stays stubbornly at 1920×1080.
This isn’t wrong; arguably it’s the correct thing to do—don’t change things behind the user’s back that you don’t have to change—but if you naively expect output settings to follow system settings you might be disappointed to come back from a day’s shoot with an external recorder full of HD clips instead of UHD clips. (Not that I would ever be so foolish, of course; I’m speaking hypothetically. Besides, I caught my mistake after only a couple of shots.)
Menus are accessed by pressing the MENU button on the body or on the handgrip, or by pressing on the touchscreen for half a second (long enough you’re unlikely to hit it by accident). Menus are then navigated by spinning the control wheel on the body, the wheel on the grip, or by onscreen taps. If you select a camera parameter to adjust, the screen flips back to picture with the adjustment controls on the side, so you can see the effect of what you’re doing—and again, you can use either of the control wheels or screen taps to twiddle that control.
Adjusting frame rate.
In this way the camera can be used like any other camera, with appropriately-assigned user buttons and switches and the occasional menu-dive. However, you may find yourself a control or two short of what you need; the USER position on the control wheel, for example, can adjust shutter angle, frame rate, or audio monitor volume—but only one of those at a time.
Fortunately, the EVA1 has a VariCam trick up its sleeve: press the HOME button to display the Six-Button Side Panel (SBSP).
The HOME screen’s “six button side panel” display.
The Six-Button Side Panel originated (as far as I can tell) with the Sony F23 a decade ago, and modern variants appear on many high-end cine cameras: ARRI Alexa, Sony F5/55, Canon C700, and current VariCams, to name a few. It’s a large status display with six action buttons, three above and three below, mounted on one or both sides of the camera or on a separate control panel. Usually there’s an associated dial or control wheel for adjusting settings, too. A SBSP presents most of the commonly-needed controls and readouts with quick access to important functions, minimizing menu-diving.
The EVA1’s SBSP looks almost exactly like the one on the VariCam LT, but it’s a monitor display mode instead of a dedicated control surface. Instead of six action buttons, the EVA1 gives you direct touchscreen access: tap any of the six white tabs to display the appropriate submenu or to adjust a setting directly (if the touchscreen isn’t convenient, use one of the control wheels to cycle through the tabs—the selected one will turn yellow—and click the wheel to select it). With frame rate, color settings, shutter angle, exposure index, audio settings, and white balance immediately available, most common configuration tasks can be done without ever cracking open a menu.
Power
The camera comes with a dual battery charger, and the supplied AC adaptor is used for either the charger or the camera—you can’t charge a battery and power the camera at the same time.
Battery charger with normal and high-capacity batteries.
Fortunately the batteries last a good long time: the stock battery is rated for 2 hours 50 minutes, and that seemed to be accurate in my tests. Optional batteries survive for 4 hours 15 minutes or 5 hours 40 minutes (the big battery in the picture is one of those 5+ hour batteries).
Handling and Operation
The EVA1 is a chunky little handheld camera, best stabilized with a “tripod grip”: body pressed against the shoulder, right hand on the handgrip, left hand cradling the body or lens. With a lightweight lens and minimal added hardware, the camera is comfortably operable for reasonably long periods of time, but piling on monitor/recorders, wireless transmitter/receivers, and other such gumpf results in a heavier and more tiring beast. This isn’t to fault the EVA1 in particular; it’s a common problem with cameras of this form factor.
If you choose to operate this way, be advised that any I/O cables you plug in stick out the back of the camera, limiting your ability to clutch it to your chest.
Cables exiting the rear of the EVA1.
For those desiring proper shoulder mounting, build-up kits are already available from Shape and Zacuto. Wooden Camera makes a handgrip relocator. More options are surely in the works.
Startup and Mode-Switching
Eight seconds elapse between switching power on and being able to record. Switching sensor modes takes perhaps four or five seconds. Even a reboot, needed to change system frequency, is completed in ten seconds or less. It’s a bit slower than a GH5, but much faster than VariCam LT, and fast enough that I never felt I was waiting for the camera.
White Balance Setting (and other controls, too)
Like the VariCams, the EVA1 doesn’t give you an endlessly-scrolling list of all possible white balance settings (or shutter angles, or frame rates). Instead, it gives you a short list of useful values, which you can edit as you see fit. Pressing the ADD button in the appropriate menu returns you to the live-view image with color-temperature adjustment buttons, and a vectorscope thoughtfully provided in the lower right corner. Once you’ve set temperature, you can adjust green/magenta tint, too. You can save up to 12 different color temperature/tint combos in the list.
By the same token, you can save 12 different shutter angles and a stonking 150 different frame rates into their respective lists.
These stored white balances, shutter speeds, and frame rates are then available using the control wheel on the camera or grip, or the appropriate tab in the SBSP (HOME) screen. Once you grok the concept of having quick-access lists of frequently used values instead of having to scroll through all possible values, adjusting the EVA1 becomes fast and easy, and you’ll miss it when you have to work with a more conventional camera.
At the bottom of the white balance list—scrolling down, that is—is an “A” value you set by pressing the AWB button while aimed at a color-neutral surface. If you want to add that AWB value to your saved list, go ahead: just ADD the value by clicking through the temperature and tint values shown without changing them. Again, it’s a bit different from the usual PRESET/A/B switch settings, but it’s just as capable.
If you’re not shooting V-Log, you get one further setting: ATW. Auto-Tracking White uses a small ambient-light sensor on the front of the camera to continuously determine and adjust white balance; it reads the light the way an incident meter would, so it’s not overly affected by colors in front of the lens.
Focusing
I’ve already mentioned the manual focusing aids, which I feel are among the best in the business.
The EVA1 also offers push-to-set autofocus with compatible lenses, but it’s really a setup function, not a live-shooting utility. The EVA1 uses contrast-detection AF, without the GH5’s “depth from defocus” predictive capabilities, so autofocusing is an iterative, trial-and-error process with the camera adjusting the lens repeatedly and seeing whether focus gets better or worse. When you press the AF button (button #1 by default), the focus will seek back and forth perhaps a couple of times, then fine-tune on the final position in a series of small steps, during which the focus motor emits a faint chuckling noise. It often takes a couple of seconds to run; it always throws focus off initially; and it doesn’t always wind up with the subject in focus, especially if the subject is moving during the attempt. I found it to be useful on test charts, less so on real-world subjects.
If you need autofocus during shooting, the EVA1 isn’t the camera to use: a GH5 is a much better bet despite its temperamental autofocusing, or one of the Canon DPAF-equipped cine cameras like the C200 (a very different camera overall, despite the comparable form factor and price—don’t just say, “well, the C200 has DPAF so that’s the one to get”, unless AF is the most important thing in a camera. In some ways the C200 wipes the floor with the EVA1; in other ways the EVA1 totally pwns the C200. It’s good to have choices!).
Exposure
As mentioned the EVA1 offers zebras, a spot meter, and a waveform monitor for exposure control. A three-stage internal ND helps keep apertures within reason, though with a maximum value of ND 1.2 you might want to carry an additional filter for bright days. While the base ISO of 800 can be dialed down to 200, you’ll lose two stops of highlight headroom by doing so (mind you, the camera has 14+ stops of dynamic range to begin with, so cutting that down to 12+ stops isn’t quite the end of the world).
You can turn on auto-iris with compatible EF lenses by clicking the IRIS wheel in, but depending on the lens used that may not be especially usable.
Many stills lenses, including two Sigma and two Canon lenses I tested with, aren’t designed for smooth, quiet iris changes. Instead, the iris will change in a series of small, discrete, and noisy steps: the lens will rattle or buzz as the aperture changes. Even though the steps might be very fine—the Sigma 18-35mm DC f/1.8 supplied for the review has eight steps per stop, while my Canon 24-70mm F/2.8 EF L has only four—the nearly-instantaneous changes, desirable for still-camera use, are visible in the picture as sudden jumps in brightness, and audible in the soundtrack whenever a mike is close to the camera.
However, my Canon 70-200mm f/2.8 EF L II smoothly adjusted its iris as cleanly, unobtrusively, and silently as any video lens would, so clearly the EVA1 can do it if the lens allows it. You’ll want to test lenses for auto-iris behavior on the EVA1 before you go running-and-gunning with auto-iris turned on.
Image Stabilization
If your lens has optical image stabilization and it can be controlled with a switch on the lens, it will work on the EVA1. If your lens doesn’t have OIS, or you switch it off, you can use electronic image stabilization instead.
EIS crops the image slightly so the camera can pan-and-scan across the face of the sensor, but as the camera is considerably oversampled this cropping has little impact on image resolution. EIS images suffer (as all EIS images do) from momentary microblurring when the camera wiggles, and it’s not available in the 4/3 crop mode, but it’s quite effective otherwise.
Purists may scoff at the use of EIS (along with autofocus and autoexposure) but it’s a useful thing to have in your toolkit in case of emergencies. It’s better to have it and never need it, than to not have have it and find yourself with a wobbly tripod, a long lens, and a must-get shot.
VFR
Variable Frame Rates from 1–60fps can be had at 4K / UHD frame sizes; to 120fps in 2K / FHD using the full S35mm sensor in “mix” mode; and to 240fps in a 4/3” “crop&mix” mode. Available rates depend on the SENSOR MODE (S35 5.7K, S35 MIX 2.8K, or 4/3 CROP&MIX 2.2K), MAIN PIXEL (4096×2160, 3840×2160, 2048×1080, or 1920×1080), and MAIN CODEC (too many options to list) settings. Once you pick those, your image-rendering qualities are set; there aren’t any breakpoints where changing the frame rate triggers an unannounced change in scanning mode or effective sensor size. The manual has a handy table of these speeds ‘n’ feeds.
Once you’ve selected those settings, choosing a frame rate is as quick and easy as changing shutter angles or white balances.
Audio
The EVA1 has the important realtime audio controls on physical knobs and switches: auto/manual gain, and gain pots for both channels. Anything you need to adjust in a hurry is right there on the side of the camera. Everything else—mike vs. line, baseline levels, phantom power, signal routing—can be done in the menus or the HOME screen.
By default, the USER setting on the control wheel’s three-way switch adjusts monitor volume.
Etc.
Each status LED can be switched off individually, so if you don’t care for front tally, rear tally, card status, and/or power lamps, you can turn ‘em off and keep your camera blissfully dark.
The IR filter can be retracted for low-light infrared shooting.
The AC supply’s coax plug snaps firmly into its socket, so it’s less likely to come undone than the same sort of connection on many other cameras. It takes a reassuringly firm pull to pop the plug out.
When not shooting V-Log the EVA1 offers five Scene Files with extensive picture adjustments, including standard matrix controls as well a 16-vector color corrector.
There’s even more in part 3…
The post Review: Panasonic AU-EVA1 4K Cine Camera, part 2 appeared first on ProVideo Coalition.
First Found At: Review: Panasonic AU-EVA1 4K Cine Camera, part 2
0 notes
Video
vimeo
First Look at JVC's GY-LS300 from Zacuto on Vimeo.
JVC representative Craig Yanagi visits Zacuto Headquarters to talk to Steve Weiss and Jens Bogehegn about the new JVC GY-LS300. Check out this new 4K camera's specs in this video, including it's ability to have it's own IP address and streaming abilities! This new camera is fully compatible with Zacuto's Next Gen Recoil system, allowing this new camera to be balanced with only a few universal components. The addition of a Gratical HD Micro-OLED EVF really takes this camera to the next level.
Learn More About the Next Gen Recoils: http://bit.ly/1EbWW7k
Learn More About the Gratical HD: http://bit.ly/1D62K4w
0 notes
Text
One of the most underestimated, sadly rarely heard of, Super 35 4K camcorders out there is the JVC GY-LS300 by JVCKENWOOD USA Corporation’s JVC Professional Video division. I have never had the pleasure of trying out the GY-LS300 or even seeing one from a distance, so must rely on the professional insights of documentary cinematographer Rick Young who has expressed nothing but praise for the camera.

The JVC GY-LS300 has intrigued me from the moment I first read about it, at a time when I was wondering whether I should stick with hybrid stills/video cameras or look into the emerging world of 4K camcorders.
With an independent self-funded photographer and moviemaker budget, and the need to adequately cater for both creative fields, I opted for hybrid cameras but sometimes wonder if I have made the right decision on the video side of things.
Should I have bitten the bullet on the JVC GY-LS300 4K camcorder and made do with a smaller selection of cameras and lenses for stills photography? Given the ongoing problems we have in this country with our lousy online upload speeds, some of the worst in the world, I made the best choice available at the time and opted to start off Untitled: Stories of Creativity, Innovation, Success by focussing more on documentary photography than short documentary movies.
If things had been different for Australian Internet access I would gladly have chosen to focus more on video than stills and I most likely would have selected the JVC GY-LS300 as my prime video camera with hybrids as my B and C cameras. If full-length documentary features enter the picture sometime soon, then I may well do exactly that.
JVC GY-LS300 4K camcorder with Atomos Ninja Inferno monitor/recorder
JVC GY-LS300 4K camcorder in Zacuto Recoil rig
JVC GY-LS300 4K camcorder with Veydra Mini Prime Micro Four Thirds geared cinema lenses
Before JVC announced its version 3.02 firmware update, the JVC GY-LS300 possessed a specifications list to impress:
4K Ultra High Definition video.
Super 35 4K CMOS sensor.
Micro Four Thirds lens mount.
Variable Scan Mapping for native angle of view with a wide range of lenses including M43, Super 16 and Super 35.
Lens mount adapters for EF and PL lenses.
Built-in 3-position ND filters – 1/4, 1/16 and 1/64.
HD-SDI (3G) and HDMI outputs with 4K only via HDMI, feeding and triggering external recorders.
DCI Cinema 4K 24p and DCI Cinema 2K 24p recording.
Full HD 4:2:2 recording at 50Mbps.
JVC-Log for 800% dynamic range.
120fps HD slow motion recording.
2-channel XLR phantom-powered audio inputs and included shotgun microphone.
Hot-swappable dual SDVH/SDXC card slots for dual, backup or continuous recording.
Handle unit for XLR input and microphone.
And more.
The one widely-reported downside to the JVC GY-LS300? Its viewfinder. Given current electronic viewfinder technology, JVC could easily add a far better EVF to the JVC GY-LS300 and really knock one out of the park.
Links:
Atomos – Ninja Inferno
JVC – GY-LS300CHU
JVC – GY-LS300 4K Super 35 camcorder – downloadable PDF brochure.
JVCKENWOOD – NEW FIRMWARE FOR JVC GY-LS300CH CAMERA
ADDS 4K 4:2:2 RECORDING AND 60P OUTPUT
Rick Young – One of a kind – shooting with the JVC GY-LS300
Rick Young’s Movie Machine – JVC GY-LS300 ON LOCATION: REAL-WORLD SHOOTING
Image Credits:
Quick and dirty image graphic concept by Carmel D. Morris.
JVCKENWOOD Updates the Incredible JVC GY-LS300 4K Camcorder Firmware to Version 3.02, Adds 4K 4:2:2 Recording and 4K60p Output One of the most underestimated, sadly rarely heard of, Super 35 4K camcorders out there is the…
#4K#camcorders#Cinema 4K#DCI#DCI 4K#documentary#documentary cinematography#documentary filmmaking#documentary moviemaking#EF#EF mount#GY-LS300#Japan Video Corporation#JVC#JVC GY-LS300#M43#MFT#Micro Four Thirds#PL#PL mount#Rick Young#Super 16#Super 35#UHD#Ultra HD#VSM
0 notes
Photo

Zacuto Z-Finder JR EVF Pro 3.2" Flip HDMI Viewfinder w/battery and HDMI Cable http://rover.ebay.com/rover/1/711-53200-19255-0/1?ff3=2&toolid=10044&campid=5337410320&customid=&lgeo=1&vectorid=229466&item=322474624354
0 notes
Last Seen Blogs

rafaelsfiles
rafael

cockatielspiel
A Spiel of Cockatiels!

evie-the-hecate-goth
Evie needs an adultier adult

leyahays
Untitled

mactirian
/night city/