#Maya was how I learned and Blender just doesn't make sense
Explore tagged Tumblr posts
Visit Tumblr Blog
Explore Tumblr blogs with no restrictions, modern design and the best experience.
Last Seen Tumblr Blogs


Fun Fact
Tumblr is available in 18 languages.
Text

#nonsims#crap post#delete later#before my queue starts unless it already did#lol#trying the donut blender tutorial#I know how to 3d model#Maya was how I learned and Blender just doesn't make sense#but I'm really going to try#It has more stuff now than the old 2.7 version we were stuck with a long time ago#anyhoo#so yeah...hey if you are new here#I used to like writing essays in the tags
44 notes
·
View notes
Text
Daily Log #11
I'M ON TOP OF THE WORLD!!!
9/29:
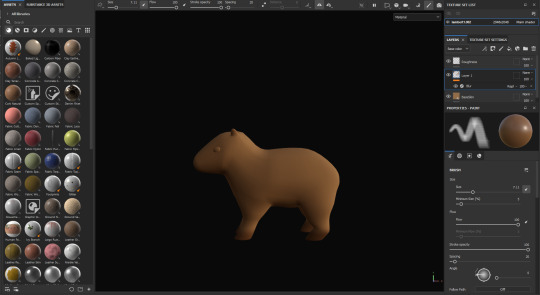
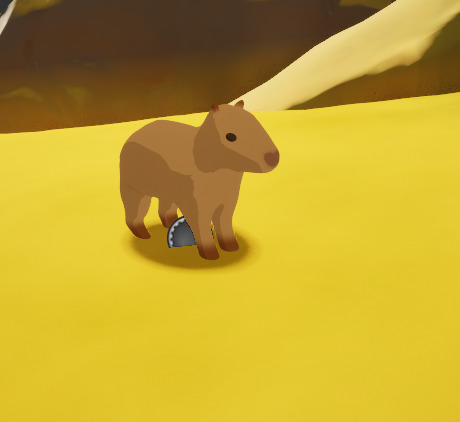
Colored capybara model (fun!)
Made cel-shading texture for the capybaras (AAAAAAHHHH)
Added a blob shadow under the capys (nice)
Okay, so starting out, I went into Blender and unwrapped the first (and so far, only) capybara model. I will learn how to unwrap UVs in Maya eventually, but I'm more familiar with Blender's system, so I'm sticking with that for now. Painting the capy was so fun, and it turned out adorable, if I do say so myself.
Alright, story time, and fair warning, this is going to be long. I was expecting it to be pretty simple to get the cel shading texture done. Then, I tried working on it, and realized I was screwed.
The problem is, cel shading is done post-process, and would apply to the entire scene. So, if I wanted a cel-shaded capybara, I would have to have the entire game and landscape be cel-shaded. After all the work I put into the environment, I was NOT happy with this.
I was so excited for the stylistic choices I had made and really didn't want to give up. After lots of research, I figured out I had five options:
Cel shade the whole scene (not a chance, bucko).
Use complex nodes that I have no clue about, and that have almost no notation online to learn from, to sort of mask out the capys (WAY too confusing, and believe me, I tried my best... but my best wasn't good enough).
Create a post-processing cube, and copy and paste it around the capybara model like some kind of weird post-processing skin, which would take absolute ages and would break as soon as I started animating.
Take the L and choose a different style for the capy characters (I admit, I almost just gave up and went with this one).
Fake it.
I chose option 5.
Let me tell you, it was a eureka moment when I thought of how to do this. I realized I could use what I learned creating the tree leaves texture and, hopefully, rearrange the hell out of it, add to it, and get it to work. I worked on it for so long, but eventually...
IT WORKED! I literally jumped out of my chair in excitement.
So, the way it works is that it detects the direction that the material normals are facing, and basically selects them based on this direction and applies a different color. For the trees, I used just the Z axis for shadows on the bottom. A little tweaking, and I could adjust it for all three axes. I put in a parameter for each so I could change the direction the "light" is coming from. So, unlike real cel shading, it doesn't respond to the actual lighting of the scene. You arrange the shadows yourself. I'm sure with more complex code I could get it to respond to a single light source, but I highly doubt I'd ever get it to respond to multiple light sources.
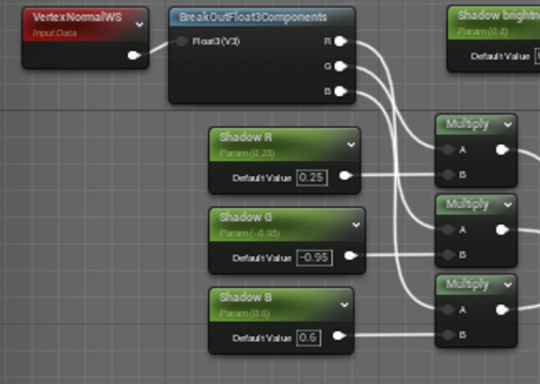
I used these as the alpha/mask for a lerp node. I could then set up the base color as the A value in the lerp, and then plug in a bunch of modifications (like saturation, darkness, etc.) to the base color and put it in the B value, so I could adjust the shadow's appearance.
The next problem was, the shadow color was applying beautifully, but there were still default shadows from the engine itself. I needed to get rid of all the shadows. My solution? Well, lights don't cast shadows, so if the capybara was emitting even just a little, tiny, itty bit of light, it wouldn't collect shadows. I took everything that I plugged into the base color pin and plugged it into the emissive color pin. It messed up the colors, but it did remove the shadows! With some more adjustments I got the colors correct again.
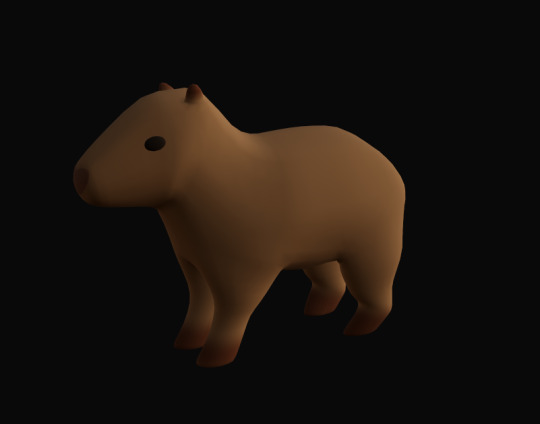
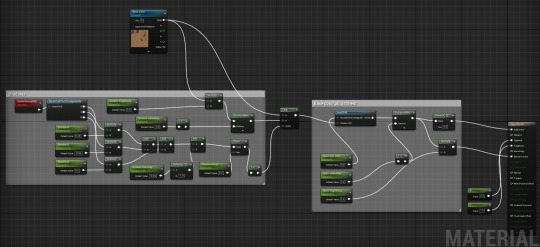
Here's the finished code:
One final problem: If you look above at the capybara screenshot, it's not casting a shadow. Obviously, it's emitting light, so it makes sense that it wouldn't, but it looked like it was just floating there. Solution: add a blob shadow!
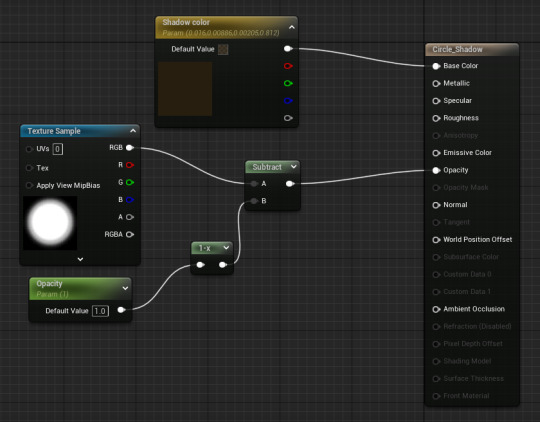
I tried just putting a plane underneath the capybara actor and applying this texture. Unfortunately, my landscape is really varied in height, but the shadows were just flat horizontal, and would clip into the ground or hang over the top of the ground (and sometimes both at once!)
After some research I learned about decals, which cling to the landscape. I could just create a decal actor and nest it to the capybara actor in the level itself (technically not perfect; I was hoping to be able to combine them in the actor blueprint itself, but it's such a quick fix that it's simply the best and easiest option).
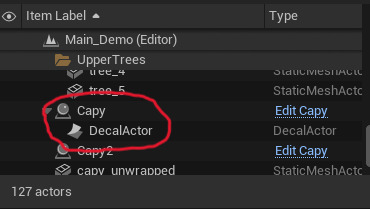
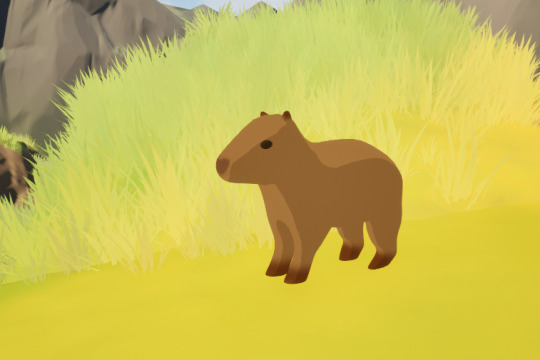
VOILA, IT WORKED! Now the shadow is always applied clinging to the landscape, so no weird clipping!
Here's the final result of hours of texturing:
Don't mind the little gear-shaped icon, it doesn't appear during play.
After all that, I went to bed and passed out immediately (it was like 6 in the morning). Best sleep I've had in weeks. Totally worth it!
This was a really long post, sorry for yapping but I'm sure you can understand how proud I am of myself. I just had to gush about it.
Have a good one!
0 notes
Text
Week 8 - Digital Iteration
This week's tutorial was really interesting and entertaining. One of my personal hobbies is digital rendering (mainly in Blender), but it was really nice to go out of my comfort zone to a program I have only ever used once before. When I opened 3ds Max for the first time, I noticed how similar the interface looked to Maya. Being Autodesk programs natively, it made sense, but it was nice to have some element of familiarity.
During my year 10 and 11 high school holidays I completed a Cert IV in digital design for games and film. That coursed used Maya and Unreal Engine 4, so I had a bit of experience with the interface and principles of polygon modelling. However, 3ds max was probably one of the popular programs which I had the least experience with; so it was still a hugely informative and insightful process trying to adapt my knowledge between programs.
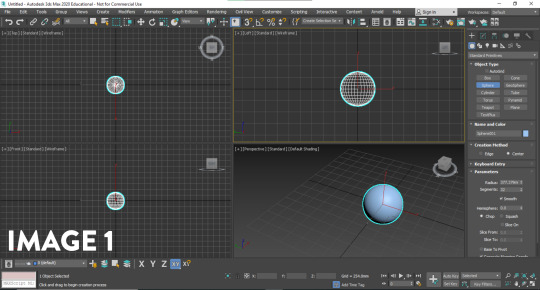
I started with the primitives menu, and imported a sphere into the workspace. I initially found myself struggling with the interface. There are a lot of options and features which are not necessary when learning the basics of a program. When starting to learn any 3d program, I often find myself spoiled for choice, and perhaps even too overwhelmed. I was very glad when the tutorial suggested hiding some superfluous menus from view, as I felt that it really cleared up the screen. After aligning the views (Image 1), I experimented with the modifiers tab.
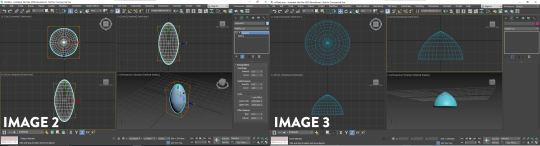
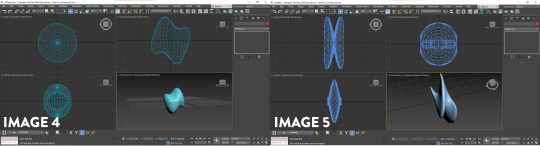
The modifiers in 3ds max were really interesting to play around with. Working with meshes can sometimes be a tedious and particular process, but it was really enjoyable creating something with no end goal in mind. I liked how using a squeeze modifier (Image 2) could generate an egg shape with the sphere primitive, and how the melt, twist and wave modifiers (Images 3, 4 and 5) could be pushed to the mesh extremes. When working with a mesh, the topology is important to the quality of the final form. As the entire object is constructed of tris and quads, the way they are situated on the model, and their resolution play an important role in what you see. For example, the more I increased the twist modifier, the more I could see the vertices sticking out of the shape. It goes to show that unless the resolution is increased, there are limitations to the modifiers usage, as they can 'break' your model.
The modifiers in 3ds Max are very different to the ones in blender, I definitely feel like in any 3D program, anything you can create in one is attainable in the other; however 3ds max has a lot of mesh deformation modifiers out of the box. Although I thought these created really interesting and abstract shapes which I certainly enjoyed, I realised that I couldn't think of many instances where I would use some of the modifiers on a real project, but I think they are really valuable for niche tasks.
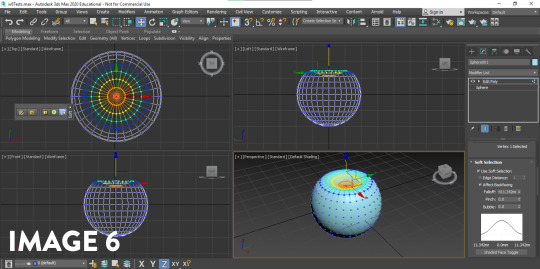
My favourite part about the exercise was learning poly modelling in 3ds Max. Poly modelling is a core part of most 3d modelling programs; and the skills are usually transferrable between. There are some really fantastic modelling tools in 3ds max which make the process of modelling enjoyable. I had a look around my desk for some quick and interesting forms I could make, and started with a really simple apple using the sphere I had in the viewport. I utilised the 'soft select' (Image 6) feature to move many verts at once, to create the top and bottom crease in the apple where the stem travels. To create the stem, I used the cylinder primitive and used the taper/bend modifier to create a curved and natural form (Image 7).

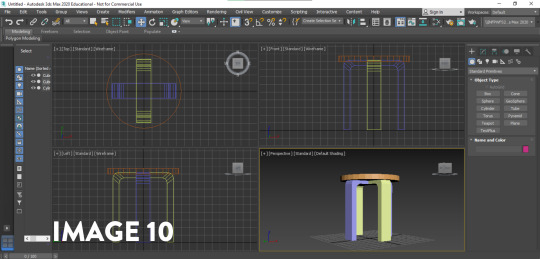
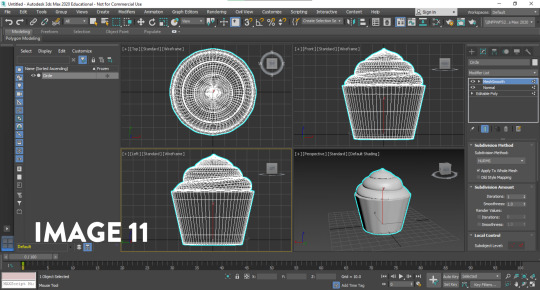
Next, I used the cylinder primitive and used the scale and extrusion feature to get the barrel of a pen. To create the tip of the pen I target welded the vertices together to get the point. I created a new cube primitive to create the clip on the pen, and extruded it (Image 8); also creating a bevelled edge to round it out slightly. Using the same techniques, I also made a stool from my room (Image 9). I really wanted to experiment with as many features as I could in these exercises, so with each 'sketch' I tried to focus on a tool I hadn't used before - as it felt like the best way to improve (Image 10). Still getting comfortable with the Poly Modelling in 3ds max, I also made a cupcake (Image 11) from the basic cylinder primitive to try and improve my modelling quality and speed; making simple extrusions, scaling the rings in, rotating them to get the icing layers. I played around with NURMS subdivision on the mesh to smooth it out, and was really happy with the results.

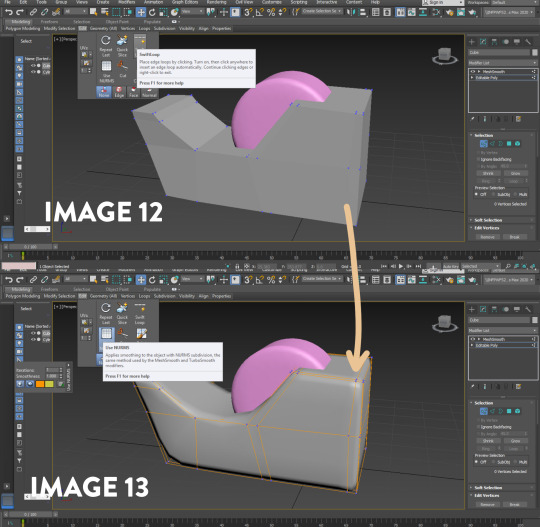
Finally, I wanted to use all the skills in conjunction, as well as using a tool which really sped up the workflow. I knew from Blender and Maya that loop cuts sped up the process, but I could not find them in 3ds max. After researching the issue on different forums, I found that it went under a different name; Swift loop Though it was very basic problem solving, it goes to show that these skills and programs have transferrable knowledge; and doing a simple search of your problem can lead to new ways of solving them. Swift loop was really useful in creating a loop cut between two parallel edges; adding more geometry for manipulation. When creating the tape dispenser, I noticed that the subdivision was rounding the model out too much, to the point where it no longer registered as a tape dispenser. So I used the swift loop feature to create loop cuts close to the bordering edges to reduce the interpolation between the curve (Images 12 and 13). This taught me that the subdivision modifiers aren't just something that can be added to a model to instantly make it look better; they require some manipulation and editing to get the desired effect.
I found 3ds max challenging but really interesting and insightful. As I am familiar with other programs of similar nature, it took me a while to get out of my own head; using shortcuts and hotkeys from the other programs and wondering why it wouldn't work. Overall, I think that its really rewarding to pick up another program, as it expands my skills and approach to modelling. If I were to redo this activity, I think I would try and make some more complex forms now that I have gotten more comfortable with 3ds Max; perhaps moving onto a product or more complex object. I am really looking forward to creating the bottle concepts in 3ds max next week, as I believe it will be another chance to improve my skills.
Thoughts on the Pre-Class activity - Andrew Simpson case Study
I believe that digital modelling and physical models have a closer relationship than people think. Form and Materials are an important part of perception, but there are qualities of both physical and digital modelling provide when compared to one another. Digital models allow for material iteration, simulation and rendering. Physical models allow for the physical contact, and interaction with the end user. When Andrew discusses the importance of materiality, it drives home the necessity of experimentation and versatility in design. The idea of new materials informed new processes in his decision making process, and it lead to different material types being explored.
I found Andrew's discussion on model fidelity really insightful. I perceive high and low fidelity models to represent how close the model is to a refined product. Whilst a high fidelity model would be fantastic to show clients or to use in renders, low fidelity models are required to quickly iterate on concepts and ideas to test the boundaries of the product e.g. material, form, colour. High fidelity models are more refined, and have more time put into them, to explore how the end product will feel for the user. High fidelity and low fidelity models are both important, and when Andrew talks about the non-uniform relationship of the two in his process, it shows that design is not a linear process; rather a circular one driven by prototyping and feedback. If a high fidelity model still doesn't feel right, faster, low fidelity models can be made testing a range of new ideas; to be taken through the process of design once again.
9 notes
·
View notes