#DIY Jewelry
Explore tagged Tumblr posts
Visit Tumblr Blog
Explore Tumblr blogs with no restrictions, modern design and the best experience.
Last Seen Tumblr Blogs


Fun Fact
The KCSC sent more than 20K requests to delete posts related to prostitution and porn to Tumblr from January to June 2017.
Text


liquid & pearl watch necklace or bracelet
#︵‿୨♡୧‿︵‿︵‿୨♡୧‿︵‿︵‿୨♡୧‿︵‿︵‿୨♡୧‿︵#aesthetic#fashion#jewelry#diy#diy jewelry#handmade#by me#moodboard#grunge
186 notes
·
View notes
Text
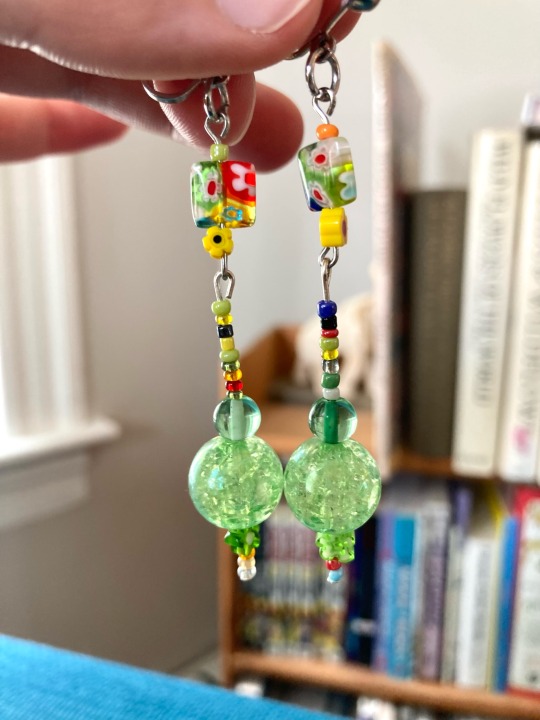

New pair of earrings I made recently 🥰💚
271 notes
·
View notes
Text

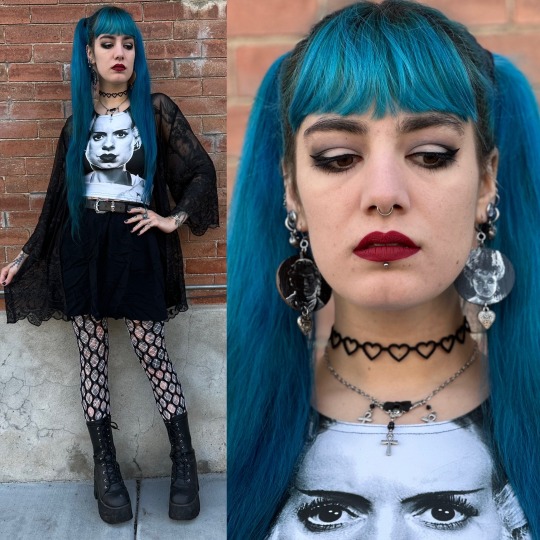
Early 90s nostalgia vibe with this vintage leather jacket I found in college (and bought in reference to a certain film)💛 Jeffrey Campbell shoes secondhand, bleach painted shirt by me, bone jewelry gifted.
74 notes
·
View notes
Text
Well maybe I have made some more poolverine jewelry to fit with my "Peanut Bub" bracelet 🤭

I am absolutely obsessed with how the earrings turned out <33 and they look sooo amazing when I wear them
I'm going to wear them 24/7 (or at least when I'm not sleeping lol)
111 notes
·
View notes
Text

I just wanted to show my collection of what I consider my "fairy jewelry." My fairy aesthetic is mainly about twinkling gold and silver, pearls, stars, and clear crystals - especially those with an iridescent rainbow sheen.
Lots of these pieces were either made by me or I embellished them.


Here's a cool thing for people with gauge earrings: you can make your own elegant plugs by finding pretty buttons, snapping off the loop on the back, and gluing them to a stack of one or two buttons (depending on how thick your earlobe is) that match your gauge size. Then glue a slightly bigger button to the back to keep it in place when you're wearing it. People won't even be able to tell they're plugs!


I also love making brooches from buttons. Hobby Lobby has lots of very beautiful ones for $1.99, and I got all my buttons there - both for the plugs above and the brooches below on the left. To make brooches, just snap off the metal loop and glue a flat-backed pin to the back; they sell those especially for brooches, although in a pinch you can glue a safety pin to the back or secure it with some wire matching the color of the button.
The brooches on the right were some of my favorites that I either made (like the moon face) or bought.
I hope you enjoyed seeing my collection!

#fairy#fairies#fairycore#fairy aesthetic#fairycore asethetic#fae#jewelry#diy jewelry#diy#diy crafts#craft projects#gauge earrings
99 notes
·
View notes
Text


If you love my handmade beaded jewelry, why not try making your own? I offer over 20 DIY easy-to-follow written instructions on my Etsy shop, with options for all skill levels. You'll love the joy of crafting your own beadwork. Give it a try at Ravit.etsy.com!
#beadedjewelry#beadwork#jewelrydesigner#etsyartist#artists on tumblr#etsystore#online shoppping#beadedbracelets#beadednecklace#beadedearrings#diy projects#diy jewelry#diy ideas#learning#creativity
108 notes
·
View notes
Text


Made a choker for @searchingforlostthings!
I used a thin leather belt, actual dog collar hardware and spikes from my own collection
126 notes
·
View notes
Text

I felt that this meat / flesh themed bracelet would be appreciated here on Tumblr. 90% of the beads, including that meat slab charm, are made by me.
[Liha Is finnish For Meat]
#Morsos bead works#Bracelets#diy jewelry#diy bracelet#self made#(I still don't know all the right tags for this stuff)#crafters of tumblr#fimo clay#fimoart#meatcore#fleshcore#meat aesthetic
413 notes
·
View notes
Text


Gooseberry bracelet I made :)
#my art#art#fanart#outlast trials#outlast#mother gooseberry#phylis futterman#dr futterman#diy jewelry#bracelet#creepy cute
78 notes
·
View notes
Text
using this pose to once again show off my Hello Kitty ring that I made with krazy glue
OF | fansly | wishlist | my links | nsfw blog
#me#mine#hello kitty#soft tummy#cute tummy#tummy kink#pierced navel#navel piercing#belly piercing#bellybutton piercing#egirl outfit#soft egirl#alt grunge#alt aesthetic#black and pink#pink and black#diy jewelry
301 notes
·
View notes
Text

Pochacco
#diy ideas#diy jewelry#diydecor#cute#cute animals#diy craft#diy fashion#kawaii#adorable#gift#gift ideas#unique gifts#gift for her#handmade#pochacco
60 notes
·
View notes
Text
youtube
made a tutorial in case anyone wants to make one of these :)
70 notes
·
View notes
Text


Made some clay earrings the other day and I’m so pleased with how they came out! 🥺💖
Am I entering my jewelry making era? Maybe!! 😳
200 notes
·
View notes
Text
Did I paint Lisa Frankenstein earrings because I couldn’t find merch? Yes, gotta appreciate that artist power⚡️Top from blxckfly on Etsy, moth duster from Hot Topic, boots Demonia, earrings acrylic on wood with found charms.
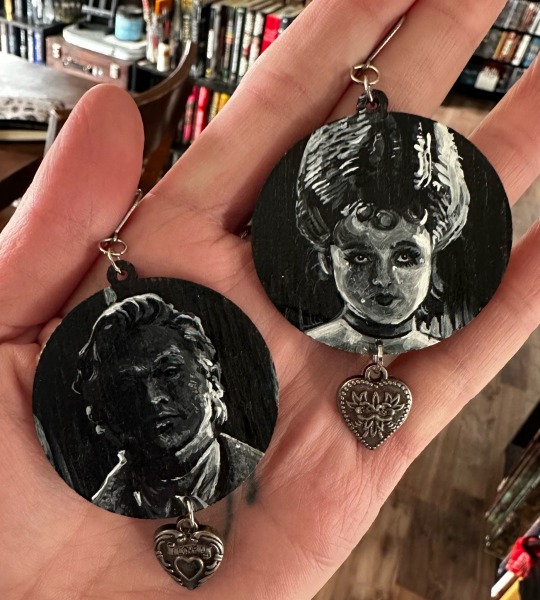
#ootd#bride of Frankenstein#blxckfly#demonia#fishnets#diy jewelry#hand painted earrings#lisa frankenstein
203 notes
·
View notes
Text


Avari inspired necklace
#court of darkness#guy avari#aquia avari#zev avari#ithseem's arts and crafts#diy jewelry#handmade jewelry#beaded jewelry
21 notes
·
View notes
Text

Today I made three new ribbon fairy-cuffs...


Two pretty clips with ribbon, rhinestones and some sparkly buttons from Hobby Lobby...


And one amethyst bracelet with stars to complement the purple ribbon fairy-cuffs. Also, I wanted to show off the Elf ears my family got me for Christmas. Aren't they beautiful?! I usually embellish all of my Elf ears, but I think they're perfect as they are!

#fairycore#fairycore asethetic#fairies#fairy aesthetic#whimsicore#whimsicore aesthetic#whimsigoth#whimsigoth aesthetic#diy#diy jewelry
36 notes
·
View notes